Canopia Studio Copenhagen 10x12 3x3.5 - Garden shed

Studio Copenhagen 10x12 3x3.5 - Garden shed Canopia - Free user manual and instructions

Find the device manual for free Studio Copenhagen 10x12 3x3.5 Canopia in PDF.

📄 139 pages English EN Download 💬 AI Question 10 questions ⚙️ Specs
Notice Canopia Studio Copenhagen 10x12 3x3.5 - page 1
Pick your language and provide your email: we'll send you a specifically translated version.
Product type Garden shed
Brand Canopia
Model Palram Canopia Garden Studio Copenhagen 10x12 3x3.5 Assembly
Dimensions (W x D) 3.0 x 3.5 m
Height 2.2 m
Weight 120 kg
Main material Double-wall polycarbonate panels, aluminum frame
Color White
Door type Sliding polycarbonate door
Roof type Flat roof with slight slope, polycarbonate panels
Floor area 10.5 m²
Ventilation Integrated ventilation panels
UV resistance Yes, anti-UV treatment
Impact resistance Impact-resistant polycarbonate
Assembly required Yes, 139-page manual included
Care and cleaning Clean with soapy water, avoid abrasive products
Safety Door lock, ground anchoring recommended
Warranty 10 years on panels, 5 years on frame
Spare parts Available on request via Canopia website
Repairability Interchangeable panels, standard screws

Frequently Asked Questions - Studio Copenhagen 10x12 3x3.5 Canopia

What tools are needed for assembly?
A Phillips screwdriver, an Allen key (supplied), a rubber mallet, a spirit level, and a drill (for ground anchoring). Read the complete manual before starting.
Do I need a concrete slab to install the shed?
It is highly recommended to place the shed on a flat concrete slab or treated wooden base to ensure stability. A level surface is essential.
How to clean the polycarbonate panels?
Use warm water with mild soap and a soft cloth. Avoid abrasive products, solvents, and pressure washers that could scratch or damage the anti-UV coating.
Does the warranty cover weather damage?
The standard warranty covers manufacturing defects and panel discoloration. Damage caused by strong winds or excessive snow is generally not covered. Ensure you respect the maximum snow loads indicated.
Can I paint the aluminum frame?
It is not recommended to paint aluminum as it may void the warranty. If you wish to change the color, use a special paint for outdoor metals after consulting customer service.
How to anchor the shed to the ground?
Use the supplied ground anchors (plugs and screws) or concrete fixing kits. Drill holes in the base, insert plugs and screw firmly. For soft ground, use ground anchors or concrete blocks.
Are the doors reversible?
Yes, the sliding door can be installed on the left or right according to your preference. Follow the manual instructions to reverse the opening direction during assembly.
How to replace a damaged panel?
Remove the fixing profiles around the panel, take out the damaged panel and insert a new panel of the same dimensions. Replace the profiles. Spare panels are available on the Canopia website.
Is the shed snow-resistant?
The roof supports moderate snow load (approx. 100 kg/m²). In case of heavy snowfall, it is advisable to clear the snow regularly to avoid overload.
Can I install the shed directly on grass?
It is not recommended as grass can rot and destabilize the structure. Use a solid base (concrete, wood, or slabs) to ensure durability and warranty.

User questions about Studio Copenhagen 10x12 3x3.5 Canopia

0 question about this device. Answer the ones you know or ask your own.

Ask a new question about this device

The email remains private: it is only used to notify you if someone responds to your question.

No questions yet. Be the first to ask one.

Download the instructions for your Garden shed in PDF format for free! Find your manual Studio Copenhagen 10x12 3x3.5 - Canopia and take your electronic device back in hand. On this page are published all the documents necessary for the use of your device. Studio Copenhagen 10x12 3x3.5 by Canopia.

USER MANUAL Studio Copenhagen 10x12 3x3.5 Canopia

Please read these instructions carefully before starting assembly.

Keep these instructions in a safe place for future reference.

Canopia Studio Copenhagen 10x12 3x3.5 - 1

HAVE A CONCERN? WE CAN HELP.

Before returning your purchase:

You didn't find what you were looking for? We can help at canopia.shop/support

Still can't find what you are looking for? Please see next page for local customer care.

HABEN SIE BEDENKEN? WIR KÖNNEN HELFEN.

canopia.com/contact-us

Canopia Studio Copenhagen 10x12 3x3.5 - HABEN SIE BEDENKEN? WIR KÖNNEN HELFEN. - 1
SCAN ME

CR • SL

0599-37-057 | info@ms-viscom.com

DK

07-575 42 70 | post@nshnordic.com

CH • HU • SK

0493-523-523 | servis@garland.cz

PL

Infolinia: 801-011-929 | 22-349-93-36

Canopia Studio Copenhagen 10x12 3x3.5 - HABEN SIE BEDENKEN? WIR KÖNNEN HELFEN. - 2
☐ Electric Drill With Drill Bit 10 mm | 3/8"

Canopia Studio Copenhagen 10x12 3x3.5 - HABEN SIE BEDENKEN? WIR KÖNNEN HELFEN. - 3
□ Cordless Drill - Philips Head

Canopia Studio Copenhagen 10x12 3x3.5 - HABEN SIE BEDENKEN? WIR KÖNNEN HELFEN. - 4
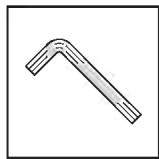
□ Allen Key 2.5 mm | 7/64"

Canopia Studio Copenhagen 10x12 3x3.5 - HABEN SIE BEDENKEN? WIR KÖNNEN HELFEN. - 5
□ Silicone

Canopia Studio Copenhagen 10x12 3x3.5 - HABEN SIE BEDENKEN? WIR KÖNNEN HELFEN. - 6
□ Philips head Screwdriver

Canopia Studio Copenhagen 10x12 3x3.5 - HABEN SIE BEDENKEN? WIR KÖNNEN HELFEN. - 7
□ Wrench 10 mm | 3/8"

Canopia Studio Copenhagen 10x12 3x3.5 - HABEN SIE BEDENKEN? WIR KÖNNEN HELFEN. - 8
□ Soap

Canopia Studio Copenhagen 10x12 3x3.5 - HABEN SIE BEDENKEN? WIR KÖNNEN HELFEN. - 9
□ Scissors

Canopia Studio Copenhagen 10x12 3x3.5 - HABEN SIE BEDENKEN? WIR KÖNNEN HELFEN. - 10
□ Rubber Mallet

Canopia Studio Copenhagen 10x12 3x3.5 - HABEN SIE BEDENKEN? WIR KÖNNEN HELFEN. - 11
□ Handsaw / Hacksaw

Canopia Studio Copenhagen 10x12 3x3.5 - HABEN SIE BEDENKEN? WIR KÖNNEN HELFEN. - 12
□ Cordless Drill - Torx Head

Canopia Studio Copenhagen 10x12 3x3.5 - HABEN SIE BEDENKEN? WIR KÖNNEN HELFEN. - 13
□ Hole saw

A - PREPARE THE SITE

The product must be positioned and fixed on a flat level surface.

① - Clear the site
Canopia Studio Copenhagen 10x12 3x3.5 - A - PREPARE THE SITE - 1

Canopia Studio Copenhagen 10x12 3x3.5 - A - PREPARE THE SITE - 2

② - Level the ground
Canopia Studio Copenhagen 10x12 3x3.5 - A - PREPARE THE SITE - 3

Canopia Studio Copenhagen 10x12 3x3.5 - A - PREPARE THE SITE - 4

A12
FRPRÉPARER LE TERRAINLa produit doit être positionnée et fixée sur une surface planeDéblayer le terrainNiveler le sol
DEVORBEREITUNG DES UNTERGRUNDESDas Produkt muss auf einem flachen Untergrund aufgestellt und befestigt werden.Standort säubernUntergrund ausgleichen und nivellieren
ESPREPARE EL SITIOEl producto debe colocarse y fijarse en una superficie plana y nivelada.Limpie el sitioNivele el terreno
SVFÖRBEREDA OMRÅDETProdukt måste placeras på en fast och plant underlag.Rensa områdetPlatta marken
NNFORBERED OMRÅDETProdukt må plasseres og festes på et flatt underlag.Rydd områdetFlat ut bakken
FIVALMISTELE RAKENNUSALUEPinnan on oltava täysin tasainen ja suora, ja perustan oltava kiinteä.Raivaa rakennusalueTasoita maa
DAFORBERED OMRÅDETProdukt skal placeres og opføres på en plan flade.Ryd stedetGør jorden jævn
NLTERREIN VOORBEREIDENHet grondoppervlak moet perfect vlak en waterpas zijn.Maak het terrein vrijEgaliseer de grond
ITPREPARARE IL SITOIl prodotto deve essere posizionato e fissato su una superficie pianaSgombrare il sitoLivellare il terreno
SKPRIPRAVTE SI MIESTOVýrobok musí byť postavený a upevnený na rovnom povrchu.Vyčistite miestoVyrovnajte povrch
SLPRIPRAVITE LOKACIJOIzdelek mora biti nameščen in pritrjen na ravno in ravno površino.Očistite lokacijoPoravnajte tla
ETVALMISTAGE ETTE MAATÜKKTootetuleb paigaldada ja kinnitada tasasele pinnalePuhastage maatükkTasandage maapinda
HUTEREP ELŐKÉSZÍTÉSEA termék építeni, egyenes vízszintes és felületen helyezze el.Tisztítsa meg a területetEgyengesse vízszintesre a talajt
PLPRZYGOTUJ MIEJSCEProduktmusi być umieszczona i umocowana na płaskiej i równej powierzchni.Oczyść miejsceWyrównaj podłoże
RUПОДГОТОВЬТЕ ПЛОЩАДКУПродукт нужно расположить и зафиксировать на плоской ровной поверхности.Очистите площадкуВыровняйте грунт
LTSAGATAVOJIET VIETUProduktu jānovieto un jānostiprina uz plakanas gludas virsmas.Notīriet vietuNolidziniet zemi
CSPŘIPRAVTE SI MÍSTOProdukt musí být umístěn a upevněn na rovném povrchuVyčistěte místoVyrovnejte povrch
HRPRIPREMITE LOKACIJUProizvod mora biti postavljen i pričvršćen na ravnu površinu.Očistite površinuPoravnajte tlo
HEהכלהההכלהההכלהההכלהההכלהההכלהההכלהההכלהההכלהההכלהההכלהההכלהההכלהההכלהההכלהההכלהההכלהההכלהההכלהההכלהההכלהההכלהההכלהההכלהההכלהההכלה

B - CHOOSE YOUR FOUNDATION TYPE

Concrete / Wooden surface
Canopia Studio Copenhagen 10x12 3x3.5 - B - CHOOSE YOUR FOUNDATION TYPE - 1

Canopia Studio Copenhagen 10x12 3x3.5 - B - CHOOSE YOUR FOUNDATION TYPE - 2

Please consult with an expert regarding which fasteners are suitable for other surfaces types (not supplied).

B
FRCHOISIR VOTRE TYPE DE FONDATIONBéton /Superficie de maderaVeuillez consulter un expert pour savoir quelles fixations sont adaptées aux terrasses en bois (non fournis).
DEFUNDAMENTWAHLBeton /Starke HolzgundflächeBitte fragen Sie einen Experten, welche Befestigungsmittel für andere Untergründe geeignet sind (nicht im Lieferumfang enthalten).
ESELIJA EL TIPO DE CIMENTACIÓNHormigón /Superficie de maderaPregunte a un experto qué elementos de fijación son adecuados para otro tipo superficie (no incluidos).
SVVÄLJ GRUNDTYPBetong / TräytaRådgör med en expert om vilka fästelement som är lämpliga för andra typer av ytor (medföljer ej).
NNVELG FUNDAMENTTYPEBetong / TreoverflateSpør en ekspert hvilke festemidler som er egnet for andre overflater (ikke inkludert).
FIVALITSE RAKENNUSPOHJAN TYYPPIBetoni /Vahva puinen pohjaKysy asiantuntijalta, mitkä kiinnikkeet sopivat muille pinnoille (ei sisälly).
DAVÆLG DIN FUNDAMENTTYPEbeton / Stærk træbundSpørg en ekspert, hvilke fastgørelseselementer der egner sig til andre overflader (medfølger ikke).
NLKIES UW TYPE FUNDERINGBeton / Sterke houten basisVraag een deskundige welke bevestigingsmiddelen geschikt zijn voor andere ondergronden (niet meegeleverd).
ITSCEGLIERE IL TIPO DI FONDAMENTAMento / Superficie di legnoChiedete a un esperto quali elementi di fissaggio sono adatti ad altre superfici (non incluse).
HEהַרָבּרָרָבּרָבּרָבּרָבּרָבּרָבּרָבּרָבּרָבּרָבּרָבּרָבּרָבּרָבּרָבּרָבּרָבּרָגּוֹןהַרָבּרָבּרָבּרָבּרָבּרָבּרָבּרָבּרָבּרָבּרָבּרָבּרָבּרָבּרָבּרָבּרָהּוֹן(הַרָבּרָבּרָבּרָבּרָבּרָבּרָבּרָבּרָבּרָבּרָבּרָבּרָבּרָבּרָבּרָבּשִׁעַעַעַעַעַעַעַעַעַעַעַעַעַעַעַעַעַעַעַעַעַעַעַעַעַעַעַעַעַעַעַעַעַעַפְעַעַעַעַעַעַעַעַעַעַעַעַעַעַעַעַעַעַעַעַעַעַעַעַעַעַעַעַעַעַעַעַעַאָהּוֹן

B - CHOOSE YOUR FOUNDATION TYPE

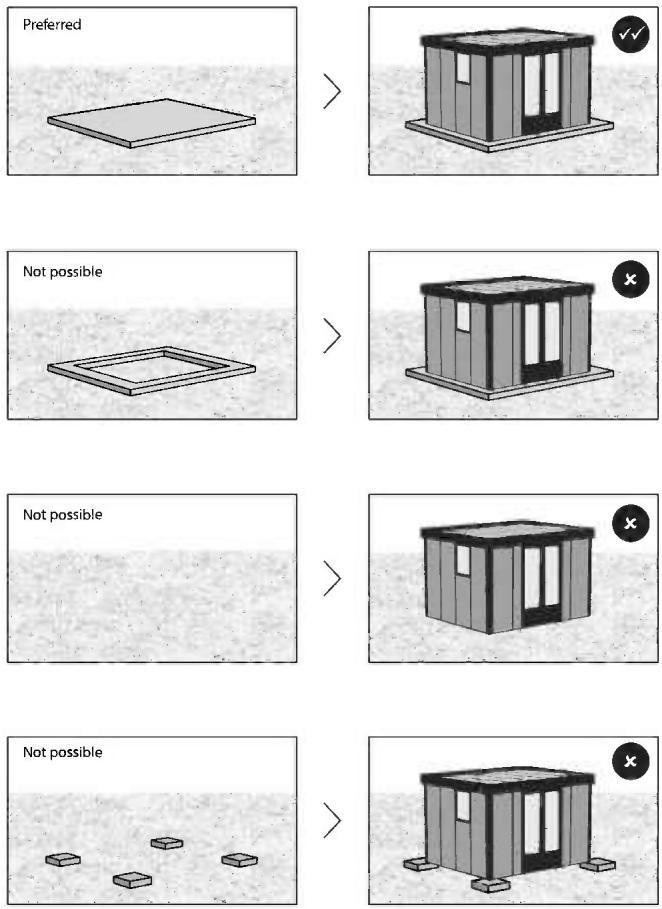
For a foundation, we recommend using three material types: Concrete / Pressure treated wood / wood deck

OPTION 1: Solid foundation
Canopia Studio Copenhagen 10x12 3x3.5 - B - CHOOSE YOUR FOUNDATION TYPE - 1
* The size of the product displayed is for illustration purposes only and may not reflect the size of your product.

1 Option Canopia Studio Copenhagen 10x12 3x3.5 - B - CHOOSE YOUR FOUNDATION TYPE - 2 Solid foundation PreferredNot possible
FRCHOISIR VOTRE TYPE DE FONDATIONSPour la fondations, nous recommandons d’utiliser trois types de matériaux :Béton / Bois traité sous pression / plancher en bois* La taille de la produit affichée ici est uniquement à titre d’illustration et ne reflète pas forcément la taille de votre produit.Pas possible
DEFUNDAMENTWAHLAls Fundament stehen Folgende Materialien zur Auswahl (Empfehlung):Beton / Druckbehandeltes Holz / Holzdeck* Die Größe des abgebildeten Produkt dient nur zur Veranschaulichung und entspricht möglicherweise nicht der Größe Ihres Produkt.Nicht möglich
ESELIJA EL TIPO DE CIMENTACIÓNComo cimentación, recomendamos usar tres tipos de materiales:Hormigón / Madera prensada / Piso de madera* El tamaño del producto que se muestra tiene un propósito meramente ilustrativo y puede no reflejar el tamaño de su producto.No es posible
SVVÄLJ GRUNDTYPSom stiftelse rekommenderar vi tre typer av material:Betong / Tryckbehandlat trä / trägolv* Produkt storlek är endast för att illustrera och visar inte rätt storlek på ditt produkt.Omöjligt
NNVELG FUNDAMENTTYPESom fundament anbefaler vi tre typer materiell:Betong | Trykkbehandlet tre/tredekke* Produktets størrelse er bare for illustrasjon, og viser ikke korrekt størrelse på ditt produkt.Ikke mulig
FIVALITSE RAKENNUSPOHJAN TYYPPIRakennuspohjaksi suosittelemme kolmea materiaalityyppiä:Betoni | Painekäsitelty puu/puukansi* Esillä olevan tuote koko on tarkoitettu vain havainnollistamistarkoituksiin eikä se välttämättä vastaa tuote kokoa.Ei mahdollinen
DAVÄELG DIN FUNDAMENTTYPETil en fundament anbefaler vi at bruge tre materialetyper:Beton / Trykbehandlet træ / trædæk* Størrelsen på det viste produkt er kun til illustration og afspejler muligvis ikke størrelsen på dit produkt.Ikke muligt
NLKIES UW TYPE FUNDERINGAls fundering adviseren wij drie materiaalsoorten te gebruiken:Beton | Onder druk behandeld hout/houten dek* De grootte van de getoonde Product dient enkel ter illustratie en weerspiegelt mogelijk niet de grootte van uw eigen Product.Niet mogelijk
ITSCEGLIERE IL TIPO DI FONDAMENTACome fondamenta consigliamo tre tipi di materiali:Calcestruzzo / Legno pressato / Pavimenti in legno* La dimensione della Prodotto visualizzata è solo a scopo illustrativo e potrebbe non rispecchiare le dimensioni della vostra Prodotto.No possible
HEהכלההכלההכלההכלההכלההכלההכלההכלההכלההכלההכלההכלההכלההכלההכלההכלההכלההכלההכלההכלההכלההכלההכלההכלההכלההכלההכלההכלההכלההכלההכלההכלההכלההכלההכלההכלההכלההכלההכלההכchiaהכchiaהכchiaהכchiaהכchiaהכchiaהכchiaהכchiaהכchiaהכchiaהכchiaהכchiaהכchiaהכchiaהכchiaהכchiaהכchiaהכchiaהכchiaהכchiaהכchiaהכchiaהכchiaהכchiaהכchiaהכchiaהכchiaהכchiaהכchiaהכchiaהכchiaהכchiaהכchiaהכchia

C - ANCHOR TO FOUNDATION

① - On a solid foundation / frame
Canopia Studio Copenhagen 10x12 3x3.5 - C - ANCHOR TO FOUNDATION - 1

Secure the product to the foundation of your choice using suitable screws & plugs or masonry anchors (not supplied).

Make sure you have at least 10 cm / 4" between the product base and the edges of your foundation - on all sides.

2
Canopia Studio Copenhagen 10x12 3x3.5 - C - ANCHOR TO FOUNDATION - 2

The product dimensions do not include the gutters.

C12
FRANCRAGE A LA FONDATIONSur une fondation solide / cadre Fixez le produit à la fondation de votre choix, à l'aide de vis et de chevilles appropriées ou d'ancrages en maçonnerie (non fournis).Assurez-vous qu'il y a au moins 10 cm entre la base du produit et le périmètre de votre fondation -de tous les côtés.Les dimensions du produit ne comprennent pas les gouttières.
DEBEFESTIGUNG AM FUNDAMENTBefestigen Sie das Produkt auf einem festen Fundament / RahmenMit geeigneten Dübeln und Schrauben oder Mauerwerksankern, je nach gewähltem Fundamenttyp (nicht mitgeliefert).Stellen Sie sicher, dass zwischen der Basis des Produkts und den Kanten Ihres Fundaments auf allen Seiten mindestens 10 cm Abstand sind.Die Produktabmessungen beinhalten nicht die Dachrinnen.
ESANCLAJE A LOS CIMIENTOSSobre una cimentación sólida / estructuraAsegure el producto a los cimientos de su elección, usando tornillos y tacos adecuados o anclajes de mampostería (no incluidos).Asegúrese de tener al menos 10 cm | 4" entre la base del producto y el perímetro de su cimiento -en todos los lados.Las dimensiones del producto no incluyen las canaletas.
SVFEST FÖR STIFTELSEPå en solid stiftelse / ramPå en solid bas, säkra produkten till den grund du valt med lämpliga skruvar, pluggar eller väggfästen (ingår ej).Se till att du har minst 10 cm | 4" mellan produktens bas och kanterna på fundamente- på alla sidor.Produktmåtten inkluderar inte hängrännor.
NNFEST TIL FUNDAMENTPå en solid fundament / rammeSikrer du produktet til fundamentet du har valgt med passende skruer, plugger eller murfester (ikke inkludert).Forsikre deg om at du har minst 10 cm | 4" mellom bunnen av produktet og kantene på fundamentet ditt - på alle sider.Produktmålene inkluderer ikke takrennene.
FIRAKENNUSPOHJAN ANKKURIKiinteälle rakennuspohjalle / kehykseenMikäli tuote rakennetaan kiinteälle rakennuspohjalle, kiinnitä tuote valitsemaasi rakennuspohjaan sopivilla ruuveilla & tapeilla tai muurausankkureilla (ei sisälly toimitukseen).Varmista, että sinulla on vähintään 10 cm | 4" tilaa tuotteen alustan ja perustuksen reunojen välillä -kaikilla puolilla.Tuotteen mitat eivät sisällä kouruja.
DAFASTGÖRELSE TIL FUNDAMENTETPå et solidt underlag / rammeSkal du fastgøre produktet til det fundament, du vælger, ved hjælp af passende skruer & stik eller murankre (medfølger ikke).Skal du sørge for at have mindst 10 cm | 4" mellem produktrammen og kanterne på dit fundament - på alle sider.Produktmålene inkluderer ikke tagrenderne.
NLVERANKERING AAN FUNDERINGOp een stevige fundering / kaderZet het product op een stevige basis vast op de fundering van uw keuze, met geschikte schroeven & pluggen of metselwerkankers (niet meegeleverd).Zorg ervoor dat u minstens 10 cm hebt tussen de basis van het product en de randen van uw fundering -langs alle kanten.De productafmetingen zijn exclusief de goten.
ITANCORAGGIO ALLE FONDAMENTASu una Fondamenta solida / telaioFissare il prodotto alla fondazione di vostra scelta, utilizando viti e tasselli adeguati o ancoraggi in muratura (non forniti).Assicurati di avere almeno 10 cm tra la base del prodotto e i bordi del tuo fondotinta -su tutti i lati.Le dimensioni del prodotto non includono le grondaie.
HEהכלהההכלהההכלהההכלהההכלהההכלהההכלהההכלהההכלהההכלהההכלהההכלהההכלהההכלהההכלהההכלהההכלהההכלהההכלהההכלהההכלהההכלהההכלהההכלהההכלהההכלה

SAFETY ADVICE

  • It is of utmost importance to assemble all of the parts according to the directions. Do not skip any steps.
    • Always wear work gloves during panel sliding.
    • Always wear shoes and safety goggles when working with extruded aluminium.
  • If using a step ladder or power tools make sure that you follow the manufacturer's safety advice.
  • Do not touch overhead power cables with the aluminium profiles.
  • Do not attempt to assemble the product in windy or wet conditions.
  • Do not climb or stand on the roof.
  • Dispose of all plastic bags. Keep them out of reach of small children.
  • Keep children away from the assembly area.
  • Do not lean against or push the products during construction.
  • Do not position your product in an area exposed to excessive winds.
  • Do not attempt to assemble this product if you are tired, have taken drugs or alcohol or if you are prone to dizzy spells.
  • Hot items such as recently used grills, blowtorches etc. must not be stored in the product.
  • Make sure there are no hidden pipes or cables in the ground before anchoring to foundation.
    • Heavy snow load on the roof can make it unsafe to stand below or nearby.
  • The snow must be removed from the structure's roof if the snow is accumulated.
    • This product is designed to be used mainly as a Garden studio.
    • Make sure to anchor the product directly to a solid foundation to increase the product's stability and wind resistance in areas with severe weather conditions. Make sure that there are no obstructions between the assembly area and the final position of the product.

CARE & MAINTENANCE

  • When your product needs to be cleaned, use a soft cloth and rinse with cold clean water.
    • DO NOT use acetone, abrasive cleaners or other special detergents to clean the panels.
  • Clean the product once assembly is complete.

BEFORE ASSEMBLY

  • Selecting a site:
  • Choose your site carefully before beginning assembly.
  • Choose a sunny position away from overhanging trees.
  • The product must be positioned and fixed on a flat level surface.
    • The product must be secured directly to a solid foundation.
  • This is a multi-part assembly best achieved by two people. Allow at least half a day for the assembly process.
    • Take all components & parts out of the packages. Sort the parts and check against the content parts list.
  • Parts should be laid out close at hand. Keep all small parts (screws etc.) in a bowl so they do not get lost.
  • Please note multi-sided profiles are used in this product. As a result some holes in the profiles are not used during assembly.
  • Please review entire instructions before starting. Carry out the assembly steps in exact order.
  • Please consult your local authorities if any permits are required prior to constructing the product.
  • Please ensure you have sufficient side space for inserting the roof panels during the assembly process.

IMPORTANT!

  • Firmly connect the product to a level surface immediately after completion of the assembly.
  • Anchoring this product to the ground is essential to its stability and rigidity. It is required to complete this stage in order for your warranty to be valid.
  • During assembly use a soft surface below the parts to avoid scratches and damages.
    • We recommend checking for restrictions or covenants for building this product in your area.

In addition we advise to check if you need to submit any forms or if any permit is required prior to building the product.

DURING ASSEMBLY

During assembly, you will encounter different icons for different products.

Please see below for more information:

Canopia Studio Copenhagen 10x12 3x3.5 - Please see below for more information: - 1

You may use silicone lubricant spray on the frame in order to help you slide the panels into the profiles. Do not spray the panels.

Canopia Studio Copenhagen 10x12 3x3.5 - Please see below for more information: - 2

Use a rubber mallet if necessary.

Canopia Studio Copenhagen 10x12 3x3.5 - Please see below for more information: - 3

Make sure you remove covering plastic film from both sides of the panel.

Canopia Studio Copenhagen 10x12 3x3.5 - Please see below for more information: - 4

All panels with the stamped words “THIS SIDE OUT” must be facing out to create full UV protection. Remove plastic sticker as panels are locked in place.

Canopia Studio Copenhagen 10x12 3x3.5 - Please see below for more information: - 5

This icon indicates that the installer should be inside the product.

Canopia Studio Copenhagen 10x12 3x3.5 - Please see below for more information: - 6

This icon indicates that the installer should be outside the product.

Extension Kit

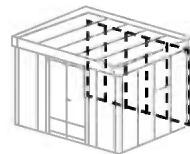
Steps marked with dashed outlines refer to Extensions only. Some of the steps are irrelevant for an assembly of a single product. When assembling a single or an extended product, some parts may be surplus.

Canopia Studio Copenhagen 10x12 3x3.5 - Extension Kit - 1

Canopia Studio Copenhagen 10x12 3x3.5 - Extension Kit - 2

Canopia Studio Copenhagen 10x12 3x3.5 - Extension Kit - 3

Canopia Studio Copenhagen 10x12 3x3.5 - Extension Kit - 4

These 2 icons below indicate if screw's tightening is required or not.

Temporary tightening of a few screws may be needed to prevent a profile from sliding out.

Tighten all screws once assembly is completed.

CONSEILS DE SECURITE

• Carles, Among (1) and (2) are

When encountering this information icon during assembly, please refer the relevant assembly step for important additional comments.

Step 2:

Decide on the 2 window's location before assembly. Window can be installed in one of the indicated options.

Steps

After choosing the location of the window, assemble only 8 panels (#9698) in this location.

3+10:

Steps

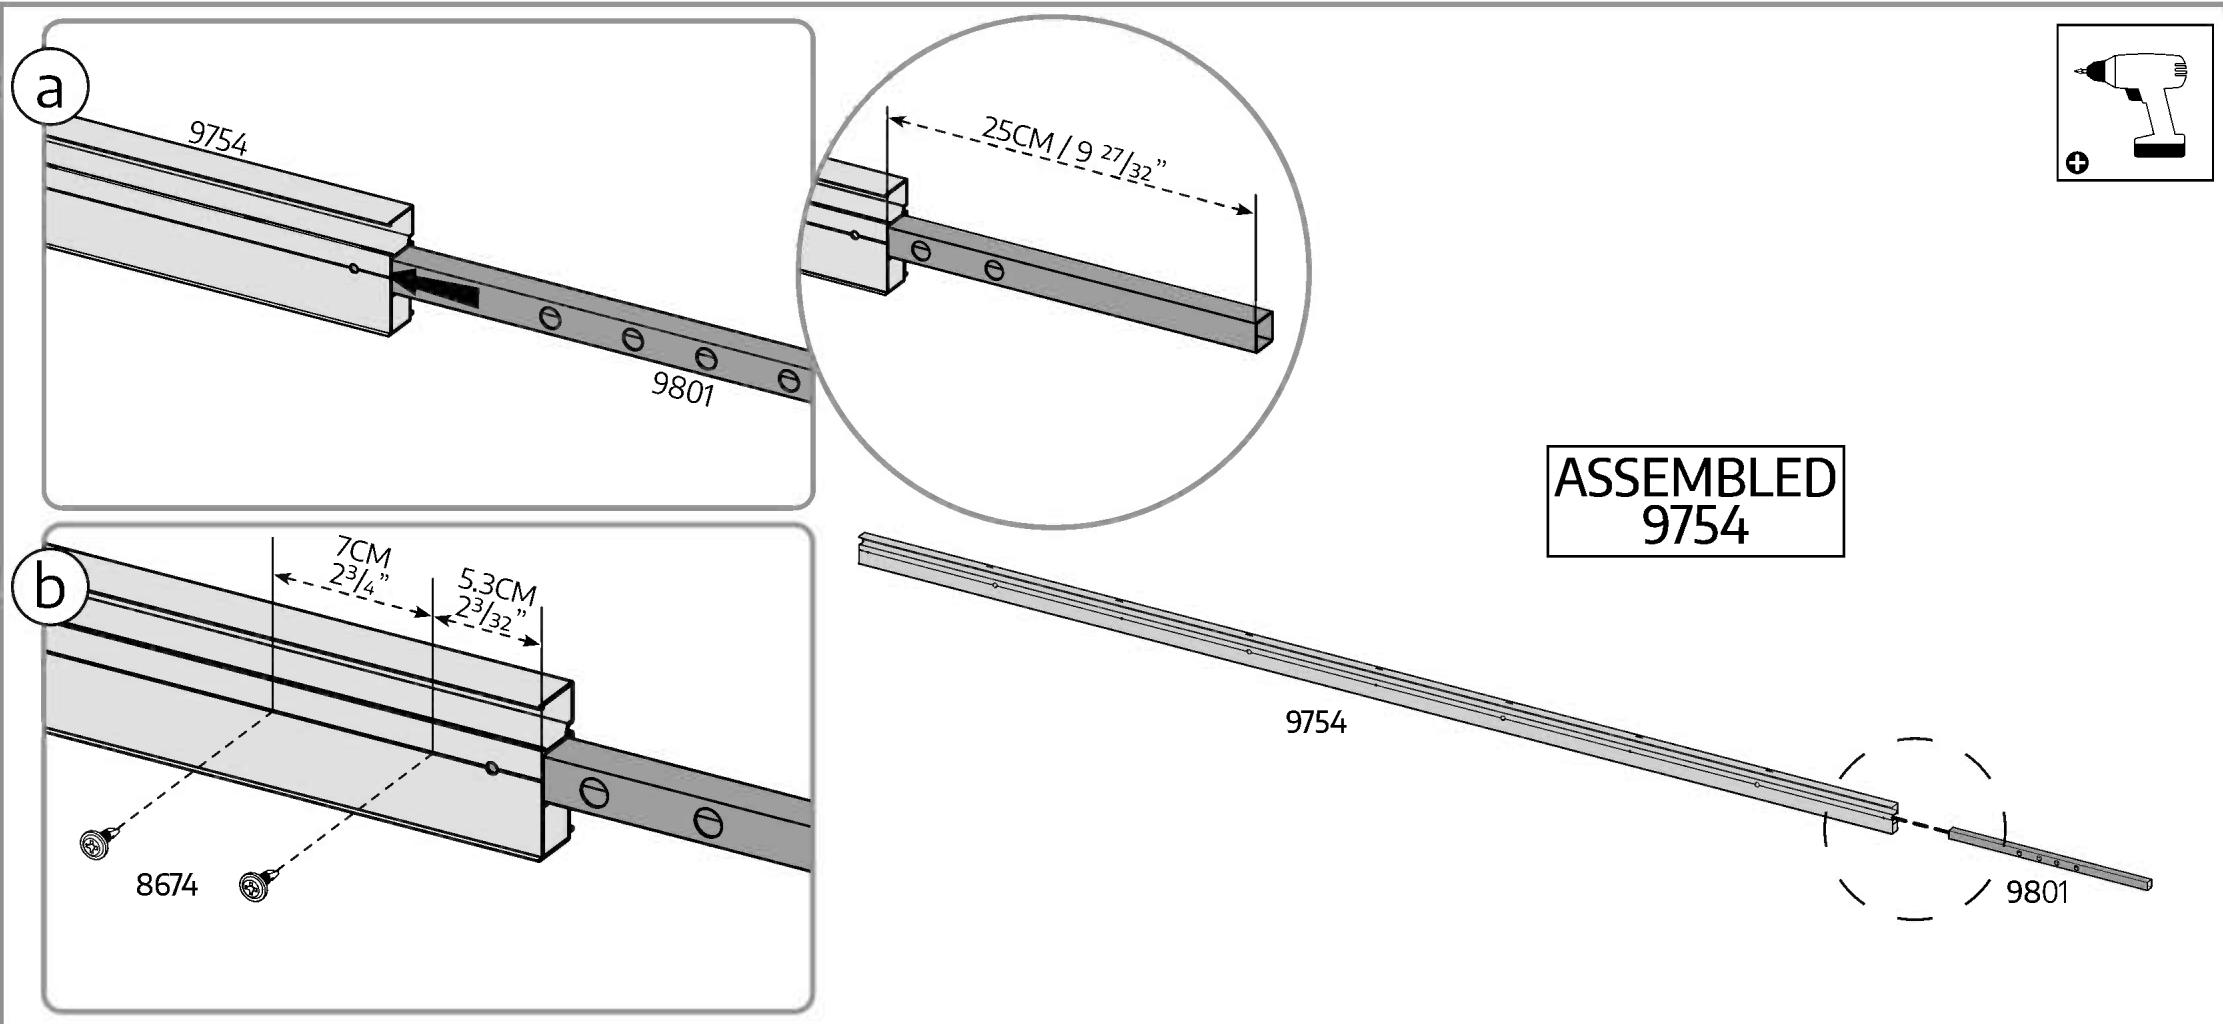
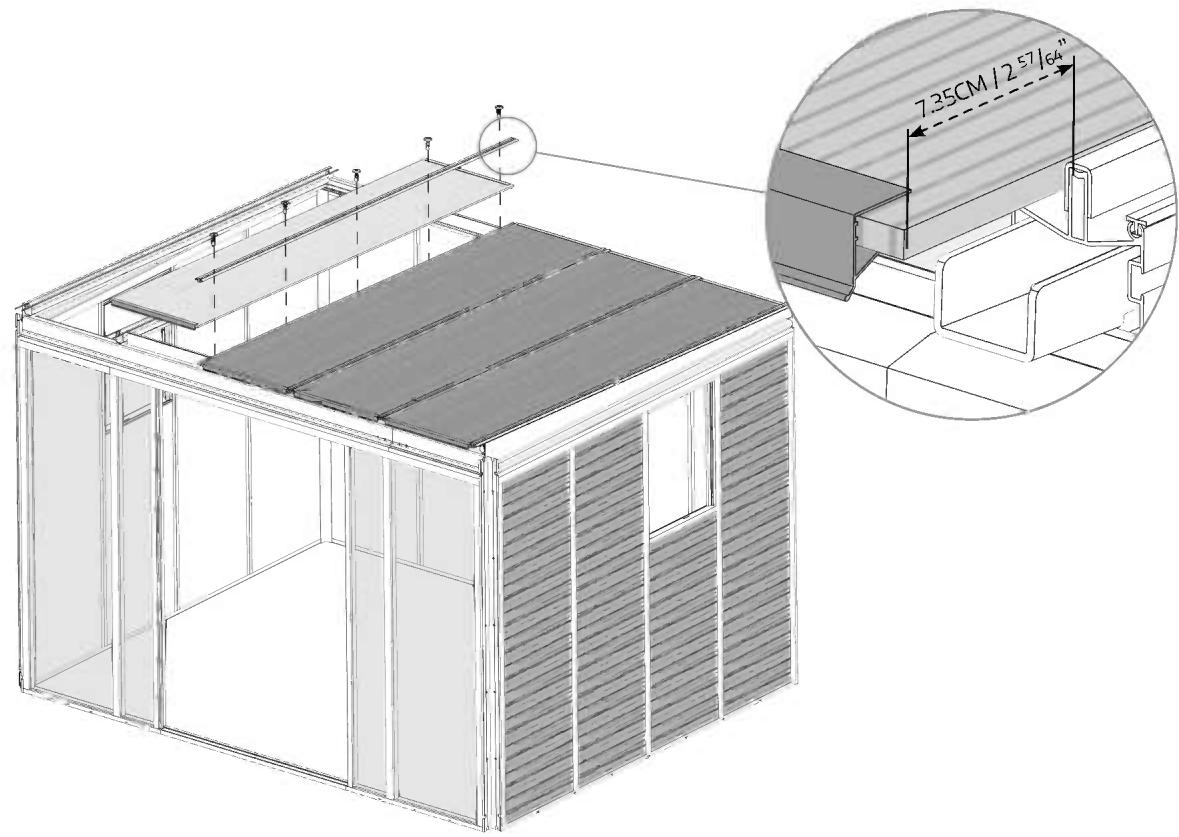
While threading insert #9801 into profile #9753, make sure to us the exact dimensions indicated in close-up drawing.

5,7,12:

Steps

Peel the film from the panels' edges before sliding them into the profiles, peel the entire film once the assembly is complete.

19,32-35,57

60,62,75,82:

Step 27:

Assemble temporary corner coverings, to make sure that the product is aligned (X=Y).

Step 28:

Disassemble temporary corner coverings.

Step 29:

The walls of the infrastructure have enough space between them to set up any hidden wiring or pipes for electricity, internet, or water. At this step, wires and cables can be threaded in the corners of the product and through the floor profiles. It is possible to reveal the wires and cables at any desired location by drilling into the floor profile.

Step 53:

Choose the location of the "light entry opening" in the roof. Assemble the profiles #9783 in the selected location.

Step 84:

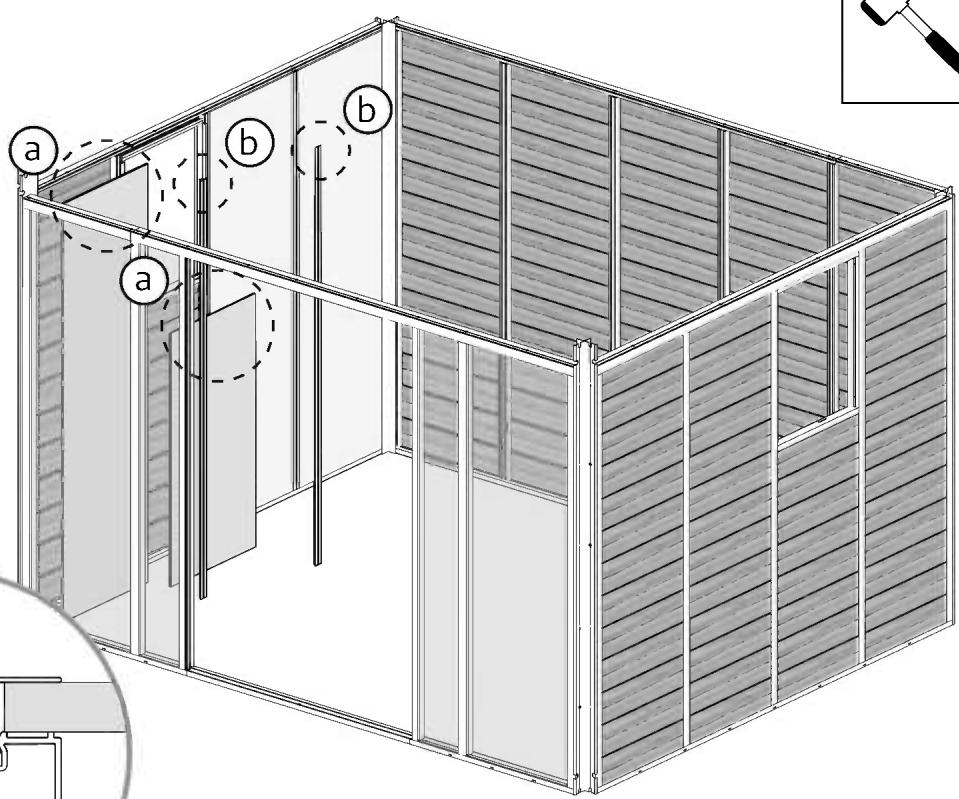
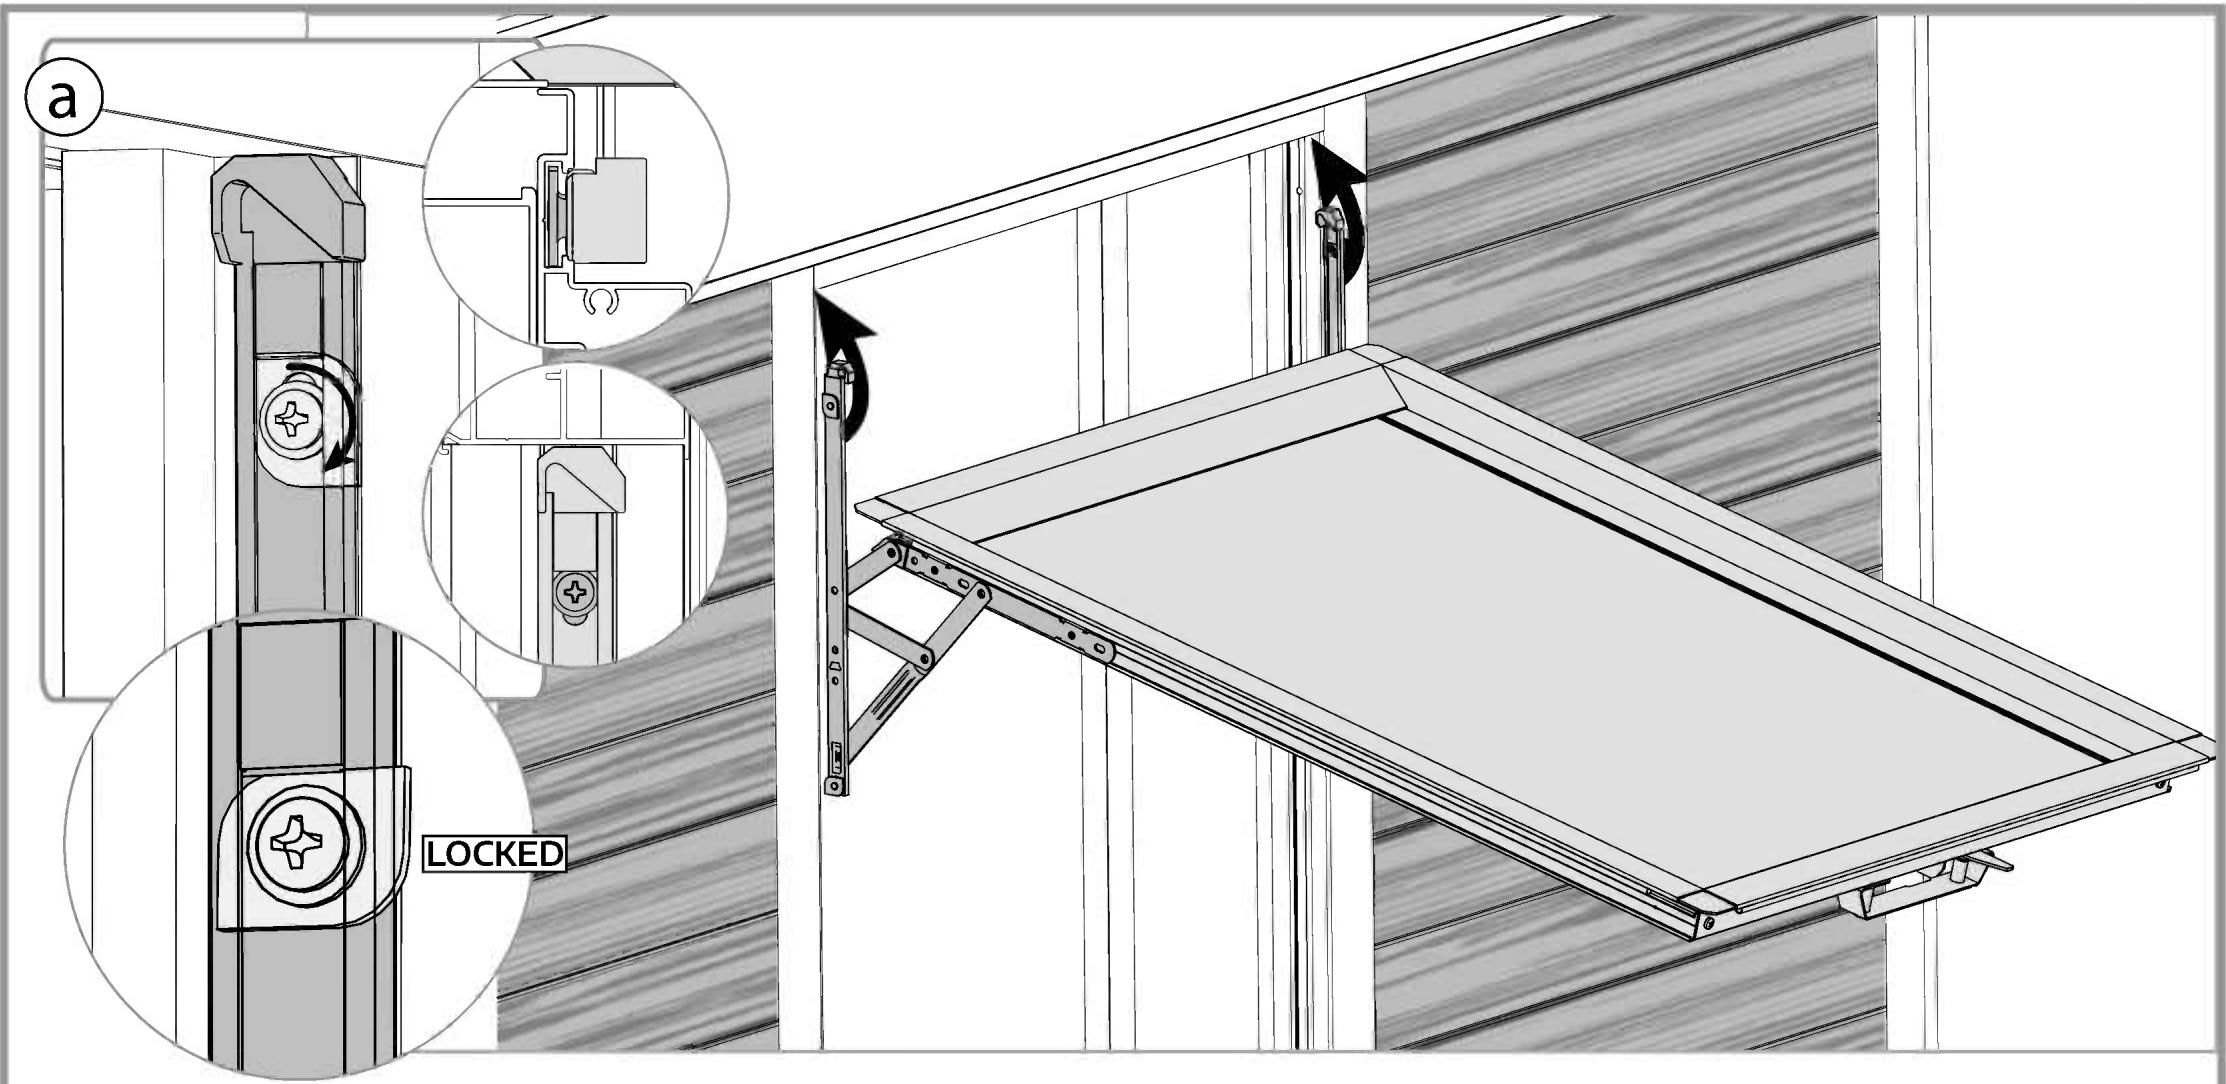
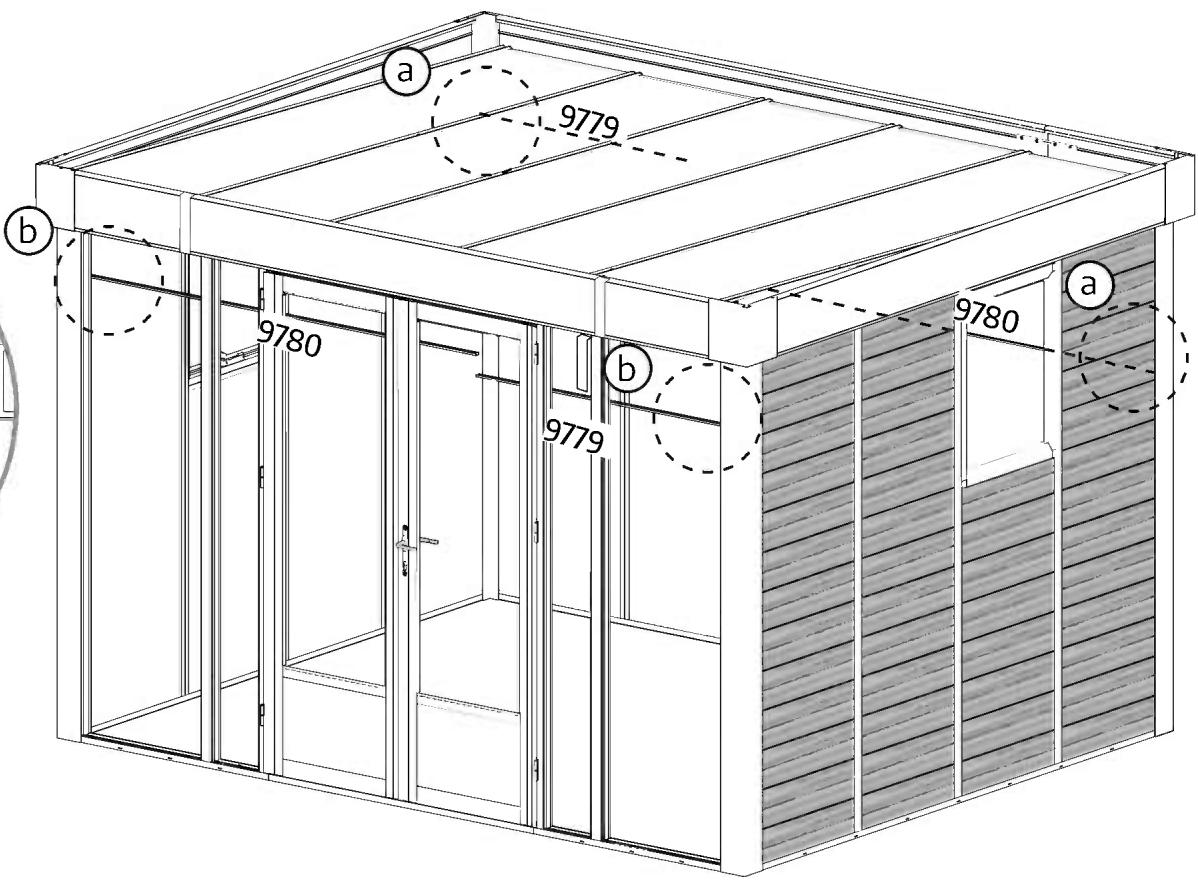
If necessary, you can rotate the cylinder tab. See Drawing a + b.

Step 94:

Drill the profile (#9763) according to the height of the Elbow fitting (#1116) assembled in previous steps.

Canopia Studio Copenhagen 10x12 3x3.5 - Step 94: - 1

PRINCIPALES ÉTAPES D'ASSEMBLAGE

99302
99312
97966

Canopia Studio Copenhagen 10x12 3x3.5 - PRINCIPALES ÉTAPES D'ASSEMBLAGE - 1

Canopia Studio Copenhagen 10x12 3x3.5 - PRINCIPALES ÉTAPES D'ASSEMBLAGE - 2

Canopia Studio Copenhagen 10x12 3x3.5 - PRINCIPALES ÉTAPES D'ASSEMBLAGE - 3

Canopia Studio Copenhagen 10x12 3x3.5 - PRINCIPALES ÉTAPES D'ASSEMBLAGE - 4

ItemQty.
98017
97862
90091
98001
79854
11162
1004
ItemQty.
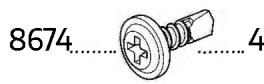
8674165(+16)
40454
45044(+4)
995636(+3)
819232(+3)
46628(+2)
97088
981919(+1)
401019(+1)
ItemQty.
792312
79196
79186
79206
79216
97072
792424
79226
Curtain1
ItemQty.
79942
79951
93122
79121
79131
93011
79581
*DO NOT USE
79931
80391
ItemQty.
79942
79951
93122
79121
79131
93011
79581
*DO NOT USE
79931
80391

1
SIDE WALL
Canopia Studio Copenhagen 10x12 3x3.5 - PRINCIPALES ÉTAPES D'ASSEMBLAGE - 5

Canopia Studio Copenhagen 10x12 3x3.5 - PRINCIPALES ÉTAPES D'ASSEMBLAGE - 6

Canopia Studio Copenhagen 10x12 3x3.5 - PRINCIPALES ÉTAPES D'ASSEMBLAGE - 7

Canopia Studio Copenhagen 10x12 3x3.5 - PRINCIPALES ÉTAPES D'ASSEMBLAGE - 8

Canopia Studio Copenhagen 10x12 3x3.5 - PRINCIPALES ÉTAPES D'ASSEMBLAGE - 9

Canopia Studio Copenhagen 10x12 3x3.5 - PRINCIPALES ÉTAPES D'ASSEMBLAGE - 10

Canopia Studio Copenhagen 10x12 3x3.5 - PRINCIPALES ÉTAPES D'ASSEMBLAGE - 11

2

Canopia Studio Copenhagen 10x12 3x3.5 - PRINCIPALES ÉTAPES D'ASSEMBLAGE - 12

Decide on the 2 window's location before assembly. Window can be installed in one of the indicated options.

Canopia Studio Copenhagen 10x12 3x3.5 - PRINCIPALES ÉTAPES D'ASSEMBLAGE - 13

windows assembly page 61-67
Canopia Studio Copenhagen 10x12 3x3.5 - PRINCIPALES ÉTAPES D'ASSEMBLAGE - 14

Canopia Studio Copenhagen 10x12 3x3.5 - PRINCIPALES ÉTAPES D'ASSEMBLAGE - 15

Canopia Studio Copenhagen 10x12 3x3.5 - PRINCIPALES ÉTAPES D'ASSEMBLAGE - 16

Canopia Studio Copenhagen 10x12 3x3.5 - PRINCIPALES ÉTAPES D'ASSEMBLAGE - 17

Canopia Studio Copenhagen 10x12 3x3.5 - PRINCIPALES ÉTAPES D'ASSEMBLAGE - 18

4
SIDE WALL
Canopia Studio Copenhagen 10x12 3x3.5 - PRINCIPALES ÉTAPES D'ASSEMBLAGE - 19

Canopia Studio Copenhagen 10x12 3x3.5 - PRINCIPALES ÉTAPES D'ASSEMBLAGE - 20

Canopia Studio Copenhagen 10x12 3x3.5 - PRINCIPALES ÉTAPES D'ASSEMBLAGE - 21

Canopia Studio Copenhagen 10x12 3x3.5 - PRINCIPALES ÉTAPES D'ASSEMBLAGE - 22

Canopia Studio Copenhagen 10x12 3x3.5 - PRINCIPALES ÉTAPES D'ASSEMBLAGE - 23

Canopia Studio Copenhagen 10x12 3x3.5 - PRINCIPALES ÉTAPES D'ASSEMBLAGE - 24

Canopia Studio Copenhagen 10x12 3x3.5 - PRINCIPALES ÉTAPES D'ASSEMBLAGE - 25

7

Canopia Studio Copenhagen 10x12 3x3.5 - PRINCIPALES ÉTAPES D'ASSEMBLAGE - 26

While threading insert #9801 into profile #9753, make sure to us the exact dimensions indicated in close-up drawing.

FRONT WALL

BACK WALL

Canopia Studio Copenhagen 10x12 3x3.5 - PRINCIPALES ÉTAPES D'ASSEMBLAGE - 27

Canopia Studio Copenhagen 10x12 3x3.5 - PRINCIPALES ÉTAPES D'ASSEMBLAGE - 28

Canopia Studio Copenhagen 10x12 3x3.5 - PRINCIPALES ÉTAPES D'ASSEMBLAGE - 29

Canopia Studio Copenhagen 10x12 3x3.5 - PRINCIPALES ÉTAPES D'ASSEMBLAGE - 30

Canopia Studio Copenhagen 10x12 3x3.5 - PRINCIPALES ÉTAPES D'ASSEMBLAGE - 31

Canopia Studio Copenhagen 10x12 3x3.5 - PRINCIPALES ÉTAPES D'ASSEMBLAGE - 32

Canopia Studio Copenhagen 10x12 3x3.5 - PRINCIPALES ÉTAPES D'ASSEMBLAGE - 33

Canopia Studio Copenhagen 10x12 3x3.5 - PRINCIPALES ÉTAPES D'ASSEMBLAGE - 34

Canopia Studio Copenhagen 10x12 3x3.5 - PRINCIPALES ÉTAPES D'ASSEMBLAGE - 35

Canopia Studio Copenhagen 10x12 3x3.5 - PRINCIPALES ÉTAPES D'ASSEMBLAGE - 36

x2

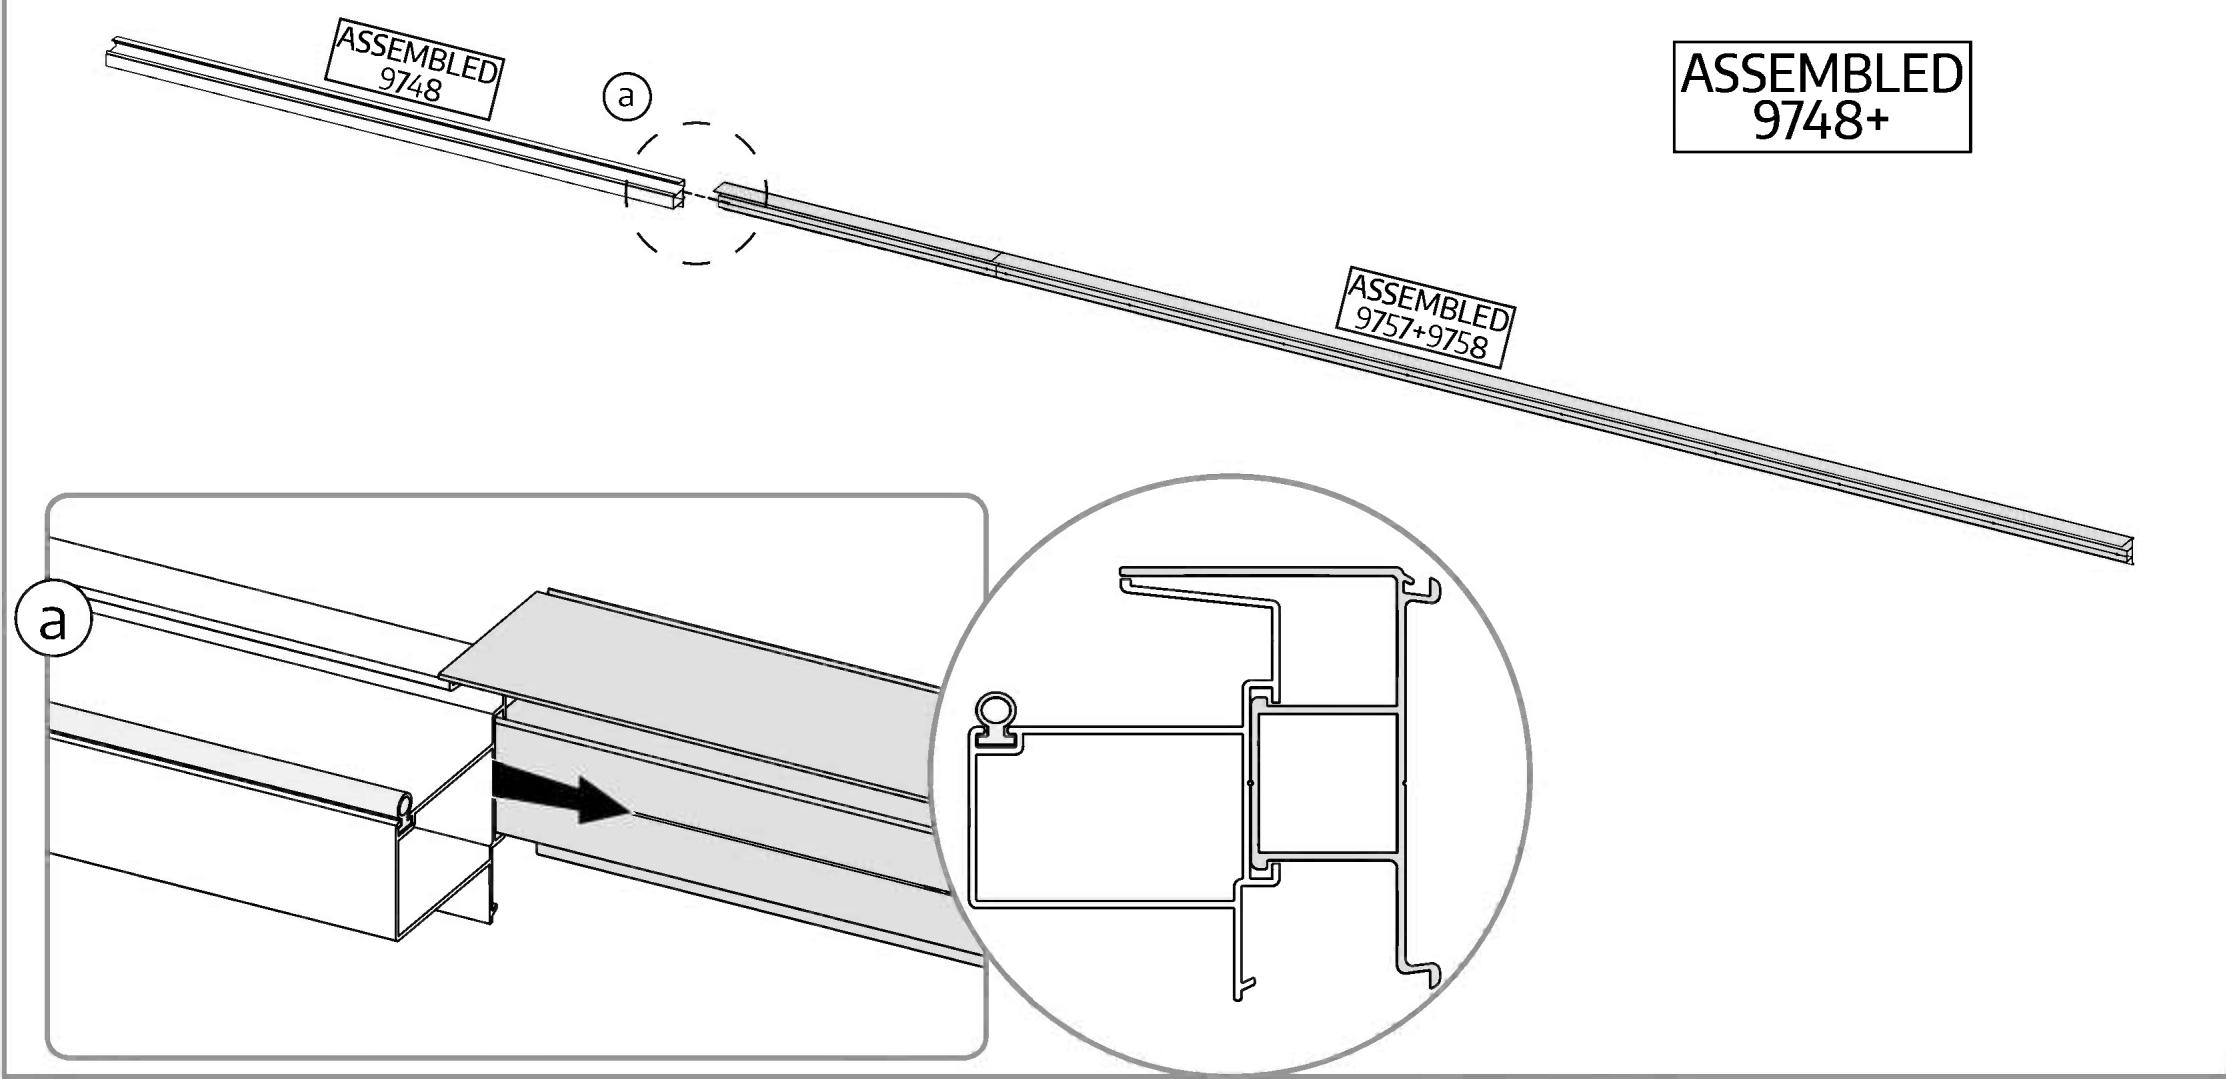
ASSEMBLED 9757+9758

9
BACK WALL
Canopia Studio Copenhagen 10x12 3x3.5 - PRINCIPALES ÉTAPES D'ASSEMBLAGE - 37

Canopia Studio Copenhagen 10x12 3x3.5 - PRINCIPALES ÉTAPES D'ASSEMBLAGE - 38

Canopia Studio Copenhagen 10x12 3x3.5 - PRINCIPALES ÉTAPES D'ASSEMBLAGE - 39

Canopia Studio Copenhagen 10x12 3x3.5 - PRINCIPALES ÉTAPES D'ASSEMBLAGE - 40

Canopia Studio Copenhagen 10x12 3x3.5 - PRINCIPALES ÉTAPES D'ASSEMBLAGE - 41

Canopia Studio Copenhagen 10x12 3x3.5 - PRINCIPALES ÉTAPES D'ASSEMBLAGE - 42

Canopia Studio Copenhagen 10x12 3x3.5 - PRINCIPALES ÉTAPES D'ASSEMBLAGE - 43

Canopia Studio Copenhagen 10x12 3x3.5 - PRINCIPALES ÉTAPES D'ASSEMBLAGE - 44

Canopia Studio Copenhagen 10x12 3x3.5 - PRINCIPALES ÉTAPES D'ASSEMBLAGE - 45

Canopia Studio Copenhagen 10x12 3x3.5 - PRINCIPALES ÉTAPES D'ASSEMBLAGE - 46

12

Canopia Studio Copenhagen 10x12 3x3.5 - PRINCIPALES ÉTAPES D'ASSEMBLAGE - 47

While threading insert #9801 into profile #9753, make sure to us the exact dimensions indicated in close-up drawing.

FRONT WALL

Canopia Studio Copenhagen 10x12 3x3.5 - PRINCIPALES ÉTAPES D'ASSEMBLAGE - 48

Canopia Studio Copenhagen 10x12 3x3.5 - PRINCIPALES ÉTAPES D'ASSEMBLAGE - 49

Canopia Studio Copenhagen 10x12 3x3.5 - PRINCIPALES ÉTAPES D'ASSEMBLAGE - 50

Canopia Studio Copenhagen 10x12 3x3.5 - PRINCIPALES ÉTAPES D'ASSEMBLAGE - 51

Canopia Studio Copenhagen 10x12 3x3.5 - PRINCIPALES ÉTAPES D'ASSEMBLAGE - 52

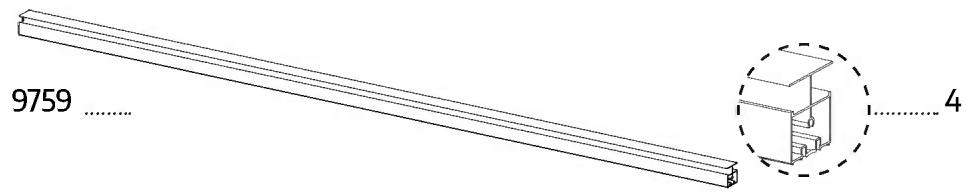
ASSEMBLED 9756
Canopia Studio Copenhagen 10x12 3x3.5 - PRINCIPALES ÉTAPES D'ASSEMBLAGE - 53

Canopia Studio Copenhagen 10x12 3x3.5 - PRINCIPALES ÉTAPES D'ASSEMBLAGE - 54

Canopia Studio Copenhagen 10x12 3x3.5 - PRINCIPALES ÉTAPES D'ASSEMBLAGE - 55

Canopia Studio Copenhagen 10x12 3x3.5 - PRINCIPALES ÉTAPES D'ASSEMBLAGE - 56

Canopia Studio Copenhagen 10x12 3x3.5 - PRINCIPALES ÉTAPES D'ASSEMBLAGE - 57

Canopia Studio Copenhagen 10x12 3x3.5 - PRINCIPALES ÉTAPES D'ASSEMBLAGE - 58

Canopia Studio Copenhagen 10x12 3x3.5 - PRINCIPALES ÉTAPES D'ASSEMBLAGE - 59

Canopia Studio Copenhagen 10x12 3x3.5 - PRINCIPALES ÉTAPES D'ASSEMBLAGE - 60

Canopia Studio Copenhagen 10x12 3x3.5 - PRINCIPALES ÉTAPES D'ASSEMBLAGE - 61

Canopia Studio Copenhagen 10x12 3x3.5 - PRINCIPALES ÉTAPES D'ASSEMBLAGE - 62

Canopia Studio Copenhagen 10x12 3x3.5 - PRINCIPALES ÉTAPES D'ASSEMBLAGE - 63

Canopia Studio Copenhagen 10x12 3x3.5 - PRINCIPALES ÉTAPES D'ASSEMBLAGE - 64

Canopia Studio Copenhagen 10x12 3x3.5 - PRINCIPALES ÉTAPES D'ASSEMBLAGE - 65

Canopia Studio Copenhagen 10x12 3x3.5 - PRINCIPALES ÉTAPES D'ASSEMBLAGE - 66

Canopia Studio Copenhagen 10x12 3x3.5 - PRINCIPALES ÉTAPES D'ASSEMBLAGE - 67

Canopia Studio Copenhagen 10x12 3x3.5 - PRINCIPALES ÉTAPES D'ASSEMBLAGE - 68

Canopia Studio Copenhagen 10x12 3x3.5 - PRINCIPALES ÉTAPES D'ASSEMBLAGE - 69

Canopia Studio Copenhagen 10x12 3x3.5 - PRINCIPALES ÉTAPES D'ASSEMBLAGE - 70

Canopia Studio Copenhagen 10x12 3x3.5 - PRINCIPALES ÉTAPES D'ASSEMBLAGE - 71

Canopia Studio Copenhagen 10x12 3x3.5 - PRINCIPALES ÉTAPES D'ASSEMBLAGE - 72

Canopia Studio Copenhagen 10x12 3x3.5 - PRINCIPALES ÉTAPES D'ASSEMBLAGE - 73

Canopia Studio Copenhagen 10x12 3x3.5 - PRINCIPALES ÉTAPES D'ASSEMBLAGE - 74

Canopia Studio Copenhagen 10x12 3x3.5 - PRINCIPALES ÉTAPES D'ASSEMBLAGE - 75

Canopia Studio Copenhagen 10x12 3x3.5 - PRINCIPALES ÉTAPES D'ASSEMBLAGE - 76

19

Canopia Studio Copenhagen 10x12 3x3.5 - PRINCIPALES ÉTAPES D'ASSEMBLAGE - 77

Peel the film from the panels' edges before sliding them into the profiles, peel the entire film once the assembly is complete.

FRONT WALL

Canopia Studio Copenhagen 10x12 3x3.5 - PRINCIPALES ÉTAPES D'ASSEMBLAGE - 78

Canopia Studio Copenhagen 10x12 3x3.5 - PRINCIPALES ÉTAPES D'ASSEMBLAGE - 79

Canopia Studio Copenhagen 10x12 3x3.5 - PRINCIPALES ÉTAPES D'ASSEMBLAGE - 80

Canopia Studio Copenhagen 10x12 3x3.5 - PRINCIPALES ÉTAPES D'ASSEMBLAGE - 81

Canopia Studio Copenhagen 10x12 3x3.5 - PRINCIPALES ÉTAPES D'ASSEMBLAGE - 82

Canopia Studio Copenhagen 10x12 3x3.5 - PRINCIPALES ÉTAPES D'ASSEMBLAGE - 83

Canopia Studio Copenhagen 10x12 3x3.5 - PRINCIPALES ÉTAPES D'ASSEMBLAGE - 84

Canopia Studio Copenhagen 10x12 3x3.5 - PRINCIPALES ÉTAPES D'ASSEMBLAGE - 85

Canopia Studio Copenhagen 10x12 3x3.5 - PRINCIPALES ÉTAPES D'ASSEMBLAGE - 86

Canopia Studio Copenhagen 10x12 3x3.5 - PRINCIPALES ÉTAPES D'ASSEMBLAGE - 87

Canopia Studio Copenhagen 10x12 3x3.5 - PRINCIPALES ÉTAPES D'ASSEMBLAGE - 88

Canopia Studio Copenhagen 10x12 3x3.5 - PRINCIPALES ÉTAPES D'ASSEMBLAGE - 89

Canopia Studio Copenhagen 10x12 3x3.5 - PRINCIPALES ÉTAPES D'ASSEMBLAGE - 90

Canopia Studio Copenhagen 10x12 3x3.5 - PRINCIPALES ÉTAPES D'ASSEMBLAGE - 91

Canopia Studio Copenhagen 10x12 3x3.5 - PRINCIPALES ÉTAPES D'ASSEMBLAGE - 92

Canopia Studio Copenhagen 10x12 3x3.5 - PRINCIPALES ÉTAPES D'ASSEMBLAGE - 93

Canopia Studio Copenhagen 10x12 3x3.5 - PRINCIPALES ÉTAPES D'ASSEMBLAGE - 94

Canopia Studio Copenhagen 10x12 3x3.5 - PRINCIPALES ÉTAPES D'ASSEMBLAGE - 95

Canopia Studio Copenhagen 10x12 3x3.5 - PRINCIPALES ÉTAPES D'ASSEMBLAGE - 96

Canopia Studio Copenhagen 10x12 3x3.5 - PRINCIPALES ÉTAPES D'ASSEMBLAGE - 97

Canopia Studio Copenhagen 10x12 3x3.5 - PRINCIPALES ÉTAPES D'ASSEMBLAGE - 98

Canopia Studio Copenhagen 10x12 3x3.5 - PRINCIPALES ÉTAPES D'ASSEMBLAGE - 99

Canopia Studio Copenhagen 10x12 3x3.5 - PRINCIPALES ÉTAPES D'ASSEMBLAGE - 100

Canopia Studio Copenhagen 10x12 3x3.5 - PRINCIPALES ÉTAPES D'ASSEMBLAGE - 101

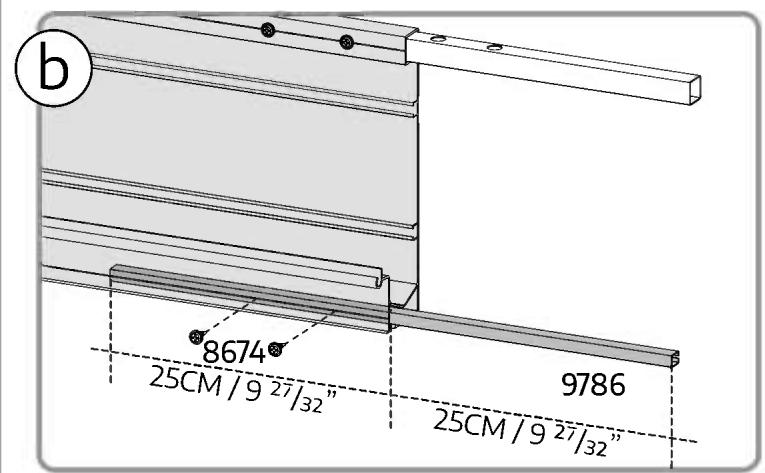
8674.

Canopia Studio Copenhagen 10x12 3x3.5 - PRINCIPALES ÉTAPES D'ASSEMBLAGE - 102

10

Canopia Studio Copenhagen 10x12 3x3.5 - PRINCIPALES ÉTAPES D'ASSEMBLAGE - 103

Canopia Studio Copenhagen 10x12 3x3.5 - PRINCIPALES ÉTAPES D'ASSEMBLAGE - 104

Canopia Studio Copenhagen 10x12 3x3.5 - PRINCIPALES ÉTAPES D'ASSEMBLAGE - 105

Canopia Studio Copenhagen 10x12 3x3.5 - PRINCIPALES ÉTAPES D'ASSEMBLAGE - 106

Canopia Studio Copenhagen 10x12 3x3.5 - PRINCIPALES ÉTAPES D'ASSEMBLAGE - 107

Canopia Studio Copenhagen 10x12 3x3.5 - PRINCIPALES ÉTAPES D'ASSEMBLAGE - 108

X=Y

Canopia Studio Copenhagen 10x12 3x3.5 - PRINCIPALES ÉTAPES D'ASSEMBLAGE - 109

Canopia Studio Copenhagen 10x12 3x3.5 - PRINCIPALES ÉTAPES D'ASSEMBLAGE - 110

Canopia Studio Copenhagen 10x12 3x3.5 - PRINCIPALES ÉTAPES D'ASSEMBLAGE - 111

Canopia Studio Copenhagen 10x12 3x3.5 - PRINCIPALES ÉTAPES D'ASSEMBLAGE - 112

TORX
T40 ....
Canopia Studio Copenhagen 10x12 3x3.5 - PRINCIPALES ÉTAPES D'ASSEMBLAGE - 113

Canopia Studio Copenhagen 10x12 3x3.5 - PRINCIPALES ÉTAPES D'ASSEMBLAGE - 114

Canopia Studio Copenhagen 10x12 3x3.5 - PRINCIPALES ÉTAPES D'ASSEMBLAGE - 115

Canopia Studio Copenhagen 10x12 3x3.5 - PRINCIPALES ÉTAPES D'ASSEMBLAGE - 116

Canopia Studio Copenhagen 10x12 3x3.5 - PRINCIPALES ÉTAPES D'ASSEMBLAGE - 117

Canopia Studio Copenhagen 10x12 3x3.5 - PRINCIPALES ÉTAPES D'ASSEMBLAGE - 118

Canopia Studio Copenhagen 10x12 3x3.5 - PRINCIPALES ÉTAPES D'ASSEMBLAGE - 119

Canopia Studio Copenhagen 10x12 3x3.5 - PRINCIPALES ÉTAPES D'ASSEMBLAGE - 120

Canopia Studio Copenhagen 10x12 3x3.5 - PRINCIPALES ÉTAPES D'ASSEMBLAGE - 121
ASSEMBLED 9760

Canopia Studio Copenhagen 10x12 3x3.5 - PRINCIPALES ÉTAPES D'ASSEMBLAGE - 122

Canopia Studio Copenhagen 10x12 3x3.5 - PRINCIPALES ÉTAPES D'ASSEMBLAGE - 123

Canopia Studio Copenhagen 10x12 3x3.5 - PRINCIPALES ÉTAPES D'ASSEMBLAGE - 124

Canopia Studio Copenhagen 10x12 3x3.5 - PRINCIPALES ÉTAPES D'ASSEMBLAGE - 125

Canopia Studio Copenhagen 10x12 3x3.5 - PRINCIPALES ÉTAPES D'ASSEMBLAGE - 126

Canopia Studio Copenhagen 10x12 3x3.5 - PRINCIPALES ÉTAPES D'ASSEMBLAGE - 127

Canopia Studio Copenhagen 10x12 3x3.5 - PRINCIPALES ÉTAPES D'ASSEMBLAGE - 128

34

Canopia Studio Copenhagen 10x12 3x3.5 - PRINCIPALES ÉTAPES D'ASSEMBLAGE - 129

Peel the film from the panels' edges before sliding them into the profiles, peel the entire film once the assembly is complete.

Canopia Studio Copenhagen 10x12 3x3.5 - PRINCIPALES ÉTAPES D'ASSEMBLAGE - 130

Canopia Studio Copenhagen 10x12 3x3.5 - PRINCIPALES ÉTAPES D'ASSEMBLAGE - 131

Canopia Studio Copenhagen 10x12 3x3.5 - PRINCIPALES ÉTAPES D'ASSEMBLAGE - 132

Canopia Studio Copenhagen 10x12 3x3.5 - PRINCIPALES ÉTAPES D'ASSEMBLAGE - 133

Canopia Studio Copenhagen 10x12 3x3.5 - PRINCIPALES ÉTAPES D'ASSEMBLAGE - 134

Canopia Studio Copenhagen 10x12 3x3.5 - PRINCIPALES ÉTAPES D'ASSEMBLAGE - 135

Canopia Studio Copenhagen 10x12 3x3.5 - PRINCIPALES ÉTAPES D'ASSEMBLAGE - 136

Canopia Studio Copenhagen 10x12 3x3.5 - PRINCIPALES ÉTAPES D'ASSEMBLAGE - 137

Canopia Studio Copenhagen 10x12 3x3.5 - PRINCIPALES ÉTAPES D'ASSEMBLAGE - 138

Canopia Studio Copenhagen 10x12 3x3.5 - PRINCIPALES ÉTAPES D'ASSEMBLAGE - 139

Canopia Studio Copenhagen 10x12 3x3.5 - PRINCIPALES ÉTAPES D'ASSEMBLAGE - 140

Canopia Studio Copenhagen 10x12 3x3.5 - PRINCIPALES ÉTAPES D'ASSEMBLAGE - 141

Canopia Studio Copenhagen 10x12 3x3.5 - PRINCIPALES ÉTAPES D'ASSEMBLAGE - 142

Canopia Studio Copenhagen 10x12 3x3.5 - PRINCIPALES ÉTAPES D'ASSEMBLAGE - 143

Canopia Studio Copenhagen 10x12 3x3.5 - PRINCIPALES ÉTAPES D'ASSEMBLAGE - 144

Canopia Studio Copenhagen 10x12 3x3.5 - PRINCIPALES ÉTAPES D'ASSEMBLAGE - 145

Canopia Studio Copenhagen 10x12 3x3.5 - PRINCIPALES ÉTAPES D'ASSEMBLAGE - 146

Canopia Studio Copenhagen 10x12 3x3.5 - PRINCIPALES ÉTAPES D'ASSEMBLAGE - 147

Canopia Studio Copenhagen 10x12 3x3.5 - PRINCIPALES ÉTAPES D'ASSEMBLAGE - 148

8674....2

Canopia Studio Copenhagen 10x12 3x3.5 - PRINCIPALES ÉTAPES D'ASSEMBLAGE - 149

Canopia Studio Copenhagen 10x12 3x3.5 - PRINCIPALES ÉTAPES D'ASSEMBLAGE - 150

Canopia Studio Copenhagen 10x12 3x3.5 - PRINCIPALES ÉTAPES D'ASSEMBLAGE - 151

Canopia Studio Copenhagen 10x12 3x3.5 - PRINCIPALES ÉTAPES D'ASSEMBLAGE - 152

ASSEMBLED 9766

Canopia Studio Copenhagen 10x12 3x3.5 - PRINCIPALES ÉTAPES D'ASSEMBLAGE - 153

Canopia Studio Copenhagen 10x12 3x3.5 - PRINCIPALES ÉTAPES D'ASSEMBLAGE - 154

8674....2

Canopia Studio Copenhagen 10x12 3x3.5 - PRINCIPALES ÉTAPES D'ASSEMBLAGE - 155

Canopia Studio Copenhagen 10x12 3x3.5 - PRINCIPALES ÉTAPES D'ASSEMBLAGE - 156

Canopia Studio Copenhagen 10x12 3x3.5 - PRINCIPALES ÉTAPES D'ASSEMBLAGE - 157

Canopia Studio Copenhagen 10x12 3x3.5 - PRINCIPALES ÉTAPES D'ASSEMBLAGE - 158
ASSEMBLED 9766+9767

Canopia Studio Copenhagen 10x12 3x3.5 - PRINCIPALES ÉTAPES D'ASSEMBLAGE - 159

Canopia Studio Copenhagen 10x12 3x3.5 - PRINCIPALES ÉTAPES D'ASSEMBLAGE - 160

Canopia Studio Copenhagen 10x12 3x3.5 - PRINCIPALES ÉTAPES D'ASSEMBLAGE - 161

Canopia Studio Copenhagen 10x12 3x3.5 - PRINCIPALES ÉTAPES D'ASSEMBLAGE - 162

Canopia Studio Copenhagen 10x12 3x3.5 - PRINCIPALES ÉTAPES D'ASSEMBLAGE - 163

Canopia Studio Copenhagen 10x12 3x3.5 - PRINCIPALES ÉTAPES D'ASSEMBLAGE - 164

Canopia Studio Copenhagen 10x12 3x3.5 - PRINCIPALES ÉTAPES D'ASSEMBLAGE - 165

Canopia Studio Copenhagen 10x12 3x3.5 - PRINCIPALES ÉTAPES D'ASSEMBLAGE - 166

Canopia Studio Copenhagen 10x12 3x3.5 - PRINCIPALES ÉTAPES D'ASSEMBLAGE - 167

Canopia Studio Copenhagen 10x12 3x3.5 - PRINCIPALES ÉTAPES D'ASSEMBLAGE - 168

Canopia Studio Copenhagen 10x12 3x3.5 - PRINCIPALES ÉTAPES D'ASSEMBLAGE - 169

Canopia Studio Copenhagen 10x12 3x3.5 - PRINCIPALES ÉTAPES D'ASSEMBLAGE - 170

Canopia Studio Copenhagen 10x12 3x3.5 - PRINCIPALES ÉTAPES D'ASSEMBLAGE - 171

9800
Canopia Studio Copenhagen 10x12 3x3.5 - PRINCIPALES ÉTAPES D'ASSEMBLAGE - 172

  1. Canopia Studio Copenhagen 10x12 3x3.5 - PRINCIPALES ÉTAPES D'ASSEMBLAGE - 173

Canopia Studio Copenhagen 10x12 3x3.5 - PRINCIPALES ÉTAPES D'ASSEMBLAGE - 174

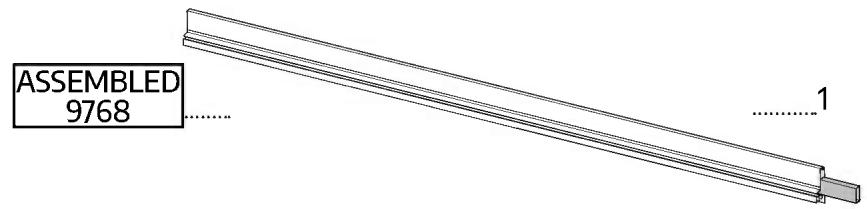
ASSEMBLED 9768

Canopia Studio Copenhagen 10x12 3x3.5 - PRINCIPALES ÉTAPES D'ASSEMBLAGE - 175

a
Canopia Studio Copenhagen 10x12 3x3.5 - PRINCIPALES ÉTAPES D'ASSEMBLAGE - 176

Canopia Studio Copenhagen 10x12 3x3.5 - PRINCIPALES ÉTAPES D'ASSEMBLAGE - 177

Canopia Studio Copenhagen 10x12 3x3.5 - PRINCIPALES ÉTAPES D'ASSEMBLAGE - 178

Canopia Studio Copenhagen 10x12 3x3.5 - PRINCIPALES ÉTAPES D'ASSEMBLAGE - 179

8674....2

Canopia Studio Copenhagen 10x12 3x3.5 - PRINCIPALES ÉTAPES D'ASSEMBLAGE - 180

Canopia Studio Copenhagen 10x12 3x3.5 - PRINCIPALES ÉTAPES D'ASSEMBLAGE - 181

8192.....
Canopia Studio Copenhagen 10x12 3x3.5 - PRINCIPALES ÉTAPES D'ASSEMBLAGE - 182
......6

466
Canopia Studio Copenhagen 10x12 3x3.5 - PRINCIPALES ÉTAPES D'ASSEMBLAGE - 183
......6

Canopia Studio Copenhagen 10x12 3x3.5 - PRINCIPALES ÉTAPES D'ASSEMBLAGE - 184

Canopia Studio Copenhagen 10x12 3x3.5 - PRINCIPALES ÉTAPES D'ASSEMBLAGE - 185

ASSEMBLED 9782
Canopia Studio Copenhagen 10x12 3x3.5 - PRINCIPALES ÉTAPES D'ASSEMBLAGE - 186

Canopia Studio Copenhagen 10x12 3x3.5 - PRINCIPALES ÉTAPES D'ASSEMBLAGE - 187

Canopia Studio Copenhagen 10x12 3x3.5 - PRINCIPALES ÉTAPES D'ASSEMBLAGE - 188

Canopia Studio Copenhagen 10x12 3x3.5 - PRINCIPALES ÉTAPES D'ASSEMBLAGE - 189

Canopia Studio Copenhagen 10x12 3x3.5 - PRINCIPALES ÉTAPES D'ASSEMBLAGE - 190

Canopia Studio Copenhagen 10x12 3x3.5 - PRINCIPALES ÉTAPES D'ASSEMBLAGE - 191

Canopia Studio Copenhagen 10x12 3x3.5 - PRINCIPALES ÉTAPES D'ASSEMBLAGE - 192

Canopia Studio Copenhagen 10x12 3x3.5 - PRINCIPALES ÉTAPES D'ASSEMBLAGE - 193

Canopia Studio Copenhagen 10x12 3x3.5 - PRINCIPALES ÉTAPES D'ASSEMBLAGE - 194

Canopia Studio Copenhagen 10x12 3x3.5 - PRINCIPALES ÉTAPES D'ASSEMBLAGE - 195

Canopia Studio Copenhagen 10x12 3x3.5 - PRINCIPALES ÉTAPES D'ASSEMBLAGE - 196

Canopia Studio Copenhagen 10x12 3x3.5 - PRINCIPALES ÉTAPES D'ASSEMBLAGE - 197

Canopia Studio Copenhagen 10x12 3x3.5 - PRINCIPALES ÉTAPES D'ASSEMBLAGE - 198

Canopia Studio Copenhagen 10x12 3x3.5 - PRINCIPALES ÉTAPES D'ASSEMBLAGE - 199

Canopia Studio Copenhagen 10x12 3x3.5 - PRINCIPALES ÉTAPES D'ASSEMBLAGE - 200

Canopia Studio Copenhagen 10x12 3x3.5 - PRINCIPALES ÉTAPES D'ASSEMBLAGE - 201

Canopia Studio Copenhagen 10x12 3x3.5 - PRINCIPALES ÉTAPES D'ASSEMBLAGE - 202

Canopia Studio Copenhagen 10x12 3x3.5 - PRINCIPALES ÉTAPES D'ASSEMBLAGE - 203

Canopia Studio Copenhagen 10x12 3x3.5 - PRINCIPALES ÉTAPES D'ASSEMBLAGE - 204

Canopia Studio Copenhagen 10x12 3x3.5 - PRINCIPALES ÉTAPES D'ASSEMBLAGE - 205

Canopia Studio Copenhagen 10x12 3x3.5 - PRINCIPALES ÉTAPES D'ASSEMBLAGE - 206

Canopia Studio Copenhagen 10x12 3x3.5 - PRINCIPALES ÉTAPES D'ASSEMBLAGE - 207

Canopia Studio Copenhagen 10x12 3x3.5 - PRINCIPALES ÉTAPES D'ASSEMBLAGE - 208

Canopia Studio Copenhagen 10x12 3x3.5 - PRINCIPALES ÉTAPES D'ASSEMBLAGE - 209

Canopia Studio Copenhagen 10x12 3x3.5 - PRINCIPALES ÉTAPES D'ASSEMBLAGE - 210

Canopia Studio Copenhagen 10x12 3x3.5 - PRINCIPALES ÉTAPES D'ASSEMBLAGE - 211

Canopia Studio Copenhagen 10x12 3x3.5 - PRINCIPALES ÉTAPES D'ASSEMBLAGE - 212

Canopia Studio Copenhagen 10x12 3x3.5 - PRINCIPALES ÉTAPES D'ASSEMBLAGE - 213

Canopia Studio Copenhagen 10x12 3x3.5 - PRINCIPALES ÉTAPES D'ASSEMBLAGE - 214

Canopia Studio Copenhagen 10x12 3x3.5 - PRINCIPALES ÉTAPES D'ASSEMBLAGE - 215

Canopia Studio Copenhagen 10x12 3x3.5 - PRINCIPALES ÉTAPES D'ASSEMBLAGE - 216

Canopia Studio Copenhagen 10x12 3x3.5 - PRINCIPALES ÉTAPES D'ASSEMBLAGE - 217

Canopia Studio Copenhagen 10x12 3x3.5 - PRINCIPALES ÉTAPES D'ASSEMBLAGE - 218

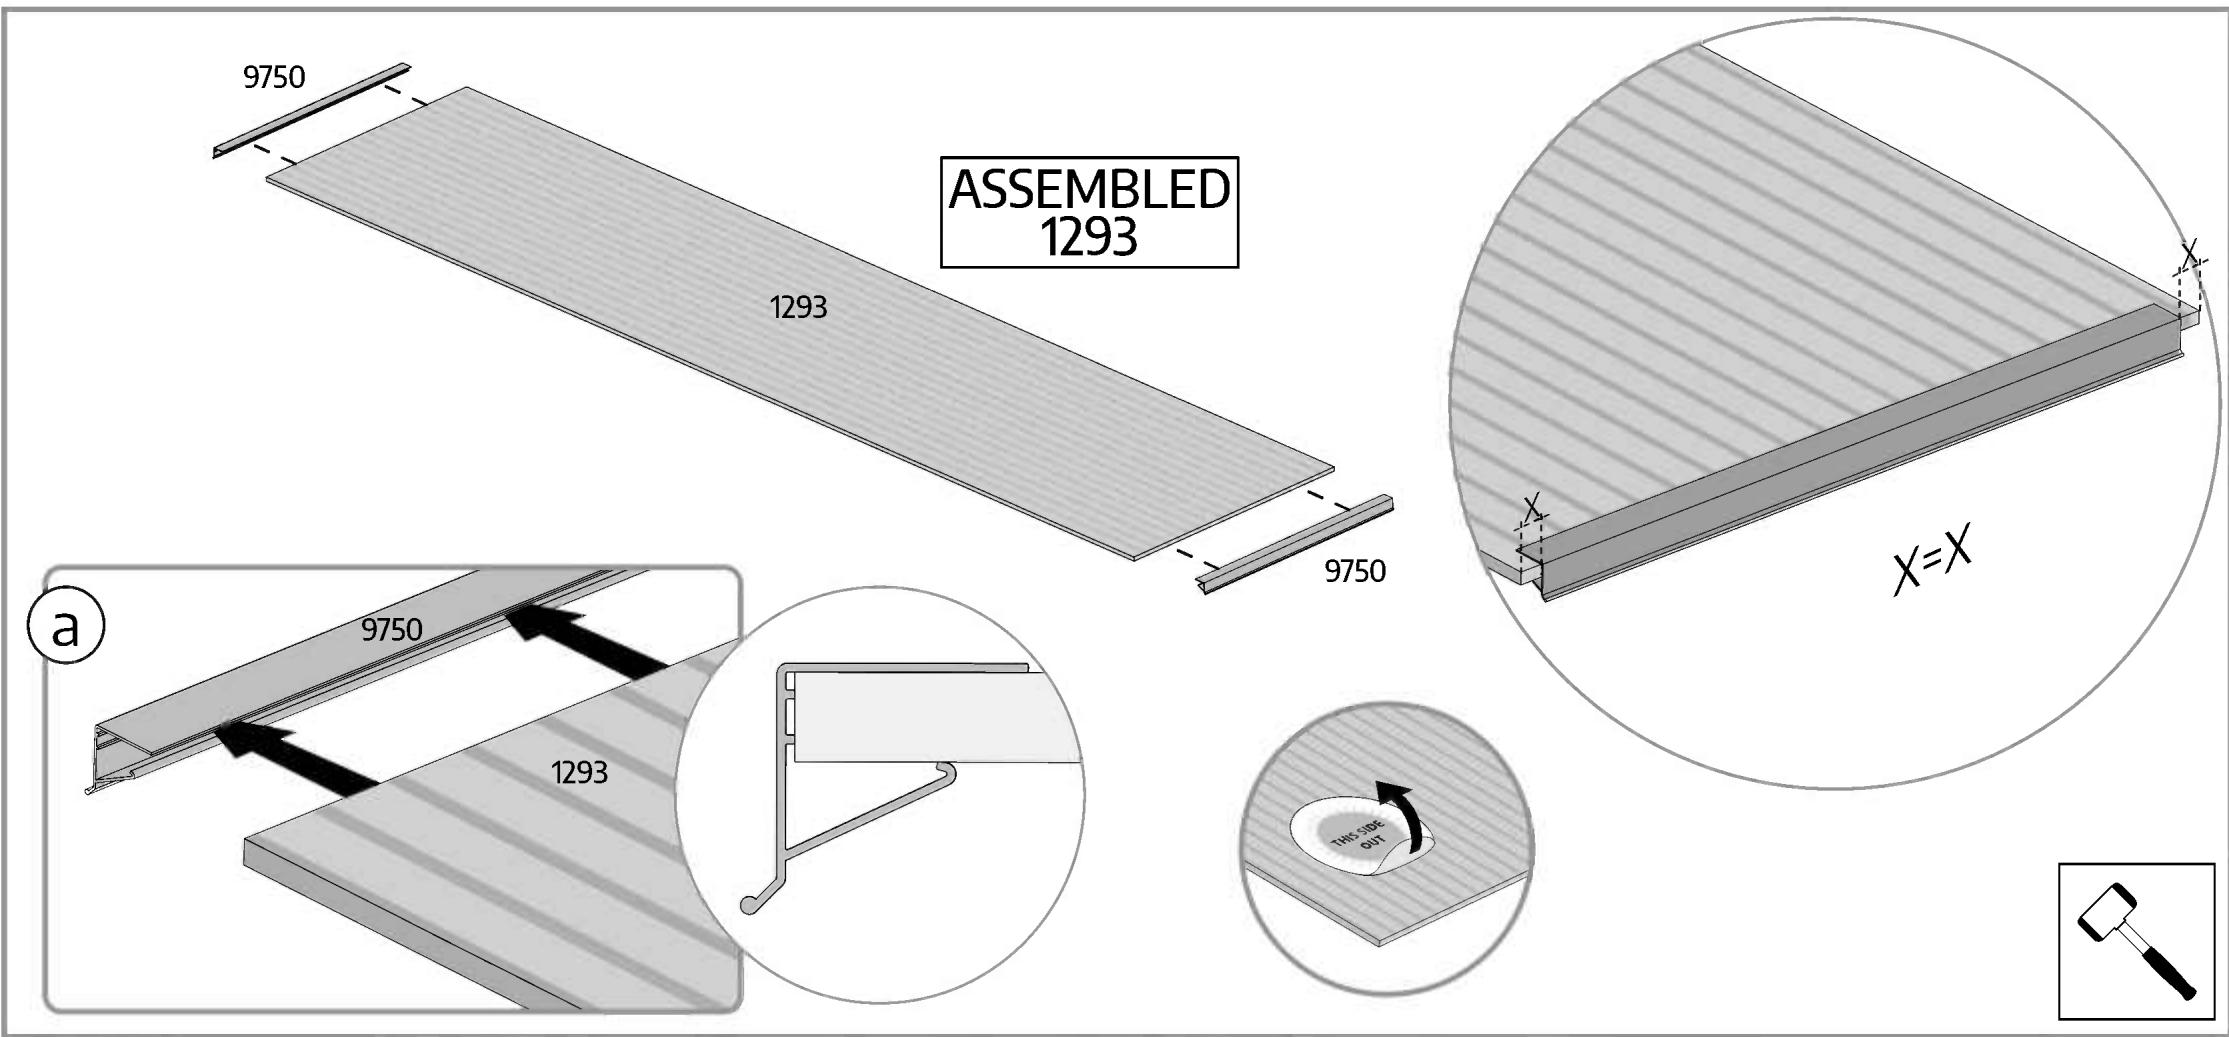
ASSEMBLED 1293

Canopia Studio Copenhagen 10x12 3x3.5 - PRINCIPALES ÉTAPES D'ASSEMBLAGE - 219

Canopia Studio Copenhagen 10x12 3x3.5 - PRINCIPALES ÉTAPES D'ASSEMBLAGE - 220

Canopia Studio Copenhagen 10x12 3x3.5 - PRINCIPALES ÉTAPES D'ASSEMBLAGE - 221

Canopia Studio Copenhagen 10x12 3x3.5 - PRINCIPALES ÉTAPES D'ASSEMBLAGE - 222

8674.

Canopia Studio Copenhagen 10x12 3x3.5 - PRINCIPALES ÉTAPES D'ASSEMBLAGE - 223

5

Canopia Studio Copenhagen 10x12 3x3.5 - PRINCIPALES ÉTAPES D'ASSEMBLAGE - 224

Canopia Studio Copenhagen 10x12 3x3.5 - PRINCIPALES ÉTAPES D'ASSEMBLAGE - 225

Canopia Studio Copenhagen 10x12 3x3.5 - PRINCIPALES ÉTAPES D'ASSEMBLAGE - 226

Canopia Studio Copenhagen 10x12 3x3.5 - PRINCIPALES ÉTAPES D'ASSEMBLAGE - 227

Canopia Studio Copenhagen 10x12 3x3.5 - PRINCIPALES ÉTAPES D'ASSEMBLAGE - 228

Canopia Studio Copenhagen 10x12 3x3.5 - PRINCIPALES ÉTAPES D'ASSEMBLAGE - 229

8674.

Canopia Studio Copenhagen 10x12 3x3.5 - PRINCIPALES ÉTAPES D'ASSEMBLAGE - 230

Canopia Studio Copenhagen 10x12 3x3.5 - PRINCIPALES ÉTAPES D'ASSEMBLAGE - 231

Canopia Studio Copenhagen 10x12 3x3.5 - PRINCIPALES ÉTAPES D'ASSEMBLAGE - 232

Canopia Studio Copenhagen 10x12 3x3.5 - PRINCIPALES ÉTAPES D'ASSEMBLAGE - 233

Canopia Studio Copenhagen 10x12 3x3.5 - PRINCIPALES ÉTAPES D'ASSEMBLAGE - 234

Canopia Studio Copenhagen 10x12 3x3.5 - PRINCIPALES ÉTAPES D'ASSEMBLAGE - 235

Canopia Studio Copenhagen 10x12 3x3.5 - PRINCIPALES ÉTAPES D'ASSEMBLAGE - 236

Canopia Studio Copenhagen 10x12 3x3.5 - PRINCIPALES ÉTAPES D'ASSEMBLAGE - 237

Canopia Studio Copenhagen 10x12 3x3.5 - PRINCIPALES ÉTAPES D'ASSEMBLAGE - 238

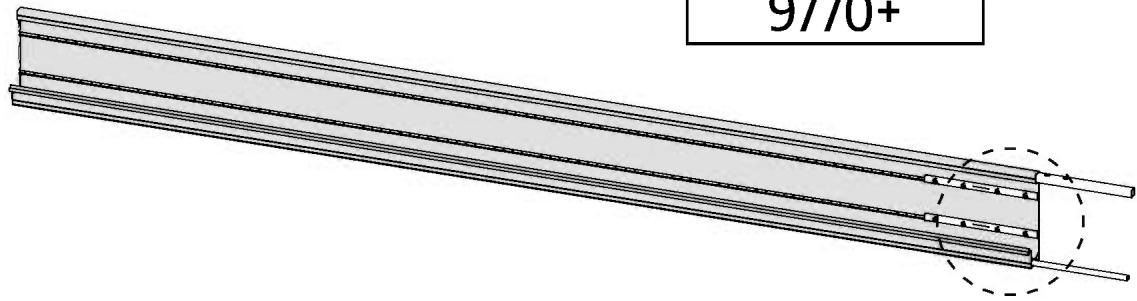
ASSEMBLED 9770
Canopia Studio Copenhagen 10x12 3x3.5 - PRINCIPALES ÉTAPES D'ASSEMBLAGE - 239

x2
Canopia Studio Copenhagen 10x12 3x3.5 - PRINCIPALES ÉTAPES D'ASSEMBLAGE - 240

Canopia Studio Copenhagen 10x12 3x3.5 - PRINCIPALES ÉTAPES D'ASSEMBLAGE - 241

Canopia Studio Copenhagen 10x12 3x3.5 - PRINCIPALES ÉTAPES D'ASSEMBLAGE - 242

4 8192......

Canopia Studio Copenhagen 10x12 3x3.5 - PRINCIPALES ÉTAPES D'ASSEMBLAGE - 243

.....16

466

Canopia Studio Copenhagen 10x12 3x3.5 - PRINCIPALES ÉTAPES D'ASSEMBLAGE - 244

16

Canopia Studio Copenhagen 10x12 3x3.5 - PRINCIPALES ÉTAPES D'ASSEMBLAGE - 245

ASSEMBLED 9770+
Canopia Studio Copenhagen 10x12 3x3.5 - PRINCIPALES ÉTAPES D'ASSEMBLAGE - 246

Canopia Studio Copenhagen 10x12 3x3.5 - PRINCIPALES ÉTAPES D'ASSEMBLAGE - 247

Canopia Studio Copenhagen 10x12 3x3.5 - PRINCIPALES ÉTAPES D'ASSEMBLAGE - 248

x2

Canopia Studio Copenhagen 10x12 3x3.5 - PRINCIPALES ÉTAPES D'ASSEMBLAGE - 249

Canopia Studio Copenhagen 10x12 3x3.5 - PRINCIPALES ÉTAPES D'ASSEMBLAGE - 250

Canopia Studio Copenhagen 10x12 3x3.5 - PRINCIPALES ÉTAPES D'ASSEMBLAGE - 251

Canopia Studio Copenhagen 10x12 3x3.5 - PRINCIPALES ÉTAPES D'ASSEMBLAGE - 252

Canopia Studio Copenhagen 10x12 3x3.5 - PRINCIPALES ÉTAPES D'ASSEMBLAGE - 253

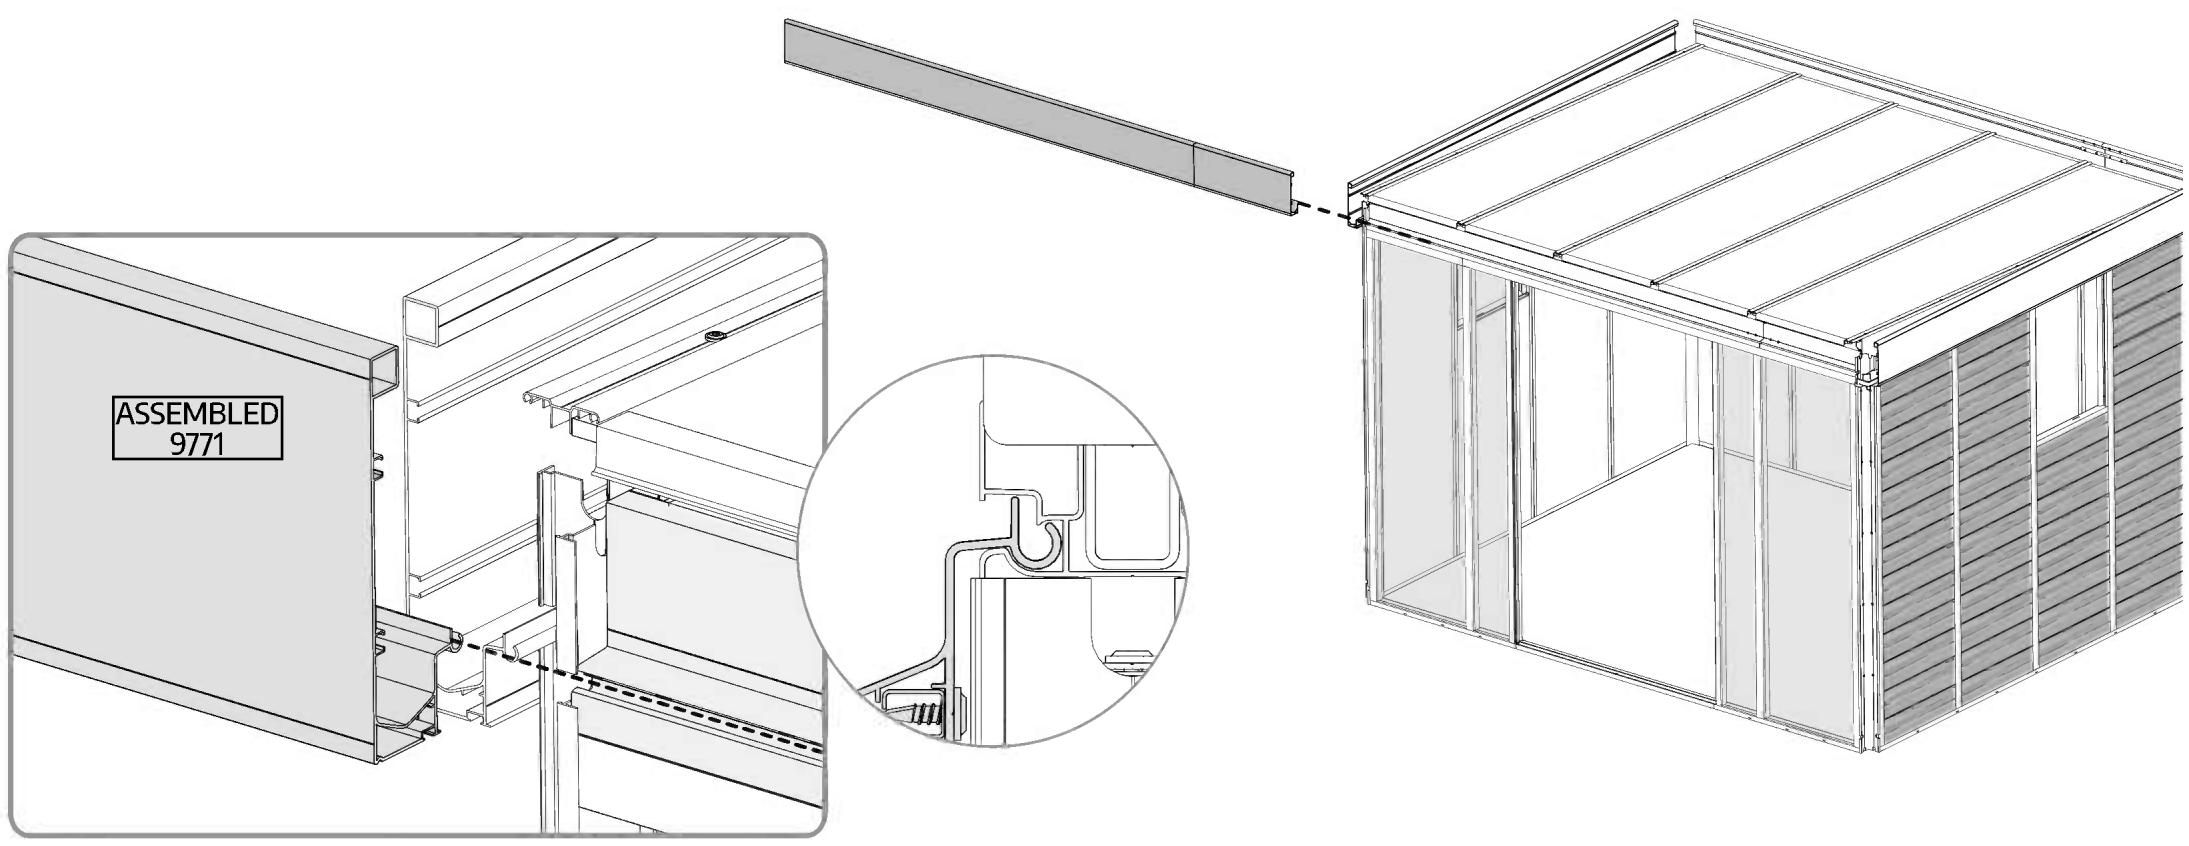
ASSEMBLED 9771

Canopia Studio Copenhagen 10x12 3x3.5 - PRINCIPALES ÉTAPES D'ASSEMBLAGE - 254

Canopia Studio Copenhagen 10x12 3x3.5 - PRINCIPALES ÉTAPES D'ASSEMBLAGE - 255

Canopia Studio Copenhagen 10x12 3x3.5 - PRINCIPALES ÉTAPES D'ASSEMBLAGE - 256

Canopia Studio Copenhagen 10x12 3x3.5 - PRINCIPALES ÉTAPES D'ASSEMBLAGE - 257

Canopia Studio Copenhagen 10x12 3x3.5 - PRINCIPALES ÉTAPES D'ASSEMBLAGE - 258

Canopia Studio Copenhagen 10x12 3x3.5 - PRINCIPALES ÉTAPES D'ASSEMBLAGE - 259

9330

Canopia Studio Copenhagen 10x12 3x3.5 - PRINCIPALES ÉTAPES D'ASSEMBLAGE - 260

Canopia Studio Copenhagen 10x12 3x3.5 - PRINCIPALES ÉTAPES D'ASSEMBLAGE - 261

Canopia Studio Copenhagen 10x12 3x3.5 - PRINCIPALES ÉTAPES D'ASSEMBLAGE - 262

Canopia Studio Copenhagen 10x12 3x3.5 - PRINCIPALES ÉTAPES D'ASSEMBLAGE - 263

Canopia Studio Copenhagen 10x12 3x3.5 - PRINCIPALES ÉTAPES D'ASSEMBLAGE - 264

Canopia Studio Copenhagen 10x12 3x3.5 - PRINCIPALES ÉTAPES D'ASSEMBLAGE - 265

Canopia Studio Copenhagen 10x12 3x3.5 - PRINCIPALES ÉTAPES D'ASSEMBLAGE - 266

Canopia Studio Copenhagen 10x12 3x3.5 - PRINCIPALES ÉTAPES D'ASSEMBLAGE - 267

Canopia Studio Copenhagen 10x12 3x3.5 - PRINCIPALES ÉTAPES D'ASSEMBLAGE - 268

100

Canopia Studio Copenhagen 10x12 3x3.5 - PRINCIPALES ÉTAPES D'ASSEMBLAGE - 269

a

Canopia Studio Copenhagen 10x12 3x3.5 - PRINCIPALES ÉTAPES D'ASSEMBLAGE - 270

b

Canopia Studio Copenhagen 10x12 3x3.5 - PRINCIPALES ÉTAPES D'ASSEMBLAGE - 271

C

Canopia Studio Copenhagen 10x12 3x3.5 - PRINCIPALES ÉTAPES D'ASSEMBLAGE - 272

Canopia Studio Copenhagen 10x12 3x3.5 - PRINCIPALES ÉTAPES D'ASSEMBLAGE - 273

Canopia Studio Copenhagen 10x12 3x3.5 - PRINCIPALES ÉTAPES D'ASSEMBLAGE - 274

Canopia Studio Copenhagen 10x12 3x3.5 - PRINCIPALES ÉTAPES D'ASSEMBLAGE - 275

Canopia Studio Copenhagen 10x12 3x3.5 - PRINCIPALES ÉTAPES D'ASSEMBLAGE - 276

Canopia Studio Copenhagen 10x12 3x3.5 - PRINCIPALES ÉTAPES D'ASSEMBLAGE - 277

Canopia Studio Copenhagen 10x12 3x3.5 - PRINCIPALES ÉTAPES D'ASSEMBLAGE - 278

Canopia Studio Copenhagen 10x12 3x3.5 - PRINCIPALES ÉTAPES D'ASSEMBLAGE - 279

Canopia Studio Copenhagen 10x12 3x3.5 - PRINCIPALES ÉTAPES D'ASSEMBLAGE - 280

Canopia Studio Copenhagen 10x12 3x3.5 - PRINCIPALES ÉTAPES D'ASSEMBLAGE - 281

Canopia Studio Copenhagen 10x12 3x3.5 - PRINCIPALES ÉTAPES D'ASSEMBLAGE - 282

Canopia Studio Copenhagen 10x12 3x3.5 - PRINCIPALES ÉTAPES D'ASSEMBLAGE - 283

Canopia Studio Copenhagen 10x12 3x3.5 - PRINCIPALES ÉTAPES D'ASSEMBLAGE - 284

Canopia Studio Copenhagen 10x12 3x3.5 - PRINCIPALES ÉTAPES D'ASSEMBLAGE - 285

Canopia Studio Copenhagen 10x12 3x3.5 - PRINCIPALES ÉTAPES D'ASSEMBLAGE - 286

75

Canopia Studio Copenhagen 10x12 3x3.5 - PRINCIPALES ÉTAPES D'ASSEMBLAGE - 287

Peel the film from the panels' edges before sliding them into the profiles, peel the entire film once the assembly is complete.

Canopia Studio Copenhagen 10x12 3x3.5 - PRINCIPALES ÉTAPES D'ASSEMBLAGE - 288

Canopia Studio Copenhagen 10x12 3x3.5 - PRINCIPALES ÉTAPES D'ASSEMBLAGE - 289

Canopia Studio Copenhagen 10x12 3x3.5 - PRINCIPALES ÉTAPES D'ASSEMBLAGE - 290

Canopia Studio Copenhagen 10x12 3x3.5 - PRINCIPALES ÉTAPES D'ASSEMBLAGE - 291

Canopia Studio Copenhagen 10x12 3x3.5 - PRINCIPALES ÉTAPES D'ASSEMBLAGE - 292

x2

Canopia Studio Copenhagen 10x12 3x3.5 - PRINCIPALES ÉTAPES D'ASSEMBLAGE - 293

Canopia Studio Copenhagen 10x12 3x3.5 - PRINCIPALES ÉTAPES D'ASSEMBLAGE - 294

Canopia Studio Copenhagen 10x12 3x3.5 - PRINCIPALES ÉTAPES D'ASSEMBLAGE - 295

Canopia Studio Copenhagen 10x12 3x3.5 - PRINCIPALES ÉTAPES D'ASSEMBLAGE - 296

9308......

Canopia Studio Copenhagen 10x12 3x3.5 - PRINCIPALES ÉTAPES D'ASSEMBLAGE - 297

...... 2

9309 ....

Canopia Studio Copenhagen 10x12 3x3.5 - PRINCIPALES ÉTAPES D'ASSEMBLAGE - 298

...... 2

Canopia Studio Copenhagen 10x12 3x3.5 - PRINCIPALES ÉTAPES D'ASSEMBLAGE - 299

Canopia Studio Copenhagen 10x12 3x3.5 - PRINCIPALES ÉTAPES D'ASSEMBLAGE - 300

Canopia Studio Copenhagen 10x12 3x3.5 - PRINCIPALES ÉTAPES D'ASSEMBLAGE - 301

Canopia Studio Copenhagen 10x12 3x3.5 - PRINCIPALES ÉTAPES D'ASSEMBLAGE - 302

Canopia Studio Copenhagen 10x12 3x3.5 - PRINCIPALES ÉTAPES D'ASSEMBLAGE - 303

Canopia Studio Copenhagen 10x12 3x3.5 - PRINCIPALES ÉTAPES D'ASSEMBLAGE - 304

Canopia Studio Copenhagen 10x12 3x3.5 - PRINCIPALES ÉTAPES D'ASSEMBLAGE - 305

x2

Canopia Studio Copenhagen 10x12 3x3.5 - PRINCIPALES ÉTAPES D'ASSEMBLAGE - 306

Canopia Studio Copenhagen 10x12 3x3.5 - PRINCIPALES ÉTAPES D'ASSEMBLAGE - 307

Canopia Studio Copenhagen 10x12 3x3.5 - PRINCIPALES ÉTAPES D'ASSEMBLAGE - 308

Canopia Studio Copenhagen 10x12 3x3.5 - PRINCIPALES ÉTAPES D'ASSEMBLAGE - 309

Canopia Studio Copenhagen 10x12 3x3.5 - PRINCIPALES ÉTAPES D'ASSEMBLAGE - 310

Canopia Studio Copenhagen 10x12 3x3.5 - PRINCIPALES ÉTAPES D'ASSEMBLAGE - 311

Canopia Studio Copenhagen 10x12 3x3.5 - PRINCIPALES ÉTAPES D'ASSEMBLAGE - 312

Canopia Studio Copenhagen 10x12 3x3.5 - PRINCIPALES ÉTAPES D'ASSEMBLAGE - 313

Canopia Studio Copenhagen 10x12 3x3.5 - PRINCIPALES ÉTAPES D'ASSEMBLAGE - 314

Canopia Studio Copenhagen 10x12 3x3.5 - PRINCIPALES ÉTAPES D'ASSEMBLAGE - 315

Canopia Studio Copenhagen 10x12 3x3.5 - PRINCIPALES ÉTAPES D'ASSEMBLAGE - 316

Canopia Studio Copenhagen 10x12 3x3.5 - PRINCIPALES ÉTAPES D'ASSEMBLAGE - 317

Canopia Studio Copenhagen 10x12 3x3.5 - PRINCIPALES ÉTAPES D'ASSEMBLAGE - 318

Canopia Studio Copenhagen 10x12 3x3.5 - PRINCIPALES ÉTAPES D'ASSEMBLAGE - 319

Canopia Studio Copenhagen 10x12 3x3.5 - PRINCIPALES ÉTAPES D'ASSEMBLAGE - 320

Canopia Studio Copenhagen 10x12 3x3.5 - PRINCIPALES ÉTAPES D'ASSEMBLAGE - 321

Canopia Studio Copenhagen 10x12 3x3.5 - PRINCIPALES ÉTAPES D'ASSEMBLAGE - 322

Canopia Studio Copenhagen 10x12 3x3.5 - PRINCIPALES ÉTAPES D'ASSEMBLAGE - 323

Canopia Studio Copenhagen 10x12 3x3.5 - PRINCIPALES ÉTAPES D'ASSEMBLAGE - 324

Canopia Studio Copenhagen 10x12 3x3.5 - PRINCIPALES ÉTAPES D'ASSEMBLAGE - 325

Canopia Studio Copenhagen 10x12 3x3.5 - PRINCIPALES ÉTAPES D'ASSEMBLAGE - 326

Canopia Studio Copenhagen 10x12 3x3.5 - PRINCIPALES ÉTAPES D'ASSEMBLAGE - 327

Canopia Studio Copenhagen 10x12 3x3.5 - PRINCIPALES ÉTAPES D'ASSEMBLAGE - 328

Canopia Studio Copenhagen 10x12 3x3.5 - PRINCIPALES ÉTAPES D'ASSEMBLAGE - 329

Canopia Studio Copenhagen 10x12 3x3.5 - PRINCIPALES ÉTAPES D'ASSEMBLAGE - 330

7912

Canopia Studio Copenhagen 10x12 3x3.5 - PRINCIPALES ÉTAPES D'ASSEMBLAGE - 331

Canopia Studio Copenhagen 10x12 3x3.5 - PRINCIPALES ÉTAPES D'ASSEMBLAGE - 332

Canopia Studio Copenhagen 10x12 3x3.5 - PRINCIPALES ÉTAPES D'ASSEMBLAGE - 333

Canopia Studio Copenhagen 10x12 3x3.5 - PRINCIPALES ÉTAPES D'ASSEMBLAGE - 334

9301 ......

Canopia Studio Copenhagen 10x12 3x3.5 - PRINCIPALES ÉTAPES D'ASSEMBLAGE - 335

...... 1

7912 .....

Canopia Studio Copenhagen 10x12 3x3.5 - PRINCIPALES ÉTAPES D'ASSEMBLAGE - 336

...... 1

Canopia Studio Copenhagen 10x12 3x3.5 - PRINCIPALES ÉTAPES D'ASSEMBLAGE - 337

Canopia Studio Copenhagen 10x12 3x3.5 - PRINCIPALES ÉTAPES D'ASSEMBLAGE - 338

Canopia Studio Copenhagen 10x12 3x3.5 - PRINCIPALES ÉTAPES D'ASSEMBLAGE - 339

Canopia Studio Copenhagen 10x12 3x3.5 - PRINCIPALES ÉTAPES D'ASSEMBLAGE - 340

Canopia Studio Copenhagen 10x12 3x3.5 - PRINCIPALES ÉTAPES D'ASSEMBLAGE - 341

Canopia Studio Copenhagen 10x12 3x3.5 - PRINCIPALES ÉTAPES D'ASSEMBLAGE - 342

Canopia Studio Copenhagen 10x12 3x3.5 - PRINCIPALES ÉTAPES D'ASSEMBLAGE - 343

Canopia Studio Copenhagen 10x12 3x3.5 - PRINCIPALES ÉTAPES D'ASSEMBLAGE - 344

Canopia Studio Copenhagen 10x12 3x3.5 - PRINCIPALES ÉTAPES D'ASSEMBLAGE - 345

Canopia Studio Copenhagen 10x12 3x3.5 - PRINCIPALES ÉTAPES D'ASSEMBLAGE - 346

Canopia Studio Copenhagen 10x12 3x3.5 - PRINCIPALES ÉTAPES D'ASSEMBLAGE - 347

Canopia Studio Copenhagen 10x12 3x3.5 - PRINCIPALES ÉTAPES D'ASSEMBLAGE - 348

Canopia Studio Copenhagen 10x12 3x3.5 - PRINCIPALES ÉTAPES D'ASSEMBLAGE - 349

Canopia Studio Copenhagen 10x12 3x3.5 - PRINCIPALES ÉTAPES D'ASSEMBLAGE - 350

Canopia Studio Copenhagen 10x12 3x3.5 - PRINCIPALES ÉTAPES D'ASSEMBLAGE - 351

Canopia Studio Copenhagen 10x12 3x3.5 - PRINCIPALES ÉTAPES D'ASSEMBLAGE - 352

Canopia Studio Copenhagen 10x12 3x3.5 - PRINCIPALES ÉTAPES D'ASSEMBLAGE - 353

Canopia Studio Copenhagen 10x12 3x3.5 - PRINCIPALES ÉTAPES D'ASSEMBLAGE - 354

Canopia Studio Copenhagen 10x12 3x3.5 - PRINCIPALES ÉTAPES D'ASSEMBLAGE - 355

Canopia Studio Copenhagen 10x12 3x3.5 - PRINCIPALES ÉTAPES D'ASSEMBLAGE - 356

Canopia Studio Copenhagen 10x12 3x3.5 - PRINCIPALES ÉTAPES D'ASSEMBLAGE - 357

Canopia Studio Copenhagen 10x12 3x3.5 - PRINCIPALES ÉTAPES D'ASSEMBLAGE - 358

Canopia Studio Copenhagen 10x12 3x3.5 - PRINCIPALES ÉTAPES D'ASSEMBLAGE - 359

Canopia Studio Copenhagen 10x12 3x3.5 - PRINCIPALES ÉTAPES D'ASSEMBLAGE - 360

Canopia Studio Copenhagen 10x12 3x3.5 - PRINCIPALES ÉTAPES D'ASSEMBLAGE - 361

Canopia Studio Copenhagen 10x12 3x3.5 - PRINCIPALES ÉTAPES D'ASSEMBLAGE - 362

Canopia Studio Copenhagen 10x12 3x3.5 - PRINCIPALES ÉTAPES D'ASSEMBLAGE - 363

Canopia Studio Copenhagen 10x12 3x3.5 - PRINCIPALES ÉTAPES D'ASSEMBLAGE - 364

Canopia Studio Copenhagen 10x12 3x3.5 - PRINCIPALES ÉTAPES D'ASSEMBLAGE - 365

Canopia Studio Copenhagen 10x12 3x3.5 - PRINCIPALES ÉTAPES D'ASSEMBLAGE - 366

Canopia Studio Copenhagen 10x12 3x3.5 - PRINCIPALES ÉTAPES D'ASSEMBLAGE - 367

Canopia Studio Copenhagen 10x12 3x3.5 - PRINCIPALES ÉTAPES D'ASSEMBLAGE - 368

9973

Canopia Studio Copenhagen 10x12 3x3.5 - PRINCIPALES ÉTAPES D'ASSEMBLAGE - 369

Canopia Studio Copenhagen 10x12 3x3.5 - PRINCIPALES ÉTAPES D'ASSEMBLAGE - 370

Canopia Studio Copenhagen 10x12 3x3.5 - PRINCIPALES ÉTAPES D'ASSEMBLAGE - 371

7869

Canopia Studio Copenhagen 10x12 3x3.5 - PRINCIPALES ÉTAPES D'ASSEMBLAGE - 372

Canopia Studio Copenhagen 10x12 3x3.5 - PRINCIPALES ÉTAPES D'ASSEMBLAGE - 373

Canopia Studio Copenhagen 10x12 3x3.5 - PRINCIPALES ÉTAPES D'ASSEMBLAGE - 374

9977

Canopia Studio Copenhagen 10x12 3x3.5 - PRINCIPALES ÉTAPES D'ASSEMBLAGE - 375

Canopia Studio Copenhagen 10x12 3x3.5 - PRINCIPALES ÉTAPES D'ASSEMBLAGE - 376

Canopia Studio Copenhagen 10x12 3x3.5 - PRINCIPALES ÉTAPES D'ASSEMBLAGE - 377

Canopia Studio Copenhagen 10x12 3x3.5 - PRINCIPALES ÉTAPES D'ASSEMBLAGE - 378

9977

Canopia Studio Copenhagen 10x12 3x3.5 - PRINCIPALES ÉTAPES D'ASSEMBLAGE - 379

Canopia Studio Copenhagen 10x12 3x3.5 - PRINCIPALES ÉTAPES D'ASSEMBLAGE - 380

(a

Canopia Studio Copenhagen 10x12 3x3.5 - PRINCIPALES ÉTAPES D'ASSEMBLAGE - 381

Canopia Studio Copenhagen 10x12 3x3.5 - PRINCIPALES ÉTAPES D'ASSEMBLAGE - 382

Canopia Studio Copenhagen 10x12 3x3.5 - PRINCIPALES ÉTAPES D'ASSEMBLAGE - 383

Canopia Studio Copenhagen 10x12 3x3.5 - PRINCIPALES ÉTAPES D'ASSEMBLAGE - 384

Canopia Studio Copenhagen 10x12 3x3.5 - PRINCIPALES ÉTAPES D'ASSEMBLAGE - 385

Canopia Studio Copenhagen 10x12 3x3.5 - PRINCIPALES ÉTAPES D'ASSEMBLAGE - 386

Canopia Studio Copenhagen 10x12 3x3.5 - PRINCIPALES ÉTAPES D'ASSEMBLAGE - 387

Canopia Studio Copenhagen 10x12 3x3.5 - PRINCIPALES ÉTAPES D'ASSEMBLAGE - 388

Canopia Studio Copenhagen 10x12 3x3.5 - PRINCIPALES ÉTAPES D'ASSEMBLAGE - 389

Canopia Studio Copenhagen 10x12 3x3.5 - PRINCIPALES ÉTAPES D'ASSEMBLAGE - 390

EN

PALRAM - CANOPIA | 12 YEAR LIMITED WARRANTY

Palram Canopia Ltd. (Company number: 512106824) whose registered office is at Teradion Industrial Park, M.P Misgav 2017400, Israel ("Canopia") warrants that the product will be free from defects in material or workmanship for a period of 12 years from the original date of purchase. • This warranty is valid only if the product is installed, handled, cleaned, and maintained in accordance with Canopia's written specifications. • This warranty does not cover defects resulting from normal wear and tear including, but not limited to: damage caused by use of force, incorrect handling, inappropriate use, negligence, accidents, impact from foreign objects, vandalism, pollutants, alteration, painting, damage resulting from cleaning with incompatible detergents or minor deviations of the product. • This warranty does not apply to damage resulting from "acts of Nature", which includes but is not limited to hail, storm, tornado, hurricane, blizzard, flood, or fire. • Upon submitting proof of purchase and evidence of the claimed product failure, and subject to reporting the failure in writing within 30 days after discovery of the defect, Canopia, at its sole discretion, will replace defective parts of the Product, or refund you a prorated portion of the purchase price on a straight-line depreciated basis for the length of the warranty.

FR

GARANTIE LIMITÉE À 12 ANS DE PALRAM - CANOPIA

PALRAM - CANOPIA 7-7 12-7

Declaration of Performance

No 0501

Year of Affix :24

Palram-Canopia Garden Office - CopenhagenTM - Garden office or studio for domestic customers.
1. The reference of the product-type for which the declaration of performance has been drawn up.Palram-Canopia Garden Office - Copenhagen.
2. The system or systems of assessment and verification of constancy of performance of the construction product, as set out in Annex V. System 2+
3. The reference number and date of issue of the harmonised standard or the European Technical Assessment which has been used for the assessment of each essential characteristic: EN 1090-1:2009+A1:2011
4. Where applicable, the reference number of the Specific Technical Documentation used and the requirements with which the manufacturer claims the product complies.EN1090-1 Execution of steel structures and aluminium structuresPart 1: Requirements for conformity assessment of structural componentsEN1090-3 Execution of steel structures and aluminium structuresPart 3: Technical requirements for aluminium structuresEN 1990 Basis for structural designEN 1991 Actions on StructuresEN 1999 Design of aluminium structures
5. The intended use or uses for the construction product, in accordance with the applicable harmonised technical specification: Garden office or studio for domestic customers.
6. The performance of the essential characteristics of the construction product.Tolerances on dimensions and shape: EN1090-3 - Annex GWeldability: NPDFracture toughness/impact resistance: NPD (aluminium structure)Load bearing capacity:Maximum permitted Wind zone: 21 m/s defined as once in 50-year return probability interval, value at 10m from ground, averaged over 10min, terrain category II (open landscape)Maximum permitted Snow zone: 1 kN/m2 defined as once in 50-year return probability intervalDeformations and Deflections: NPDRelease of cadmium and its compound: NPDRadioactivity: NPDDurability: NPD
7. EXC -1
8. Manufacturer: Palram Canopia Ltd. Teradion Industrial Park, M.P Misgav 2017400, P.O.B. 53, Israel
9. Importer and EU representative : Palram DE GmbH, Calbesche str.25, 39218 Schonebeck, Deutschland
10. Name and identification number of the notified body: 0906-CPR - 20000210005796
Signed for and behalf of Palram Canopia Ltd. by:Teradion Industrial Park, M.P Misgav 2017400, P.O.B 53, Israel 29.01.2024____(Place & date of issue) Canopia Studio Copenhagen 10x12 3x3.5 - Declaration of Performance - 1 ____(Signature)

2017400, P.O.B 53, Israel

29.01.2024

2017400, P.O.B 53, Israel

29.01.2024

Manual assistant
Powered by Anthropic
Waiting for your message
Product information

Brand : Canopia

Model : Studio Copenhagen 10x12 3x3.5

Category : Garden shed