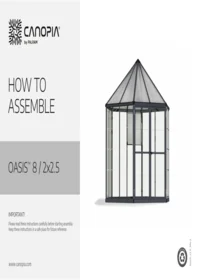
Oasis 8 2x2.5 - Garden shed Canopia - Free user manual and instructions
Find the device manual for free Oasis 8 2x2.5 Canopia in PDF.


| Product Type | Garden Greenhouse |
| Brand | Canopia |
| Model | Palram Oasis 8 2x2.5 |
| Dimensions (L x W x H) | 200 cm x 250 cm x 210 cm |
| Floor Area | 5 m² |
| Weight | 80 kg |
| Frame Material | Anodized Aluminum |
| Panel Material | Cellular Polycarbonate |
| Panel Thickness | 4 mm |
| Color | Bronze Green |
| Power Supply | None (non-electric structure) |
| Main Functions | Plant protection, heat retention, soilless cultivation |
| Opening Type | Sliding or hinged door (depending on version) |
| Ventilation | Roof window included |
| Wind Resistance | Up to 80 km/h (anchoring required) |
| Maintenance and Cleaning | Soapy water and soft cloth |
| Safety | Assembly on flat ground, ground anchoring recommended |
| Spare Parts and Repairability | Parts available upon request from the manufacturer |
| Warranty | 5 years (parts and structure) |
| Number of pages in the manual | 80 |
Frequently Asked Questions - Oasis 8 2x2.5 Canopia
User questions about Oasis 8 2x2.5 Canopia
0 question about this device. Answer the ones you know or ask your own.
Ask a new question about this device
Download the instructions for your Garden shed in PDF format for free! Find your manual Oasis 8 2x2.5 - Canopia and take your electronic device back in hand. On this page are published all the documents necessary for the use of your device. Oasis 8 2x2.5 by Canopia.
USER MANUAL Oasis 8 2x2.5 Canopia
Please read these instructions carefully before starting assembly. Keep these instructions in a safe place for future reference.

HAVE A CONCERN? WE CAN HELP.
Before returning your purchase:
You didn't find what you were looking for?
We can help at
canopia.shop/support
Still can't find what you are looking for?
Please see next page for local customer care.
HABEN SIE BEDENKEN? WIR KÖNNEN HELFEN.
canopia.shop/support
canopia.shop/support
canopia.com/contact-us

SCAN ME
| MODEL | 8 / 2x2.5 | |
| WIDTH | A | 245 cm / 8' |
| LENGTH | B | 212 cm / 6'11" |
| DIAGONAL | C/D | C = D |
| MIN. SPACE | E | 5 cm / 2" |

TOOLS & EQUIPMENT

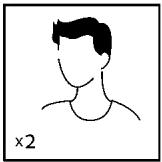
□ 2 people needed

□ Work gloves
□ Spirit Level

□ Needle Nose Pliers

□ Ladder
□ Philips head
Screwdriver

□ Cordless drill
Phillips head

Silicone

□ Tape measure

□ Scissors

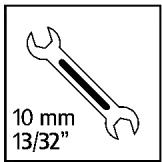
□ Wrench
10 mm | 3/8"
13 mm | 1/2"

☐ Electric Drill
With Drill Bit
10 mm | 3/8"
A - PREPARE THE SITE
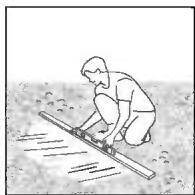
The product must be positioned and fixed on a flat level surface.
① - Clear the site


② - Level the ground
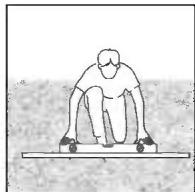
| A | 1 | 2 | |
| FR | PRÉPARER LE TERRAINLe produit doit être positionnée et fixée sur une surface plane | Déblayer le terrain | Niveler le sol |
| DE | VORBEREITUNG DES UNTERGRUNDESDas Produkt muss auf einem flachen Untergrund aufgestellt und befestigt werden. | Standort säubern | Untergrund ausgleichenund nivellieren |
| ES | PREPARE EL SITIOEl producto debe colocarse y fijarse en una superficie plana y nivelada. | Limpie el sitio | Nivele el terreno |
| SV | FÖRBEREDA OMRÅDETProdukt måste placeras på en fast och plant underlag. | Rensa området | Platta marken |
| NN | FORBERED OMRÅDETProdukt må plasseres og festes på et flatt underlag. | Rydd området | Flat ut bakken |
| FI | VALMISTELE RAKENNUSALUEPinnan on oltava täysin tasainen ja suora, ja perustan oltava kiinteä. | Raivaa rakennusalue | Tasoita maa |
| DA | FORBERED OMRÅDETProdukt skal placeres og opføres på en plan flade. | Ryd stedet | Gør jorden jævn |
| NL | TERREIN VOORBEREIDENHet grondoppervlak moet perfect vlak en waterpas zijn. | Maak het terrein vrij | Egaliseer de grond |
| IT | PREPARARE IL SITOIl prodotto deve essere posizionato e fissato su una superficie piana | Sgombrare il sito | Livellare il terreno |
| SK | PRIPRAVTE SI MIESTOVýrobok musí byť postavený a upevnený na rovnom povrchu. | Vyčistite miesto | Vyrovnajte povrch |
| SL | PRIPRAVITE LOKACIJOIzdelek mora biti nameščen in pritrjen na ravno in ravno površino. | Očistite lokacijo | Poravnajte tla |
| ET | VALMISTAGE ETTE MAATÜKKTootetuleb paigaldada ja kinnitada tasasele pinnale | Puhastage maatükk | Tasandage maapinda |
| HU | TEREP ELŐKÉSZÍTÉSEA termék építeni, egyenes vízszintes és felületen helyezze el. | Tisztítsa meg a területet | Egyengesse vízszintesre a talajt |
| PL | PRZYGOTUJ MIEJSCEProduktmusi być umieszczona i umocowana na płaskiej i równej powierzchni. | Oczyść miejsce | Wyrównaj podłoże |
| RU | ПОДГОТОВЬТЕ ПЛОЩАДКУПродукт нужно расположить и зафиксировать на плоской ровной поверхности. | Очистите площадку | Выровняйте грунт |
| LAT | SAGATAVOJIET VIETUProduktu jānovieto un jānostiprina uz plakanas gludas virsmas. | Notīriet vietu | Nolidziniet zemi |
| CS | PŘIPRAVTE SI MÍSTOProdukt musí být umístěn a upevněn na rovném povrchu | Vyčistěte místo | Vyrovnejte povrch |
| HR | PRIPREMITE LOKACIJUProizvod mora biti postavljen i pričvršćen na ravnu površinu. | Očistite površinu | Poravnajte tlo |
| LIT | PARUOŠKITE VIETĄProduktą reikia išlygiuoti ir įrengti ant plokščio bei lygaus paviršiaus. | Išvalykite vietą | Išlygiuokite pagrindą |
| BG | ПОДГОТВЕТЕ МЯСТОТОПродуктът трябва да бъде позициониран и фиксиран върху равна повърхност. | Почистете мястото | Изравнете повърхността |
| HE | הַבָרְהֹאָהּשָׁעָהּשָׁעָהּשָׁעָהּשָׁעָהּשָׁעָהּשָׁעָהּשָׁעָהּשָׁעָהּשָׁעָהּשָׁע‘הַבָרְהֹאָהּשָׁעָהּשָׁע‘הַבָרְהֹאָהּשָׁע‘הַבָרְהֹאָהּשָׁע‘הַבָרְהֹאָהּשָׁע‘הַבָרְהֹאָהּשָׁע‘הַבָרְהֹ华ָהּשָׁע‘הַבָרְהֹאָהּשָׁע‘הַבָרְהֹאָהּשָׁע‘הַבָרְהֹאָהּשָׁע‘הַבָרְהֹלְרָהּשָׁע‘הַבָרְהֹאָהּשָׁע‘הַבָרְהֹאָהּשָׁע‘הַבָרְהֹאָהּשָׁע‘הַבָרְהֹהּשָׁע‘הַבָרְהֹאָהּשָׁע‘הַבָרְהֹאָהּשָׁע‘הַבָרְהֹאָהּשָׁע‘הַבָרְהֹאֵהּשָׁע‘הַבָרְהֹאָהּשָׁע‘הַבָרְהֹאָהּשָׁע‘הַבָרְהֹאָהּשָׁע‘הַבָרְהֹאִהּשָׁע‘הַבָרְהֹאָהּשָׁע‘הַבָרְהֹאָהּשָׁע‘הַבָרְהֹאָהּשָׁע‘הַבָרְהֹאֶהּשָׁע‘הַבָרְהֹאָהּשָׁע‘הַבָרְהֹאָהּשָׁע‘הַבָרְהֹאָהּשָׁע‘הַבָרְהֹאַהּשָׁע‘הַבָרְהֹאָהּשָׁע‘הַבָרְהֹאָהּשָׁע‘הַבָרְהֹאָהּשָׁע‘הַבָרְהֹאּשָׁע‘הַבָרְהֹאָהּשָׁע‘הַבָרְהֹאָהּשָׁע‘הַבָרְהֹאָהּשָׁע‘הַבָרְהֹאָ郭ּשָׁע‘הַבָרְהֹאָ郭ּשָׁע‘הַבָרְהֹאָ郭ּשָׁע‘הַבָרְהֹאָ郭ּשָׁע‘הַבָרְהֹאָהּשָׁע‘הַבָרְהֹאָ郭ּשָׁע‘הַבָרְהֹאָ郭ּשָׁע‘הַבָרְהֹאָהּשָׁע‘הַבָרְהֹאָהּשָׁע‘הַבָרְהֹאָ郭ּשָׁע‘הַבָרְהֹאָהּשָׁע‘הַבָרְהֹאָ郭ּשָׁע‘הַבָרְהֹאָהּשָׁע‘הַבָרְהֹאָהּשָׁע‘הַבָרְהֹאָהּשָׁע‘הַבָרְהֹאָ phrase ‘הַבָרְהֹאָ郭ּשָׁע‘הַבָרְהֹאָ郭ּשָׁע‘הַבָרְהֹאָ郭ּשָׁע‘הַבָרְהֹאָ郭ּשָׁע’הַבָרְהֹאָ郭ּשָׁע‘הַבָרְהֹאָ郭ּשָׁע‘הַבָרְהֹאָ郭ּשָׁע‘הַבָרְהֹאָ郭ּשָׁע“הַבָרְהֹאָ郭ּשָׁע‘הַבָרְהֹאָ郭ּשָׁע‘הַבָרְהֹאָ郭ּשָׁע‘הַבָרְהֹאָ郭ּשָׁע•הַבָרְהֹאָ郭ּשָׁע‘הַבָרְהֹאָ郭ּשָׁע‘הַבָרְהֹאָ郭ּשָׁע‘הַבָרְהֹאָ郭ּשָׁע'הַבָרְהֹאָ郭ּשָׁע‘הַבָרְהֹאָ郭ּשָׁע‘הַבָרְהֹאָ郭ּשָׁע‘הַבָרְהֹאָ郭ּשָׁע ́הַבָרְה:וּוּוּוּוּוּוּוּוּוּוּוּוּוּוּוּוּוּוּוּוּוּוּוּוּוּוּוּוּוּוּוּוּוּ�וּוּוּוּוּוּוּוּוּוּוּוּוּוּוּוּוּוּוּוּוּוּוּוּוּוּוּוּוּוּוּוּוּי:וּוּוּוּוּוּוּוּוּוּוּוּוּוּוּוּוּוּוּוּוּוּוּוּוּוּוּוּוּוּוּוּוֱ:וּוּוּוּוּוּוּוּוּוּוּוּוּוּוּוּוּוּוּוּוּוּוּוּוּוּוּוּוּוּוּוּוֲ:וּוּוּוּוּוּוּוּוּוּוּוּוּוּוּוּוּוּוּוּוּוּוּוּוּוּוּוּוּוּוּוּוִ:וּוּוּוּוּוּוּוּוּוּוּוּוּוּוּוּוּוּוּוּוּוּוּוּוּוּוּוּוּוּוּוּוָ:וּוּוּוּוּוּוּוּוּוּוּוּוּוּוּוּוּוּוּוּוּוּוּוּוּוּוּוּוּוּוּוּוֹ:וּוּוּוּוּוּוּוּוּוּוּוּוּוּוּוּוּוּוּוּוּוּוּוּוּוּוּוּוּוּוּוּוֶ:וּוּוּוּוּוּוּוּוּוּוּוּוּוּוּוּוּוּוּוּוּוּוּוּוּוּוּוּוּוּוּוּוֽ:וּוּוּוּוּוּוּוּוּוּוּוּוּוּוּוּוּוּוּוּוּוּוּוּוּוּוּוּוּוּוּוּוֵ:וּוּוּוּוּוּוּוּוּוּוּוּוּוּוּוּוּוּוּוּוּוּוּוּוּוּוּוּוּוּוּוּוֺ:וּוּוּוּוּוּוּוּוּוּוּוּוּוּוּוּוּוּוּוּוּוּוּוּוּוּוּוּוּוּוּוּוֻ:וּוּוּוּוּוּוּוּוּוּוּוּוּוּוּוּוּוּוּוּוּוּוּוּוּוּוּוּוּוּוּוּוֳ:וּוּוּוּוּוּוּוּוּוּוּוּוּוּוּוּוּוּוּוּוּוּוּוּוּוּוּוּוּוּוּוּוְ:וּוּוּוּוּוּוּוּוּוּוּוּוּוּוּוּוּוּוּוּוּוּוּוּוּוּוּוּוּוּוּוּוַ:וּוּוּוּוּוּוּוּוּוּוּוּוּוּוּוּוּוּוּוּוּוּוּוּוּוּוּוּוּוּוּוּו֖:וּוּוּוּוּוּוּוּוּוּוּוּוּוּוּוּוּוּוּוּוּוּוּוּוּוּוּוּוּוּוּוּוֿ:וּוּוּוּוּוּוּוּוּוּוּוּוּוּוּוּוּוּוּוּוּוּוּוּוּוּוּוּוּוּוּוּו־:וּוּוּוּוּוּוּוּוּוּוּוּוּוּוּוּוּוּוּוּוּוּוּוּוּוּוּוּוּוּוּוּוօ:וּוּוּוּוּו-וּו''::'::'::'::'::'::'::'::'::'::'::'::'::'::'::'::'::'::'::'::'::'::'::'::'::'::'::'::'::'::'::'::'::'::'::'::'::'::'::'::'::'::'::'::'::'::'::'::'::'::': :'::'::'::'::'::'::'::'::'::'::'::'::'::'::'::'::'::'::'::'::'::'::'::'::'::'::'::'::'::'::'::'::'::'::'::'::'::'::'::'::'::'::'::'::'::'::'::'::'::':::'::'::'::'::'::'::'::'::'::'::'::'::'::'::'::'::'::'::'::'::'::'::'::'::'::'::'::'::'::'::'::'::'::'::'::'::'::'::'::'::'::'::'::'::'::'::'::'::'::'::A |
B - CHOOSE YOUR FOUNDATION TYPE
For a foundation, we recommend using three material types: Concrete / Pressure treated wood / wood deck / Paver blocks
Option 1: Solid foundation


Option 2: Solid frame
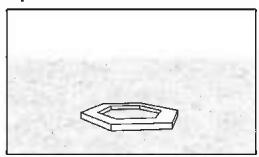

Option 3: Firm ground / grass


* The size of the product displayed is for illustration purposes only and may not reflect the size of your product.
| B | Option 1 | Option 2 | Option 3 | |
| FR | CHOISIR VOTRE TYPE DE FONDATIONPour la fondation, nous recommandons d'utiliser trois types de matériaux :Béton / Bois traité sous pression / plancher en bois / Blocs de pavés* La taille du la produit affichée ici est uniquement à titre d'illustration et ne reflète pas forcément la taille de votre produit. | Une fondation solide | Un cadre rigide | Terre /pelouse ferme |
| DE | FUNDAMENTWAHLAls Fundament stehen Folgende Materialien zur Auswahl (Empfehlung):Beton / Druckbehandeltes Holz / Holzdeck / Pflastersteine.* Die Größe des abgebildeten Gewächshauses dient nur zur Veranschaulichung und entspricht möglicherweise nicht der Größe Ihres Gewächshauses. | Fester Fundament | Fester Rahmen | Erdboden /Gras |
| ES | ELIJA EL TIPO DE CIMENTACIÓNComo cimentación, recomendamos usar tres tipos de materiales:Hormigón / Madera prensada / Piso de madera / Adoquín de hormigón.* El tamaño del invernadero que se muestra tiene un propósito meramente ilustrativo y puede no reflejar el tamaño de su invernadero. | cimentación sólida | Estructura sólida | Tierra firme /œsped |
| SV | VÄLJ GRUNDTYPSom stiftelse rekommenderar vi tre typer av material:Betong / Tryckbehandlat trä / trägolv / Beläggningssten* Växthusets storlek är endast för att illustrera och visar inte rätt storlek på ditt växthus. | solid stiftelse | Solid ram | fast mark /gräs |
| NN | VELG FUNDAMENTTYPESom fundament anbefaler vi tre typer materiell:Betong | Trykkbehandlet tre/tredekke | Belegningsstein* Drivhusets størrelse er bare for illustrasjon, og viser ikke korrekt størrelse på ditt drivhus. | Solid fundament | Solid ramme | Solid bakke /gress |
| FI | VALITSE RAKENNUSPOHJAN TYYPPIRakennuspohjaksi suosittelemme kolmea materiaalityyppiä:Betoni | Painekäsitely puu/puukansi | Kiveyselementit* Esillä olevan kasvihuoneen koko on tarkoitettu vain havainnollistamistarkoituksiin eikä se välttämättä vastaa kasvihuoneesi kokoa. | Kiinteä rakennuspohja | Kiinteä kehys | Kova maa /ruohikko |
| DA | VÄELG DIN FUNDAMENTYPETil en fundament anbefaler vi at bruge tre materialetyper:Beton / Trykbehandlet træ / trædæk / Udlægningsblokke* Størrelsen på det viste drivhus er kun til illustration og afspejler muligvis ikke størrelsen på dit drivhus. | Solid fundament | Solid ramme | Fast jord/græs |
| NL | KIES UW TYPE FUNDERINGAls fundering adviseren wij drie materiaalsoorten te gebruiken:Beton | Onder druk behandeld hout/houten dek | Bestratingsblokken* De grootte van de getoonde broeikas dient enkel ter illustratie en weerspiegelt mogelijk niet de grootte van uw eigen broeikas. | Massieve fundering | Massieve kader | Stevige bodem /gras |
| IT | SCEGLIERE IL TIPO DI FONDAMENTACome fondamenta consigliamo tre tipi di materiali:Calcestruzzo / Legno pressato / Pavimenti in legno / Calcestruzzo per pavimentazioni.* La dimensione della serra visualizzata è solo a scopo illustrativo e potrebbe non rispecchiare le dimensioni della vostra serra. | Fondamenta solide | telaio solida | Terreno compatto/ erba |
| SK | VYBERTE SI TYP PODLOŽENIAPre základňu odporúčame použiť tri typy materiálov:Betón | Tlakovop upravené drevo/drevená paluba | Dlăžobné kocky* Veľkosť zobrazeného skleníka slúži iba na ilustráciu a nemusí odrážať veľkosť vášno skleníka. | Pevná založenie miesta | Masívny rám | Pevná zem /tráva |
B - CHOOSE YOUR FOUNDATION TYPE
For a foundation, we recommend using three material types: Concrete / Pressure treated wood / wood deck / Paver blocks
Option 1: Solid foundation


Option 2: Solid frame


Option 3: Firm ground / grass


* The size of the product displayed is for illustration purposes only and may not reflect the size of your product.
| B | Option 1 √√ | Option 2 √√ | Option 3 √ | |
| SL | IZBERITE SVOJO VRSTO TEMELJAZa podlago priporočamo uporabo treh vrst materialov:Beton | Tlačno obdelan les / leseni krov | Granitne kocke* Velikost prikazanega rastlinjaka je le informativne narave in nenujno odraža velikosti vašega rastlinjaka. | Trdna temelja | Trdni okvir | Trdna tla /trava |
| ET | VALIGE OMA VUNDAMENDI TÜÜPAluse jaoks soovitame kasutada kolme tüüpi materjale:Betoon | Survetöödeldud puit / puidutekk | Sillutuskivid* Kuvatud kasvuhoone suurus on ainult illustrativne ja ei pruugi kajastada teie kasvuhoone suurust. | Tugev alus | Tugev raam | Tahke maa /rohi |
| HU | VÄLASSZA ALAP TÍPUSÄTAlapként három anyagtípus használatát javasoljuk:Beton | nyomással kezelt fa/fa padlózat | Útburkoló elemek* A megjelenített üvegház mérete csak szemléltetési célokat szolgál, és nem feltétlenültükrözi az üvegház tényleges méretét. | szilárd alap | szilárd keret | szilárd talaj /fú |
| PL | WYBIERZ TYP FUNDAMENTÓWDo budowy podstawy polecamy trzy typy materialów :Beton | Drewno impregnowane ciśnieniowo/podkład drewniany | Kostka brukowa* Rozmiar przedstawionej szklarni ma jedynie charakter poglądowy i može nieodzwierciedlać rozmiaru Twojej szklarni. | Solidna podstawa | Solidna rama | Twarde podłoże /trava |
| RU | ВЫБЕРИТЕ ТІП ФУНДАМЕНТАДля основания (фундамента) мы рекомендуем использовать три типа материалов:Бетон | Пропитанную древесину/деревянный настил | Блоки дорожных плит.* Указанный на риснуже размер теплицы приведен исключительно для наглядностии может не отркажать реальные размеры вашей теплицы. | Сплошноеоснование | Цельная рама | Плотный грунт /газон |
| LAT | IZVĚLIETIES PAMATA VEIDUPamatam iesakām izmantot trís materiālu veidus:Betonu | Ar spiedienu apstrādātu koksní/koksnes klāju | Bruğakmeņu blokus.* Parāditās siltumnīcas lielums ir paredzēts tikai ilustratīviem nolūkiem,un tas var neatspoguļot jūsu siltumnīcas lielumu. | Cieta nodibinājums | Ciets rāmis | Cieta zeme /zále |
| CS | VYBERTE SI TYP PODLOŽENÍPro základnu doporučujeme použít tři typy materiálů:Beton | Tlakově upravené dřevo/dřevěná paluba | Dlažební kostky* Velikost zobrazeného skleníku slouží pouze pro ilustraci a nemusí odrážet velikost vašeho skleníku. | Pevná nadace | Masivní rám | Pevná zem /tráva |
| HR | ODABERITE VRSTU BAZEZa bazu preporučujemo korištenje tri vrste materijala:Beton / prešano drvo / podloga od drveta / blokovi za popločavanje* Prikazana veličina staklenika je samo u svrhu ilustracije i možda ne odražava veličinu vašeg staklenika. | Čvrsti temelj | Čvrsti okvir | Čvrsta podloga /trava |
| LIT | PASIRINKITE PAMATO TIPĄPamatuí rekomenduojame naudoti trís medžiagų tipusbetoną / slėgiu apdorotą medieną / medinį paklotą / grindinio trinkeles:* Paveikslėliuose patelkiamas produktas yra tik informacijai ir gali neatspindėti tikrojo jūsųprodukto dydžio. | Tvirtas pamatas | Tvirtas rèmas | Kietas pagrindas /žolė |
| BG | Изберете вашия тип основаЗа основа препоръчваме използването на три вида материали:Бетон / Дърво, обработено под налягане / дървена настилка / Павета* Показаният размер на продукта e само за илюстрация и може да не отразява размера на вашия продукт. | Солидна основа | Солидна рамка | Твърда земя /трева |
| HE | הַרָרִשְׁתֹבָרָאָהּלָהּלָהּלָהּלָהּלָהּלָהּלָהּלָהּלָהּלָהּלָהּלָהּלָהּלָהּלָהּלָהּלָה | |||
C - ANCHOR TO FOUNDATION
① - On a solid foundation / frame

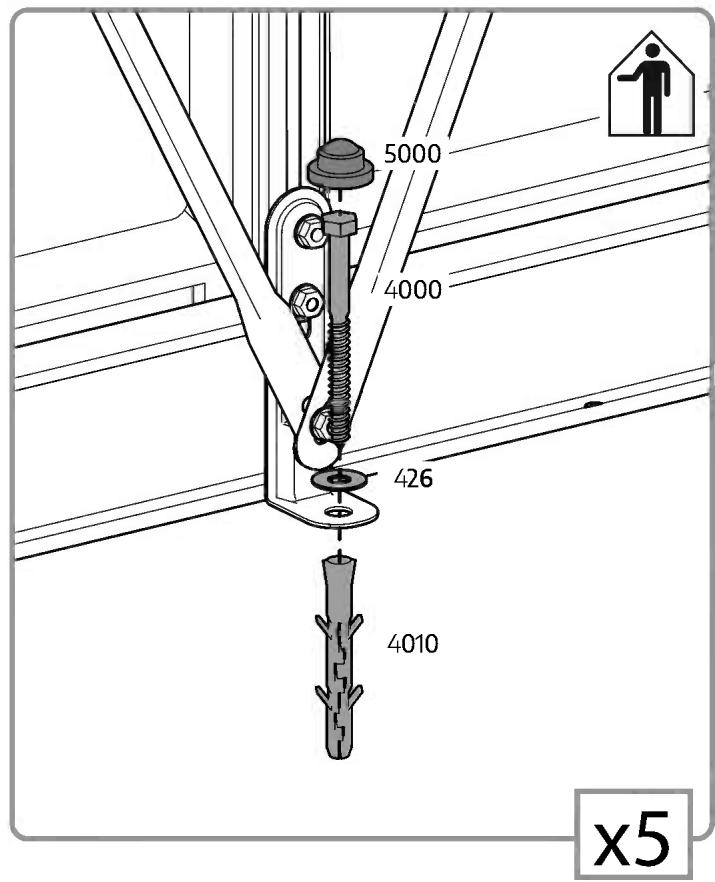
Secure the product to the foundation of your choice using suitable screws & plugs or masonry anchors (not supplied).
Make sure you have at least 5 cm / 2" between the product base and the edges of your foundation - on all sides.
② - On soil / grass

Secure the product to the ground surface using suitable long pegs (not supplied).
Please consult with an expert regarding which fasteners are suitable for other surface types.
| C | 1 | 2 | |
| FR | ANCRAGE A LA FONDATION | Sur une fondation solide / cadre Fixez le produit à la fondation de votre choix, à l'aide de vis et de chevilles appropriées ou d'ancrages en maçonnerie (non fournis). Assurez-vous qu'il y a au moins 5 cm entre la base du produit et le périmètre de votre fondation -de tous les côtés. | Sur la terre ou l'herbe Fixez le produit à la surface du sol à l'aide de longs piquets appropriés (non fournis).Demandez à un expert quels éléments de fixation conviennent à un autre type de surface. |
| DE | BEFESTIGUNG AM FUNDAMENT | Befestigen Sie das Produkt auf einem festen Fundament / RahmenMit geeigneten Dübeln und Schrauben oder Mauerwerksankern, je nach gewähltem Fundamenttyp (nicht mitgeliefert). Stellen Sie sicher, dass zwischen der Basis des Produkts und den Kanten Ihres Fundaments auf allen Seiten mindestens 5 cm Abstand sind. | Montieren Sie das Produkt direkt auf dem Rasen / BodenMüssen ausreichend lange Erdanker verwendet werden. Sichern Sie das Produkt auf dem Boden/Rasen mit geeigneten langen Pflöcken (nicht im Lieferumfang enthalten) auf der Bodenoberfläche. Bitte fragen Sie einen Experten, welche Befestigungsmittel für andere Untergründe geeignet sind. |
| ES | ANCLAJE A LOS CIMIENTOS | Sobre una cimentación sólida / estructura Asegure el producto a los cimientos de su elección, usando tornillos y tacos adecuados o anclajes de mampostería (no incluidos). Asegúrese de tener al menos 5 cm | 2" entre la base del producto y el perímetro de su cimiento -en todos los lados. | Sobre tierra / césped Asegure el producto a la superficie del terreno usando clavijas largas y adecuadas (no incluidos). Pregunte a un experto qué elementos de fijación son adecuados para otro tipo superficie. |
| SV | FEST FÖR STIFTELSE | På en solid stiftelse / ram På en solid bas, säkra produkten till den grund du valt med lämpliga skruvar, pluggar eller väggfästen (ingår ej).Se till att du har minst 5 cm | 2" mellan produktens bas och kanterna på fundamente -pà alla sidor. | Mark / gräs Fäst produkten på ytan med mark / gräs med lämpliga markkrokar (no suministrados). Rådgör med en expert angående vilka fästelement som är lämpliga för trädäck. |
| NN | FEST TIL FUNDAMENT | På en solid fundament / ramme Sikrer du produktet til fundamentet du har valgt med passende skruer, plugger eller murfester (ikke inkludert). Forsikre deg om at du har minst 5 cm | 2" mellom bunnen av produktet og kantene på fundamentet ditt -pà alle sider. | På jord / gress Må du sikre produktet til overflaten ved hjelp av passende bakkekroker (ikke inkludert).Spør en ekspert hvilke festemidler som er egnet for andre overflater. |
| FI | RAKENNUSPOHJAN ANKKURI | Kiinteälle rakennuspohjalle / kehykseen Mikäli tuote rakennetaan kiinteällerakennuspohjalle, kiinnitä tuote valitsemaasi rakennuspohjaan sopivillaruuveilla & tapeilla tai muurausankkureilla (ei sisälly toimitukseen).Varmista, että sinulla on vähintään 5 cm | 2" tilaa tuotteen alustan ja perustuksen reunojen välillä -kaikilla puolilla. | Kiinnitä tuote Mikäli tuote rakennetaan maaperään tai ruohikkoon,kiinnitä tuote maahan pitkillä tapeilla (ei sisälly toimitukseen).Kysy asiantuntijalta, mitkä kiinnikkeet sopivat puulevyille. |
| DA | FASTGÖRELSE TIL FUNDAMENTET | På et solidt underlag / ramme Skal du fastgøre produktet til det fundament,du vælger, ved hjælp af passende skruer & stik eller murankre (medfølger ikke).Skal du sørge for at have mindst 5 cm | 2" mellem produktrammen og kanterne på dit fundament -pà alle sider. | jorden / græset Fastgør produktet på jorden/græset på jordoverfladen ved hjælp af passende lange pløkker (medfølger ikke). Spørg en ekspert,hvilke fastgørelseselementer der egner sig til andre overflader. |
| NL | VERANKERING AAN FUNDERING | Op een stevige fundering / kader Zet het product op een stevige basis vast op de fundering van uw keuze, met geschikte schroeven & pluggen of metselwerkankers (niet meegeleverd).Zorg ervoor dat u minstens 5 cm hebt tussen de basis van het product en de randen van uw fundering -langs alle kanten. | Op grond / gras Bevestig het product aan het grondoppervlak met behulp van geschikte lange pinnen (niet meegeleverd). Vraag een deskundige welke bevestigingsmiddelen geschikt zijn voor andere ondergronden. |
| IT | ANCORAGGIO ALLE FONDAMENTA | Su fondamenta solida / telaio Fissare il prodotto delle fondamenta di vostra scelta, utilizando viti e tasselli adeguati o ancoraggi in muratura (non forniti). Assicurati di avere almeno 5 cm tra la base del prodotto e i bordi del tuo fondotinta -su tutti i lati. | Su terreno / erba Fissare il prodotto alla superficie del terreno con appositi tasselli lunghi (non forniti). Chiedete a un esperto quali elementi di fissaggio sono adatti ad altre superfici (non incluse). |
| SK | UPEVNENIE PODLOŽENIA | Na pevnom založenie miesta / rámè sa uistite Produkt k podloženiu podľa vášho výberu pomocou vhodných skrutiek a hmoždiniek alebo murovadích kotiev (nedodané). Uistite sa, že máte najmenej 5 cm | 2" medzi základňou výrobku a okrajmi podkladu -na všetkých stranách. | Na pôdu / trávu Pripevnite produkt k povrchu zeme pomocou vhodných dlhých kolíkov (nedodané). Poradte sa s odborníkom o tom, ktoré upevňovacie prvky sú vhodné pre iné typy povrchov (nie sú súčastou balenia). |
C - ANCHOR TO FOUNDATION
① - On a solid foundation / frame
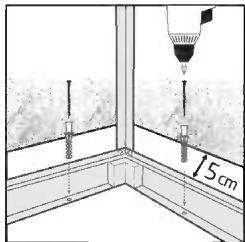
Secure the product to the foundation of your choice using suitable screws & plugs or masonry anchors (not supplied).
Make sure you have at least 5 cm / 2" between the product base and the edges of your foundation - on all sides.
② - On soil / grass

Secure the product to the ground surface using suitable long pegs (not supplied).
Please consult with an expert regarding which fasteners are suitable for other surface types.
- It is of utmost importance to assemble all of the parts according to the directions. Do not skip any steps.
• Always wear work gloves during panel sliding.
• Always wear shoes and safety goggles when working with extruded aluminium. - If using a step ladder or power tools make sure that you follow the manufacturer's safety advice.
- Do not touch overhead power cables with the aluminium profiles.
- Do not attempt to assemble the product in windy or wet conditions.
- Do not climb or stand on the roof.
- Dispose of all plastic bags. Keep them out of reach of small children.
- Keep children away from the assembly area.
- Do not lean against or push the products during construction.
- Do not position your product in an area exposed to excessive winds.
- Do not attempt to assemble this product if you are tired, have taken drugs or alcohol or if you are prone to dizzy spells.
- Hot items such as recently used grills, blowtorches etc. must not be stored in the product.
- Make sure there are no hidden pipes or cables in the ground before anchoring to foundation.
• This product is designed to be used mainly as a greenhouse.
⚠ Make sure to anchor the product directly to a solid foundation to increase the product's stability and wind resistance in areas with severe weather conditions. Make sure that there are no obstructions between the assembly area and the final position of the product. The Canopia Anchoring kit is available for purchase separately.
CARE & MAINTENANCE
- When your product needs to be cleaned, use a soft cloth and rinse with cold clean water.
• DO NOT use acetone, abrasive cleaners or other special detergents to clean the panels. - Clean the product once assembly is complete.
BEFORE ASSEMBLY
- Selecting a site:
- Choose your site carefully before beginning assembly.
- Choose a sunny position away from overhanging trees.
- The product must be positioned and fixed on a flat level surface.
• The product must be secured directly to a solid foundation.
- This is a multi-part assembly best achieved by two people. Allow at least half a day for the assembly process.
• Take all components & parts out of the packages. Sort the parts and check against the content parts list.
- Parts should be laid out close at hand. Keep all small parts (screws etc.) in a bowl so they do not get lost.
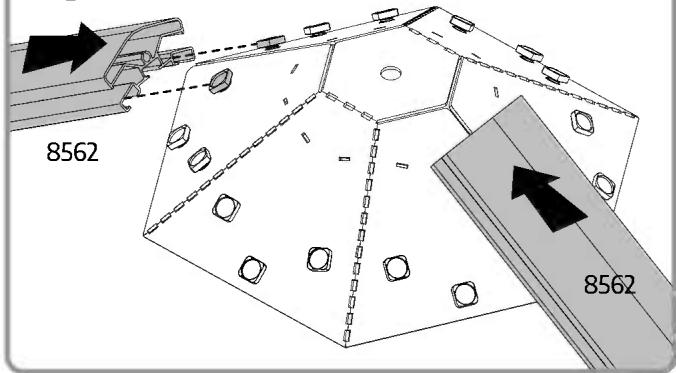
- Please note multi-sided profiles are used in this product. As a result some holes in the profiles are not used during assembly.
- Please review entire instructions before starting. Carry out the assembly steps in exact order.
- Please consult your local authorities if any permits are required prior to constructing the product.
- Please ensure you have sufficient side space for inserting the roof panels during the assembly process.
IMPORTANT!
- Firmly connect the product to a level surface immediately after completion of the assembly.
- Anchoring this product to the ground is essential to its stability and rigidity. It is required to complete this stage in order for your warranty to be valid.
- During assembly use a soft surface below the parts to avoid scratches and damages.
• We recommend checking for restrictions or covenants for building this product in your area.
In addition we advise to check if you need to submit any forms or if any permit is required prior to building the product.
DURING ASSEMBLY
During assembly, you will encounter different icons for different products. Please see below for more information:

You may use silicone lubricant spray on the frame in order to help you slide the panels into the profiles. Do not spray the panels.

Use a rubber mallet if necessary.

Make sure you remove covering plastic film from both sides of the panel.

All panels with the stamped words "THIS SIDE OUT" must be facing out to create full UV protection. Remove plastic sticker as panels are locked in place.

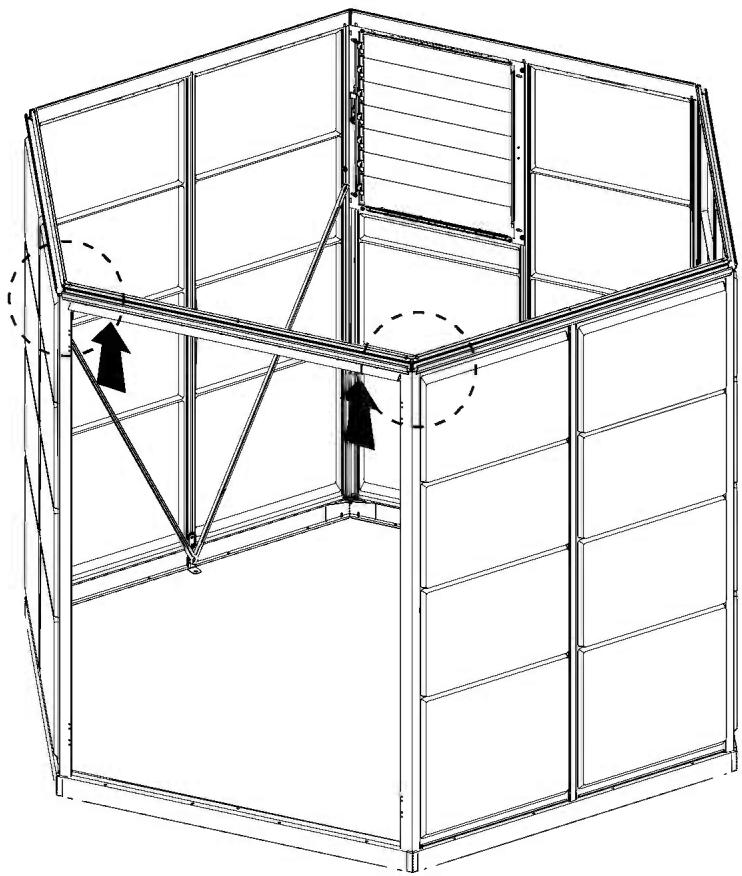
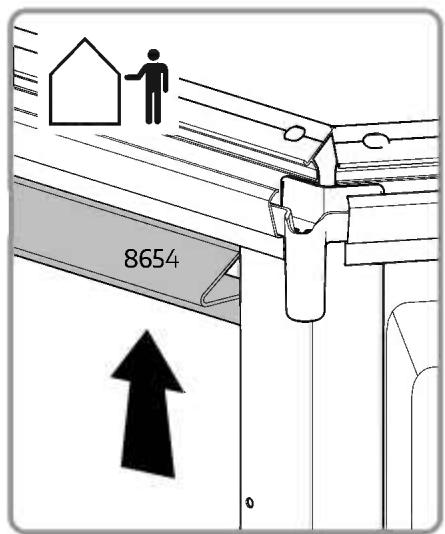
This icon indicates that the installer should be inside the product.

This icon indicates that the installer should be outside the product.
Extension Kit
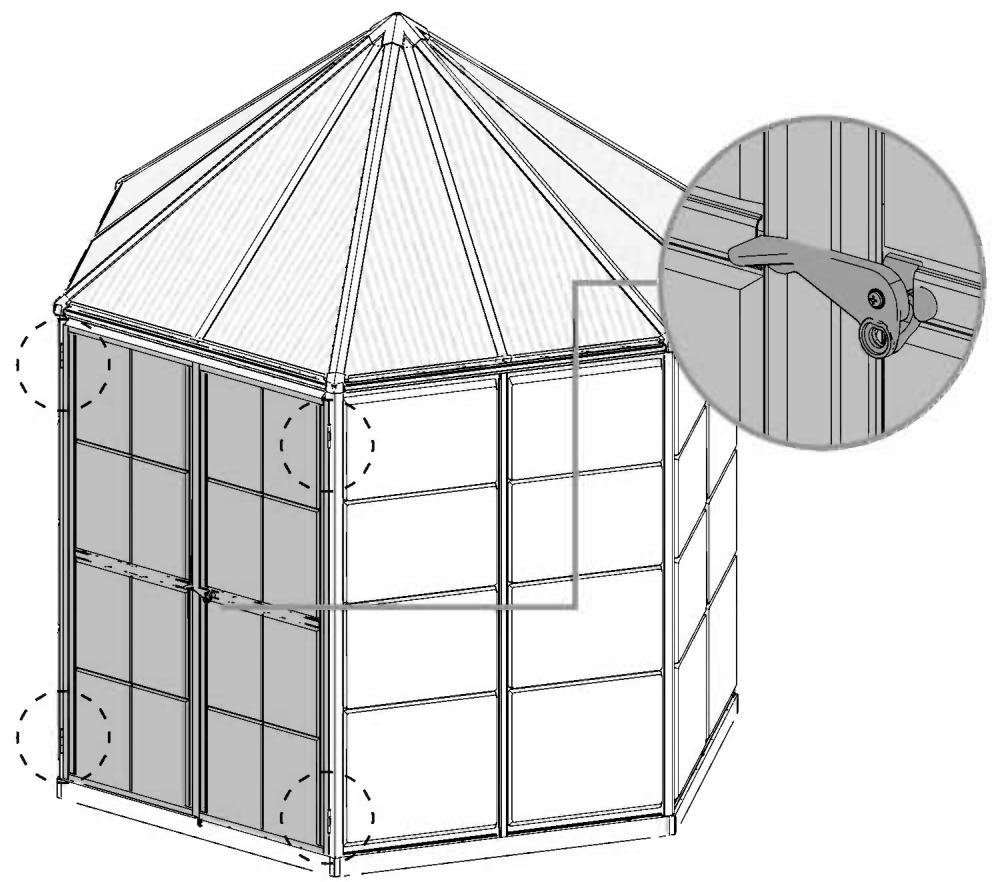
Steps marked with dashed outlines refer to Extensions only. Some of the steps are irrelevant for an assembly of a single product. When assembling a single or an extended product, some parts may be surplus.


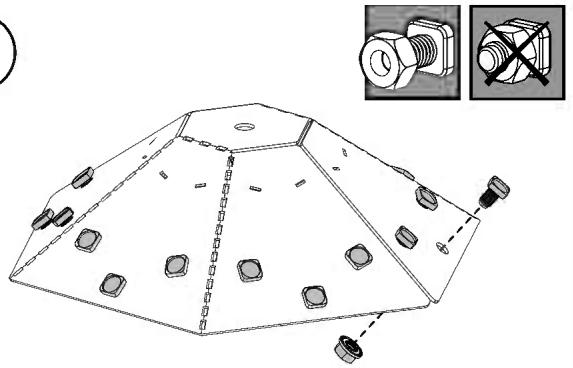
These 2 icons below indicate if screw's tightening is required or not.


Temporary tightening of a few screws may be needed to prevent a profile from sliding out. Tighten all screws once assembly is completed.
CONSEILS DE SECURITE
When encountering this information icon during assembly, please refer the relevant assembly step for important additional comments.
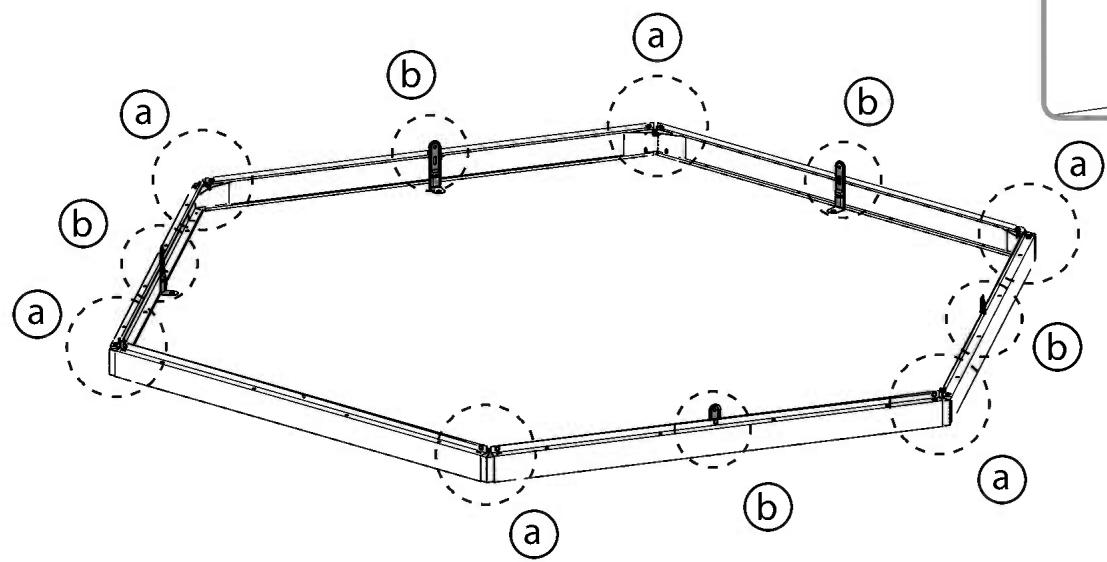
Step 3:
Door assembly: To determine the door direction, Parts #8561 (x2) must be in the front of the greenhouse.
Please assure the holes direction on both right & left profiles.
Step 8:
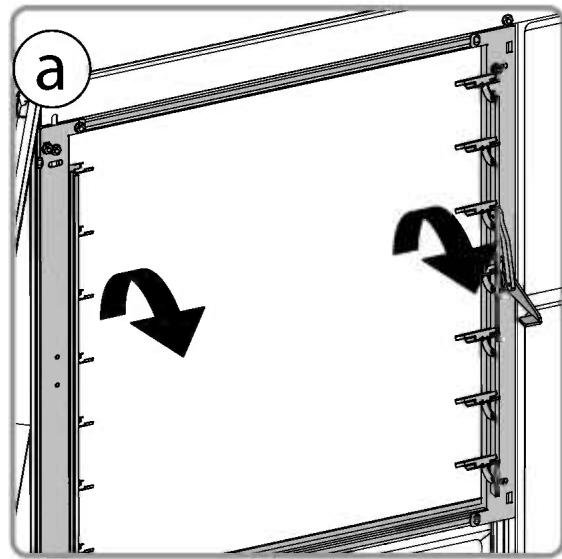
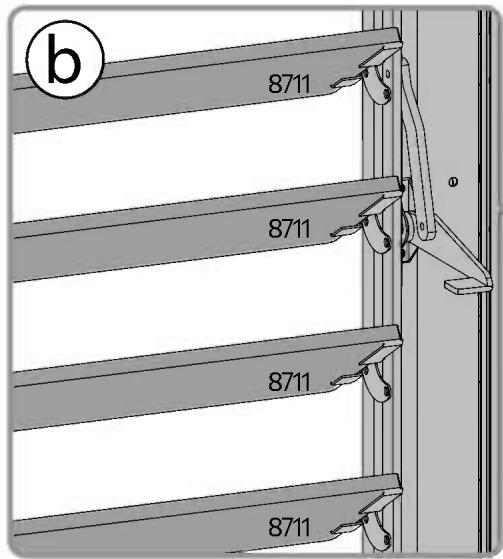
Decide on the louvre window's location before assembly.
Step 18:
Make sure the upper profiles of the louver window are firmly attached to the gutter's profile, only then you can tighten the screws.
Steps
All panels labeled “THIS SIDE OUT” must be facing out to ensure full UV protection. Remove the plastic film before threading the panels.
Step 25:
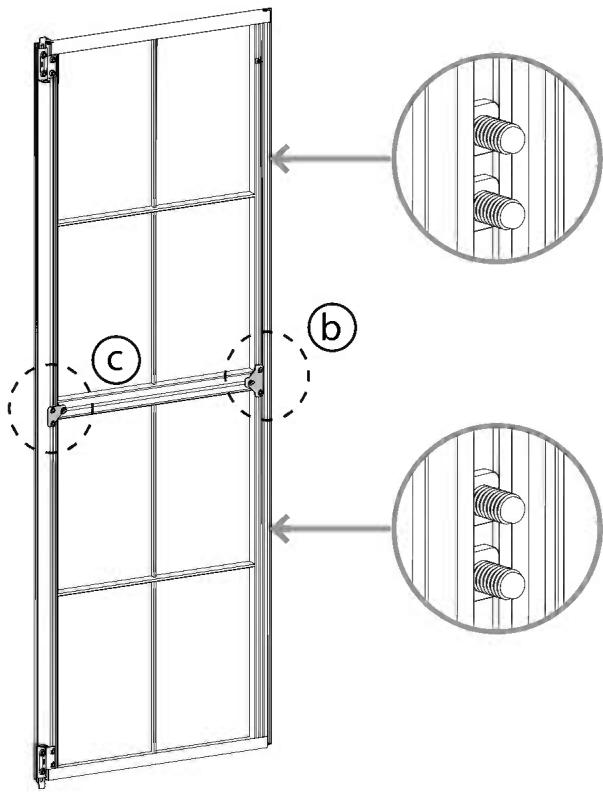
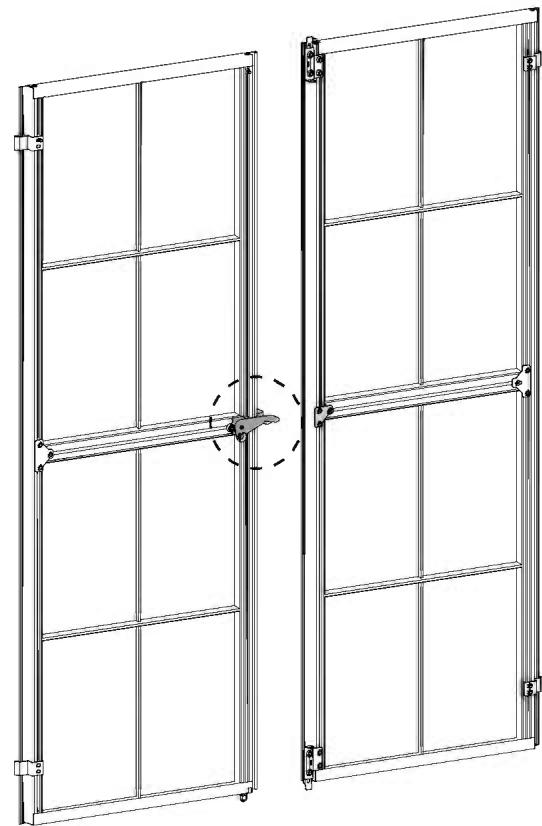
Carefully tighten the ring nut, Part #9048.
Screw the ring until the edge of Part #7119 appears, as shown in the correct close up in Drawing c.
Over screwing can damage Part #8534.
Step 26:
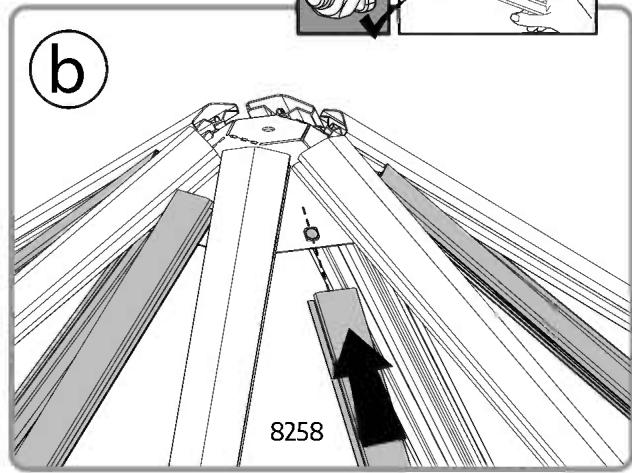
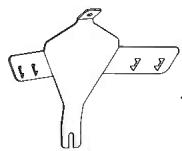
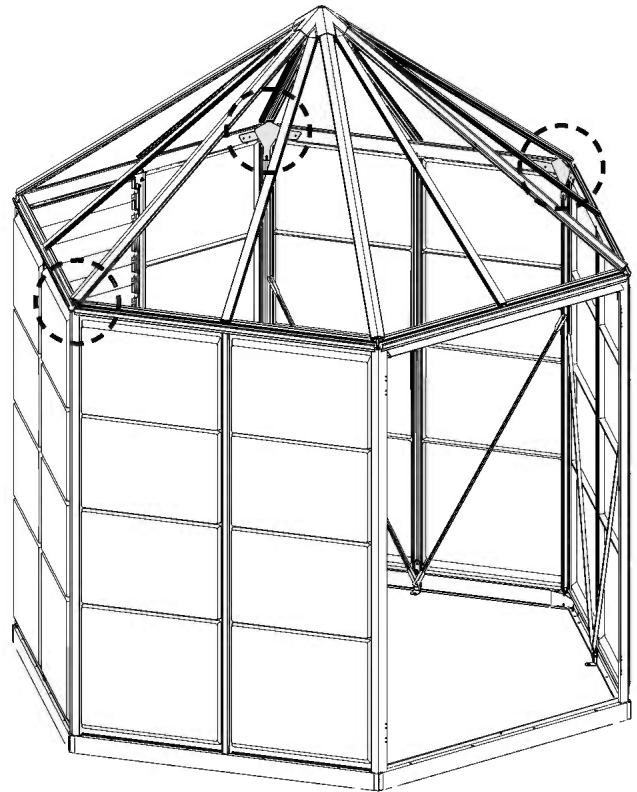
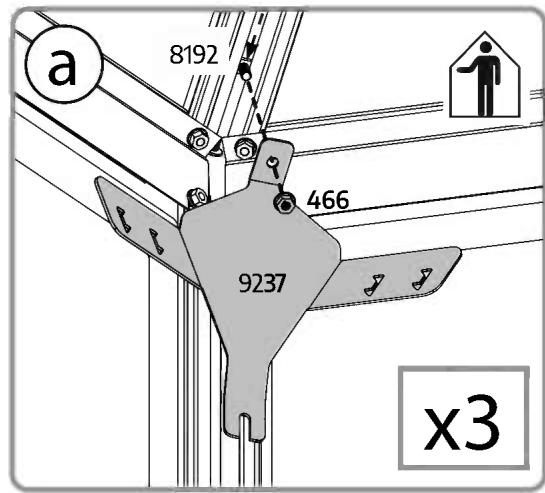
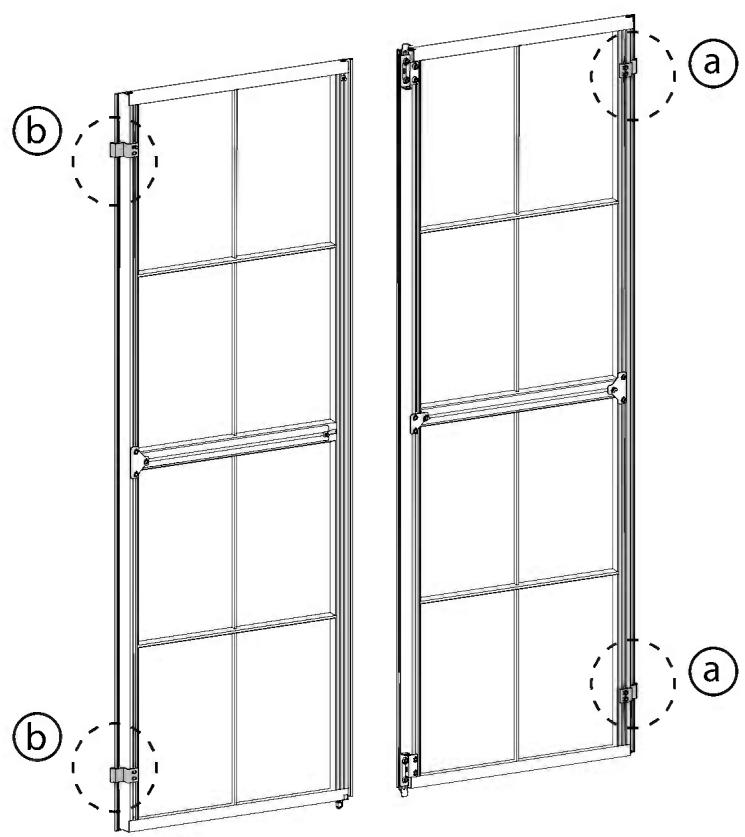
Attach the screw, Part #4045 to the bottom holes of Part #9237, see close ups in Drawings a & c.

PRINCIPALES ÉTAPES D'ASSEMBLAGE
"TUO EDIS SIHT" (الله)
ロコウシ
:72,91


3
4
5
Contents
| Item | Qty. | Item | Qty. | Item | Qty. | Item | Qty. | |
| 8534 |  | 1 | 1255 | 6 | 7083 | 1 | 411 | 125(+10) |
| 1239 |  | 6 | 139 | 7084 | 1 | 8192 | 17(+1) | |
| 1238 |  | 6 | 7085 | 1 | 466 | 132(+10) | ||
| 462 | 4 | 7086 | 1 | 5001 | 104(+10) | |||
| 464 | 8 | 7088 | 1 | 5000 | 5(+1) | |||
| 463 | 4 | 423 | 426 | |||||
| 422 | 16(+2) | 4000 | 5 | |||||
| 465 | 16(+2) | 4010 | 5 | |||||
| 7119 | 1 | 8230 | 2 | 4006 | ||||
| 9048 | 1 | 7871 | 2 | 4009 | 4 | |||
| 4020 | 5 | 7870 | 2 | 9692 | 6 | |||
| 7442 | 24(+2) | |||||||
| 4045 | 12(+1) | |||||||
| 4008 | 20(+2) | |||||||
| 412 | 10(+1) | |||||||
| Item | Qty. | |
| 1255 | 6 | |
| 139 | 1 | |
| 462 | 4 | |
| 464 | 8 | |
| 463 | 4 | |
| 422 | 16(+2) | |
| 465 | 16(+2) |
| 7119 | 1 | |
| 9048 | 1 | |
| 4020 | 5 |
| Item | Qty. | |
| 7083 | 1 | |
| 7084 | 1 | |
| 7085 | 1 | |
| 7086 | 1 | |
| 7088 | 1 | |
| 423 | 1 |
| 8230 | 2 | |
| 7871 | 2 | |
| 7870 | 2 |
| Item | Qty. | |
| 411 | 125(+10) | |
| 8192 | 17(+1) | |
| 466 | 132(+10) | |
| 5001 | 104(+10) | |
| 5000 | 5(+1) | |
| 426 | 6 | |
| 4000 | 5 | |
| 4010 | 5 | |
| 4006 | 4 | |
| 4009 | 4 | |
| 9692 | 6 | |
| 7442 | 24(+2) | |
| 4045 | 12(+1) | |
| 4008 | 20(+2) | |
| 412 | 10(+1) |

6
8657

6
7442

24
411
......

6
8657
x6
b

C


9227
......

5
8192


10
411
-

12
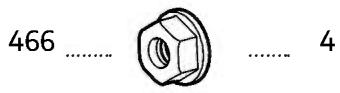
466
(二)

22


3

Door assembly: To determine the door direction, Parts #8561 (x2) must be in the front of the greenhouse.
Please assure the holes direction on both right & left profiles.


4


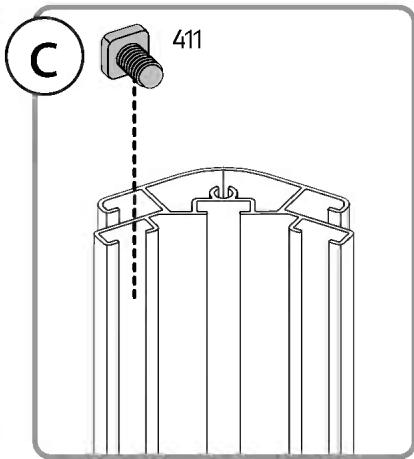
411
......

......
8


8
8192

......
4
466

..... 12


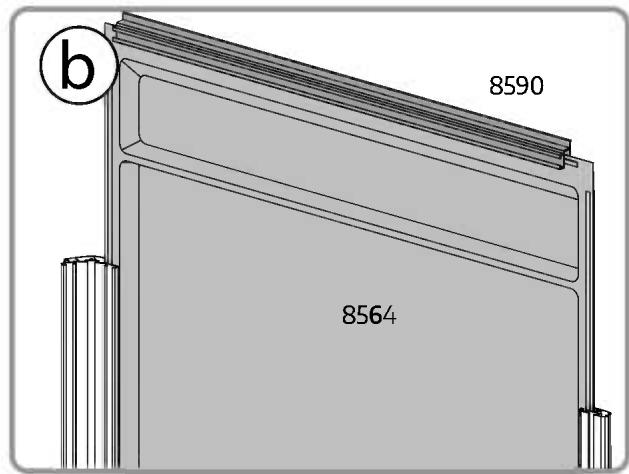
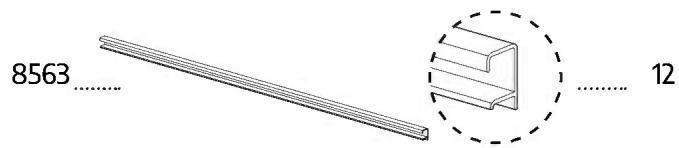
8564......

...... 1
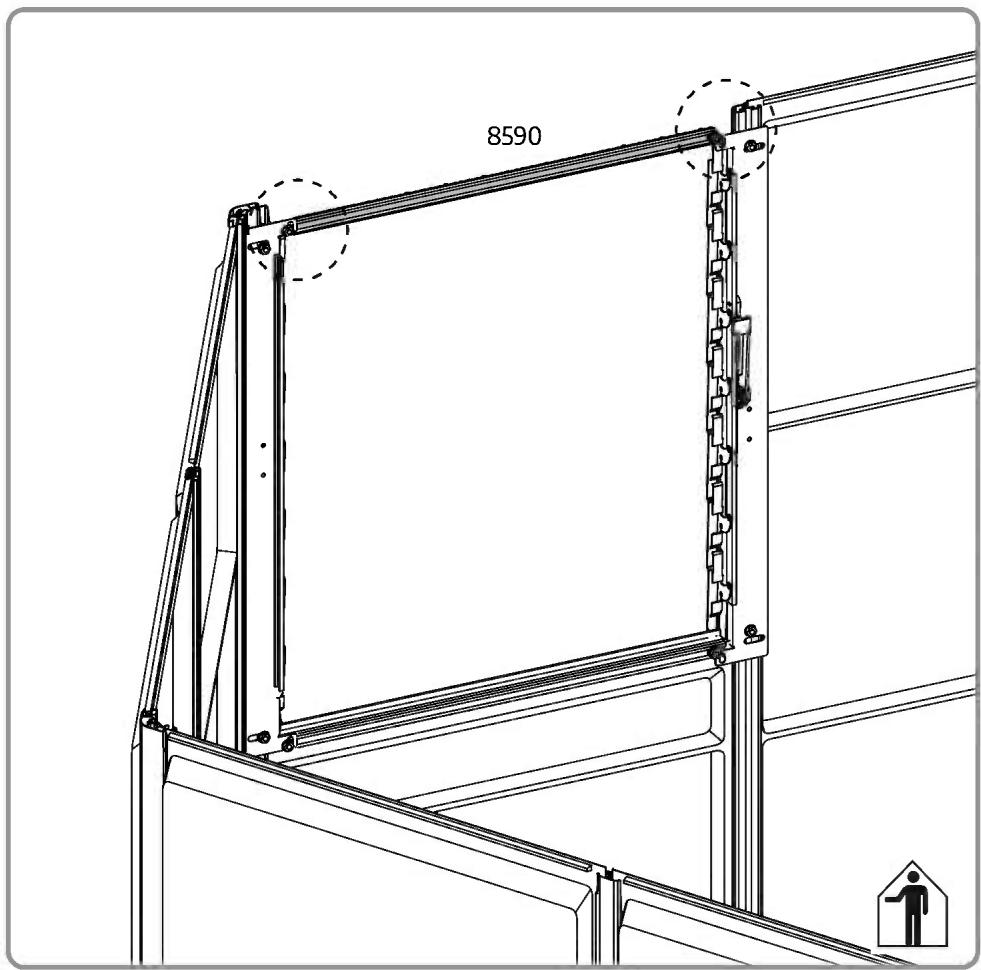
8590......

...... 1



7077 ....

9
318
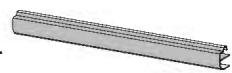

9




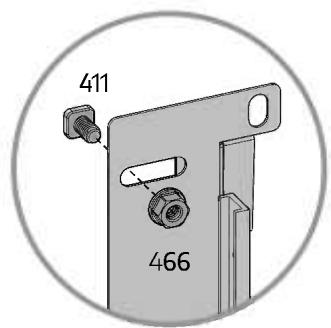
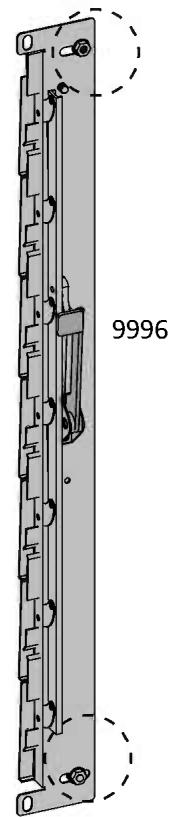
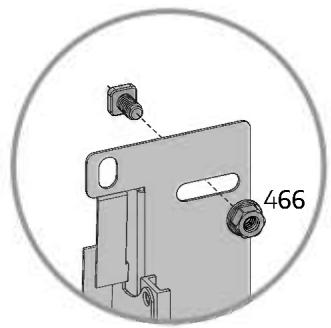
9996......

...... 1
9997 ....
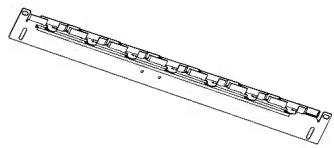
...... 1
411 ....

...... 4
466 ....

...... 4

411

......
2
466
2016.03.01

......
2


8590......
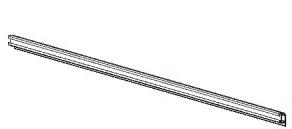
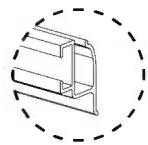
1
411 ......

2
466 ......

2

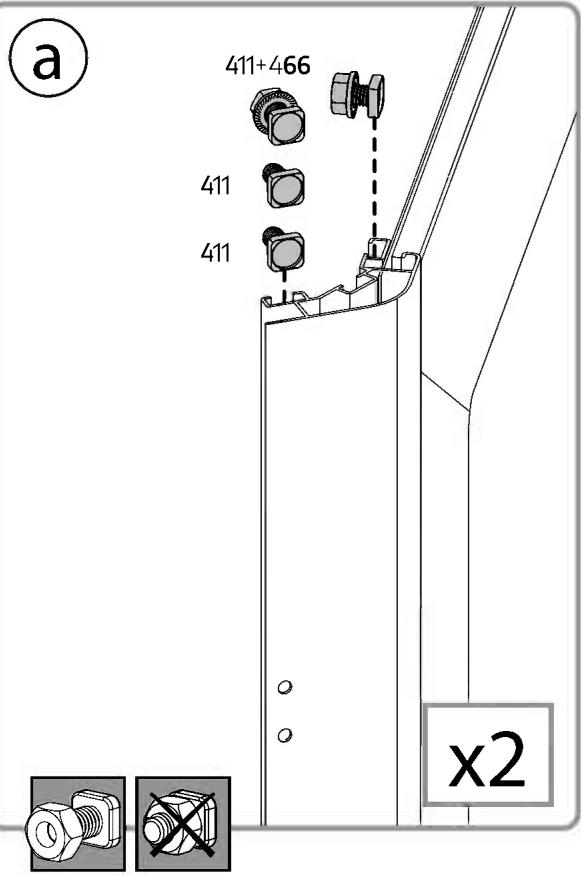
411
......

20
466
......

12


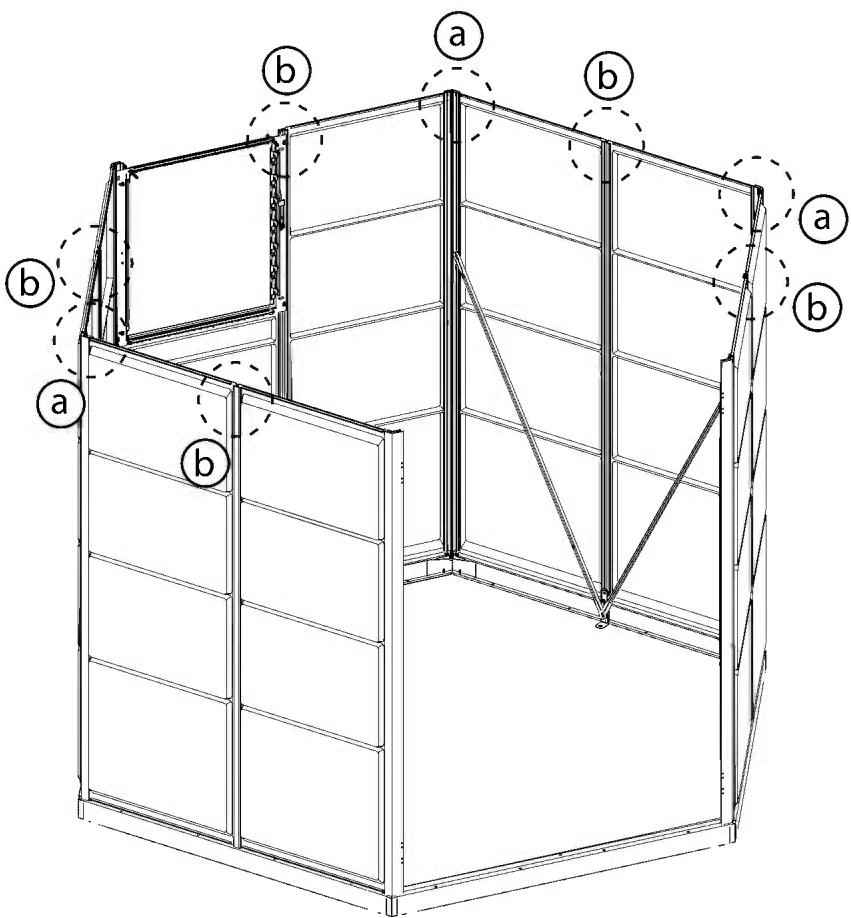
411
......

......
8
466
......

44444
5

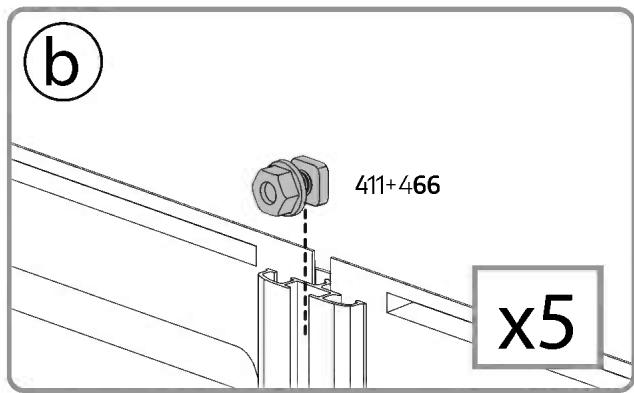


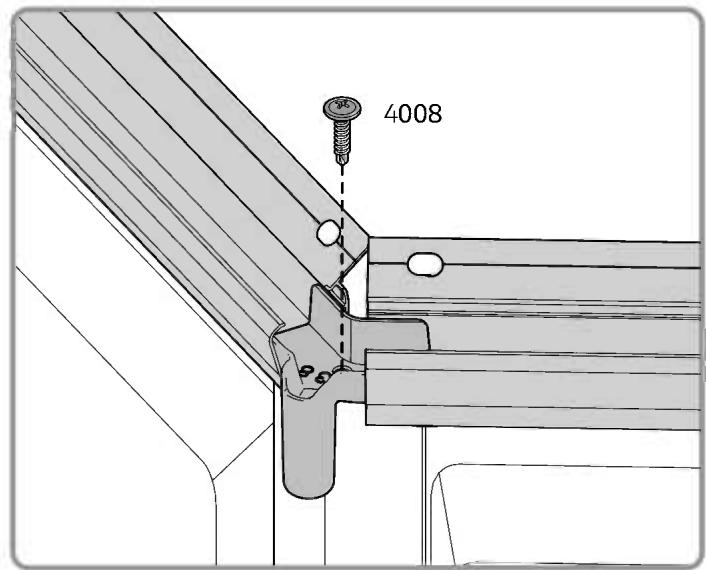

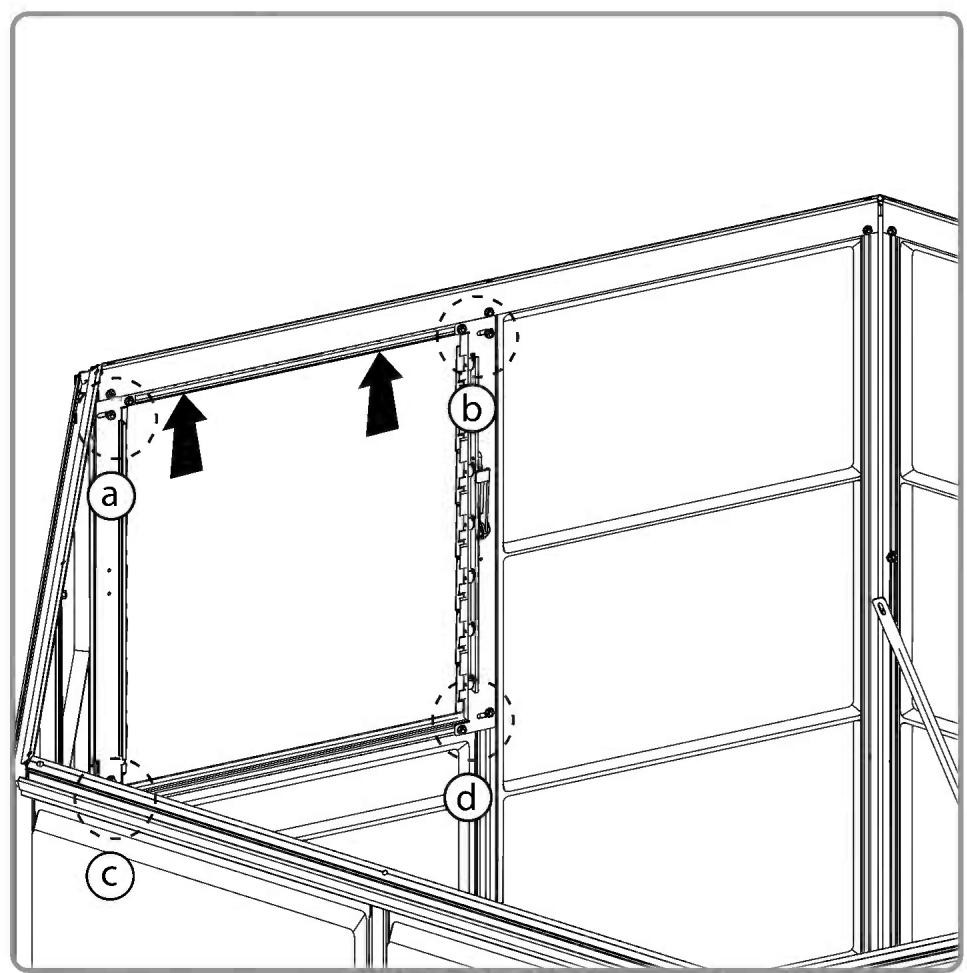

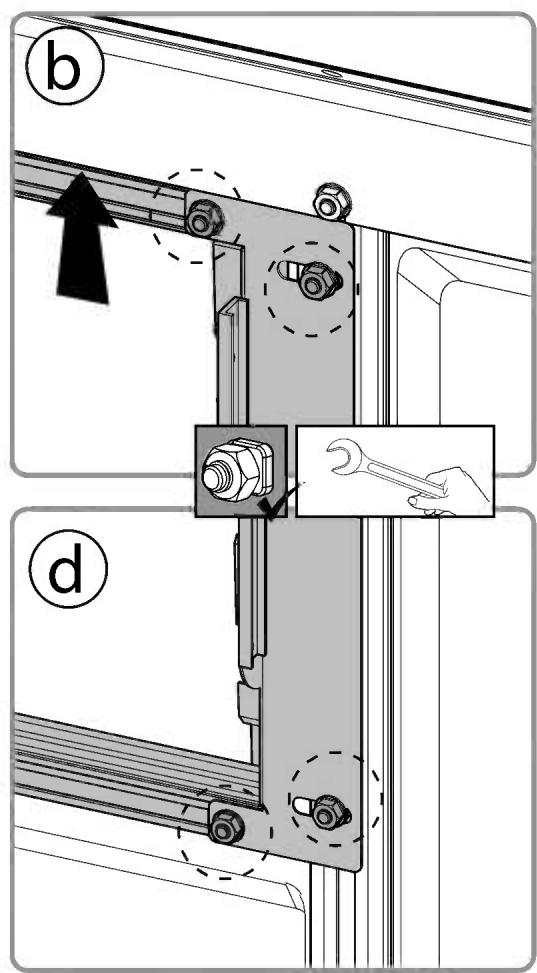
8711
......
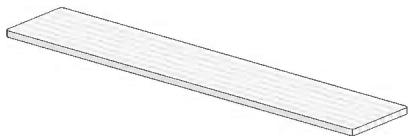
...... 7






411

18
466

18


8656 ....

8562 .....


411

18
466 ....

18
a

b


C
d


8192


3

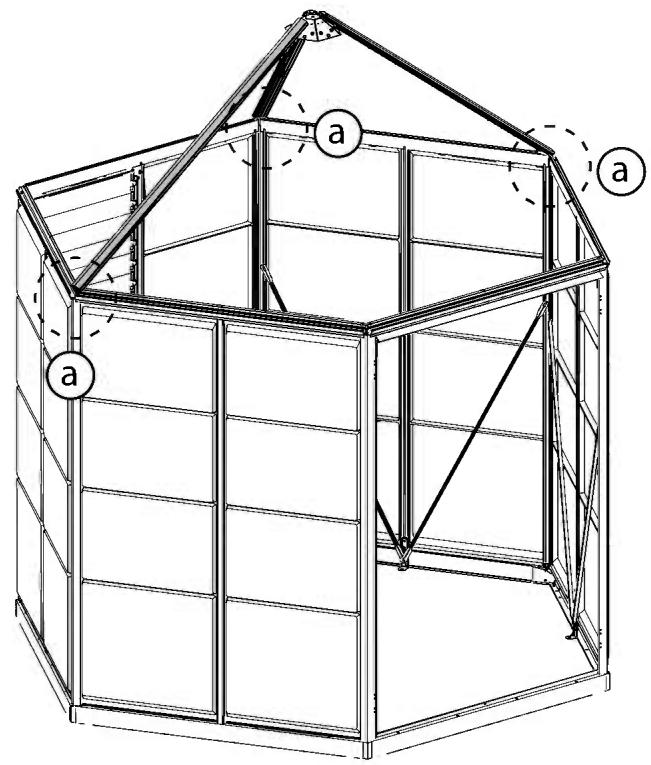
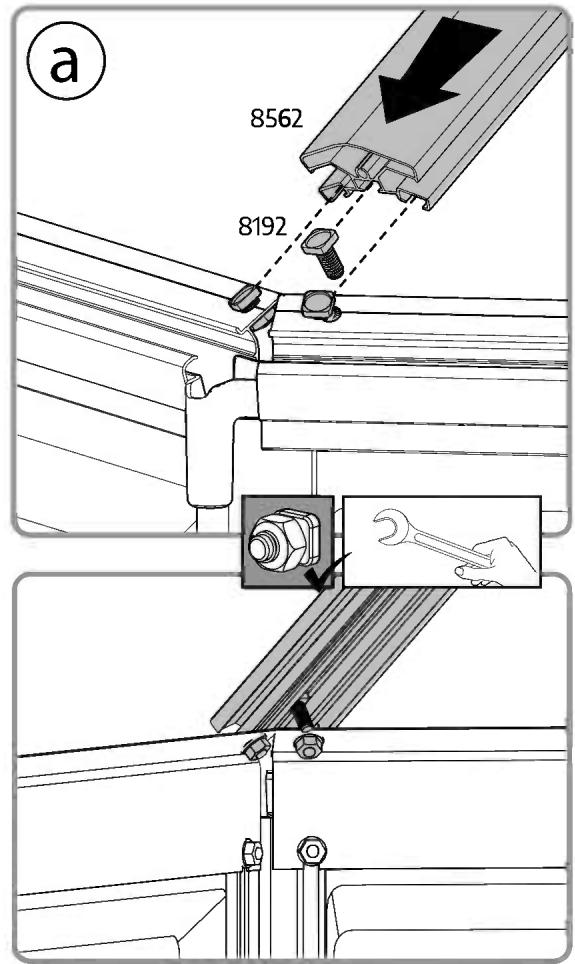


a


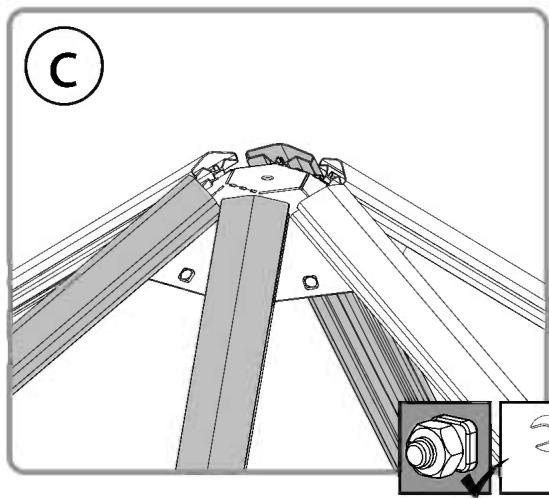


8534

1
7119

1
9048

1
426

1
4020

11122




9237
...... 3
466
......

...... 6
4045
......

..... 12






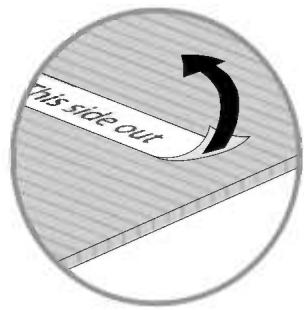

This side out


9590 ....
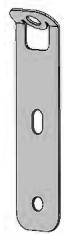
...... 4
466

...... 4


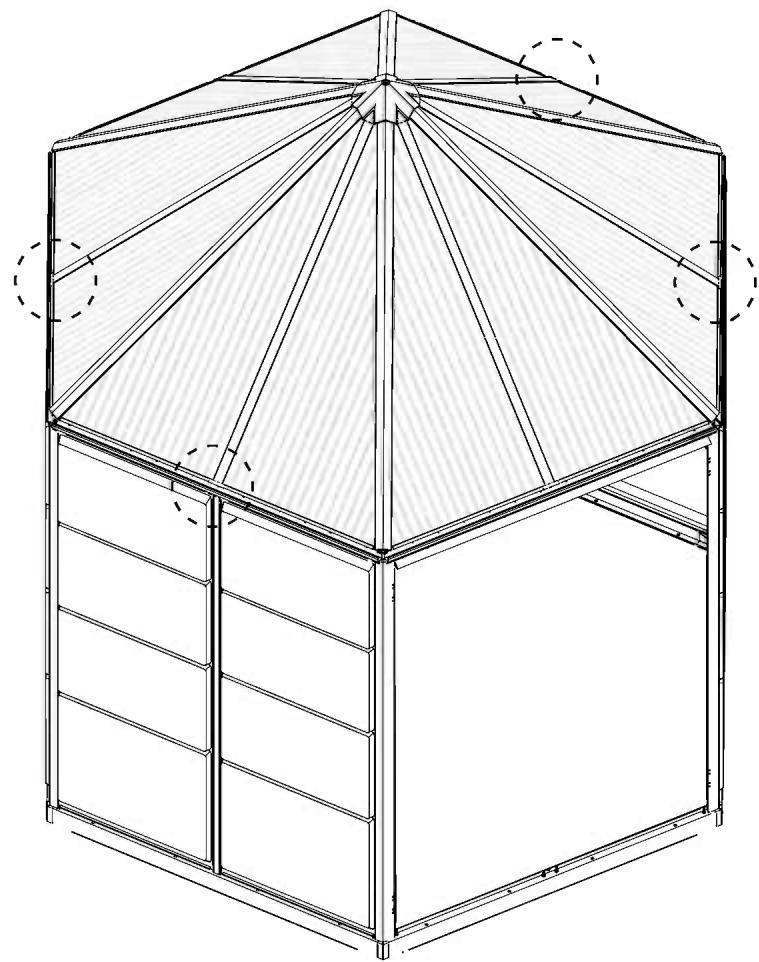

1239

6
9692

6


464 ....

8
465

...... 16
422 ....

...... 16
a


b




4008......

...... 4



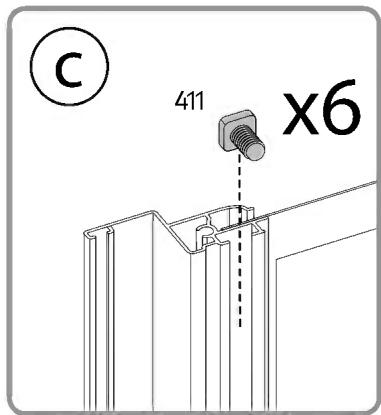
411

19
984
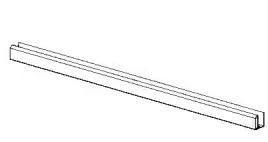
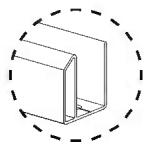
2
4008

4




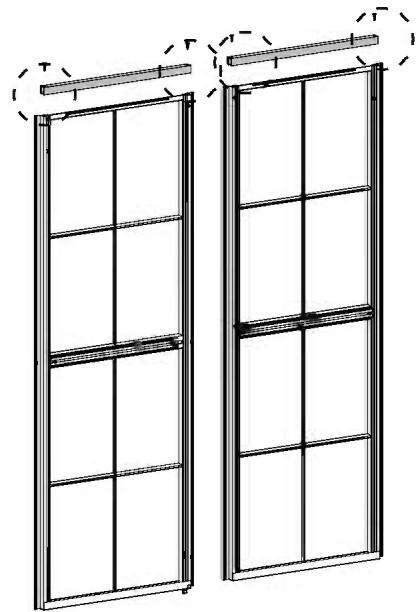


7870 ......

...... 2
411

4
466

8
7871 ....

……
a


C


8710 ....

......
2
139 ....

...... 1
466

9






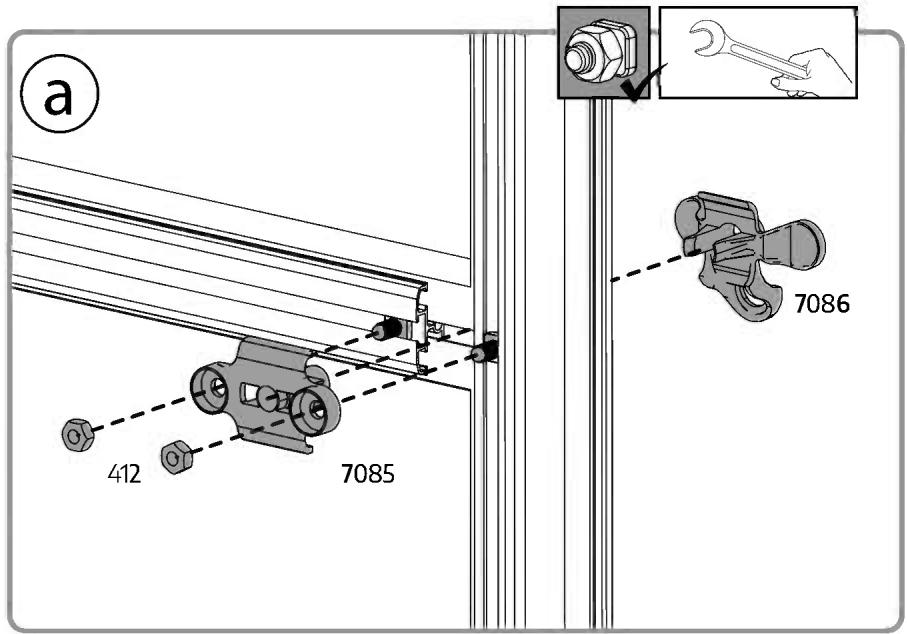
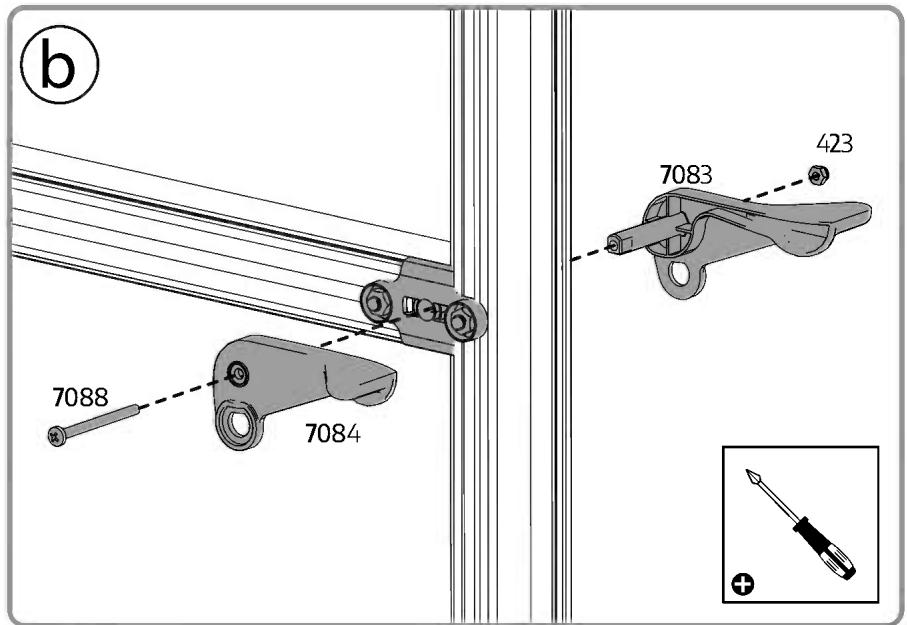
7083 1
7084 1
7085 1
7086 1
m - 1 0 ;
423 1
412 2















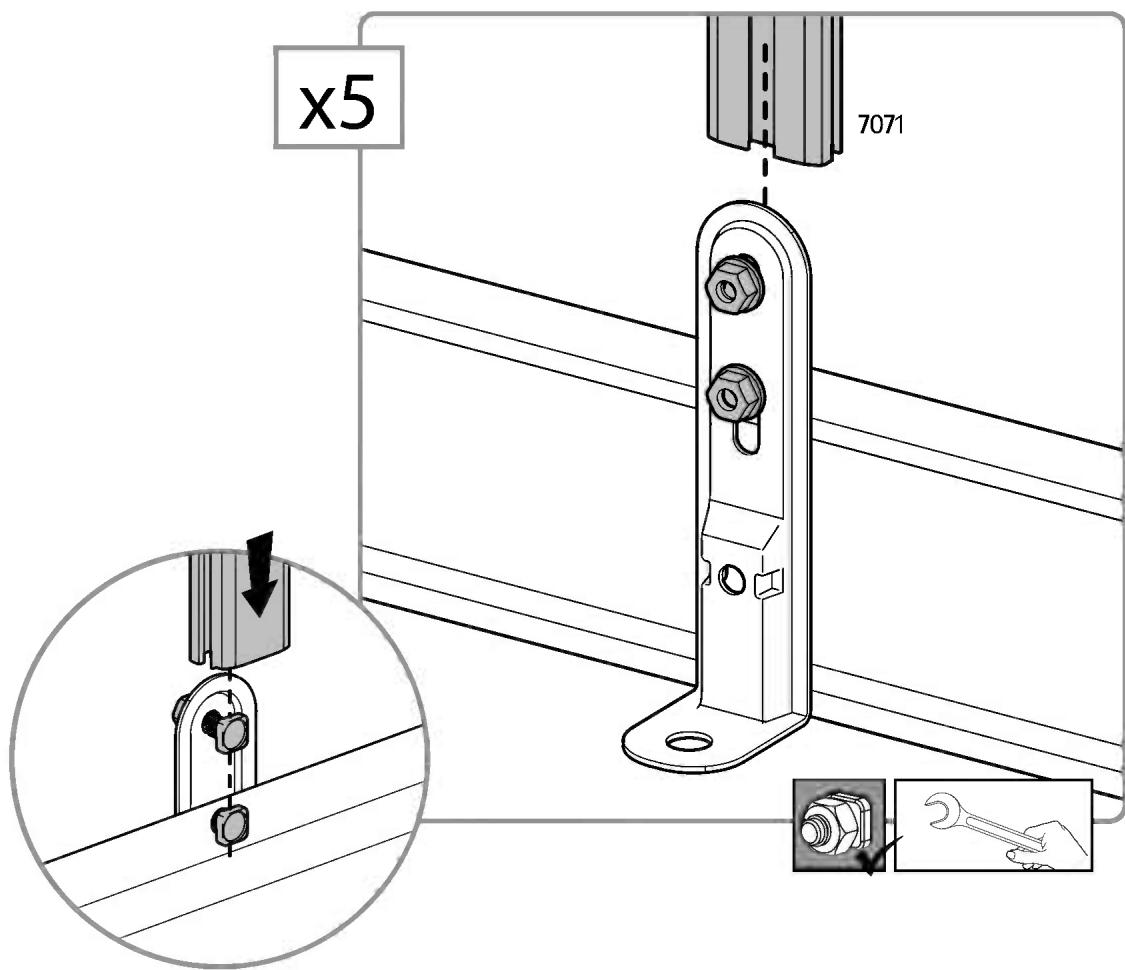
x5
5001 ....

104


EN
PALRAM - CANOPIA | 5 YEAR LIMITED WARRANTY
Palram Canopia Ltd. (Company number: 512106824) whose registered office is at Teradion Industrial Park, M.P Misgav 2017400, Israel ("Canopia") warrants that the product will be free from defects in material or workmanship for a period of 5 years from the original date of purchase. This warranty is valid only if the product is installed, handled, cleaned, and maintained in accordance with Canopia's written specifications. This warranty does not cover defects resulting from normal wear and tear including, but not limited to: damage caused by use of force, incorrect handling, inappropriate use, negligence, accidents, impact from foreign objects, vandalism, pollutants, alteration, painting, damage resulting from cleaning with incompatible detergents or minor deviations of the product. This warranty does not apply to damage resulting from "acts of Nature", which includes but is not limited to hail, storm, tornado, hurricane, blizzard, flood, or fire. Upon submitting proof of purchase and evidence of the claimed product failure, and subject to reporting the failure in writing within 30 days after discovery of the defect, Canopia, at its sole discretion, will replace defective parts of the Product, or refund you a prorated portion of the purchase price on a straight-line depreciated basis for the length of the warranty.
FR
GARANTIE LIMITÉE À 5 ANS DE PALRAM - CANOPIA
PALRAM - CANOPIA 7-7 5-7



- HAVE A CONCERN? WE CAN HELP.
- HABEN SIE BEDENKEN? WIR KÖNNEN HELFEN.
- TOOLS & EQUIPMENT
- A - PREPARE THE SITE
- B - CHOOSE YOUR FOUNDATION TYPE
- C - ANCHOR TO FOUNDATION
- ① - On a solid foundation / frame
- ② - On soil / grass
- CARE & MAINTENANCE
- BEFORE ASSEMBLY
- IMPORTANT!
- DURING ASSEMBLY
- Extension Kit
- CONSEILS DE SECURITE
- Step 3:
- Step 8:
- Step 18:
- Steps
- Step 25:
- Step 26:
- PRINCIPALES ÉTAPES D'ASSEMBLAGE
- EN
- PALRAM - CANOPIA | 5 YEAR LIMITED WARRANTY
- FR
- GARANTIE LIMITÉE À 5 ANS DE PALRAM - CANOPIA
- PALRAM - CANOPIA 7-7 5-7
Brand : Canopia
Model : Oasis 8 2x2.5
Category : Garden shed