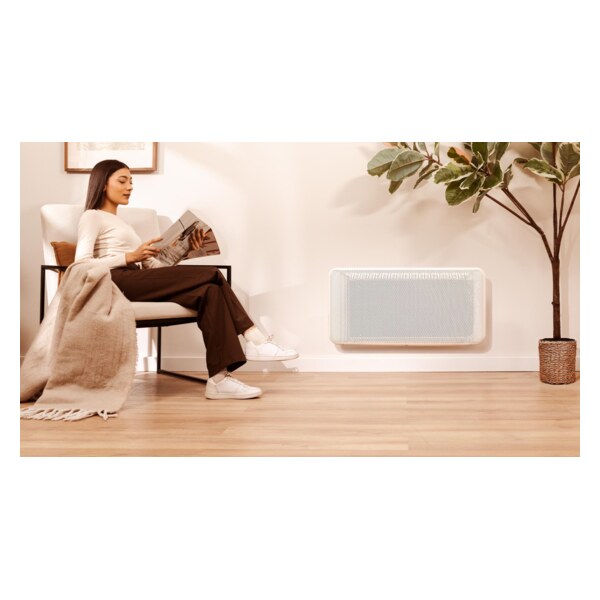
ReadyWarm 2000 Graphene - Fan heater CECOTEC - Free user manual and instructions
Find the device manual for free ReadyWarm 2000 Graphene CECOTEC in PDF.


| Product Type | Fan Heater |
| Brand | Cecotec |
| Model | ReadyWarm 2000 Graphene |
| Maximum Power | 2000 W |
| Heating Technology | Graphene |
| Operating Modes | 2 speeds (gentle and intense airflow), fan-only mode without heat |
| Adjustable Thermostat | Yes |
| Dimensions (W x D x H) | 25 x 20 x 15 cm |
| Weight | 1.2 kg |
| Power Supply | 220-240 V, 50-60 Hz |
| Material | Resistant plastic with graphene element |
| Maximum Heating Area | 20 m² |
| Oscillation | No |
| Remote Control | No |
| Noise Level | ~45 dB |
| Overheat Protection | Yes |
| Tip-over Protection | Yes |
| Safety Switch | Yes |
| Frost Protection | Yes |
| Maintenance and Cleaning | Clean with a soft dry cloth; do not immerse |
| Spare Parts and Repairability | No spare parts available; device not user-serviceable |
| Warranty | 2 years (Cecotec standard) |
Frequently Asked Questions - ReadyWarm 2000 Graphene CECOTEC
User questions about ReadyWarm 2000 Graphene CECOTEC
0 question about this device. Answer the ones you know or ask your own.
Ask a new question about this device
Download the instructions for your Fan heater in PDF format for free! Find your manual ReadyWarm 2000 Graphene - CECOTEC and take your electronic device back in hand. On this page are published all the documents necessary for the use of your device. ReadyWarm 2000 Graphene by CECOTEC.
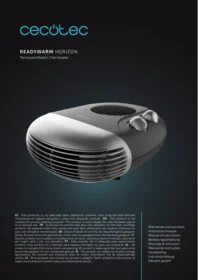
USER MANUAL ReadyWarm 2000 Graphene CECOTEC
natural_image
Exterior view of a modern white electric TV with perforated grille and visible brand logo (no text or symbols on device body)ES: Este producto no es adecuado para calefacción primaria. Este producto está indicado únicamente en lugares abrigados o para una utilización puntual. / EN: This product is not suitable for primary heating purposes. This product is only suitable for well insulated spaces or occasional use / FR: Cet appareil ne convient pas pour une utilisation en tant que chauffage primaire. Cet appareil a été conçu seulement pour être utilisé dans des espaces intérieurs ou pour une utilisation momentanée / DE: Dieses Produkt ist nicht für als Hauptheizgerät geeignet. Dieses Produkt ist nur für geschützten Orten oder zur gelegentlichen Verwendung geeignet / IT: Questo apparecchio non è adatto a scopi di riscaldamento primario. Il suo utilizzo è indicato solo in luoghi riparati o per uso occasionale / PT: Este produto não é adequado para ser utilizado como aquecimento primário. Destina-se a uma utilização ocasional e apenas em locais abrigados / NL: Dit product is niet geschikt voor primaire verwarming. Dit product is alleen geschikt voor gebruik op beschutte plaatsen of voor occasioneel gebruik / PL: Ten produkt nie nadaje się do pierwotnego ogrzewania. Ten produkt jest wskazany tylko do miejsc ostoniętych lub do okazjonalnego użytku / CZ: Tento produkt není vhodný pro primární vytápění. Tento produkt je vhodný pouze na chráněných místech nebo pro příležitostné použitíá / TR: TR · Bu ürün birincil isitma için uygun değildir. Bu ürün yalnızca korunaklı yerler veya ara sira kullanım için uygundur. / GR: Autó to προϊόν δεν είναι κατάλληλο για κύρια θέρμανση. Autó to προϊόν είναι κατάλληλο μόνο για προστατευμένους χώρους ή περιστασιακή χρήση. / CAT: Aquest producte no és adequat per a calefacció primària. Aquest producte está indicat únicament a llocs abrigats o per a una utilització puntual. / HU · Ez a termék nem alkalmas elsódleges fútésre. Ez a termék csak fedett helyeken vagy alkalmi használatra alkalmas. / Ⓔ يهيمجلا نکامَالل طQLF بيسانب کیساس ALA کیفتحتلل بيسانم ریغ جشکن لاب آده يضیر ęłą مادعتسالل
Safety instructions 7
-
Parts and components 47
-
Before use 47
-
Installation 48
-
Operation 48
-
Troubleshooting 49
-
Cleaning and maintenance 49
-
Recycling of electrical and electronic equipment 50
-
Copyright 50
-
Simplified EU Declaration of Conformity 50
SOMMAIRE
EN • The coding in this manual is generic and applies to all code variants of the appliance.
Read the following instructions carefully before using the appliance. Keep this instruction manual for future reference or new users.
- Make sure that the mains voltage matches the voltage specified on the product's rating label and that the plug is
earthed.
- This appliance is intended for domestic use only and is not suitable for use in commercial establishments such as bars, restaurants, farms, hotels, motels, and offices.
- Do not immerse the cord, plug, or any other non-removable part of the appliance in water or any other liquid or expose electrical connections to water. Make sure your hands are dry before handling the plug or switching on the appliance.
- Check the power cord regularly for visible damage. If the cord is damaged, it must be replaced by Cecotec's Official Technical Support Service to avoid any danger.
- Do not place the appliance near heat sources, flammable substances, wet surfaces, or allow it to come into contact with water or other liquids. Do not use outdoors.
- Do not cover the device during operation.
- Warning: To avoid overheating, do not cover the heater. The meaning of the figure in the mark is "DO NOT COVER".
- Do not introduce or allow objects to be introduced in the device, this could cause risk of electrical shock, fire or damage.
- Always turn off and unplug the appliance when not in use and before moving it. To unplug the appliance, pull the plug, not the cord.
- Avoid using extension cords, as they could overheat and cause risk of fire.
- The appliance must not be placed directly under a power socket.
- Do not use the heating appliance in the immediate vicinity of a bath, shower, or swimming pool.
- Do not use this heating appliance if it has been dropped.
- Do not use if there are visible signs of damage to the
heating appliance.
- Use this heating appliance on a horizontal and stable surface, or fix it to the wall, as applicable.
- WARNING: do not use this heating device in small rooms that are occupied by people who cannot leave the room by themselves, unless permanent supervision is provided.
- WARNING: to reduce the risk of fire, keep textiles, curtains, or other flammable material at least 1 m away from the air outlet.
- CAUTION: some of the product's parts may become very hot and cause burns. Particular attention should be paid when children and/or vulnerable people are present.
- One of the most common causes of overheating is the building up of debris or fluff in the appliance. Be sure to clean these accumulations periodically by vacuuming the vents and grilles.
- Do not place the appliance on carpets, and do not place the cable under carpets. Position the cord in such a way as to avoid obstructing passage and cause tripping hazards.
- Do not store it until it cools down. Store it in a cool, dry place when not in use.
- The heater must be installed at a minimum height of 1.8 m above the floor.
- Keep the appliance out of the reach of children under 3 years of age unless they are continuously supervised.
- Children between 3 and 8 years old should only switch the appliance on or off when it has been placed or installed in its normal, intended operating position and if they have been given supervision or instruction concerning the use of the appliance in a safe way and understand the hazards involved. Children between 3 and 8 years old should not plug in, adjust, and clean the appliance and should not
carry out maintenance tasks.
- This appliance can be used by children aged 8 and above and people with reduced physical, sensory, or mental capabilities or lack of experience and knowledge, as long as they have been given supervision or instruction concerning the use of the appliance in a safe way and understand the hazards involved. Children must not play with the appliance. Cleaning and maintenance should not be carried out by children without supervision.
- Supervise children to ensure they do not play with the product. Close supervision is necessary when the appliance is being used by or near children.
INSTRUCTIONS DE SÉCURITÉ
The graphics in this manual are schematic representations and may not exactly match the product.
2. BEFORE USE
- This appliance comes in a packaging designed to protect it during transport. Remove the appliance from its box. You can keep the original box and other packaging materials in a safe place to prevent damage to the appliance if you need to transport it in the future. If you wish to dispose of the original packaging, make sure all items are recycled properly.
- Check that all parts and components are included and in good condition. If any of them are missing or damaged, please contact Cecotec's Official Technical Support Service immediately.
Box content:
- Product
- Feet
- Remote control
- Wall mounting bracket
- Instruction manual
- Do not remove the product's serial number in order to keep proper traceability if technical assistance is required.
3. INSTALLATION
Wall mounting
Make sure all accessories are present and the contents match the accessories list and packaging. Before beginning the installation:
- If any component is missing, please do not assemble the product and contact the Technical Support Service.
- Tools required for assembly: screwdriver, ruler and drill.
Assembly instructions:
- Use a ruler to measure the distance between the four fixed mounting holes on the rear of the product. The horizontal distance between the holes is 505 mm and the vertical distance is 265 mm. (Fig. 2)
- Based on the wall mounting hole distances, use an electric drill to make four holes in the wall (approximately 35 mm deep).
- Insert four plastic wall plugs into the holes, then screw the mounting screws into the expansion plugs. The rear end of the screws should protrude approximately 8 mm.
- Finally, hang the appliance and it is ready for use. For safety reasons, the screws must be securely fastened.
Floor standing assembly
Make sure all accessories are present and the contents match the accessories list and packaging. Before beginning the installation:
- If any component is missing, please do not assemble the product and contact the Technical Support Service.
- Tools required for assembly: screwdriver.
Assembly instructions:
- Place the heater on a flat surface with the bottom facing upward and use a screwdriver to remove the 8 screws located underneath the product.
- Install the corresponding feet fixing holes onto the corresponding bottom fixing holes and tighten the screws. (Fig. 3)
4. OPERATION
Please check before use:
- Whether the heating element is damaged or broken.
-
Whether the power cord is damaged.
-
Whether the assembly/installation has been completed according to the manual instructions.
-
Whether the plug is compatible with the socket and the socket load capacity is not less than 10A/220V, otherwise a hazard may occur.
-
First, turn on the power and adjust the thermostat switch to the "high" position. Connect the heater to the mains and the power indicator light will illuminate. Then select either "Low" or "High" on the mode knob, and the heater will operate normally.
- When you feel the indoor temperature is suitable, you can slowly turn the thermostat anticlockwise until the indicator light turns off. At this point, the position indicated by the knob pointer is your ideal indoor temperature control point. The appliance will automatically maintain this temperature.
- To stop using the heater, first turn the thermostat to the "off" position, then set the thermostat to the "low" position, the power indicator light will turn off, and finally unplug the unit to stop the heater's operation.
5. TROUBLESHOOTING
| Problem | Cause | Solution |
| The appliance does not turn on | The power cord is not plugged in or has a bad contact. | Plug in the power cord to ensure good contact. |
| The thermostat is not switched on. | Turn the thermostat to the “high” position. | |
| Appliance damaged. | Return for repair. | |
| The appliance does not turned off | The on/off mode has not been selected. | Select the on/off mode to stop appliance operation. |
| Appliance damaged. | Return for repair. |
6. CLEANING AND MAINTENANCE
Before performing any cleaning or maintenance operations, disconnect the appliance from the mains power supply.
For cleaning, it is recommended to use a soft, damp cloth and mild detergent. Do not use abrasive cloths or implements that might affect the appliance's surface. Check that the hot air outlet and ventilation inlet are free from dust and dirt. During cleaning, be careful not to touch the heating elements.
In case of malfunction and/or faulty operation, disconnect the appliance from the mains power supply and contact an authorised repair technician.
7. RECYCLING OF ELECTRICAL AND ELECTRONIC EQUIPMENT
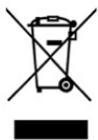
This symbol indicates that, according to the applicable regulations, the product and/or battery must be disposed of separately from household waste. When this product reaches the end of its shelf life, you should dispose of the batteries/accumulators and take them to a collection point designated by the local authorities.
For detailed information on how to properly dispose of electrical and electronic equipment and/or the corresponding batteries, consumers should contact their local authorities.
Compliance with the above guidelines will help protecting the environment.
8. COPYRIGHT
The intellectual property rights over the texts in this manual belong to CECOTEC INNOVACIONES, S.L. All rights reserved. The content of this publication may not, either in part or in its entirety, be reproduced, stored in a retrieval system, transmitted or distributed by any means (electronic, mechanical, photocopying, recording or similar) without prior authorisation from CECOTEC INNOVACIONES, S.L.
9. SIMPLIFIED EU DECLARATION OF CONFORMITY
CE Cecotec Innovaciones hereby declares that this appliance complies with the essential requirements and other relevant provisions of applicable European Union regulations. This appliance has been designed, manufactured and tested in compliance with required safety and quality standards. The full text of the EU Declaration of Conformity can be found on the following website: https://cecotec.es/es/information/declaration-of-conformity
1. PIÈCES ET COMPOSANTS
Img. 1
5. PROBLEEMOPLOSSING
natural_image
Technical line drawing of a rectangular electronic device with internal components and directional arrows (no text or symbols)Fig./Img./Abb./Afb./Rys. 2
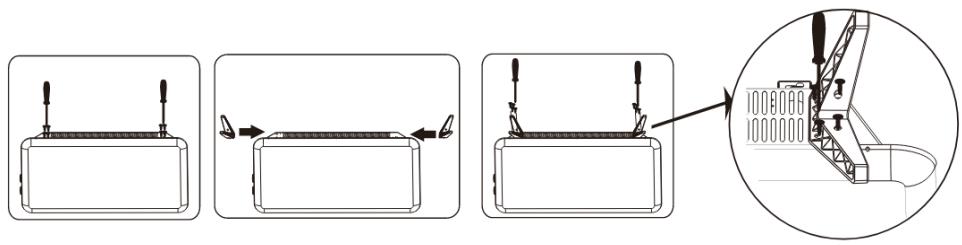
flowchart
graph TD
    A["Device with lever mechanism"] --> B["Step 1: Insert lever"]
    B --> C["Step 2: Insert lever"]
    C --> D["Step 3: Insert lever"]
    D --> E["Final Stage with lever mechanism"]
Fig./Img./Abb./Afb./Rys. 3
www.cecotec.es


- SOMMAIRE
- INSTRUCTIONS DE SÉCURITÉ
- BEFORE USE
- Box content:
- INSTALLATION
- Wall mounting
- Assembly instructions:
- Floor standing assembly
- OPERATION
- Please check before use:
- TROUBLESHOOTING
- CLEANING AND MAINTENANCE
- RECYCLING OF ELECTRICAL AND ELECTRONIC EQUIPMENT
- COPYRIGHT
- SIMPLIFIED EU DECLARATION OF CONFORMITY
- PIÈCES ET COMPOSANTS
- Img. 1
- PROBLEEMOPLOSSING
Brand : CECOTEC
Model : ReadyWarm 2000 Graphene
Category : Fan heater