
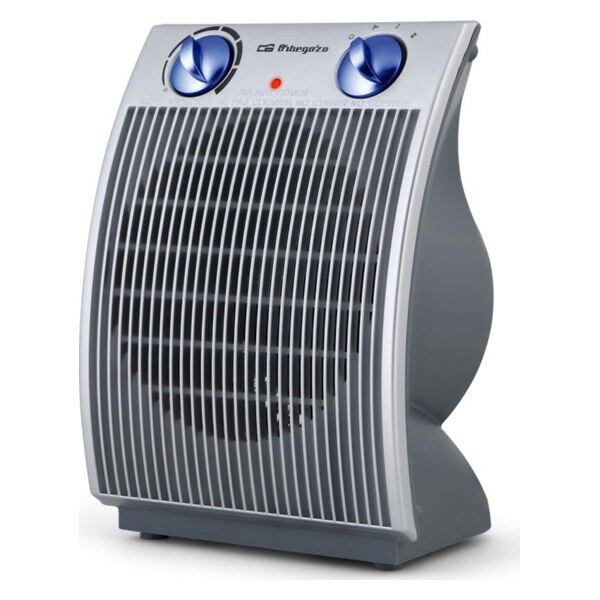
SP 6500 - Fan heater Orbegozo - Free user manual and instructions
Find the device manual for free SP 6500 Orbegozo in PDF.


| Brand | Orbegozo |
| Model | SP 6500 |
| Product type | Fan heater |
| Power supply | 220-240 V ~ 50 Hz |
| Power | 1000 W (min) / 2000 W (max) |
| Remote control | Yes |
| Installation | Wall-mounted, at least 1.8 m from the floor |
| Shut-off timer | 1 to 12 hours |
| On timer | 1 to 12 hours |
| Weekly programmer | Yes (up to 6 periods per day) |
| Open window detection | Yes |
| Temperature range | 10°C to 49°C |
| Temperature control | Electronic |
| Thermostat type | Mechanical |
| Overheat protection | Yes |
| Automatic shut-off | After 12 hours of continuous operation |
| Cleaning | Soft damp cloth |
| Housing material | Plastic |
| Weight | Approximately 2.5 kg |
| Dimensions (W x H x D) | Approximately 40 x 15 x 15 cm |
Frequently Asked Questions - SP 6500 Orbegozo
User questions about SP 6500 Orbegozo
0 question about this device. Answer the ones you know or ask your own.
Ask a new question about this device
Download the instructions for your Fan heater in PDF format for free! Find your manual SP 6500 - Orbegozo and take your electronic device back in hand. On this page are published all the documents necessary for the use of your device. SP 6500 by Orbegozo.
USER MANUAL SP 6500 Orbegozo
CHAUFFAGE CERAMIQUE SPLIT MANUEL D'INSTRUCTIONS - MANUEL D'INSTRUCTIONS
AQUECEDOR CERAMICO SPLIT - MANUAL DE INSTRUÇÕES

natural_image
Illustration of a remote control with a Wi-Fi signal icon above it (no text or symbols on the device itself)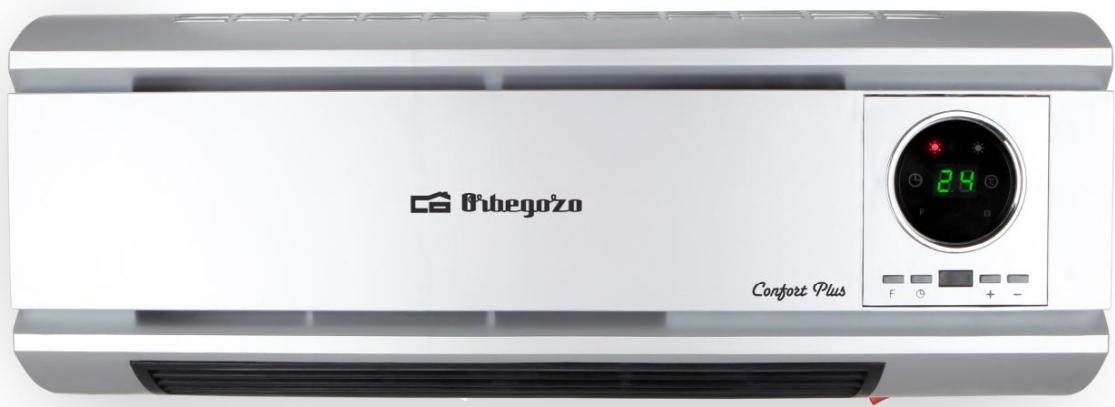
SP 6500
SONIFER, S.A.
This product is only suitable for well insulated spaces or occasional use
Read the safety instructions and the operating instructions through carefully before starting to use your split heater. Please keep this booklet in a safe place
LIMPIEZA Y MANTENIMIENTO
- This appliance can be used by children aged from 8 years and above and persons with reduced physical, sensory or mental capabilities or lack of experience and knowledge if they have been given supervision or instruction concerning use of the appliance in a safe way and understand the hazards involved. Children must never play with the appliance. Cleaning and user maintenance must never be carried out by children without supervision.
- Children should be supervised to ensure that they do not play with the appliance.
- WARNING: In order to ensure your children's safety, please keep all packaging (plastic bags, boxes, polystyrene etc.) out of their reach.
- If the supply cord is damaged it must be repaired by the Authorized Service Agent.
- Never pull on the cord when unplugging.
- Do not use the unit with a damaged cord or plug, or if it is not working properly.
- Do not handle the appliance with wet hands.
- Never immerse the appliance in water or any other liquid.
- Make sure the appliance has been unplugged before cleaning.
- This appliance must be installed following the national
regulations for electrical installations.
- This appliance is for household use only.
- In case that you need a copy of the instruction manual, you can ask for it writing an email to sonifer@sonifer.es.
-
WARNING: In case of misuse, there is a risk of possible injury.
-
WARNING: In order to avoid overheating, do not cover the heater
- Children of less than 3 years should be kept away unless continuously supervised.
- Children aged from 3 years and less than 8 years shall only switch on/off the appliance provided that it has been placed or installed in its intended normal operating position and they have been given supervision or instruction concerning use of the appliance in a safe way and understand the hazards involved. Children aged from 3 years and less than 8 years shall not plug in, regulate and clean the appliance or perform user maintenance.
- CAUTION: Some parts of this product can become very hot and cause burns. Particular attention has to be given where children and vulnerable people are present.
-
The device should not be placed immediately below a socket base.
-
Do not place a heater in use near curtains, furniture, wood paneling or combustible material which can deteriorate with heat.
- WARNING: This heater isn't equipped with a temperature control room. Do not use this heater in small rooms that are occupied by people who cannot leave the room by themselves, unless you provide surveillance.
- The appliance must be installed so that the switches, thermostat and power cable cannot be touched directly or indirectly by a person in the bath or shower.
- The heating appliance must be installed at least 1.8 m above the ground.
- The air outlet must be hanged downward on the wall and horizontal. Do not install the appliance differently or diagonally.
- Do not use this heater with a programmer, timer or any other device that switches the heater on automatically, since a fire risk exists if the heater is covered or positioned incorrectly.
- Keep the appliance at least 1 meter away from flammable materials, such as furniture, curtains, bed clothing, clothes or paper.
- Do not use the heater in areas where petrol, paint or other flammable substances are used or stored.
TECHNICAL DATA
| Type | Specification | Voltage | Frequency | Power |
| SP 6500 | Remote Control | 220-240V | 50 Hz | 1000W/2000W |
INSTALLATION ON THE WALL

Drill two holes in wall and have a distance of 1.8m from the ground. The diameter of the hole just contained the inflated plastic pipe. Introduce inflated plastic pipe into the holes and screw supplied screws letting them stick out a little. Hang the appliance on the screws.
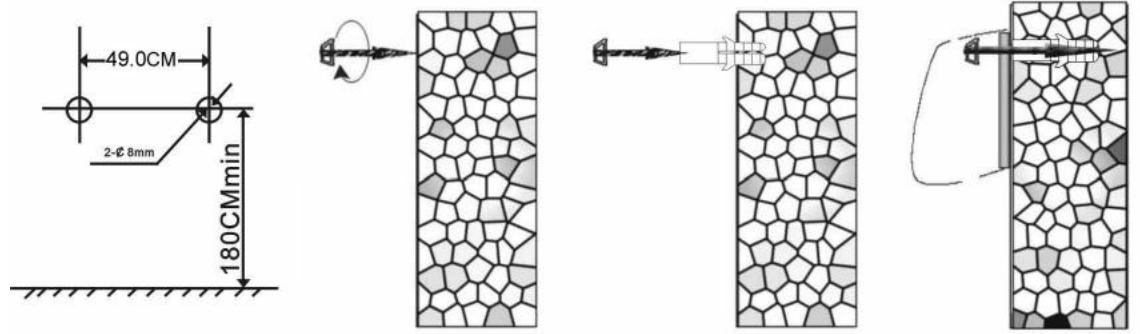
FUNCTION OPERATION (CONTROL PANEL AND REMOTE CONTROL)
CONTROL PANEL

Control panel operation
REMOTE CONTROL

- Plug in and switch on by pressing the main switch 0/I, enter into standby mode and display shows "S".

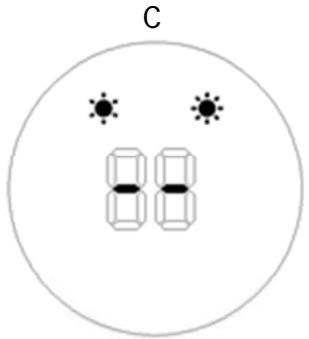
- Once press F, enter into fan mode, display shows like photo A; press F in second time, enter into lower heating, display like photo B; press F in third time, enter into high heating, display like photo C, press in fourth time, enter into in standby mode (fan keeps working for 30 seconds before shutting down completely).


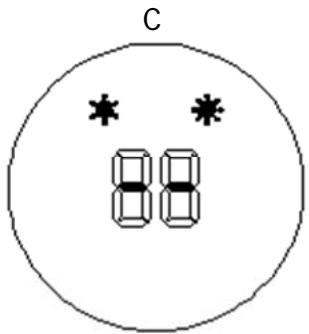
- Turn-off timer. Press ⏻ button to set timer (1-12hours) during working status. Pressing the button one time increases one hour for timer. After setting time, the display will show current setting time for 5 seconds, then resume to previous display, meanwhile the ⏻ light on. Below photo is an example of setting 8h.

- Turn-on timer. In standby mode, press ⏻ timer button, you can set the appointment turn-on time in 1-12 hours. After complete setting, the display shows the appointment turn-on time and also the light ⏻ is on. The display automatically decreases 1 hour for each hour passed. When the appointment power-on time arrived, the product will automatically turns on. The default setting temperature is 23 °C during appointment turn-on. Below photos is an example to set appointment turn-on time to 8 hours:

Note: if you don't set the temperature or weekly program, the heater will turn off automatically after continuous use of 12 hours and enter into standby.
- Temperature setting. While the appliance is working, press "+" or "-" buttons, display will show "23", default temperature. Display also will show "°C". Press "+" or "-" to set the desired temperature (temperature range 10-49°C). For example: the current temperature of the room is 15°C, when you set the heater temperature to 25°C, display will light on as below picture. If you want to cancel selected temperature, press "F" or ⏻ in remote control to select max or min power instead of temperature. "°C" will light off on display.

Remote control operation
Note: during operation, ensure remote control aims to receptor on appliance to working correctly.
-
Press ⏻ to turn on the heater, fan function will active and display will light as pic. A.
-
Press 🙏 once, heater will work in min. Power heating and display will show ⚙ (pic. B). Press again, max. Power heating and display will show ⚙ / ⚙ (pic. C).


-
Timer function Ⓤ works the same as timer button on control panel.
-
Set current time/day (it can be set under standby mode & working status): press Ⓗ button once, display shows the hour, press “⊕/⊖” to set current hour (total 24 hours); press Ⓗ again, display will show minutes, press “⊕/⊖” to set current minutes (00-59 minutes); press Ⓗ for third time, display will show the day “d7”, press “⊕/⊖” to set current day (Monday-Sunday: d1-d7). Then press Ⓗ to confirm the configuration, display will show previous setting. For example: setting to Wednesday, 9:30 AM, 25°C, max. power of heating, display will be:

Note: note: above setting time/day will keep as long as switch on or stand by. If main switch off or power cut off, or plug out, it need reset. You can press SET to check you set current time / day.
- Set temperature. During working status, press “⊕/⊖”, the display shows “23” as default. Press “⊕/⊖” to set desired temperature (temperature range 10-49°C), press Ⓞ to confirm the setting or wait a few seconds. For example: the current room temperature is 15°C, when set temperature to 25°C, the display shows as following pic. If want to cancel the set temperature, press ⏻ to set the low or high heating instead of set temperature. “°C” light turn off.

Note: when setting temperature, it will use smart working way as follows:
- If room temperature is 2^ c or lower than set temperature, the heater will work in max power heating.
- If room temperature is less than 2^ c of set temperature without reach it, heater will work in min power heating.
- If room temperature is the same as set temperature, heater will work in fan mode for 30 seconds to cool down the appliance and protect its components, after that it will enter in standby mode.
-
After this situation if room temperature is lower than 2^ c of set temperature, heater will turn on again and work as same way.
-
Set weekly program (only by remote control)
A. Press ⏻, the product enter into working status.
B. After set current hour/day as point 4 explains, follow next instructions to set weekly program.
C. Press Ⓟ, the display shows "p", it enter into weekly program setting.(pic. A)
D. Press DAY, the display shows d1\~d7, set to working days as required (Monday-Sunday: d1\~d7). Such as set Monday, the display as (pic. B)
Note: in order to distinguish between setting current day & working period of the day: current day - Monday-Sunday: d1\~d7; working period - each day: p1\~p6.
E. Press EDIT, the display shows p1\~p6 (for each day, it can be set maximum 6 time periods).for example, 1st period setting.(figure c).
F. Press, the display shows "00" as default. Press continuously to set the turn-on time. Such as set the turn-on time 7:00am (as figure d) (memo: the setting time 0-24 for choice).


G. Press ☐, the display shows the previous setting turn-on time by default. Press continuously to set the turn-off time. Such as set the shutdown time at 13:00pm (the display as figure e), (note: turn-off time later than turn-on time, when turn-on time same as turn-off time, the unit in standby mode).
H.Repeat steps 4-7 above, you can set the whole weekly program (& each day, the work of each segment opens, the time of shutdown).
I. After above setting, press ^DAY chose the unit turn-on day of the week, then press ^EDIT to choose the turn-on time of the day, then press “+/-” to set desired temperature (temperature range 10-49°C), press “OK” to confirm the setting.
J. To cancel the weekly function, press the Ⓟ, the light "p" will go off. The weekly program is off. The unit will revert to the previous working status.
Note:
- After the above setting are completed and P program is working, for checking the program press until take required day and pulse to select the period you want to check and pulse TIME ON to check turn-on time and TIME OFF to check turn-off time.
- The turn-on time periods 0\~24hours, cannot set to minutes;
- The "time/off" cannot be less than "time/on";
- When the "time/on" is the same as "time/off", the time period enter into standby mode.
A

B

C
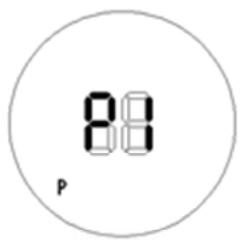
D

E

Note: if main switch off, power cut off or plug out, it needs reset. You can press Ⓗ to check you set time/day.
- Set open-window detection(only by remote control) :
A. Press ⏻, the product enter into working status. Heating for a moment to stable.
B. Press by remote control, light /°C light on; the temperature display "23" by default. Press ⊕/⊖ to set target temperature. During open-window detection mode, once the room temperature drops 5-10°C within 10 minutes, then the product will stop working within 30 minutes and enter into standby mode. Turn on the unit, it need press ⏻ again.

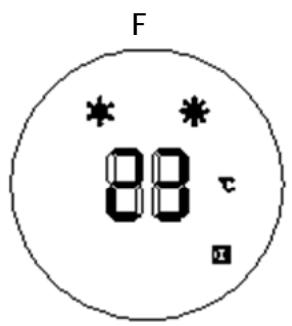
Turn off the open-window detection, press 📄 again, the 📋 light off, the unit will resume to previous working mode. How to operate, for example: current room temperature lower than 23°C, setting 23°C, open-window detection on (pic. F).
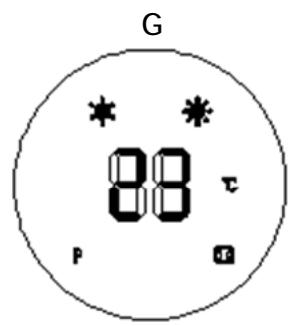
c. Open-window detection and weekly program can work simultaneously (pic. G). Heater will work according the program and set temperature and if room temperature decrease 5-10°C for 10 minutes the appliance will stop and enter in standby mode.


CLEANING AND MAINTENANCE
Unplug from the outlet before cleaning. Allow to cool before cleaning the appliance. To clean the surface use the soft wet cloth (or cloth with some scour). Make sure that do not pour water on to the appliance. Do not use any organic solvents such as gasoline or toluene.
If you do not use the appliance for a long time, wipe off the surface and store the appliance in the original packing box at a well-ventilated place. Avoid dampness and impacts.
| Item | Symbol | Value | Unit | Item | Unit | |
| Heat output | Type of heat input, for electric storage local space heaters only (select one) | |||||
| Nominal heat output | P_nom | 2.0 | KW | manual heat charge control, with integrated thermostat | [no] | |
| Minimum heat output (indicative) | P_min | 0 | KW | manual heat charge control with room and/or outdoor temperature feedback | [no] | |
| Maximum continuous heat output | P_max,c | 2.0 | KW | electronic heat charge control with room and/or outdoor temperature feedback | [no] | |
| Auxiliary electricity consumption | fan assisted heat output | [no] | ||||
| At nominal heat output | el_max | 0 | KW | Type of heat output/room temperature control (select one) | ||
| At minimum heat output | el_min | 0 | KW | single stage heat output and no room temperature control | [no] | |
| In standby mode | el_SB | 0.000 | W | Two or more manual stages, no room temperature control | [no] | |
| with mechanic thermostat room temperature control | [no] | |||||
| with electronic room temperature control | [no] | |||||
| electronic room temperature control plus day timer | [no] | |||||
| electronic room temperature control plus week timer | [yes] | |||||
| Other control options (multiple selections possible) | ||||||
| room temperature control, with presence detection | [no] | |||||
| room temperature control, with open window detection | [yes] | |||||
| with distance control option | [no] | |||||
| with adaptive start control | [no] | |||||
| with working time limitation | [yes] | |||||
| with black bulb sensor | [no] | |||||
| Contact details info | SONIFER SA. Avenida de Santiago 86, 30007, Murcia. Spain. | |||||

Disposal of old electrical appliances.
The European directive 2002/96/EC on Waste Electrical and Electronic Equipment (WEEE), requires that old household electrical appliances must not be disposed of in the normal unsorted municipal waste stream. Old appliances must be collected separately in order to optimize the recovery and recycling of the materials they contain, and reduce the impact on human health and the environment.
The crossed out “wheeled bin” symbol on the product reminds you of your obligation, that when you dispose of the appliance, it must be separately collected.
Consumers should contact their local authority or retailer for information concerning the correct disposal of their old appliance.
DECLARATION OF CONFORMITY: This device complies with the requirements of the Low Voltage Directive 2014/35/EU and the requirements of the EMC directive 2014/30/EU.
CONSIGNES IMPORTANTES
c. La detection de fenêtre ouverte et le programme hebdomadaire peuvent fonctionner simultanémentOpen-window detection and weekly program can work simultaneously (pic. G). Heater will work according the program and set temperature and if room temperature decrease 5-10°C for 10 minutes the appliance will stop and enter in standby mode.
NETTOYAGE ET ENTRETIEN
Control panel operation
- Conecte e ligue pressionando o interruptor principal 0 / I, entre no modo de espera e a tela mostre "S".

natural_image
Simple diagram of two vertical bars inside a circle, labeled 'A' at top (no text or symbols within the shapes)


Brand : Orbegozo
Model : SP 6500
Category : Fan heater