
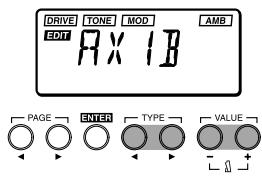
AX1B - Bass Multi-effects KORG - Free user manual and instructions
Find the device manual for free AX1B KORG in PDF.
| Product Type | Multi-effects for bass |
| Brand | KORG |
| Model | AX1B |
| Power Supply | DC 9V (AC adapter sold separately) or 4 AA batteries (not included) |
| Number of Effects | 71 effect types, up to 7 usable simultaneously |
| Preset Programs | 30 user programs (3 banks of 10) |
| Main Functions | Expression pedal, sampling (Sample & Play), chromatic tuner, metronome, amp simulator |
| Input | 6.35 mm jack socket (INPUT) with battery power switch |
| Output | 6.35 mm stereo jack socket (OUTPUT/PHONES) |
| Display | Backlit LCD screen |
| Dimensions | Not specified |
| Weight | Not specified |
| Cleaning | Wipe with a clean, dry cloth; do not use detergents |
| Safety | Avoid direct sunlight, excessive humidity, dust and vibrations |
| Spare parts / Repairability | Contact Korg representative or authorized dealer for any repairs |
| Included Accessories | Instruction manual; AC adapter not included, batteries not included |
Frequently Asked Questions - AX1B KORG
User questions about AX1B KORG
0 question about this device. Answer the ones you know or ask your own.
Ask a new question about this device
Download the instructions for your Bass Multi-effects in PDF format for free! Find your manual AX1B - KORG and take your electronic device back in hand. On this page are published all the documents necessary for the use of your device. AX1B by KORG.
USER MANUAL AX1B KORG
To ensure long, trouble-free operation, please read this manual carefully.
Precautions
Location
Using the unit in the following locations can result in a malfunction.
- In direct sunlight
- Locations of extreme temperature or humidity
- Excessively dusty or dirty locations
- Locations of excessive vibration
Power supply -C-
Please connect the designated AC adaptor to an AC outlet of the correct voltage. Do not connect it to an AC outlet of voltage other than that for which your unit is intended.
Interference with other electrical devices
This product contains a microcomputer. Radios and televisions placed nearby may experience reception interference. Operate this unit at a suitable distance from radios and televisions.
Handling
To avoid breakage, do not apply excessive force to the switches or controls.
Care
If the exterior becomes dirty, wipe it with a clean, dry cloth. Do not use liquid cleaners such as benzene or thinner, or cleaning compounds or flammable polishes.
Keep this manual
After reading this manual, please keep it for later reference.
Keeping foreign matter out of your equipment
- Never set any container with liquid in it near this equipment. If liquid gets into the equipment, it could cause a breakdown, fire, or electrical shock.
- Be careful not to let metal objects get into the equipment. If something does slip into the equipment, unplug the AC adaptor from the wall outlet. Then contact your nearest Korg dealer or the store where the equipment was purchased.
THE FCC REGULATION WARNING
This equipment has been tested and found to comply with the limits for a Class B digital device, pursuant to Part 15 of the FCC Rules. These limits are designed to provide reasonable protection against harmful interference in a residential installation. This equipment generates, uses, and can radiate radio frequency energy and, if not installed and used in accordance with the instructions, may cause harmful interference to radio communications. However, there is no guarantee that interference will not occur in a particular installation. If this equipment does cause harmful interference to radio or television reception, which can be determined by turning the equipment off and on, the user is encouraged to try to correct the interference by one or more of the following measures:
- Reorient or relocate the receiving antenna.
- Increase the separation between the equipment and receiver.
- Connect the equipment into an outlet on a circuit different from that to which the receiver is connected.
- Consult the dealer or an experienced radio/TV technician for help.
Unauthorized changes or modification to this system can void the user's authority to operate this equipment.
CE mark for European Harmonized Standards
CE mark which is attached to our company's products of AC mains operated apparatus until December 31, 1996 means it conforms to EMC Directive (89/336/EEC) and CE mark Directive (93/68/EEC). And, CE mark which is attached after January 1, 1997 means it conforms to EMC Directive (89/336/EEC), CE mark Directive (93/68/EEC) and Low Voltage Directive (73/23/EEC).
Also, CE mark which is attached to our company's products of Battery operated apparatus means it conforms to EMC Directive (89/336/EEC) and CE mark Directive (93/68/EEC).
- Main features 7
- Installing the batteries 7
-
Front and rear panel 7
Front panel 7
Rear Panel 8
LCD display 8 -
Making connections 9
■ Play mode 10
- Let's play the AX1B 10
Turn on the power 10
Adjusting the master level (overall volume) .. 10
Select a program and play 10
- Bypass and mute 10
Bypass 10
Mute 10
3.Tuner 11
Tuning your bass 11
- Changing the calibration 11
4.Metronome 11
-
Start the metronome, and adjust the tempo and output level (volume) 11
-
Using the expression pedal 12
Play using the expression pedal 12
Using the Sample & Play effect 12
1. SAMPL1/2, SCRAT1/2 12
- LOOP1/2 13
Calibrating (adjusting) the expression pedal. 13
■ Edit mode. 14
-
Selecting the parameter to edit 14
-
Editing effect parameters 14
DRIVE 14
TONE 14
- MOD 14
PEDAL 15
AMB. 15
Amp simulator 15
NR 15
- Editing other parameters 15
LEVEL 15
RENAME 15
WRITE 16
- Restoring the preset programs (factory setting programs) 16
Appendice 50
- Effect Parameter list 50
- Preset program parameter list 55
3.Troubleshooting 55 - Specifications 58
■ Introduction 17
Thank you for purchasing the ToneWorks AX1B High Performance Processor. In order to enjoy long and trouble-free use, please read this owner's manual and use the product correctly. Keep this manual in a safe place for future reference.
1. Main features
- 71 types of effect variation are provided, and a maximum of seven effects can be used simultaneously.
- 30 (10 x three banks) user programs are provided in internal memory.
The expression pedal lets you control effects in realtime. - The sample & play function lets you record a phrase that you play (up to 1.8 seconds long), and use the pedal to play it back.
- The IPE (Integrated Parameter Edit) system makes editing easy, so you don't have to deal with large numbers of confusing parameters.
- A metronome is built-in for convenience when practicing alone.
The auto chromatic tuner helps you tune when the unit is bypassed or muted. - The friendly user interface features a liquid crystal display.
- LCD backlit by luminous material -easy viewing in dark locations without wearing down the batteries.
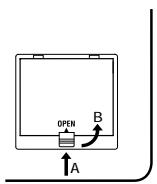
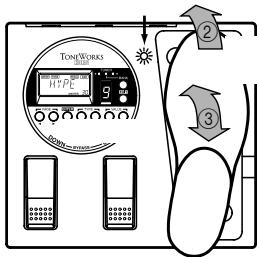
2. Installing the batteries
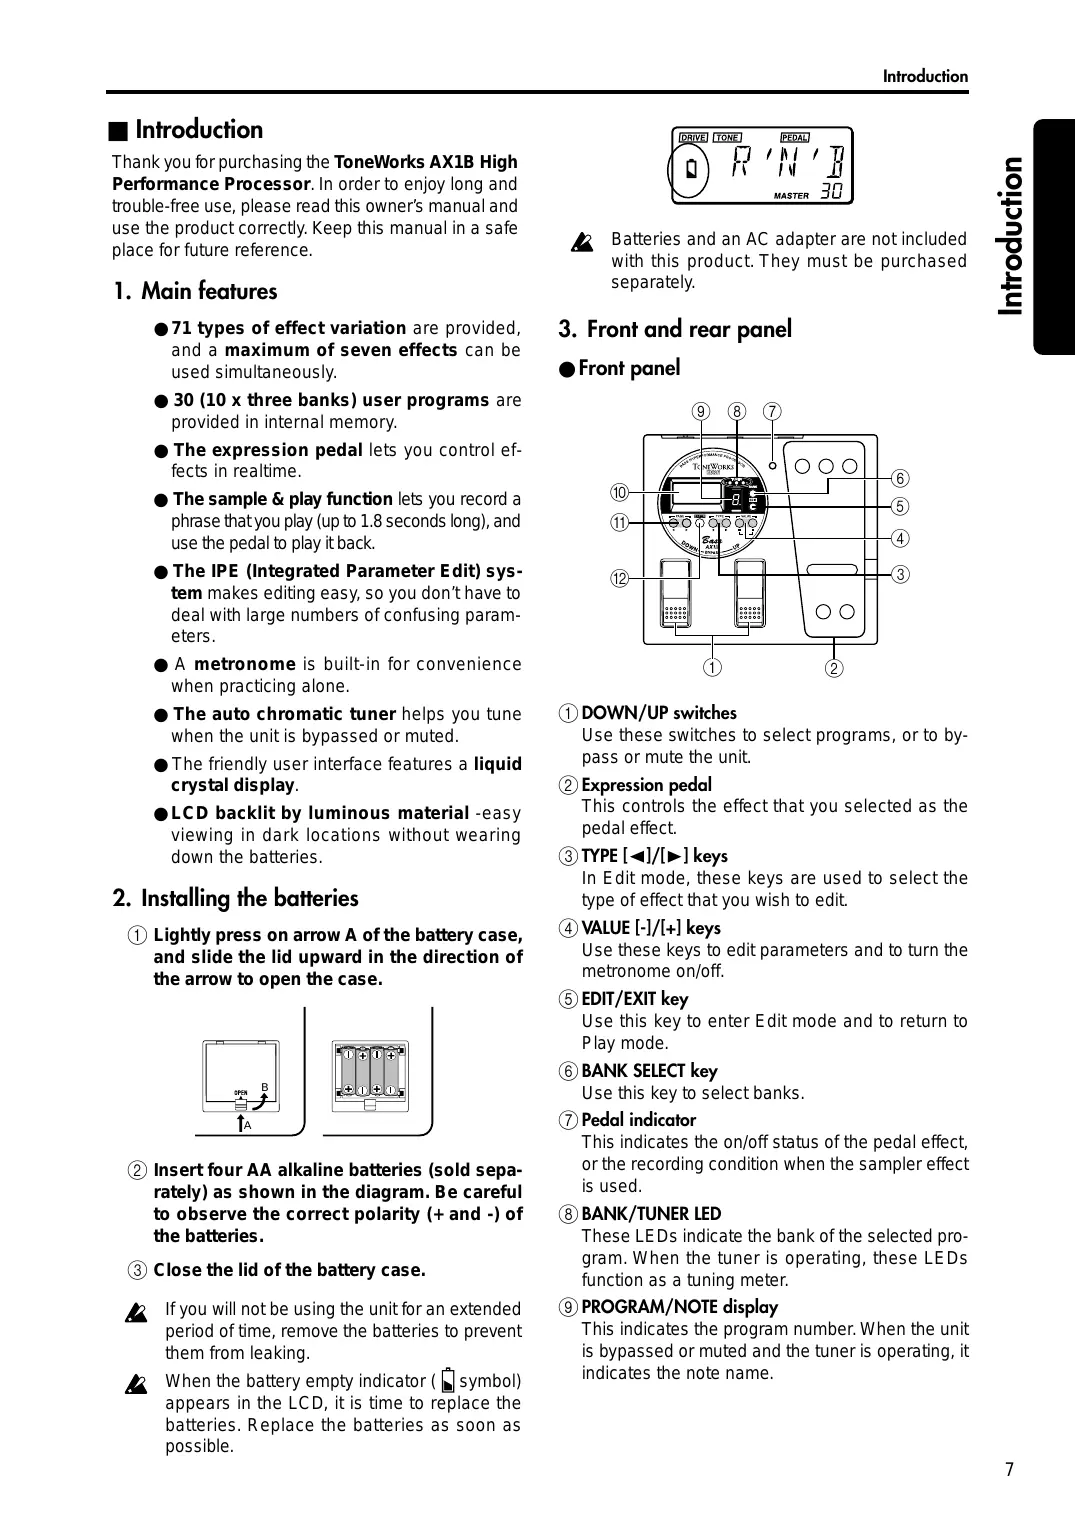
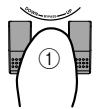
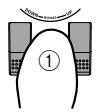
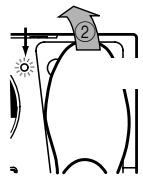
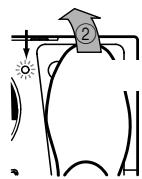
① Lightly press on arrow A of the battery case, and slide the lid upward in the direction of the arrow to open the case.
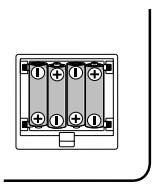
② Insert four AA alkaline batteries (sold separately) as shown in the diagram. Be careful to observe the correct polarity (+ and -) of the batteries.
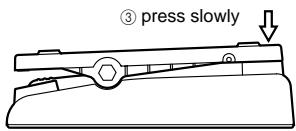
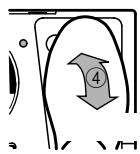
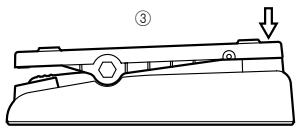
③ Close the lid of the battery case.
If you will not be using the unit for an extended period of time, remove the batteries to prevent them from leaking.
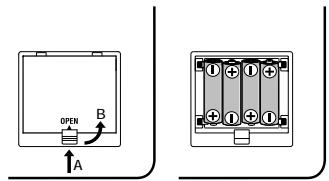
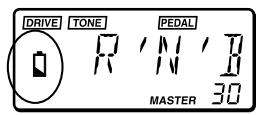
When the battery empty indicator (symbol) appears in the LCD, it is time to replace the batteries. Replace the batteries as soon as possible.
Batteries and an AC adapter are not included with this product. They must be purchased separately.
3. Front and rear panel
- Front panel
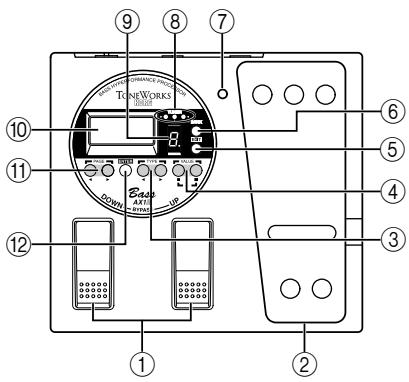
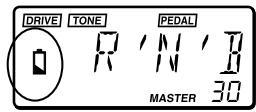
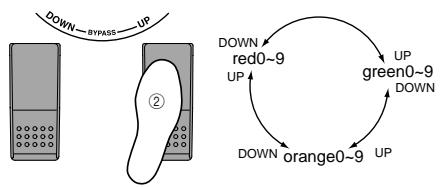
①DOWN/UP switches
Use these switches to select programs, or to bypass or mute the unit.
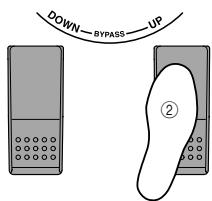
② Expression pedal
This controls the effect that you selected as the pedal effect.
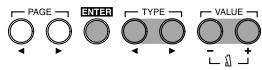
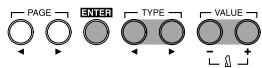
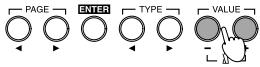
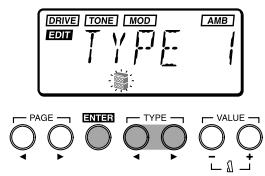
③ TYPE [▲]/[▶] keys
In Edit mode, these keys are used to select the type of effect that you wish to edit.
④ VALUE[-]/[+]keys
Use these keys to edit parameters and to turn the metronome on/off.
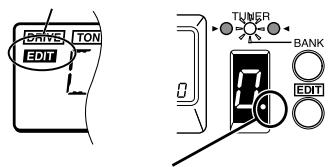
⑤ EDIT/EXIT key
Use this key to enter Edit mode and to return to Play mode.
⑥ BANK SELECT key
Use this key to select banks.
⑦ Pedal indicator
This indicates the on/off status of the pedal effect, or the recording condition when the sampler effect is used.
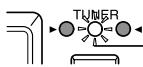
BANK/TUNER LED
These LEDs indicate the bank of the selected program. When the tuner is operating, these LEDs function as a tuning meter.
⑨ PROGRAM/NOTE display
This indicates the program number. When the unit is bypassed or muted and the tuner is operating, it indicates the note name.
⑩ LCD with luminous backlight
Before using the unit in a dark location, expose the LCD to sunlight or fluorescent light.
⑪ PAGE [▲]/[▶] keys
In Edit mode or when the metronome is on, these keys are used to select the parameter that you wish to modify.
⑫ ENTER key
In Edit mode, this key is used to switch the effect on/off, or to write a program.
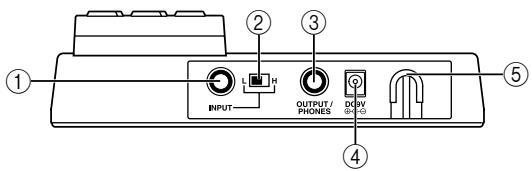
Rear Panel
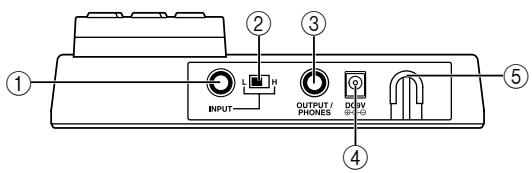
① INPUT jack
If you are using batteries, this jack acts as a power switch. When a cable is connected, the power will be turned on.

Before turning the power on or off, be sure to turn down the volume of any equipment that is connected.
② Input level switch
Set this switch according to the output of your instrument.
H: Suitable for a pickup with a high output level, such as a humbucking pickup
L: Suitable for a pickup with a low output level, such as a single coil pickup
③ OUTPUT/PHONES jack
(4)DC9V
The separately sold AC adapter (DC9V - can be connected here. When this is connected, the power will be turned on automatically.
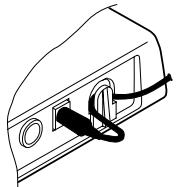
⑤ Cable hook
If the separately sold AC adapter is connected, hook the cable of the AC adapter around this hook as shown below. When removing the cable from the hook, do not apply excessive tension to the cable.

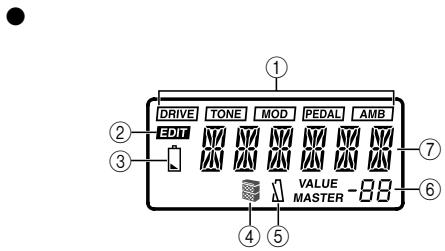
LCD display
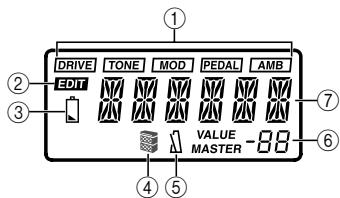
① Effect on/off indicators
These indicate the effects (drive, tone, modulation, pedal, ambiance) which are turned on.
② Edit mode indicator
③ Battery empty indicator
④ Amp simulator on/off indicator
⑤ Metronome on/off indicator
(6) This indicates effect parameter values or the master level.
⑦ This indicates the program name or effect type, etc.
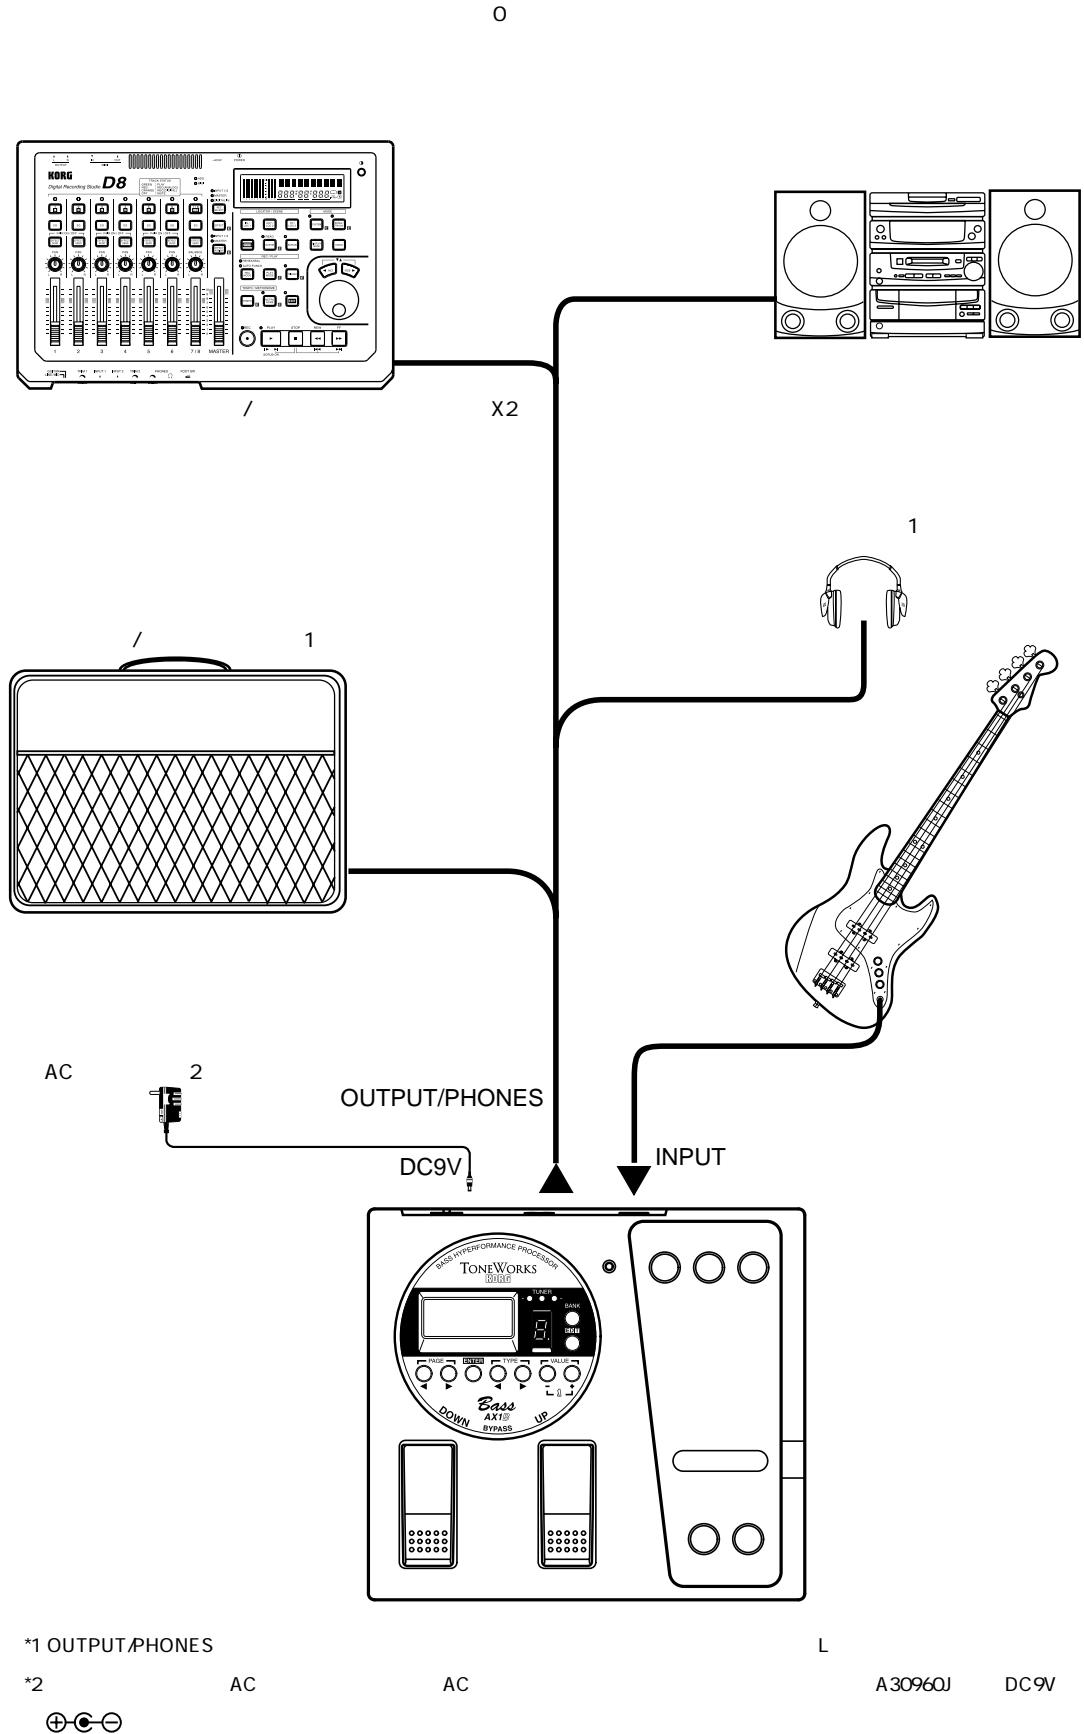
4. Making connections
Before you make connections, be sure to turn off the power of your other equipment, or turn the volume down to zero. Connecting cables are sold separately.
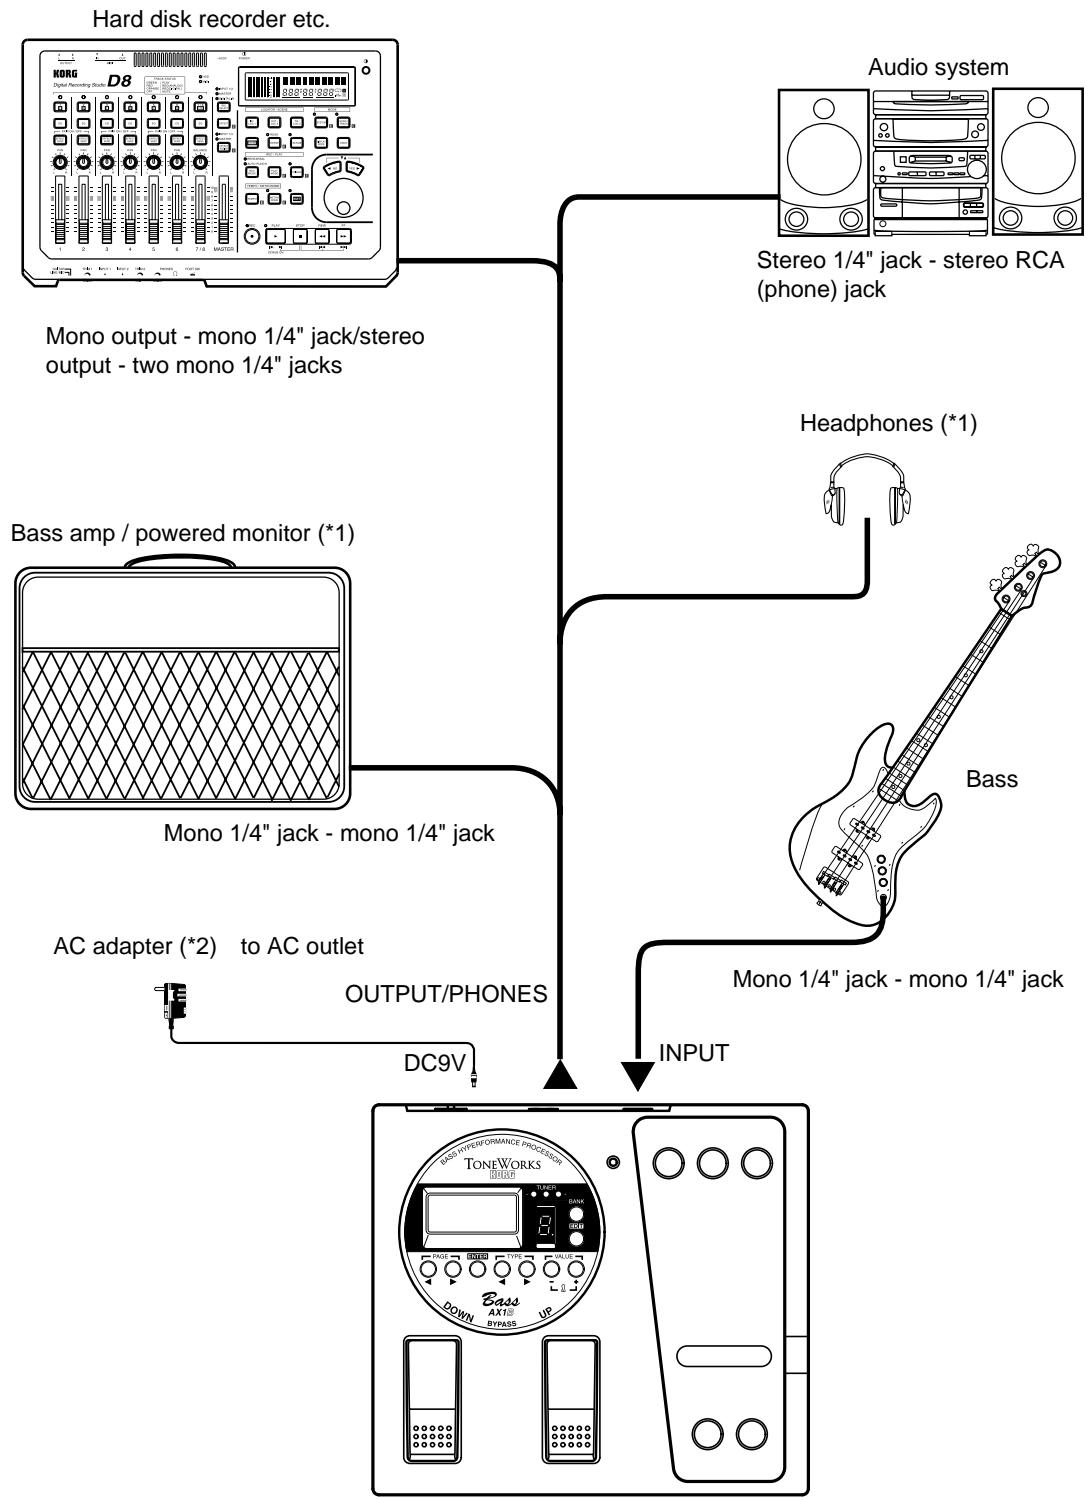
1: The OUTPUT/PHONES jack is a stereo output. If you use a mono phone cable to connect the AX1B to a bass amp, only the L (left) sound will be output.
2: If you use batteries, the AC adapter is not necessary. If you use an AC adapter, be sure to use only the specified model (DC9V⊕-C-).
Play mode
1. Let's play the AX1B
- Turn on the power
The AX1B does not have a power switch. The power will be turned on when one of the following occurs.
- If you are using batteries, the power will be turned on when you connect a mono phone plug cable to the INPUT jack.
If you connect a stereo phone plug cable, the power will not be turned on.
When the power is turned on, the AX1B will automatically be in Play mode.
The program selected at power-on will be the program which had been selected when the power was last turned off.
To maximize the battery life, disconnect the cable from the INPUT jack when you are not using the AX1B.
- If you are using the separately sold AC adapter, the power will be turned on when you connect the AC adapter to an AC outlet.
Before you turn off the power of the AX1B, turn off the power of the other connected equipment.
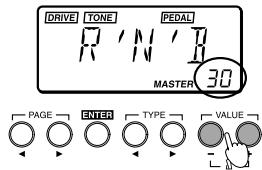
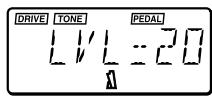
Adjusting the master level (overall volume)
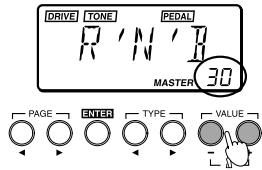
The master level adjusts the final output volume of the AX1B. The master level setting is displayed in Play mode in the lower right of the LCD.
Use the VALUE [+] or [-] keys to adjust the master level. If you continue holding a key, the value will change rapidly.
Normally you will leave the master level at 30 (maximum). The output of the AX1B will be optimal when the master level is set at 30. If the output sound is distorted when the master level is 30 and you play with the AX1B bypassed, reduce the master level so that the sound does not distort.
- Select a program and play
Here's how to select a user program.
① Press the BANK SELECT key to switch the bank between green, orange, and red.
The bank will change each time you press
the key, and the BANK/TUNER LEDs will change from "green - orange - red".
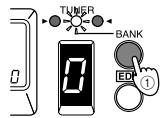
② Press the UP or DOWN switch to select a program number.
The program number is shown in the PROGRAM/NOTE display, and the program name is shown in the LCD.
2. Bypass and mute
When the AX1B is bypassed, no effects will be applied, and the tuner will function. When the AX1B is muted, no sound will be output from the AX1B, and the tuner will function.
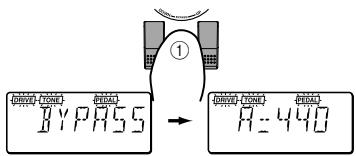
Bypass
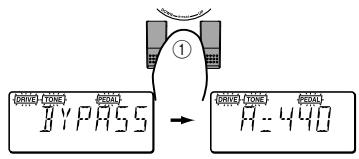
① Simultaneously press the UP and DOWN switches and immediately release them to select Bypass.
The LCD effect on/off indicators will blink, and after displaying "BYPASS" for approximately one second, the tuner calibration will appear.
② Press the UP or DOWN switch to defeat Bypass.
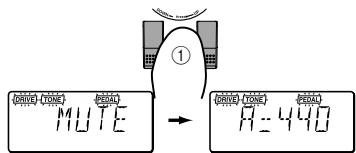
Mute
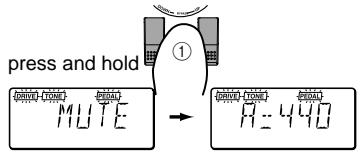
① Simultaneously press the UP and DOWN switches and continue holding them down to mute the output.
While you press the switches, the LCD will indicate "MUTE". When you release the switches, the tuner calibration will appear. The effect on/off indicators will blink in the same way as for Bypass.
② Press the UP or DOWN switch to defeat Mute.
3. Tuner
When the AX1B is bypassed or muted, the tuner will automatically operate. If you mute the AX1B, you will be able to tune without outputting any sound from your amp system etc., which is convenient during an on-stage performance.
Tuning your bass
① Bypass (or mute) the AX1B.
The AX1B will enter bypass or mute mode, and the tuner will operate.

If the metronome is on, the tuner will not operate.
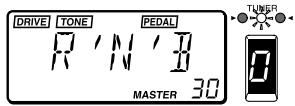
② Play the string that you wish to tune.
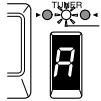
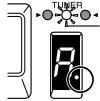
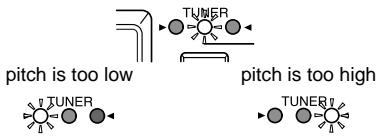
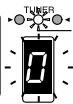
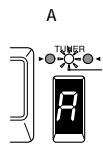
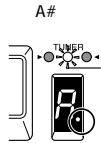
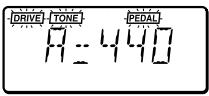
The note name will appear in the PROGRAM/NOTE display. If the note you input is higher (#) than the note name, the decimal point "." of the PROGRAM/NOTE display will light.
When the note name is A.
When the note name is A#.
When tuning, be careful to play only one string at a time.
③ Adjust the tuning head of your bass to the desired pitch desired, so that the PROGRAM/NOTE display shows the correct note name.
④ Make fine adjustments to the tuning of your bass so that only the center LED (green) of the BANK/TUNER LEDs is lit.
⑤ When you are finished tuning, turn off Bypass (or Mute).
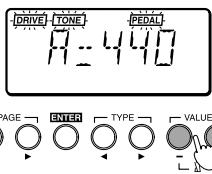
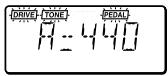
- Changing the calibration
The tuner calibration (the frequency of the standard pitch A) can be adjusted in the range of 438 to 445Hz . You can adjust the calibration when the tuner is operating.
Press the VALUE ([+] or ([-]) keys to change the calibration.
Changes you make to the calibration will be lost when the power is turned off. The next time the power is turned on, the calibration will automatically be reset to 440Hz .
Calibration is not displayed in Edit mode.
4. Metronome
The AX1B provides a metronome that is especially convenient when you are practicing alone.
- Start the metronome, and adjust the tempo and output level (volume)
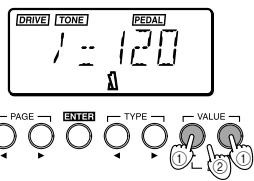
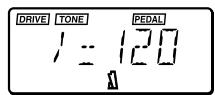
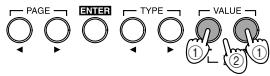
① Simultaneously press the VALUE [+] and [-] keys to start the metronome.
The LCD will indicate the metronome tempo.
Even when the metronome is on, you can still change programs or bypass the AX1B.
It is not possible to turn on the metronome in Edit mode. Return to Play mode and turn it on.
② Press the VALUE [+] or [-] key to adjust the tempo of the metronome.
The metronome tempo can be adjusted in the range of = 40 - 208
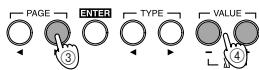
③ Press the PAGE [▶] key once to display the metronome output level.
Pressing the PAGE [ ] key will take you back to the tempo display.
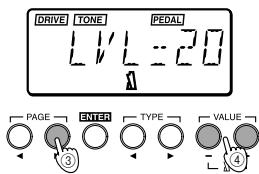
④ Press the VALUE [+] or [-] key to adjust the metronome output level.
The output level of the metronome can be adjusted from 0 to 30.
(5) Once again, press the VALUE [+] and [-] keys simultaneously. The metronome will stop.
The metronome tempo and output level setting will be remembered even if the power is turned off.
5. Using the expression pedal
You can use the expression pedal to control volume, wah, chorus effect, and delay time etc. in realtime. Using the expression pedal, you can control 18 different MOD (modulation) type effects and 13 different AMB (ambiance) type effects. The volume can also be controlled. You can select one of these for use (refer to p.50 "Effect parameter list").
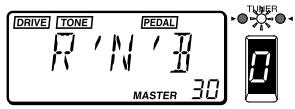
Play using the expression pedal
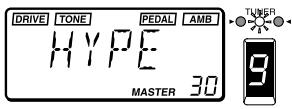
① In Play mode, select a program that allows you to use the expression pedal.
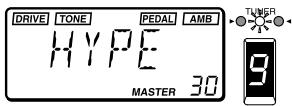
The "PEDAL" indicator at the top of the LCD will light to indicate programs which allow you to use the expression pedal.
For this example, let's select G (green)-9 "HYPE".
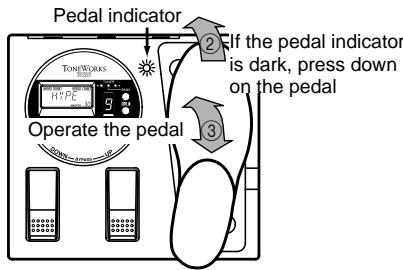
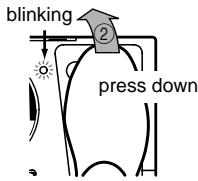
② Make sure that the pedal indicator is lit.
If it is not lit, press down on the expression pedal once to make the pedal indicator light.
When controlling the volume, it is not possible to turn the expression pedal on/off. it will remain on (the pedal indicator lit).
The pedal indicator (i.e., the on/off state of the expression pedal) is not remembered when you write the program in Edit mode.
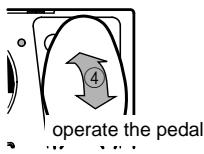
③ Operate the expression pedal while you play your bass.
When you raise and lower the pedal, the output sound will change accordingly.
Do not apply excessive force to the expression pedal. Before you operate the expression pedal, check whether the pedal indicator is lit, and the amount of force actually required for the effect.
Using the Sample & Play effect
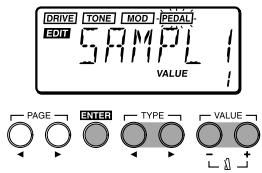
1. SAMPL1/2, SCRAT1/2
The SAMPL1/2 effect types let you use the pedal to playback a recorded phrase.
The SCRAT1/2 effect types let you use the pedal to playback a scratch sound based on a recorded phrase.
① Select a program which uses the Sample & Play effect.
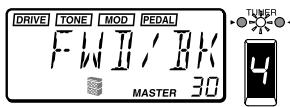
For this example, let's select SAMPL2 R (red)-4 "FWD/BK".
② Press down on the expression pedal to select record-ready mode.
The pedal indicator will light.
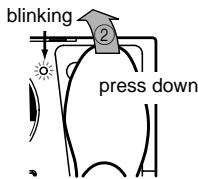
③ Play a phrase on your bass.
When you start playing your bass, recording will begin automatically, and the pedal indicator will light.
When recording ends, the pedal indicator will go dark.
Recording will not begin until your bass exceeds a minimum volume level.
④ Operate the expression pedal.
SAMPL1: The recorded phrase will playback when you press the pedal.
SAMPL2: The recorded phrase will playback when you press the pedal, and will playback in reverse when you return the pedal.
SCRAT1: A scratch sound will playback when you move the pedal. Pedal movement alone will cause the scratch sound to playback.
SCRAT2: A scratch sound will playback when you move the pedal while playing your bass. Pedal movement alone will not produce playback.
The recorded sound will be cleared (erased) when the program is changed, when the AX1B is bypassed or muted, when the effect type is changed or when the power is turned off.
2. LOOP1/2
The LOOP1/2 effect types let you record a phrase while you playback a loop. This allows you to layer your own playing onto the playback.
① Select a program which uses a Sample & Play effect.
For this example, let's select LOOP 1 R (red)-3 "S/LOOP".
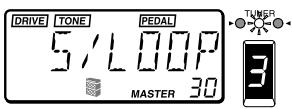
② Press down on the expression pedal deeply to select record-ready mode.
The pedal indicator will light.
③ Play a phrase on your bass.
When you start playing your bass, recording will begin automatically, and the pedal indicator will light.
When recording ends, the pedal indicator will go dark, and the recorded sound will begin playing back as a loop.

Recording will not begin until your bass exceeds a minimum volume level.
④ Operate the expression pedal.

LOOP1: The pedal will control the playback volume.
LOOP2: The pedal will control the length of the loop. The loop will become shorter as you return the pedal, and at the minimum length the loop will not playback at all.

The recorded sound will be cleared (erased) when the program is changed, when the AX1B is bypassed or muted, when the effect type is changed or when the power is turned off.
For SAMPL1/2, the recording time is 0.9 seconds for hi-fi sound or 1.8 seconds for lo-fi sound. For LOOP1/2, the recording time is 0.26-1.8 seconds (in approximately 0.05 second steps). (p.50, "Effect parameters")
The effect type and recording time can be modified in Edit mode. For details refer to p.15, "PEDAL (Expression Pedal)".
- Calibrating (adjusting) the expression pedal
The operating range of the expression pedal can be adjusted. If you find that the sensitivity of the expression pedal is not to your liking, you can perform this adjustment so that the pedal operates ideally. You should perform the adjustment described below if fully advancing the pedal does not produce the maximum effect, or conversely, if it is not possible to turn off the effect fully.
When calibrating the pedal, use your hand to operate the pedal. Accurate adjustment may not be possible if you use your foot to operate the pedal.
① While simultaneously holding down the PAGE [▲] key and VALUE [-] key, turn on the power.
The LCD will indicate "PEDAL" for approximately one second, and then indicate "MIN".
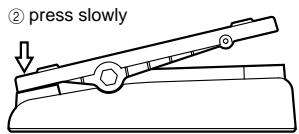
② Slowly move the pedal back. When it stops, take your hand off the pedal and press the VALUE [+] key.
The LCD will change from "MIN" to "MAX".
If you press the VALUE [-] key during the calibration operation, calibration will be halted. The power-on display will appear, and you will be in Play mode.
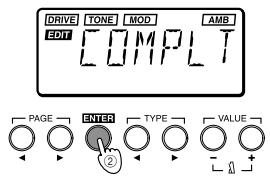
③ Slowly move the pedal forward. When it stops, take your hand off the pedal and press the VALUE [+] key.
The LCD will display "COMPLT" for approximately one second. Then the initial power-on screen will appear, and you will be in Play mode.
After the calibration has been set, check the operation of the pedal at the MIN and MAX positions.
Check the operation by selecting an effect type that has a clearly audible result, such as the effect type VOLUME, and verify that the MIN level is produced for a value of 0.
If the calibration operation fails, the LCD will indicate "ERROR", and you will return to the display before calibration ("MIN"). If repeated attempts are unsuccessful, it is possible that the AX1B has malfunctioned. Contact a Korg service center or your dealer.
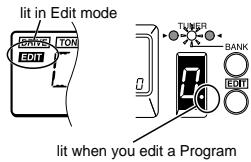
Edit mode
In Edit mode you can make detailed settings for each effect, and modify the program name.
Press the EDIT/EXIT key and the LCD will indicate "EDIT" showing that the AX1B is in Edit mode. Press the EDIT/EXIT key once again and you will return to Play mode. You can edit the on/off setting of each effect, and its parameters. When you edit a program, the ".” (decimal point) of the PROGRAM/NOTE display will light.
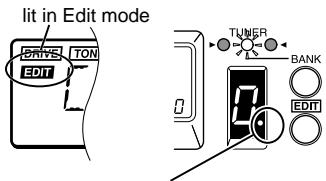
lit when you edit a Program
Edited programs will be lost if you change programs or turn the power off before writing the edited program. While editing, be sure to write your changes frequently. For the Write procedure, refer to p.16 "WRITE".
It is not possible to switch modes when the unit is bypassed (or muted). Defeat bypass (or mute), and then switch the mode.
If you bypass (or mute) the AX1B in Edit mode, it is not possible to perform editing operations. Defeat bypass (or mute) before you continue editing.
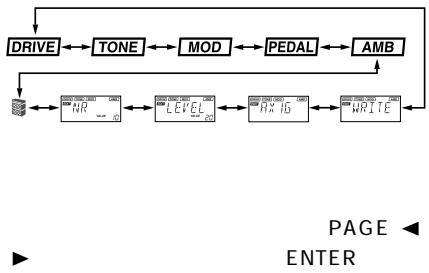
1. Selecting the parameter to edit
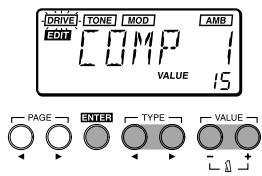
Use the PAGE [<] or [▶] key to select the parameter that you wish to edit.
You can select effects and other parameter in the order shown by the diagram below.
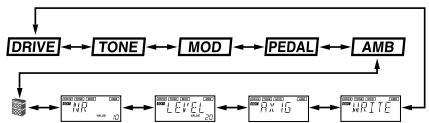
The currently selected effect display will blink. Effects which are turned off cannot be edited. To edit an effect which is turned off, use the PAGE [<] or [>] key to select the effect, and then press the ENTER key to turn on the effect.
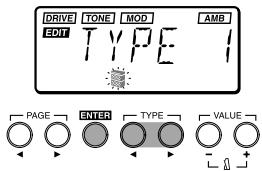
2. Editing effect parameters
To edit a program, you can select an effect type Drive, Tone, Modulation, Pedal, or Ambiance, and modify the value of the parameter assigned to each effect type. For the type of effects which can be selected and the available values of the parameters, refer to the Effect Parameter table (p.50).
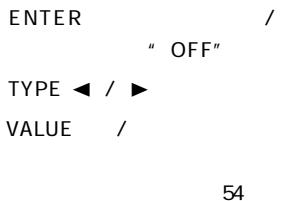
DRIVE
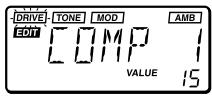
This provides effects which process the tonal character, such as compressor, overdrive, and distortion.
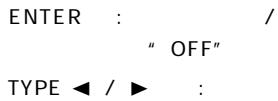
ENTER key: Turn the effect on/off (the type name is displayed when on, and “OFF” when off)
TYPE [] / [] keys: Select the effect type
VALUE [-]/[+] keys: Specify the value of the parameter assigned to each effect type ( 忍 p.50)
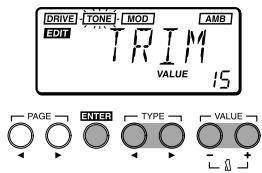
TONE
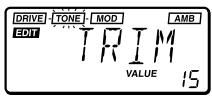
This is a five-band graphic equalizer used to adjust the tonal character.
ENTER key: Equalizer on/off (the type name is displayed when on, and "OFF" when off)
TYPE [▲]/[▶] keys: Switch between TRIM (volume adjustment for the entire equalizer) and frequency
VALUE[-]/[+] keys: Set the level or gain
Depending on the settings, the output volume may be too low, or the sound may distort (clip). If this occurs, adjust TRIM to an appropriate volume level.
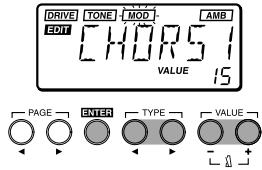
- MOD
This provides modulation-type effects such as chorus, flanger, and phaser.
ENTER key: Turn the effect on/off (the type name is displayed when on, and “OFF” when off)
TYPE [] / [] keys: Select the effect type
VALUE [-]/[+] keys: Specify the value of the parameter assigned to each effect type (p.51-52)
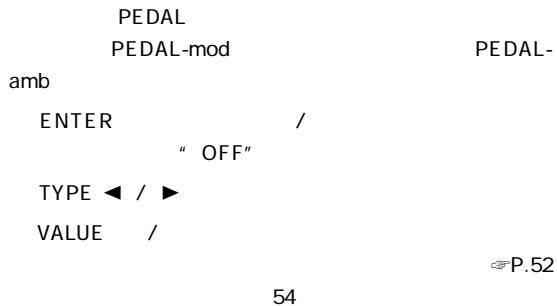
PEDAL
This provides effects which can be controlled using the expression pedal. PEDAL provides volume pedal, PEDAL-mod (modulation-type effects), and PEDAL-amb (ambiance-type effects).
ENTER key: Turn the effect on/off (the type name is displayed when on, and “OFF” when off)
TYPE [] / [] keys: Select the effect type
VALUE [-]/[+] keys: Specify the value of the parameter assigned to each effect type ( 忍 p.52-54)
PEDAL-mod cannot be used simultaneously with MOD effects. One or the other effect will be turned off. Also, if the MOD effect is automatically turned off, turning PEDAL off or selecting an effect other than PEDAL-mod will automatically turn it on once again. Similarly, PEDAL-amb and AMB effects cannot be used simultaneously.
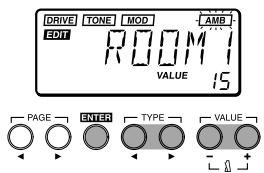
AMB
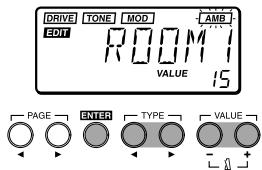
This provides spatial effects such as reverb and delay.
ENTER key: Turn the effect on/off (the type name is displayed when on, and "OFF" when off)
TYPE [] / [] keys: Select the effect type
VALUE [-]/[+] keys: Specify the value of the parameter assigned to each effect type( 一 ^ 一 p.54)
- Amp simulator
The amp simulator simulates the acoustical characteristics of an amplifier.
It is particularly effective when you are not using an amp (i.e., when you are using headphones or connecting directly to a mixer, hard-disk recorder, or audio system etc.).
ENTER key: Turn the effect on/off (the type name is displayed when on, and “OFF” when off)
TYPE [<] keys: Select the type of amp
NR
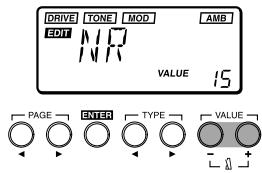
Adjust the depth of noise reduction. Raising this value will produce more noise reduction. Normally you will adjust this so that you do not hear obtrusive noise when the strings are lightly muted.
VALUE [-]/[+] keys: Adjust the depth of noise reduction
It is not possible to turn noise reduction off.
If this value is raised excessively, the sound may be cut off prematurely, depending on the device that is connected. If this occurs, reduce the value.
3. Editing other parameters
LEVEL
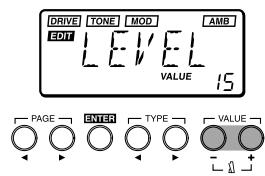
Adjust the level for each program.
Depending on the DRIVE or TONE settings, the output sound may be distorted (clipped), so adjust this parameter so that the sound is not distorted.
VALUE [-]/[+] keys: Set the level accordingly
The volume of each program (each tone) will change depending on the bass you use. Adjust the level that is appropriate for your bass.
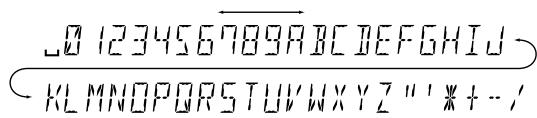
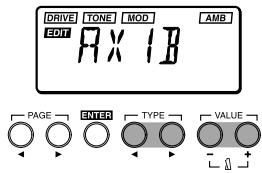
RENAME
Here you can specify a name for each program.
TYPE [] / [] key: Select the character location (the selected character will blink)
VALUE [-]/[+] keys: Select the character
Simultaneously pressing [+] and [-] will insert a space (blank).
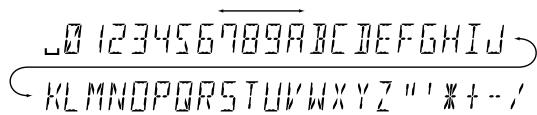
The following characters and symbols are available.
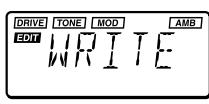
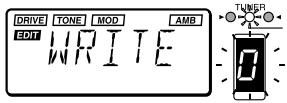
WRITE
A program you edited or created can be written (stored) into memory.
When the Write operation is selected, the LCD will indicate "WRITE", and the program number will blink in the PROGRAM/NOTE display.
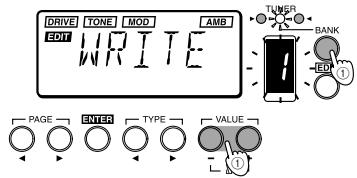
1 Use the BANK SELECT key or the VALUE [+ [-] keys to select the bank and program number into which you wish to write the settings. When you select the writing destination, the program name of that writing destination will be displayed briefly.

Before you write an edited program onto another program number, make sure that it is OK to overwrite that program.
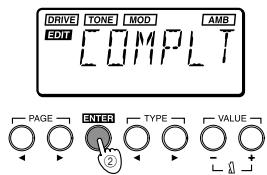
② Press the ENTER key to write the program. When you write the program, the LCD will indicate "COMPLT" for approximately one second. If you decide not to write, press the PAGE [▲] or [▶] keys to select another display, and the Write operation will be canceled.
OENTER key: Execute the Write operation
OBANK SELECT key: Select the bank
VALUE[-]/[+] keys: Select the program number
4. Restoring the preset programs (factory setting programs)
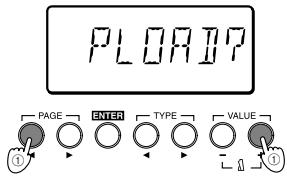
① While simultaneously pressing the PAGE [<] and VALUE [+] keys, turn on the power.
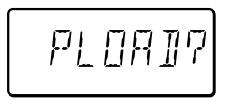
The LCD will indicate "PLOAD?"
If you press the VALUE [-] key, you will jump to the initial power-on display without loading the preset programs, and the AX1B will enter Play mode.
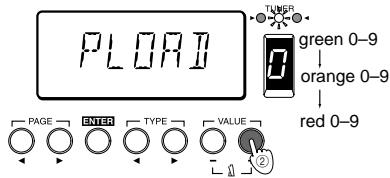
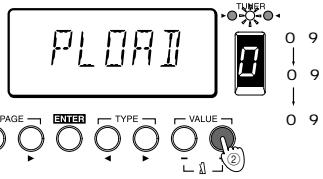
② Press the VALUE ([+] key.
The LCD will change to "PLOAD," and the preset programs will be loaded. While the data is being loaded, the bank and program number of the program currently being loaded will be shown by the BANK/TUNER LEDs and in the PROGRAM/NOTE display.
When loading is complete, the LCD will indicate "COMPLT" for approximately one second. Then the initial power-on display will appear, and the AX1B will enter Play mode.
Never turn off the power while this operation is in progress.
Introduction
IPE Integrated Parameter Edit
①DOWN/UP
②
③ TYPE /
④ VALUE /
⑤ EDIT/EXIT
⑥ BANK SELECT
⑦
BANK/TUNER LED
⑨ PROGRAM/NOTE
(10)
LCD
2.
①
A
B
② 3
4
(3)


ENTER


① INPUT

②
H
L
③ OUTPUT/PHONES
④ DC9V
AC A30960J DC9V ⑥-
(5)
AC AC
①
)
(2)
(3)
(4)
(5)
(6)
4.
1. AX1B
AX1B
INPUT

② UP DOWN
PROGRAMNOTE


2.
AX1B
AX1B INPUT
AC
AC
AC
① UP DOWN

AX1B
" BYPASS"
VALUE
AX1B
② UP DOWN
30
30
30 AX1B
AX1B
① UP DOWN
MUTE
② UP DOWN
① BANKSELECT
3.
4.
AX1B
①
②
PROGRAMNOTE
③
④ BANK/TUNER LED
PROGRAM/NOTE
LED


(5)
445Hz
A
438
VALUE
440Hz
① VALUE
② VALUE

③ PAGE
1

④ VALUE
0 30
⑤ VALUE
5.


1

②
1


(3)


1.SAMPL1/2, SCRAT1/2
SAMPL1/2
SCRAT1/2
①
SAMPLE2 R -4" FWD/BK

②
(3)

4
SAMPL1:
SAMPL2:
SCRAT1:
SCRAT2:

2. LOOP1/2
LOOP1/2
1
LOOP 1 R -3' S/LOOP"

②
③

(4)

LOOP1:
LOOP2

| SAMPL1/2 | 0.9 | ||
| 1.8 | LOOP1/2 | ||
| 26 | 1.8 | 0.05 | P:50 |
P.48 PEDAL


MIN MAX
VALUE


1 "COMPLT"
VOLUME MIN

"ERROR
“MIN" "ERROR

DRIVE
P.50
P.49 WRITE
TONE


1.

TRIM
MOD

2.

52

PEDAL

PEDAL-mod MOD

- AMB
Amp simulator
HDR

NR
VALUE

3.

LEVEL
DRIVE TONE
VALUE

RENAME
TYPE /
VALUE
WRITE
"WRITE"
PRO-
GRAMNOTE
① BANKSELECT
VALUE

② ENTER

ENTER
VALUE /
BANK SELECT
4.

PAGE

VALUE
" PLOAD?"
VALUE

② VALUE
PLOAD
BANK/TUNER LED PROGRAMNOTE
COMPLT
1


Appendices Appendices Anhänge
1. Effect Parameter list List des paramètres des effets Effektparameterliste
Effect type: Effect type (use TYPE [] / [] keys to select) Type d'effet (utiliser les touches TYPE [] / [] pour les selectionner) Effekttyp (mit TYPE [] / [] -Tasten wahlen) Effect type TYPE / VALUE: Value (use VALUE [-]/[+] keys to specify) Valeur (utiliser les touches VALUE [-]/[+] pour spécifique lavaleur) Wert (mit VALUE [-]/[+] -Tasten bestimmen) Value VALUE /
DRIVE
| Effect type | VALUE | |
| COMP 1 | Vintage-type compressor compresseur de type vintage „klassischer“ Kompressor | Sensitivity (1...30) Sensibilité (1...30) Empfindlichkeit (1...30) 1...30 |
| COMP 2 | Compressor with a clear high-frequency range compresseur à haute fréquence claire Kompressor mit klarem Höhenbereich | |
| EXCT | Exciter an effect which adds sparkle to the sound and enhances its definition excitateur. Un effet qui ajoute de la brillance au son et accroît sa définition. Der Exciter-Effekt verleht dem Klang mehr Glanz und verbessert die Sächfe seiner Konturen | Effect level (1...30) Niveau de l'effet (1...30) Effektpegel (1...30) 1...30 |
| DYNAEX | Dyna-exciter an exciter which applies more deeply as youplay your bass more strongly excitateur dynamique. Un excitateur dont la puissance est accrue lorsque vous jouez votre basse plus fort. Der Dyna-Exciter wird um so stärker angewandt, je härter Sie ihren Baß spielen | |
| OVDRV 1 | overdrive1 Surmultiplication1. Overdrive1 1 | Gain (1...30) Gain (1...30) Verständung (1...30) 1...30 |
| OVDRV 2 | overdrive2 Surmultiplication2. Overdrive2 2 | |
| DIST | Distortion Distorsion Distortion | |
| OCTAVE | Effect that creates a sound one octave lower *Playing chords may cause malfunction Effet qui create un son d'une octave plus bas *Le jeu d'accords risque de causer une perte de netteté Erzeugt einen 1 Oktave tieferen Klang *Bei Akkorden gehen vielfeicht etwas Klarheit verloren | Effect level (1...30) Niveau de l'effet (1...30) Effektpegel (1...30) 1...30 |
| OCTDST | Distortion which adds an ultra-low note one octave below distorsion qui ajoute une note très BASSE de l'octave inférieure. Dieser Distortion-Effekt fegt 1 Oktave tiefer liegende TONE hinzu. | Gain (1...30) Gain (1...30) Verständung (1...30) 1...30 |
TONE
| Effect type | VALUE | |
| TRIM | Trim (overall volume adjustment of the entire equalizer) Trim (modification générale du volume de tout l'égaliseur) TRIM: Mit Trim stellen Sie die Lautstärke des gesamten Equalizers ein | Level (1...30) Niveau (1...30) Pegel (1...30) 1...30 |
| 80Hz | Graphic equalizer 80 Hz égaliseur graphique de 80 Hz Ein graphischer EQ bei 80Hz. EQ 80HZ | Gain (-15...15) Gain (-15...15) Verständigung (-15...15) -15...15 |
| 250Hz | Graphic equalizer 250 Hz égaliseur graphique de 250 Hz Ein graphischer EQ bei 250Hz. EQ 250HZ | |
| 550Hz | Graphic equalizer 550 Hz égaliseur graphique de 550 Hz Ein graphischer EQ bei 550Hz. EQ 550HZ | |
| 1600Hz | Graphic equalizer 1600 Hzégaliseur graphique de 1600HzEin graphischer EQ bei 1600Hz.EQ 1600HZ | Gain (-15...15)Gain (-15...15)Verständigung (-15...15)-15...15 |
| 3550Hz | Graphic equalizer 3550 Hzégaliseur graphique de 3550 HzEin graphischer EQ bei 3550Hz.EQ 3550HZ | |
MOD
| Effect type | VALUE | |
| CHORS 1 | Chorus with adjustable depthChorus avec intensité régiable.Chorus mit regelbarer Stärke | Effect depth (1...30)Intensité de l'effet (1...30)Effektstärke (1...30)1...30 |
| CHORS 2 | Doubling chorus with adjustable depthDouble chorus avec intensité régiable.Dopplungs-Chorus mit regelbarer Stärke | |
| CHORS 3 | Chorus with adjustable speedChorus avec vitesse régiable.Chorus mit regelbarer Geschwindigkeit | Modulation speed (1...30)Vitesse de modulation (1...30)Modulationsgeschwindigkeit(1...30)1...30 |
| CHORS 4 | Chorus with effect sound output to left and direct sound to rightChorus avec sortie du son avec effet à gauche et sortie du son direct à droite.Chorus mit Effektsignal auf linkem und Direktsignal auf rechtem Kanal | |
| VIB | VibratoVibrato.Vibrato | |
| FLANG1, 2, 3 | Flanger (FLANG1, 2, 3 differ in feedback amount)Flanger (Les effets FLANG 1, 2, 3 différent dans l'importance du feedback).Flanger (FLANG1, 2, 3 untersiden sich in der Feedbackstärke)FLANG1, 2, 3 | |
| FLANG 4 | Flanger with inverted feedbackFlanger avec feedback inversé.Flanger mit umgekehrtem Feedback | |
| PHASE 1 | Vintage-type phaserPhaser de type ancien.Vintage-Phaser | |
| PHASE 2 | Phaser with strong peaksPhaser avec des pointes fortes.Phaser mit starken Wellenspitzen | |
| PHASE 3 | PHASE1 with inverted feedbackPHASE1 avec feedback inversé.PHASE1 mit umgekehrtem FeedbackPHASE1 | |
| PHASE 4 | PHASE2 with inverted feedbackPHASE2 avec feedback inversé.PHASE2 mit umgekehrtem FeedbackPHASE2 | |
| TREM 1 | Tremolo (LFO: sine wave )Trémolo (LFO: onde sinusoidale )Tremolo (LFO: Sinuswelle )LFO : . | |
| TREM 2 | Tremolo (LFO: square wave )Trémolo (LFO: onde carrée )Tremolo (LFO: Rechteckwelle )LFO : . | |
| PAN 1 | Auto pan (LFO: sine wave )Positionnément panoramicique automatique (LFO: onde sinusoidale )Auto-Pan (LFO: Sinuswelle )LFO : . | |
| PAN 2 | Auto pan (LFO: square wave )Positionnément panoramicique automatique (LFO: onde carrée )Auto-Pan (LFO: Rechteckwelle )LFO : . | |
| DEFRET | Effect which simulates the sound of a fretless basseffect qui simule le son d'uneasse sans touchettes.Dieser Effekt simuliert den Klang eines bundlosen Basses. | Modulation depth (1...30)Intensité de la modulation (1...30)Modulationsstärke (1...30)1...30 |
| AWAH1, 2 | Auto wah (AWAH1, 2 differ in Effect depth)Wah automatique (AWAH1, 2 différent dans le intensité de l'effet).Auto-Wah (AWAH1, 2 untersichen sich in der Effektstärke)AWAH1 2 | Sensitivity (1...30)Sensibilité (1...30)Empfindlichkeit (1...30)1...30 |
| AWAH3, 4 | Auto wah in opposite direction from AWAH1, 2 (AWAH3, 4 differ in Effect depth)Wah automatique dans le sens opposé à AWAH1, 2 (AWAH3, 4 différent dans le intensité de l'effet).Auto-Wah in entgegenegasetzter Entwicklung von AWAH1, 2 (AWAH1, 2 untersichen sich in der Effektstärke)AWAH1 AWAH3 4 | |
| PRCWAH | Percussive auto wahwah automatique de percussionDies ist ein Perkinsiver Auto-Wah-Effekt. | |
| FIXWAH | Fixed wahWah fixe.Fest eingestelltes Wah | Frequency (1...30)Fréquence (1...30)Frequenz (1...30)1...30 |
| RANDM1, 2, 3 | Random step filter which moves randomly (RANDOM1, 2, 3 differ in speed)Filtre à pas aléatoire qui se déplace de manière aléatoire ( Les effets RANDOM1, 2, 3 différents dans les bandes de fréquences).Random Step Filter, das sich zufallsgesteuert bewegt ( RANDOM1, 2, 3 untersichen sich in den Frenz-bändern).RANDM1 2 3 | Modulation speed (1...30)Vitesse de modulation (1...30)Modulationsgeschwindigkeit(1...30)1...30 |
| PITCH1, 2, 3 | Pitch shifter (PITCH1, 2, 3 differ in the level of the effect sound)Pitch shifter (PITCH1, 2, 3 différent dans le niveau du son de l'effet).Pitch Shifter (PITCH1, 2, 3 untersichen sich im Pegel des Effektklangs)PITCH1 2 3 | Amount of pitch shiftImportance du changement de hauteurStärke der Tonhöhenverschiebung(-24, -17, -12...-1,-d, +d, +1...+12, +19, +24) |
| PITCH4 | Pitch shifter with effect sound and dry sound split left, rightPitch shifter avec son de l'effet et son direct partages entre la gauche et la droite.Pitch Shifter mit Effektsignal auf linkem und Direktsignal auf rechem Kanal | |
PEDAL
| Effect type | VALUE | |
| VOLUME | Volume pedal Pédale de volume. Volumenpedal | Minimum level (0..30) Niveau minimum (0..30) Minimalpegel (0..30) 0..30 |
If the AX1B does not operate as you expect, please check the following points first. If this does not resolve the problem, contact your dealer or a Korg service center.
1. Power does not turn on.
- Are batteries installed? Alternatively, is the AC adapter connected to an AC outlet? (p.9, 10)
- Is a mono phone plug cable connected to the INPUT jack? (p.9, 10)
- Are your bass, amp and/or headphones connected to the correct jacks? (p.9)
- Is your amp turned on and set correctly?
- Are any cables broken?
- Is the master level of the AX1B set to "1" or to a low level? (p.10)
- Is the program level of the AX1B set to "1" or to a low level? (p.15)
- Is the volume of your instrument turned down?
- Is the AX1B muted?
Pas de son
3. No effect is applied
- Is the AX1B bypassed? (p.10)
- Are the effects used in the program turned on?
Pas d'effet audible
4. Metronome does not work
- Is the AX1B in Play mode? The metronome does not function in Edit mode.
- Is the metronome output level set to "0"? (p.11)
5. Pedal does not work
- Have you selected a program which uses an expression pedal effect?(p.12)
Check whether the "PEDAL" icon in the LCD is lit.
6. Cannot write (LCD indicates "ERROR")
- Did you turn the power off while the preset programs were being loaded?
Reload the preset programs. (p.16)