
BUCKINGHAM 20680-56 - Kettle RUSSELL HOBBS - Free user manual and instructions
Find the device manual for free BUCKINGHAM 20680-56 RUSSELL HOBBS in PDF.
| Product type | Programmable drip coffee maker |
| Brand | RUSSELL HOBBS |
| Model | BUCKINGHAM 20680-56 |
| Power supply | 220-240 V / 50-60 Hz |
| Power | 900-1100 W (estimated) |
| Water tank capacity | Up to 12 cups (estimated) |
| Filter type | Cone filter #4 |
| Functions | Delayed programming, 1-4 cup function, auto shut-off after 1 hour, warming plate |
| Display | LCD screen with 24h clock |
| Indicator light | Solid blue (0-30 min), flashing blue (30-60 min) |
| Carafe | Glass with lid and handle |
| Filter holder | Removable, dishwasher safe (top rack) |
| Cleaning | Exterior: damp cloth; removable parts: dishwasher or hand wash |
| Descaling | Self-cleaning function with white vinegar (every 1 to 4 weeks depending on water hardness) |
| Safety | Hot surfaces, auto shut-off, short cord, supervision children ≥8 years old |
| Package contents | Coffee maker, carafe, filter holder, insert, coffee scoop |
| Recycling | Electrical appliance must not be thrown in household waste |
| Warranty | Manufacturer's warranty (details in the manual) |
Frequently Asked Questions - BUCKINGHAM 20680-56 RUSSELL HOBBS
User questions about BUCKINGHAM 20680-56 RUSSELL HOBBS
0 question about this device. Answer the ones you know or ask your own.
Ask a new question about this device
Download the instructions for your Kettle in PDF format for free! Find your manual BUCKINGHAM 20680-56 - RUSSELL HOBBS and take your electronic device back in hand. On this page are published all the documents necessary for the use of your device. BUCKINGHAM 20680-56 by RUSSELL HOBBS.
USER MANUAL BUCKINGHAM 20680-56 RUSSELL HOBBS
http://www.russellhobbs.com/ifu/550979
http://www.russellhobbs.com/ifu/550979
| figurer | 5 filterholder | 9 varmeplate |
| 1 feste | 6 papirfilter #4 | 10 statuslampe |
| 2 deksel | (fölger ikke med) | 11族自治县 |
| 3 vann | 7 skyv | oppvaskmakin – overste |
| 4 sprekk | 8 kanne | hylle |
BEHANDLING OG VEDLIKEHOLD
http://www.russellhobbs.com/ifu/550979
BAXKbIE MEPbl IPEIOCTOPOXHOCTN
CleyuTe OCHOBHbIM HNCTpyKcIyAM No 6e3OpaChOCTn, BkJIouyAa CJeDuOuIe:
1 IcnoJIb3OBaHne daHHoro yCTpoiCTBa deTbMn CTapIe 8 JeT, IuIaMn C OrpaHnueHHbIMN fN3NueCKmN, ceHCOPNbIMN uIN yMCTBeHHbIMN cNoC06HOCTaMn, HeIOCTaTKOM ONbITa uIN 3HaHni DOpyCKaETcR npu ycIOBnN KOHTpOJr uIN HCTpyKtaxa IN OCO3HaHnR CBa3aHHbIX PNCKOB.
-Детамзапpeшенинграль сустюйтВOM.
OuicTkU n o6cIyJxIBaHne yCTpOiCTBa MOrTy BbIIOJIHЯTb DeTn CTapSe 8 let npu ycIobuHa6JIoJeHna B3PocIbIMn.
XpaHnTe yCTpOJCTBO N Ka6eJIb B HeIOCTyINHom dIa DeTei Do 8 JeT MeCTe.
He norpykaite np6op B KjndKoCTb.
2 Ecni Ka6eIb IOBpeJxdeH, OH DoJIkeH 6bITb 3aMeHeN npOn3BOiTeJIeM, cepBnCHbIM aReHTOM nIIN dpYrIM KbAIIuΦIuCIPoBAHHbIM IINcO M dIy IpeDOTBpaUeHn ONaCHOCTN.
3 YctaHaBnBaIte npi60 npHa yctOuHByIO, rOpu3oHTaIbHyIO, TepMOCTOkyIO NOBepxHOCTb.
4 UcTpoIcTBn KabeN He eoJXHbI paCNoJaTaBcHa KaPio pa6Oeero cToJa.
5 IcnoIb3yIte ToIbKO npInHaIeXHIOCTn HacAKn OT npOn3BOIDTeJIa.
6 Пибор He может pa60taTb OT BHeшнero TaMepa nIIN dNCTaHcNoHHo CnCTeMbI ynpabLeHn.
7 He ncpoJIb3yIte np6Op, ecn OH noBpeJdeH nn pa6OtaeT c nepe6Oamn.
TOnbKOДЯ6blTOBOrNcNoJb3OBaHn
IPEEDIPEBbIM IcIIOJIb3OBAHHEM IPIIBOPA
HanoJIHnItepe3epByap BOoIdo MaKcMaJIbHOI OTMeTkn (max) IN BkJIIOUHTe np6Op 6e3 Kofoe.
HANOJIHEHNE
1 Chmmtpe3epByap cnoctabKn.
2 IcnoIb3yIte pyky, yTO6bI OTKpbITb KpbIuKy upe3epByap.
3 HanonHnTe BOn, He MeHee 2 uAaKam, Ho He npeBbIaIte MaKcMaIbHoI OTMeTKn (max).
4 PackpoTe 6ymaxhbln oInbTp #4 n Iomecntte erO B depkaTeIb oIbTpa.
5 Tomecnte B φnIbTp 1 nopuzu MOJTOrO KoΦe Ha KaKdyU yauKy
6 3akpoIte KpbIshky.
7 YctaHOBnte rpaΦnHa nOCTaBky.
BKJIIOUOHEHNE
8 BCTaBbTe BnJIky Bpo3ETy.
9Ipn6op n3daCT 3BykoBoi cnHn. Ha nncnnee 3amraet cnppa 12:00.
PINIROTOBJEHNE KOFE
10 He npHnMaJTe yka3aHHoe BpemBa BVnMaHne.
11 EcIn BbI rTOBnTE MeHee 5 uAweK KoE, HaxMnTe KhONKy 142
12 Ha dncnlee noBHTc3Haoyok 1-4V.
13 Θa ΦyHKZnI 3aMeEDJIeT pnoecc pnproTOBHeHnI, n KoΦe nOlyuaeTcra TakoJ Xe KpeNoCTn, KaN I KoΦe n3 PONHO rpaΦnHa.
14 Haxmnte KhONky. KhONka 3acBETTcra.
15 Yepe3 HeKoTOpoe BpeM KoFe haHneT KaNaTb B pe3epByap.
16 Korda 3TO npoI3OienTe, noIcTaBka 6yIeT noIepKINBaTb pe3epByap TeIbIM. PpI6Op n3dact 3ByKOBoi cnHnA.
17 Ecln HuyxHO ocTaHOBnTb pa6Otu KoΦeBaPkn BO BpeM npoceca npuToOBneHnKoΦe, HaxMnte KOnKy
NHNIKATOP COCTOHNIA
18 LbET INDnKaTopa IN3MeHHTcT, NOKa3bIbA, YTO KoOfe ROTOBO.
CINHn = nprirotoblenne / 0-30 MmN c hauJaI nprirotoblenna
CINHn (MnraUoui) = 30-60 mHn c hauJa npriROBneHna
ABTOMATNUCHECKOE OTKJIIOUEHNE
19 Yepe3 1 yac noDcTaBkBa BbIKIouHITcTc.
20 Ecni npoiJeT 6oJIe e Yaca, XmMueCeKne I3MeHeHnKoFeiHOJ NaCTbI HaCyHT BInrTb Ha apomat. Lyuwe BCero 6yTe TBInrT coepxIMoe n 3aBapntb HOBoe.
OTJNOXHTb PNPIGOTOBLEHNE KOΦE
21 Yacb6ydyT coxpaHrTB CBOE 3NaueHne, noka KofoBapka OTKlUOeHa OTCen.
22 ⅢkaJa BpeMeHn - 24-ycobra.
23 YctaHOBInTe npabINbHoe BpeMn Ha yacax.
3AHTA OKPYKAIOU CPEbI
ДяТOrO yTo6bI n36eKaTb yrpo3 ДЯЗ IDOPOBЯ И OKpykaIOSeI cpeDbI n3-3a BpeDhbIX BeueCTB B 3JIeKTPnueCcknx I 3JIeKTPoHHbIX TOBaPax, pIn6Opby, OTMeueHHbIe DaHHbIM CmBOJOM, DJIJIHKbI yTIIN3uPoBAtbcr He KaK He OTCopTuPOBaHHbIe 6blTOBbIe OTXObI, a KaK BOCCTaHOBJeHHbIe INI IOBTOphO INCNoJIb3OBAHHbIe.

nHCTpyKcnn (Pycckn) - Bolee noJpO6hIe yKa3aHnI MOxHO hAIITn HaHaem Be6-caTe:
http://www.russellhobbs.com/ifu/550979
http://www.russellhobbs.com/ifu/550979
http://www.russellhobbs.com/ifu/550979
PIPINAO THN IPOTH XPHSE
TeuTo To doxio vepou xpi TnV evdEIG n OaO unc max kai oet e oIeupyia tn ouokun Xwipc va npooofoeT Kape.
IIAHHPQsH
1 AnouakpuveTnV kavata ano Tny eotia.
2 XpnoiouoioTe n ia va avoieTe to kaakikai va qavei to doxieio vepou.
3 i toulambdaioTov 2 vερο, aλλ áxι nανw ano TnV evδεiEη στaθμnc max.
4 AvoiTe eva xapTivo pItpo ap. 4 kai tono theote to eOa styn thKn pItpou.
5 Bálté 1 koutaia aλεομένου καφέ μεσα στο φιλτρο γι καθε φλιτάνι
http://www.russellhobbs.com/ifu/550979
http://www.russellhobbs.com/ifu/550979
CINHbO = BapeHe / 0-30 MInHyTu OT BapeHeTo
CINHbO (Mnraa) = 30-60 MmHytn OT BapeHeTo
ABTOMATNUHO N3KJIIOUBAHE
19 Cnei 1 yac KOTIOHbT ue ce n3KInoun.
20 Ako octabnte kafoTo B npOdbJIxHeHne Ha MHoro IOBue O TeEIN Yac, XmMnHn IpOMeHN B TeUHOCTTA ue 3aOnuHaT da npOMeHr apomata My. Hau-Do6pe e da ro n3xBpIInTe i da HappaBNTe HOBA KaHa C kafoe.
KAΦE 3A ΠΟ-KbCHO
21 YacobnKbT 3a3n HactpoKnte cn, DOKaTo KafeMaunHaTa He 6bJe n3KnIouheHa.
22 YacOBHnKbTe c 24-ycob foPmTa.
23 HactpoIte yacOBHnKa Ha CbOTBeTHnA cac.
- I3no3BaIte 6yToHInTe 3a yac n MInHyTa (h n min), 3a da HactpOnTe ToUHO yacbT mInHyTInTe.
24 HacptoTe TaMepa Ha yaca, B KOITo JxelaTe da 3aNoUHe BapeHeTo.
- HatncheTe 6yToH ①.
- I3no3BaIte 6yToHInTe 3a yac n MInHyTa (h n min), 3a da HactpOnTe ToUHO yacbT mHyTInTe.
Ako He HataChete 6yToH h nn 6yToH min B pamKnte Ha 5 cekyni, kafeMaunHaTa ige Ce BbpHe KbM "HopMaIeH" peXIM n ige ce nokaxe yacbt. Tp6Ba da HataChete 6yToH n da 3anOuHete OTHaUJIo.
25 Ako kejalaTe da npirrotbnte no-malko ot 5 caa nn Kafe, Hatachete 6ytoHa 14.
26 1-4V ce nokazBa Ha dncnpej.
AKTUBPAHA
27 HaTnchTe n Ocbo6oJeTe 6yToH AUTO.
28 Ha ekpaHa Ⅲe Ce n3VeJe AUTO.
29 Korato 3aJaTe KOJIuYeCTBOTO, CBETBa 6yToHbT (I) n MaJInHaTa 3a KaFe 3aOnOyBa da pa6OtN.
30 3a da Hynipate TaMepa npedn KafoTo da 3anoHne da ce Bapn, OTHOBO HaTNCHTe 6yToHa.
3ANOMHARE
31 B cnuyai ye 3a6paBNTe KaKBO BpeMe CTe 3aJaIi, HATNCHe Te 3aApbXTe 6yToHa 巧 , CneI KOeTO rO OCBo6oJeTe.
bP3A yAUSA
32 MojkeTe Da OTCpaHnTE KaHaTa NO BcKaO BpeMe. 3a Da npEdoTbPaTne npEiNbAhe OT NocTabKaTa 3a ΦnIbP, NoCTaBeTe KaHaTa OTHOBo Ha KOTNoHa B paMKIne Ha OKOJ0 20 CekyHdN.
IO-CNJIHO BAPEHE
33 Ako cTe peuHnI da npiroTbIte 5 nIIN NOBuey aUH, MoKeTe da nI3NoJI3BaTe fYHKcIraTa 1-4V, 3a neKo yCUNBaHe Ha BapeHeto. PpOCTo HATNCHE Te BeDhJx 6yToHa
341-4V ce nokaBa Ha dncnJeA.
TPNJN IN IODAPbXKA
35 N3KJIIOUeTe ypea OT KOHTaKaTaNrO OCTaBeTe Da N3CTInHe.
36 N3tpbckaiTe cbdbpkaHneTo OT NOCTaBkata 3a φnIITbp B KΦaTa 3a 6oKnyK.
37Поунсте Вьншине NOВьрхноп Ha урета с Влжна Кьрna.
38 HaTnchHepebukataB3aHaTa YactHa KaNaKa Ha KaHaTa,HaI dpbXkKaTa,3aJa OTBOpUte.
39 N3mnTe Ha pbKa KaHaTa n NOCTaKaTa 3a fNtbp.
Mоже дa Изми-te TeиЧастВ Ворнота Рпuctа К МИЯлнаТа МшиHa.
41 OTHOBO NOCTABeTe NOCTABKaTa 3a ΦιπTp, KaTo CLOTbT COUn KbM KaNaKa.
42 3aTbOpTe KaNaKa Ido HaTnChHe, 3a Da ce 3aKlHouN.
CAMONOYNCCTBAHE
40 3a Да п dedOTbpaTInTe NaTpynBaHToHa KOTJIeN KaMbK, ИЗПОЛЗВaIte ФунКцЯТа 3a CamOnOuHcTBAHe NOHe BeDньЖ MeceHNo B paIOhn C HopMaJHa BOda I NO-YeCTo B paIOhn C TBbPdA BOda.
41 YBepeTe ce, ye KuxHraTa e do6pe npoBeTpena, Tb' KaTo npi HaqrBaHe oUeTbT MnpuIe HnprnaTHO.
42 Ta3n onepaunia 1e BN oTHeme 45-60 mHytn.
43 Cmecete 6 yaun 6yol ouet c 4 yaun BOa B kaHata.
44 IV3cInTe CmecTa B pe3epBoapa.
45 3aTbOpTe Kanaka.
46 OTHOBO NOCTaBeTe KaHaTa Ha KOTJIOHa.
47 BkIIOUeTe ⅢeNceJaB3axpaHbauaON KOHTaKT.
48 Hatnchete 6yToH
49 ce noka3Ba Ha dncnpea.
50 Yact OT cmeCTa npOHnKBa B pe3epBOapa. OcTaHaJaT a yact ce hakncBa B 6oJIepa 3a 30 MInHyTI, CJIeD KOEt CbIoo npOHnKBa.
51 B kpa ha onepaunra, ypebT n3daBa 3BykoB cnHan, cIeD KoETo ce n3KnIOUba.
52 HanbIHeTe pe3epBoaapdo 6o3NaeHneTo max n pynche Te ypea 6e3 Kafe.
53 NobTopeTe 2 nnn 3 nbTn,doKaTo MnpuMaTa Ha oUeTa He n3ue3He.
PpOdykTn Poi rapaHcIy, BbPHaTn C NOBpeDn B pe3yIaT OT HaTpynBaHe Ha KOTJIeH KaMbK, POnJIexKaT Ha TAKca 3a peMOHT.

ОПАЗBAHE HA OKOЛHATA CPEДА
3a da ce n36erHaT ekOJoruHn 3dpabHn npo6JeMn npaHn HauHne Ha onaCHn cy6ctaHcN B eEeKTPnuCeckIne N eEeKTPoHNn CTOKn, ypeINte, o603NaeHn C To3n CmBOJ, He Tp8Ba Da ce n3xBpIaT 3aeHOn C HecOpTnpaHn O6uHcN OTpaIbU, a CneBda Ca Ce BbpHaT o6paTHO, da ce n3PON3BaT OTHOBu NII peuNKlnpaT.

nHCTpykCn (BbIrapcKn) - no-IOpO6Hn INCTpyKcHn IMa Ha Na HauTa ye6 cTpaHnca: http://www.russellhobbs.com/ifu/550979
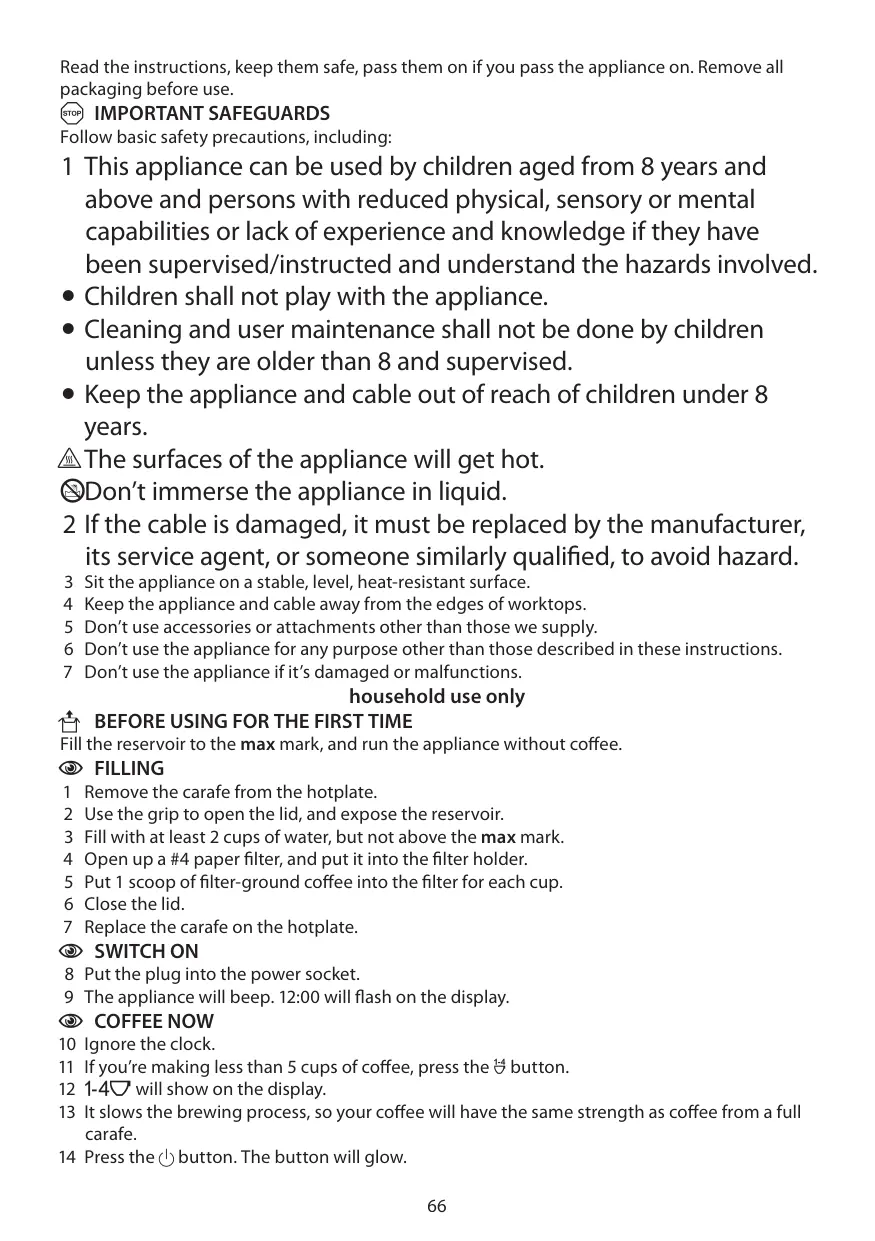
Read the instructions, keep them safe, pass them on if you pass the appliance on. Remove all packaging before use.

IMPORTANT SAFEGUARDS
Follow basic safety precautions, including:
1 This appliance can be used by children aged from 8 years and above and persons with reduced physical, sensory or mental capabilities or lack of experience and knowledge if they have been supervised/instructed and understand the hazards involved.
- Children shall not play with the appliance.
- Cleaning and user maintenance shall not be done by children unless they are older than 8 and supervised.
- Keep the appliance and cable out of reach of children under 8 years.
The surfaces of the appliance will get hot.

Don't immerse the appliance in liquid.
2 If the cable is damaged, it must be replaced by the manufacturer, its service agent, or someone similarly qualified, to avoid hazard.
3 Sit the appliance on a stable, level, heat-resistant surface.
4 Keep the appliance and cable away from the edges of worktops.
5 Don't use accessories or attachments other than those we supply.
6 Don't use the appliance for any purpose other than those described in these instructions.
7 Don't use the appliance if it's damaged or malfunctions.
household use only

BEFORE USING FOR THE FIRST TIME
Fill the reservoir to the max mark, and run the appliance without coffee.

FILLING
1 Remove the carafe from the hotplate.
2 Use the grip to open the lid, and expose the reservoir.
3 Fill with at least 2 cups of water, but not above the max mark.
4 Open up a #4 paper filter, and put it into the filter holder.
5 Put 1 scoop of filter-ground coffee into the filter for each cup.
6 Close the lid.
7 Replace the carafe on the hotplate.

SWITCH ON
8 Put the plug into the power socket.
9 The appliance will beep. 12:00 will flash on the display.

COFFEE NOW
10 Ignore the clock.
11 If you're making less than 5 cups of coffee, press the button.
12 1-4 will show on the display.
13 It slows the brewing process, so your coffee will have the same strength as coffee from a full carafe.
14 Press the button. The button will glow.
| diagrams | 5 filter holder | 9 hotplate |
| 1 grip | 6 paper filter #4 | 10 status light |
| 2 lid | (not supplied) | 11 scoop |
| 3 water | 7 press | dishwasher – top rack |
| 4 slot | 8 carafe |
15 Shortly afterwards, coffee will start to drip into the carafe.
16 When it's done, the hotplate will keep the carafe warm. The appliance will beep.
17 If you want to stop the coffee maker while it's brewing, press the button.
STATUS LIGHT
18 The status light will change colour to show how fresh the coffee is.
blue = brewing / 0-30 minutes since brewing
blue (flashing) = 30-60 minutes since brewing
AUTO SHUT-OFF
19 After 1 hour, the hotplate will switch off.
20 If left for much more than an hour, chemical changes in the coffee liquor start to affect the flavour. It's best to pour it away and make a fresh pot.
COFFEE LATER
21 The clock will retain its settings until the coffee maker is unplugged.
22 It's a 24 hour clock.
23 Set the clock to the correct time.
- Use the h and min buttons to set the correct hour and minute.
24 Set the timer to the time you want to start brewing.
- Press the button.
- Use the h and min buttons to set the correct hour and minute.
If you don't press either the h or m buttons within 5 seconds, the coffee maker will revert to "normal", and the time will show. You'll have to press the button, and start again.
25 If you're making less than 5 cups of coffee, press the button.
26 1-4 will show on the display.
ACTIVATION
27 Press the AUTO button.
28 AUTO will show on the display.
29 At the time you set, the button will glow, and the coffee maker will start up.
30 To cancel the timer before brewing has started, press the button again.
REMEMBER
31 If you forget what time you've set it to, press and hold the button, then release it.
A QUICK CUP
32 You can remove the carafe at any time. To prevent the filter holder overflowing, replace the carafe on the hotplate within about 20 seconds.
A STRONGER BREW
33 If you're making 5 cups or more, you may use the 1 - 4 function to make the brew slightly stronger. Just press the button once.
34 1-4 will show on the display.
CARE AND MAINTENANCE
35 Unplug the appliance and let it cool.
36 Tip the contents of the filter holder into the bin.
37 Clean the outside surfaces of the appliance with a damp cloth.
38 Press the lever at the rear of the carafe lid, above the handle, to open the carafe lid.
39 Hand wash the carafe and filter holder.
You may wash these parts in the top rack of a dishwasher.
41 Turn the filter holder to bring the slot in its rim towards the lid, then lower the filter holder back into the coffee maker.
42 Close the lid, and press down to lock it.
SELF CLEAN
40 To prevent scale building up, use the self clean function at least monthly in normal water areas, more often in hard water areas.
41 Ensure the kitchen is well ventilated, as heating vinegar causes an unpleasant smell.
42 This operation will take 45-60 minutes.
43 Mix 6 cups of white vinegar with 4 cups of water in the carafe.
44 Pour the mixture into the reservoir.
45 Close the lid.
46 Replace the carafe on the hotplate.
47 Put the plug into the power socket.
48 Press the button.
49 will show on the display.
50 Part of the mixture will come through. The remainder will soak in the boiler for 30 minutes, then come through.
51 At the end of the operation, the appliance will beep, then switch itself off.
52 Fill the reservoir to the max mark, and run the appliance without coffee.
53 Do this 2 or 3 times, till the vinegar smell has gone.
Products returned under guarantee with faults due to scale will be subject to a repair charge.

ENVIRONMENTAL PROTECTION
To avoid environmental and health problems due to hazardous substances in electrical and electronic goods, appliances marked with this symbol mustn't be disposed of with unsorted municipal waste, but recovered, reused, or recycled.

instructions - more detailed instructions are available on our website: http://www.russellhobbs.com/ifu/550979
31
20 1
G
1-40 5 5
14
1-4 33
aIaIaIgaiIeI
. 45 jil gil jil 34
a 35
AaBaaabba jll 36
. 1111111111111111111111111111111111111
Jdla Jda Jda 138
jglg jglj 0jll JlJj 0j 0jll jjll jjll 39
.
alilai jai baiol ai bail 40
j 41
Jusall
42
60-45 aoe 43
6 144
45
146
J 47
48
0 jil 1e biol 49
50
30 30 30 30 30 30 30 30 30 30 30 30 30 30 30 30 30 30 30 30 30 30 30 30 30 30 30 30 30 30 30 30 30 30 51
Aaaii i 1jai jaii aaii 52
.000000000000000000000000000000000000000000000000000000
54
y 1
solo lei oic
alglgcllglalj
Jaa aaii aalal min aaii h aaii
aill 100000000000000000000000000000000000000000000000000000
④ j( a - b) = 0
.
15 5 5 (a) min j j (acl) h j b
J 1 J 1 1 1 1 1 1 1 1 1 1 1 1 1 1 1 1 1 1 1 1 1 1 1 1 1 1 1 1 1 1 1 1
14 jll bc biai iogai 5 n jao
14 jll 15 25
Jie 1
.AUTO 26
AutaO 27
.8gall 124 125
.0j 0o jll bc biai, jaiill ci jia jil jie 29
sii
jiall Jala 4a 4 4 jiall 4
5
.156 16
7
- BEHANDLING OG VEDLIKEHOLD
- BAXKbIE MEPbl IPEIOCTOPOXHOCTN
- TOnbKOДЯ6blTOBOrNcNoJb3OBaHn
- IPEEDIPEBbIM IcIIOJIb3OBAHHEM IPIIBOPA
- HANOJIHEHNE
- BKJIIOUOHEHNE
- PINIROTOBJEHNE KOFE
- NHNIKATOP COCTOHNIA
- ABTOMATNUCHECKOE OTKJIIOUEHNE
- OTJNOXHTb PNPIGOTOBLEHNE KOΦE
- 3AHTA OKPYKAIOU CPEbI
- PIPINAO THN IPOTH XPHSE
- IIAHHPQsH
- ABTOMATNUHO N3KJIIOUBAHE
- KAΦE 3A ΠΟ-KbCHO
- AKTUBPAHA
- 3ANOMHARE
- bP3A yAUSA
- IO-CNJIHO BAPEHE
- TPNJN IN IODAPbXKA
- CAMONOYNCCTBAHE
- ОПАЗBAHE HA OKOЛHATA CPEДА
- IMPORTANT SAFEGUARDS
- Don't immerse the appliance in liquid.
- household use only
- BEFORE USING FOR THE FIRST TIME
- FILLING
- SWITCH ON
- COFFEE NOW
- STATUS LIGHT
- AUTO SHUT-OFF
- COFFEE LATER
- ACTIVATION
- REMEMBER
- A QUICK CUP
- A STRONGER BREW
- CARE AND MAINTENANCE
- SELF CLEAN
- ENVIRONMENTAL PROTECTION
Brand : RUSSELL HOBBS
Model : BUCKINGHAM 20680-56
Category : Kettle