
D420 - Robot vacuum Symbo - Free user manual and instructions
Find the device manual for free D420 Symbo in PDF.


| Product Type | Robot Vacuum Cleaner |
| Brand | Symbo |
| Model | D420 |
| Dimensions (Diameter x Height) | 32 cm x 8.5 cm |
| Weight | 3.2 kg |
| Battery Type | Lithium-Ion |
| Battery Capacity | 2600 mAh |
| Run Time | 120 minutes |
| Charging Time | 4 hours |
| Dustbin Capacity | 400 ml |
| Suction Power | 2000 Pa |
| Cleaning Modes | Auto, Edge, Spot, Scheduled |
| Sensors | Cliff, Bumper, Anti-Drop |
| Connectivity | Manual Control via Remote |
| Filter Type | HEPA |
| Brush Type | Main Roller Brush + Side Brushes |
| Maintenance | Clean brushes and filter regularly; replace every 3-6 months |
| Safety Features | Auto-stop on lift, bumpers, cliff sensors |
| Spare Parts Available | Filter, brush kit, battery, charging dock |
| Reparability | User-replaceable parts; instructions in manual |
| General Information | Designed for daily vacuuming on hard floors and low-pile carpets |
Frequently Asked Questions - D420 Symbo
User questions about D420 Symbo
0 question about this device. Answer the ones you know or ask your own.
Ask a new question about this device
Download the instructions for your Robot vacuum in PDF format for free! Find your manual D420 - Symbo and take your electronic device back in hand. On this page are published all the documents necessary for the use of your device. D420 by Symbo.
USER MANUAL D420 Symbo
| Česky |
| Polski |
| Slovensky |
| English |
| Deutsch |
| Romanian |
1.


POPIS ZAŘÍZENÍ

Přední nárazník
POPIS ZAŘÍZENÍ
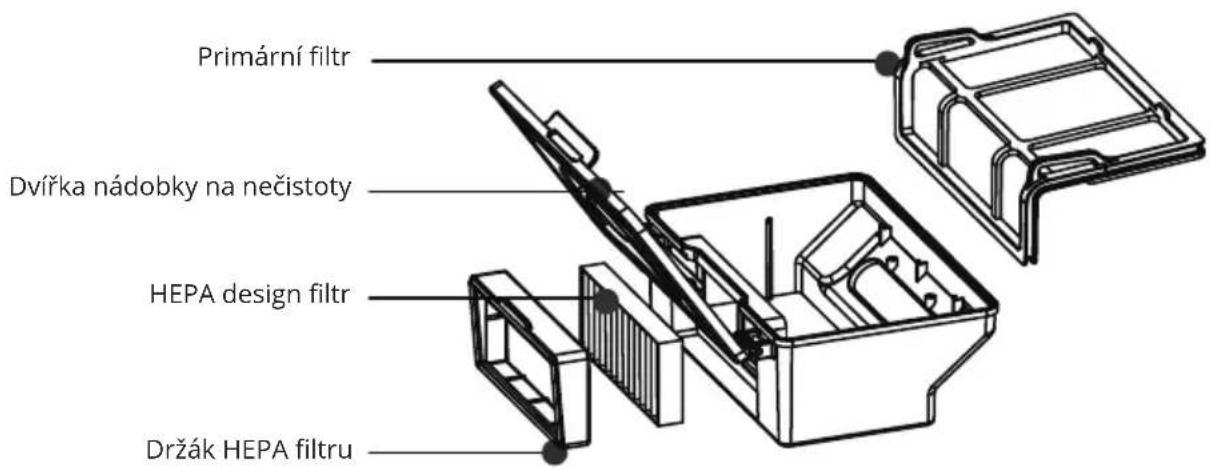
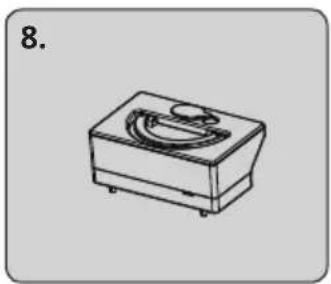
Odpadní nádobka
A
B


CHYBOVÉ HLÁŠKY A STAVOVÉ DIODY
Chybové hlášky
www.symbo.eu
1.





OPIS URZĄDZENIA

Zderzak przedni
OPIS URZĄDZENIA
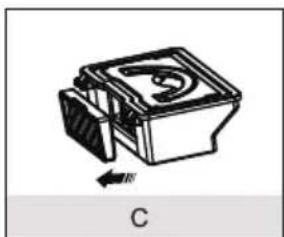
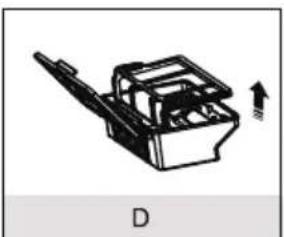
Odpadowy pojemnik

A
B




KOMUNIKATY BŁĘDÓW A DIODY STANU
Komunikaty błędu
www.symbo.eu
1.






POPIS ZARIADENIA

Predný nárazník
POPIS ZARIADENIA
Odpadová nádobka

A

B

WORKING AREA - oblast v ktorej robot upratuje.
FORBIDDEN AREA - oblast v ktorej robot nebude upratovat.
OBSLUHA A POUŽÍVANIE
Mopovanie



Čistenie senzorov a kontaktov
CHYBOVÉ HLÁŠKY A STAVOVÉ DIODY
Chybové hlášky
www.symbo.eu
TABLE OF CONTENTS
1.
Important Safety Instructions
Important Safety Instructions .... 1
2.
Package Contents, Product Diagram and Technical Specification
Included with Product 2
Product Diagram.... 3-5
Technical Specification 6
3.
Product Operation
How to get started....7
Starting up, Pause, Sleeping 8
Scheduling, Electrowall....8
Mopping 9
4.
Cleaning and Maintenance
Side Brushes Cleaning.... 10
Dust Bin and Filters Cleaning 10
Cliff Sensors Cleaning.... 10
5.
Troubleshooting
Error code sheet.... 11
6.
Recycling and Disposal
Recycling and Disposal 12
IMPORTANT SAFETY INSTRUCTIONS
BEFORE USING THIS PRODUCT, PLEASE READ THE FOLLOWING SAFETY INSTRUCTIONS AND FOLLOW ALL NORMAL SAFETY PRECAUTIONS. ANY OPERATIONS THAT OPPOSE TO DESCRIPTIONS IN THIS USER MANUAL MAY LEAD TO HARM TO HUMAN OR THIS PRODUCT.
- Only the certified technician may disassemble the product. Users are not allowed to disassemble or repair the product.
- Only use the adapter provided by the factory. Using other un-matched adapter may cause electric shock, fire or product damage.
- Do not touch the power cord, plug or adapter when your hands are wet.
- Do not make clothes or part of a body drawn into the product's wheels.
- Do not make this product close to cigarette, lighter, match or any flammables.
- If the product is needed to clean, clean it after charging is stopped.
- Do not over-bend the power cord or pressure the power cord with heavy or sharp objects.
- This product is used only indoors, do not use it outdoors.
- Do not sit on top of this product or attach an object on the top of it.
- Do not use this product in wet or moist environment (any environment with liquid).
- Before use, remove all the damageable objects (textile, glass, lighting, etc) and objects that could get caught in the brushes or suck passage(cords, dothing, papers, drapes, blinds, etc).
- Do no place this product where it is easy to drop off (tables, chairs, etc).
- Tum off the power switch during transportation or when you don't need to use this product for a long time.
- Before use, check whether adapter and outlet are properly connected. Or else the battery may be damaged.
- To avoid tripping, inform all the people in the house when this product is working.
- Do not use this product when dust bin is full.
- Use this product in temperature from -10" to 50"(centigrade degree).
- Do not place this product in high-temperature environment.
- The battery must be removed from the product before it is scrapped.
- The product must be disconnected from the supply mains when removing the battery.
- The battery is to be disposed of safety.
- Use factory-authorized battery only, do not use unmatched battery.

WARNING
Do not incinerate the Appliance even it is severely damaged. The battery can explode in a fire. The Appliance must be used in accordance with the directions in this Instruction Manual. Product manufacturer cannot be held liable or responsible for any damages or injuries caused by improper use.
INCLUDED WITH PRODUCT
| Description D410 / D420 | ||
| 1. Main body 1 pc | ||
| 2. Charging home base 1 pc | ||
| 3. Remote control 1 pc | ||
| 4. Adapter 1 pc | ||
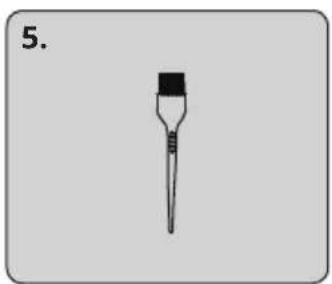
| 5. Cleaning tool 1 pc | ||
| 6. Extra side brushes 2 pcs | ||
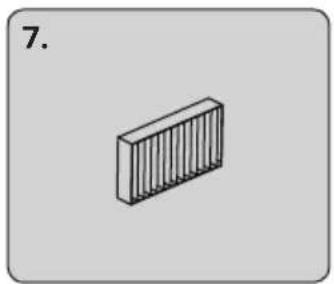
| 7. Extra HEPA filter 1 pc | ||
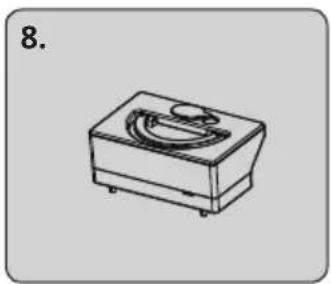
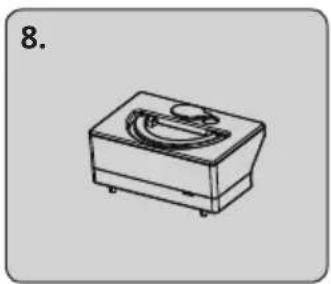
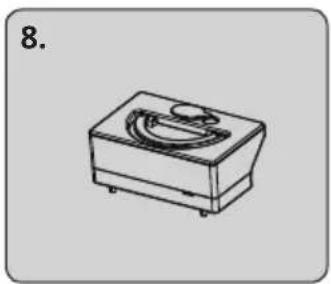
| 8. Water tank 1 pc | ||
| 9. Extra mop 2 pc | ||
| 10. User manual 1 pc | ||




PRODUCT DIAGRAM
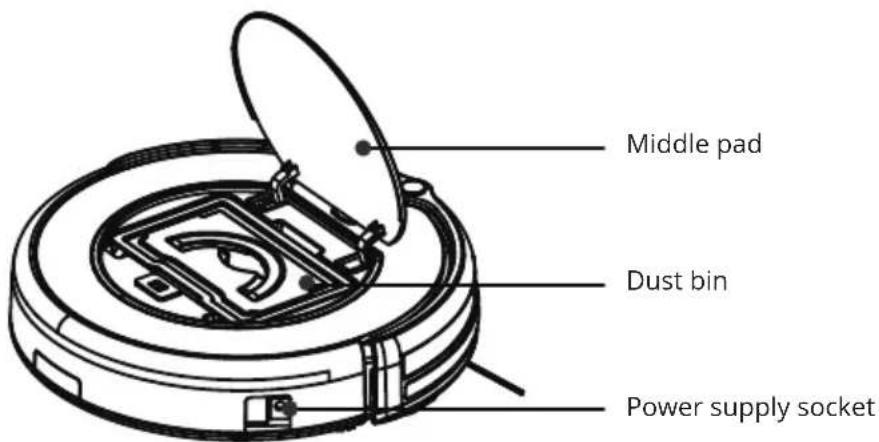
Dust bin

Water tank

Charging home base

PRODUCT DIAGRAM
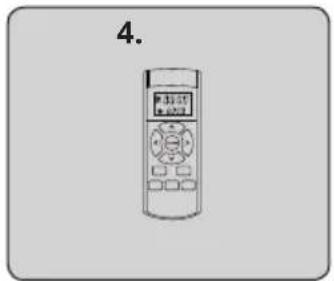
Remote control
1. Button „CLEAN"
Press this buttot to start cleaning in selected mode.
Press this button to make the robot stop when it's cleaning.
2. Directional buttons
A. Button "▲"
Press this button to increase number in scheduling or clock mode. Press this button to make robot move forward in selected mode or make robot stop when robot is moving forward.
B. Button "▼"
Press this button to decrease number in scheduling or clock mode. Press to make robot move backward for little step in selected mode.
C. Button "◀"
Press this button to exchange from minute to hour in scheduling or clock mode. Press this button to make robot turn left.
D. Button "▶"
Press this button to exchange from hour to minute in scheduling or clock mode. Press this button to make robot turn right.
3. Button „PLAN“
Press this button to enter scheduling mode when in selected mode. Press this button to confirm scheduling in scheduling mode.
4. Button „CLOCK"
Press this button to enter clock mode when in selected mode. Press this button to confirm clock setting in clock mode.
5. Button „SPIRAL“
Press this button to make robot start spot cleaning.
6. Button „HOME“
Press this button to return robot to charging home base.
7. Button „EDGE”
Press this button to make robot clean along wall.
Note:
• Install two AAA type batteries into the remote.
• Take out the batteries if the remote control is not used for long time.

TECHNICAL SPECIFICATION
- Model: D410 / D420
• Diameter: 300 mm - Height: 75 mm
• Suction power: 20 W - Battery: Li-ion, 14.4 V - 14.8 V, rechargeable
• Battery capacity: 2400 mAh
• Power supply: AC 100\~240V
• Charging time: 250-350 min.
• Operation time: 90-110 min.
• Noise level: 68-72 dB
• Capacity of dust bin: 0,3 l
• Capacity of water tank: 0,3 l - Filter: HEPA filter
- Side brush: 2
• Moping function: yes
All specifications are subject to change without prior notice.
PRODUCT OPERATION
How to get started
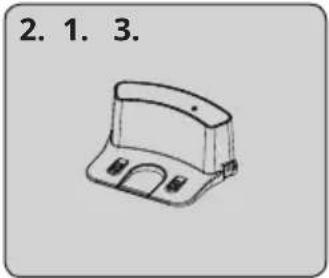
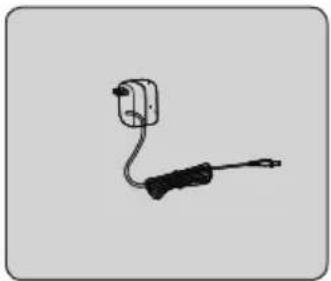
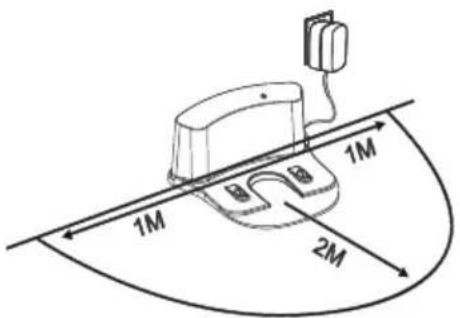
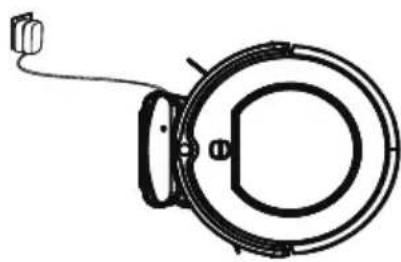
1. Place charging home base, plug in adapter, signal light on charging home base will flash.
Note: Put charging home base against the wall and remove obstacles about 1 meter at two sides and about 2 meters forward.
2. Turn on the power switch around power socket, then display panel will flash.
- If no command received, the robot will turn to sleeping mode after 15 seconds.
- Please always keep the power switch turning on. If not, it is unable to make the robot work.
- If power switch is turned off, all the scheduling will be lost.
- Before charge the robot, please make sure the power switch is turned on, or else the robot can not be charged.
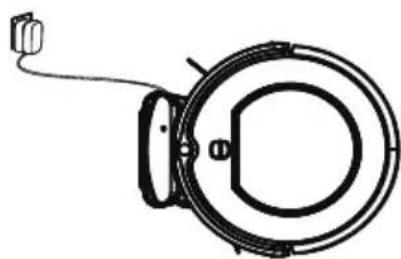
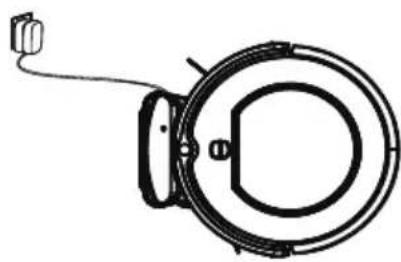
3. Charge the robot in either way as shown below:
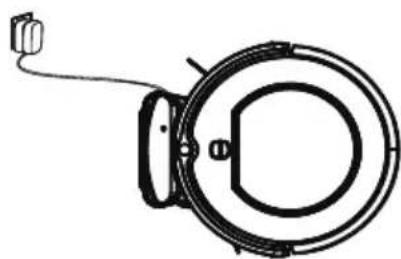
A. Plug into an outlet.
B. Press HOME to make robot return to charging home base for charging itself.

A

B
For better extending battery life:
A. Before first use, charge the robot overnight. When charging is finished, display panel will turn solid green.
B. In normal use, always store the robot on charging home base with base plugged in.
C. If the robot is not used for long time, turn the power switch off, fully charge the robot and store it in a cool, dry place.
4. Auto charging
The robot will automatically return to charging home base when battery is low.
PRODUCT OPERATION
Starting up / Pause / Sleeping
1. Starting up
A. Make sure the power switch is on.
B. Press CLEAN button on main body or on remote control to start cleaning.
Note: If robot is in sleeping mode, press CLEAN button to wake the robot up from sleeping mode. Then press CLEAN for a second time, the robot starts cleaning automatically.
2. Pause
Press CLEAN button on main body or on remote control to exchange robot from cleaning mode to selected mode.
3. Sleeping mode
To turn robot into sleeping mode from selected mode. Keep pressing CLEAN on main body for 3 seconds.
Scheduling
- The vacuum cleaner will always start cleaning at the set time.
- Press the „PLAN" button on the remote control to enter the „Schedule Cleaning" mode.
- Use the directional buttons at the top half of the remote control display (HH: MM) to set the start for the schedule cleaning
- Press the "PLAN" button again to confirm the set time.
• To erase the set time, turn the vacuum cleaner off. - Successful schedule cleaning setting will be confirmed by a beep sound on the vacuum cleaner.
Electrowall
The virtual wall creates an invisible wall that the robotic vacuum cleaner can not cross. You can, for example, prevent passage to the next room, prevent climbing on high-pitched carpets, protect fragile objects, or define the area with cables
- Put the battery firstly, then turn it on.
- Put the Electrowall on the outside of the doorway you wish to block.
- Turn off the Electrowall after each use.
Virtual wall divides the space into two areas, which are marked on the virtual wall: WORKING AREA and FORBIDDEN AREA. Please, place the virtual wall accordingly.


Mopping
This robotic vacuum cleaner has a wet mopping function.
- Attach the moistened mop cloth to the mop holder.
- Attach the mop holder with the cloth to the robot from below (insert pins into holes).
- Pour water into the water tank (we recommend using clean water; you can apply any detergent directly to the fabric)
- Place the water tank into the robotic vacuum cleaner (in the place of the original dust bin)
- Press CLEAN to start mopping (the robot will recognize this mode automatically)
- When cleaning is complete, disconnect the mop holder and remove the water tank. Pour excess water out of the tank and clean the mop cloth for future use.
Notes:
- In the mopping mode, vacuuming is off, only side brushes work.
- Prevent the vacuum cleaner from entering a carpet or dangerous area by a physical obstacle or a virtual wall (not included).
- It is possible to mount the mop holder for dry wiping when vacuuming.
- We recommend washing the mop cloth by hand, but it can also be done by wasching machine at low temperatures and without the use of fabric softener.
Warning:
- Use the mopping function only under adult supervision.
- Water drips from the water tank spontaneously, so make sure that the robotic vacuum cleaner does not stay in the same place for a long time to prevent excessive water leakage in one place.
- Do not charge the robotic vacuum cleaner with the water tank inside and the mopping cloth attached.
CLEANING AND MAINTENANCE
Cleaning side brushes
Check at least once a week both side brushes together with the air intake and remove the worn hair and other dirt.
Remove the side cleaning brush from the vacuum cleaner by unscrewing the crosshead screw
Note: Before replacing side brushes, check and match „L“ and „R“ mark on both side brush nad bottom of robot.
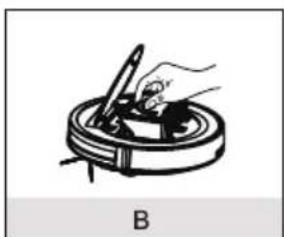
Cleaning dust bin and filter
Empty the dust container after every cleaning. If the dust container is full it has a bad effect on the suction power of the vacuum cleaner and the quality of the cleaning.
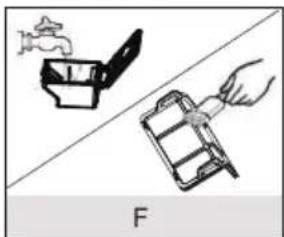
Clean the filter every 14 days by tapping, brushing or vacuuming with a standard vacuum cleaner. We recommend to replace the HEPA filter every 6 months.
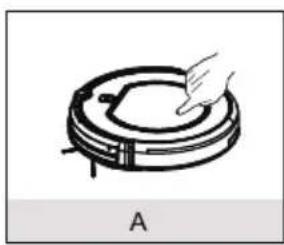


Cleaning cliff sensors and auto charging pins
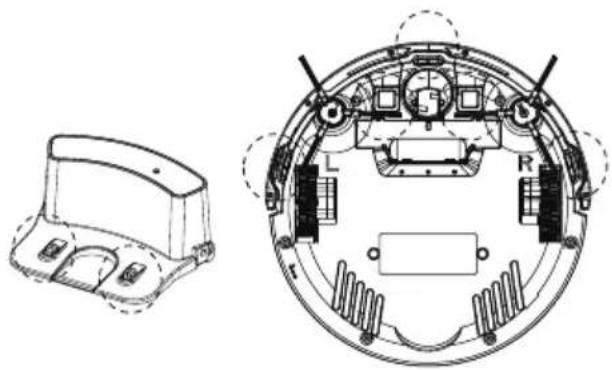
Clean the charging contacts on the vacuum cleaner and on the charging station once a month with a soft cloth. Clean the three sensors on the bottom of the vacuum cleaner in the same way, marked points in the wheel (see figure).
TROUBLESHOOTING
Description of audo error signals
| Short tone Cause Solution | ||
| 0 | The front wheel or the side brushes do not work. | Check the front wheel and the side brushes clean them. |
| 00 Error of the bottom or front sensor. | Clean the bottom sensors. Lightly press the front bumper. Check there is no jammed object. | |
| 000 The vacuum cleaner got jammed. | Move the robot and continue cleaning. |
Description of the status led diodes
| Status CLEAN button status | |
| Charging All lights flash gradually | |
| Battery fully charged All light turns solid | |
| Low battery The middle lights flash | |
| Selected mode All lights flash slowly | |
| Vacuum cleaner error All lights flash |
INSTRUCTIONS AND INFORMATION REGARDING THE DISPOSAL OF USED PACKAGING MATERIALS
Take the packaging material to a designated municipal waste facility.
DISPOSAL OF USED BATTERIES
Batteries contain environmentally damaging compounds and therefore do not belong in standard household waste. Take the batteries to an appropriate collection point, which will provide for their ecological disposal. You can obtain the contact for the nearest collection point from you town council or from your retailer.
DISPOSAL OF USED ELECTRICAL AND ELECTRONIC EQUIPMENT

This symbol on products or original documents means that used electric or electronic products must not be added to ordinary municipal waste. For proper disposal and recycling, take these products to designated collection points. Alternatively, in some European Union states or other European countries you may return your appliances to the local retailer when buying an equivalent new appliance. Correct disposal of this product helps save valuable natural resources and prevents damage to the environment caused by improper waste disposal. Ask your local authorities or collection facility for more details. In accordance with national regulations penalties may be imposed for the incorrect disposal of this type of waste.
For business entities in European Union states
If you want to dispose of electric or electronic devices, ask your retailer or supplier for the necessary information.
Disposal in other countries outside the European Union
This symbol is valid in the European Union. If you wish to discard this product, ask your local authorities or retailer about proper disposal.

This product meets all the basic requirements of EU directives that apply to it.

www.symbo.eu
INHALT
1.




GERÄTEBESCHREIBUNG

Vorderer Stoßfänger
GERÄTEBESCHREIBUNG
Abfallbehälter

A
B



www.symbo.eu
1.


Capac superior
A
B


MESAJELE DE EROARE ŞI DIODELE DE STARE
Mesajele de eroare
www.symbo.eu
SYMBO
Dovozce / Importer / Dovozca:
ROBOT WORLD s.r.o.
Běloveská 944
547 01 Náchod
Česká republika

- 1
- POPIS ZAŘÍZENÍ
- ODPADNÍ NÁDOBKA
- CHYBOVÉ HLÁŠKY A STAVOVÉ DIODY
- OPIS URZĄDZENIA
- ODPADOWY POJEMNIK
- KOMUNIKATY BŁĘDÓW A DIODY STANU
- POPIS ZARIADENIA
- ODPADOVÁ NÁDOBKA
- OBSLUHA A POUŽÍVANIE
- MOPOVANIE
- ČISTENIE SENZOROV A KONTAKTOV
- TABLE OF CONTENTS
- IMPORTANT SAFETY INSTRUCTIONS
- 2
- PACKAGE CONTENTS, PRODUCT DIAGRAM AND TECHNICAL SPECIFICATION
- 3
- PRODUCT OPERATION
- 4
- CLEANING AND MAINTENANCE
- 5
- TROUBLESHOOTING
- 6
- RECYCLING AND DISPOSAL
- BEFORE USING THIS PRODUCT, PLEASE READ THE FOLLOWING SAFETY INSTRUCTIONS AND FOLLOW ALL NORMAL SAFETY PRECAUTIONS. ANY OPERATIONS THAT OPPOSE TO DESCRIPTIONS IN THIS USER MANUAL MAY LEAD TO HARM TO HUMAN OR THIS PRODUCT
- WARNING
- INCLUDED WITH PRODUCT
- PRODUCT DIAGRAM
- DUST BIN
- WATER TANK
- CHARGING HOME BASE
- REMOTE CONTROL
- BUTTON „CLEAN
- DIRECTIONAL BUTTONS
- BUTTON "▲
- BUTTON "▼
- BUTTON "◀
- BUTTON
- BUTTON „PLAN
- BUTTON „CLOCK
- BUTTON „SPIRAL
- BUTTON „HOME
- BUTTON „EDGE
- NOTE
- TECHNICAL SPECIFICATION
- HOW TO GET STARTED
- PLACE CHARGING HOME BASE, PLUG IN ADAPTER, SIGNAL LIGHT ON CHARGING HOME BASE WILL FLASH
- TURN ON THE POWER SWITCH AROUND POWER SOCKET, THEN DISPLAY PANEL WILL FLASH
- CHARGE THE ROBOT IN EITHER WAY AS SHOWN BELOW
- FOR BETTER EXTENDING BATTERY LIFE
- AUTO CHARGING
- STARTING UP / PAUSE / SLEEPING
- STARTING UP
- PAUSE
- SLEEPING MODE
- SCHEDULING
- ELECTROWALL
- MOPPING
- THIS ROBOTIC VACUUM CLEANER HAS A WET MOPPING FUNCTION
- NOTES
- CLEANING SIDE BRUSHES
- CLEANING DUST BIN AND FILTER
- CLEANING CLIFF SENSORS AND AUTO CHARGING PINS
- INSTRUCTIONS AND INFORMATION REGARDING THE DISPOSAL OF USED PACKAGING MATERIALS
- DISPOSAL OF USED BATTERIES
- DISPOSAL OF USED ELECTRICAL AND ELECTRONIC EQUIPMENT
- FOR BUSINESS ENTITIES IN EUROPEAN UNION STATES
- DISPOSAL IN OTHER COUNTRIES OUTSIDE THE EUROPEAN UNION
- INHALT
- GERÄTEBESCHREIBUNG
- ABFALLBEHÄLTER
- MESAJELE DE EROARE ŞI DIODELE DE STARE
- SYMBO
Brand : Symbo
Model : D420
Category : Robot vacuum