Symbo

xBot 5 PRO - Vacuum Cleaner Symbo - Free user manual and instructions

Find the device manual for free xBot 5 PRO Symbo in PDF.

📄 84 pages English EN Download 💬 AI Question 10 questions ⚙️ Specs
Notice Symbo xBot 5 PRO - page 66
View the manual : Čeština CS English EN Polski PL Slovenčina SK
Pick your language and provide your email: we'll send you a specifically translated version.
Product TypeRobotic vacuum cleaner
BrandSymbo
ModelxBot 5 PRO
Dimensions (diameter x height)300 mm x 80 mm
Weight2.8 kg
Battery TypeLi-Ion, 2150 mAh
Input Voltage100-240 V ~50/60 Hz, 400 mA
Output Voltage (adapter)24 V, 600 mA
Charging Time4 hours
Cleaning Time110-120 minutes
Noise Level< 65 dB
Suction Power1300 Pa
Dust Bin Capacity0.5 L (standard), 0.3 L (2-in-1)
Water Tank Capacity0.2 L
Cleaning ModesAuto, Edge, Spot, Random, Double, Max
Navigation SystemSmart GYRO
Remote ControlYes (with LCD display, requires 2 AAA batteries)
Wi-Fi App ControlYes (via Android/iOS app)
Boundary StripIncluded (PRO model only)
Included AccessoriesCharging station, power adapter, remote control, side brushes, mopping cloth, HEPA design filter (3 pcs), 2-in-1 dust bin/water tank, boundary strip, cleaning brush, user manual
Filter TypePrimary (washable) and HEPA design filter (replaceable, max 24 months)
Safety FeaturesAnti-fall sensors, anti-collision bumper, automatic docking, low battery auto-return

Frequently Asked Questions - xBot 5 PRO Symbo

How do I charge the robot?
You can charge the robot automatically by placing it on the docking station or manually using the power adapter. For the first use, charge the robot for 12 hours (overnight) to optimize battery life. Ensure the robot is switched on to start charging. The LED panel will show '1111' during charging and 'FULL' when complete.
How do I set a cleaning schedule?
First, set the system time by pressing the PLAN button on the robot. Then, press and hold PLAN for 3 seconds to enter schedule settings. Use the HOME button to adjust hours and minutes, and ON/OFF to confirm. The robot will clean once daily at the set time. You can also schedule via the app if connected to Wi-Fi.
What do the error codes E2, E3, E11, etc. mean?
Error codes indicate specific issues: E2 means the robot is turned off while trying to charge (turn on the power switch). E3 means low charging voltage or auto-recharge failure (charge the robot). E11/E12/E13 indicate anti-fall sensor errors (remove obstacles or place robot on floor properly). E21/E22/E23 are wheel errors. E31/E32/E33 are bumper errors. For overload errors (E41-E46), remove obstructions from wheels, brushes, or fan. LO means low battery; charge the robot. 11:11 and FULL are normal charging indicators. CONN/FAIL/SUCC relate to Wi-Fi connection.
How do I clean the dust bin and filters?
Press the button to remove the dust bin. Open it and remove both filters (primary and HEPA design). Empty the bin and wash the primary filter with water (let it dry completely before reuse). Do not wash the HEPA design filter; it is replaceable with a maximum lifespan of 24 months. Reinstall the filters after cleaning.
Can the robot clean carpets?
Yes, the robot can clean low-pile carpets. However, it may not perform well on high-pile or shag carpets. It is recommended to use the Max mode for maximum suction power on carpets. Ensure the robot does not get stuck on tassels or edges.
How do I connect the robot to Wi-Fi?
Ensure your robot supports Wi-Fi (check model). Download the Symbo app from Google Play or Apple App Store. Register and follow in-app instructions. The robot and mobile device must be connected to the same 2.4 GHz Wi-Fi network (not 5 GHz). Press and hold the HOME button on the robot for 3 seconds until the display shows 'SUCC' to enable Wi-Fi pairing mode.
What is the boundary strip used for?
The boundary strip creates an invisible barrier to prevent the robot from entering certain areas (e.g., near pet bowls, cables, or rooms). Lay the strip on the floor; the robot recognizes it as an obstacle and will not cross it. It can be placed under carpets or cut to smaller pieces. Additional strips are available for purchase.
How do I replace the side brushes?
Remove the side brushes by pulling them off from the robot. If they are curly or deformed, dip the bristles in hot water for at least 5 seconds to restore shape. If damaged or bristles are too short, replace them with new ones (available from the manufacturer). Ensure proper orientation: left side marked L and right side R.
How long does the battery last and how do I maximize its life?
The robot has a cleaning time of 110-120 minutes on a full charge. To extend battery life, charge the robot for 12 hours before first use, charge promptly when low, and store in a cool, dry place if not used for a long time. If unused for over 3 months, recharge for 12 hours before use.
What should I do if the robot gets stuck?
If the robot gets stuck, first check for obstacles such as loose cables, clothing, or low furniture. Clear the area. If the robot is stalled on an uneven surface, manually lift it to a flat area. Ensure the sensors are clean and not blocked. If the robot frequently gets stuck, use the boundary strip to restrict access to problem areas.

User questions about xBot 5 PRO Symbo

0 question about this device. Answer the ones you know or ask your own.

Ask a new question about this device

The email remains private: it is only used to notify you if someone responds to your question.

No questions yet. Be the first to ask one.

Download the instructions for your Vacuum Cleaner in PDF format for free! Find your manual xBot 5 PRO - Symbo and take your electronic device back in hand. On this page are published all the documents necessary for the use of your device. xBot 5 PRO by Symbo.

USER MANUAL xBot 5 PRO Symbo
natural_image Technical line drawing of a circular robotic device with mounting brackets and a digital display (no text or symbols)

Symbo xBot 5 PRO - 1

text_image Česky Polski Slovensky English

1.

natural_image Technical line drawing of a circular mechanical component with internal features and mounting holes (no text or symbols)

Symbo xBot 5 PRO - 1. - 1

natural_image Line drawing of a mechanical device with a curved top and two side brackets (no text or symbols)

Symbo xBot 5 PRO - 1. - 2

natural_image Simple line drawing of a power adapter with a coiled cable (no text or symbols)

Symbo xBot 5 PRO - 1. - 3

text_image 4. FLU TIME ON/SET MAX OK MAX

Symbo xBot 5 PRO - 1. - 4

natural_image Two identical mechanical linkages with circular end caps, no text or symbols present

Symbo xBot 5 PRO - 1. - 5

natural_image Simple geometric shape with a shaded semicircle, no text or symbols present

Symbo xBot 5 PRO - 1. - 6

natural_image Isometric view of a rectangular solar panel with five grating panels (no text or symbols)

Symbo xBot 5 PRO - 1. - 7

natural_image Technical line drawing of a mechanical component with curved and rectangular parts (no text or symbols)

Symbo xBot 5 PRO - 1. - 8

natural_image Roll of metallic plastic strips with no text or symbols visible

Symbo xBot 5 PRO - 1. - 9

natural_image Simple line drawing of a brush with a circular end, no text or symbols present

Symbo xBot 5 PRO - 1. - 10

text_image 11. SYMBO xBot 5 / xBot 5 PRO Product name: BOSO Product type: SAPR Product description: Product details: Product name: Product description: Product details: Product description: Product details: Product description: Product details: Product description: Product details: Product description: Product details: Product description: Product details: Product description: Product details: Product description: Product details: Product description: Product details: Product description: Product details: Product description: Product details: Product description: Product details: Product description: Product details: Product description: Product details: Product description: Product details: Product description: Product details: Product description: Product details: Product description:

POPIS ZAŘÍZENÍ

Symbo xBot 5 PRO - POPIS ZAŘÍZENÍ - 1

text_image 1 M 2 M 1 M
natural_image Line drawing of a robotic vacuum cleaner with power outlet and wiring (no text or symbols)

2. Pomocí adaptéru

text_image (A) L R L R (B)

OBSLUHA A POUŽÍVÁNÍ

natural_image Simple diagram with directional arrows and a circular gauge-like symbol (no text or labels)

Automatický režim

natural_image Illustration of a robotic vacuum cleaner inside a brick wall, with airflow arrows indicating movement (no text or symbols)
natural_image Illustration of a robotic vacuum cleaner with wireless signal waves and a clock face (no text or symbols)

Režim MAX

natural_image Technical line drawing of a mechanical housing component with an upward arrow indicating motion (no text or symbols present)
  1. Symbo xBot 5 PRO - Režim MAX - 1
text_image Technical diagram of a water tank with pipe flow and valve mechanism, showing internal components and fluid circulation arrows

Symbo xBot 5 PRO - Režim MAX - 2

natural_image Technical line drawing of a boat's side panel with mesh insulation and internal components (no text or symbols)

Symbo xBot 5 PRO - Režim MAX - 3

natural_image Technical line drawing of a mechanical housing component with an arrow indicating rotation (no text or symbols present)

Symbo xBot 5 PRO - Režim MAX - 4

natural_image Technical line drawing of a circular device with internal components and directional arrows indicating movement (no text or symbols)
natural_image Illustration of a potted plant and a vacuum cleaner on a diagonal line (no text or symbols)
text_image QR code image containing encoded data, no visible human-readable text

iOS

Symbo xBot 5 PRO - Režim MAX - 5

text_image QR code image containing encoded data, no visible human-readable text

Android

ČIŠTĚNÍ A ÚDRŽBA

natural_image Line drawing of a hand holding a device next to a circular device with arrows indicating motion (no text or symbols)
natural_image Cross-sectional diagram of a mechanical device showing internal components and an arrow indicating rotation (no text or symbols)
natural_image Exploded view diagram of a device showing internal components and assembly (no text or labels)
natural_image Diagram of a mechanical device with internal components and a textured base (no text or symbols)
natural_image Isometric illustration of a handheld electronic device with a black base and connector (no text or symbols)
natural_image Diagram showing a device being processed into a circular housing, with arrows indicating motion (no text or symbols present)
natural_image Line drawing of a hand holding a circular device with a handle, showing a change in the right-hand corner (no text or symbols present)
natural_image Illustration of a hand turning a component into a curved mechanical housing (no text or symbols)
natural_image Diagram of a hand placing a component into a mechanical housing with an upward arrow indicating motion (no text or symbols present)
natural_image Technical line drawing of a mechanical assembly with an arrow indicating direction (no text or symbols present)
natural_image Diagram showing a mechanical assembly with an open housing and a rectangular component, illustrating a process (no text or symbols present)
natural_image Diagram of a mechanical device with a granular material inside, showing internal components and a circular base (no text or symbols)
natural_image Illustration of a battery pack and a paintbrush (no text or symbols)
natural_image Diagram showing a mechanical assembly with an open housing and internal compartments, no text or symbols present
natural_image Simple line drawing of a three-blade tool with a central hub (no text or symbols)

Symbo xBot 5 PRO - ČIŠTĚNÍ A ÚDRŽBA - 1

natural_image Pure mechanical component diagram with three arms and central hub (no text or symbols)
natural_image Technical line drawing showing assembly of a mechanical component before and after disassembly (no text or symbols)

CHYBOVÉ HLÁŠKY A ŘEŠENÍ PROBLÉMŮ

text_image QR code image containing encoded data, no visible human-readable text

www.symbo.eu

1.

natural_image Technical line drawing of a circular mechanical component with internal features and mounting holes (no text or symbols)

Symbo xBot 5 PRO - 1. - 1

natural_image Line drawing of a mechanical device with a curved top and two side slots (no text or symbols)

Symbo xBot 5 PRO - 1. - 2

natural_image Simple line drawing of a rectangular device with a power outlet and coiled cable (no text or symbols)

Symbo xBot 5 PRO - 1. - 3

text_image 4. FLU TIME ON/SET MAX OK MAX

Symbo xBot 5 PRO - 1. - 4

natural_image Two identical mechanical linkages with circular end caps, no text or symbols present

Symbo xBot 5 PRO - 1. - 5

natural_image Simple line drawing of a shaded crescent shape with grid pattern (no text or symbols)

Symbo xBot 5 PRO - 1. - 6

natural_image Isometric view of a rectangular solar panel with grid lines (no text or symbols)

Symbo xBot 5 PRO - 1. - 7

natural_image Technical line drawing of a mechanical component with curved and rectangular parts (no text or symbols)

Symbo xBot 5 PRO - 1. - 8

natural_image Roll of metallic plastic strips with no text or symbols visible

Symbo xBot 5 PRO - 1. - 9

natural_image Simple line drawing of a brush with a circular end, no text or symbols present

Symbo xBot 5 PRO - 1. - 10

  1. " ⏻" Przycisk ON/OFF
text_image 1 M 2 M 1 M
natural_image Diagram of a robotic vacuum cleaner connected to a wall-mounted power outlet (no text or symbols present)
text_image (A) L R L R (B)

OBSŁUGA I UŻYTKOWANIE

natural_image Simple diagram showing a directional arrow and a circular gauge with a pointer (no text or symbols)

Tryb automatyczny

natural_image Illustration of a robotic vacuum cleaner inside a brick wall, with airflow arrows indicating movement (no text or symbols)
natural_image Illustration of a robotic vacuum cleaner with wireless signal and clock, set against a brick wall background (no text or symbols)

Tryb MAX

natural_image Technical line drawing of a mechanical housing component with an upward arrow indicating motion (no text or symbols present)
  1. Symbo xBot 5 PRO - Tryb MAX - 1
natural_image Technical line drawing of a boat's side panel with mesh insulation and internal components (no text or symbols)

Symbo xBot 5 PRO - Tryb MAX - 2

natural_image Technical line drawing of a mechanical component with an arrow indicating motion (no text or symbols present)

Symbo xBot 5 PRO - Tryb MAX - 3

natural_image Technical line drawing of a circular device with internal components and directional arrows indicating movement (no text or symbols)
natural_image Illustration of a potted plant and a robotic vacuum cleaner on a diagonal line (no text or symbols)
text_image QR code image containing encoded data, no visible human-readable text

iOS

Symbo xBot 5 PRO - Tryb MAX - 4

text_image QR code image containing encoded data, no visible human-readable text

Android

CZYSZCZENIE I UTRZYMANIE

natural_image Line drawing of a hand holding a device with a circular component and directional arrows (no text or symbols)
natural_image Cross-sectional diagram of a mechanical device showing internal components and a directional arrow (no text or symbols)
natural_image Exploded view diagram of a device showing internal components and assembly (no text or labels)
natural_image Diagram of a mechanical device with internal components and a base, no visible text or symbols
natural_image Isometric illustration of a handheld electronic device with a black base and connector (no text or symbols)
natural_image Diagram showing a device being processed into a multi-chambered housing (no text or symbols present)
natural_image Line drawing of a hand holding a circular device with a handle, showing a change in the right-hand corner (no text or symbols present)
natural_image Illustration of a hand turning a component into a curved mechanical housing (no text or symbols)
natural_image Diagram of a hand placing a component into a mechanical housing with an upward arrow indicating motion (no text or symbols present)
natural_image Technical line drawing of a mechanical assembly with an arrow indicating direction (no text or symbols present)
natural_image Diagram showing a mechanical assembly with an open housing and a rectangular component, illustrating a process (no text or symbols present)
natural_image Diagram of a mechanical device with a granular material inside, showing internal components and a circular base (no text or symbols)
natural_image Illustration of a battery pack and a paintbrush (no text or symbols)
natural_image Diagram showing a mechanical assembly with an open housing and internal compartments, no text or symbols present
natural_image Simple line drawing of a three-blade tool with a central hub (no text or symbols)

Symbo xBot 5 PRO - CZYSZCZENIE I UTRZYMANIE - 1

natural_image Pure mechanical component diagram with three arms and a central hub (no text or symbols)
natural_image Technical line drawing showing assembly of a mechanical component before and after disassembly (no text or symbols)

BŁĘDY I ROZWIAŻYWANIE PROBLEMÓW

text_image QR code image containing encoded data, no visible human-readable text

www.symbo.eu

1.

natural_image Technical line drawing of a circular mechanical component with internal features (no text or symbols)

Symbo xBot 5 PRO - 1. - 1

natural_image Line drawing of a mechanical device with a curved top and two side brackets (no text or symbols)

Symbo xBot 5 PRO - 1. - 2

natural_image Simple line drawing of a power outlet connected to a circuit board (no text or symbols)

Symbo xBot 5 PRO - 1. - 3

text_image FLU TIME ON/Off MAX OK MAX

Symbo xBot 5 PRO - 1. - 4

natural_image Two identical mechanical linkages with circular end caps, labeled '5. 6.' (no text or symbols on the diagrams)

Symbo xBot 5 PRO - 1. - 5

natural_image Simple line drawing of a shaded wedge or leaf shape, no text or symbols present

Symbo xBot 5 PRO - 1. - 6

natural_image Isometric view of a rectangular solar panel with five grating panels (no text or symbols)

Symbo xBot 5 PRO - 1. - 7

natural_image Technical line drawing of a mechanical housing component (no text or symbols)

Symbo xBot 5 PRO - 1. - 8

natural_image Roll of metallic plastic strips with no text or symbols visible

Symbo xBot 5 PRO - 1. - 9

natural_image Simple line drawing of a brush with a circular end, no text or symbols present

Symbo xBot 5 PRO - 1. - 10

text_image 11. SYMBO xBot 5 / xBot 5 PRO Product name: Boschel Product type: Ferrexed Product description: Product details: Color: Color Color Color

POPIS ZARIADENIA

Symbo xBot 5 PRO - POPIS ZARIADENIA - 1

text_image 1 M 2 M 1 M

1. Pomocou nabíjacej stanice

natural_image Line drawing of a robotic vacuum cleaner with power outlet and wiring (no text or symbols)

2. Pomocou adaptéra

Zasuňte konektor adaptéra do robota a následne zapojte adaptér do elektrickej siete.

Poznámky:

text_image (A) L R L R (B)

OBSLUHA A POUŽÍVANIE

natural_image Simple diagram showing a directional arrow and a circular gauge with a pointer (no text or symbols)

Automatický režim

natural_image Illustration of a robotic vacuum cleaner inside a brick wall, with airflow arrows indicating movement (no text or symbols)
natural_image Illustration of a robotic vacuum cleaner with wireless signal waves and a clock face (no text or symbols)

Režim MAX

natural_image Technical line drawing of a mechanical housing component with an upward arrow indicating motion (no text or symbols present)
  1. Symbo xBot 5 PRO - Režim MAX - 1
text_image Technical diagram of a water tank with labeled components and airflow indicators

Symbo xBot 5 PRO - Režim MAX - 2

natural_image Technical line drawing of a boat's side panel with mesh insulation and internal components (no text or symbols)

Symbo xBot 5 PRO - Režim MAX - 3

natural_image Technical line drawing of a mechanical housing component with an arrow indicating rotation (no text or symbols present)

Symbo xBot 5 PRO - Režim MAX - 4

natural_image Technical line drawing of a circular device with internal components and directional arrows indicating movement (no text or symbols)
natural_image Illustration of a potted plant and a robotic vacuum cleaner on a diagonal line (no text or symbols)
text_image QR code image containing encoded data, no visible human-readable text

iOS

Symbo xBot 5 PRO - Režim MAX - 5

text_image QR code image containing encoded data, no visible human-readable text

Android

ČISTENIE A ÚDRŽBA

natural_image Line drawing of a hand holding a device next to a circular device with arrows indicating motion (no text or symbols)

A. Vyberte odpadovú nádobku z robota stlačením tlačidla a vytiahnite ju
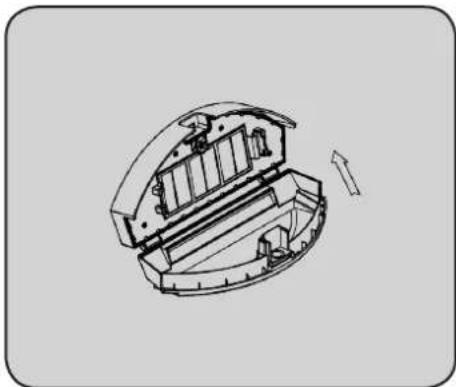
Symbo xBot 5 PRO - ČISTENIE A ÚDRŽBA - 1

natural_image Cross-sectional diagram of a mechanical device showing internal components and an arrow indicating rotation (no text or symbols)
natural_image Exploded view diagram of a device showing internal components and assembly (no text or labels)

C. Vyberte oba filtre

Symbo xBot 5 PRO - ČISTENIE A ÚDRŽBA - 2

natural_image Diagram of a mechanical device with internal components and a base, no visible text or symbols

D. Vysypte odpad z nádobky do koša

Symbo xBot 5 PRO - ČISTENIE A ÚDRŽBA - 3

natural_image Isometric illustration of a handheld electronic device with a black base and connector (no text or symbols)

E. Vyčistite oba filtre

Symbo xBot 5 PRO - ČISTENIE A ÚDRŽBA - 4

natural_image Diagram showing a device being processed into a multi-chambered housing (no text or symbols present)
natural_image Line drawing of a hand holding a circular device with a handle, showing a change in the right-hand corner (no text or symbols present)
natural_image Illustration of a hand turning a component into a curved mechanical housing (no text or symbols)

B. Nadvihnite držadlo a zatiahnite

Symbo xBot 5 PRO - ČISTENIE A ÚDRŽBA - 5

natural_image Diagram of a hand placing a component into a mechanical housing with an upward arrow indicating motion (no text or symbols present)
natural_image Technical line drawing of a mechanical assembly with an arrow indicating direction (no text or symbols)
natural_image Diagram showing a mechanical assembly with an open housing and a rectangular component, illustrating a process (no text or symbols present)

E. Vyberte oba filtre

Symbo xBot 5 PRO - ČISTENIE A ÚDRŽBA - 6

natural_image Diagram of a mechanical device with a granular material inside, showing internal components and a circular base (no text or symbols)
natural_image Illustration of a battery pack and a paintbrush (no text or symbols)

G. Vyčistite oba filtre

Symbo xBot 5 PRO - ČISTENIE A ÚDRŽBA - 7

natural_image Diagram showing a mechanical assembly with an open housing and internal compartments, no text or symbols present
natural_image Simple line drawing of a three-blade tool with a central hub (no text or symbols)

Symbo xBot 5 PRO - ČISTENIE A ÚDRŽBA - 8

natural_image Pure mechanical component diagram with three arms and a central hub (no text or symbols)
natural_image Technical illustration of a mechanical component before and after assembly, showing disassembly steps (no text or symbols)

CHYBOVÉ HLÁŠKY A RIEŠENIE PROBLÉMOV

text_image QR code image containing encoded data, no visible human-readable text

www.symbo.eu

TABLE OF CONTENTS

1.

Important Safety Instructions

Important Safety Instructions 1

2.

Package Contents, Product Diagram and Technical Specification

Included with Product 2

Product Diagram 3-5

Technical Specification...... 6

3.

Product Operation

Control Panel 7

Battery Charging 8

Starting Up/ Stand-by/ Sleeping 9

Before the first use 9

Scheduling 10

Cleaning Modes 11

How to use 2-in-1 water tank 12

How to use boundary strip 13

Application 13

4.

Cleaning and Maintenance

Dust Bin and Filters Cleaning 14-15

Sensors and Charging Poles Cleaning 16

Side Brushes Cleaning 16

Main Brush Cleaning 16

5.

Troubleshooting

Troubleshooting Table 17

Battery Removal 18

6.

Recycling and Disposal

Recycling and Disposal 19

IMPORTANT SAFETY INSTRUCTIONS

READ ALL INSTRUCTIONS BEFORE USING THIS APPLIANCE. SAVE THESE INSTRUCTIONS.

  1. This Appliance is not intended to be used by children under 8 years of age or anyone lacking knowledge on proper use. Supervision may be necessary. Do not allow children to play with the Appliance.
  2. Do not use the Appliance in extremely hot or cold environments (below 0^ C/ 32^ F or above 40^ C/ 104^ F).
  3. Do not use the Appliance at higher places than the height of the user, to prevent the Appliance from falling and causing injuries.
  4. For household use ONLY. Do not use the Appliance in commercial or industrial environments.
  5. Before use, clean floor environment (remove all fragile objects and cords, clothing, paper, loose cables, as well as make sure to lift curtains and drapes off the floor to avoid any possible accidents).
  6. Check if dustbin is empty prior to use.
  7. Do not let curtain, any kind of wrapping material, clothes, and so on caught in wheels of the Appliance.
  8. Do not sit or attach an item on the top of this product. Take care of children or pets while the Appliance is in operation.
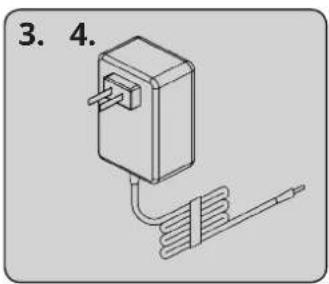
  9. Only use accessories recommended or supplied by the manufacturer. Only use the Power Adapter supplied by the manufacturer. Please make sure your power supply voltage matches the power voltage marked on the Power Adapter.
  10. Turn off the power switch during product transportation or for long term storage. It is also recommended to remove the battery for long term storage.
  11. Store the Appliance away from heat and flammable materials.
  12. To reduce the risk of electrical shock, do not put the Appliance in water or other liquid. Do not place or store the Appliance where it can fall (table, chair, etc.) or be pulled into a tub or sink.
  13. Do not touch power plug or the Appliance with wet hands.
  14. Do not charge the Appliance in extremely hot or cold environments, or it may affect battery life span.
  15. When charging the Appliance, do not place it on other electrical appliances and keep it away from fire and liquid.
  16. Take care not to damage the power cord, charging adapter and charging station. Do not put heavy weights on the power cord and charging station and keep them away from hot surfaces.
  17. Do not use with a damaged power cord or receptacle. Do not use the Appliance if it is not working properly, has been dropped, damaged, or come in contact with water. It must be repaired by the manufacturer or its service agent in order to avoid a hazard.
  18. If the supply cord is damaged, it must be replaced by the manufacturer or its service agent in order to avoid a hazard.
  19. The battery must be removed and discarded according to local laws and regulations before disposal of the Appliance.
  20. The Appliance must be disconnected from the receptacle before removing the battery for disposal of the Appliance.
  21. Please dispose of used batteries according to local laws and regulations.

Symbo xBot 5 PRO - READ ALL INSTRUCTIONS BEFORE USING THIS APPLIANCE. SAVE THESE INSTRUCTIONS. - 1

WARNING

Do not incinerate the Appliance even it is severely damaged. The battery can explode in a fire. The Appliance must be used in accordance with the directions in this Instruction Manual. Product manufacturer cannot be held liable or responsible for any damages or injuries caused by improper use.

INCLUDED WITH PRODUCT

Item List xBot 5 xBot 5 PRO
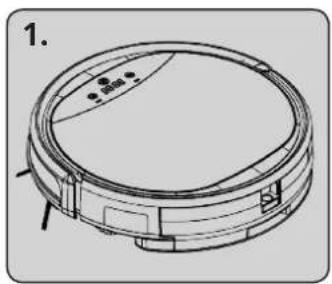
1. Robotic vacuum cleaner 1 pcs 1 pcs
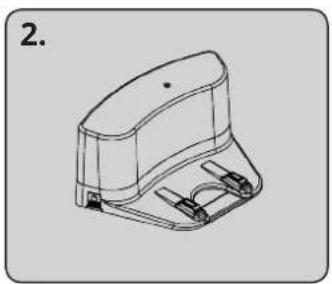
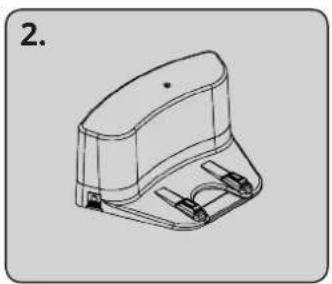
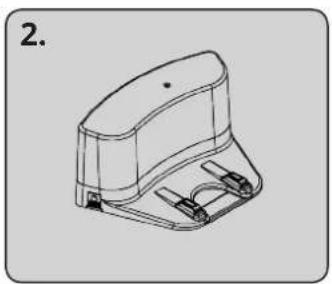
2. Charging station 1 pcs 1 pcs
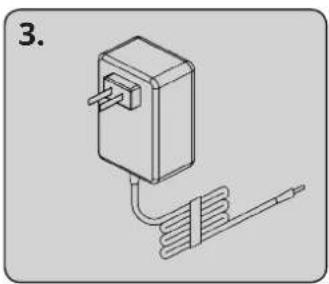
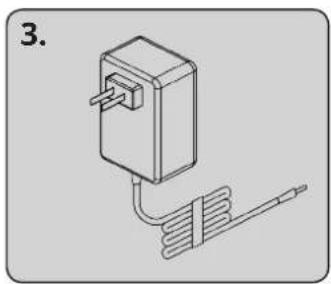
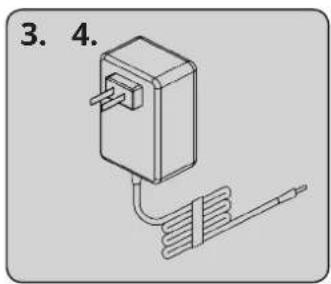
3. Power adapter 1 pcs 1 pcs
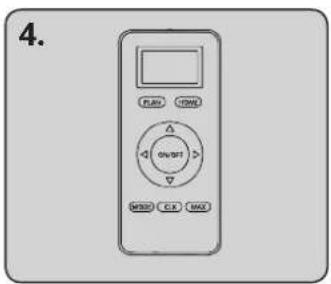
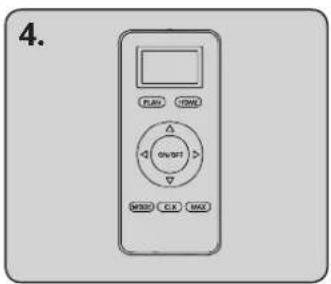
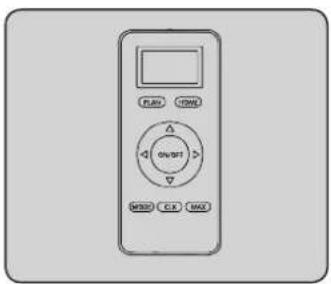
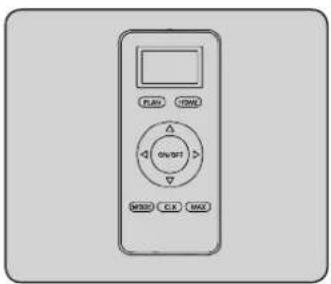
4. Remote control (batteries not included) 1 pcs 1 pcs
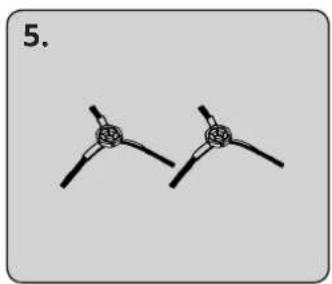
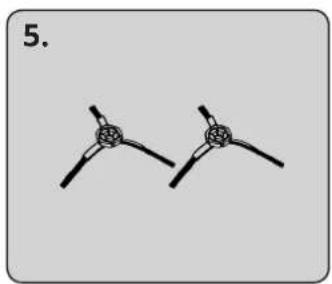
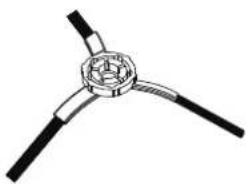
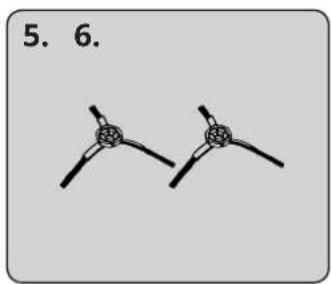
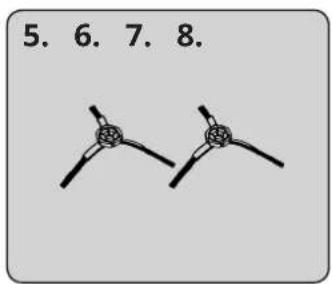
5. Side brushes (a pair) 1 pcs 1 pcs
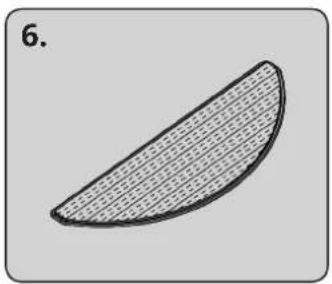
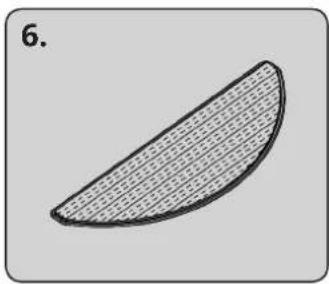
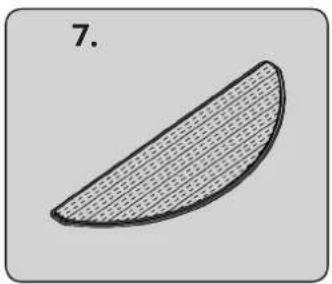
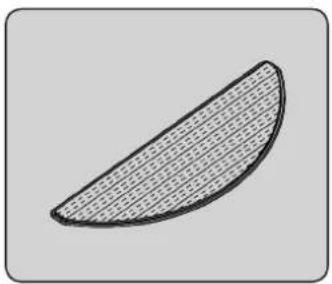
6. Mopping cloth 1 pcs 1 pcs
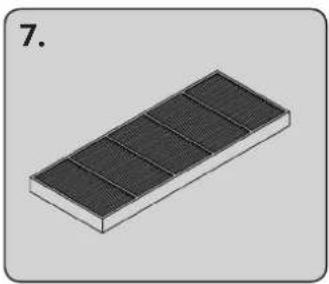
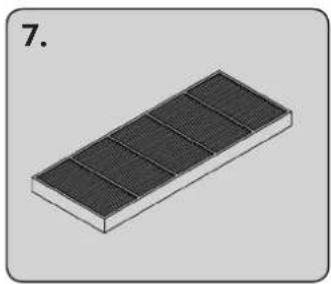
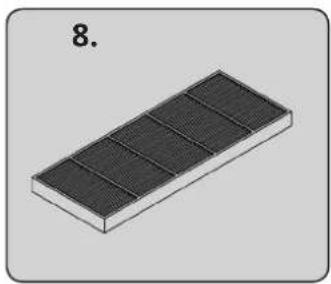
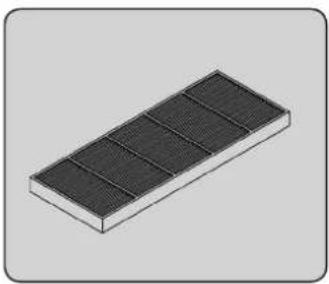
7. HEPA design filter 1 pcs 3 pcs
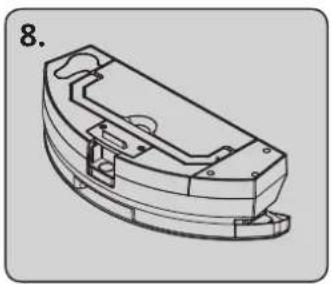
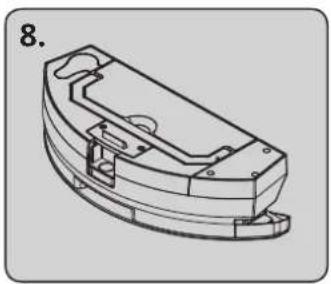
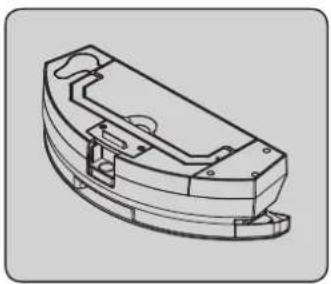
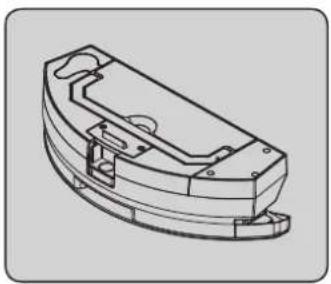
8. 2-in-1 Dust bin with water tank 1 pcs 1 pcs
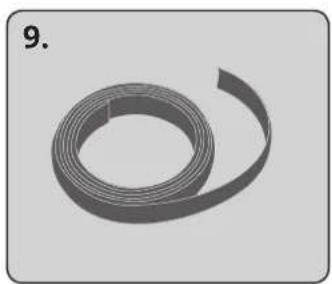
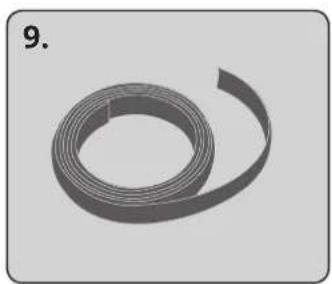
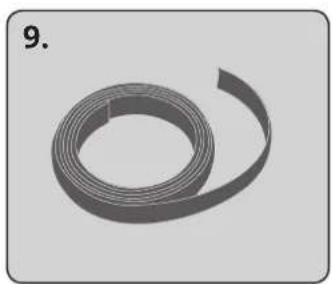
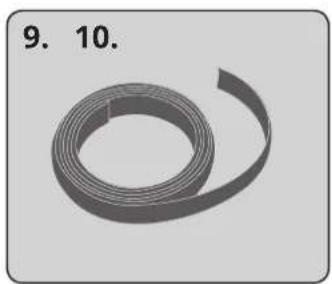
9. Boundary strip - 1 pcs
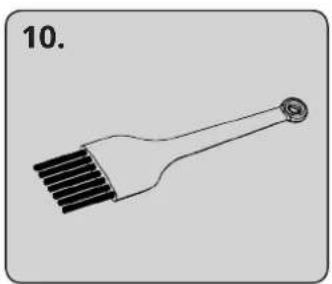
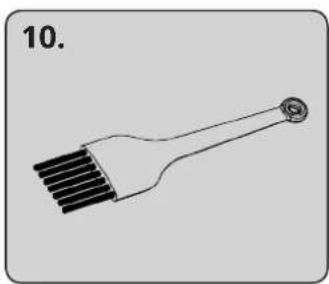
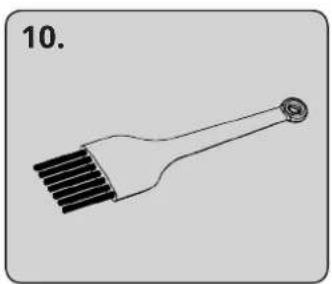
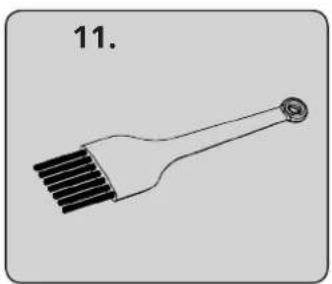
10. Cleaning brush1 pcs 1 pcs
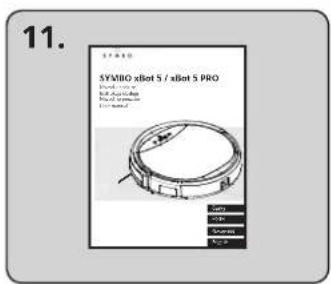
11. User manual1 pcs 1 pcs

Symbo xBot 5 PRO - INCLUDED WITH PRODUCT - 1

natural_image Technical line drawing of a circular mechanical component with internal features and mounting holes (no text or symbols)

Symbo xBot 5 PRO - INCLUDED WITH PRODUCT - 2

natural_image Line drawing of a mechanical device with a curved top and two side brackets (no text or symbols)

Symbo xBot 5 PRO - INCLUDED WITH PRODUCT - 3

natural_image Simple line drawing of a power strip connected to a terminal block, labeled with numbers 3 and 4 (no text or symbols on the diagram itself)

Symbo xBot 5 PRO - INCLUDED WITH PRODUCT - 4

text_image FLU TIME ON/Off MAX OK MAX

Symbo xBot 5 PRO - INCLUDED WITH PRODUCT - 5

text_image 5. 6. 7. 8.

Symbo xBot 5 PRO - INCLUDED WITH PRODUCT - 6

natural_image Simple line drawing of a sliced fruit or vegetable with a textured fill (no text or symbols)

Symbo xBot 5 PRO - INCLUDED WITH PRODUCT - 7

natural_image Isometric illustration of a rectangular solar panel with five grating panels (no text or symbols)

Symbo xBot 5 PRO - INCLUDED WITH PRODUCT - 8

natural_image Technical line drawing of a mechanical housing component (no text or symbols)

Symbo xBot 5 PRO - INCLUDED WITH PRODUCT - 9

natural_image Roll of plastic film with no visible text or symbols on the film itself

Symbo xBot 5 PRO - INCLUDED WITH PRODUCT - 10

natural_image Simple line drawing of a brush with a circular end, labeled '11.' (no text or symbols on the diagram itself)

Symbo xBot 5 PRO - INCLUDED WITH PRODUCT - 11

text_image SYMBO xBot 5 / xBot 5 PRO Version: 10.000 Type: XBot Model: 2.000 Description: Product name: SYMBO xBot 5 / xBot 5 PRO

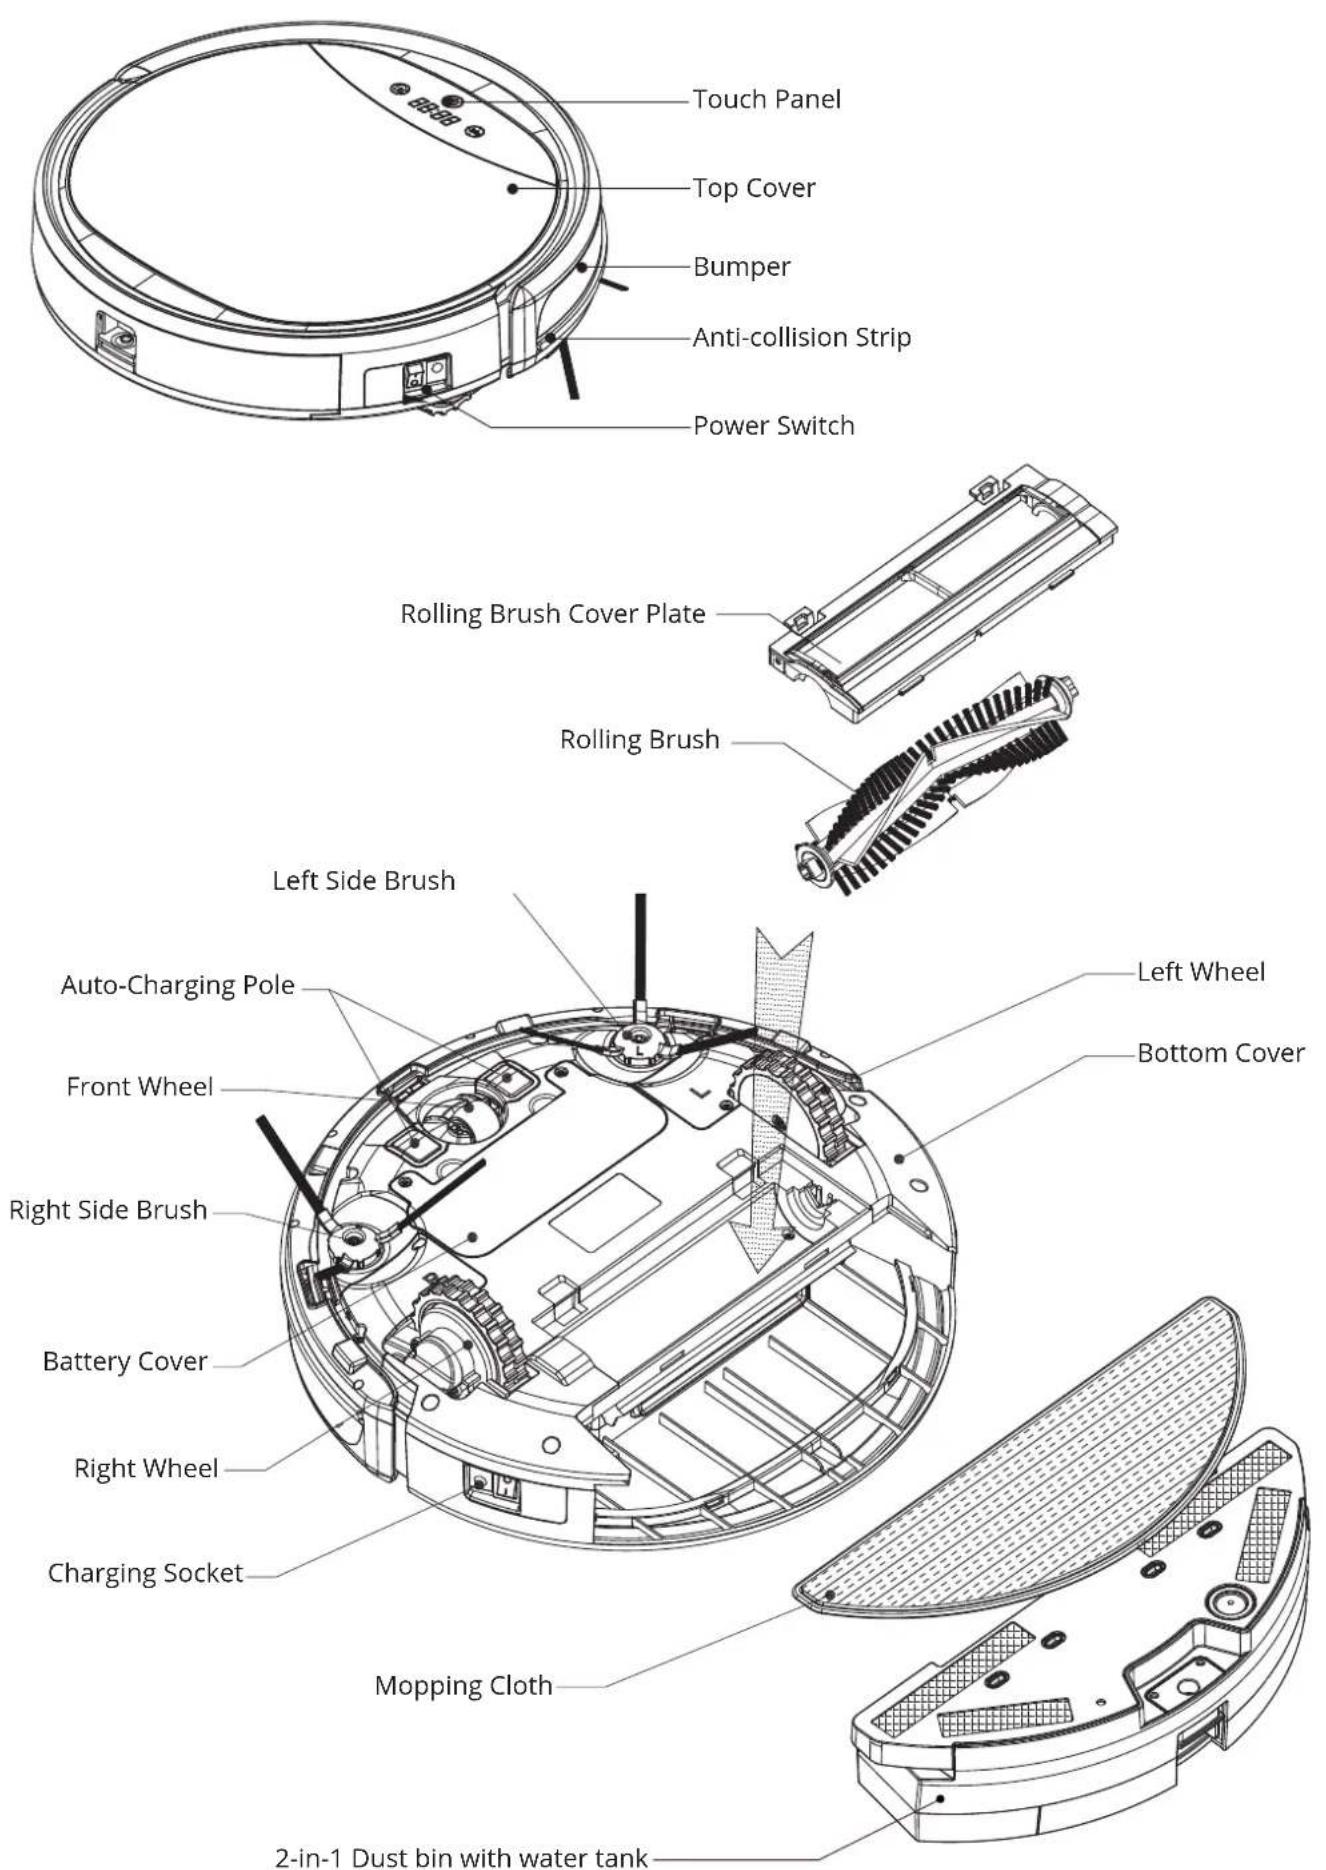
PRODUCT DIAGRAM

Symbo xBot 5 PRO - PRODUCT DIAGRAM - 1

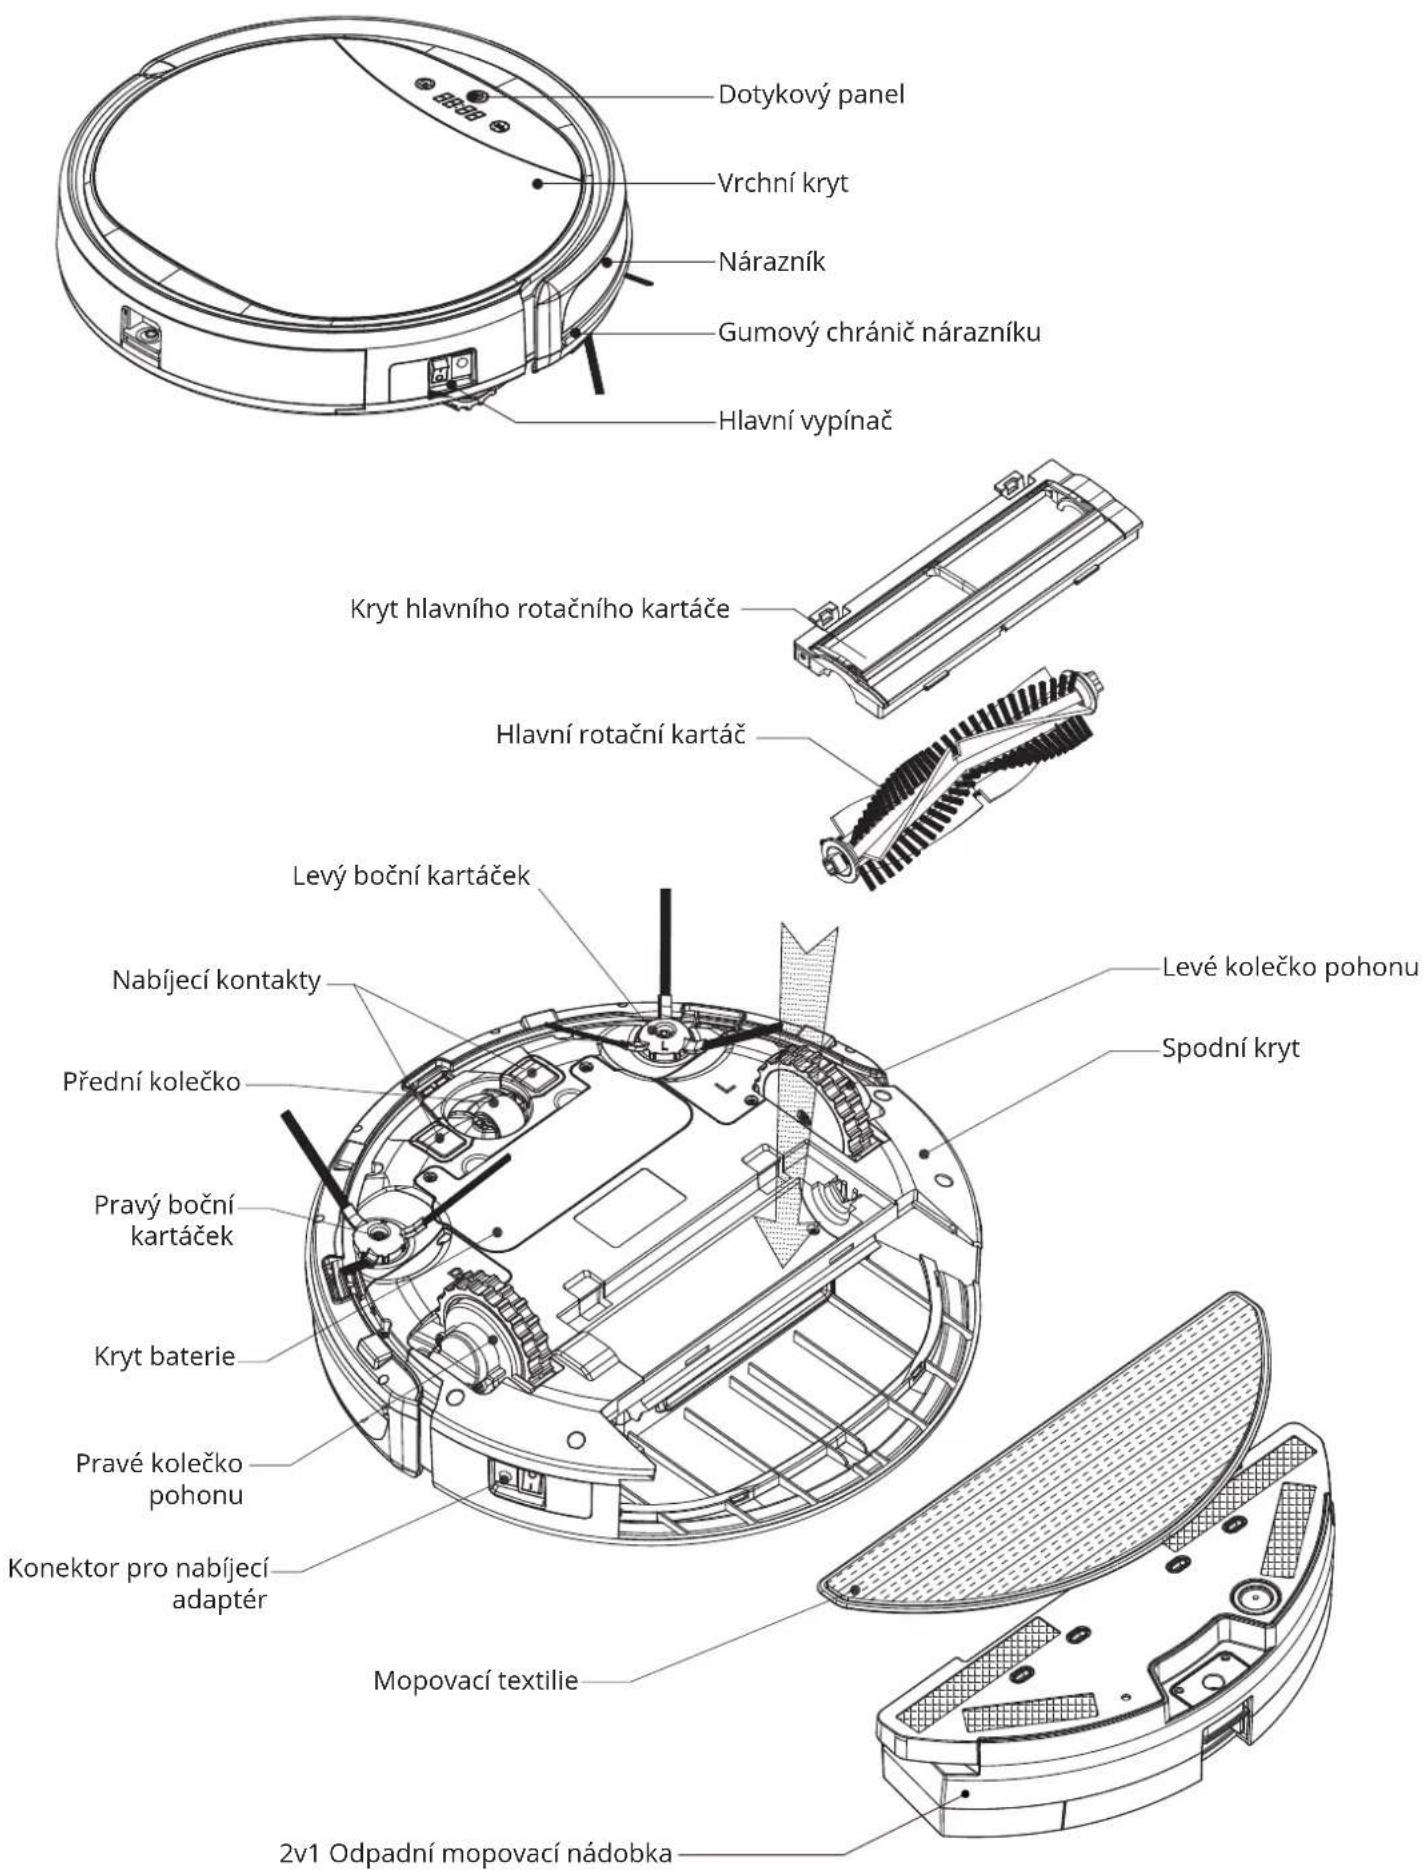
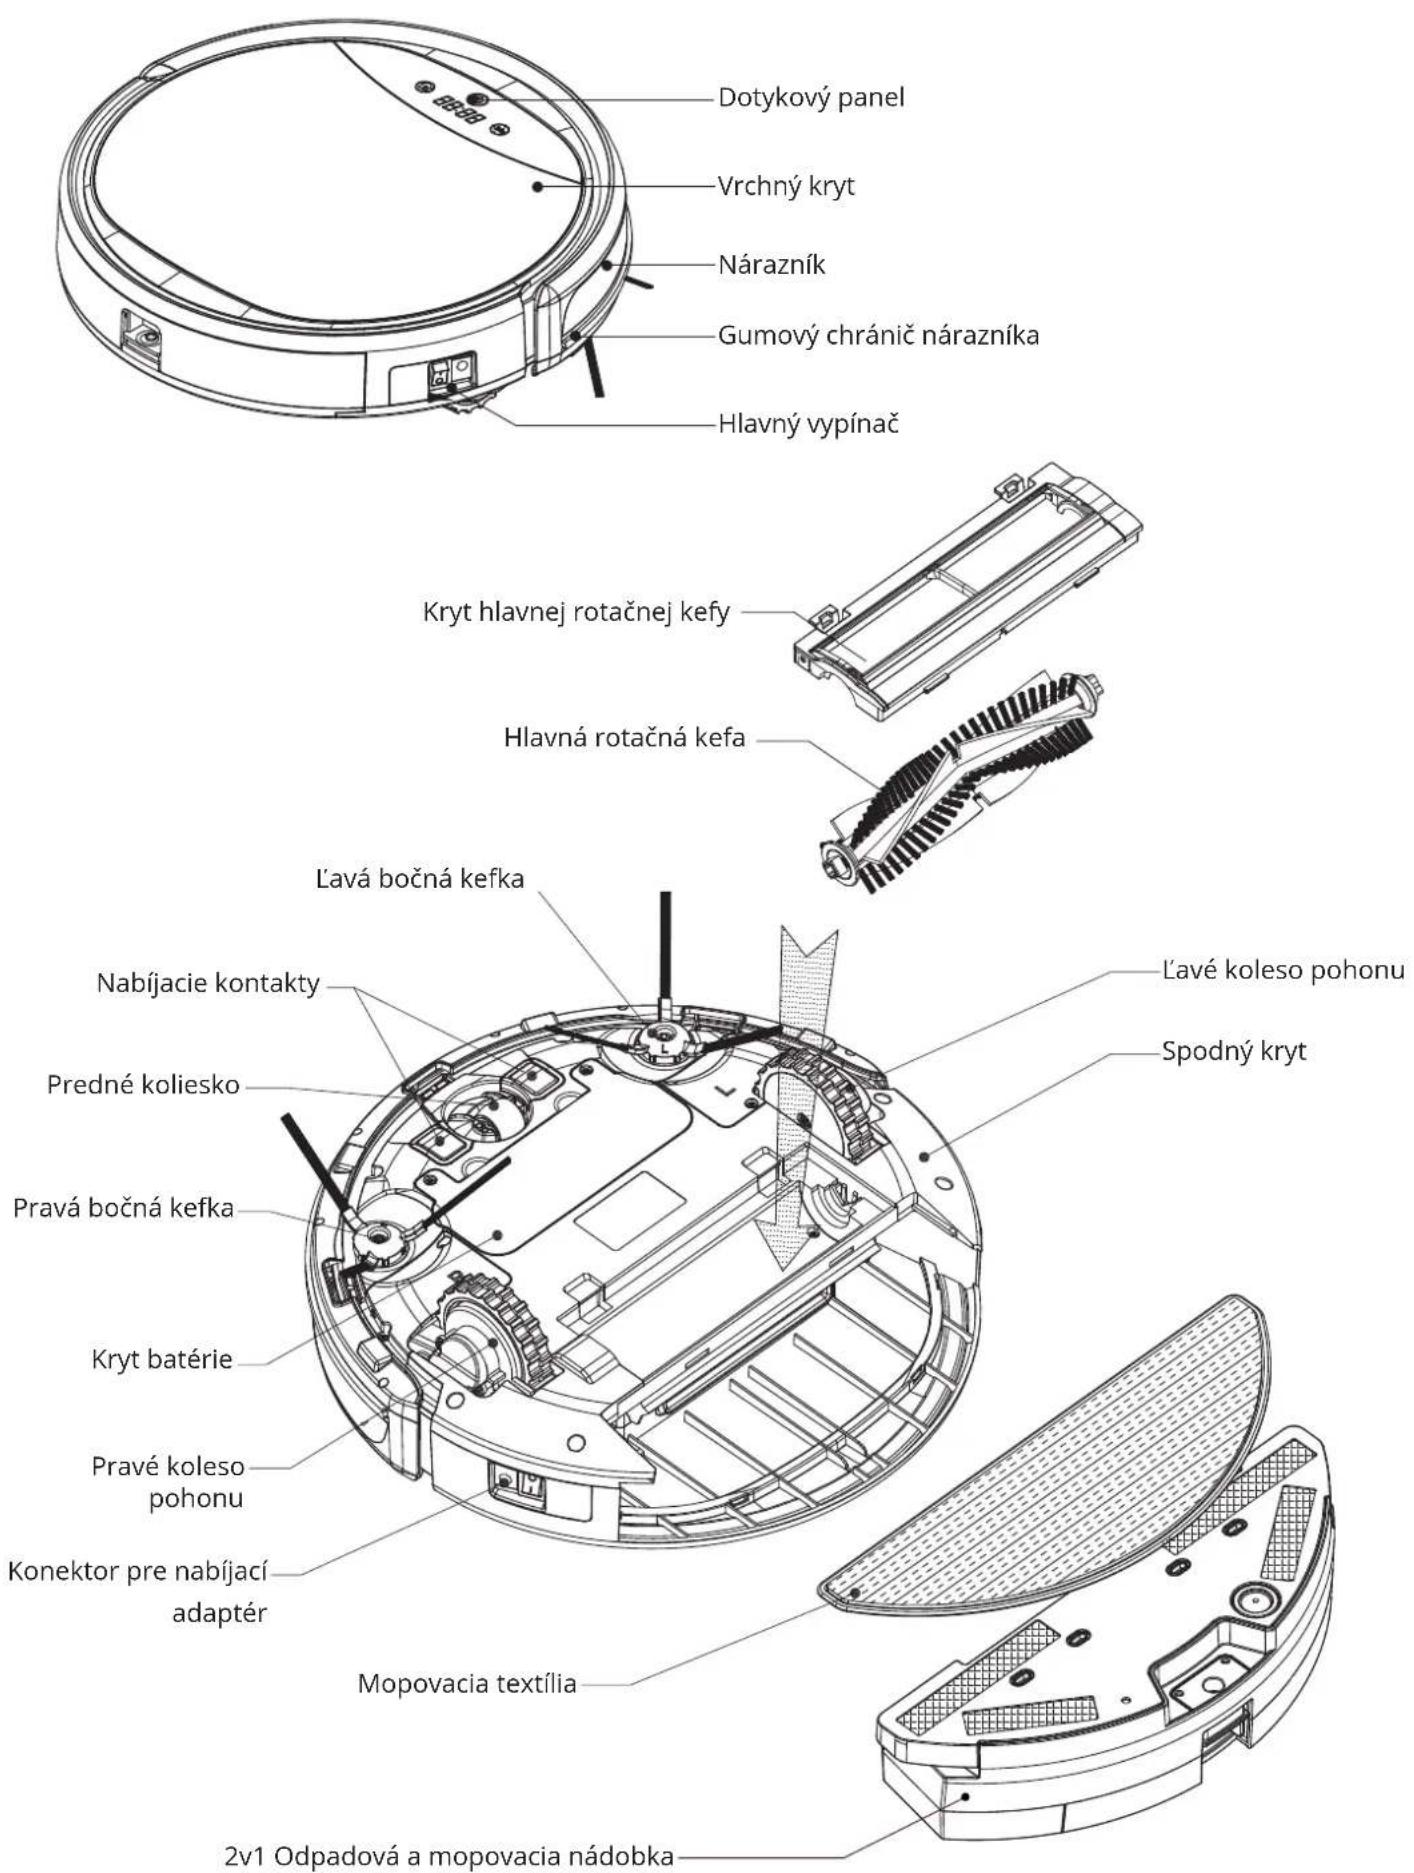
text_image Touch Panel Top Cover Bumper Anti-collision Strip Power Switch Rolling Brush Cover Plate Rolling Brush Left Side Brush Auto-Charging Pole Front Wheel Right Side Brush Battery Cover Right Wheel Charging Socket Mopping Cloth 2-in-1 Dust bin with water tank Left Wheel Bottom Cover

PRODUCT DIAGRAM

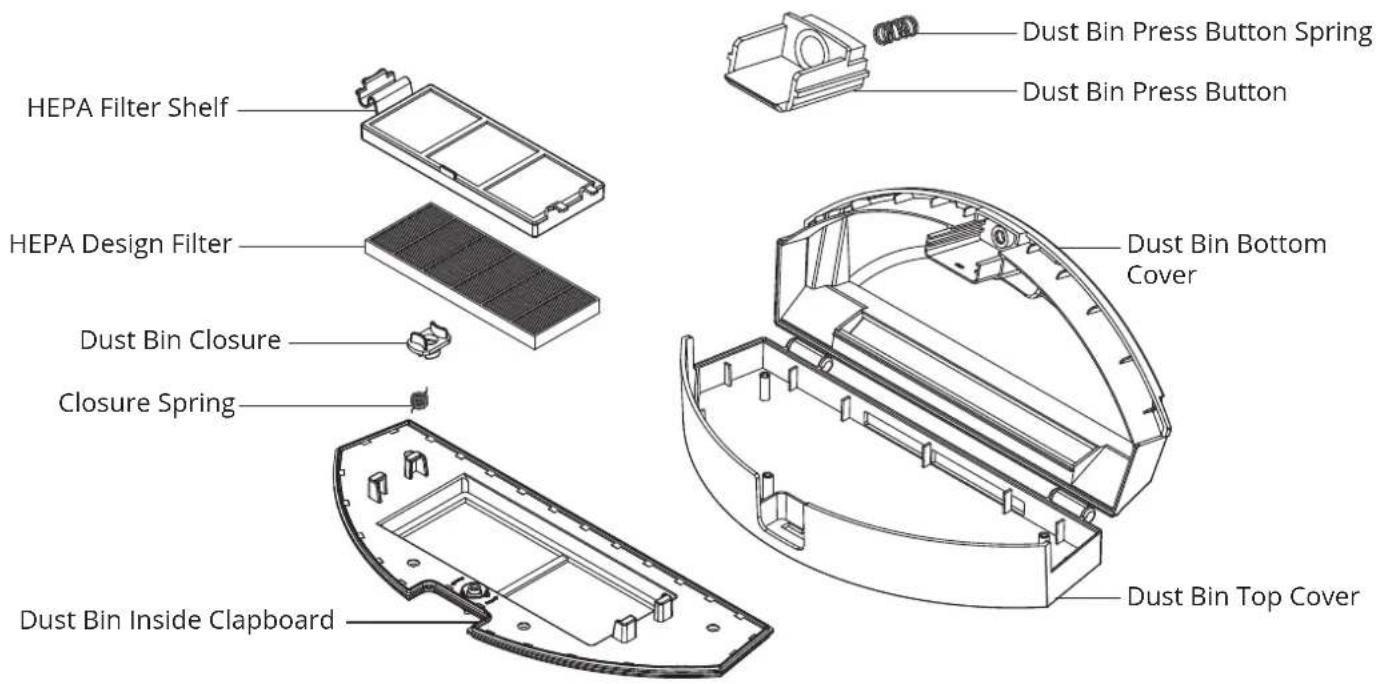
Dust Bin

Symbo xBot 5 PRO - Dust Bin - 1

text_image HEPA Filter Shelf HEPA Design Filter Dust Bin Closure Closure Spring Dust Bin Inside Clapboard Dust Bin Press Button Spring Dust Bin Press Button Dust Bin Bottom Cover Dust Bin Top Cover

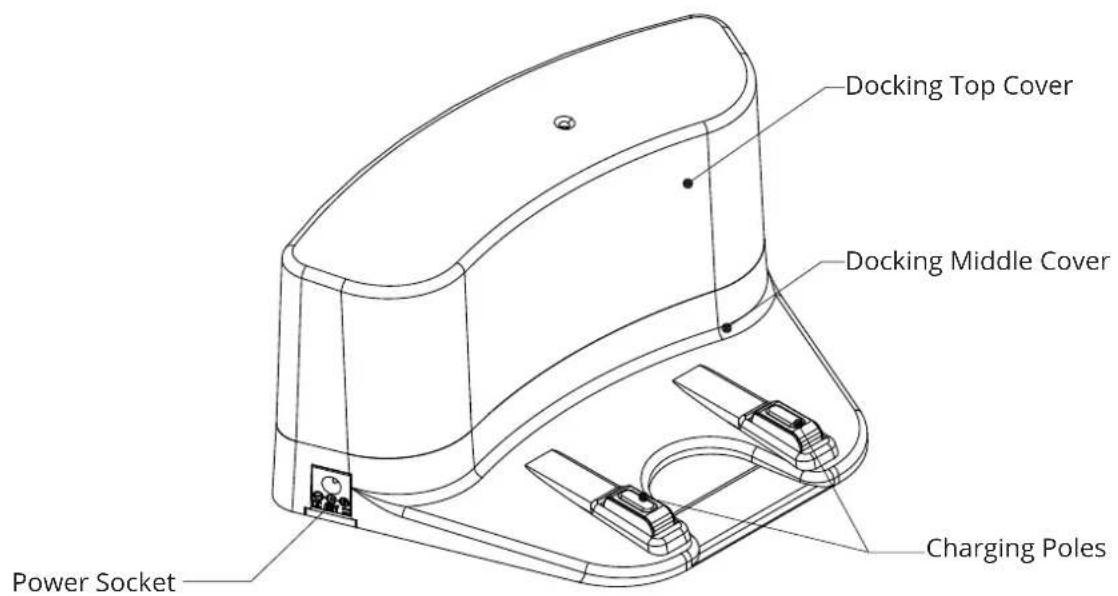
Docking Station

Symbo xBot 5 PRO - Docking Station - 1

text_image Docking Top Cover Docking Middle Cover Power Socket Charging Poles

PRODUCT DIAGRAM

Remote Control

  1. LCD Display
  2. HOME: docking button
  3. Direction buttons
    (work only when robot in stand-by)
  4. MAX: button for maximizing cleaning power (works only when robot in stand-by)
  5. CLK: time setting button
  6. PLAN: schedule cleaning time button
  7. ON/OFF: turn on/off or start/pause the robot when robot in sleep mode or stand-by
  8. MODE: change cleaning modes button (works only when robot in stand-by)
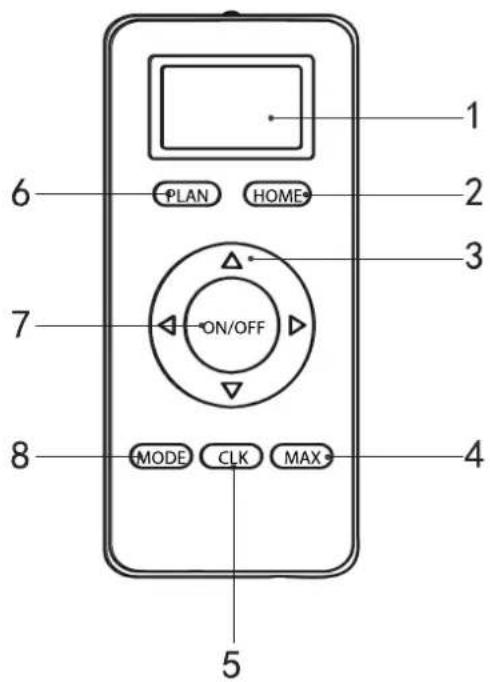
Symbo xBot 5 PRO - Remote Control - 1

text_image 1 2 3 4 5 6 PLAN HOME 7 ON/OFF 8 MODE CLK MAX
  • Please install two AAA type batteries into the remote control before use.
  • Remove the batteries if the remote control will be left unused for longer period of time.
  • If you use the remote control near the docking station, the robot may not recognize the command and may not work.

Control Panel
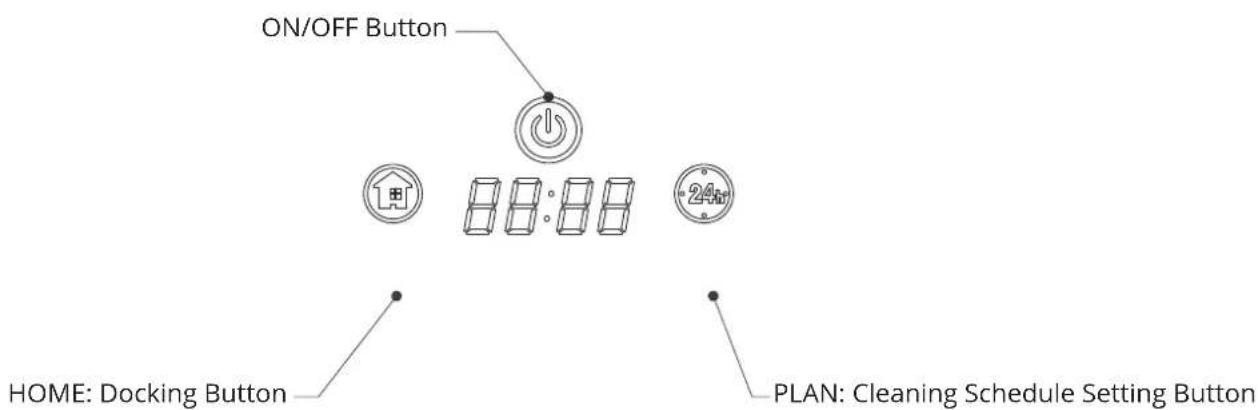
Symbo xBot 5 PRO - Control Panel - 1

text_image ON/OFF Button 1# 8:8:88 24# HOME: Docking Button PLAN: Cleaning Schedule Setting Button

TECHNICAL SPECIFICATION

  • Weight: 2.8 kg
  • Height: 80 mm
  • Diameter: 300 mm
  • Input: 100-240 V, \~50/60 Hz, 400 mA
    • Output: 24 V, 600 mA
    • Battery: Li-Ion, 2150 mAh
  • Noise level: < 65 dB
    • Vacuum power: 1300 Pa
    • Dust bin capacity: 0.5 L
    • 2-in-1 box capacity: dust bin 0.3 L, water tank: 0.2 L
  • Charging time: 4 hours
    • Cleaning time: 110-120 minutes

All specifications are subject to change without prior notice.

PRODUCT OPERATION
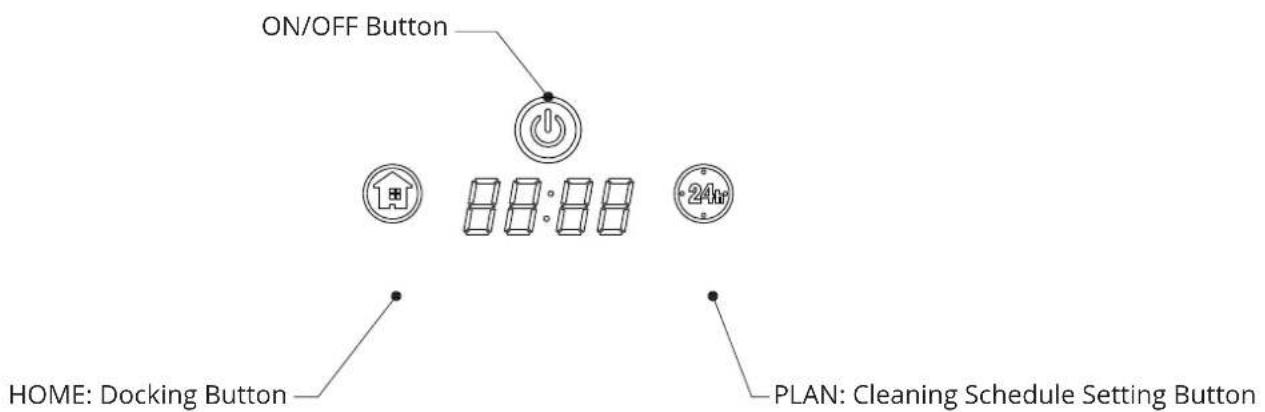
Symbo xBot 5 PRO - PRODUCT OPERATION - 1

text_image ON/OFF Button HOME: Docking Button PLAN: Cleaning Schedule Setting Button
  1. " ⏻" Cleaning operation

A. Under sleep mode, press the key to activate the robot, press again to enter auto cleaning mode.
B. Long press the key for 3 second make the robot change from stand-by to sleep mode.
C. When schedule cleaning time, press the key to confirm the schedule setting.
D. In robot time setting process, press the key to confirm the time setting.
E. In stand-by status, press the key to start auto cleaning.
F. In working status, press the key to pause robot.

  1. “①” Auto-charging/ number increase (+) operation

A. In schedule / system time setting process, press this key to make the cleaning time increase or system time number increase; when you keep pressing this key, the number will increase automatically.
B. When robot in other modes, press this key to make the robot start looking for its charging station.
C. In stand-by status, press this key for 3 seconds to enter wi-fi connection mode, display will show SUCC.

  1. "Schedule setting operation

In stand-by or charging status, press this key to Enter/Quit system time setting process; Long press this key for 3 second to Enter/Quit schedule setting.

  1. “Sdn” + “L” Operation

In stand-by status, press "PLAN" + "HOME" together at the same time to switch off/on voice demonstration.

Battery Charging

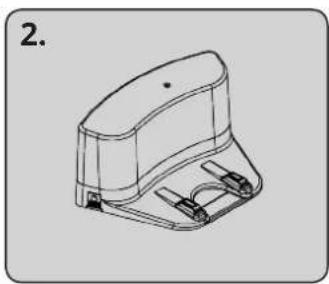
The robot can be charged automatically by docking station or manually by adapter.
Symbo xBot 5 PRO - Battery Charging - 1

text_image 1 M 2 M 1 M

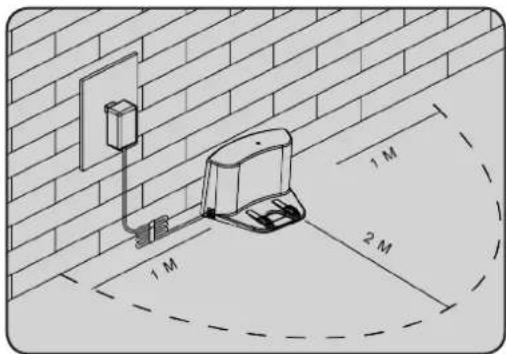
1. Charging by docking station

Place docking station against the wall and remove any obstacles about 1 meter on each side and 2 meters in front of the station (as shown in the image).

Press "HOME" button on remote control or on the robot to navigate him to docking station automatically. Or put the robot to docking station manually; be sure to place him on charging contacts properly.
Symbo xBot 5 PRO - Charging by docking station - 1

natural_image Line drawing of a robotic vacuum cleaner with power outlet and wiring (no text or symbols)

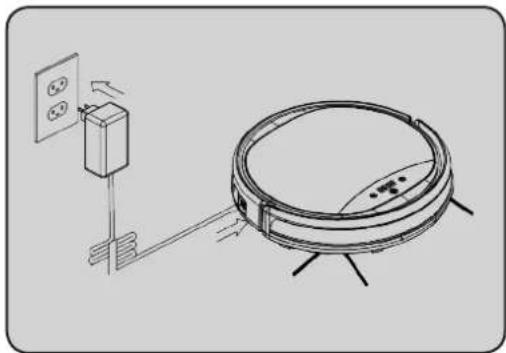
2. Charging by adapter

Connect one end of the adapter to the robot and the other end plug into the power socket (as shown in the image).

Notes:

• The robot must be switched on to start charging.
- When the robot is charging, LED panel will gradually show "1111" from left to right.
- When charging is over, LED panel will show "FULL".
- In stand-by status, the robot will broadcast voice "Please Charge" when battery capacity is low.
- While working, the robot will be looking for docking station automatically when battery capacity is low.

Tips to Extend Battery Life

  • Please, charge the robot up to 12 hours (overnight) for the first time.
  • Charge the robot as soon as possible when the battery capacity is low.
  • When you will not use the robot for longer time, please fully charge the batter, switch off the robot and keep it in a cool and dry place.
    • If the robot has been put aside over 3 months, please charge the robot for 12 hours before using.

Starting Up/ Stand-by/ Sleeping

1. Starting up

A. Switch on the button on the right side of the robot. Robot will enter stand-by status, waiting for user's operation. B. In Stand-by status, press ⏻ button on robot or "ON/OFF" on remote control to start up the robot.

Note: If the robot is in Sleeping status, press @on robot or "ON/OFF" on remote control to wake up the robot first, then press again to start up.

2. Stand-by

Stand-by means the robot is powered on, waiting for user's operation. When robot is in working status, press Ⓞ on robot or "ON/OFF" on remote control to enter stand-by status.

3. Sleeping

After some minutes of idleness, robot will enter into sleeping status. When robot is in Sleeping status, press ⏻ on robot or "ON/OFF" on remote control to activate the robot.

Before the first use

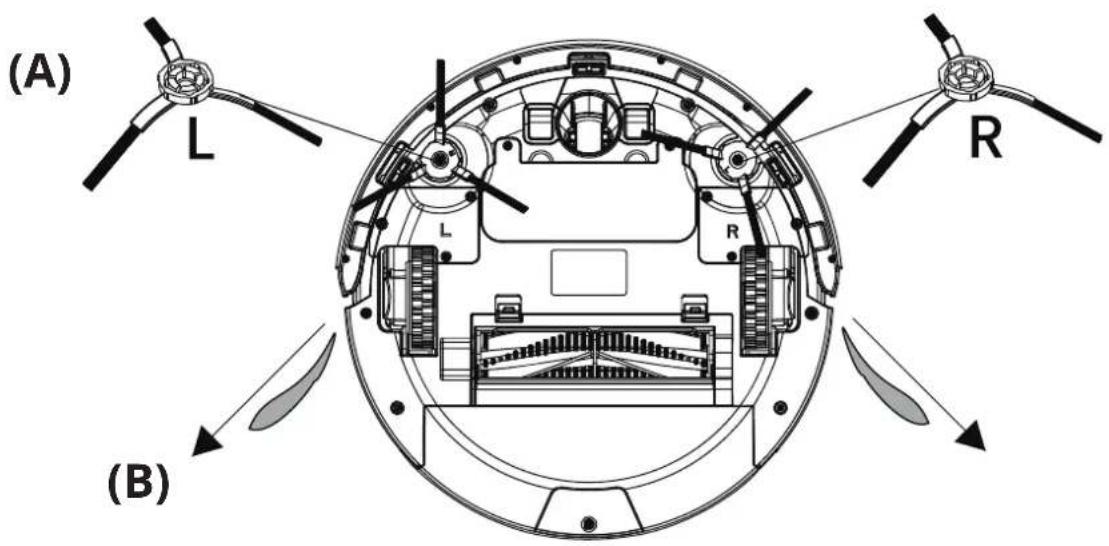
Install both side brushes (A) to proper places (R should match R, the same with L side) and remove robot bumper safety tabs from the bumper (B). Before the first use, please, charge the robot up to 12 hours (overnight), to achieve better battery life.
Symbo xBot 5 PRO - Before the first use - 1

text_image (A) L R L R (B)

Scheduling

You can schedule the robot to automatically clean once per day. The scheduled cleaning time is based on robot system time. So, you need to set the robot system time to same as real time to set the schedule correctly. When robot connects to your mobile phone's app via Wi-Fi, time will synchronize automatically. Make sure the robot is in stand-by or charging status to set the actual time or to schedule cleaning time. Once the cleaning time schedule is set, robot will start cleaning every day at the same scheduled time.

Note: If the robot is powered off, its schedule will be deleted. If you need to keep schedule time, you have to have the robot in stand-by status on charging station, or you have to schedule time again.

  • Press "PLAN" on display of robot once to enter into time settings - the left two numbers on display (representing the hours) will be flashing.
  • Press "HOME" on robot to increase hours. If you hold "HOME" on robot, the number will continuously increase till you release it.
  • Press ⏻ to confirm the hour setting and enter into minute setting, the right two numbers will be flashing. Press "HOME" to increase number. Hold "HOME" button to continuously increase minutes.
  • Press ⏻ to save the setting, then press "PLAN" to quit the time settings.

2. Schedule cleaning time

  • Hold "PLAN" button on robot or on remote control for 3 seconds to enter into robot schedule settings, the left two numbers on display (representing the hours) will be flashing.
  • On robot: Press "HOME" to increase the number. Hold "HOME" button to continuously increase hours. ⏻ Press to confirm the hour setting, and enter minutes setting, the right two numbers will be flashing. Press "HOME" to increase minutes. If you hold "HOME", the numbers will continuously increase till you release it. Press ⓘ to save settings, then press "PLAN" to exit time schedule settings.
  • On remote control: Press direction buttons on remote control to schedule delayed cleaning (for example: robot current time is 7:00 pm, scheduled delayed time on remote control is 14:30, so the robot will start work at 9:30 am). Point remote control towards the robot, then press "ON/OFF" button on remote control to confirm the setting. If delayed time successfully set, the robot LED display will show your scheduled time. Hold "PLAN" button on remote control for 3 seconds to exit scheduling mode.
  • Via app (if supported): it is able to schedule cleaning time at different times for each day. Please, see instructions in app for settings.

3. Cancel schedule cleaning time

  • On robot: Set the scheduled time on robot to "00:00"
  • On remote control: Set the scheduled time to "00:00", then point remote control towards the robot and press "ON/OFF" to confirm.
    • Via app (if supported)

PRODUCT OPERATION

Cleaning Modes

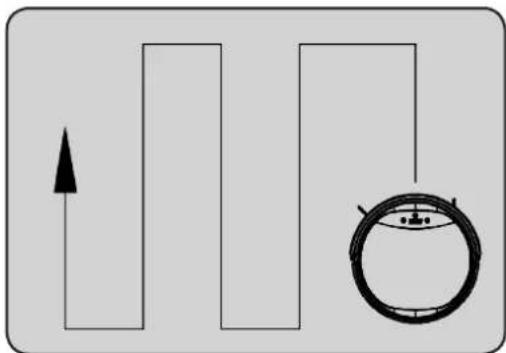
There are below cleaning modes to meet different cleaning requirements for you.
Symbo xBot 5 PRO - Cleaning Modes - 1

natural_image Simple diagram with directional arrows and a circular gauge (no text or symbols)

Automatic Cleaning Mode

In stand-by status, press "ON/OFF" button on robot body or on remote control, to start automatic cleaning mode. The robot uses Smart GYRO navigation to clean thoroughly and to cover the greatest area.
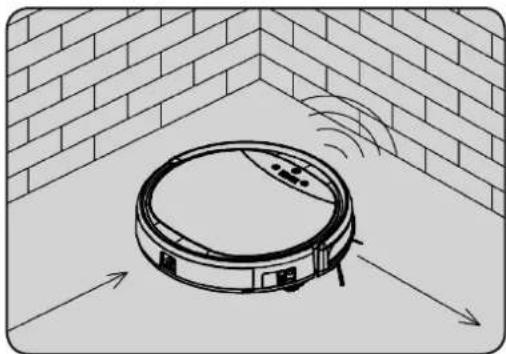
Symbo xBot 5 PRO - Automatic Cleaning Mode - 1

natural_image Illustration of a robotic vacuum cleaner inside a brick wall, with airflow arrows indicating movement (no text or symbols)

Other Cleaning Modes

Press "MODE" on remote control to change the cleaning mode:

• MODE 1: edge cleaning - the robot will clean edges, part by part.
• MODE 2: local cleaning - the robot will clean small area about 2 x 2 m.
- MODE 3: random cleaning - the robot will start random cleaning (the robot will not use any navigation system).
- MODE 4: double cleaning - the robot will clean house twice (available for small room only).

After pressing "MODE" button again, the robot will enter stand-by status.
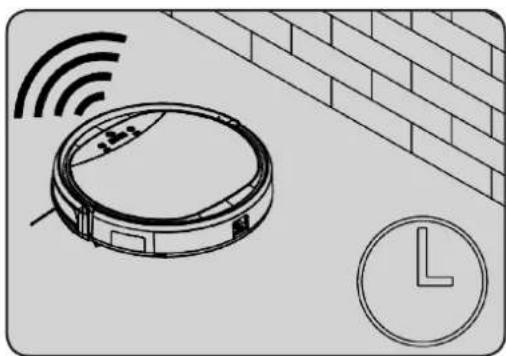
Symbo xBot 5 PRO - Other Cleaning Modes - 1

natural_image Illustration of a robotic vacuum cleaner with wireless signal waves and a clock face (no text or symbols)

Max Cleaning Mode

Press "MAX" on remote control to maximize the power of suction.

The robot uses Smart GYRO navigation in this mode.

PRODUCT OPERATION

How to use 2-in-1 water tank

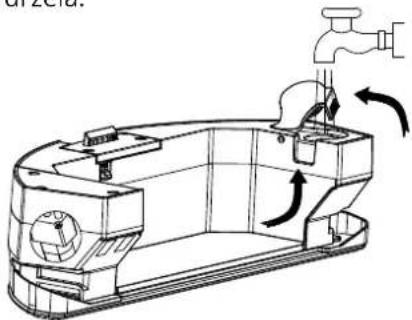
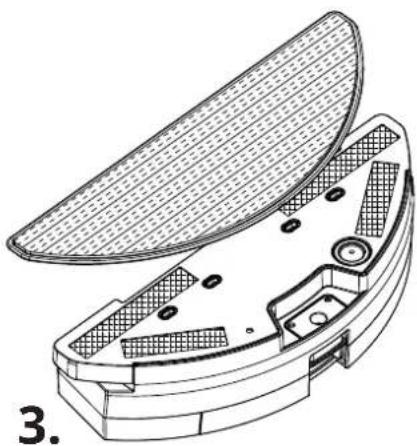
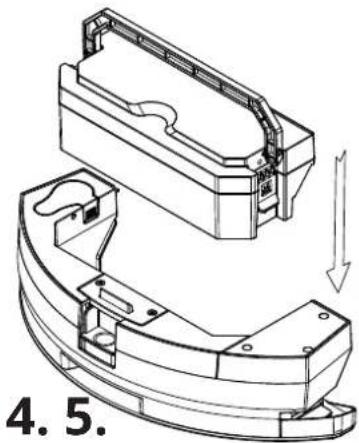
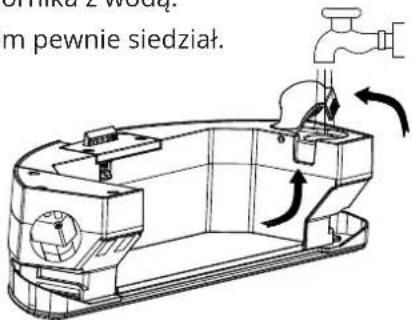
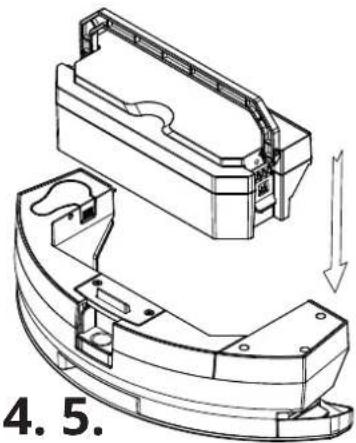
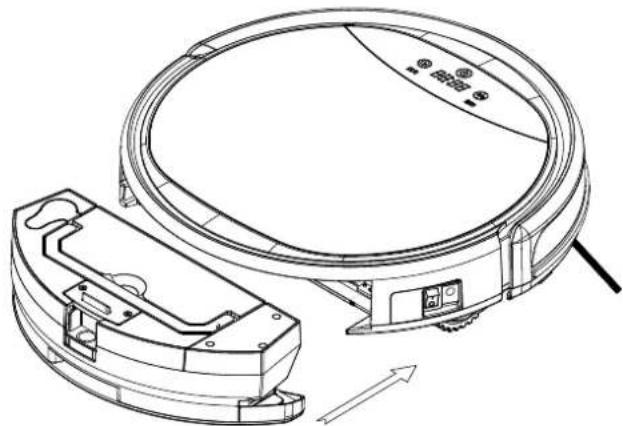
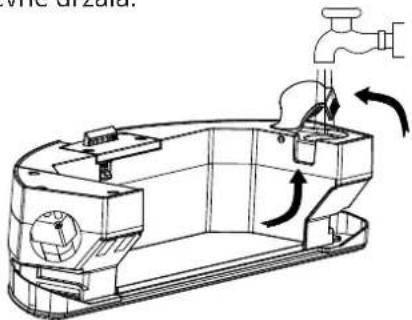
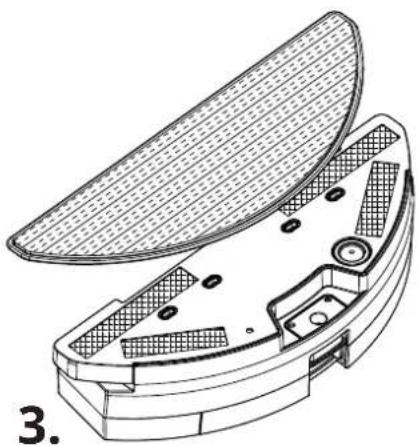
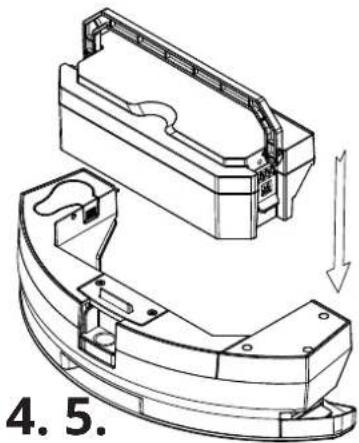
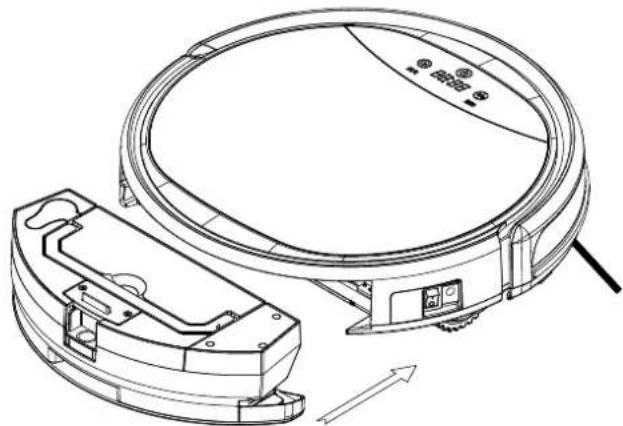
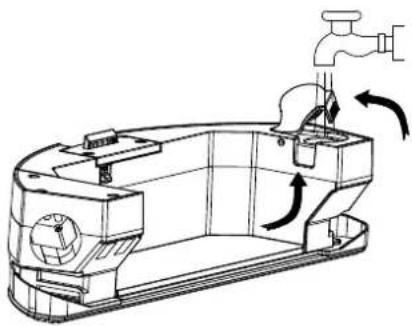
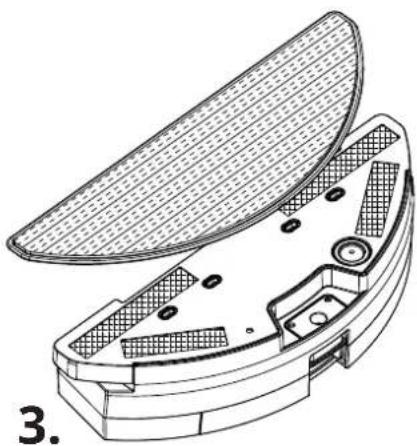
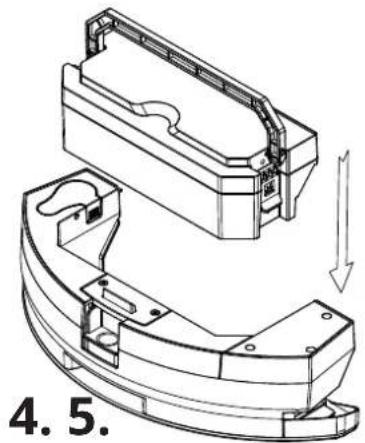
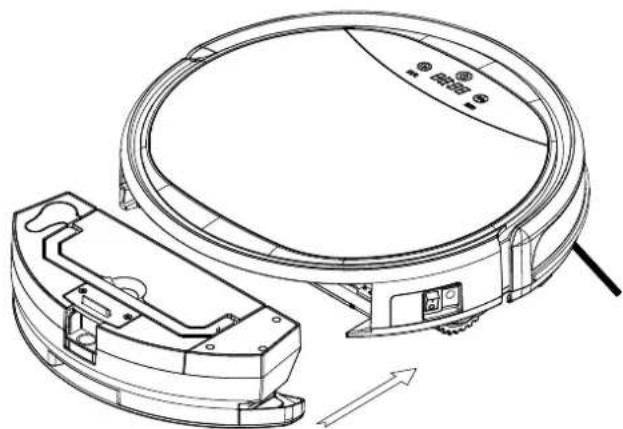
The robot can use 2-in-1 water tank for vacuum cleaning and wet mopping at the same time. To use 2-in-1 water tank, remove the dust bin first. Before installing 2-in-1 water tank, follow the next steps:

  1. Remove the dust bin from 2-in-1 water tank.
  2. Fill the water tank with clear water.
  3. Moisten the mopping cloth and attach it to the water tank from below.
  4. Attach the dust bin back to 2-in-1 water tank.
  5. Install the 2-in-1 water tank to the robot.
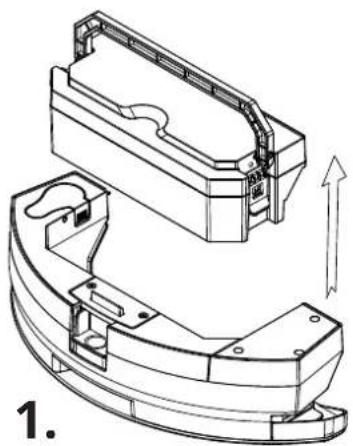
Symbo xBot 5 PRO - How to use 2-in-1 water tank - 1

natural_image Technical line drawing of a mechanical housing component with an upward arrow indicating motion (no text or symbols present)
  1. Symbo xBot 5 PRO - How to use 2-in-1 water tank - 2
natural_image Technical line drawing of a mechanical device with faucet and internal components (no text or symbols)

Symbo xBot 5 PRO - How to use 2-in-1 water tank - 3

natural_image Technical line drawing of a boat's internal structure with mesh insulation and mounting holes (no text or symbols)

Symbo xBot 5 PRO - How to use 2-in-1 water tank - 4

natural_image Technical line drawing of a mechanical housing component with internal components and directional arrows (no text or symbols)

Symbo xBot 5 PRO - How to use 2-in-1 water tank - 5

natural_image Technical line drawing of a robotic vacuum cleaner with internal components and directional arrows (no text or symbols)

Note: the 2-in-1 water tank has electronic pump to water dosing. It also prevents the water leakage when robot ends cleaning or is in docking station.

How to use boundary strip

Boundary strip is used to prevent to enter the robot to the protected area. You can use it to protect pet bowls, to prevent access to rooms, etc.

Just lay the boundary strip down on the floor and the robot recognizes it as an obstacle and do not go across. The boundary strip can be used under the carpet, you can use a double-sided tape to keep it on place, you can also cut it to smaller pieces. You can buy additional boundary strips to enlarge the protected area.
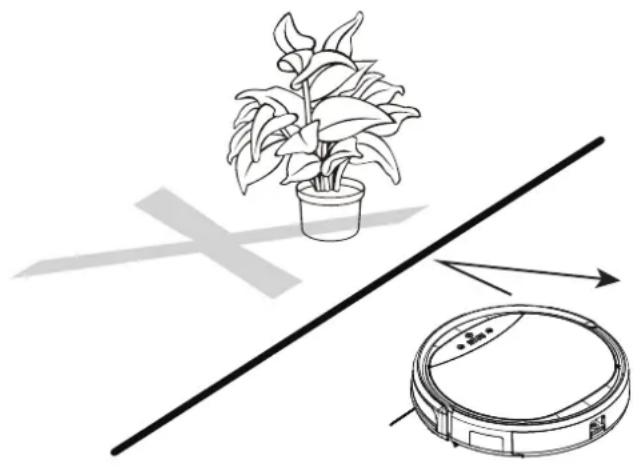
Symbo xBot 5 PRO - How to use boundary strip - 1

natural_image Illustration of a potted plant and a vacuum cleaner on a diagonal line, with no text or symbols present.

Note: some models (such as xBot 5 PRO) are delivered with the boundary strip in package, some (such as xBot 5) are not, but you can buy it from your seller.

Application

If Wi-Fi is supported by your robot, you can control it via app.

  1. Install the app from Google Play or Apple App Store.
  2. Run the app and, please, register yourself before using it for the first time.
  3. Connect the app with the robot (follow the instructions in app).
  4. Now, you can control the robot via app (movement, scheduling, see stats, ...).

Notes: Before the first connection, the robot and the mobile device must be connected to the same Wi-Fi network.

Make sure the mobile device is connected to 2.4 GHz network (not 5 GHz) and the Wi-Fi signal is strong enough.

Regularly update the app for the latest features.

Symbo xBot 5 PRO - Application - 1

text_image QR code image containing encoded data, no visible human-readable text

iOS

Symbo xBot 5 PRO - Application - 2

text_image QR code image containing encoded data, no visible human-readable text

Android

CLEANING AND MAINTENANCE

Dust Bin and Filters Cleaning

Empty and clean dust bin every time after use:
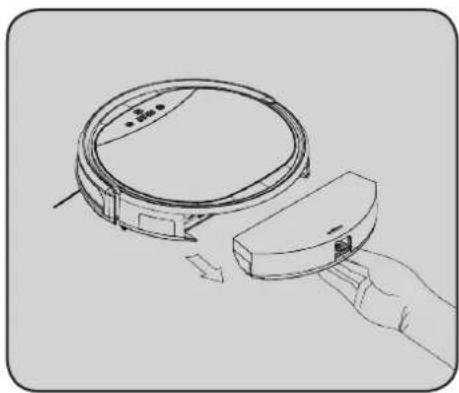
Symbo xBot 5 PRO - Dust Bin and Filters Cleaning - 1

natural_image Line drawing of a hand holding a device next to a circular device with arrows indicating motion (no text or symbols)

A. Remove the dust bin by pressing down the button and pulling off
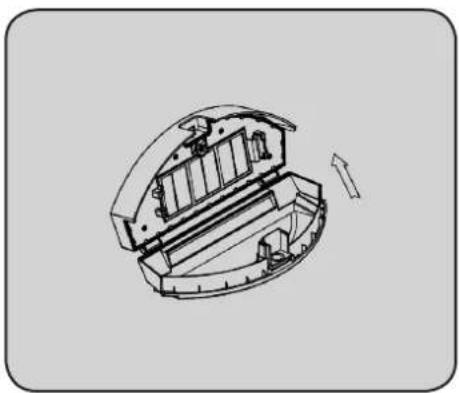
Symbo xBot 5 PRO - Dust Bin and Filters Cleaning - 2

natural_image Cross-sectional diagram of a mechanical device showing internal components and a directional arrow (no text or symbols)

B. Open the dust bin

Symbo xBot 5 PRO - Dust Bin and Filters Cleaning - 3

natural_image Exploded view diagram of a robotic device showing internal components and assembly (no text or labels)

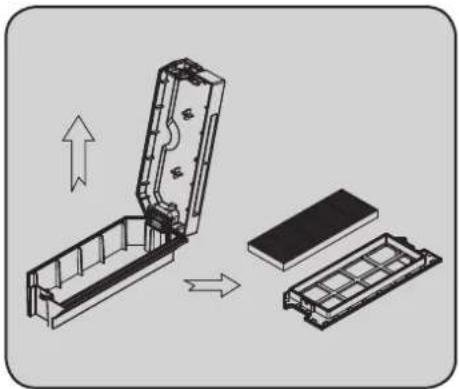
C. Remove both filters

Symbo xBot 5 PRO - Dust Bin and Filters Cleaning - 4

natural_image Diagram of a mechanical device with internal components and a base, no visible text or symbols

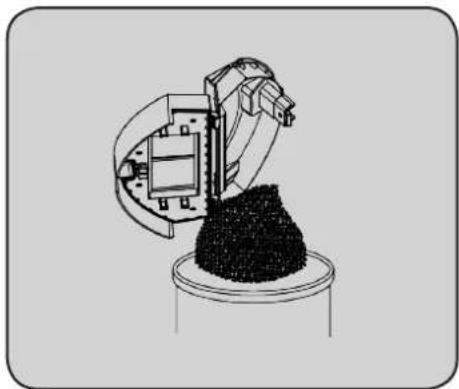
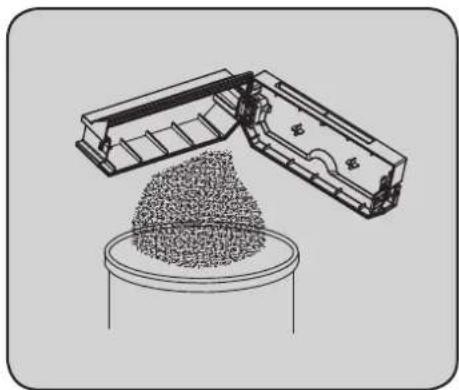
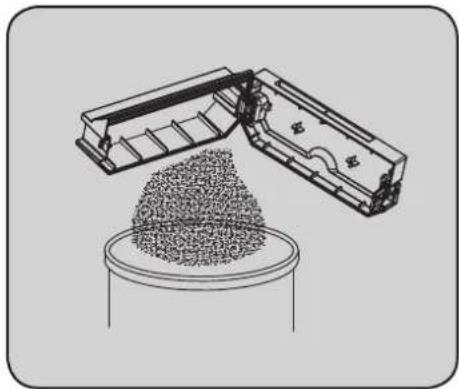
D. Empty the dust bin

Symbo xBot 5 PRO - Dust Bin and Filters Cleaning - 5

natural_image Isometric illustration of a handheld electronic device with a black base and connector (no text or symbols)

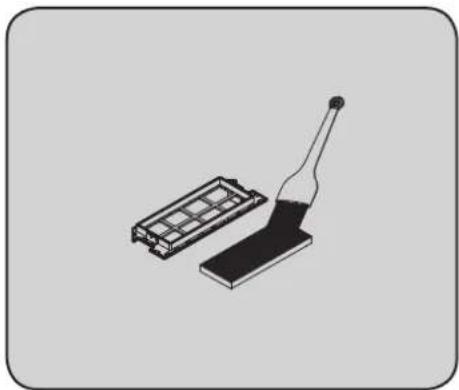
E. Clean the filters

Symbo xBot 5 PRO - Dust Bin and Filters Cleaning - 6

natural_image Diagram showing a device being processed into a multi-chambered housing, with arrows indicating process flow (no text or symbols present)

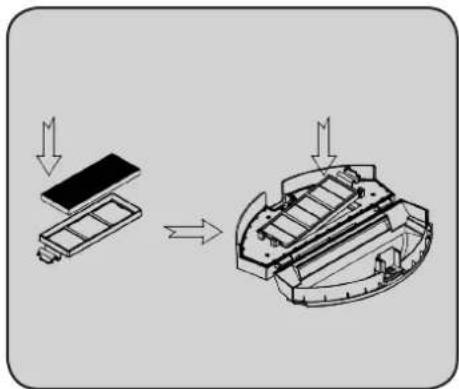
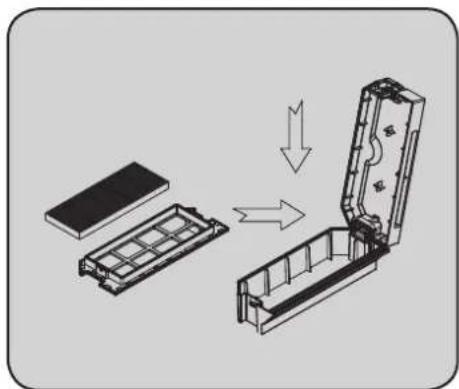
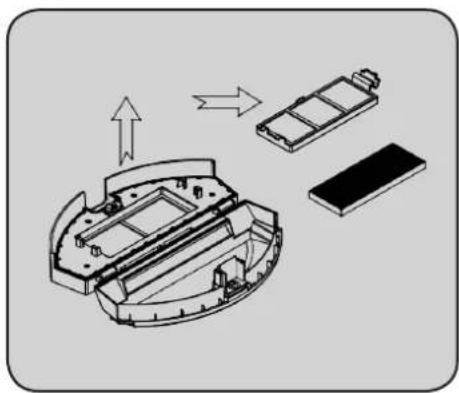
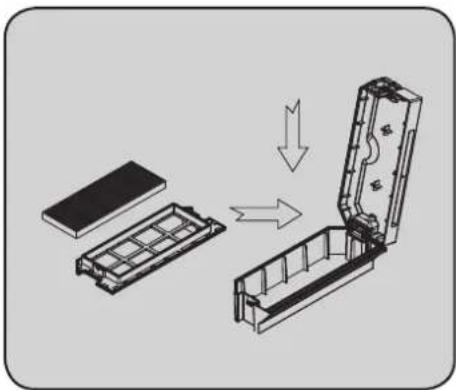
F. Install the filters back to dust bin

CLEANING AND MAINTENANCE

Dust Bin and Filters Cleaning

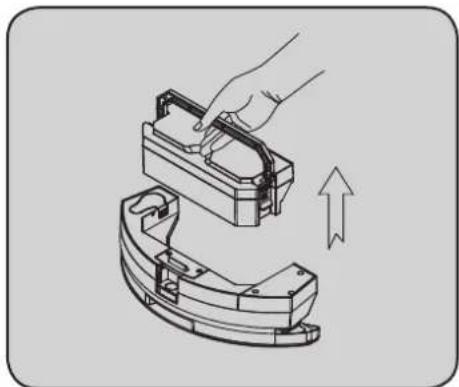
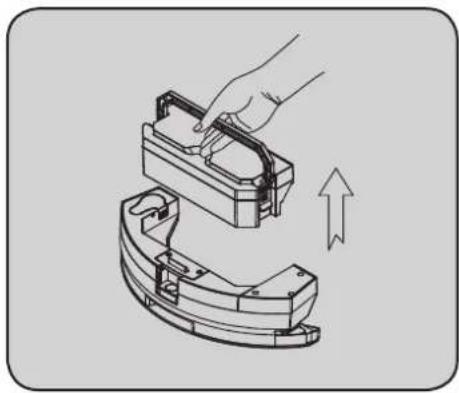
The 2-in-1 water tank can be cleaned similarly:
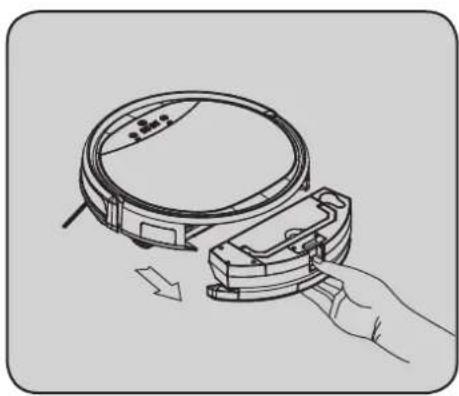
Symbo xBot 5 PRO - Dust Bin and Filters Cleaning - 1

natural_image Line drawing of a hand holding a device with a circular component and directional arrow (no text or symbols)

A. Remove the dust bin by pressing down the button and pulling off
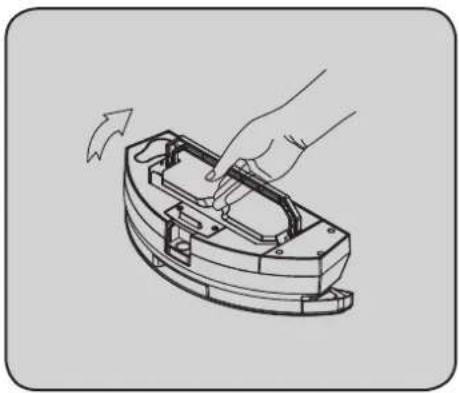
Symbo xBot 5 PRO - Dust Bin and Filters Cleaning - 2

natural_image Illustration of a hand turning a component into a curved mechanical housing (no text or symbols)

B. Hold and lift the handle

Symbo xBot 5 PRO - Dust Bin and Filters Cleaning - 3

natural_image Diagram of a hand placing a component into a mechanical housing with an upward arrow indicating motion (no text or symbols present)

C. Detach the dust bin from water tank
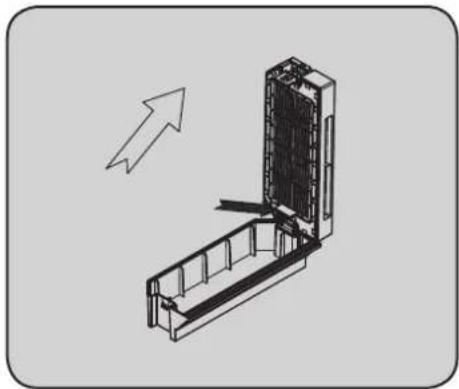
Symbo xBot 5 PRO - Dust Bin and Filters Cleaning - 4

natural_image Technical line drawing of a mechanical assembly with an arrow indicating direction (no text or symbols present)

D. Open the dust bin

Symbo xBot 5 PRO - Dust Bin and Filters Cleaning - 5

natural_image Diagram showing a device being assembled into a battery pack, with no visible text or symbols.

E. Remove both filters

Symbo xBot 5 PRO - Dust Bin and Filters Cleaning - 6

natural_image Diagram of a conveyor belt system with granular material inside, showing no text or symbols

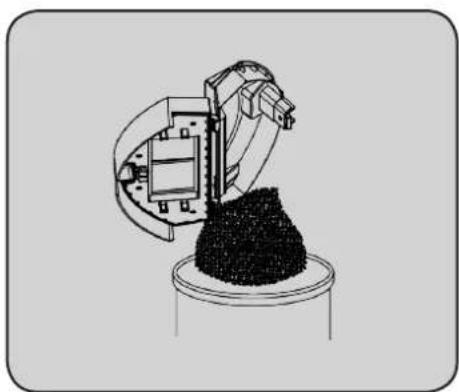
F. Empty the dust bin

Symbo xBot 5 PRO - Dust Bin and Filters Cleaning - 7

natural_image Illustration of a battery pack and a paintbrush (no text or symbols)

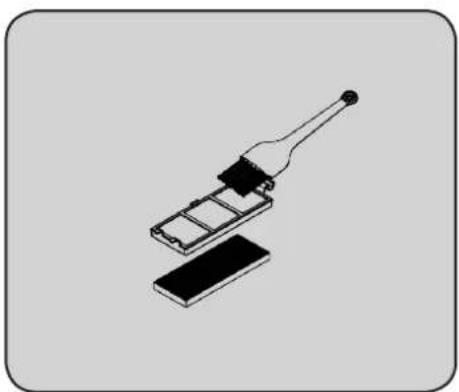
G. Clean the filters and dust bin

Symbo xBot 5 PRO - Dust Bin and Filters Cleaning - 8

natural_image Diagram showing a device being processed into a multi-chamber housing, with no visible text or symbols.

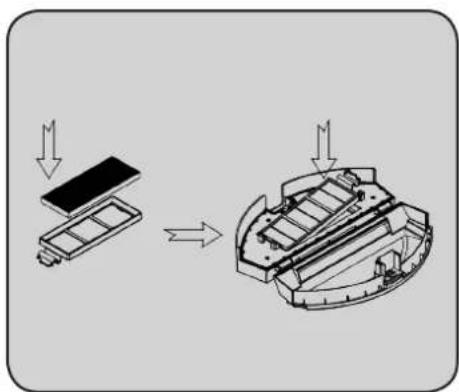
H. Install the filters back to dust bin

Note: empty also the left water from water tank

The dust bin can be washed by water. You can wash also the primary filter. After washing, be sure to fully dry the dust bin and filter. Do not wash HEPA-design filter.

Primary filter and HEPA-design filter are changeable accessories. Maximum life span for HEPA-design filter is 24 months.

CLEANING AND MAINTENANCE

Sensors and Charging Poles Cleaning

Please, regularly clean the anti-fall and anti-collision sensors, and charging poles of robot and docking station with dry cloth.
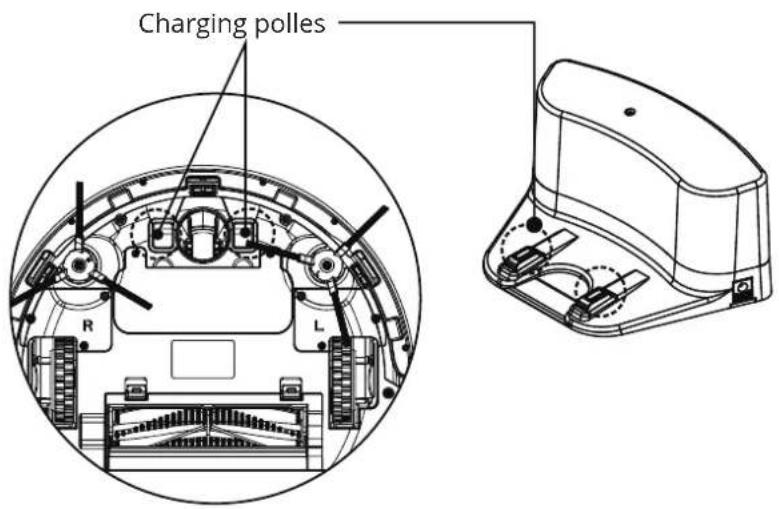
Symbo xBot 5 PRO - Sensors and Charging Poles Cleaning - 1

text_image Charging polles R L

Side Brushes Cleaning

Symbo xBot 5 PRO - Side Brushes Cleaning - 1

natural_image Simple line drawing of a three-pronged tool with a central hub (no text or symbols)

Symbo xBot 5 PRO - Side Brushes Cleaning - 2

natural_image Pure mechanical component diagram with three arms and a central hub (no text or symbols)

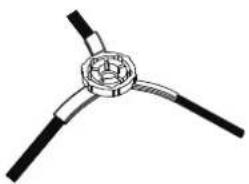
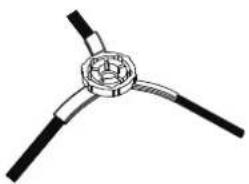
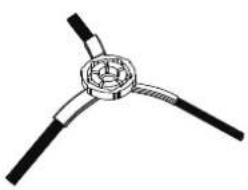
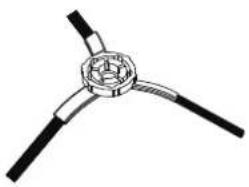
Remove any tangled material from side brushes, like hair, threads, ... and behind the side brushed by removing them from the robot body. If side brushes are curly or deformed, put the bristles into hot water for at least 5 seconds. If side brush is damaged or bristles are too short, please, replace it.

Main Brush Cleaning

Please, regularly clean also the main rolling brush. Remove any dirt, hair, threads,... from the brush and also from the bearing.
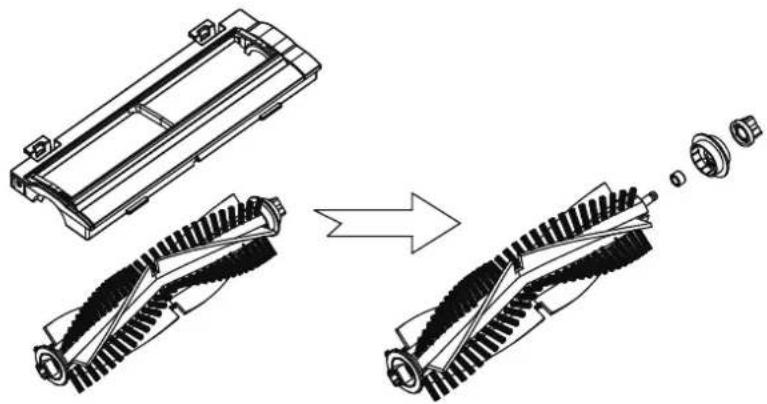
Symbo xBot 5 PRO - Main Brush Cleaning - 1

natural_image Technical illustration of a mechanical component before and after assembly, showing disassembled parts with no visible text or symbols.

TROUBLESHOOTING

Error CodeReason Solution
E2The robot is turned off while trying to chargeTurn on the power switch on robot.
E3Charging voltage is low or auto recharging failsPlease charge the robot.
E11 Left side anti-fall errorPlease, remove any obstacles from anti-fall sensors, wheels, or put the robot on the floor properly.
E12 Right side anti-fall error
E13 Front side anti-fall error
E21 Left wheel fall error
E22 Right wheel fall error
E23 Front wheel lifted up
E31 Left side bumper errorRemove any obstacles from bumper. If it does not help, please, contact customer service.
E32 Right side bumper error
E33 Front side bumper error
E41 Left wheel overload errorRemove any obstacles from the wheel. If it does not help, please, contact customer service.
E42 Right wheel overload error
E43 Left side brush overload errorRemove any obstacles from the side brush. If it does not help, please, contact customer service.
E44 Right side brush overload error
E45 Fan motor overload error Please, contact customer service.
E46Main brush overload errorRemove any obstacles from the main brush. If it does not help, please, contact customer service.
LOPower is lowPlease charge the robot.
11:11In chargingThe robot is charging. No need for any action.
FULLCharge completeCharging is complete and the robot is ready for work.
CONNWi-Fi connecting
FAILWi-Fi connection errorTry to connect to Wi-Fi once again.
SUCCWi-Fi release success

Note: if above solutions did not work, please try as below:
1. Switch off the power button on the robot, then switch it on.
2. If it does not help, please, contact customer service.

TROUBLESHOOTING

Battery Removal

  1. Remove the screws on battery cover with a screw driver.
  2. Remove the battery cover.
  3. Grasp the battery and lift it up.
  4. Unplug the wire connector that links the battery and the robot.
  5. Plug the wire connector to the new battery.
  6. Put back the battery to the robot.
  7. Put the battery cover on place and screw it.
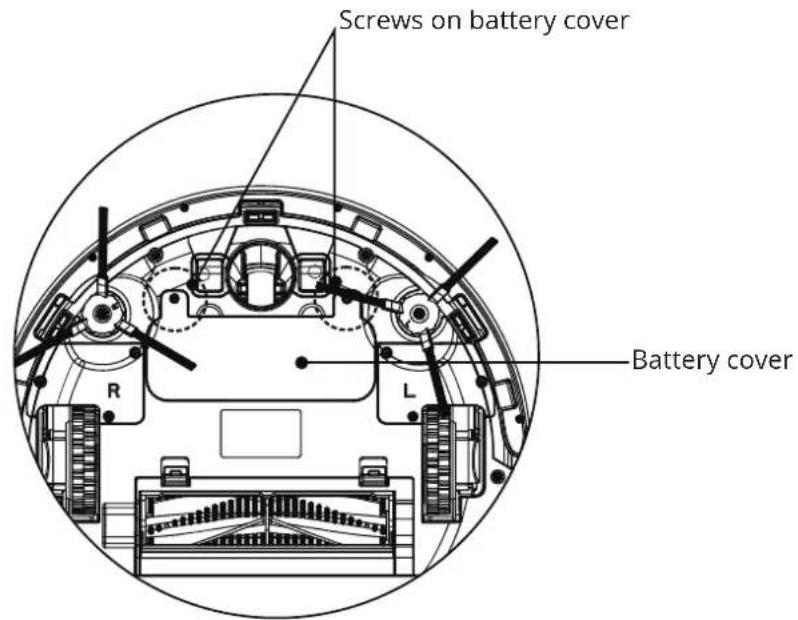
Symbo xBot 5 PRO - Battery Removal - 1

text_image Screws on battery cover Battery cover R L

INSTRUCTIONS AND INFORMATION REGARDING THE DISPOSAL OF USED PACKAGING MATERIALS

Take the packaging material to a designated municipal waste facility.

DISPOSAL OF USED BATTERIES

Batteries contain environmentally damaging compounds and therefore do not belong in standard household waste. Take the batteries to an appropriate collection point, which will provide for their ecological disposal. You can obtain the contact for the nearest collection point from you town council or from your retailer.

DISPOSAL OF USED ELECTRICAL AND ELECTRONIC EQUIPMENT
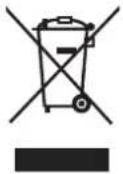
Symbo xBot 5 PRO - DISPOSAL OF USED ELECTRICAL AND ELECTRONIC EQUIPMENT - 1

This symbol on products or original documents means that used electric or electronic products must not be added to ordinary municipal waste. For proper disposal and recycling, take these products to designated collection points. Alternatively, in some European Union states or other European countries you may return your appliances to the local retailer when buying an equivalent new appliance. Correct disposal of this product helps save valuable natural resources and prevents damage to the environment caused by improper waste disposal. Ask your local authorities or collection facility for more details. In accordance with national regulations penalties may be imposed for the incorrect disposal of this type of waste.

For business entities in European Union states

If you want to dispose of electric or electronic devices, ask your retailer or supplier for the necessary information.

Disposal in other countries outside the European Union

This symbol is valid in the European Union. If you wish to discard this product, ask your local authorities or retailer about proper disposal.

Symbo xBot 5 PRO - Disposal in other countries outside the European Union - 1

This product meets all the basic requirements of EU directives that apply to it.
Symbo xBot 5 PRO - Disposal in other countries outside the European Union - 2

text_image QR code image containing encoded data, no visible human-readable text

www.symbo.eu

Symbo xBot 5 PRO - Disposal in other countries outside the European Union - 3

natural_image Abstract geometric icon of a 3D cube with no text or symbols

SYMBO

Dovozce / Importer / Dovozca:

ROBOT WORLD s.r.o.

Běloveská 944

547 01 Náchod

Česká republika

www.symbo.eu
Table of contents Click a title to access it
Manual assistant
Powered by Anthropic
Waiting for your message
Product information

Brand : Symbo

Model : xBot 5 PRO

Category : Vacuum Cleaner