532 43 20-32 - Agricultural tractor accessory MCCULLOCH - Free user manual and instructions
Find the device manual for free 532 43 20-32 MCCULLOCH in PDF.
User questions about 532 43 20-32 MCCULLOCH
0 question about this device. Answer the ones you know or ask your own.
Ask a new question about this device
Download the instructions for your Agricultural tractor accessory in PDF format for free! Find your manual 532 43 20-32 - MCCULLOCH and take your electronic device back in hand. On this page are published all the documents necessary for the use of your device. 532 43 20-32 by MCCULLOCH.
USER MANUAL 532 43 20-32 MCCULLOCH
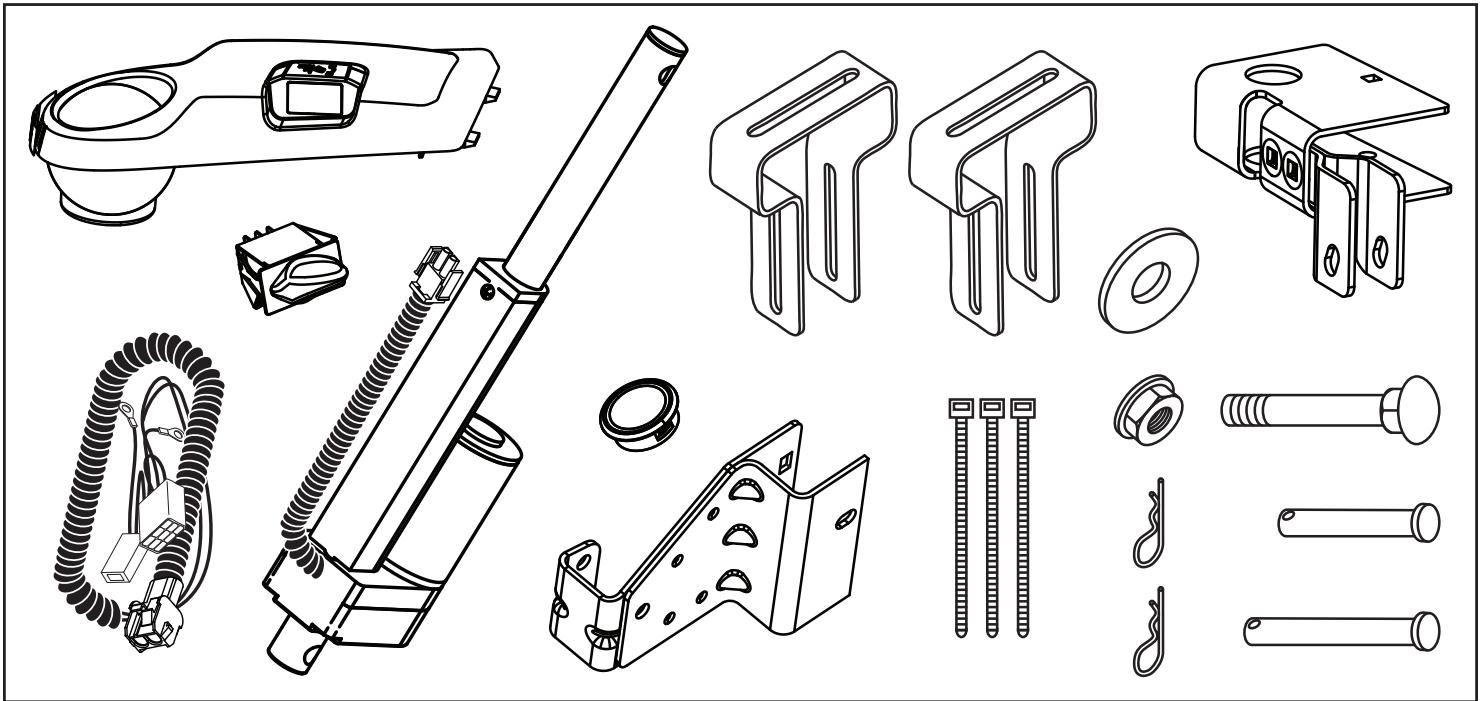
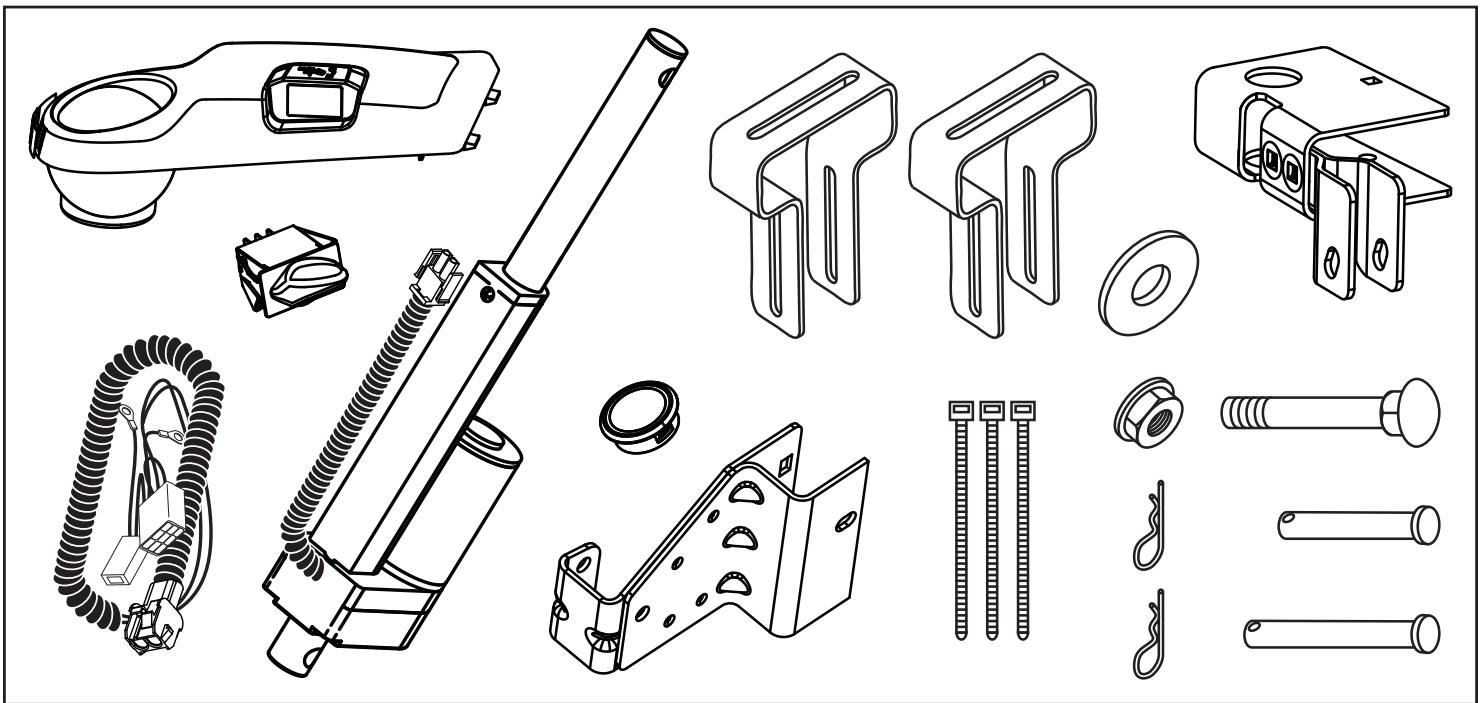
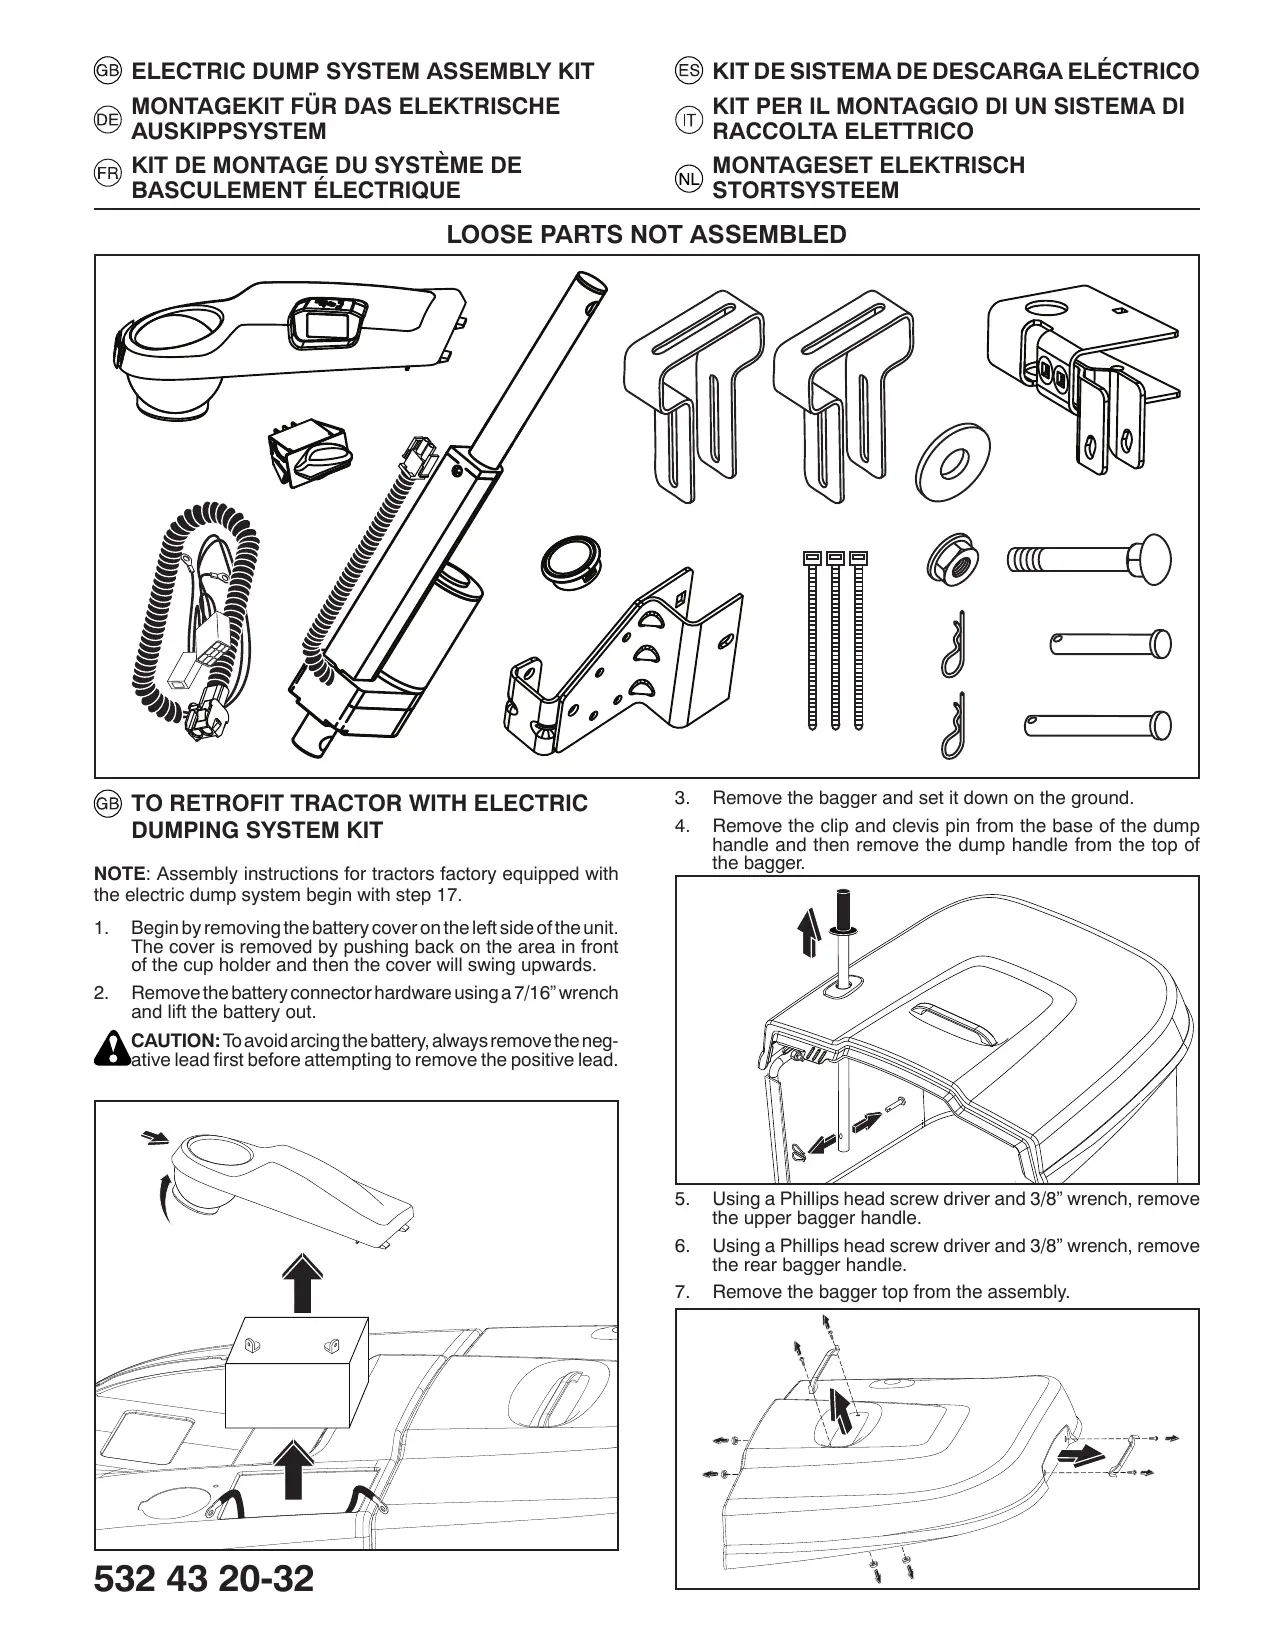
LOOSE PARTS NOT ASSEMBLED
GB TO RETROFIT TRACTOR WITH ELECTRIC DUMPING SYSTEM KIT
NOTE: Assembly instructions for tractors factory equipped with the electric dump system begin with step 17.
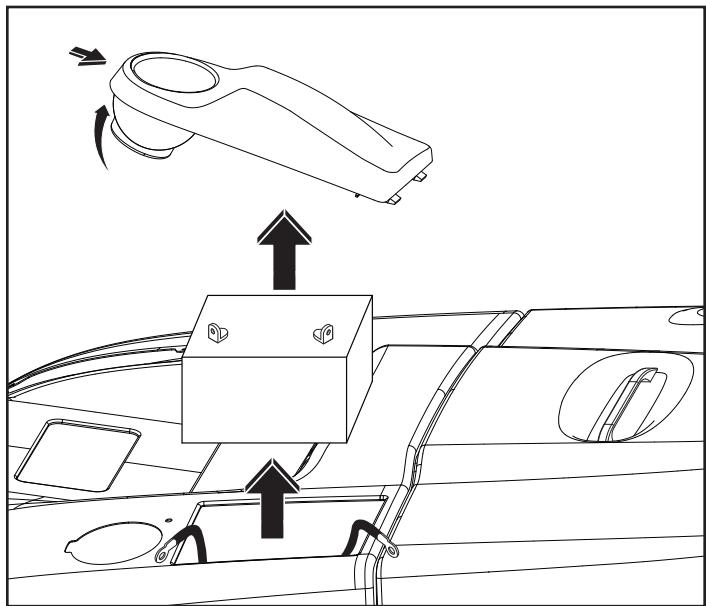
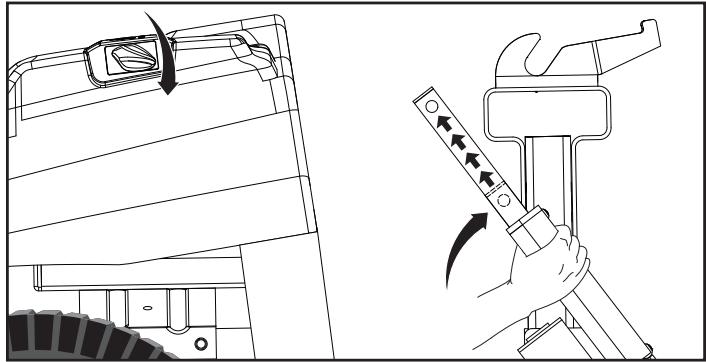
- Begin by removing the battery cover on the left side of the unit. The cover is removed by pushing back on the area in front of the cup holder and then the cover will swing upwards.
- Remove the battery connector hardware using a 7/16" wrench and lift the battery out.
CAUTION: To avoid arcing the battery, always remove the negative lead first before attempting to remove the positive lead.
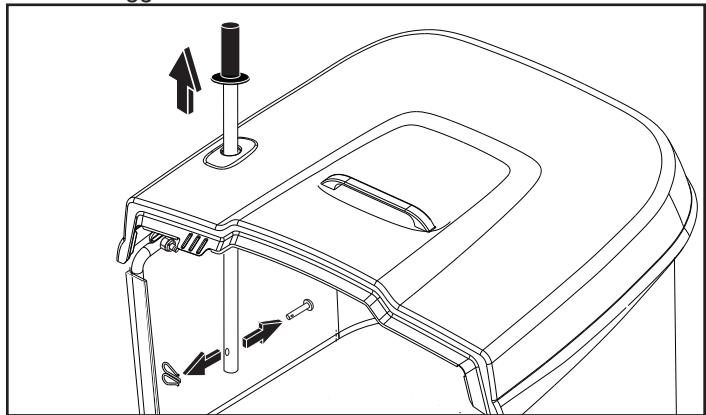
- Remove the dagger and set it down on the ground.
- Remove the clip and clevis pin from the base of the dump handle and then remove the dump handle from the top of the bagger.
- Using a Phillips head screw driver and 3/8" wrench, remove the upper bagger handle.
- Using a Phillips head screw driver and 3/8" wrench, remove the rear bagger handle.
- Remove the dagger top from the assembly.

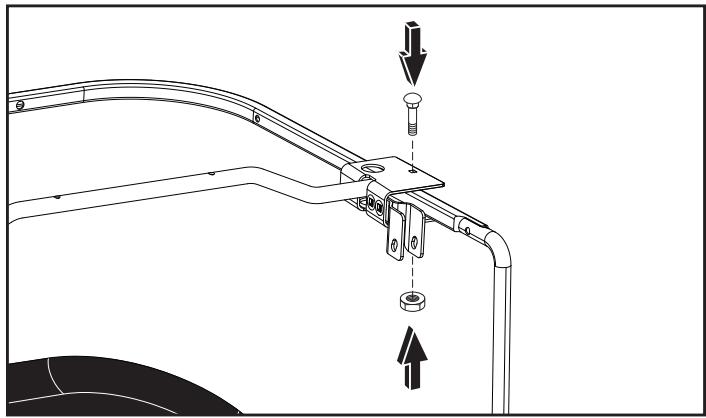
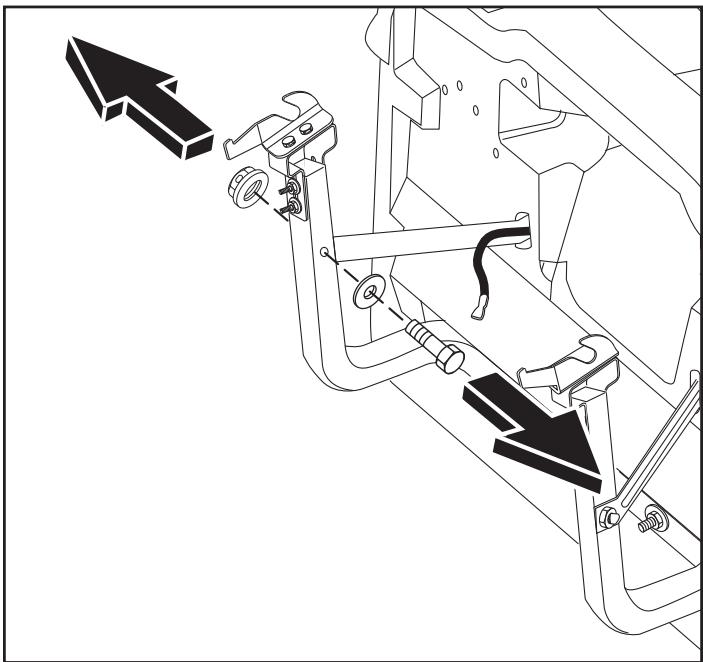
8 Using a 7/16" socket, remove the nut and carriage bolt that hold the upper side bracket onto the bagger.
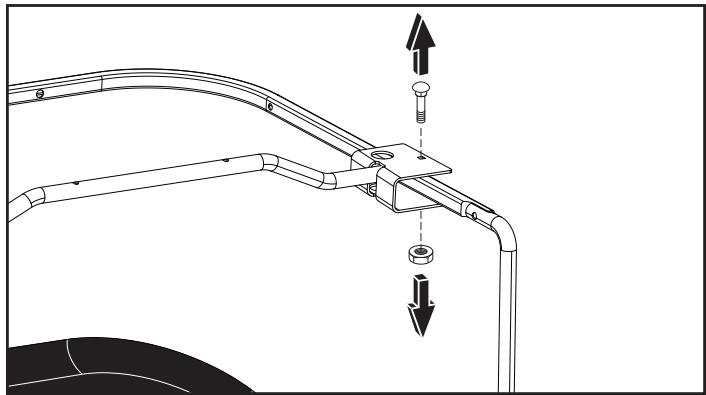
9 Lift up on the cross shaft and remove the upper side bracket from the bagger.
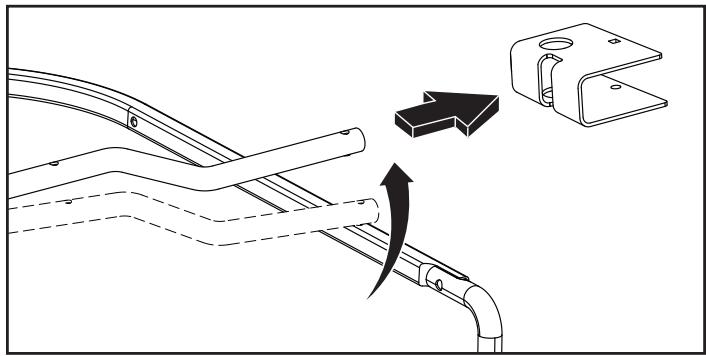
10 Install the new upper bracket assembly from the kit by sliding it onto the cross shaft and then align the bolt holes.
11 Using a 7/16" socket, reinstall the carriage bolt and nut to hold in the upper bracket assembly.
- Using a 3/8" socket and Phillips head screw driver, reinstall the bagger cover and handles.
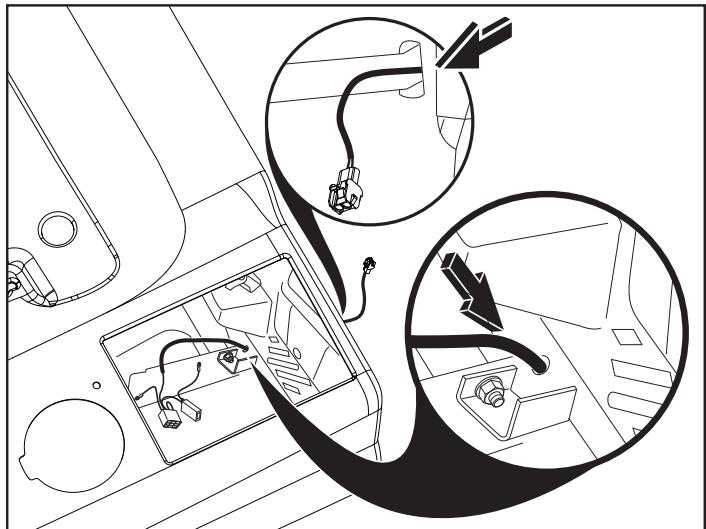
- Route the jumper harness so that the eye loops and switch plug are in the battery hole and the actuator plug passes through the back plate along side of the bagger support bracket on the left side of the tractor.
-
Reinstall the battery.
-
Ensure the harness is routed over top of the battery from the rearward, right corner.

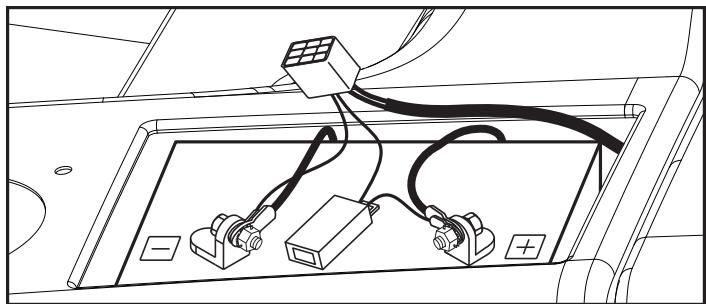
- Connect the red wire to the positive terminal first, followed by the black wire to the negative terminal. Ensure the leads are flat against the battery before tightening down the hardware.
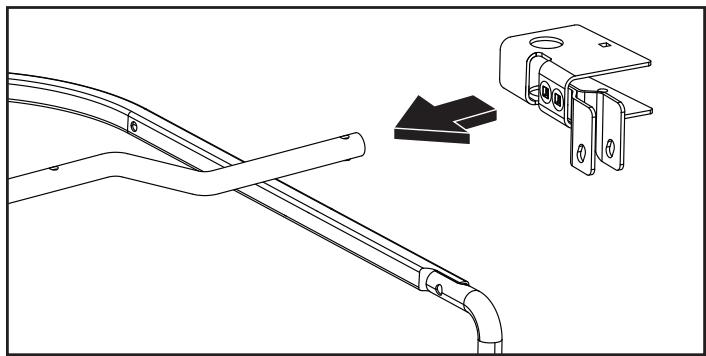
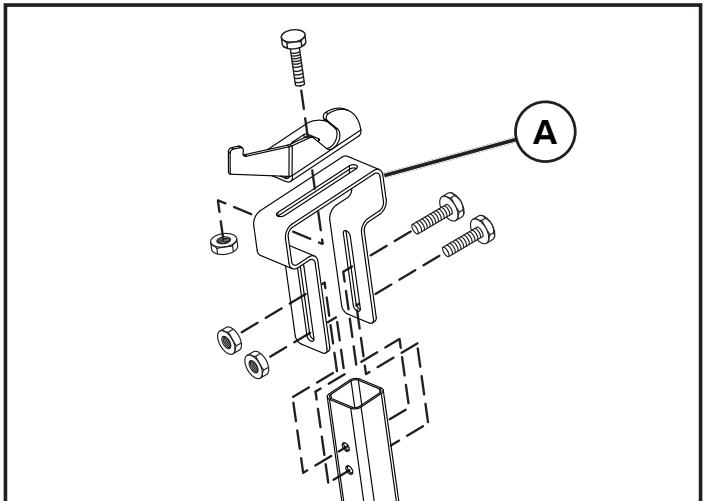
- Remove the bolts holding the adjustment bracket to the support tube and then remove the pivot bracket from the adjustment bracket. Replace the adjustment bracket (A) with the high strength version included in the kit. Complete this step on both sides of the tractor.
NOTE: This may require adjustment of the bagger. Please refer to the tractor Owner's/Operator's Manual for adjustment procedures.
- Using a 9/16" wrench and 9/16" socket, remove the bolt and nut that holds the dagger assembly support bracket to the dagger support frame.
ASSEMBLY INSTRUCTIONS FOR TRACTORS FACTORY EQUIPPED WITH ELECTRIC DUMP SYSTEM BEGIN HERE.
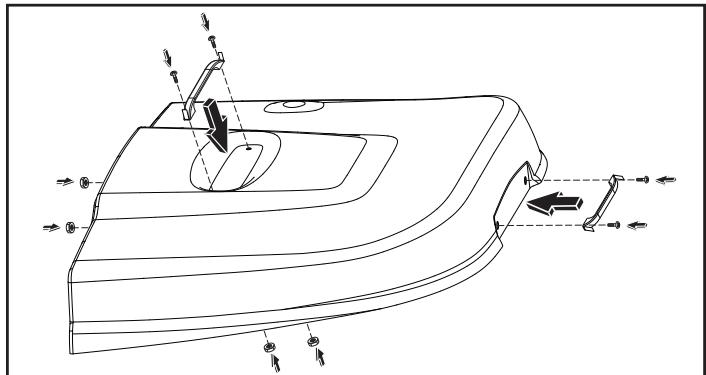
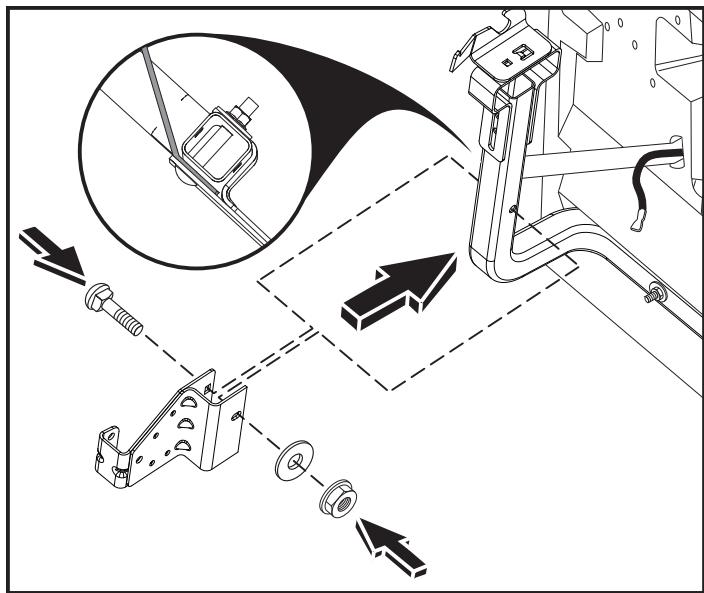
- Install the lower bracket assembly onto the bagger support frame and align the mounting hole with the current hole in the frame. Install the 2 1/2 "carriage bolt from the kit through the mounting hole, making sure to have the threaded end of the bolt facing towards the center line of the tractor. The support bracket that extends from the back plate should be installed between the frame and lower bracket assembly.
- Using a 9/16" socket, install a lock nut and washer provided in the kit on the 2 1/2" carriage bolt and tighten down.
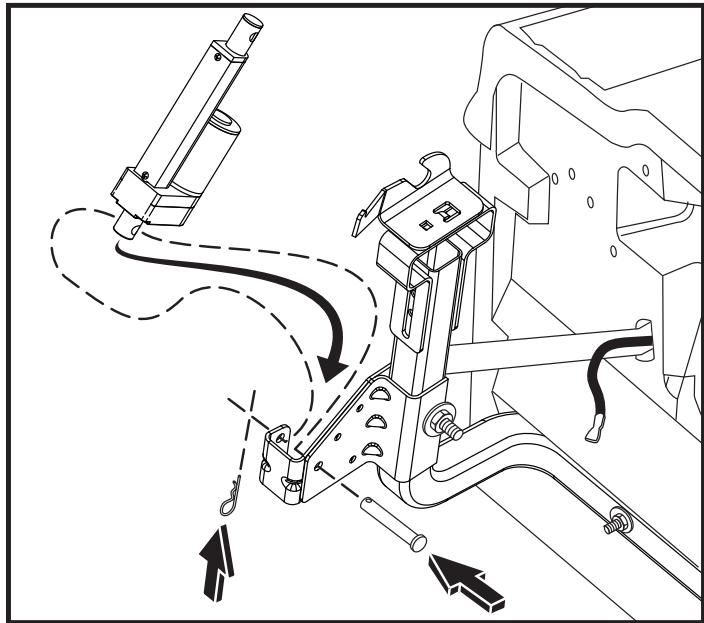
- Using the 2-3/8" clevis pin, install the actuator onto the lower bracket assembly with the motor facing towards the front of the tractor.
- Push a clip through the hole on the end of the 2-3/8" clevis pin.
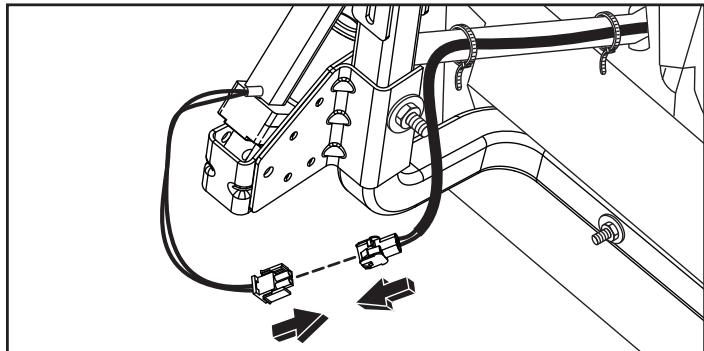
- Connect the wire connectors between the actuator and harness. Use the zip ties in the kit to secure the wires to the dagger frame.
- Pass the harness through the switch opening and then attach the new battery cover.
- Plug the harness into the switch.
- Snap the switch into the battery cover.

25. Press the switch down to extend the actuator fully while supporting the actuator with your right hand.
CAUTION: Do not allow the actuator to press into the back plate.
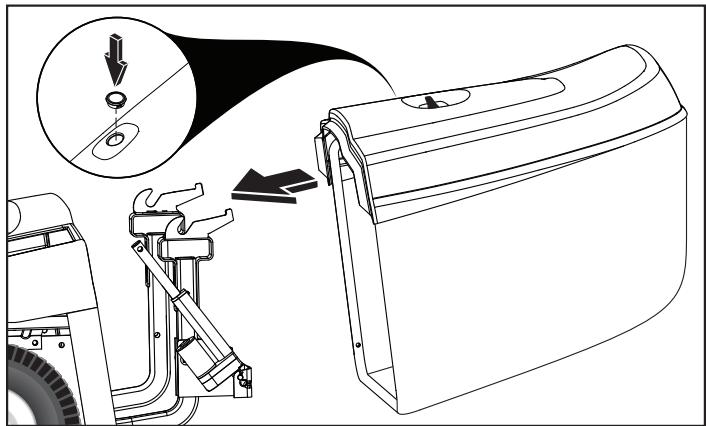
26. With the actuator resting on the back plate, reinstall the bagger onto the back of the tractor.
- Snap the hole cover from the kit into the hole in the dagger top where the dump handle was located.
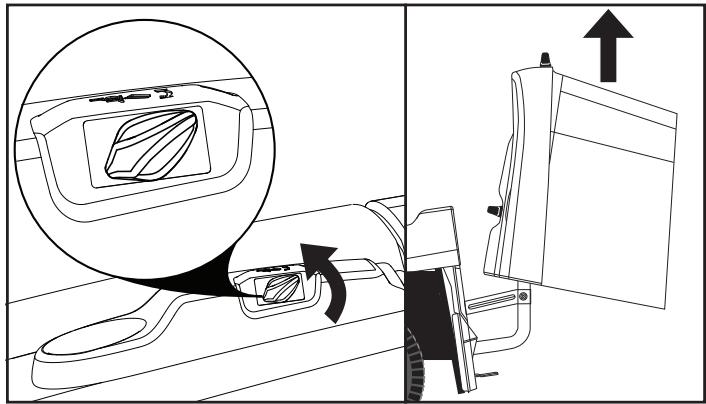
28. Unclip the mesh side from the dagger frame on the left side of the tractor to access the actuator assembly.
NOTE: Extend or retract the actuator as needed to align the mounting hole with the upper bracket slot.

- Reaching into the bagger, connect the actuator to the upper pivot bracket assembly using the 1-3/4" clevis pin.
- Reach into the bag and use a clip provided in the kit to secure the 1 - 3 / 4" clevis pin.
- Use the switch to raise the dagger and then reattach the dagger mesh to the side of the dagger frame.
- Place the included warning label on the fender of the tractor.
NOTE: For tractors that have the factory equipped electric dump system, the ignition switch must be in the "ON" position for the包子 to dump. Tractors retrofitted with the kit do not.

WARNING: Keep fingers and objects clear of the bagger during operation.
TO DUMP BAGGER
Your tractor is equipped with a Dump Bag Alarm. To turn off the alarm disengage the attachment clutch control.
CAUTION: Do NOT place objects on top of the bagger or lean on the bagger.
Position tractor in location you wish to dump bagger.
- Ensure that the transaxle is in the neutral position. Set parking brake.
- To dump clippings, activate the electric dump switch by turning the switch counterclockwise until dagger reaches its highest position.
- To continue mowing, ensure that the area around the tractor is clear and carefully pull forward until the bunker has cleared the grass pile. Once the bunker is clear of the grass pile, stop the tractor, ensure the transaxle is in the neutral position, set the parking brake, and turn the dump switch clockwise until the bunker is completely down.

IMPORTANT: Bagger max load = 60 Lb (27,2 Kg) of grass
IMPORTANT: The electric dump system may be equipped with an overload protection device. If the bagger system is overloaded, it will cut power to the system. The protection device will automatically reset after approximately 2 minutes. Once the system has reset, ensure that nothing is on top of or against the bagger that could overload the system. Open the bag slightly using the switch and then use a small rake or similar tool to scoop grass out of the bag. Once you have removed the excess load, attempt to dump the bagger using the electric dump system.
ERFORDERLICHE MONTAGEWERKZEUGE