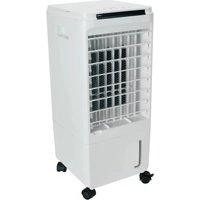
BL-205DLR - Air Conditioning BESTHERM - Free user manual and instructions
Find the device manual for free BL-205DLR BESTHERM in PDF.


| Product type | Mobile monoblock air conditioner |
| Brand | BESTHERM |
| Model | BL-205DLR |
| Dimensions (L x D x H) | approx 45 x 35 x 70 cm |
| Net weight | approx 22 kg |
| Power supply | 230 V ~ 50 Hz |
| Cooling power | 7000 BTU/h (approx 2050 W) |
| Max power consumption | approx 1000 W |
| Energy class | A (cooling) |
| Refrigerant | R290 / R32 (depending on version) |
| Max air flow | 300 m³/h |
| Noise level | 65 dB(A) max |
| Main functions | Cooling, ventilation, dehumidification, 24h timer, remote control |
| Temperature range | 16 °C to 32 °C |
| Water tank capacity | 1 L (continuous drainage possible) |
| Air filter | Washable, removable |
| Maintenance and cleaning | Clean the filter every 2 weeks; empty the tank regularly |
| Safety | Frost protection, automatic shut-off when tank full, motor protection |
| Spare parts and repairability | Repairability index: 7.1/10; available parts: remote control, filter, exhaust kit |
Frequently Asked Questions - BL-205DLR BESTHERM
User questions about BL-205DLR BESTHERM
0 question about this device. Answer the ones you know or ask your own.
Ask a new question about this device
Download the instructions for your Air Conditioning in PDF format for free! Find your manual BL-205DLR - BESTHERM and take your electronic device back in hand. On this page are published all the documents necessary for the use of your device. BL-205DLR by BESTHERM.
USER MANUAL BL-205DLR BESTHERM
MANUEL D'INSTRUCTIONS
REFROIDISSEUR D'AIR BL-205DLR

natural_image
White air conditioner unit with grid-patterned ventilation slots and wheels (no visible text or symbols)ASSEMBLAGE DU PRODUIT
natural_image
Open industrial machine with blue internal components and control buttons (no visible text or symbols)natural_image
White air conditioner unit with grid-patterned ventilation slots and wheels (no visible text or symbols)Original version
BEFORE OPERATING THIS PRODUCT, READ, UNDERSTAND, AND FOLLOW THESE INSTRUCTION
EN_V1_20221230
GENERAL SAFETY INSTRUCTIONS
- This appliance can be used by children aged from 8 years and above and persons with reduced physical, sensory or mental capabilities or lack of experience and knowledge if they have been given supervision or instruction concerning the use of the appliance in a safe way and understands the hazards involved.
- Children should be supervised to ensure that they do not play with the appliance.
- If the supply cord is damaged, it must be replaced by the manufacturer, its service agent or similarly qualified persons in order to avoid a hazard.
- This appliance is not intended to be operated by means of an external timer or separate remote-control system.
- Only the appropriate connector must be used.
- Do not use attachments not recommended or supplied for this product.
- Disconnect the appliance from the power supply if it is left unattended and before assembling, disassembling or cleaning.
- Do not take out the water tank before unplugging the power cord plug.
- Do not insert or allow objects to enter on any ventilation or exhaust opening, as this may damage the product and could cause an electrical shock or fire.
- Do not operate your unit with a cover on it as this may result on overheating and motor damage.
- Do not add any chemical, metal ingredients into the water tank. These materials are dangerous and can cause problems.
-
Baby, old people and valetudinarianism should not be exposed directly to the fan wind for a long time.
-
If you hands are wet, do not pull out the plug from the electrical outlet.
- Switch off the appliance and unplug from the mains socket when not in use, before filling, cleaning or other maintain.
- Be aware that high humidity levels may encourage the growth of biological organisms in the environment.
- Do not permit the area around the appliance to become damp or wet. If dampness occurs, turn the output of the humidifier down. If the humidifier output volume cannot be turned down, use the appliance intermittently. Do not allow absorbent materials, such as carpeting, curtains, drapes, or tablecloths, to become damp.
- Unplug the appliance during filling and cleaning.
- Never leave water in the reservoir when the appliance is not in use.
- Empty and clean the humidifier before storage, clean the humidifier before next use.
- After assembly, do not remove the guards during use or cleaning
PRODUCT ASSEMBLY
- Remove the packaging carefully, taking care not to damage the plastic body with the scissors or knife.
- Installation of the wheels: place 4 wheels to the holes located at the base of the air cooler. Insert the wheels tightly to the air cooler's body.
- Set the unit on a stable and horizontal base, keeping it away from radiating heat sources and naked flame.
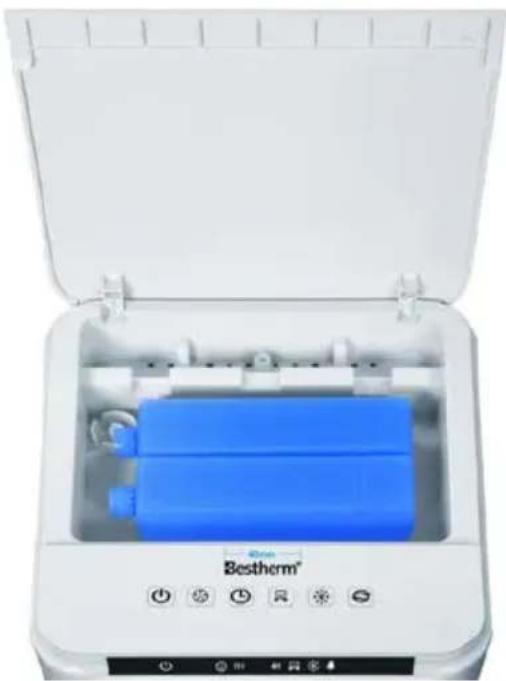
- Filling water: Lift the lid from the top and add water. The water tank cannot be pulled out.
Fitting/Replacing remote control batteries
The remote control use one button cells, model No. CR2025 (not included).
- To install a new battery, hold the remote control with the back facing up.
- Push and hold the locking clip towards the right (Fig. A), and slide out the battery compartment (Fig.B)
- Install the new battery 1XCR2025(not included) with the + side facing up (Fig. C)
- Firmly close the battery compartment.
Note: Please follow battery disposal instruction on battery packaging, or contact your local councils for safely disposal of batteries.

FUNCTIONS & OPERATION
Insert the plug into the electrical outlet. The power indicator will make a beep sound and the air cooler switches to the standby
position. The functions of the unit can be controlled using the control panel or the remote control.



Control Panel

Remote Control
-
ON/OFF: Press the “ON/OFF 🔊” button on the control panel or press the ON/OFF 🔊 button of the remote control to turn the unit ON. The unit will start at low speed and normal wind. To switch back to the standby position, simply press the ON/OFF 🔊 button on the control panel or on the remote control.
-
Speed: wind speed can be adjusted to 3 levels (low-mid-high) by pressing the “Speed” button. Each time the “Speed” button is pressed, an indicator will light to indicate the speed level.
-
Wind: press the "Wind
Each time this button is pressed, an indicator will light on the screen to indicate the type of wind. There are 3 types of winds to choose: Normal, nature or sleep.

- Timer: press the "Timer

time between 1-7 hours, which switches the unit to standby after the preset time. Each time the button is pressed, the hours will increase one by one and the time indicator will light on the screen. To cancel the timer, simply press the button until the indicator is off.
- Swing: press the "Swing

will be on. The air control blades are activated, which disperse the outflow of air to the left and right. Press the button again to stop the oscillation. The control blades are responsible for directing the airflow up and down and must be set manually.
- Cooler: to activate the air cooler function, please press the
“Cooler ” button. The water pump will take the water from the tank and pour it onto the cooling pad. The cooling pad absorbs the heat of the water and the evaporated air is blown out by the help of the fan. The cool breeze blown by the cooler drops the temperature and creates a relaxing cooling effect.
OPERATING THE WATER TANK
Check the level of the water in the tank frequently. Be sure that water level is not below the 'MIN' marking which is located on the water tank.
Before refilling water, turn your unit to the "Off" position by pressing the switch located on the back panel and unplug the power cord.
USING THE ICE BOXES
In order to increase the cooling effect of your fan, you can use the ice boxes which are supplied with the unit. Before using, fill the ice boxes with water and place them into the freezing compartment of your refrigerator for a few hours. Then place them into the top container and add water to the ‘MAX’ level. Using the ice boxes will drop the temperature of the air flow which will create a more effective cooling effect.
natural_image
Open industrial machine with blue internal component and control buttons (no visible text or symbols)TECHNICAL DATA
| Model No: | BL-205DLR | |
| Voltage/Frequency: | 220-240V~, 50Hz | |
| Rated power: | 80W | |
 | Compliance with all requirements of applicable CE directives | |
 | Electrical products should not be disposed of with household waste.Please recycle at collection points provided for this purpose.Contact local authorities or your dealer for recycling advice. | |
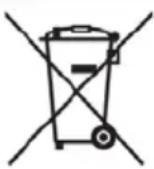 | Disposal of an exhausted batteries.To preserve natural resources, please recycle or dispose of the batteries properlyConsult your local waste authority for information regarding available recycling and/or disposal options. | |
 | The Triman logo indicates that the product or packaging must not be disposed of with household waste but must be sorted or taken to a collection point (containers in shops, rubbish dumps, etc.) to be recycled.For more information: www.quefairedemesdechets.fr | |
 | Keep out of reach of children | |
 | Product contains a coin/button cell. | |
| Information requirements for Fan | |||
| Model identifier: | BL-205DLR | ||
| Description | Symbol | Value | Unit |
| Maximum fan flow rate | F | 5.0 | m^3/min |
| Fan power input | P | 80 | W |
| Service Value | SV | 0.06 | (m^3/min)/W |
| Standby power consumption | P_SB | / | W |
| Seasonal electricity consumption | Q | 25.846 | kWh/a |
| Fan sound power level | L_WA | 60 | dB(A) |
| Maximum air velocity | c | 7.0 | meters/sec |
| Measurement standard for service value | IEC 60879:2019 | ||
| Contacts details for obtaining more information | HOM'Y SAS GREEN PARK - Bat A, 61 rue de la cimaise, 59650 Villeneuve d'Ascq, FRANCE | ||
CLEANING AND MAINTENANCE
After using for long a time, the dust cumulated in the dust filter or the cooling pad may influence the inflow of air. Therefore it is recommended to clean your fan regularly. Please follow the steps below to clean your device.
Turn off the unit and unplug the power cord before doing the cleaning and maintenance.
DUST FILTER
To remove the dust filter, first remove the screw, then simply press the locks with both hands and pull it out. Use neutral cleaning agent and brush to clean the dust and dirt on the filter. To attach the clean filter, place the bottom of the filter first and then push upper part until it is locked tightly.
COOLING PAD
After removing the dust filter you can see the cooling pad. Press the lock in the middle and gently pull out the pad. Use a clean or soft brush to remove the dust and dirt from the pad. Rinse with water if needed and leave it to dry in open air. Never use any chemical cleaning solution that can harm the pad.
EXTERIOR CLEANING
Clean the exterior case of the fan with a soft damp cloth except the control panel. Never use hard cleaning agents that can harm the case. Make sure the unit is dry before operating it.
Caution: Never let water contact with the control panel. Always clean it with a soft dry cloth.


Imported by: HOM'Y SAS
- MANUEL D'INSTRUCTIONS
- REFROIDISSEUR D'AIR BL-205DLR
- ASSEMBLAGE DU PRODUIT
- GENERAL SAFETY INSTRUCTIONS
- PRODUCT ASSEMBLY
- Fitting/Replacing remote control batteries
- FUNCTIONS & OPERATION
- Control Panel
- Remote Control
- OPERATING THE WATER TANK
- USING THE ICE BOXES
- CLEANING AND MAINTENANCE
- DUST FILTER
- COOLING PAD
- EXTERIOR CLEANING
Brand : BESTHERM
Model : BL-205DLR
Category : Air Conditioning