
RHP6320B - Heating BEKO - Free user manual and instructions
Find the device manual for free RHP6320B BEKO in PDF.
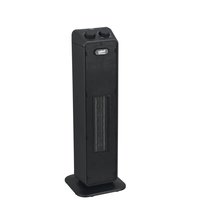


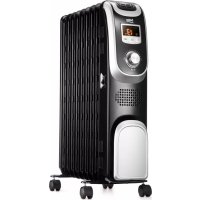
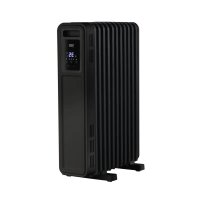
| Product type | Oil-filled radiator |
| Power | 2000 W |
| Dimensions (L x D x H) | 64 x 38 x 24 cm |
| Weight | 12 kg |
| Power supply | 220-240 V ~ 50 Hz |
| Number of elements | 9 |
| Power levels | 3 (800 / 1200 / 2000 W) |
| Adjustable thermostat | Yes, with automatic shut-off |
| Frost protection | Yes |
| Safety shut-off in case of overturning | Yes |
| Overheat protection | Yes |
| Material | Steel and powder-coated paint |
| Color | White |
| Casters for mobility | Yes, 4 swivel casters |
| Power cord length | 1.5 m |
| Noise level | Silent |
| Maintenance and cleaning | Clean with a soft, dry cloth; do not use abrasive products |
| Repairability | Spare parts available (thermostat, switch, casters) |
| Warranty | 2 years |
Frequently Asked Questions - RHP6320B BEKO
User questions about RHP6320B BEKO
0 question about this device. Answer the ones you know or ask your own.
Ask a new question about this device
Download the instructions for your Heating in PDF format for free! Find your manual RHP6320B - BEKO and take your electronic device back in hand. On this page are published all the documents necessary for the use of your device. RHP6320B by BEKO.
USER MANUAL RHP6320B BEKO
RHP 6320 B
EN - FR - IT - DE - RU
CONTENTS
ENGLISH 03-20
FRANÇAIS 12-21
ITALIANO 22-33
DEUTSCH 34-44
РУССКИЙ 45-61
Please read this user manual first!
Dear Customer,
Thank you for preferring a Beko product. We hope that you get the best results from your product which has been manufactured with high quality and state-of-the-art technology. Therefore, please read this entire user manual and all other accompanying documents carefully before using the product and keep it as a reference for future use. If you handover the product to someone else, give the user manual as well. Follow all warnings and information in the user manual.
Meanings of the symbols
Following symbols are used in the various section of this manual:

Important information or useful hints about usage.

Warning for hazardous situations with regard to life and property.

Warning: electric shock hazard.

Warning: fire hazard.

Do not cover.
1 Important safety and environmental instructions
This section contains safety instructions that will help protect against risks of personal injury or material damage. Failure to follow these instructions will void the warranty.
1.1 General safety
- This appliance complies with international safety standards.
- This appliance can be used by children aged 8 years and above and persons with reduced physical, sensory, or mental capabilities, or lack of experience and knowledge, if they have been given supervision or instruction concerning use of the appliance in a safe way and understand the hazards involved. Children shall not play with the appliance. Cleaning and user maintenance shall not be performed by children without supervision.
• This appliance is intended for household and similar applications such as: - Staff kitchen areas in shops, offices, and other working environments; - Farm houses; - By clients in hotels and other residential type environments; - Bed and Breakfast type environments.
• Children under 3 years should be kept away unless continuously supervised.
- Children aged from 3 years and less than 8 years shall only switch the appliance on/off provided that it has been placed or installed in its intended normal operating position and they have been given supervision or instruction concerning use of the appliance in a safe way and understand the hazards involved.
1 Important safety and environmental instructions
Children aged from 3 years and less than 8 years shall not plug in, regulate, or clean the appliance, or perform user maintenance.
- CAUTION: Some parts of this product can become very hot and cause burns. Particular attention must be given where children and vulnerable people are present.
- Use this heater on a horizontal and stable surface.
- Details concerning precautions during user maintenance. Consider all the information, including the information contained in the 'Cleaning and maintenance' chapter.
- WARNING: In order to avoid overheating, do not cover the heater.
- If the supply cord is damaged, it must be replaced by the manufacturer or its service agent or a similarly qualified person in order to avoid a hazard.
- The heater must not be located immediately below a socket outlet.
- Do not use this heater in the immediate surroundings of a bath, a shower or a swimming pool.
- Do not use this heater if it has been dropped.
- Do not use if there are visible signs of damage to the heater.
- WARNING: Do not use this heater in small rooms when they are occupied by persons not capable of leaving the room on their own, unless constant supervision is provided.
- WARNING: To reduce the risk of fire, keep textiles, curtains, or any other flammable material a minimum distance of 1 m from the air outlet.
- Do not use outdoors.
1 Important safety and environmental instructions
1.2 Compliance with the WEEE Directive and Disposing of the Waste Product:
This product complies with EU WEEE Directive (2012/19/EU). This product bears a classification symbol for waste electrical and electronic equipment (WEEE).

This symbol indicates that this product shall not be disposed of with other household wastes at the end of its service life. Used devices must be returned to an official collection point for recycling of electrical and electronic devices. To find these collection systems, please contact your local authorities or the retailer where the product was purchased. Each household plays an important role in recovering and recycling old appliances. Appropriate disposal of used appliances helps prevent potential negative consequences for the environment and human health.
1.3 Compliance with RoHS Directive
The product you have purchased complies with the EU RoHS Directive (2011/65/EU). It does not contain harmful and prohibited materials specified in the Directive.
1.4 Package Information

Packaging materials of the product are manufactured from recyclable materials in accordance with our National Environment Regulations. Do not dispose of the packaging materials together with domestic or other wastes.
Take them to the packaging material collection points designated by the local authorities.
2 Part figure

2.1 Control and parts
- Temperature control knob
- Grille
- Power selection knob
- Logo piece
- Rear cover
- Front cover
- Base
2.2 Technical data
Electrical insulation class:
Power Regulation Range (W):
| LOW 1200W | |
| HIGH 2000W | |
| LOW OSC 1200W | |
| HIGH OSC 2000W |
Technical and design modifications reserved.
Values stated on the markings on the product or in the printed materials supplied with the product are the values obtained in laboratory in accordance with relevant standards. Such values may vary depending on the usage of the product and the ambient conditions.
2.3 Information requirements for electric local space heaters
| Item Symbol | Value Unit | Item Unit | |||
| Heat output | Type of heat input, for electric storage local space heaters only (select one) | ||||
| Nominal heat output | Pnom | 2.0 kW | Manual heat charge control with integrated thermostat | [No] | |
| Minimum heat output (indicative) | Pmin | 1.2 kW | Manual heat charge control with room and/or outdoor temperature feedback | [No] | |
| Maximum continuous heat output | Pmax,c | 2.0 kW | Electronic heat charge control with room and/or outdoor temperature feedback | [No] | |
| Auxiliary electricity consumption Fan | assisted hear output [No] | ||||
| At nominal heat output | elmax | N/A kW | Type of heat output/room temperature control (select one) | ||
| At minimum heat output | elmin | N/A kW | Single stage heat output and no room temperature control | [No] | |
| In standby mode | elSB | 0.47 kW | Two or moremanual stage, no room temperature control | [No] | |
| With mechanic thermostat room temperature control | [No] | ||||
| With electronic room temperature control | [Yes] | ||||
| Electronic room temperature control plus day timer | [No] | ||||
| Electronic room temperature control plus week timer | [No] | ||||
| Other control options (multiple selections possible) | |||||
| Room temperature control, with presence detection | [No] | ||||
| Room temperature control, with open window detection | [No] | ||||
| With distance control option [No] | |||||
| With adaptive start control [No] | |||||
| With working time limitation [No] | |||||
| With black bulb sensor [No] | |||||
| Contact details | Arçelik A.Ş. Karaağaç Caddesi No: 2-6, 34445, Sütlüce, İstanbul, Turkiye | ||||
3 Operation
3.1 Check before turning on the machine
- Check if the power wire is under good condition.
- The product adopts 220-240V AC power supply, before use, please confirm if the rated current of the power socket meets the local requirements with safe grounding device, otherwise, please replace it with the qualified socket.
3.2 Put the machine on the flat place
Uneven place may possibly cause the turnover switch at abnormal position, then the heater can't work after turning on, therefore, please put the heater on the flat place, at least the surface below the base of the heater must be flat.
3.3 Temperature control knob
Insert the plug into the power socket, then turn the Temperature Control knob clockwise, when hearing the "poop" sound (it means the temperature controller is on), adjust the Temperature Control knob to the desired temperature level.
3.4 Power selection knob

Turn the Power selection knob to select between 4 functions: Low 1200W (LOW), High 2000W (HIGH), Low 1200W Swing (LOW SWING), High 2000W Swing (HIGH SWING).
3.5 Turn off the heater
- Turn the Power selection knob to "0" position.
- Turn the Temperature Control knob anticlockwise to the initial position.
- Remove the power plug, store the heater after the entire machine has become cool.
3.6 Safety protection
• Overheat protection: When the temperature in the heater is too high due to abnormality in the use environment or improper use, the thermostat device can automatically cut off the power and the heater stops working. After the whole heater is cooling, the heater can return to the normal use after removing the abnormality. - Inversion protection: When the whole heater is inverted, the safety system will automatically cut off the power, and return to the work state before inversion after the body is placed upright.
4 Cleaning and maintenance
4.1 Cleaning
Before cleaning and assembling, fan must be unplugged.

WARNING: Do not use any abrasive detergent or solvents to avoid scratching the surface. Do not use any of the following as a cleaner: gasoline, thinner.
It is recommended that the heater be cleaned at least one time during the operating season in order to provide the optimum level of performance. ALWAYS TURN THE POWER SWITCH OFF AND UNPLUG THE HEATER BEFORE CLEANING. Be sure to save the box for off-season storage.
- Turn the heater "0", unplug it and wait for the heater to cool down.
- Use a dry cloth to clean only external surfaces of the heater.
- Do not use any cleaning agents or detergents.
- Never immerse the heater in water.
- Pack the heater in the original carton and store it in a cool and dry place.

WARNING: This heater cannot achieve accurate temperature control of the environment, and thus cannot be used as insulation device for storage environment.
4.2 Handling and transportation
- During handling and transportation, carry the appliance in its original packaging. The packaging of the appliance protects it against physical damages.
- Do not place heavy loads on the appliance or on the packaging. The appliance may get damaged.
- Dropping the appliance may render it non operational or cause permanent damage.
5 Troubleshooting
Operation of your appliance can lead to errors and malfunctions. The following tables contain possible causes and notes for resolving an error message or malfunction. It is recommended to read the table below carefully in order to save your time and money that may cost for calling to the service center.
| Problem Cause Solution | ||
| After the power is engaged, the machine does not work. | The plug may not be plugged well. | Check whether the plug is properly inserted into the receptacle. |
| The machine suddenly stops during heating. | The temperature ex-ceeds the threshold of the thermal cut-off. | Pull off the plug manually and then insert it into the receptacle again when the machine is cooled. |
- CONTENTS
- PLEASE READ THIS USER MANUAL FIRST
- MEANINGS OF THE SYMBOLS
- IMPORTANT SAFETY AND ENVIRONMENTAL INSTRUCTIONS
- GENERAL SAFETY
- COMPLIANCE WITH THE WEEE DIRECTIVE AND DISPOSING OF THE WASTE PRODUCT
- COMPLIANCE WITH ROHS DIRECTIVE
- PACKAGE INFORMATION
- PART FIGURE
- CONTROL AND PARTS
- TECHNICAL DATA
- OPERATION
- CHECK BEFORE TURNING ON THE MACHINE
- PUT THE MACHINE ON THE FLAT PLACE
- TEMPERATURE CONTROL KNOB
- POWER SELECTION KNOB
- TURN OFF THE HEATER
- SAFETY PROTECTION
- CLEANING AND MAINTENANCE
- CLEANING
- HANDLING AND TRANSPORTATION
- TROUBLESHOOTING
Brand : BEKO
Model : RHP6320B
Category : Heating