
NN-CD88QS - Microwave PANASONIC - Free user manual and instructions
Find the device manual for free NN-CD88QS PANASONIC in PDF.


| Brand | Panasonic |
| Model | NN-CD88QS |
| Product type | Combination microwave oven (microwave, grill, convection) |
| Dimensions (W x H x D) | approx. 50.0 x 32.0 x 42.0 cm |
| Interior volume | 33 liters |
| Net weight | 15.3 kg |
| Power supply | 230 V ~ 50 Hz, 13 A |
| Microwave power | 1000 W (IEC 60705) |
| Grill power | 1200 W |
| Convection power | 1500 W |
| Main functions | Microwave, grill, fan oven, combined, automatic defrost |
| Wave technology | Inverter (continuously adjustable power) |
| Control type | Touch LCD screen + touch keys |
| Automatic programs | 20 preset menus |
| Grill | Quartz heating element, chrome-plated rack |
| Convection | Fan + ring heating element, temperature probe |
| Safety | Child lock, automatic stop when door open, safety thermostat |
| Maintenance and cleaning | Catalytic enamel interior, removable glass turntable |
| Spare parts and repairability | Turntable, rack, grease filter (ref. P80Z2212) |
| Included accessories | Turntable (glass Ø30cm), chrome-plated rack, drip tray |
Frequently Asked Questions - NN-CD88QS PANASONIC
User questions about NN-CD88QS PANASONIC
0 question about this device. Answer the ones you know or ask your own.
Ask a new question about this device
Download the instructions for your Microwave in PDF format for free! Find your manual NN-CD88QS - PANASONIC and take your electronic device back in hand. On this page are published all the documents necessary for the use of your device. NN-CD88QS by PANASONIC.
USER MANUAL NN-CD88QS PANASONIC
Operating Instructions
Bedienungsanleitung
Gebruiksaanwijzing
Mode d'emploi
For household use only
NN-CD88QS


Scan the QR code for more recipes
IMPORTANT SAFETY INSTRUCTIONS:
Before operating this oven, please read these instructions carefully and keep for future reference.
IMPORTANT SAFETY INSTRUCTIONS
Safety Instructions....2-6
Disposal of Old Equipment ....7
Installation and Connection ....8
Placement of Your Oven 8
Important User Instructions .....9-11
Parts of Your Oven 12
Oven Accessories ......13
Control Panel....14
Display Window 15
Cooking Modes....15-16
Word Prompting 17
Operation Guide Setting ......17
Setting the Clock 18
Child Lock 18
Microwave Cooking and Defrosting ..19
Defrosting Guidelines ......20
Defrosting Charts....21-22
Grilling 23
Convection....24-25
Air Fry Cooking 26-27
Air Fry Cooking Chart .....28-30
Combination Cooking ....31-32
Multistage Cooking 33
Using the Timer 34-35
Using the Add Time Function......36
One Push Reheating ....37-38
Turbo Defrost....39-40
Auto Weight Programs .....41-42
Auto Beverage Programs ....43
Re-Bake Bread Programs ....44
Auto Sensor Programs .....45-47
Junior Menu Programs ....48-50
Auto Combi Programs ....51-52
Questions and Answers ....53-54
Care of Your Oven ....54-55
Building-in Your Oven 55
Technical Specifications ....56
Safety Instructions
■ Important safety instructions. Before operating this oven, please read these instructions carefully and keep for future reference. ■ This appliance can be used by children aged from 8 years and above and persons with reduced physical, sensory and mental capabilities or lack of experience and knowledge if they have been given supervision or instruction by a person responsible for their safety concerning the use of the appliance in a safe way and understand the hazards involved. Children shall not play with the appliance. Cleaning and user maintenance shall not be made by children without supervision. Keep the appliance and its cord out of reach of children less than 8 years. ■ When this oven is installed, it should be easy to isolate the appliance from the electricity supply by pulling out the plug or operating a circuit breaker. ■ If the supply cord is damaged, it must be replaced by the manufacturer or its service agent or a similarly qualified person in order to avoid a hazard. ■ WARNING! The appliance should be inspected for damage to the door seals and door seal areas and if these areas are damaged the appliance should not be operated until it has been repaired by a service technician trained by the manufacturer. ■ WARNING! Do not attempt to tamper with or make any adjustments or repairs to the door, control panel housing, safety interlock switches or any other part of the oven. Do not remove the outer panel from the oven which gives protection against exposure to microwave energy.
Safety Instructions
■ Repairs should only be by a qualified service person. ■ WARNING! Do not place this oven near an electric or gas cooker range. ■ Liquids and other foods must not be heated in sealed containers since they are liable to explode. ■ WARNING! Only allow children to use the oven without supervision when adequate instructions have been given so that the child is able to use the oven in a safe way and understands the hazards of improper use. Ensure that children do not touch the hot outer casing after operation of the oven. ■ The appliance must not be installed behind a decorative door in order to avoid overheating. ■ This oven is intended for counter-top use and built-in use. It is not intended for use inside a cupboard. This oven may be built into a wall cabinet by using the proper trim kit, (NN-TK81KCSCP) which may be purchased from a local Panasonic dealer. ■ The cabinet must NOT have a door.
For Countertop use:
■ Oven must be placed on a flat, stable surface 85 cm above floor level, with rear of oven placed against a back wall. For proper operation, the oven must have sufficient air flow. i.e. 5 cm at one side, the other being open; 15 cm clear over the top; 10 cm at the rear.
■ When heating food in plastic or paper containers, check the oven frequently as these types of containers ignite if overheated.
Safety Instructions
■ If smoke is emitted or a fire occurs in the oven, press the Stop/Cancel button and leave the door closed to stifle any flames. Disconnect the power cord, or shut off power at the fuse or circuit breaker panel. ■ This appliance is intended for household use only. ■ Microwave heating of beverages can result in delayed eruptive boiling, so care must be taken when handling the container. ■ The contents of feeding bottles and baby food jars must be stirred or shaken. The temperature must be checked before consumption to avoid burns. ■ Do not cook eggs in their shells or whole hard-boiled eggs in the microwave. Pressure may build up and the eggs may explode, even after microwave heating has ended. ■ The oven should be cleaned regularly and any food deposits removed. ■ Clean the inside of the oven, door seals, and door seal areas regularly. When food splatters or spilled liquids adhere to the oven walls, door seals, or door seal areas, wipe them off with a damp cloth. Mild detergent may be used if they become very dirty. The use of harsh detergents or abrasives is not recommended. ■ Do not use commercial oven cleaners. - When using the grill, convection, air fry, or combination mode, some foods may inevitably splatter grease onto the oven walls. If the oven is not cleaned occasionally, it may start to "smoke" during use.
Safety Instructions
■ Failure to maintain the oven in a clean condition could lead to deterioration of surfaces that could affect the life of the appliance and possibly result in a hazardous situation. ■ WARNING! The appliance and its accessible parts become hot during use. Care should be taken to avoid touching heating elements. Children less than 8 years of age shall be kept away unless continuously supervised. ■ A steam cleaner is not to be used for cleaning the appliance. ■ Do not use harsh, abrasive cleaners or sharp metal scrapers to clean the oven door glass, as they can scratch the surface, which may result in shattering of the glass. ■ Exterior oven surfaces and the oven door will get hot during grill, convection, air fry, and combination functions; take care when opening or closing the door and when inserting or removing food and accessories. ■ This appliance is not intended to be operated by means of an external timer or separate remote-control system. ■ Only use utensils that are suitable for use in microwave ovens. ■ The oven has a heating element situated in the top of the oven. After using the grill, convection, air fry, or combination functions, the inside surfaces of the oven will be very hot. Care should be taken to avoid touching any of the inside surfaces near the heating element inside the oven. N.B. After cooking with these functions, the oven accessories will be very hot.
Safety Instructions
■ In case of electronic failure, the oven can only be turned off at the wall socket. ■ This combination oven is intended for heating food and beverages only. Take care when heating foods low in moisture, e.g. bread items, chocolate, biscuits and pastries. These can easily burn, dry out or catch on fire if cooked too long. We do not recommend heating foods low in moisture such as popcorn or poppadoms. ■ Drying of food, newspapers or clothing and heating of warming pads, slippers, sponges, damp cloths, wheat bags, hot water bottles and similar may lead to risk of injury, ignition or fire. ■ Users are advised to avoid a downward pressure on the microwave oven door when in the open position. There is a safety risk that the oven will tilt forward. ■ The oven lamp must be replaced by a service technician trained by the manufacturer. Do not attempt to remove the outer casing from the oven. ■ Caution! In order to avoid a hazard due to inadvertent resetting of the thermal cut-out, this appliance must not be supplied through an external switching device, such as a timer, or connected to a circuit that is regularly switched on and off by the utility. ■ Care should be taken not to displace the glass tray when removing containers from the appliance. ■ Metallic containers for food and beverages are not allowed during microwave cooking.
Disposal of Old Equipment

Only for European Union and countries with recycling systems
This symbol on the products, packaging, and/or accompanying documents means that used electrical and electronic products must not be mixed with general household waste.
For proper treatment, recovery and recycling of old products, please take them to applicable collection points in accordance with your national legislation.
By disposing of them correctly, you will help to save valuable resources and prevent any potential negative effects on human health and the environment. For more information about collection and recycling, please contact your local municipality.
Penalties may be applicable for incorrect disposal of this waste, in accordance with national legislation.
Installation and Connection
Examine your Oven
Unpack the oven, remove all packing material, and examine the oven for any damage such as dents, broken door latches or cracks in the door. If you find any damage, notify your dealer immediately. Do not install a damaged oven.
Earthing Instructions
If your AC outlet is not grounded, it is the personal responsibility of the customer to have it replaced with a properly grounded wall socket.

Important! This unit has to be properly earthed for personal safety.
Operation Voltage
The voltage has to be the same as specified on the label on the oven. If a higher voltage than specified is used, it may cause a fire or other damages.
Placement of Your Oven
This oven is intended for counter-top use and built-in use. It is not intended for use inside a cupboard. Refer to Building-in Your Oven on page 55.
Countertop use:
- Place the oven on a flat and stable surface more than 85 cm above the floor level, with rear of oven placed against a back wall.
- When this oven is installed, it should be easy to isolate the appliance from the electricity supply by pulling out the plug or operating a circuit breaker.
- For proper operation, ensure a sufficient air circulation for the oven. a. Allow 5 cm at one side, the other being open; 15 cm clear over the top; 10 cm at the rear.

b. If one side of the oven is placed flush to a wall, the other side or top must not be blocked.
- Do not place this oven near an electric or gas cooker range.
- The feet should not be removed.
- This oven is only for household usage. Do not use outdoors.
- Avoid using the oven in high humidity.
- The power cord should not touch the outside of the oven. Keep the cord away from hot surfaces. Do not let the cord hang over the edge of a table or work top. Do not immerse the cord, plug or oven in water.
- Do not block the air vents on the sides and back of the oven. If these openings are blocked during operation the oven may overheat. In this case the oven is protected by a thermal safety device and resumes operation only after cooling down.
Important User Instructions
- Do not use the oven for any reason other than the preparation of food. This oven is specifically designed to heat or cook food. Do not use this oven to heat chemicals or other non-food products.
- Before use, check that utensils/containers are suitable for use in microwave ovens.
- Do not operate this appliance if it has a damaged cord or plug, if it is not working properly, or if it has been damaged or dropped. It is dangerous for anyone other than a service technician trained by the manufacturer to perform repair service.
- It is hazardous for anyone other than a competent person to carry out any service or repair operation that involves the removal of a cover which gives protection against exposure to microwave energy.
- When the oven is not being used, do not store any objects inside the oven in case it is accidentally turned on.
- The appliance must not be operated by microwave or combination without food in the oven. Operation in this manner may damage the appliance. Exception to this is point 1 under heater operation.
- The microwave oven is intended for heating food and beverages only. Take care when heating foods low in moisture, e.g. bread items, chocolate, biscuits and pastries. These can easily burn, dry out or catch fire if cooked too long. We do not recommend heating foods low in moisture such as popcorn or poppodums. Drying of food, newspapers or clothing and heating of warming pads, slippers,
sponges, damp cloth, wheat bags, hot water bottles and similar may lead to risk of injury, ignition or fire.
- If smoke is emitted or a fire occurs in the oven, press Stop/Cancel and leave the door closed in order to stifle any flames. Disconnect the power cord, or shut off power at fuse or circuit breaker panel.
Heater operation
- Before using convection, air fry, combination or grill function for the first time, wipe excessive oil off in the oven cavity and operate the oven without food and accessories on convection 220 °C for 5 minutes. This will allow the oil that is used for rust protection to be burned off. This is the only time the oven is used empty.

Caution! Hot surfaces Exterior oven surfaces and the oven door will get hot during Combination/Grill/Convection/Air Fry.
- Exterior oven surfaces and the oven door will get hot during convection, air fry, combination and grilling, take care when opening or closing the door and when inserting or removing food and accessories.
- The oven has a heating element situated in the top of the oven.

Caution!
After using the convection, air fry, combination and grill functions, the inside surfaces of the oven will be very hot. Care should be taken to avoid touching the heating elements inside the oven.
Important User Instructions
- WARNING: The accessible parts may become hot in convection, air fry, combination and grill use. Young children less than 8 years of age should be kept away, and children should only use the oven under adult supervision due to the temperatures generated.

Caution!
After cooking by these modes, the oven accessories will be very hot.
Oven Light
When it becomes necessary to replace the oven light, please consult your dealer.
Cooking Times
The cooking times given in the cookbook are approximate. The cooking time depends on the condition, temperature, amount of food and on the type of cookware.
Begin with the minimum cooking time to help prevent overcooking. If the food is not sufficiently cooked you can always cook it for a little longer.

Important!
If the recommended cooking times are exceeded the food will be spoiled and in extreme circumstances could catch fire and possibly damage the interior of the oven.
Small Quantities of Foods
Small quantities of food or foods with low moisture content can burn, dry out or catch on fire if cooked too long. If materials inside the oven should ignite, keep the oven door closed, turn the oven off and remove the plug from the socket.
Piercing Skin
Food with non porous skins, such as potatoes, egg yolks and sausages must be pierced before cooking by microwave to prevent bursting.
Meat Thermometer
Use a meat thermometer to check the degree of cooking of roasts and poultry only when the meat has been removed from the oven. Do not use a conventional meat thermometer in the oven because it may cause sparking.
Eggs
Do not cook eggs in their shells and whole hard-boiled eggs by microwave. Pressure may build up and the eggs may explode, even after the microwave heating has ended.
Important User Instructions
Liquids
When heating liquids, e.g. soup, sauces and beverages in your oven, overheating the liquid beyond boiling point can occur without evidence of bubbling. This could result in a sudden boil over of the hot liquid.
To prevent this possibility the following steps should be taken:
a Avoid using straight-sided containers with narrow necks. b Do not overheat. c Stir the liquid before placing the container in the oven and again halfway through the cooking time. d After heating, allow it to stand in the oven for a short time, stir again before carefully removing the container.
Paper/Plastic
When heating food in plastic or paper containers, keep an eye on the oven due to the possibility of ignition.
Do not use recycled paper products (e.g. kitchen roll) unless the paper product is labelled as safe for microwave oven use. Recycled paper products may contain impurities which may cause sparks and/or fires during use.
Remove wire twist-ties from roasting bags before placing the bags in the oven.
Utensils/Foil
Do not heat any closed cans or bottles because they might explode.
Metal containers or dishes with metallic trim should not be used during microwave cooking. Sparking will occur.
Feeding Bottles/Baby Food Jars
The top and teat or lid must be removed from feeding bottles or baby food jars before placing in the oven.
The contents of feeding bottles and baby food jars are to be stirred or shaken.
The temperature has to be checked before consumption to avoid burns.
Fan Motor Operation
After using the oven the fan motor may rotate for a few minutes to cool the electric components. This is normal and you can take out food even though the fan motor operates. You can continue using the oven during this time.
Parts of Your Oven
1 Door release
Press to open the door. When you open the oven door during cooking, the cooking is stopped temporarily without clearing earlier made settings. The cooking is resumed as soon as the door is closed and Start pressed. The oven lamp lights as soon as the oven door is opened.
2 Oven window 3 Door safety lock system 4 Oven lamp 5 Waveguide cover (do not remove) 6 External oven air vents 7 Control panel 8 Power supply cord
9 Plug
10 Identification label 11 Glass tray 12 Roller ring 13 Heating elements 14 Caution symbol (hot surfaces) 15 Position your supplied menu label here 16 Wire rack
Spacers: Do not remove when cooking.
17 Enamel tray 18 Air Fry Basket 19 Warning label 20 Door hinges
To prevent injury when opening or closing the door, keep fingers away from the door hinges.


Note
- The illustration is for reference only.
- The glass tray, wire rack, enamel tray, and air fry basket are the only accessories with this oven. All other cooking utensils mentioned in this manual must be purchased separately.
Oven Accessories
Accessories
The oven comes equipped with a variety of accessories. Always follow the instructions given for use of the accessories.
Glass Tray
- Do not operate the oven without the roller ring and the glass tray in place.
- Never use another type of glass tray than the one specially designed for this oven.
- If the glass tray is hot, let it cool before cleaning or placing in water.
- The glass tray can turn in either direction.
- If the food or cooking vessel on the glass tray touches the oven walls and stops the tray rotating, the tray will automatically rotate in the opposite direction. This is normal.
- Do not cook foods directly on the glass tray, except when cooking jacket potatoes in microwave mode.
Air Fry Basket
- The Air Fry Basket cannot be used in the microwave or any combination mode.
- The Air Fry Basket must always be in place on the wire rack on the enamel tray, and glass tray (unless stated).
Roller Ring
- The roller ring and the oven floor should be cleaned frequently to prevent noise and build-up of remaining food.
- The roller ring must always be used for cooking together with the glass tray.
Enamel Tray
- The enamel tray is for cooking on grill, convection, air fry, and combination modes.
- Do not use the enamel tray in microwave mode only.
- Always place the enamel tray in the centre when using it directly on the glass tray.
Wire Rack
- The wire rack is used to facilitate browning of small dishes and help with the good circulation of the heat.
- Do not use any metal container directly on the wire rack in combination with microwave.
- Do not use the wire rack in microwave mode only.
- Always place the wire rack in the centre when using it directly on the glass tray.
The following chart shows correct use of the accessories in the oven.
Glass tray En | Enamel tray Wire  | rack Air Fry  | Basket  | |
| Microwave Yes | No No No | |||
| Grill Yes Yes Yes | Yes | |||
| Convection/Air Fry | Yes Yes Yes Yes | |||
| Combination | Yes | Yes | Yes | No |
Control Panel
NN-CD88QS

Note
This oven is equipped with an energy saving function.
When in stand-by mode the brightness of display will be reduced. The oven will enter stand-by mode after 6 minutes of the last operation. Opening the door will revert back to standard mode.
If an operation is set and Start is not pressed, after 6 minutes the oven will automatically cancel the operation. The display will revert back to clock mode.
1 Display window
2 Convection button (pages 24-25)
3 Micro Power button (page 19)
4 Grill button (page 23)
5 Air Fry/Combi button (pages 26-32)
6 Timer/Clock button (pages 17-18, 34-35)
7 Stop/Cancel button Before cooking:
One press clears your instructions.
During cooking:
One press temporarily stops the cooking program. Another press cancels all your instructions and the time of day will appear in the display.
8 Dial
The dial has the following 4 functions: Cooking time
After selecting a manual cooking mode, enter time by turning the dial. Use the dial for the Add Time function (page 36)
Start/Confirmation
Press the dial to start operating the oven or confirm the setting. If during cooking the door is opened or stop/cancel is pressed once, Start has to be pressed again to continue cooking.
Auto Programs
When clock mode is displayed, turn the dial to select auto programs and weight (pages 39-52)
One Push Reheating
When clock mode is displayed, press dial for quick start reheating chilled meal (page 37-38)

Beep Sound
A beep sounds when a button is pressed. If this beep does not sound, the setting is incorrect. When the oven changes from one function to another, two beeps sound. After the completion of the preheating on Convection or Combination mode, three beeps sound. After completion of cooking, five beeps sound.
Display Window

Cooking Modes
The diagrams shown below are examples of the accessories. It may vary depending on recipe/dish used. Further information can be found in the Cookbook.
| Cooking modes Uses | Accessories to use | Containers | |
MICROWAVE | DefrostingReheatingMelting: butter, chocolate, cheese.Cooking fi sh, vegetables, fruits, eggs.Preparing: stewed fruits, jam, sauces, custards, choux, pastry, caramel, meat, fi sh.Baking cakes without colour.No Preheating | - | Use microwaveable, plates or bowls eg. Pyrex®, directly on the Glass tray.No metal. |
Cooking Modes
| Cooking modes Uses | Accessories to use | Containers | |
GRILL | Grilling of meat or fi sh.Toast grilling.Colouring of gratin dishes or meringue pies.No Preheating | Wire rack on enamel tray * | Use heatproof dishes, plates or bowls eg. Pyrex® directly on the Wire rack on Enamel tray on Glass tray.* |
CONVECTION  | Baking of small items with short cooking times: puff pastry, cookies, roll cakes.Special baking: bread rolls or brioches, sponge cakes.Baking of pizzas and tarts.Preheating advised | Enamel tray or wire rack * | Heatproof, metal tin can be used on Enamel tray*.Do not place dishes directly on Glass tray. |
AIR FRY | Baking french fries.Baking steak, pork chops, hamburgers.Baking frozen breaded foods.No Preheating | Air fry basket on wire rack on enamel tray* | Put the food on the air fry basket directly. |
GRILL + MICROWAVE | Cooking lasagne, meat, potatoes or vegetable gratins.No Preheating | Wire rack on enamel tray* | Microwaveable and heatproof dishes placed directly on Wire rack on Enamel Tray on Glass tray*. |
CONVECTION + MICROWAVE | Baking cakesPuff pastry tartsPreheating if necessary | Enamel tray* | Microwaveable and heatproof dishes can be used on the Enamel tray*.Do not place dishes directly on Glass tray. |
* N.B. Small food items can be placed directly on the Enamel Tray on the Wire Rack
Word Prompting

Press Start
![graph TD A["88:88"] --> B["FRANCAIS"] B --> C["DEUTSCH"] C --> D["NEDERLANDS"] D --> E["ENGLISH"] E --> F["ESPANOL"] F --> G["ITALIANO"] H["Word prompting"] --> I["No Word"] I --> J["In French"] J --> K["In German"] K --> L["In Dutch"] L --> M["In English"] M --> N["In Spanish"] N --> O["In Italian"…](/content/2026/06/1400491/images/3ce174f0c6d3e696fb98fa5f46ae2c4231285f6331a5b204e98e78c891da453a.jpg)
These models have a unique function "Word Prompting" which guides you through the operation of your microwave. After plugging in the oven, press Start until you locate your language. As you press the buttons and turn the dial, the display will scroll the next instruction, eliminating the opportunities for mistakes. If for any reason you wish to change the language displayed, unplug the oven and repeat this procedure.
Operation Guide Setting
To assist you in programming your oven, the following operation will appear in the display window. When you become familiar with your oven, the operation guide can be turned off.
To turn off:
![graph LR A["Timer/Clock"] --> B["OPERATION GUIDE OFF"] B --> C["Colon or time of day appears in the display window."] D["Press Timer/Clock four times."] --> E["Display window"]](/content/2026/06/1400491/images/7cd3e65f1ac6ba72c652775b3f785c8f196b7d4d50523b7c7370e6b4f927b026.jpg)
To turn on:
![graph LR A["Timer/Clock"] --> B["OPERATION GUIDE ON"] B --> C["Colon or time of day appears in the display window."]](/content/2026/06/1400491/images/d5011174676ad6a2725c581a44c2c767baf7a655dcdca7f633e6c8f6576f1efa.jpg)
Press Timer/Clock four times.
Display window
Setting the Clock
When the oven is first plugged in, "88:88" appears in the display window.
![graph LR A["Timer/Clock"] --> B["Processing"] B --> C["Timer/Clock"]](/content/2026/06/1400491/images/c353dc060483e69f9079ea23f21f64403e96cdda30b3838c613aa4a17d6492a9.jpg)
Press Timer/Clock twice
"SET TIME" will appear in the display window, and the colon starts to blink.
Turn dial
Enter the time by turning the dial. The time appears in the display.
Press Timer/Clock
The colon stops blinking. Time of day is now locked into the display.

Note
- To reset time of day, repeat step 1 through to step 3, as above.
- The clock will keep the time of day as long as the oven is plugged in and electricity is supplied.
- This is a 24 hour clock, ie 2 pm = 14:00 not 2:00.
Child Lock
Using this system will make the oven controls inoperable; however, the door can be opened. Child lock can be set when the display shows a colon or the time.
To set: To cancel:

Press Stop/Cancel three times
The time of day will disappear. Actual time will not be lost. 🔗 is indicated in the display.

Press Stop/Cancel three times
The time of day will reappear in the display.

Note
To activate or cancel child lock, Stop/Cancel must be pressed 3 times within a 10 second period.
Microwave Cooking and Defrosting
The glass tray must always be in position when using the oven. There are 7 different microwave power levels available (see the chart below).
Use of accessory:
![graph LR A["Micro Power"] --> B["Glass tray"] B --> C["Product with LED indicator"] C --> D["Product with LED indicator"]](/content/2026/06/1400491/images/19f01c3fe804c3e5ca3d757c6b67f94c08424d4cdf6e27d3c8142e3ae1b61541.jpg)
Select Microwave power level Press this button until the power you require appears in the display window. The microwave symbol
will also appear. When you select 270 W, ** will also appear.
Set time
Select cooking time by turning the dial.
Press Start
The cooking program will start and the time counts down in the display.
| Press Power Level Wattage | Max. time | available | |
| Once High | 1000 W 30 minutes | ||
| Twice Medium-High | 800 W 1 | hour and 30 minutes | |
| 3 times Defrost | 270 W 1 hour | and 30 minutes | |
| 4 times Medium | 600 W | 1 hour and 30 minutes | |
| 5 times | Low 440 W | 1 hour and 30 minutes | |
| 6 times | Simmer | 300 W 1 hour and 30 minutes | |
| 7 times | Warm 100 W | 1 hour and 30 minutes | |
This chart shows approximate wattage for each power level.

Note
- For multistage cooking refer to page 33.
- Stand time can be programmed after microwave power and time setting. Refer to using the timer pages 34-35.
- You can change the cooking time during cooking if required. Turn dial to increase or decrease the cooking time. Time can be increased/decreased in 1 minute increments, up to 10 minutes. Turning the dial to zero will end cooking.
- Do not use metal containers on microwave mode.
- For manual defrosting times, please refer to defrosting charts on pages 21-22.
Defrosting Guidelines
Tips for Defrosting
Check the defrosting several times, even if you use the auto programs. Observe the standing times.
Standing Times
Individual portions of food may be cooked almost immediately after defrosting. It is normal for large portions of food to be frozen in the centre. Before cooking, allow to stand for a minimum of one hour. During this standing time, the temperature becomes evenly distributed and the food is defrosted by conduction. N.B. If the food is not going to be cooked immediately, store it in the refrigerator. Never refreeze defrosted food without first cooking it.
Joints and Poultry
It is preferable to place the joints on an upturned plate or plastic rack so that they are not resting in the juices.
Minced Meat or Cubes of Meat and Seafood
Since the outside of these foods quickly defrosts, it is necessary to separate them, break the blocks into pieces frequently while defrosting and remove them when they have defrosted.
Small Portions of Food
Chops and chicken pieces must be separated as soon as possible so that they defrost evenly throughout. Fatty parts and the ends defrost more quickly. Place them near the centre of the glass tray.
Bread
Loaves will require a standing time of 5-30 minutes to allow the centre to thaw. Standing time can be shortened if slices are separated and rolls and loaves cut in half.
Beep Sounds
Beeps will sound during the Turbo defrost programs. The beeps are to remind you to check, stir, separate the pieces. Failure to do this may result in uneven defrosting.


Defrosting Charts
Choose defrost power 270 W then calculate the cooking time as per the chart below. For large quantities, adjust the cooking time. The times indicated are for guidance only. Always check the food during defrosting by opening the door then restarting the defrosting. It is not necessary to cover food during defrosting.
| Food | Weight/Quantity | Time Stand | time |
| Meat | |||
| Meat for roasting on the bone #* | 500 g 18-20 | mins | 1 hour-1 hour 30 mins |
| Meat for roasting off the bone #* | 500 g 18-22 | mins | 1 hour-1 hour 30 mins |
| Chops # 500 g 12-15 mins | 20 mins | ||
| Cutlets # 250 g 6-7 mins | 15 mins | ||
| Thin steak* 430 g (2 pcs) | 15 mins 30 mins | ||
| Rib steak* 450 g 4-6 mins | 15 mins | ||
| Minced meat, sausage meat* | 500 g 12-15 | mins 30 mins | |
| Hamburger* | 100 g (1 pce) | 4-5 mins 10 mins | |
| 400 g (4 pcs) | 10-12 mins 20 mins | ||
| Pieces for stew* | 500 g 14-16 | mins 30 mins | |
| Whole poultry # 500 g 12-15 mins | 1 hour-1 hour 30 mins | ||
| Poultry in pieces #* | 1 kg (4 pcs) | 22-25 mins | 30 mins |
| Poussin # | 400 g 15-18 | mins 30-45 mins | |
| Fish | |||
| Whole # | 450 g (2 pcs) | 11-13 mins | 15 mins |
| Fillets # | 500 g (4 pcs) | 16-18 mins | 20 mins |
| Fish steak* | 450 g (2 pcs) | 10-12 mins | 30 mins |
| Thick pieces of fish * | 280 g (2 pcs) | 10-12 mins | 30 mins |
| Prawns* | 200 g | 7 mins | 10 mins |
| Miscellaneous | |||
| Butter * # | 250 g 2-3 mins | 20 mins | |
| Fruit coulis * | 200 g 4-5 mins | 30 mins | |
| Cheese # | 450 g 3-5 mins | 30 mins | |
| Berries*(spread out thinly) | 250 g 5-6 mins | 15 mins | |
| 500 g 10-12 mins | 20 mins | ||
| Concentrated fruit juice* | 200 ml 4 mins | 15 mins | |

Note
# turn this food halfway through defrosting;
* stir, turn or separate several times during defrosting.
Defrosting Charts
Choose defrost power 270 W then calculate the cooking time as per the chart below. For large quantities, adjust the cooking time. The times indicated are for guidance only. Always check the food during defrosting by opening the door then restarting the defrosting. It is not necessary to cover food during defrosting.
| Food | Weight/Quantity | Time Stand | time |
| Cooked desserts | |||
| Sponge cake 300 g (1 pce) | 5-6 mins 30 mins | ||
| Black Forest gateau 550 g | (1 pce) 6-8 mins | 30 mins | |
| Raspberry tart 470 g (1 pce) | 10 mins 30 mins | ||
| Chocolate cake 500 g (1 pce) | 5 mins 1 hour | ||
| Lemon tart 110 g (1 pce) | 3 mins 5-10 mins | ||
| Pastry / Dough | |||
| Sweet or shortcrust pastry # | 500 g 6-7 mins | 20 mins | |
| Pizza dough - rolled* | 220 g 5-6 mins | 20 mins | |

Note
# turn this food halfway through defrosting; * stir, turn or separate several times during defrosting.
Grilling
The grill system on the oven gives fast efficient cooking for a wide variety of foods e.g. chops, sausages, steaks, toast, etc. There are 3 different grill settings available. The glass tray must always be in position when using the oven. ** / SSS
![graph LR A["Grill"] --> B["Computer Mouse Icon"] B --> C["Computer Phone Icon"]](/content/2026/06/1400491/images/fa56d912fce2c1d67a513b895018723883d13b4629a09c1146d61b013e8aa5b3.jpg)
Press to select grill level
Set Time
Select cooking time by turning dial. Maximum cooking time is 1 hour and 30 minutes.
Press Start
The cooking program will start and the time counts down in the display.
| Press Power Level | |
| Once | Grill 3 (High) |
| Twice | Grill 2 (Medium) |
| 3 times | Grill 1 (Low) |
Use of accessory:

Note
- Place food on wire rack on enamel tray. Small food items can be placed directly on the enamel tray on the wire rack.
- Never cover foods when grilling.
- Do not attempt to preheat the grill.
- The grill will only operate with the oven door closed. It is not possible to use the grill function with the door open.
- There is no microwave power on the grill only program.
- Most foods require turning halfway during cooking. When turning food, open oven door and carefully remove wire rack using oven gloves.
- After turning, return food to the oven and close door. After closing oven door, press Start. The oven display will continue to count down the remaining grilling time. It is quite safe to open the oven door at any time to check the progress of the food as it is grilling.
- You can change the cooking time during cooking if required. Turn dial to increase or decrease the cooking time. Time can be increased/decreased in 1 minute increments, up to 10 minutes. Turning the dial to zero will end cooking.
- The grill will glow on and off during cooking - this is normal. Always clean the oven after using the grill and before using the microwave or combination.
Convection
This feature offers a choice of convection temperatures: 40 °C, and 100-220 °C in 10 °C increments. For quick selection of the most commonly used cooking temperatures, the temperatures start at 150 °C and count up to 220 °C, then
40 °C, 100 °C, 110 °C, etc.
Use of accessory:
![graph LR A["Convection"] --> B["After preheating, open the door and place the food in the oven."] B --> C["Wire rack"] C --> D["Enamel tray"] D --> E["Glass tray"] E --> F["Final oven with food placement"]](/content/2026/06/1400491/images/dd54e0a97e1bb3bb8c11b495ea4d266bfe687eb62a47576b894cb407df2eb169.jpg)
Press to select the desired oven temperature. Press Start to preheat (skip this step when preheating is not required).

Set time
Select cooking time by turning the dial. Maximum cooking time is 9 hours.
Press Start
The cooking program will start and the time counts down in the display.

Notes on Preheating
- Do not open the door during preheating. After preheating, 3 beeps will be heard and the "P" will flash in the display window.
- If you want to cook without preheating, after selecting the desired temperature, set the cooking time then press Start.
- The oven will maintain the selected temperature for approximately 30 minutes. If no food has been placed inside the oven, then it will automatically cancel the cooking program and "OPEN DOOR" will appear in the display window. If no cooking time is set, the oven will revert to time of day after 6 minutes.
- The oven cannot preheat to 40 °C.

Note
- When the selected cooking time is less than one hour, the time counts down second by second.
- When the selected cooking time is over one hour, the time counts down minute by minute until only "1H 00" (1 hour) remains. The display then indicates minutes and seconds and counts down second by second.
- You can change the cooking time during cooking if required. Turn dial to increase or decrease the cooking time. Time can be increased/decreased in 1 minute increments, up to 10 minutes. Turning the dial to zero will end cooking.
- When preheating, the screen displays the actual temperature of the oven cavity. The current temperature is not displayed until more than 100 °C is reached. To change the temperature during cooking, press the Convection button.
- When using Convection, the glass tray should be in position and must have the enamel tray placed on top.
Air Fry Cooking
The Air Fry function combines intense heat and maximized airflow to cook food crispy and brown. No need to preheat, turn the Dial to set the cooking time up to 9 hours after selecting Air Fry function.


| Press Air Fry Level Temperature | Uses | ||
| Once Air Fry 1 180 °C | Prawn, Cauiflower, Asparagus, Mushroom | ||
| Twice Air Fry 2 200 °C | Whole fi sh, Spring rolls, Sausages | ||
| 3 times Air Fry 3 220 °C | Frozen chicken nuggets,Frozen potato fries,Chicken breast | ||

Set Time
Select cooking time by turning dial.
Time can be set up to 9 hours.
Press Start

Note
- Ensure to use the proper accessories. Put the food on the Air Fry Basket on the Wire Rack on the Enamel Tray for dripping oil. DO NOT remove the spacer on the Wire Rack.
- Arrange food evenly in the Air Fry Basket. For best results, place food in a single layer and leave space between pieces. For large amount of food, stir or re-arrange the food several times during cooking.
- When the selected cooking time is less than one hour, the time counts down second by second.
- When the selected cooking time is over one hour, the time counts down minute by minute until only "1H 00" (1 hour) remains. The display then indicates minutes and seconds and counts down second by second.
- You can change the cooking time during cooking if required. Turn dial to increase or decrease the cooking time. Time can be increased/decreased in 1 minute increments, up to 10 minutes. Turning the dial to zero will end cooking.
Air Fry Cooking

Caution!
The accessories and the surrounding oven will get very hot. Use oven gloves.
Always use oven gloves when removing dishes from the oven - Especially when turning or stirring foods, as the accessories and surrounding oven will get very hot.
Oven Accessories to Use
When using the Air Fry function, place the accessories in the oven with the enamel tray on top of the glass tray, then the wire rack with the air fry basket on top containing the food.


Note
- Food is usually cooked uncovered.
- After cooking it is important that the accessories are removed for cleaning before re-use and that the oven walls and floor are wiped with a cloth squeezed in hot soapy water to remove any grease.
- Foods should always be cooked until browned and piping hot.
Air Fry Cooking Chart
| Food Weight range Temp. | Recommended time (minute) | Hints | ||
| Fresh | ||||
| Breaded prawn | 200-250 g | 180°C | 14-16 min | Coat the shrimp with egg ,then cover with a mixture of breadcrumbs and oil. Turn over at 2/3 of total time. |
| Prawn | 300-500 g | 180°C | 16-20 min | Seasoned with oil, salt &black pepper. Turn over at 1/2 of total time. |
| Whole fish 310-450 g | 200°C | 20-24 min | Seasoned with oil, salt &black pepper,cut the fish in half and put on aluminum foil or baking sheet. | |
| Potatoes 500-900 g | 200°C | 25-30 min | Seasoned with oil, salt &black pepper. Turn over/stir at 1/2 of total time. | |
| Cauliflower 310-500 g | 180°C | 22-26 min | Seasoned with oil, salt black pepper &chili powder. Turn over/stir at 2/3 of total time. | |
| Brusselsprouts | 310-500 g | 180°C | 20-24 min | Seasoned with oil, salt &black pepper. Turn over/stir at 2/3 of total time. |
| Asparagus 200-310 g | 180°C | 12-16 min | Seasoned with oil, salt &black pepper. Turn over/stir at 2/3 of total time. | |
Air Fry Cooking Chart
| Food Weight range Temp. | Recommended time (minute) | Hints | ||
| Carrot 500-780 g | 180°C 20-25 min | Seasoned with oil, salt &black pepper.Turn over/stir at 1⁄2 of total time. | ||
| Mushroom 340-500 g | 180°C 16-20 min | Seasoned with oil, salt &black pepper. | ||
| Homemade fries | 450 - 900 g | 220°C 30-40 min | Soak in cold water for 1 hour in the refrigerator, dry and mix with oil, stir at 2⁄3 of total time for over 450 g. | |
| Steak (1⁄2 inch of thickness) | 2 - 4 pcs (340 - 670 g) | 220°C 16-18 min | Seasoned, turn over at 2⁄3 of total time | |
| Pork chops | 2 - 4 pcs (225 - 450 g) | 220°C 25-30 min | Seasoned, turn over at 2⁄3 of total time | |
| Hamburger | 2 - 4 pcs (280 - 560 g) | 220°C 16-20 min | Seasoned, turn over at 2⁄3 of total time | |
| Chicken wings | 450 - 1000 g | 220°C 25-30 min | Seasoned, turn over at 2⁄3 of total time | |
| Drumsticks | 4 - 8 pcs (450 - 1000 g) | 220°C 35-40 min | cut open the surface of drumsticks with a knife; seasoned, turn over at 2⁄3 of total time | |
| Chicken breast | 2 - 4 pcs (340 - 670 g) | 220°C 26-30 min | Seasoned, turn over at 2⁄3 of total time | |
| Fish fillets | 2 - 4 pcs (225 - 450 g) | 220°C 20-25 min | Seasoned, less than 11⁄2 inch of thickness | |
Air Fry Cooking Chart
| Food Weight range Temp. | Recommended time (minute) | Hints | ||
| Frozen | ||||
| Thin frozen fries | 225 - 450 g | 220°C | 20-30 min | Stir at 2/3 of total time for over 450 g. |
| 450 - 900 g | 30-40 min | |||
| Thick frozen fries/Frozen potato steak fries/wedges | 450 - 900 g | 220°C 25-30 min | Stir at 2/3 of total time for over 450 g. | |
| Frozen potato steak fries/wedges | 450 - 900 g | 220°C 25-30 min | Stir at 2/3 of total time for over 450 g. | |
| Frozen cheese sticks | 450 - 1200 g | 220°C 16-20 min | - | |
| Frozen chicken nuggets | 450 - 1100 g | 220°C 20-30 min | Stir at 2/3 of total time for over 450 g. | |
| Frozen fish sticks | 450 - 1200 g | 220°C 20-30 min | Stir at 2/3 of total time for over 450 g. | |
| Breaded chicken fillets | 3-5 pcs (300 - 500 g) | 200°C 25-27 min | Turn over at 2/3 of total time. | |
| Chilled | ||||
| Spring rolls 300-450 g | 200°C 15-18 min | Brush oil. Turn over at 2/3 of total time. | ||
Combination Cooking
Combination cooking is ideal for many foods. The microwave power cooks them quickly, whilst the oven or grill gives traditional browning and crispness. All this happens simultaneously resulting in most foods being cooked in 1/2 to 2/3 of the conventional cooking time. There are 5 fixed combination settings (see table below). Preheat is only available when using convection combination modes. These are combi levels 2, 3, 4 or 5.
Use of accessory:


When using any combination cooking program the glass tray should be in position and must have the enamel tray placed on top, unless otherwise stated.


Set the desired combination level (Press Start if preheating - only for combi levels 2, 3, 4 or 5)
| Press | Combi Level | Combination Type Uses | |
| 4 times | Combi 1 | Grill 3 (High) + MW 440 W | Gratins, defrosting andbrowning / crisping bread, toastedsandwiches, small breaded items,samosas, spring rolls |
| 5 times | Combi 2 | Convection 180 °C +MW 100 W | Stews, casseroles and slowcooking roast meats |
| 6 times | Combi 3 | Convection 220 °C +MW 440 W | Frozen potato products,small pastry items, waffl es,doughnuts |
| 7 times | Combi 4 | Convection 200 °C +MW 440 W | Thin based pizzas,fl ammekueche, roasting meat |
| 8 times | Combi 5 | Convection 160 °C +MW 440 W | Quiche, croissants, thick basedpizzas |


Set Time
Select cooking time by turning dial. Maximum cooking time is 9 hours.
Press Start
The cooking program will start and the time counts down in the display.
Combination Cooking

Notes on Preheating
- When using Grill + Microwave mode, preheat is not available.
- When using Convection + Microwave, the oven can be preheated. Press Start after selecting Combi level 2, 3, 4 or 5. No microwaves are emitted during combination preheating.

Note
- The wire rack is designed to be used for combination and grilling. Never attempt to use any other metal accessory except the one provided with the oven. Place the enamel tray underneath to catch any fat or drips.
- Use the wire rack only as described. Do not use if operating the oven with less than 200 g of food on a manual program. For small quantities do not cook by combination, cook by grill or microwave only for best results.
- You can change the cooking time during cooking if required. Turn dial to increase or decrease the cooking time. Time can be increased/decreased in 1 minute increments, up to 10 minutes. Turning the dial to zero will end cooking.
- Never cover foods when cooking on combination.
- It is not possible to preheat the grill on combination.
- Arcing may occur if the incorrect weight of food is used, the wire rack has been damaged, or a metal container has been used accidentally. Arcing is flashes of blue light seen in the microwave. If this occurs, stop the oven immediately.
- Some foods should be cooked on combination without using the wire rack i.e. roasts, gratins, pies and puddings. The food should be placed in a heatproof non-metallic dish and placed directly onto the glass tray.
- Do not use plastic microwave containers on combination programs (unless suitable for combination cooking). Dishes must be able to withstand the heat of the top grill - heatproof glass e.g. Pyrex® or ceramic are ideal.
- It is possible to use smooth seamed metal tins and foil containers on combination but they must be placed directly onto the enamel tray on the glass tray. They must not be placed directly onto the wire rack, or arcing will occur.

Caution!
Use oven gloves when removing accessories. Never touch the outside window or inside metal parts of the door or oven when taking food in or out due to the high temperatures involved.
Multistage Cooking
2 or 3 Stage Cooking
Example
To cook on 600 W for 2 minutes, cook on 180 °C for 15 minutes and cook on Grill 3 for 10 minutes.
![graph LR A["Micro Power"] --> B["Convection"] B --> C["Output"]](/content/2026/06/1400491/images/14da08401010d4f4de0d63985da760ce1c6230436b9d3d740415b353860afa2e.jpg)
Press Micro Power 4 times to select 600 W
Set the cooking time to 2 minutes using the dial.
Press Convection button 4 times to select 180 °C.
Set the cooking time to 15 minutes using the dial.
![graph LR A["Grill"] --> B["Control Panel"] B --> C["Checkmark / Lock Icon"] C --> D["Control Panel"]](/content/2026/06/1400491/images/b6b91f2d10bd34c52f6e53f650395879e6742e6b25886533a249caf5d0aa7093.jpg)
Press Grill button once to select Grill 3.
Set the cooking time to 10 minutes using the dial.
Press Start.
The cooking program will start and the time in the display will count down.

Note:
- During cooking, one press on Stop/Cancel stops the operation. You can re-start it by pressing Start. A second press of Stop/Cancel will cancel the selected program.
- Whilst not operating, one press of Stop/Cancel cancels the selected program.
- Auto programs and preheating cannot be used with multistage cooking.
- Delay/stand feature can be used with multistage cooking.
Using the Timer:
The timer can be used either before or after a cooking program. This feature can be used to set a standing time after cooking or to delay the start of your cooking.
1. To Set a Standing Time:
Set the desired cooking program by selecting the power level and time required (up to 2 stages).
![graph LR A["Timer/Clock"] --> B["Operation"] B --> C["Output"]](/content/2026/06/1400491/images/267a0249a65d2c9685619d02f689da9313ed22b32e4104b9e57f016d58cf5851.jpg)
Press Timer/Clock.
Set the desired standing time using the dial (max 9 hours). An "H" will appear in the display to denote hours.
Press Start. The cooking program will commence, after which the standing time will count down.

Note:
- 3-stage cooking can be programmed, including standing time.
- If the oven door is opened during the standing time, the time in the display window will continue to count down.
- Standing time cannot be programmed after an auto program and preheating.
- If the programmed stand time exceeds one hour, the time will count down in units of minutes. If less than one hour, the time will count down in units of seconds.
2. To Set a Kitchen Timer:


Press Timer/Clock.
Set the desired kitchen time using the dial (max 9 hours). An "H" will appear in the display to denote hours.
Press Start. Time will count down.
Using the Timer
3. To Set a Delay Start:
![graph LR A["Timer/Clock"] --> B["+"] B --> C["Set the desired cooking program, by selecting power level and time required (up to 2 stages)."] C --> D["Speed Limit"]](/content/2026/06/1400491/images/f0cd7befa557b5a0744cf2aa82748f35fd4fd72f8d7a1ba47f2d368e9562d984.jpg)
Press Timer/Clock
Set desired Delay time using the dial (max 9 hours). An "H" will appear in the display to denote hours.
Press Start Delayed time will count down then the cooking program will start.

Note
- 3 stage cooking can be programmed including delay start cooking.
- If the programmed delay time exceeds one hour, the time will count down in units of minutes. If less than one hour, the time will count down in units of seconds.
- Delay start cannot be programmed before an auto program and preheating.
- If the oven door is opened during the delay time, the time in the display window will continue to count down.
Using the Add Time Function
This feature allows you to add cooking time at the end of previous cooking.

textimage
Circular icon with symbols including a diamond and lightning bolt, and a sensor symbol below it.After cooking, turn dial to select
Add Time function. Maximum cooking
time: Micro Power: 1000 W (High) up to 30 minutes; other microwave powers up to 1 hour and 30 minutes; Grill: 1 hour and 30 minutes, Convection, Air Fry, Combination and timer: 9 hours.
Press Start
Time will be added.
The time in the display window will count down.

Note
- This function is only available for Micro Power, Grill, Convection, Air Fry, Combination and Timer functions and it is not available for Auto programs.
- The Add Time function will not operate after 1 minute cooking.
- The Add Time function can be used after multistage cooking and during cooking.
- The power level is the same as the last stage.
This unique feature ‘the Genius’ built in sensor allows you to reheat a chilled meal with one push of the dial. It is not necessary to select the power level or cooking time. The built-in sensor measures the humidity of the food and calculates the microwave power level together with a cooking time.

textimage
◇ / ↓ / — / —When clock mode is displayed, press the dial to start. To reset oven and return to clock mode, press Stop/Cancel.
| Program Weight Accessories Instructions | ||
| Reheat a fresh pre-cooked chilled meal | 200-1000 g |  All foods must be pre-cooked. Foods should be at refrigerator temperature approx.+ 5 °C. Reheat in microwaveable container as purchased. Pierce covering fi lm with a sharp knife once in the centre and four times around the edge. If transferring food to dish, cover with pierced cling fi lm. Press dial to Start. Stir at beeps. Stir again at end of program and allow a few minutes standing time. Large pieces of meat/fi sh in a thin sauce may require longer cooking. This program is not suitable for starchy food such as rice, noodles or potatoes. All foods must be pre-cooked. Foods should be at refrigerator temperature approx.+ 5 °C. Reheat in microwaveable container as purchased. Pierce covering fi lm with a sharp knife once in the centre and four times around the edge. If transferring food to dish, cover with pierced cling fi lm. Press dial to Start. Stir at beeps. Stir again at end of program and allow a few minutes standing time. Large pieces of meat/fi sh in a thin sauce may require longer cooking. This program is not suitable for starchy food such as rice, noodles or potatoes. |
How it works
Once the One Push Reheating has been selected and Start is pressed the food is heated up. As food begins to get hot, steam is emitted. When the food reaches a certain temperature and begins to cook, an even greater amount of steam is released. The increase in steam emission is detected by a humidity sensor in the oven. This acts as a signal for the oven to calculate how
much longer the food needs to cook. The remaining cooking time will appear in the display window after two beeps. Whilst the Sensor program is still in the display window the oven door should not be opened. Wait until the cooking time appears in the window, and then open the door if required, to stir or turn the food.
Adjust to Taste
The One Push Reheating rehears a chilled meal for average tastes. You are able to adjust the reheating program to your own taste. After pressing Start, +/- symbol and flashing bar appears in the display, turn dial clockwise for more time or anticlockwise for less time. This operation should be completed within 14 seconds. Default mode is normal.

Note
- This feature is not suitable for foods that cannot be stirred eg. lasagne / macaroni cheese.
- The oven automatically calculates the reheating time or the remaining reheating time.
- The door should not be opened before the time appears in the display window.
- To prevent any mistakes during One Push Reheating, ensure that the glass tray and the container are dry.
- The room temperature should not be more than 35°C and not less than 0°C.
- If the oven has previously been used and it is too hot to be used on One Push Reheating, 'HOT' will appear in the display window. After the 'HOT' disappears, the One Push Reheating may be used. If in a hurry, cook food manually by selecting the correct cooking mode and cooking time yourself.
Turbo Defrost
This feature allows you to defrost minced meat, chops, chicken portions, meat joints, and bread.
Foods should be placed in a suitable dish. Whole chickens and joints of meat should be on an upturned saucer or on a microwave-safe plate. Chops, chicken portions, and slices of bread should be placed in a single layer. It is not necessary to cover the foods.
The Chaos theory principle is used in auto weight defrost programs to give you a quick and more even defrost. The Chaos system uses a random sequence of pulsing microwave energy which speeds up the defrosting process. During the program, the oven will beep to remind you to check the food. It is essential that you turn and stir the food frequently. On hearing the first beep, you should turn. On the second beep, you should turn the food or break it up.
1st Beep
Turn

naturalimage
Close-up of a dark, textured food item on a fluted white plate (no text or symbols visible)2nd Beep
Turn or break up
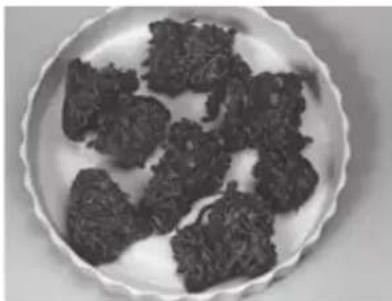
naturalimage
Plate of dark, irregularly shaped food items on a white background (no text or symbols visible)
Note
- Check foods during defrosting. Foods vary in their defrosting speed.
- It is not necessary to cover the food.
- Always turn or stir the food especially when the oven "beeps".
- Minced meat/chops/chicken portions should be broken up or separated as soon as possible and placed in a single layer.
- Allow standing time so that the centre of the food thaws out (minimum 1-2 hours for joints of meat and whole chickens).
Turbo Defrost
With this feature you can defrost frozen food according to the weight.
![graph LR A["Signal Signal"] -- gt; BPress dial to confirm auto program selection. Auto program number appears in the display. The microwave, auto and defrost symbols light. B -- gt; C["Signal Signal"] C -- gt; DPress dial to confirm auto program selection. Auto program number appears in the display.…](/content/2026/06/1400491/images/52e0e5e0d1a0782c26c486dc4fe26929e16d06ec27bba3765a4bc4490053a64f.jpg)
To allow auto program operation, ensure the oven is in Clock mode. Select the desired Turbo Defrost program by turning the dial.
Select the weight of the food by turning the dial. Turning the dial slowly will count up in 10 g steps.
Press Start Remember to stir or turn the food during defrosting.
| Program | Weight | Instructions | |
1. Bread | 100 g - 900 g | Small or large loaves of bread, white or wholewheat, bread rolls and batons. Turn the dial to select program 1, Bread. Press the dial to confi rm the program. Turn the dial to select the weight of the food and press Start. Turn at beeps. Allow bread to stand for 5 minutes (white light bread) to 30 minutes (dense rye bread). Cut large loaves in half during standing time. | |
2. Small Pieces | 100 g - 1200 g | Small pieces of meat, escallop, sausages, minced meat, steak, chops, fish fillets (each 100 g - 400 g). Turn the dial to select program 2, Small Pieces. Press the dial to confi rm the program. Turn the dial to select the weight of the food and press Start. Turn at beeps. | |
3. Big Piece | 400 g - 2000 g | Big pieces of meat, whole chickens, meat joints. Turn the dial to select program 3, Big Piece. Press the dial to confi rm the program. Turn the dial to select the weight of the food and press Start. Turn at beeps. Standing time of 1 to 2 hours should be allowed before cooking. | |
= Microwave = Defrost

Note
See page 39 for defrosting guidelines.
Auto Weight Programs

This feature allows you to cook or reheat foods by setting the weight only. The oven determines the Microwave power level and/or Convection or grill and/or Combination setting, then the cooking time automatically. Select the category of food and then just enter the weight. The weight is entered in grams.
Auto Programs with Preheating
It is necessary to preheat the oven for Re-Bake Bread programs 7 and 8; Junior Menu programs 19 Frozen Breaded Products, 20 Fresh Vegetable Fries, 21 Fresh Potato Fries; Auto Combi Programs 24 Frozen Potato Products, 26 Whole chicken.

textimage
I / ↓To allow Auto Weight Program operation, ensure the oven is in clock mode. Select the desired program by turning the dial. Refer to pages 44, 50-52.

Press the dial to confirm the program. Auto program number appears in the display. The microwave and/or grill or convection and auto weight symbols appear in the display and frozen food symbol if applicable.


textimage
Circular button with symbols including a diamond, lightning bolt, and Wi-Fi icon, next to an arrow indicating direction or change.Press dial to preheat the oven. Preheat with enamel tray on glass tray.
Press Start
After preheating, beeps sound and 'P' will flash in the display. Place the food in the oven and set weight using dial. Take care when handling the hot enamel tray.
Auto Weight Programs
It is not necessary to preheat the oven for the remaining auto programs. Operate as below:
Auto Programs without Preheating
![graph LR A["Clock with double arrow symbol"] -- gt; B["Auto program number appears in the display. The microwave and/or grill or convection and auto weight symbols appear in the display and frozen food symbol if applicable."] B -- gt; C["Clock with double arrow symbol"] C -- gt; D["Auto program symb…](/content/2026/06/1400491/images/1f2b15b7415f9d0ae65b1ec25b34b2f1d781fffba4acd901c659c8a2e25e3ccc.jpg)
To allow auto program operation, ensure the oven is in Clock mode. Select the desired Auto Weight program by turning the dial.
Select the weight of the food by turning the dial (except Junior Menu Program 18, Mug Cake.) Turning the dial slowly will count up in 10 g steps.
Press Start
When you select an automatic program symbols will appear in the display to show the cooking mode that will be used and the accessories that are needed, in addition to the glass tray. These are what they mean:


Enamel tray


Wire rack


Convection Grill Microwave
Frozen food

Note
The auto weight programs are designed to take the guesswork out of cooking or reheating your food. They must only be used for the foods described.
- Only cook foods within the weight ranges described (pages 43-44, 48-52).
- Only use the accessories as indicated on pages 43-44, 48-52.
- Beverage programs 4-6 and Junior programs 15, 16, 18 use Microwave power only. Re-Bake Bread programs 7-8; Junior Menu programs are 17, 19-21 and Auto Combi programs are 22-27 use a combination of Microwave and Convection or Grill.
- Do not cover food unless stated, when using a Combination or Convection program, it will prevent the food browning. The heat will also melt any plastic covering.
- Most foods benefit from a standing time after cooking on an auto program, to allow heat to continue conducting to the centre.
- To allow for some variations that occur in food, check that food is thoroughly cooked and piping hot before serving.
- Always weigh the food rather than relying on the package weight information.
Auto Beverage Programs
| Program Weight Accessories Instructions | |||
4. Tea/Coff ee | 200 g or 400g |  | For reheating one beverage with a fixed weight of 200 g or two beverages of 200 g each from room temperature eg. tea, coffee or hot chocolate. Turn dial to select program 4, Tea/coffee. Press the dial to confirm the program. Select 200 g for 1 beverage or 400 g for two beverages using the dial and press Start. Stir before and after heating. |
5. Milk/Hot Chocolate/Milk Coff ee | 200 g or 600 g |  | For reheating one mug of milk with a fixed weight of 200 g or one jug of milk with a fixed weight of 600 g from fridge temperature. This program is suitable for full fat, semi-skimmed and skimmed milk. The hot milk can be used for making milky coffee or hot chocolate. Turn the dial to select program 5, Milk/Hot Chocolate/Milk Coffee. Press the dial to confirm the program. Select 200 g for 1 mug or 600 g for 1 jug using the dial and press Start. Stir before and after heating for one mug of milk. Stir at beeps during heating for one jug of milk. |
6. Soup | 200-1000 g |  | For reheating tetra, canned or homemade soups. Soup should be at room or refrigerator temperatures. Soup should be placed in a suitable sized microwaveable bowl. It is preferable to cover with a lid or plate or saucer. Turn the dial to select program 6, Soup. Press the dial to confirm the program. Turn the dial to select weight and press Start. Stir before, at beeps and after reheating. Final temperature of soup may vary depending on thickness of soup, starting temperature, sugar and fat content of soup. |
≈ = Microwave = Beverage
Re-Bake Bread Programs
| Program Weight Accessories Instructions | |||
7. Baguette/ Crusty Rolls | 100-500 g |  | To re-bake baguettes and crusty rolls. This program is suitable for reheating, browning and crisping pre-purchased baguettes and rolls from room temperature. Ensure height of baguette/rolls is no more than 5 cm. Turn the dial to select program 7, Baguette/Crusty Rolls. Press the dial to confi rm the program. Press Start to preheat the oven. After preheating, beeps sound and ‘P’ will fl ash in the display. Place baguette/crusty rolls on enamel tray on glass tray. Turn the dial to select weight and press Start. After cooking place on a wire rack for a few minutes. |
8. Croissants | 50-350 g |  | To re-bake croissants. This program is is suitable for reheating, browning and crisping pre-purchased croissants from room temperature. Turn the dial to select program 8, Croissants. Press the dial to confi rm the program. Press Start to preheat the oven. After preheating, beeps sound and ‘P’ will fl ash in the display. Place croissants on enamel tray on glass tray. Turn the dial to select weight and press Start. After cooking place on a wire rack for a few minutes. |
≈ = Microwave
=Grill
≈ = Preheating is required
= Convection
Auto Sensor Programs
This feature allows you to cook or reheat foods without entering the weight. The built-in sensor measures the humidity of the food and calculates the recommended microwave power level together with a suggested cooking time.
How it works
Once the food has been selected and Start is pressed the food is heated up. As food begins to get hot, steam is emitted. When the food reaches a certain temperature and begins to cook, an even greater amount of steam is released. The increase in steam emission is detected by a humidity sensor in the oven. This acts as a signal for the oven to calculate how much longer the food needs to cook. The remaining cooking time will appear in the display window after two beeps.
Whilst the Sensor program is still in the display window the oven door should not be opened. Wait until the cooking time appears in the window, and then open the door if required, to stir or turn the food.
Adjust to Taste
The Sensor programs cook foods for average tastes. You are able to adjust the cooking programs to your own taste. After pressing Start, +/- symbol and flashing bar appears in the display, turn dial clockwise for more time or anti-clockwise for less time. This operation should be completed within 14 seconds. Default mode is normal.

textimage
*** /$$ / ◇ / ↓ / →To allow auto program operation, ensure the oven is in Clock mode. Select the desired Auto Sensor program by turning the dial.
Press the dial to confirm the program. Auto
program number appears in the display. The microwave and sensor auto symbols appear in the display, and the frozen food symbol if applicable.

Press Start
Auto Sensor Programs

Note
- The oven automatically calculates the cooking time or the remaining cooking time.
- The door should not be opened before the time appears in the display window.
- The temperature for frozen food is assumed to be -18°C to -20°C, for other types of food +5°C to +8°C (refrigerator temperature).
- To prevent any mistakes during Auto Sensor programs, ensure that the glass tray and the plate are dry.
- The room temperature should not be more than 35°C and not less than 0°C.
- Only cook foods within the recommended weight range described on page 47.
- For Auto Sensor programs fresh vegetables, frozen vegetables, potatoes, and fresh fish, cover with cling film. Pierce the cling film with a sharp knife once in the centre and four times around the edge. For Auto Sensor programs pasta and reheat casserole, cover with a lid.
- For foods covered with cling film, pierce the film with a sharp knife, once in the centre and four times around the edge. If the cling film is not pierced, steam cannot escape and this could result in overcooking.
- If the oven has previously been used and it is too hot to be used on an Auto Sensor Program, 'HOT' will appear in the display window. After the 'HOT' disappears, the Auto Sensor Programs may be used. If in a hurry, cook food manually by selecting the correct cooking mode and cooking time yourself.
Auto Sensor Programs
| Program Weight Instructions | ||
9. Fresh Vegetables | 200 g - 1000 g | To cook fresh vegetables. Place prepared vegetables into a suitable sized container. Sprinkle with 1 tbsp water per 100 g vegetables. Cover with cling film. Pierce cling fi lm with a sharp knife once in the centre and four times around the edge. Turn the dial to select program 9, Fresh Vegetables. Press the dial to confi rm the program. Press Start. Stir at beeps. Drain after cooking and season to taste. |
10. Frozen Vegetables | 200 g - 800 g | To cook frozen vegetables. Place vegetables into a suitable sized container. Sprinkle with 1-3 tbsp water. If cooking vegetables with high water content, such as spinach or tomatoes, do not add water. Cover with cling film. Pierce cling film with a sharp knife once in the centre and four times around the edge. Turn the dial to select program 10, Frozen Vegetables. Press the dial to confi rm the program. Press Start. Stir at beeps. Drain after cooking. |
11. Potatoes | 200 g - 1000 g | To cook potatoes. Peel and cut potatoes into even sized pieces. Place prepared potatoes into a shallow container. Add 90 ml (6 tbsp) of water for 200-590 g, or 150 ml (10 tbsp) for 600-1000 g potatoes. Cover with pierced cling film. Pierce cling film with a sharp knife once in the centre and four times around the edge. Turn the dial to select program 11, Potatoes. Press the dial to confi rm the program. Press Start. Stir at beeps. Drain after cooking and season to taste. |
12. Fresh Fish | 200 g - 800 g | To cook fresh fillets or steaks of fish. Place in a suitable sized container, add 2 tbsp (30 ml) water. Cover with cling film. Pierce cling film with a sharp knife once in the centre and four times around the edge. Turn the dial to select program 12, Fresh Fish. Press the dial to confi rm the program. Press Start. |
13. Pasta | 100 g - 450 g | For cooking dried pasta. Use a large bowl. Add 1 tsp salt, 1 tbsp oil and boiling water. For 100 g - 290 g pasta add 1 litre of boiling water. For 300 g - 450 g pasta add 11/2 litre of boiling water. Cover with a lid. Turn the dial to select program 13, Pasta. Press the dial to confi rm the program. Press Start. Drain after cooking. |
14. Casserole | 300 - 800 g | For reheating casserole eg. Pea stews, ravioli, ragouts or goulash (industrially prepared or home made). Remove dish from packaging and place in a dish with lid. Turn the dial to select program 14, Casserole. Press the dial to confi rm the program. Press Start. Stir at beeps and before the standing time. After heating, allow to stand covered for 2 minutes. |
Junior Menu Programs
The Junior Menu offers a range of programs catering for babies, toddlers and older children - great for time saving and convenience. The fruit and vegetable purées are ideal first foods for weaning babies. Homemade purées taste like real food and cost less than jars or packets. Extra portions can be frozen in ice cube trays, then defrosted and reheated. Healthy vegetable fries and pasta bakes are perfect for smaller tummies. Mug cakes offer a quick and easy dessert. Simple tablespoon measurements that can be mixed in the mug for ease of preparation. Ready to eat in no time at all when using the Mug Cake program. For operation refer to pages 41-42.
| Program Weight Accessories Instructions | |||
15. Vegetable Puree | 100 g - 400 g |  | This program is suitable for cooking parsnips, potatoes, butternut squash, carrots, sweet potato and swede. The cooked vegetables are then puréed and suitable when weaning babies. Peel and chop the vegetables into even sized pieces. Place in a Pyrex® dish. Add the following quantities of water:100 g - 150 g vegetables 75 ml water.155 g - 300 g vegetables 100 ml water.305 g - 400 g vegetables 150 ml water.Cover with lid. Turn the dial to select program 15, Vegetable Puree. Press the dial to confi rm the program. Turn the dial to select the weight of the vegetables.Press Start. Stir halfway during cooking at beeps. After cooking allow to stand for 10 minutes. Purée the vegetables with the cooking liquid using a blender. If necessary adjust the consistency with a little water to thin or baby rice to thicken. Check the temperature before feeding. |
16. Fruit Puree | 100 g - 400 g |  | This program is suitable for cooking apples, pears, peaches, papaya and mango. The cooked fruit is then puréed and suitable when weaning babies. Peel and chop the fruit into even sized pieces. Place in a Pyrex® dish. Add the following quantities of water:100 g - 150 g fruit 75 ml water.155 g - 300 g fruit 100 ml water.305 g - 400 g fruit 150 ml water.Cover with lid. Turn the dial to select program 16, Fruit Puree. Press the dial to confi rm the program. Turn the dial to select the weight of the fruit. Press Start. Stir halfway during cooking at beeps. After cooking allow to stand for 10 minutes. Purée the fruit with the cooking liquid using a blender. If necessary adjust the consistency with a little water to thin or baby rice to thicken. Check the temperature before feeding. |
Junior Menu Programs
| Program Weight Accessories Instructions | |||
17. Junior Pasta Bake + + + + + + + + + + + + + + + + + + + + + + + + + + + + + + + + + + + + + + + + + + + + + + + + + + + + + + + + + + + + + + + + + + + + + + + + + + + + + + + + + + + + + + + + + + + + + + + + + + + + + + + + + + + + + + + + + + + + + + + + + + + + + + + + + + + + + + + + + + + + + + + + + + + + + + + + + + + + + + + + + + + + + + + + + + + + + + + + + + + + + + + + + + + + + + + + + + + + + + + + + + | 250 g500 g800 g | For cooking fresh pasta bake using fresh pasta (penne, spaghetti, fusilli), cheese or tomato based sauce and grated mild cheddar cheese. Use a suitable square, shallow Pyrex® container. Use the following quantities:Other ingredients may be added such as ham, tuna and sweetcorn. In this case substitute some of the sauce for the chosen added ingredients. Turn the dial to select program 17, Junior Pasta Bake. Press the dial to confirm the program. Turn the dial to select the weight - 250 g, 500 g or 800 g. Press Start. | |
18. Mug Cake | - | For cooking one mug cake, either Chocolate Brownie, Lemon or Banana. Prepare the mug cake as in the following recipes. Size of mug should be no smaller than 300 ml. Turn the dial to select program 18, Mug Cake. Press the dial to confi rm the program. Press Start. After cooking allow to stand for a few minutes and serve warm in the mug with ice-cream, custard or cream. | |
| ingredientsFor 1 serving4 1⁄2 tbsp flour3 tbsp sugar2 1⁄2 tbsp cocoa powder2 tbsp melted butter2 tbsp milk4 squares dark or milk chocolate, choppedDecoration: sprinkles or mini marshmallows | Chocolate Brownie Mug CakeMix flour, sugar and cocoa powder together in mug.Add melted butter and milk and mix.Add chopped chocolate. Mix thoroughly.After cooking decorate with sprinkles or mini marshmallows. | ||
| ingredientsFor 1 serving3 tbsp flour3 tbsp sugar1⁄4 tsp baking powder1⁄8 tsp salt2 tbsp vegetable oil2 tbsp lemon juice, plus zest 1⁄2 lemon1 egg, beatenDecoration: strawberries, blueberries, sprinkles | Lemon Mug CakeMix flour, sugar, baking powder and salt together in mug.Add vegetable oil, lemon juice, lemon zest and beaten egg. Mix thoroughly.After cooking, decorate with strawberries, blueberries or sprinkles. | ||
Junior Menu Programs
ingredients
For 1 serving
3 tbsp flour
1/2 tsp baking powder
3 tbsp light brown sugar
1 tbsp melted butter
1 tbsp milk
1 egg, beaten
1 tsp honey
1 medium sized banana
For the sauce
1/2 tbsp honey
1 tbsp chocolate sauce
few slices banana
Banana Mug cake
- Mix together flour, baking powder and sugar.
- Add melted butter, milk, beaten egg and honey.
- Add mashed banana. Mix thoroughly.
- For the sauce combine the honey and chocolate in a small bowl. Microwave 600 W for 1 minute. Stir sauce thoroughly. Make a small insertion in the top of the cooked cake and pour the sauce over.
Program Weight Accessories Instructions
19. Frozen Breaded Products  | 100 g - 500 g |  | For preparing frozen breaded products such as frozen popcorn chicken, frozen chicken nuggets, frozen turkey drummers, frozen fish fingers, frozen scampi. Turn the dial to select program 19, Frozen Breaded Products. Press the dial to confi rm the program. Press Start to preheat the oven. After preheating, beeps sound and 'P' will fl ash in the display. Remove all packaging and place the frozen breaded products on the enamel tray on the wire rack. Turn the dial to select weight of food and press start. Turn halfway during cooking at beeps. |
20. Fresh Vegetable Fries  | 100 g - 500 g |  | For preparing fresh vegetable fries such as sweet potato, white potato, carrots, parsnips and courgettes. Peel and cut the vegetables into baton shapes. Toss in a tablespoon of vegetable oil. Turn the dial to select program 20, Fresh Vegetable Fries. Press the dial to confi rm the program. Press Start to preheat the oven. After preheating, beeps sound and 'P' will fl ash in the display. Place the vegetables on the enamel tray on the wire rack. Turn the dial to select weight of food and press Start. Turn and stir halfway during cooking at beeps. |
21. Fresh Potato Fries  | 100 g - 500 g |  | For preparing fresh potato fries. Peel and cut the potatoes into baton shapes. Toss in a tablespoon of vegetable oil. Turn the dial to select program 21, Fresh Potato Fries. Press the dial to confi rm the program. Press Start to preheat the oven. After preheating, beeps sound and 'P' will fl ash in the display. Place the potatoes on the enamel tray on the wire rack. Turn the dial to select weight of food and press Start. Turn and stir halfway during cooking at beeps. |
Auto Combi Programs
For operation refer to pages 41-42.
| Program Weight Accessories Instructions | |||
22. Frozen Pizza | 200-450 g |  | For reheating and browning of pre-purchased frozen pizza. Turn the dial to select program 22, Frozen Pizza. Press the dial to confi rm the program. Remove all packaging and place the pizza directly on the wire rack on the enamel tray. Turn the dial to select the weight of the food and press Start. This program is not suitable for deep pan pizzas. |
23. Frozen Baguette Pizza | 100-300 g |  | For reheating and browning of pre-purchased frozen baguette pizza. Turn the dial to select program 23, Frozen Baguette Pizza. Press the dial to confi rm the program. Remove all packaging and place the baguette pizza directly on the wire rack on the enamel tray. Turn the dial to select the weight of the food and press Start. |
24. Frozen Potato Products | 200-500 g | 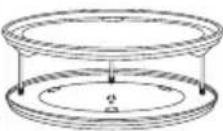 | For cooking frozen pre-purchased potato products that are suitable for grilling eg. French fries, home fries, croquettes, hash browns, potato waffl es. Turn the dial to select program 24, Frozen Potato Products. Press the dial to confi rm the program. Press Start to pre-heat the oven. After pre-heating beeps sound and 'P' will fl ash in the display. Remove all packaging and spread potato products out on enamel tray on wire rack. Turn the dial to select the weight. Press Start. Turn and stir halfway during cooking at beeps. For best results cook in a single layer.Note: Potato products vary considerably. We suggest checking a few minutes before the end of cooking to assess levels of browning. |
= Microwave = Convection Grill = Preheating is required
= Frozen food
Auto Combi Programs
| Program Weight Accessories Instructions | |||
25. Frozen Lasagne | 400-800 g |  | For reheating and browning frozen purchased savoury dishes eg.Lasagne or Gratin. Remove any lid or covering. If in a foil container transfer to a similar sized heatproof dish and place on glass tray. If using heatproof plastic based dish that food is purchased in, take care and support underneath when removing. Turn the dial to select program 25, Frozen Lasagne. Press the dial to confi rm the program.Turn the dial to select the weight of the frozen lasagne and press Start.Do not cover. |
26. Whole Chicken | 900-2000 g |  | To cook whole fresh unstuff ed chickens. Cook stuffi ng separately.Turn the dial to select program 26, Whole Chicken. Press the dial to confi rm the program. Press Start to preheat the oven. After preheating, beeps sound and 'P' will fl ash in the display. Place chicken on enamel tray and place on glass tray. Turn the dial to select the weight of the chicken, then press Start. Start cooking breast side down and turn at beeps, taking care with hot juices.Allow to stand for 5 minutes after cooking. |
27. Quiche | 150-450 g |  | For re-heating pre-cooked, fresh quiche. Remove all packaging and place the quiche on wire rack on glass tray. Turn the dial to select program 27, Quiche. Press the dial to confi rm the program. Turn the dial to select the weight of the Quiche and press Start. Transfer the quiche onto a cooling rack at the end of cooking and allow a few minutes standing time. Quiche with a high content of cheese may result in being hotter than quiches with vegetables. This program is not suitable for deep f lled quiches. |
Questions and Answers
Q: Why won't my oven turn on?
A: When the oven does not turn on, check the following:
- Is the oven plugged in securely? Remove the plug from the outlet, wait 10 seconds and reinsert.
- Check the circuit breaker and the fuse. Reset the circuit breaker or replace the fuse if it is tripped or blown.
- If the circuit breaker or fuse is all right, plug another appliance into the outlet. If the other appliance works, there probably is a problem with the oven. If the other appliance does not work, there probably is a problem with the outlet. If it seems that there is a problem with the oven, contact an authorised Service Centre.
Q: My oven causes interference with my TV. Is this normal?
A: Some radio, TV, Wi-Fi, cordless telephone, baby monitor, blue tooth or other wireless equipment interference might occur when you cook with the microwave oven. This interference is similar to the interference caused by small appliances such as mixers, vacuums, blow dryers, etc. It does not indicate a problem with your oven.
Q: The oven won't accept my program. Why?
A: 1. The oven is designed not to accept an incorrect program. For example, the oven will not accept a fourth stage.
- The oven is in a stand-by mode. Opening the door will revert back to standard mode.
Q: Sometimes warm air comes from the oven vents. Why?
A: The heat given off from the cooking food warms the air in the oven cavity. This warmed air is carried out of the oven by the air flow pattern in the oven. There are no microwaves in the air. The oven vents should never be blocked during cooking.
Q: Can I easily cook my favourite recipes using convection/air fry/grill?
A: Yes. You can cook your favourite recipe just as you would in a conventional oven. Check instructions in the Cookbook for suggested oven temperatures and cooking times.
Q: 'D' appears in the display and the oven does not cook. Why?
A: The oven has been programmed in demo mode. This mode is designed for retail store display. Deactivate this mode by pressing Micro Power button once and Stop/Cancel button 4 times.
Q: Can I use a conventional oven thermometer in the oven?
A: Only when you are using convection/air fry/grill cooking modes. The metal in some thermometers may cause arcing in your oven and should not be used on microwave and combination cooking modes.
Q: There are humming and clicking noises from my oven when I cook by combination. What is causing these noises?
A: The noises occur as the oven automatically switches from microwave power to convection/grill to create the combination setting. This is normal.
Q: My oven has an odour and generates smoke when using the convection, air fry, combination and grill function. Why?
A: After repeated use, it is recommended to clean the oven and then run the oven without food, glass tray, and roller ring on grill for 5 minutes. This will burn off any food, residue or oil which may cause an odour and/or smoking.
Questions and Answers
Q: The oven stops cooking by microwave and 'H97' or 'H98' appears in the display. Why? A: This display indicates a problem with the microwave generation system. Please contact an authorised Service Centre. Q: I can't set an auto cook program and 'HOT' appears in the display. Why? A: If the oven has previously been used and it is too hot to be used on an Auto Sensor Cook Program, 'HOT' will appear in the display window. After the 'HOT' disappears, the Auto Sensor Cook Programs may be used. If in a hurry, cook food manually by selecting the correct cooking mode and cooking time yourself.
Q: The fan continues to rotate after cooking. Why? A: After using the oven, the fan motor may rotate to cool the electrical components. This is normal and you can continue using the oven at this time. Q: The operation guide has disappeared on my display, I can only see numbers. Why? A: The operation guide was turned off by pressing Timer/Clock 4 times. When colon or time of day is displayed, press Timer/Clock 4 times to turn the operation guide back on (see page 17).
Care of Your Oven
- Turn the oven off before cleaning.
- Clean the inside of the oven, door seals and door seal areas regularly. When food splatters or spilled liquids adhere to the oven walls, door seals and door seal areas wipe off with a damp cloth. Mild detergent may be used if they get very dirty. The use of harsh detergent or abrasive is not recommended.
Do not use commercial oven cleaners.
- Do not use harsh, abrasive cleaners or sharp metal scrapers to clean the oven door glass since they can scratch the surface, which may result in shattering the glass.
- The outside oven surface should be cleaned with a damp cloth. To prevent damage to the operating parts inside the oven, water should
not be allowed to seep into the ventilation openings.
- If the control panel becomes dirty, clean it with a soft, dry cloth. Do not use harsh detergents or abrasives on the control panel. When cleaning the control panel leave the oven door open to prevent the oven from accidentally turning on. After cleaning touch Stop/Cancel button to clear display window.
- If steam accumulates inside or around the outside of the oven door, wipe with a soft cloth. This may occur when the oven is operated under high humidity conditions and in no way indicates a malfunction of the unit.
- It is occasionally necessary to remove the glass tray for cleaning. Wash the tray in warm soapy water.
Care of Your Oven
- The roller ring and oven cavity floor should be cleaned regularly to avoid excessive noise. Simply wipe the bottom surface of the oven with mild detergent and hot water then dry with a clean cloth. The roller ring may be washed in mild soapy water. Cooking vapours collect during repeated use but in no way affects the bottom surface or roller ring wheels. After removing the roller ring from the cavity floor for cleaning, be sure to replace it in the proper position.
- When using the grill, convection, air fry or combination mode, some foods may inevitably splatter grease on to the oven walls. If the oven is not cleaned occasionally, it may start to "smoke" during use.
- A steam cleaner is not to be used for cleaning.
- This oven should only be serviced by qualified personnel. For maintenance and repair of the oven contact the nearest authorised dealer.
- Failure to maintain the oven in a clean condition could lead to deterioration of surfaces that could affect the life of the appliance and possibly result in a hazardous situation.
- Keep air vents clean at all times. Check that no dust or other material is blocking any of the air vents on the top, bottom or rear of the oven. If air vents become blocked this could cause overheating which would affect the operation of the oven and possibly result in a hazardous situation.
Building-in Your Oven
- In case of fitting into an oven housing, please use Panasonic's Trim Kit NN-TK81KCSCP-Stainless.
- Microwave ovens should not be built into a unit directly above a top front venting a conventional cooker. This will invalidate your one year guarantee.
- A microwave which is built in must be more than 850 mm above floor level. Read Trim-Kit instructions carefully before installation. It is recommended that the microwave oven is placed below a conventional oven to avoid heat damage to the facia of the microwave.
Technical Specifications
| Manufacturer Panasonic | ||
| Model | NN-CD88QS | |
| Power Supply 230 V ~ / 50 Hz | ||
| Operating Frequency: 2450 MHz | ||
| Input Power: | Maximum 2110 W | |
| Microwave 1110 W | ||
| Grill 1350 W | ||
| Fan Assisted Convection | 1350 W | |
| Output Power: | Microwave 1000 W (IEC-60705) | |
| Grill 1300 W | ||
| Fan Assisted Convection | 1300 W | |
| External DimensionsW x D x H (mm) | 560 mm (W) x 450 mm (D) x 343 mm (H) | |
| Overall Interior Cavity DimensionsW x D x H (mm) | 380 mm (W) x 390 mm (D) x 228.4 mm (H) | |
| Net weight 18 kg | ||
| Noise 60 dB | ||
Weight and Dimensions shown are approximate.
This product is an equipment that fulfills the European standard for EMC disturbances (EMC = Electromagnetic Compatibility) EN 55011. According to this standard this product is an equipment of group 2, class B and is within required limits. Group 2 means that radio-frequency energy is intentionally generated in the form of electromagnetic radiation for purpose of warming or cooking food. Class B means that this product may be used in normal household areas.
Manufactured by: Panasonic Kitchen Appliances Technology (Jiaxing) Co., Ltd. No.369 Chenggong Road, Economic and Technological Development Zone, Jiaxing, Zhejiang Province, China.
Imported by: Panasonic Marketing Europe GmbH
REP. EU: Panasonic Marketing Europe GmbH Panasonic Testing Centre
Winsbergring 15, 22525 Hamburg, Germany

Note

Note


Defrosting tables
German
Set time
| Presse Air Fry Level Temperatur Verwendung | |||
| Einmal | Air Fry 1 180 °C | Garnelen, Blumenkohl, Spargel, Pilze | |
| Zweimal | Air Fry 2 200 °C | Ganzer Fisch, Frühlingsrollen, Würstchen | |
| 3 Mal | Air Fry 3 220 °C | Gefrorene Chicken Nuggets,Gefrorene Pommes frites, Hühnerbrust | |

Set time
Set time


Note
= Microwave = Grill
Panasonic Kitchen Appliances Technology (Jiaxing) Co., Ltd.
No.369 Chenggong Road, Economic and Technological Development Zone, Jiaxing, Zhejiang Province, China.
Importer:
Panasonic Marketing Europe GmbH
EU Representative:
Panasonic Marketing Europe GmbH Panasonic Testing Centre
Airfryer cooking table....28-30

Note

Press Start
![graph TD A["88:88"] --> B["FRANCAIS"] B --> C["DEUTSCH"] C --> D["NEDERLANDS"] D --> E["ENGLISH"] E --> F["ESPANOL"] F --> G["ITALIANO"] H["Hulptek op display"] --> I["Geen woord"] H --> J["Frans"] H --> K["Duits"] H --> L["Nederlands"] H --> M["Engels"] H --> N["Spaans"] H --> O["Italiaans"]](/content/2026/06/1400491/images/5fba1310e39c6c774932b13a854cbd0c1a8eadef5a5c275f551404f18b21ea7f.jpg)
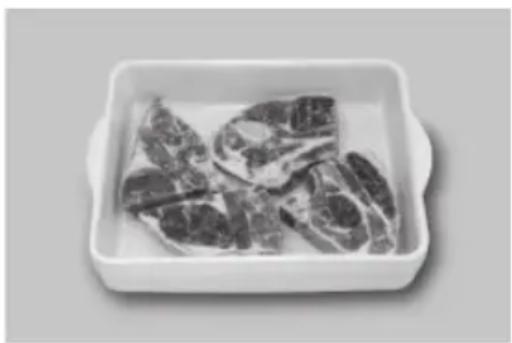
Defrosting tables
Setting time
| Drukken | Airfry-niveau Temperatuur Gebruik | ||
| 1 keer Airfry 1 180 °C | Garnalen, Bloemkool, Asperges, Champignons | ||
| 2 keer Airfry 2 200 °C | Hele vis, Loempia’s, Worstjes | ||
| 3 keer Airfry 3 220 °C | Bevroren kipnuggets, Bevroren aardappelfriet, Kipfi let | ||
![graph LR A["Input"] --> B["Process Step"] B --> C["Output"]](/content/2026/06/1400491/images/4ac48f6d8c4d2e24e80e2a2e7a1088badfddbdcf6e4d4dd948858b7fe07fa115.jpg)
Setting time
Setting time
Cooking in 2 or 3 steps
Example


Note
Press Start
≈ = Microwave = Beverage
≈ = Microwave = Grill
♂ = Preheating required 📁 = Hot air
Automatic programs
Press Start
Automatic programs

Note
≈ = Microwave = Hot air = Grill = Preheating required
= Frozen
Questions and answers
Panasonic Kitchen Appliances Technology (Jiaxing) Co., Ltd.
No.369 Chenggong Road, Economic and Technological Development Zone, Jiaxing, Zhejiang Province, China.
Imported by:
Panasonic Marketing Europe GmbH
REP. EU:
Panasonic Marketing Europe GmbH Panasonic Test Center
Attention! Hot surfaces

Note

Note
Start/Confirm


Press Start


Note
≡ = Microwave ** = Defrost

Note
Press Start

Note
Manufactured by: Panasonic Kitchen Appliances Technology (Jiaxing) Co., Ltd. No.369 Chenggong Road, Economic and Technological Development Zone, Jiaxing, Zhejiang Province, China.

Note

Note
Press Start

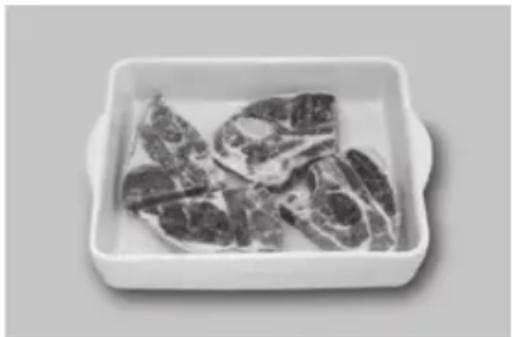
Set the time
Grid


Note
Panasonic Kitchen Appliances Technology (Jiaxing) Co., Ltd.
No.369 Chenggong Road, Economic and Technological Development Zone, Jiaxing, Zhejiang Province, China.
Imported by:
Panasonic Marketing Europe GmbH
EU REP:
Panasonic Marketing Europe GmbH Panasonic Testing Centre
Winsbergring 15, 22525 Hamburg, Germany
Content

Note

Note
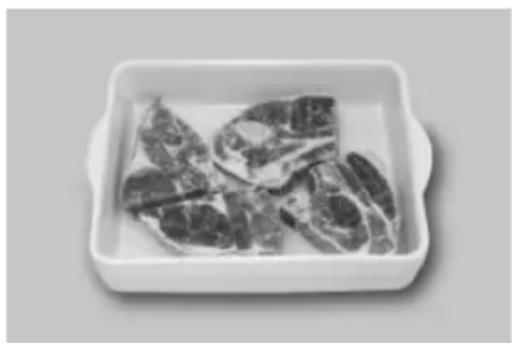
Adjust the time
Press Start

Note
Press
Timer/Clock
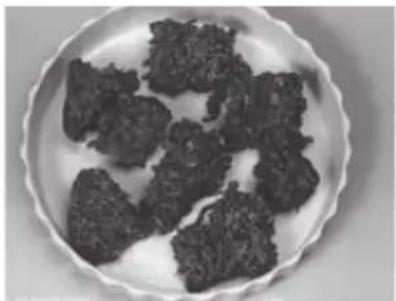

Note
Panasonic Kitchen Appliances Technology (Jiaxing) Co., Ltd.
No.369 Chenggong Road, Economic and Technological Development Zone, Jiaxing, Zhejiang Province, China.
Imported by:
Panasonic Marketing Europe GmbH
EU REP:
Panasonic Marketing Europe GmbH Panasonic Testing Centre
Winsbergring 15, 22525 Hamburg, Germany
Scan the QR code for more recipes.
https://www.panasonic.com/nn-cd88qs/

FR
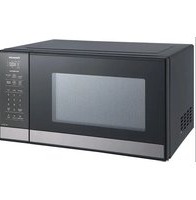
- OPERATING INSTRUCTIONS
- FOR HOUSEHOLD USE ONLY
- IMPORTANT SAFETY INSTRUCTIONS
- SAFETY INSTRUCTIONS
- FOR COUNTERTOP USE
- DISPOSAL OF OLD EQUIPMENT
- INSTALLATION AND CONNECTION
- EXAMINE YOUR OVEN
- EARTHING INSTRUCTIONS
- OPERATION VOLTAGE
- PLACEMENT OF YOUR OVEN
- COUNTERTOP USE
- IMPORTANT USER INSTRUCTIONS
- HEATER OPERATION
- CAUTION
- OVEN LIGHT
- COOKING TIMES
- IMPORTANT
- SMALL QUANTITIES OF FOODS
- PIERCING SKIN
- MEAT THERMOMETER
- EGGS
- LIQUIDS
- PAPER/PLASTIC
- UTENSILS/FOIL
- FEEDING BOTTLES/BABY FOOD JARS
- FAN MOTOR OPERATION
- PARTS OF YOUR OVEN
- DOOR RELEASE
- NOTE
- OVEN ACCESSORIES
- ACCESSORIES
- GLASS TRAY
- AIR FRY BASKET
- ROLLER RING
- ENAMEL TRAY
- WIRE RACK
- CONTROL PANEL
- THIS OVEN IS EQUIPPED WITH AN ENERGY SAVING FUNCTION
- DURING COOKING
- START/CONFIRMATION
- AUTO PROGRAMS
- ONE PUSH REHEATING
- BEEP SOUND
- DISPLAY WINDOW
- COOKING MODES
- WORD PROMPTING
- OPERATION GUIDE SETTING
- SETTING THE CLOCK
- PRESS TIMER/CLOCK TWICE
- TURN DIAL
- PRESS TIMER/CLOCK
- CHILD LOCK
- PRESS STOP/CANCEL THREE TIMES
- MICROWAVE COOKING AND DEFROSTING
- SET TIME
- PRESS START
- DEFROSTING GUIDELINES
- TIPS FOR DEFROSTING
- STANDING TIMES
- JOINTS AND POULTRY
- MINCED MEAT OR CUBES OF MEAT AND SEAFOOD
- SMALL PORTIONS OF FOOD
- BREAD
- BEEP SOUNDS
- DEFROSTING CHARTS
- GRILLING
- CONVECTION
- NOTES ON PREHEATING
- AIR FRY COOKING
- OVEN ACCESSORIES TO USE
- COMBINATION COOKING
- MULTISTAGE COOKING
- OR 3 STAGE COOKING
- EXAMPLE
- USING THE TIMER
- TO SET A STANDING TIME
- TO SET A KITCHEN TIMER
- TO SET A DELAY START
- USING THE ADD TIME FUNCTION
- AFTER COOKING, TURN DIAL TO SELECT
- HOW IT WORKS
- ADJUST TO TASTE
- TURBO DEFROST
- ST BEEP
- ND BEEP
- AUTO WEIGHT PROGRAMS
- AUTO PROGRAMS WITH PREHEATING
- AUTO BEVERAGE PROGRAMS
- RE-BAKE BREAD PROGRAMS
- AUTO SENSOR PROGRAMS
- PRESS THE DIAL TO CONFIRM THE PROGRAM. AUTO
- JUNIOR MENU PROGRAMS
- INGREDIENTS
- FOR 1 SERVING
- BANANA MUG CAKE
- AUTO COMBI PROGRAMS
- QUESTIONS AND ANSWERS
- CARE OF YOUR OVEN
- BUILDING-IN YOUR OVEN
- DEFROSTING TABLES
- IMPORTER
- EU REPRESENTATIVE
- SETTING TIME
- COOKING IN 2 OR 3 STEPS
- AUTOMATIC PROGRAMS
- IMPORTED BY
- REP. EU
- ATTENTION! HOT SURFACES
- START/CONFIRM
- SET THE TIME
- EU REP
- CONTENT
- ADJUST THE TIME
- PRESS
- TIMER/CLOCK
Brand : PANASONIC
Model : NN-CD88QS
Category : Microwave