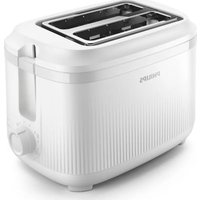
HD2511 - Toaster PHILIPS - Free user manual and instructions
Find the device manual for free HD2511 PHILIPS in PDF.

 FR
FR
 AZ
AZ
 BG
BG
 CS
CS
 DA
DA
 DE
DE
 EL
EL
 EN
EN
 ES
ES
 ET
ET
 FI
FI
 HE
HE
 HU
HU
 HY
HY
 IT
IT
 KA
KA
 KK
KK
 KO
KO
 KY
KY
 LV
LV
 MK
MK
 NL
NL
 PL
PL
 PT
PT
 RO
RO
 RU
RU
 SK
SK
 SL
SL
 SQ
SQ
 SV
SV
 TG
TG
 TR
TR
 UZ
UZ
| Product type | 2-slice toaster |
| Brand | Philips |
| Model | HD2511 |
| Dimensions (W x D x H) | 29 x 18 x 20 cm |
| Weight | 1.5 kg |
| Power supply | 220-240 V, 50-60 Hz |
| Power | 850 W |
| Material | Stainless steel and plastic |
| Number of slots | 2 |
| Main functions | Toasting, defrost, reheat, manual stop |
| Browning control | 7 levels |
| Bread centering function | Yes |
| Crumb tray | Yes, removable |
| Cord length | 0.85 m |
| Care and cleaning | Clean the exterior with a damp cloth; empty the crumb tray regularly; do not immerse in water |
| Safety | Automatic shut-off in case of jam; overheat protection |
| Spare parts and repairability | Repairability score 8.2/10; parts available on Philips website |
| Color | Black and stainless steel |
| Warranty | 2 years |
| General information | Compact 2-slice toaster, ideal for daily use |
Frequently Asked Questions - HD2511 PHILIPS
User questions about HD2511 PHILIPS
0 question about this device. Answer the ones you know or ask your own.
Ask a new question about this device
Download the instructions for your Toaster in PDF format for free! Find your manual HD2511 - PHILIPS and take your electronic device back in hand. On this page are published all the documents necessary for the use of your device. HD2511 by PHILIPS.
USER MANUAL HD2511 PHILIPS
English 3
Azərbaycanca 10
Čeština 17
Dansk 24
Deutsch 31
Eesti 38
Español 45
Français 52
Hrvatski 59
Italiano 66
Latviešu 73
Magyar 80
Nederlands 87
Norsk 94
O'zbek 101
Polski 108
Português 115
Română 122
Shqip 129
Slovenščina 136
Slovensky 143
Srpski 150
Suomi 157
Svenska 164
Türkçe 171
Türkmençe 178
Ελληνικά 185
Български 192
Кыргызча 199
Македонски 206
Русский 213
Точикй 220
Қазақша 227
Ruijtntü 234
phosphorus 241
한국어 248
הכלה 254
Introduction
Congratulations on your purchase and welcome to Philips!
To fully benefit from the support that Philips offers, register your product at www.philips.com/welcome.
General description
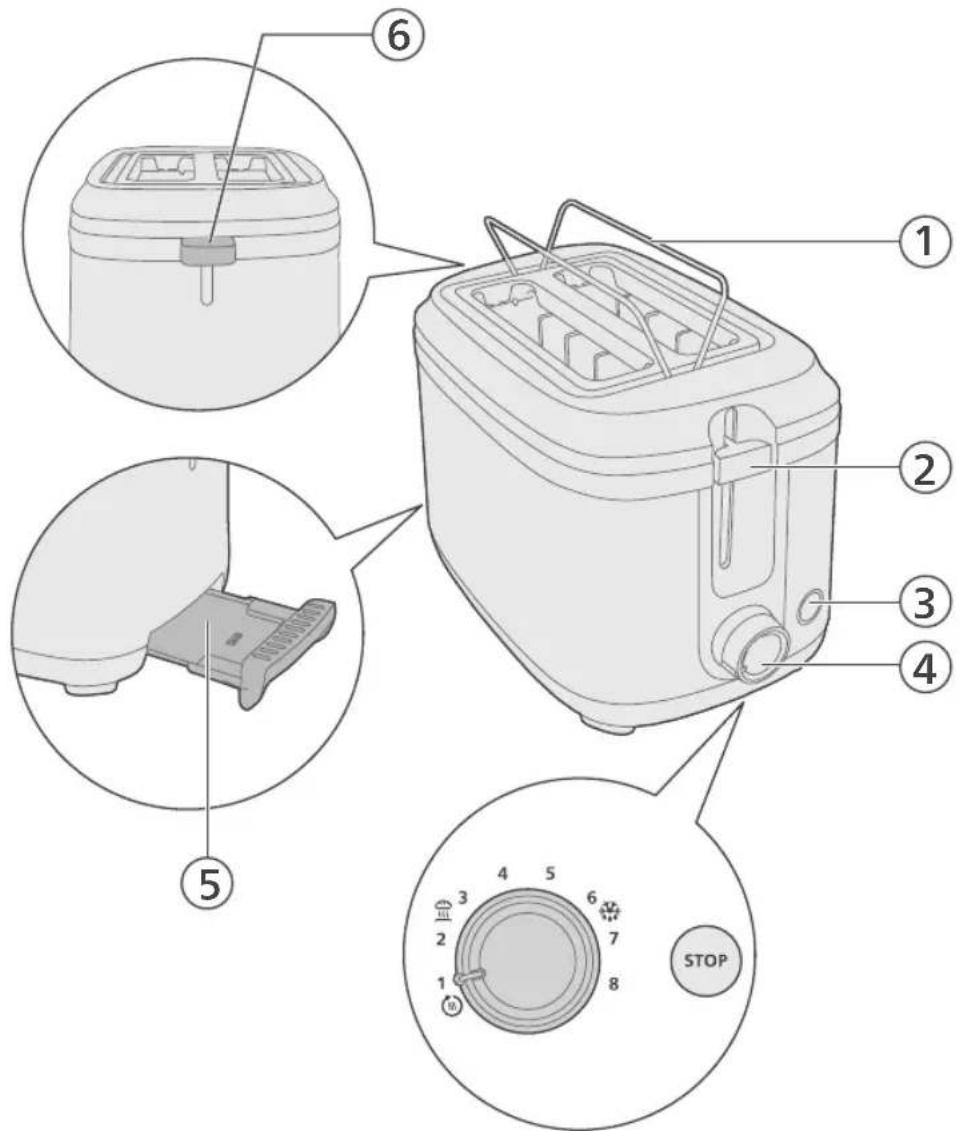
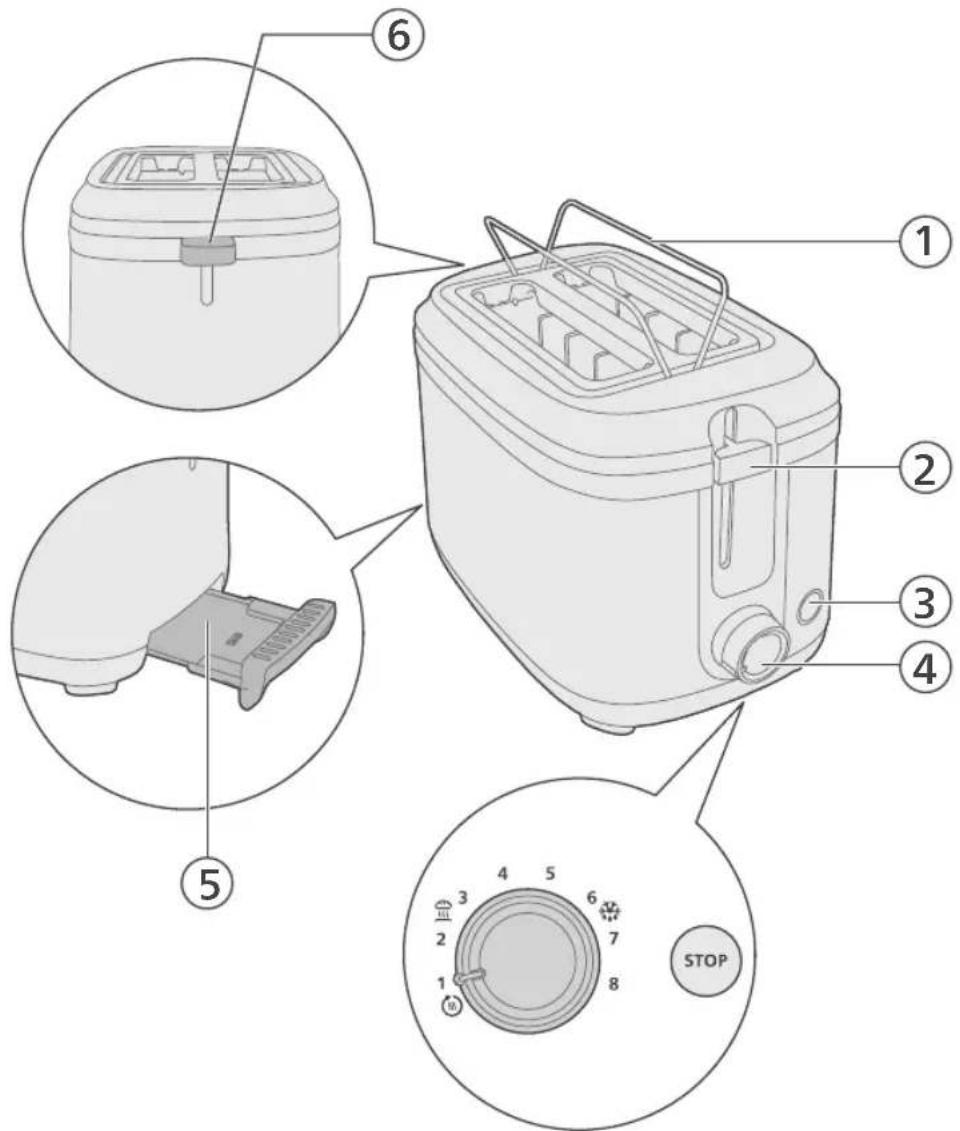
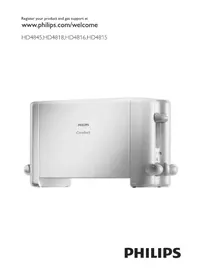
1 Warming rack
2 Lift lever
3 Stop button
4 Control knob
5 Toaster crumb tray
6 Warming rack lever
4 English
Important
- Read this important information carefully before you use the appliance and save it for future reference.
Danger
- Never immerse the appliance in water.
- Do not insert oversize foods and metal foil packages into the toaster, as this may cause fire or electric shock.
Warning
- If the power cord is damaged, you must have it replaced by Philips, a service centre authorized by Philips or similarly qualified persons in order to avoid a hazard.
- This appliance can be used by children aged from 8 years and above and persons with reduced physical, sensory or mental capabilities or lack of experience and knowledge if they have been given supervision or instruction concerning use of the appliance in a safe way and understand the hazards involved. Children shall not play with the appliance. Cleaning and user maintenance shall not be made by children unless they are older than 8 and supervised.
- Keep the appliance and its cord out of reach of children less than 8 years.
- To avoid the risk of fire, frequently remove crumbs from the crumb tray (see User Manual Chapter "Cleaning").
- Do not operate the appliance under or near curtains or other flammable materials or under wall cabinets, as this may cause fire.
- Check if the voltage indicated on the bottom of the appliance corresponds to the local power voltage before you connect the appliance.
- Do not let the appliance operate unattended.
- Immediately unplug the toaster if fire or smoke is observed.
- This appliance is only intended for toasting bread. Do not put any other ingredients in the appliance.
- The appliance is not intended to be operated by means of an external timer or a separate remote control system.
- Do not wind the power cord around the toaster after use or during storage as this may damage the cord.
- Do not place any other object on top of the toaster when the appliance is switched on or when it is still hot, as this can cause damage or fire.
Caution
- The toaster is intended for household use only and may only be used indoors. It is not intended for commercial or industrial use.
- Only connect the appliance to an earthed wall socket.
- Do not let the power cord hang over the edge of the table or worktop on which the appliance stands.
- Always unplug the appliance after use.
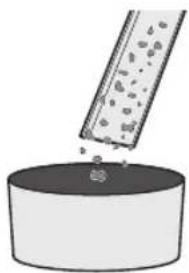
- Do not hold the appliance upside down and do not shake it to remove the crumbs.
- The heating element surface is subject to residual heat after use.
Electromagnetic fields (EMF)
This appliance complies with the applicable standards and regulations regarding exposure to electromagnetic fields.
Recycling
This symbol means that this product shall not be disposed of with normal household waste (2012/19/EU).
Follow your country's rules for the separate collection of electrical and electronic products. Correct disposal helps prevent negative consequences for the environment and human health.
Unless otherwise indicated, all packaging material in the box is made of recycled paper; see the PAP marking on the box.
Warranty and support
Versuni offers a two-year warranty after purchase on this product. This warranty is not valid if a defect is due to incorrect use or poor maintenance. Our warranty does not affect your rights under law as a consumer. For more information or for invoking the warranty, please visit our website www.philips.com/support.
Before first use
Place the toaster on a clean and dry surface close to a power outlet.
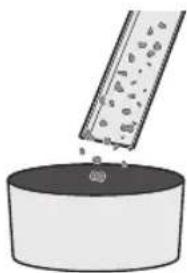
Remove any crumbs or debris from the toaster's crumb tray before initial use.
Using the appliance
Note:
Do not operate the appliance without the crumb tray.
Never force bread into toasting slots.
Never toast bread slices that have been buttered. Take extra care when toasting breads that contain sugar, preserves, raisins or fruit bits, due to risk of overheating. Do not use bent, damaged or broken bread slices in your toaster as it may get jammed into the slot or stuck in the toasting chamber.
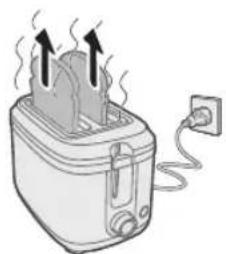
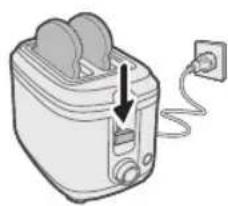
1 Insert the plug into a power outlet.
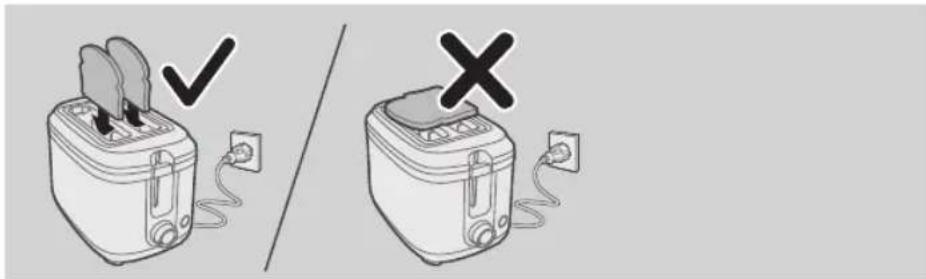
2 Place bread slices into the toaster slots.
6 English
Never put bread slices on the top of the toaster.
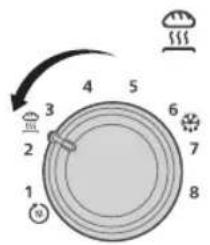
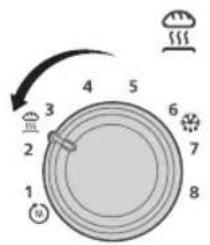
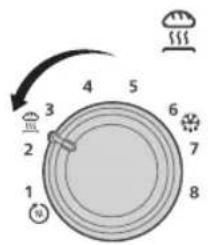
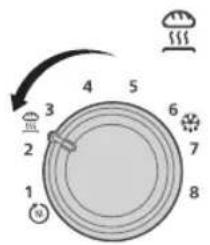
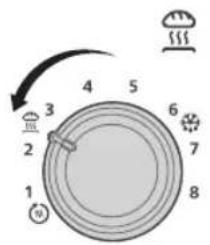
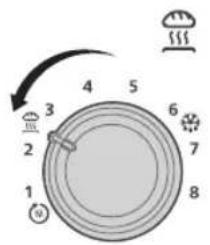
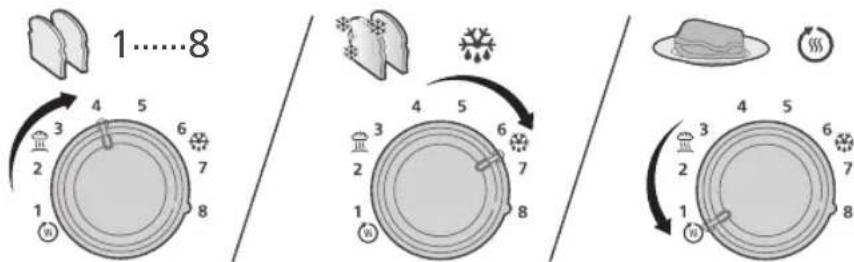
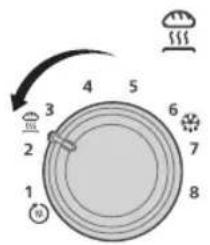
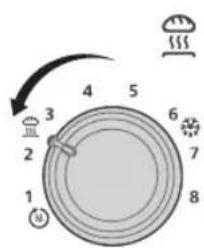
3 Turn the knob to adjust the toasting level.
You can choose from light to dark settings according to your preference.
To reheat bread, choose the reheating setting
To defrost bread, choose the defrosting setting

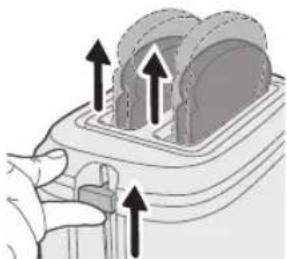
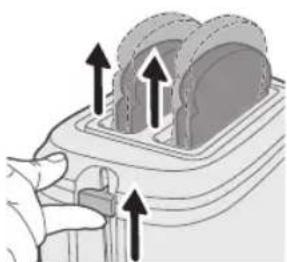
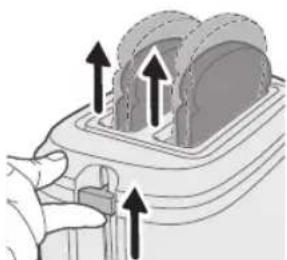
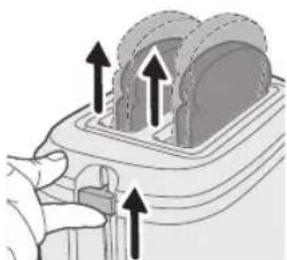
4 Press the lift lever down to lower the bread slices into the toasting slots.
The toasting process will start automatically.
To stop toasting at any time, press the stop button. The toaster will immediately turn off.


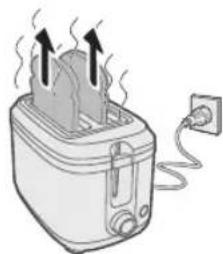
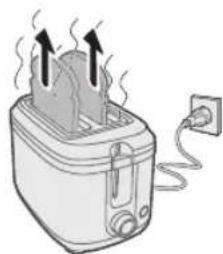
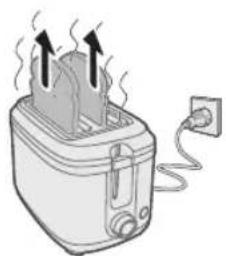
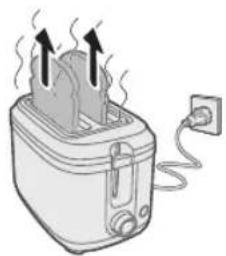
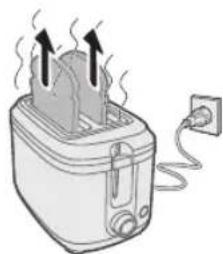
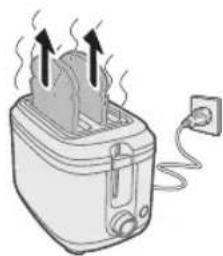
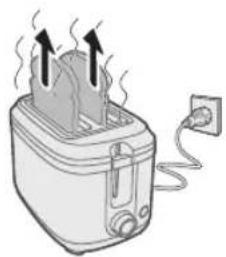
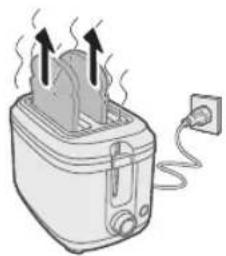
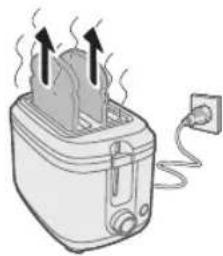
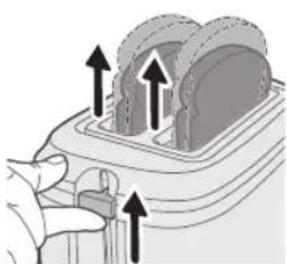
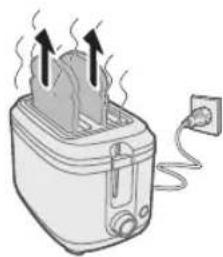
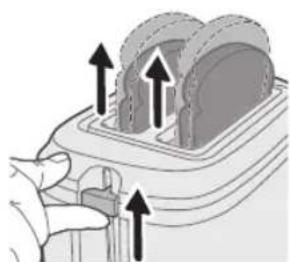
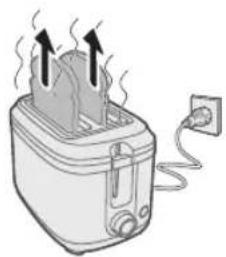
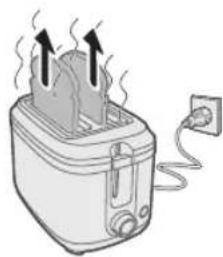
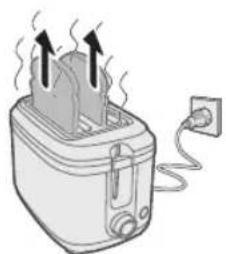
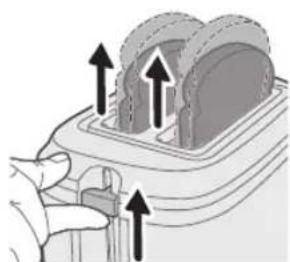
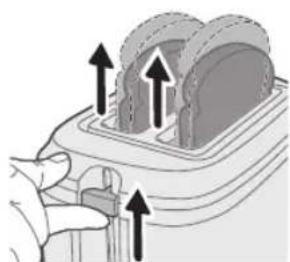
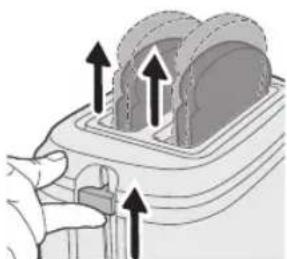
5 When the toasting cycle is complete, the bread slices will automatically rise up.
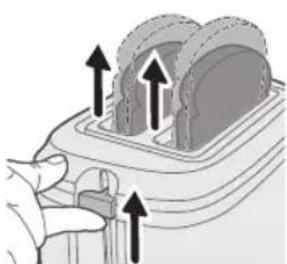
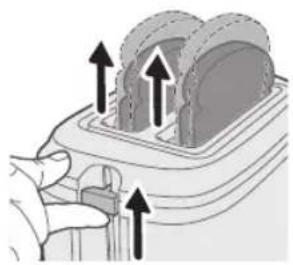
6 Use the lift lever to safely remove the toasted items from the toaster.
Tip:
You may use different browning settings when toasting different types of bread:
For dry, thin or stale bread, select a lower setting. This type of bread has less moisture and it will go brown quicker than moist, thick or fresh bread.
For fruit bread like raisin bread, select a lower setting.
For higher sugar content bread, select a lower setting.
For heavier textured bread like rye bread or whole wheat bread, select a higher setting.
When you toast one slice of bread, browning of toast may be slightly varied from one side to the other.
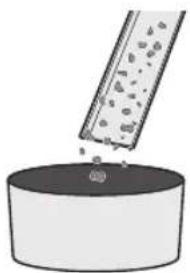
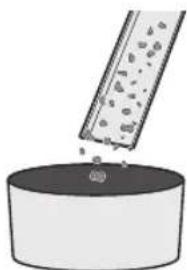
For bread that may have loose food bits, for example raisin bread and whole wheat bread, remove the loose bits before putting bread slices into the slot. This can avoid potential flame/smoke resulting from loose food bits dropping/sticking in the toaster chamber.
Bun warming
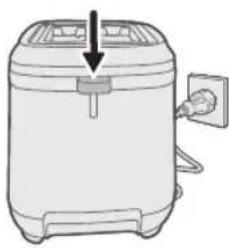
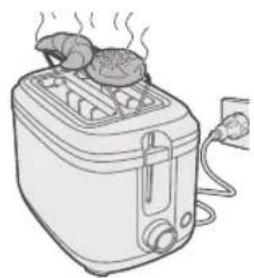
1 Insert the plug into a power outlet.
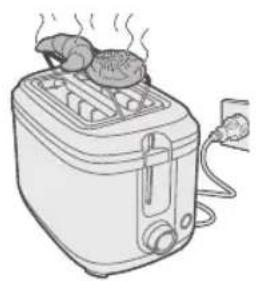
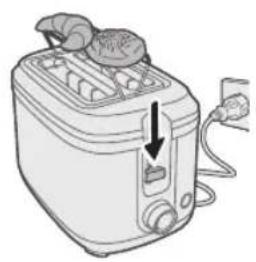
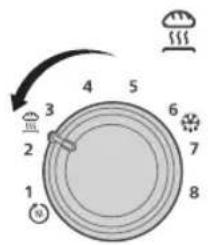
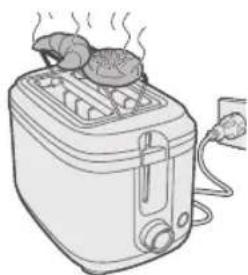
2 Push down the warming rack lever to unfold the warming rack.
3 Place buns onto the warming rack.
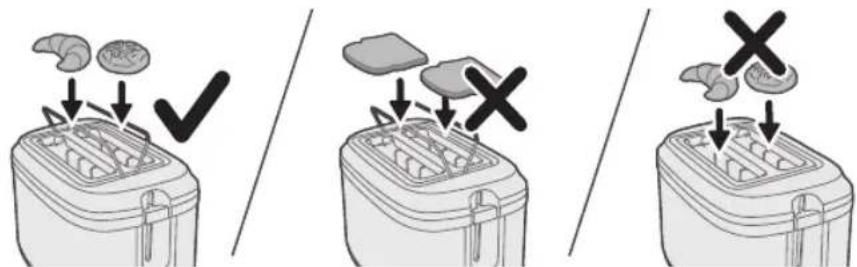
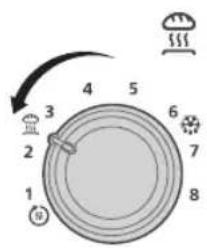
4 Turn the browning control to the bun warming setting

8 English
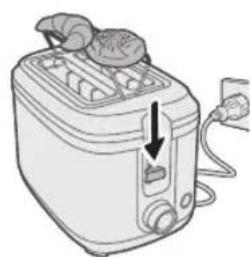
5 Press the lift lever down to start.
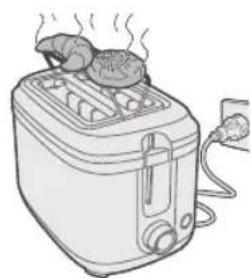
6 Wait until the toasting cycle is complete.
Note:
Do not place bread on bun warming rack to avoid damage to toaster.
Never put the rolls to be warmed up directly on top of the toaster. Always use the warming rack to avoid damage to the toaster.
Bun warm rack is not used for defrosting frozen buns. When you use bun warming setting, avoid to use defrost setting at the same time
Cleaning and Maintenance
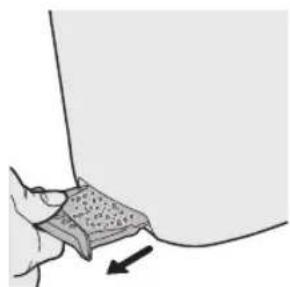
1 Ensure that the toaster is unplugged and has cooled down before cleaning.
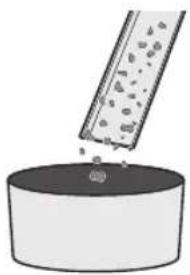
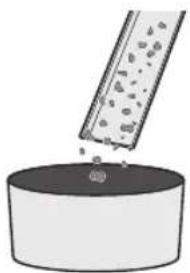
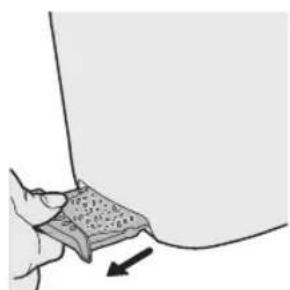
2 Gently remove any crumbs or debris from the removable crumb tray of the toaster.
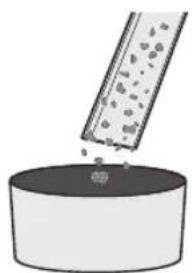
3 Dispose of the crumbs or debris in a suitable waste container.
4 Reinsert the clean crumb tray back into the toaster.
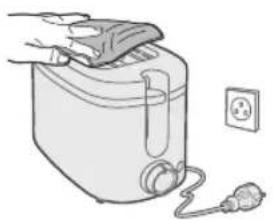
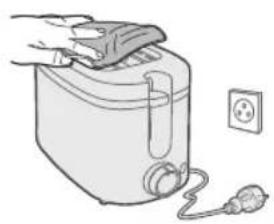
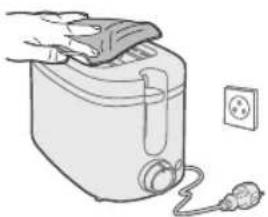
5 Wipe the exterior with a damp cloth and dry thoroughly.
Giriş
Úvod
Indledning
1 Bollerist
2 Løftegreb
3 Stopknap
4 Kontrolknap
5 Krummebakke
6 Greb til bollerist
Vigtigt
3 Drej knappen for at justere risteniveauet.
5 Tryk løftegrebet ned for at starte.


1 Soojendusrest
2 Tõstehoob
3 Stoppnupp
4 Juhtnupp
5 Rösteri purukandik
6 Soojendusresti hoob
Tähtis!



1 Rešetka za zagrijavanje
2 Ručica za podizanje
3 Gumb za zaustavljanje
4 Upravljački gumb
5 Ladica za mrvice
6 Ručica rešetke za zagrijavanje
Važno
- Prije uporabe aparata pažljivo pročitajte ove važne informacije i spremite ih za buduće potrebe.
Opasnost


4 Okrenite regulator prepečenosti na postavku za zagrijavanje peciva
6 Pričekajte da ciklus tostiranja završi.
Napomena:
1 Prije nego što započnete s čišćenjem, provjerite je li toster iskopčan iz strujne utičnice i je li se ohladio.
2 Nježno uklonite sve mrvice ili ostatke iz uklonjive ladice za mrvice.
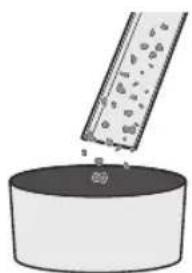
3 Odložite mrvice ili ostatke u odgovarajući spremnik za otpad.
4 Čistu ladicu za mrvice ponovno umetnite u toster.
Introduzione


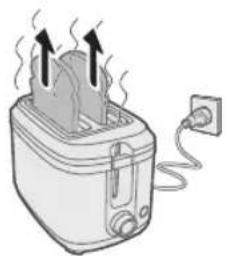
6 Izmantojiet pacelšanas sviru, lai droši iznemtu grauzdēto maizi no tostera.
Padoms.


92 Nederlands
5 Duw de lifthendel omlaag om te starten.

1 Varmestativ
2 Løftespak
3 Stoppknapp
4 Kontrollbryter
5 Smulebrett for brødrister
6 Spak for varmestativ
Important
3 Kast smulene eller rusket i en egnet avfallsbeholder.
4 Sett det rene smulebrettet tilbake i brødristeren.
100 Norsk
Kirish
Xaridingiz muborak bo'lsin va Philips'ga xush kelibsiz!
Philips taklif qiladigan qo'llab-quvvatlash xizmatidan foydalanish uchun
1 Isitish panjarasi
2 Ko'tarish dastagi
3 To'xtash tugmasi
4 Boshqarish murvati
5 Toster ushoq patnisi
6 Isitish panjarasi dastagi
102 O'zbek
Muhim
- Jihozdan foydalanishdan oldin ushbu muhim ma'lumotlarni diqqat bilan o'qib chiqing.
Xavf
- Qurilmani aslo suvga botirmang.
- Katta hajmli mahsulotlar va metall folga paketlarini tosterga qo'ymang, chunki bu yong'in yoki tok urishiga sabab bo'lishi mumkin.
Ogohlantirish
- Agar quvvat shnuri shikastlangan bo'lsa, uni Philips kompaniyasi, Philips tomonidan vakolat berilgan servis markazi yoki shu kabi malakali mutaxassislar almashtirishi kerak.
- Bu jihozdan xavfsiz foydalanish bo'yicha ko'rsatma berilgan yoki xavfsiz foydalanish uchun kuzatuv ostida bo'lsa va unga bog'liq xatarlardan xabardor bo'lsa, 8 yosh va undan katta bolalar va jismoniy, sezgi yoki ruhiy qobiliyati cheklangan yoki tajribasiz va tushunchaga ega bo'Imagan odamlar ham foydalanishi mumkin. Bolalar jihoz bilan o'ynashiga yo'l qo'ymang. Tozalash va foydalanuvchi texnik xizmatlarini bolalar 8 yoshdan oshmaguncha va kuzatuv ostida bo'Imaguncha amalga oshirilmasligi kerak.
- Jihoz va uning shnurini 8 va undan kichik yoshdagilar ololmaydigan joyda saqlang.
- Yong'in xavfining oldini olish uchun ushoq patnisidan ushoqlarni muntazam olib turing (Foydalanuvchi qo'llanmasining "Tozalash" bo'limiga qarang).
- Jihozni pardalar yoki yong'in xavfi mavjud materiallarning ostida yoki uning yaqinida yoki devor shkaflarning ostida ishlatmang, chunki bu yong'inga olib keladi.
- Jihozni ulashdan oldin uning pastki qismida ko'rsatilgan kuchlanish mahalliy tarmoq kuchlanishiga mos kelishini tekshiring.
- Jihoz e'tiborsiz qolganida ishlatilmasligi kerak.
- Yong'in yoki hid chiqsa, zudlik bilan tosterni tarmoqdan uzing.
3 Qovurish darajasini sozlash uchun murvatni burang.
1 Vilkani rozetkaga ulang.
2 Isitish panjarasini ochish uchun isitish panjarasi dastagini pastga bosing.
3 Bulochkalarni isitish tokchasiga qo'ying.

106 O'zbek

4 Qizartirish tugmasini 📂lochkani qizartirish sozlamasiga buring.

5 Ishni boshlash uchun ko'tarish dastagini pastga bosing.
6 Qovurish sikli tugaguncha kuting.
Eslatma:
Toster shikastlanishining oldini olish uchun nonni bulkani qizdirish panjarasiga qo'ymang.
Rollarni ilitish uchun ularni tosterning to'g'ridan-to'g'ri tepasiga qo'ymang. Toster shikastlanmasligi uchun qizdirish panjarasidan foydalaning.
Muzlatilgan bulochkalarni muzdan eritish uchun bulochkani isitish panjarasi ishlatilmaydi. Bulochkani isitish sozlamasini ishlatganingizda, bir vaqtning o'zida muzdan tushirish sozlamasini ishlatmang
Tozalash va texnik xizmat ko'rsatish

1 Tozalashdan oldin toster elektr tarmog'idan uzilgani va soviganiga ishonch hosil qiling.
2 Tosterning olinadigan ushoq patnisidan ushoq yoki chiqindilarni ehtiyotkorlik bilan olib tashlang.

5 Tashqi qismini nam mato bilan arting va yaxshilab quriting.
Wstep
112 Polski
Introdução


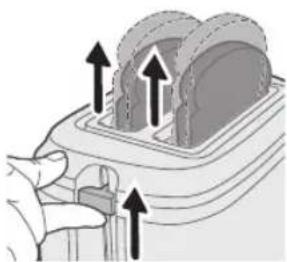
5 Ko se cikel opekanja konča, se rezine kruha samodejno dvignejo.
1 Vtič vstavite v omrežno vtičnico.
2 Vzvod nosilca za segrevanje potisnite navzdol, da razširite nosilec.
5 Za zagon pritisnite ročico za dviganje navzdol.

6 Počakajte, da se opekanje konča.
Opomba:
3 Drobtine ali ostanke odvrzite v primeren zabojnik za odpadke.
4 Čist pladenj za drobtine ponovno vstavite v opekač.
142 Slovenščina
5 Zunanjost opekača obrišite z vlažno krpo in temeljito osušite.

Úvod
1 Rošt na ohrievanie
2 Zdvíhacia páčka
3 Tlačidlo zastavenia
4 Otočný ovládač
5 Podnos na odrobinky
6 Páčka roštu na ohrievanie
Dôležité
Slovensky

5 Stlačte zdvíhaciu páčku, aby ste spustili proces.

1 Držač za podgrevanje
2 Poluga za podizanje
3 Dugme za zaustavljanje
4 Regulator
5 Fioka za mrvice
6 Poluga držača za podgrevanje
Važno
- Pre upotrebe aparata pažljivo pročitajte ove važne informacije i sačuvajte ih za buduće potrebe.
Opasnost
3 Okrenite regulator da biste podesili stepen tostiranja.
Možete da izaberete od svetlije do tamnije postavke prema želji. Da biste podgrejali hleb, izaberite postavku za podgrevanje 🌐 Da biste odmrznuli hleb, izaberite postavku za odmrzavanje 🌐
4 Pritisnite polugu za podizanje da biste spustili kriške hleba u otvore za tostiranje.

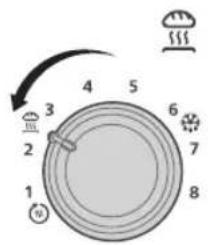
4 Regulator zapečenosti okrenite na postavku za zagrevanje zemički.
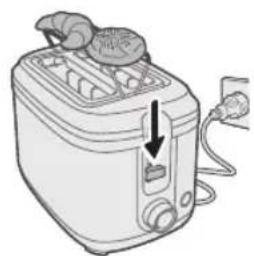
5 Pritisnite polugu za podizanje nadole da biste počeli.
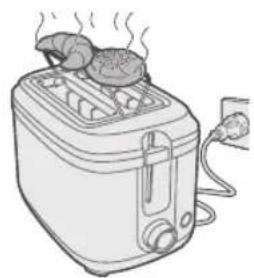
1 Uverite se da je toster isključen iz utičnice i da se ohladio pre čišćenja.
2 Nežno uklonite sve mrvice ili naslage iz uklonjive fioke za mrvice u tosteru.
156
Srpski
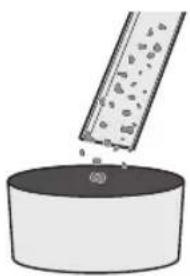
3 Odložite mrvice ili naslage u odgovarajuću kantu za otpatke.
4 Vratite čistu fioku za mrvice u toster.

5 Obrišite spoljašnjost vlažnom tkaninom i dobro je osušite.
Johdanto

Introduktion


1 Gyzardyjy
2 Yokary götermek üçin ryçag
3 Duruzyş düwmesi
4 Dolandyrys nurbady
5 Tosteriň owuntyklar üçin mejimesi
6 Gyzdyryjy ryçag
Möhüm
4 Çöregiň dilimlerini tosteriň öýjüklerine düşürmek üçin ýokary göteryän ryçagy aşak basyň. Tosterde gyzdyrma prosesi awtomatik usulda başlayar. Tosterde gyzdyrmagy islandik wagt duruzmak üçin Stop düwmesini basyň. Toster dessine öçer.

6 Gyzdyrylan zatlary tosterden howpsuz görnüşde çykarmak üçin ýokary göteryän ryçagy ulanyň.
Maslahat:
1 Dürtgüji elektrik rozetkasyna dakyň.
2 Gyzdyryjyny boşatmak üçin gyzdyryjy ryçagy aşak basyň.

4 Goňraldyş dolandyryjysyny bulkany ýyladyş sazlamasyna 📞laň.

5 Başlamak üçin yokary göteryän ryçagy aşak basyň.
6 Tosterde gyzdyrma döwresi tamamlanýança garaşyn.
Bellik:
Arassalamak we abatlamak

3 Owuntyklary ya-da galyndylary yerlikli zibil gabyna dökün.
4 Arassalanan owuntyklar üçin mejimâni tosterdâki yerine dakyň.

Въведение


5 Баштоо учүн көтөрүү туткасын ылдый басыңыз.

Вовед


Мукаддима
3 Дастаки гардонандаро тоб дихед, то дарачаи тостшавиро танзим кунед. Шумо метавонед вобаста ба хохишатон аз сатхи сабук то қахваранг интихоб намоед.
5 Хангоми ба анчом расидани давраи тосткунй, буридахои нон худ ба худ боло меоянд.
224 Точикй
6 Барои бехатар баровардани нонхои тостшуда, аз фишанги боло/поёнбаранда истифода баред.
Маслихат:

3 Резахоро ё партовхоро ба зарфи муносиб партоед.
4 Табакчай тозашударо боз ба тостер гузоред.

5 Кисми беруниро бо матои намдор пок карда, баъдан хуб хушк намоед.
Kipicne

Utρωδηρεηιύ
Cunphwulnpnuu bup qufuwu lwwwulgnujwup u pwnh qwjnuun Philips: Philips-h wnwugwnlyw0 wgwulgnujniuhg jhwndtp oqnultini hwuiwn qnwugtp attn wwnwupu wjuuntn' www.philips.com/welcome:
Cunhwùnín ǔywnwqnīpīnìu
1 Supwgúwù unwlnh
2 Fwnàn wugú wù lǒu y
3 4wǔq lynǎwù
4 Ntduhufutph yhnhuwnyhs
5 Snuuntnh yh2nwuputph unwlynhn
6 Swpwgüwi unwynhh idwyn
اللهمنز
- Uwnpu oqunwqnnttng wnug ni2wnh nwnwgtp wju lwnlwn untntlywnunlnipjniun u wuhtp wju' htunwqujnu oqunltini hwuwn:
Чиншіц
- tnptp úh núlnútp uwnpn qnh útg:
- 2wuhwqwug utd uuunwupatnp lu utunwnjw yhwjwuphptnnul yhwuprutn uh nntp unnuuntinh utg, puuh np nw lwwnnt t hnnthh ywu ttyunnwwnuwu wwnawun nwnuwu:
2qn12wgn15

5 Enlúwù ghylù wùwnùnútínig htunn hwgh 2túnntnù wùnnúwùn lytwnuì lyttn lyrwnànwùwù:
6 Pwnànwgúwù lǒuǐh úhóngnǔ wùqwhnǔ yānwùnǔ hǎutp pnuìluò hǎugtīn unnuuntīhg:
bunnphnnn.
Imip lwwnnb ip unwnptn pnultini \$niulghwutn oqunwqnnotl unwnptn unhuh hwgtnh hwuwn.
2nn, pwnwly lquí hhù hugh ntiwpnwú ntiunntp gwón lqwnqwulnnnún: Uju untuwlyh hwgù wultjīh phs huntuwulniqniù niùh hn útg, u wjù wultjīh wnwq lynwnzìw nwnzìuwqnjiù, puì huntuwú, hwuàn lquí pwnu hugn:
Zwuhşnu hwgh tüwü ünqwjhu hwgtnh näwpniü pünntip wultih gwön lynnqwulnnwutn:
Uultih pwnàn 2wpwn wwnniuwlnn hwgh ηtwpniú pùuntp wultih guòn lwnqwynnnwutn:
Uultih ðwùn ǔjnīpāwlywqū niùtignn hugtinh ńtwpniú, hùzwhuhp tǔ unwntlywùh hugn lyuú wúpnngwlywù gnptǔh hwgn, nùuntp wultih pwnàn yuqnqwlŋpnniúutn:
1 Ungntp hunngwyn hnuwuph qwnnwuh ubg:
2 Utnútp unwpugúwù unwlnhnh lǒwln nbuì h utnplù unwpugúwù unwlnhnh pwgtíni huúwùn:
3 Fniylhutn nntp unwpuguwu unwlnhh unw:

4 Pnyltln yunwylwnnup ntpp pnyltntuh unwpuguwu \$niulghwjh ynu` :


6 Uwwutp uh#u pn#uwu gh#u w#wnunh:
L2niU.
foniuwhtini hwufwn unnuuntng yüwutinig hwgn üh nntp pnulyh unwpugutini unwlynhh ynw:
Swipugutini hwuwn tnptp yh\$ihuttnn uh nntp wuhghwuytu unnuuntnh ynw: Snuuntnp ytiuwutini hwuwn uh2un oqnuwqnndap unwpugutini unwynhnp:
Enyltntü unwpugütini unwynhnp sh oqunwqnδηνιώ uwntgülωδ pnpnuütnη hwltgütini hwiúwn: Enyltntü unwpugütini \$niúlyghwu oqunwqnδητιhu hwiuuwhtp úhwudwúwúwly oqunwqnδητι hwltgütini \$niúlyghwu
Uwpnniú u unthùhlywlywù uwwuwnyniu
1 Uwpntinig wnw2 hwünqutip, nn unnuuntnü wügwunuqwö § hnuwüphg u hnluwgti §:
240 Rujtntu
2 2qn12n14jwup uwpntp yh2nwuputnu nl wnunp yh2nwuputnh hwunuh unwynhh ynwjhg:
ayu3ymn
1 სათბობი სადგამი
2 369306 87m300
3 ∂∂δυβοφην υπαμοση
4 ∂δισμοτησι υυβγρηγμο
5 ཅமுமுமை கூர்பெறேர்வு ரூகு
6 სათბობი სადგამის მერკეტი
242 ฟูดิมยูตรน ซุล
∂δη∂3δγμπμ3σ6σ5
- ยก currency đơn cannot be used to obtain a budget of \$10,000.
LPGMnbg
4 3ymn bsgfngdnl hulssgzzq qssgfngm s6gznl dgmzgl d3gdmon qos nunbn ozfmndsghmq huz gfmngddn.
5 µνηηηηηηηηηηηηηηηηηηηηηηηηηηηηηηηηηηηηηηηηηηηηηηηηηητ


3 65m86g0n 85qsszg0n 85u7s0n 65g3n 3m6g0n6g0n.
4 35630600000000000000000000000000000000000


אַלְרָה
10000
2הכלה
3(STOP)
4771710
57001074
601717
תָרִי
-
תְבָר
www.philips.com/support
הכלהה
- מַרְשָׁת הַרְשָׁת
- UNION IX 1917


6.תְשָׁרִי הַל
:
1.7###
2.ロビットת
- מְקַרָה בִי

[NO TEXT]
- מַרְשָׁתִי [

5.710717

6.ロナウリ クレア

:
-
1977 1997
-
7001077
-
כרַעְהָם
-
70010778
5.הכלה
2026 © Versuni Holding B.V.
PHILIPS and the Philips Shield Emblem are registered trademarks of Koninklijke Philips N.V. and are used under license.
This product has been manufactured by and is sold under the responsibility of Versuni Holding B.V., and Versuni Holding B.V. is the warrantor in relation to this product.


- INTRODUCTION
- GENERAL DESCRIPTION
- 4 ENGLISH
- IMPORTANT
- DANGER
- WARNING
- CAUTION
- ELECTROMAGNETIC FIELDS (EMF)
- RECYCLING
- WARRANTY AND SUPPORT
- BEFORE FIRST USE
- USING THE APPLIANCE
- 6 ENGLISH
- BUN WARMING
- 8 ENGLISH
- CLEANING AND MAINTENANCE
- GIRIŞ
- ÚVOD
- INDLEDNING
- VIGTIGT
- TÄHTIS
- VAŽNO
- OPASNOST
- INTRODUZIONE
- 92 NEDERLANDS
- KIRISH
- 102 O'ZBEK
- MUHIM
- XAVF
- OGOHLANTIRISH
- 106 O'ZBEK
- TOZALASH VA TEXNIK XIZMAT KO'RSATISH
- WSTEP
- 112 POLSKI
- INTRODUÇÃO
- 142 SLOVENŠČINA
- DÔLEŽITÉ
- SLOVENSKY
- SRPSKI
- JOHDANTO
- INTRODUKTION
- MÖHÜM
- ARASSALAMAK WE ABATLAMAK
- ВЪВЕДЕНИЕ
- ВОВЕД
- МУКАДДИМА
- 224 ТОЧИКЙ
- KIPICNE
- UTΡΩΔΗΡΕΗΙΎ
- اللهمنز
- ЧИНШІЦ
- 2QN12WGN15
- UWPNNIÚ U UNTHÙHLYWLYWÙ UWWUWNYNIU
- 240 RUJTNTU
- AYU3YMN
- 242 ฟูดิมยูตรน ซุล
- ∂ΔΗ∂3ΔΓΜΠΜ3Σ6Σ5
- LPGMNBG
- אַלְרָה
- תָרִי
- תְבָר
- הכלהה
Brand : PHILIPS
Model : HD2511
Category : Toaster