
NA552 - Deep fryer PHILIPS - Free user manual and instructions
Find the device manual for free NA552 PHILIPS in PDF.


| Product type | Electric deep fryer |
| Brand | Philips |
| Model | NA552 |
| Dimensions (W x D x H) | Approximately 40 x 30 x 30 cm |
| Weight | Approximately 5 kg |
| Power supply | 220-240 V, 50-60 Hz |
| Power | Approximately 1800 W |
| Tank capacity | Approximately 1.2 kg of fries |
| Adjustable temperature | 150 °C to 190 °C |
| Main functions | Frying with basket, odor filter, viewing window |
| Tank type | Non-stick, removable |
| Cleaning | Basket and tank dishwasher safe |
| Maintenance | Clean after each use, dry thoroughly |
| Safety | Cool-touch handle, automatic shut-off, overheat protection |
| Spare parts | Available (basket, tank, filter) |
| Repairability index | 8.1 / 10 |
| General information | Philips NA552, quality deep fryer for even cooking |
Frequently Asked Questions - NA552 PHILIPS
User questions about NA552 PHILIPS
0 question about this device. Answer the ones you know or ask your own.
Ask a new question about this device
Download the instructions for your Deep fryer in PDF format for free! Find your manual NA552 - PHILIPS and take your electronic device back in hand. On this page are published all the documents necessary for the use of your device. NA552 by PHILIPS.
USER MANUAL NA552 PHILIPS
English 4
Čeština 58
Dansk 115
Deutsch 169
Eesti 227
Español 281
Français 339
Hrvatski 396
Italiano 452
Latviešu 509
Lietuviškai 565
Magyar 621
Nederlands 677
Norsk 732
Polski 786
Português 843
Română 901
Shqip 958
Slovenščina 1014
Slovensky 1069
Srpski 1125
Suomi 1181
Svenska 1237
Türkçe 1291
Ελληνικά 1348
Български 1408
Македонски 1467
Русский 1527
Українська 1590
Қазақша 1650
הכלה 1710
Contents
Important 5
Recycling 7
Electromagnetic fields (EMF) 7
Warranty and support 7
Introduction 8
General description 9
Description of functions 11
Before first use 12
Preparations before first use 13
Cooking instruction 14
Cooking in dual pan 14
Cooking in single pan 19
Cleaning 41
Use automated cleaning programs 41
General cleaning 46
Accessories 48
Storage 53
Troubleshooting 53
Important

Read this important information carefully before you use the appliance and save it for future reference.
Danger
- Do not place the appliance on or near a hot gas stove or all kinds of electric stove and electric cooking plates, or in a heated oven.
- Never immerse the appliance in water nor rinse it under the tap.
- Do not let any water or other liquid enter the appliance to prevent electric shock.
- Always put the ingredients to be fried in the basket, to prevent them from coming into contact with the heating elements.
- Do not cover the air inlet and the air outlet openings while the appliance is operating.
- Do not fill the pan with oil as this may cause a fire hazard.
- Do not use the appliance, if the plug, the mains cord or the appliance itself is damaged.
- Never touch the inside of the appliance while it is operating.
- Always make sure heater is free and no food stuck in heater.
- Before first use, the cord storage must be assembled onto the device. Do not remove the cord storage at any time.
Warning
- If the supply cord is damaged, it must be replaced by Philips, its service agent or similarly qualified persons in order to avoid a hazard.
- Only connect the appliance to an earthed wall socket, protected by an earth leakage circuit breaker.
- Always make sure that the plug is inserted into the wall socket properly.
- This appliance is not intended to be operated by means of an external timer or a separate remotecontrol system.
- This appliance can be used by children aged from 8 years and above and persons with reduced physical, sensory or mental capabilities or lack of experience and knowledge if they have been given supervision or instruction concerning use of the appliance in a safe way and understand the hazards involved.
- Children shall not play with the appliance. Cleaning and user maintenance shall not be made by children unless they are older than 8 and supervised.
- Keep the appliance and its cord out of reach of children less than 8 years.
- Do not place the appliance against a wall or against other appliances. Leave at least 15 cm free space at the back, on both sides and above the appliance. Do not place anything on top of the appliance.
- During hot air frying, hot steam is released through the air outlet openings. Keep your hands and face at a safe distance from the steam and from the air outlet openings. Also, be careful of hot steam and air when you remove the pan from the appliance.
- Never use light ingredients or baking paper in the appliance.

- Accessible surfaces may become hot during use.
- Storage of potatoes: The temperature shall be appropriate to the potato variety stored and it shall be above 6 °C to minimize the risk of acrylamide exposure in the prepared foodstuff.
- Never fill the pan with oil.
- Since this Airfryer has two cooking chambers, its electric power is large. Do not operate other powerful appliances on the same circuit at the same time (e.g., kettles, electric grills, and the like). Else, it can happen that the circuit breaker in your house installation responds and the power at this socket fails.
- This appliance is designed to be used at ambient temperatures between 5°C and 40°C.
- Check if the voltage indicated on the appliance corresponds to the local mains voltage before you connect the appliance.
- Keep the mains cord away from hot surfaces.
- Do not place the appliance on or near combustible materials such as a tablecloth or curtain.
- Do not use the appliance for any other purpose than described in this manual and use only original Philips accessories.
- Do not let the appliance operate unattended.
- The pan, basket, and accessories placed inside the cooking chamber becomes hot during and after use of the appliance, always handle carefully.
- Thoroughly clean the parts that come into contact with food before you use the appliance for the first time. Refer to the instructions in the manual.
- When steaming food, be careful when opening the lid to avoid burns from rushing steam.
- The idle compartment is always hot even if the another one is in operation.
- Unused appliance compartment / cavity can become hot when the other compartment / cavity is in use and that it is advised to keep all drawers in place even when a single compartment / cavity is in use, and only to open / remove when this is needed for filling of the drawer.
- Don't place the appliance steam window against the socket.
Caution
- This appliance is intended for normal household use only. It is not intended for use in environments such as staff kitchens of shops, offices, farms or other work environments. Nor is it intended to be used by clients in hotels, motels, bed and breakfasts and other residential environments.
- Always disconnect the appliance from the supply if it is left unattended and before you assemble, disassemble, store or cleaning.
- Place the appliance on a horizontal, even and stable surface.
- If the appliance is used improperly or for professional or semi-professional purposes or if it is not used according to the instructions in the user manual, the guarantee becomes invalid and Philips refuses any liability for damage caused.
- Always return the appliance to a service center authorised by Philips for examination or repair. Do not attempt to repair the appliance yourself, otherwise the guarantee becomes invalid.
- Always unplug the appliance after use.
- Let the appliance cool down for approximately 30 minutes before you handle or clean it.

- Make sure the ingredients prepared in this appliance come out golden yellow instead of dark or brown.
- Remove burnt remnants. Do not fry fresh potatoes at a temperature above 180° C (to minimise the production of acrylamide).
- Be careful when cleaning the upper area of the cooking chamber: Hot heating element, edge of metal parts, and splatter shield.
- Always make sure that the food is fully cooked in the Airfryer.
- Be cautious when cooking easy perishable food with the sync finish function (bacteria may breed).
- Be careful when pouring out the cooked food and be careful not to let the accessories fall out.
- The cord holder also serves as a spacer, by creating distance between the device and the wall to prevent heat accumulation. Never remove this spacer.
- When the descaling icon lights up, proceed with the descaling process.
Recycling

- This symbol means that electrical products shall not be disposed of with normal household waste.
- Follow your country's rules for the separate collection of electrical products.
Electromagnetic fields (EMF)
This appliance complies with the applicable standards and regulations regarding exposure to electromagnetic fields.
Warranty and support
Versuni offers a two-year warranty after purchase on this product. This warranty is not valid if a defect is due to incorrect use or poor maintenance. Our warranty does not affect your rights under law as a consumer. For more information or for invoking the warranty, please visit our website www.philips.com/support.
Introduction
Congratulations and welcome to the Philips Family!
To fully benefit from the support that we offer, register your product at www.philips.com/welcome.
The dual baskets Airfryer with steam allows you to prepare two ingredients with separate cooking methods, both ready at the same time. Two baskets for frying, baking, roasting, and grilling, with the big one also equipped for steaming. Enjoy perfectly cooked meals with RapidAir Plus and Air Steam Technology.
Additionally, this airfryer is equipped with auto cleaning program such as steam cleaning and descaling. Steam clean can make it easier to remove fat building up from the big pan and around the heating tube. Descaling function helps clean limescale buildup in the device's water system and extends its lifespan.
It comes with the Home ID app that gives you step by step guidance and hundreds of mouthwatering meals with specific settings for your Dual Basket Airfryer.
Download the app by using the QR code on the pack.
General description

Main parts
1 Water tank lid 8 Bottom plate for small pan
2 MAX water level indication 9 Cord holder
3 Water tank 10 Power cord
4 Control panel 11 Air Outlets
5 Basket for big pan 12 Breakfast kit (NA55X/03 only)
6 Big pan 13 Double layer with skewers (NA55X/04 only)
7 Small pan
Control panel

a On/Off button
b Time function
c Back button
d Start/pause button
Small pan control buttons
e Small pan button
f Shaking reminder button
g Temperature control buttons
h Time control buttons
Big pan control buttons
i Big pan button
j Shaking reminder button
k Airfry function button
I Steam&airfry function button
m Steam function button
n Steam clean function button
o Temperature control buttons
p Time control buttons
q Preset buttons
r No water indication
s Descaling reminder icon
Description of functions

Water tank
The air fryer has a water tank located at the top of the appliance. The MAX water level indication is about 800 ml, visible from both the front and back. To prevent water leakage, do not exceed this level.
To avoid spills, hold the water tank with both hands while filling it, and close the lid before moving it. Empty the water tank after each cooking cycle to prevent limestone buildup.

Time function
Automatically syncs the cook time to ensure both pans finish cooking at the same time, even if there are different cook times.

Back Button
Use the back button if you mistakenly chose the wrong preset/function.

Shaking reminder
Press the shaking reminder button to enable or disable alerts that remind you to shake or turn your food twice during cooking for more even results. You'll hear a "beep" and see a shaking icon flashing beside the time display.

Airfry function
RapidAir Plus Technology with a unique star-shaped design circulates hot air around and through the food, ensuring even cooking inside and out for delicious homemade meals.

Steam&airfry function
For big pan only: Achieve the tenderness of steaming with the crispiness of air frying using RapidAir Plus with Air Steam Technology.

Steam function
For big pan only: Our Air Steam Technology ensures a good infusion of steam for your veggies, fish, dumplings, or baked goods, achieving a tender and delicate texture without being soggy or watery.

No water indication icon
It is the icon on the right digit display. When it flashes with a "beep" sound, it indicates that there is no water in the tank or that the tank is not placed properly. Fill the tank with water and ensure it is in place; then press Stop/Start button and the sign will turn off.

Steam clean function
For big pan only: Press the Steam clean button once to start cleaning the right chamber and help dissolve greasy residues in the pan and around the heater. See Chapter "Cleaning-Steam cleaning" for details.

Descaling function
For big pan only: Long press the steam clean button for at least 3 seconds until the descaling icon flashes. See Chapter "Cleaning-Descaling" for details.


Pause cooking
Press the Start/pause button or re-insert the "pan/basket" to resume cooking.
Presets
Presets below are cooking programs that give recommendation for temperature and cooking time based on a certain amount of food. For further details see chapter "Cooking with Presets".


Frozen potato based snacks
Steak Fresh potatoes Vegan Chicken
drumsticks
Fish


Vegetables Bread Muffin/
Reheat Dumplings
Cake
Appliance noise
You might hear some noise while the appliance works. This is normal and comes from the pump and fan.
Sound notifications
Sometimes you hear a sound, for example when the appliance has finished cooking, or when there is an action required during cooking, e.g., shaking or turning food.
Before first use
Important
During the first time use, the airfryer may produce some smoke and smell. This should dissipate in a few minutes.
Before first time of cooking, please follow chapter "Cleaning" to clean device throughly.
1 Remove all packing material.
2 Remove any stickers or labels (if applicable) from the appliance.
3 Thoroughly clean the appliance before first use (see chapter "cleaning").

4 Attach the cord holder to the designated area on the back of the device by clicking it into place.
Caution
- The cord holder also serves as a spacer, by creating distance between the device and the wall to prevent heat accumulation.

Caution
- This is an Air Fryer that works on hot air. Do not fill the pan with oil, frying fat, or any other liquid.
- Do not touch hot surfaces. Handle the hot pan with oven-safe gloves.
- This appliance is for household use only.
- This appliance may produce some smoke when you use it for the first time. This is normal.
- Preheating of the appliance is not necessary.
Preparations before first use
Place the appliance on a stable, horizontal, level and heat-resistant surface.
Note
- Do not put anything on top or on the sides of the appliance. This could disrupt the airflow and affect the frying result.
- Do not place the operating appliance near or underneath objects that could be damaged by steam, such as walls and cupboard.
- Do not place the Airfryer next to another cooking appliance, close to the kitchen wall, or beneath a kitchen cupboard, as hot steam may condense and run down the surfaces.
- During use, hot steam is released through the air outlet. Keep your hands and face safely away from the steam and outlet. Place the device 20 cm from the wall, and do not position the air outlet directly in front of the socket.
Cooking instruction
There are different cooking functions for the left and right pans. You can choose the corresponding pan for the desired cooking function.
Cooking mode
| Air fry Steam&airfry Steam | ||||
 |  |  | ||
| Small pan | ||||
 |  |  |  |  |
| Big pan | ||||
 |  |  |  |  |
Before using the steam or steam&airfry function, make sure there is enough water in the tank and do not exceed the MAX water level indication on the water tank.
Empty the water tank after cooking.
Cooking in dual pan
Cooking with time function
If cooking two foods with different functions, temperatures, and time, use the Time function to finish both pans at the same time.
1 Put the plug in the wall outlet.


2 Remove both pans from the appliance by pulling the handle.

3 Put the bottom plate into the small pan.

4 Put the basket into big pan.
Note
- Make sure the basket's flaps are correctly positioned on the right and left sides when inserting it into the pan. If you accidentally rotate it 90 degrees, the basket will not fit. - It's normal to apply some force to place the basket in the pan.
5 Put the ingredients in the baskets.

6 Put the pans back into the Airfryer.
Caution
- Do not touch the pan or the basket during and for some time after use, as they get very hot.
7 Press the Power On/Off button to switch on the appliance.

8 Select the small pan.
The time and temperature indication on the left side starts blinking.
9 Press the temperature up/down button and time up/down button to choose the needed time and temperature.

10 Select the big pan.

11 Select the desired cooking function: air fry, steam, or steam&airfry function. Before selecting the steam or steam&airfry function, fill the water tank to the MAX level indication.

12 Press the temperature up/down button and time up/down button to choose the needed time and temperature.
If you choose the air fry or steam&airfry function, you can adjust the cooking temperature. For the steam function, the temperature is fixed at 100° C and is not adjustable.
Refer to the food table in Chapter "Cooking in single pan" for suggested food amounts, temperatures, and cooking time.


13 Press the Shaking reminder button to be reminded to shake your food during cooking process.
14 Press the Time function button to ensure both dishes finish cooking at the same time.
If you're cooking two foods with different functions, temperatures, and cooking times, and they don't need to finish at the same time, you can skip this step.
While cooking, if you adjust the time for one pan, the Time function will be disabled, and both pans will operate separately. To activate the Time function again, press the Start/Pause button. Then, press the Time function button that appears. Finally, press the Start/Pause button again to resume cooking.
15 Press the Start/Pause button to start the cooking process.
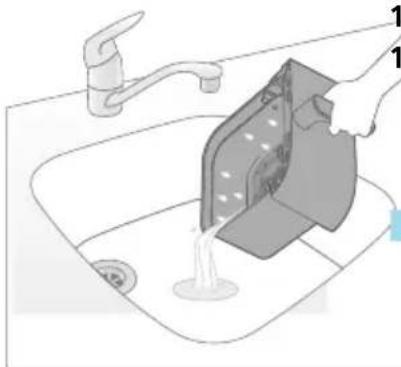
16 When you hear the sound signal of the shaking reminder, remove the pan with the basket and shake it over the sink. Then, place the pan back into the appliance.

17 When you hear the timer bell, the cooking time has elapsed.
18 Pull out the pans and check if the ingredients are ready. If not done yet, just slide the pan back into the Airfryer and add a few more minutes.
19 Carefully remove the ingredients (e.g. fries) from the pan with barbecue tongs.
Note
- To pause both pans, press the Start/Pause button. Press it again to continue cooking for both pans.
- To pause only one pan, select that pan first, then press the Start/Pause button. Press it again to continue cooking for that pan.
- You can use a preset in one pan and manual settings in the other.
- The device automatically pauses when you pull out a pan and resumes cooking when you put it back in.
For instructions on different cooking functions, refer to the corresponding sections in Chapter "Cooking in single pan".
Cooking in single pan
If you want to air fry a small food portion, select the small pan 📂
If you want to air fry, steam&airfry, or steam a large food portion, select the big pan 📊
The instructions below are for the big pan.
Note
- To remove large or delicate ingredients, use tongs to lift them out.
- Depending on the ingredients, you may want to carefully pour off excess oil or fat from the pan after each batch or before shaking or replacing the basket. Place the basket on a heat-resistant surface and wear oven-safe gloves when pouring off excess oil or fat. Then, return the basket to the pan.
Air fry function
Air fry in big pan with the food table
1 Put the plug in the wall outlet.

2 Remove the big pan with the basket from the appliance by pulling the handle.

3 Put the basket into the big pan.
4 Put the ingredients in the basket.
Note
- The Airfryer can prepare a large range of ingredients. Consult the "Food table" for the right quantities and approximate cooking times.
- Do not exceed the amount indicated in the 'Food table' section or overfill the basket as this could affect the quality of the end result.

5 Put the pan back into the Airfryer.
Caution
— Do not touch the pan or the basket during and for some time after use, as they get very hot.
6 Press the Power On/Off button to switch on the appliance.
7 Select the big pan.
8 Select the Airfry function button.
The time and temperature indication on the right side starts blinking.
9 Press the temperature up/down button and time up/down button to choose the needed time and temperature (see "Food table").

10 Press the Shaking reminder button to be reminded to shake your food during cooking process if ingredients require shaking or turning (see "Food table").
11 Press the Start/Pause button to start the cooking process.
The temperature and time display stop blinking.
Note
- The last cooking minute counts down in seconds.
- You can change the cooking settings at any time during the cooking process by clicking the up or down buttons.

12 When you hear the sound signal of the shaking reminder, pull out the pan with the basket and shake it over the sink. Then, put the pan back into the appliance.


13 When you hear the timer bell, the cooking time has elapsed.

14 Pull out the pan and check if the ingredients are ready.
Caution
The Airfryer pan is hot after the cooking process. Always place it on a heat resistant work top (eg. trivet, etc.) when you remove the pan from the device.
Note
- If the ingredients are not ready yet, simply slide the pan back into the Airfryer and add a few extra minutes.
15 Carefully remove the ingredients (e.g. fries) from the pan with barbecue tongs.
Caution
- Do not tilt the pan when removing the ingredients as the basket could fall out of the pan.
- After the cooking process, the pan, the basket, the interior housing and the ingredients are hot. Depending on the type of ingredients in the Airfryer, steam may escape from the pan.

Food table - big pan
The cooking time in the table are guidelines for fresh ingredients. If the results are not as expected, adjust the cooking time.
Ingredients Food amount Temperature Time (min) Note
| Thin frozen fries (7x7 mm / 0,3x0,3 in) | 800 g / 28 oz 200 °C 28-31 Shake, turn or stir 2 | times in between |
| Homemade fries (10x10 mm/0.4x0.4 in thick) | 800 g /28 oz 180°C 30-40 Shake, turn or stir 2 | times in between |
| Frozen chicken nuggets | 600 g/ 21 oz 200°C 10-20 Shake, turn or stir | halfway |
| Frozen spring rolls | 600 g/ 21 oz 200°C 18-24 Shake, turn or stir | halfway |
| Hamburger (around 150 g/5 oz ) | 4 patties 200 °C 15-20 Turn halfway | |
| Meat loaf 1200 g / 42 oz | 150°C 55-60 Use the baking | accessory |
| Meat chops without bone (around 150 g/5 oz) | 4 chops 200°C 15-20 Shake, turn or stir | halfway |
| Thin sausages (around 50 g/1.8 oz) | 10 pieces 200°C 11-15 Shake, turn or stir | halfway |
| Chicken drumsticks (around 125 g/4.5 oz) | 10 pieces 180°C 27-32 Shake, turn or stir | halfway |
| Chicken breast (around 160 g/6 oz) | 5 pieces 180°C 15-25 Turn halfway | |
| Whole chicken 1200 g/42 oz 180°C 50-60 | ||
| Whole fish (around 300-400 g/11-14 oz) | 3 fish 180°C 20-25 | |
| Fish filet (around 200 g/7 oz) | 5 pieces 160°C 25-32 | |
| Mixed vegetables (roughly chopped) | 1000 g/28 oz 180°C 18-23 Set the cooking | time according to your own taste , Shake, turn or stir halfway |
| Muffins (around 50 g/1.8 oz) | 9 pieces 160°C 13-15 Use the Muffin cups | |
| Cake 500 g/18 oz 140°C 35-40 Use the XL cooking | and baking pot Check the doneness before you take out the cake | |
| Pre-baked bread/rolls (around 60 g/ 2 oz) | 6 pieces 200°C 6-8 | |
| Vegan( fresh convenience vegan snacks such as falafel) | 12 pieces 180°C 12-15 Shake, turn or stir | 2-3 times in between |
| Homemade bread 550 g / 28 oz 150°C 33-35 Use the XL cooking | and baking pot The shape of the dough should be as flat as possible to avoid that the bread touches the heating element when rising Check the doneness before you take the bread | |

Food table - small pan
The cooking time in the table are guidelines for fresh ingredients. If the results are not as expected, adjust the cooking time.
Ingredients Food amount Temperature Time (min) Note
| Thin frozen fries (7x7 mm / 0,3x0,3 in) | 300 g / 11 oz 200°C 28-30 Shake, turn or stir | 2-3 times in between |
| Homemade fries (10x10 mm/0.4x0.4 in thick) | 300 g /11 oz 180°C 30-38 Shake, turn or stir | 2-3 times in between |
| Frozen chicken nuggets | 300 g / 11 oz 200°C 20-22 Shake, turn or stir | halfway |
| Frozen spring rolls | 300 g / 11 oz 200°C 20-23 Shake, turn or stir | halfway |
| Hamburger (around 150 g/5 oz) | 300g / 11 oz 200°C 21-24 Turn halfway | |
| Meat chops without bone (around 150 g/5 oz) | 300g /11oz 200°C 20-22 Shake, turn or stir | halfway |
| Thin sausages (around 50 g/1.8 oz) | 6 pieces 200°C 13-17 Shake, turn or stir | halfway |
| Chicken drumsticks (around 125 g/4.5 oz) | 5 pieces 180°C 28-30 Shake, turn or stir | halfway |
| Chicken breast (around 160 g/6 oz) | 3 pieces 180°C 20-25 Turn halfway | |
| Whole fish (around 300-400 g/11-14 oz) | 1 piece 180°C 24-26 | |
| Fish filet (around 200 g/7 oz) | 2 pieces 160°C 25-32 | |
| Mixed vegetables (roughly chopped) | 400g /14 oz 180°C 12-25 Set the cooking | time according to your own taste Shake, turn or stir halfway |
| Muffins (around 50 g/1.8 oz ) | 6 pieces 160°C 19-25 Use the Muffin cups |
Pre-baked 3 pieces 200°C 6-8 bread/rolls (around 60 g/2 oz)
Vegan(fresh convenience vegan snacks such as falafel) 12 pieces 190°C 15-18 40g for each piece
A fresh convenience vegan snacks such as falafel Shake, turn or stir 2-3 times in between
Airfry with a preset in big pan
1 Follow steps 1 to 8 in chapter "Air fry in big pan with food table.
2 Choose the preset.
Tip:
To change to another preset, press the back button or deselect the preset button and select your needed preset.

3 Start the cooking process by pressing the Start/Pause button.
The temperature and time indication stop blinking.
Refer to the table below for suggested food amounts based on the default cooking time.

Preset - Big pan
The cooking time in the table are guidelines for fresh ingredients. If the results are not as expected, adjust the cooking time.
| Presets Icon Food | amount | Tempera-ture (default) | Time (default) | Note | |
| Frozen potato based snacks |  | 800g / 28 oz | 200 °C 28 min - Potato based frozen snacks like frozen French fries, potato wedges, criss-cross fries etc.The shaking reminder is enabled by default and prompts you to shake the pan twice during cooking. | ||
| Steak (aka beef and pork chops) |  | 600g / 21 oz | 200 °C 20 min - Slices with 2-2,5 cm thickness, 200g / 7 oz each slice. | ||
| Vegan (aka fresh convenience vegan snacks such as falafel) |  | 12 pieces 180 °C 12 min - 40g for each pieceA fresh convenience vegan snacks such as falafelShake, turn or stir 2-3 times in between | |||
| Fresh potatoes |  | 800g / 28 oz | 180 °C 30 min - Use mealy potatoes-Cut into potato cubes-Soak 30 minutes in water, dry then add 1/4 to 1 tbsp of oil-The shaking reminder is enabled by default and prompts you to shake the pan twice during cooking. | ||
| Chicken drumsticks (aka poultry) |  | 8 - 10 Stk | 180 °C 32 min - 120-130g / 4-5 oz for each drumstick-Shake, turn or stir in between | ||
| Fish (aka fish and seafood) |  | 600g / 21 oz | 180 °C 23 min - Whole fish with skin around 300 g / 11 oz | ||
| Vegetables 100( |  | 35oz | 180 °C 22 min - Roughly chopped-Mixed vegetables (aubergine, courgette, pepper, onion) | ||
| Cake 800g / 35 |  | oz | 140 °C 35 min - Use the XL baking accessory (199 x 189 x 80 mm) for big pan-Use muffin cups for small basket | ||
Bread 500g 180  | min - Use the XL cooking and baking pot | - The shape of the dough should be as flat as possible to avoid that the bread touches the heating element when rising- Check the doneness before you take out the bread | |||
| Reheat 160 °C 5 min - Adjust time according to food item and food amount | |||||
 | Preset - Small panThe cooking time in the table are guidelines for fresh ingredients. If the results are not as expected, adjust the cooking time. | ||||
| Presets Icon Food | amount | Tempera-ture (default) | Time (default) | Note | |
| Frozen potato based snacks |  | 300g / 11 oz | 200 °C 30 min - Potato based frozen snacks like frozen French fries, potato wedges, criss-cross fries etc.The shaking reminder is enabled by default and prompts you to shake the pan twice during cooking. | ||
| Steak (aka beef and pork chops) |  | 400 g / 14 oz | 200 °C 22 min - Slices with 2-2,5 cm thickness, 200g / 7 oz each slice | ||
| Vegan (aka fresh convenience vegan snacks such as falafel) |  | 8 pics 190 °C 15 min - 40g for each piece | A fresh convenience vegan snacks such as falafelShake, turn or stir 2-3 times in between | ||
| Fresh potatoes |  | 300g / 11 oz | 180 °C 35 min - Use mealy potatoes- Cut into potato cubes- Soak 30 minutes in water, dry then add 1/4 to 1 tbsp of oil- The shaking reminder is enabled by default and prompts you to shake the pan twice during cooking. | ||
| Chicken drumsticks (aka poultry) |  | - Shake, turn or stir in between | |||
| Fish (aka fish and seafood) |  | 300g / 11 oz | 180 °C 25 min - Whole fish with skin around 300 g / 11 oz | ||
| Vegetables 400g |  | C 25 min - Roughly chopped | - Mixed vegetables (aubergine, courgette, pepper, onion) | ||
| Cake 6pics 150° |  | min - Use muffin cups for small basket | |||
| Bread 300g 160 |  | min - Use baking accessory | |||
| Reheat - 170 °C |  | · Adjust time according to food item | and food amount | ||
Tip: Keep Warm
- You can keep your food warm in the Airfryer by setting the temperature to 80 degrees and adapt the time as long as you want to keep your food warm. We recommend not to keep your food warm for more than 30 minutes as the quality of the food can decrease. - If food like French fries loses too much crispness during the keep warm mode, either shorten the keep warm time by switching off the appliance earlier or crisp them up for 2-3 minutes at the temperature of 180°C.
Steam&airfry function
Steam&airfry with food table
1 Remove the water tank from the appliance.


2 Fill the water tank with water.
Do not exceed the MAX water level indication.

3 Secure the lid on the water tank to avoid water leakage.
4 Place the water tank onto the groove at the top of the appliance and press down to ensure it is secured. If the water tank is not placed properly, water won't flow to the steam generator. This will cause the "no water" icon to flash and may produce strange noises from the fan and motor. The steam&airfry function might be disabled in this case.
5 Put the plug in the wall outlet.

6 Remove the big pan with the basket from the appliance by pulling the handle.
7 Put the basket into the big pan.
8 Put the ingredients in the basket.
Note
- The Airfryer can prepare a large range of ingredients. Consult the 'Food table' for the right quantities and approximate cooking times.
- Do not exceed the amount indicated in the 'Food table' section or overfill the basket as this could affect the quality of the end result.

9 Put the pan back into the Airfryer.
Caution
— Do not touch the pan or the basket during and for some time after use, as they get very hot.
10 Press the Power On/Off button to switch on the appliance.
11 Select the big pan.
12 Select steam&airfry function. The time and temperature indication on the right side starts blinking.
13 Press the temperature up/down button and time up/down button to choose the needed time and temperature (See to the food table as below).

14 Press the Shaking reminder button to be reminded to shake your food during cooking process if needed.
15 Press the Start/Pause button to start the cooking process.
The temperature and time indication stop blinking.
Note
- The last cooking minute counts down in seconds.
- If the temperature and time on the display are steady and not blinking, it means the appliance is working normally. After 20 seconds of cooking, you'll hear the motor/fan and see steam coming from the back of the machine.
- You can change the cooking settings at any time during the cooking process by clicking the up or down buttons.
16 When you hear the sound signal of the shaking reminder, pull out the pan with the basket and shake it over the sink. Then, put the pan back into the appliance.


17 When you hear the timer bell, the cooking time has elapsed.

18 Pull out the pan and check if the ingredients are ready.
Caution
The Airfryer pan is hot after the cooking process. Always place it on a heat resistant work top (eg. trivet, etc.) when you remove the pan from the device.
Note
- If the ingredients are not ready yet, simply slide the pan back into the Airfryer and add a few extra minutes.

19 Carefully remove the ingredients from the pan with barbecue tongs.
Caution
- Do not tilt the pan when removing the ingredients, as the basket could fall out and water may splash.
- After the cooking process, the pan, the basket, the interior housing and the ingredients are hot. Depending on the type of ingredients in the Airfryer, steam may escape from the pan.

Food table - big pan
Ingredients Food amount Temperature Time (min) Note
| Fresh potato cubes | 800g/ 28 oz | 180 °C | 26-35 Shake, turn or stir 2 | times in between |
| Chicken drumsticks (around 125 g/4.5 oz) | 10 pieces | 180 °C | 27-30 Shake, turn or stir | halfway |
| Chicken breast (around 200 g) | 4 pieces | 160 °C | 20-22 Add 10 g canola oil | |
| Whole fish (around 300-400 g/11-14 oz) | 3 pieces | 200 °C | 18-21 Shake, turn or stir | halfway |
| Fish filet (around 200 g/7 oz) | 5 pieces | 160 °C | 20-21 Add 10 g canola oil | |
| Mix Vegetables | 1000 g/35 oz | 200 °C | 19-21 Set the cooking | time according to your own tasteShake, turn or stir 2 times in between |
| Cauliflower | 600 g / 21 oz | 160 °C | 19-21 Shake, turn or stir 2 | times in between 10 g canola oil |
| Carrots | 600 g / 21 oz | 180 °C | 19-21 Shake, turn or stir 2 | times in between 10 g canola oil |
| Homemade bread | 550 g / 19 oz | 180 °C | 30-35 Use the XL cooking | and baking potThe shape of the dough should be as flat as possible to avoid that the bread touches the heating element when risingCheck the doneness before you take the bread |
| Dumplings | 400g/14 oz | 160 °C | 15-18 | |
| Whole chicken | 1200 g/42 oz | 180 °C | 50-60 |
Steam&airfry with preset
1 Follow steps 1 to 12 in chapter "Steam&airfry function - Steam&airfry with food table".
2 Choose the preset.
Tip
To change to another preset, press the back button or deselect the preset button and select your needed preset.
3 Start the cooking process by pressing the Start/Pause button. The temperature and time indication stop blinking.
Preset table
The cooking time in the table are guidelines for fresh ingredients. If the results are not as expected, adjust the cooking time.
| Presets Icon Food | amount | Tempera-ture (default) | Time (default) | Note | |
| Fresh potatoes |  | 800g / 28 oz | 180 °C 26 min - Use mealy potatoes | ||
| - Cut into potato cubes | |||||
| - Soak 30 minutes in water, dry then add 1/4 to 1 tbsp of oil | |||||
| - The shaking reminder is enabled by default and prompts you to shake the pan twice during cooking. | |||||
| Chicken drumsticks (aka poultry) |  | 8 - 10 Stk | 180 °C 27 min - 120-130g / 4-5 oz for each drumstick | ||
| - Shake, turn or stir in between | |||||
| Fish (aka fish and seafood) |  | 600g / 21 oz | 200 °C 18 min - Whole fish with skin around 300 g / 11 oz | ||
| Vegetables 550 |  | 19 min - Root vegetables,like | broccoli/cauliflower- The shaking reminder is enabled by default and prompts you to shake the pan twice during cooking.- If you cook mixed vegetables (aubergine, courgette, pepper, onion),pls adjust temperature to 200°C | ||
| Bread 500g 180 |  | min - Use the XL cooking and baking pot | - The shape of the dough should be as flat as possible to avoid that the bread touches the heating element when rising- Check the doneness before you take out the bread | ||
| Reheat - 150 °C |  | - Adjust time according to food item | and food amount | ||
| Dumplings 400g |  | C 15 min - | |||
Steam function
Steam with food table
1 Remove the water tank from the appliance.


2 Fill the water tank with water.
Do not exceed the MAX water level indication.
The amount of water needed for cooking depends on the food type and cooking duration.
You may need to refill the water tank during cooking if the cooking time is over 50 minutes.

3 Secure the lid on the water tank to avoid water leakage.

4 Place the water tank onto the groove at the top of the appliance and press down to ensure it is secured.
If the water tank is not placed properly, water won't flow to the steam generator. This will cause the "no water" icon to flash and may produce strange noises from the fan and motor. The steam function might be disabled in this case.

5 Put the plug in the wall outlet.

6 Remove the big pan with the basket from the appliance by pulling the handle.

7 Put the basket into the big pan.
8 Put the ingredients in the basket.
Note
- The Airfryer can prepare a large range of ingredients. Consult the 'Food table' for the right quantities and approximate cooking times.
- Do not exceed the amount indicated in the 'Food table' section or overfill the basket as this could affect the quality of the end result.

9 Put the pan back into the Airfryer.
Caution
— Do not touch the pan or the basket during and for some time after use, as they get very hot.
10 Press the Power On/Off button to switch on the appliance.
11 Select the big pan.
12 Select steam function. The time on the right side starts blinking.
13 Press the time up/down button to choose the needed time.


14 Press the Start/Pause button to start the cooking process.
The temperature and time indication stop blinking.
Note
- The last cooking minute counts down in seconds.
- If the temperature and time on the display are steady and not blinking, it means the appliance is working normally. After 20 seconds of cooking, you'll hear the motor/fan and see steam coming from the back of the machine.
- You can change the cooking settings at any time during the cooking process by clicking the up or down buttons.
15 When you hear the timer bell, the cooking time has elapsed.
16 Pull out the pan and check if the ingredients are ready.
Caution
The Airfryer pan is hot after the cooking process. Always place it on a heat resistant work top (eg. trivet, etc.) when you remove the pan from the device.
Note
- If the ingredients are not ready yet, simply slide the pan back into the Airfryer and add a few extra minutes.
17 Carefully remove the ingredients (e.g. broccoli) from the pan with barbecue tongs.
Caution
- Do not tilt the pan when removing the ingredients, as the basket could fall out and water may splash.
- After the cooking process, the pan, the basket, the interior housing and the ingredients are hot. Depending on the type of ingredients in the Airfryer, steam may escape from the pan.

Food table - big pan
Ingredients Food amount Temperature Time (min) Note
| Fresh potato cubes 800g / 28 oz 100 °C 28-35 | |
| Whole potato (around 250-300 g/9-11 oz) | 4 pieces 100 °C 45-55 |
| Chicken drumsticks (around 125 g/4.5 oz) | 10 pieces 100 °C 30-40 |
| Whole fish (around 300-400 g/11-14 oz) | 3 pieces 100 °C 18-22 |
| Root vegetables (like brocolli) | 600 g / 21 oz 100 °C 10-14 |
| Dumplings 400g/14 oz 100 °C 15-20 | |
| Pork ribs 300g/11 oz 100 °C 30-35 Use plate of certain size | |
| Rice 320g/11 oz 100 °C 25-40 Using cooking pot, like baking pot, silicon tray etc.Add 320 ml water in pot, rice/waterratio is 1:1.2 | |
| Chicken breast (around 200 g/7 oz) | 4 pieces 100 °C 20-30 |
| Yam/Sweet potato(around 100g/3.5 oz) | 8 pieces 100 °C 45-60 |
Steam with preset
1 Follow steps 1 to 12 in chapter "Steam function".

2 Choose the preset.
Tip
To change to another preset, press the back button or deselect the preset button and select your needed preset.
3 Start the cooking process by pressing the Start/Pause button.
The temperature and time indication stop blinking.
Preset table
The cooking time in the table are guidelines for fresh ingredients. If the results are not as expected, adjust the cooking time.
Presets Icon Food
amount
Temperature (default)
Time (default)
Note
| Fresh potatoes |  | 800g / 28 oz | 100 °C 35 min - Cut into potato cubes |
| Chicken drumsticks (aka poultry) |  | 8 - 10 Stk, 100 °C 40 min - 120-130g / 4-5 oz for each drumstick | |
| Fish (aka fish and seafood) |  | 600g 100 °C 20 min - Whole fish with skin around 300 g / 11 oz | |
| Vegetables 550 |  | °C 14 min - Root vegetables like cauliflower, broccoli | |
| Dumplings 400g |  | °C 20 min - | |
Making home-made fries
To make great home-made fries in the Airfryer:
- For the big pan you need 800 g /28 oz and for the small pan 300 g / 11 oz of peeled potatoes.
- Choose a potato variety suitable for making fries, e.g. fresh, (slightly) floury potatoes.
- It is best to air fry the fries in portions of up to 800 g / 28 oz for an even result. Larger quantities of fries tend to be less crispy than smaller portions.
1 Peel the potatoes and cut into fries (10x10 mm / 0.4x0.4 in thick).
2 Soak the potato sticks in a bowl of water for at least 30 minutes.
3 Empty the bowl and dry the potato sticks with a dish towel or paper towel.
4 Pour one tablespoon of cooking oil into the bowl, put the sticks in the bowl and mix until the sticks are coated with oil.
5 Remove the sticks from the bowl with your fingers or a slotted kitchen utensil so excess oil remains in the bowl.
Note
- Do not tilt the bowl to pour all the sticks in the basket at once to prevent excess oil from going into the pan.
6 Put the sticks into the basket.
Cleaning
Use automated cleaning programs
Using steam cleaning function
It helps dissolve greasy residue and deeply clean the big pan. The program lasts for 20 minutes, with 15 minutes for steam cleaning and 5 minutes for drying the pan.
1 Remove the water tank from the appliance.


2 Fill the water tank to the max level with water.

3 Secure the lid on the water tank to avoid water leakage.
4 Place the water tank onto the groove at the top of the appliance and press down to ensure it is secured.
If the water tank is not placed properly, water won't flow to the steam generator. This will cause the "no water" icon ▲o flash and may produce strange noises from the fan and motor. The steam function might be disabled in this case.
5 Press the Power On/Off button to switch on the appliance
6 Select the big pan.
7 Press the Steam Clean button to start cleaning right chamber.
The time on the right side starts blinking.

8 Press the Start/Pause button to start cleaning process. The temperature and time indication stop blinking.

9 After 15 minutes, the appliance will beep continuously and the steam clean icon will flash until you remove the pan This indicates that the cleaning process is complete and a drying phase of 5 minutes remains.

10 Remove and empty the pan.

11 Rinse the basket and pan to remove residue. If grease remains in the pan and basket, clean them with soapy water or detergent using a sponge, then rinse again. 12 Wipe away any dissolved grease around the heater area with a mop or kitchen towel. When using the air fry or steam&airfry functions, some grease will accumulate around the heater area. Regular steam cleaning and wiping will help keep the top interior clean. 13 Insert the pan back into the unit to start the dry mode automatically.


14 After 5 minutes, a beep sound indicates that the drying program is complete.
Tip
Before first use or if not used for a long time, we suggest using the "Steam clean" function to thoroughly clean the water circle and right chamber.
Note
- When starting program of steam cleaning or descaling, it might generate more vapour than steam mode from the back of appliance, which indicates that more condensation you will see on the wall. Before starting these two programs, please ensure that 1) air outlet is not directly facing the socket; 2) do not place other kitchen appliances next to the machine; 3) Place the machine 20 cm away from the wall to reduce the formation of condensation on the wall.
Using descaling function
Every 10 hours of steam mode use, the icon will blink, indicating it's time to run a descale program. This function helps clean limescale buildup in the device's water system and extends its lifespan.
1 Remove the water tank from the appliance.

2 Fill the water tank to the max level with water.

3 Secure the lid on the water tank to avoid water leakage.


4 Place the water tank onto the groove at the top of the appliance and press down to ensure it is secured.
If the water tank is not placed properly, water won't flow to the steam generator. This will cause the "no water" icon to flash and may produce strange noises from the fan and motor. The steam function might be disabled in this case.
5 Press the Power On/Off button to switch on the appliance
6 Select the big pan.
7 Long press the Steam Clean button for more than 3 seconds until the descaling icon appears and blinks.
The time on the right side starts blinking.
8 Press the Start/Pause button to begin descaling.
The time indication stop blinking.

9 Wait 50 minutes until you hear a beep, indicating the program has ended.

10 Remove the big pan.

11 Pour out the dirty water.
12 Wash the pan and basket, rinse and dry. Wipe the cooking chamber with dry cloth or kitchen towel.
Suggest to use the steam-clean function to rinse the inside water circle and dry the pan.
Note
- When the icon is flashing, it's best to descale promptly; otherwise, limescale might be accumulated in water circle and it will get clogged.
- If you want to descale later, you can skip the notification. You'll be reminded again the next time when you turn on your air fryer.
- Under no circumstances should you use a descaling liquid based on sulfuric acid, hydrochloric acid, sulfamic or acetic acid (vinegar) as this may damage the water system in your appliance and not dissolve the limescale properly.
- If you often use hard water in your area, you may need to descale the device more frequently.
General cleaning
Warning
- Let the basket, pan and the inside of the appliance cool down completely before you start cleaning.
- The pan and basket of the appliance have a non-stick coating. Do not use metal kitchen utensils or abrasive cleaning materials as this may damage the non-stick coating.
Clean the appliance after every use. Remove oil and fat from the bottom of the pan after every use.

1 Press the power On/Off button to switch off the appliance, remove the plug from the wall outlet and let the appliance cool down.
Tip
- Remove the pan and basket to let the Airfryer cool down faster.
2 Dispose of rendered fat or oil from the bottom of the pan.
3 Clean the pan, basket in a dishwasher. You can also clean them with hot water, dishwashing liquid and a non-abrasive sponge (see "cleaning table").
Tip
- If food residues stuck to the pan or basket, you can soak them in hot water and dishwashing liquid for 10–15 minutes. Soaking loosens the food residues and makes it easier to remove. Make sure you use a dishwashing liquid that can dissolve oil and grease. If there are grease stains on the pan or basket and you have not been able to remove them with hot water and dishwashing liquid, use a liquid degreaser. - If necessary, food residues stuck to the heating element can be removed with a soft to medium bristle brush. Do not use a steel wire brush or a hard bristle brush, as this might damage the coating on the heating element.
4 To prevent scratches, gently wipe the outside of the appliance with an unwrinkled, clean, and soft cloth. Begin with a slightly moistened cloth and follow up with a dry one, if necessary.

5 Clean the heating element with a cleaning brush to remove any food residues.

6 Clean the inside of the appliance with hot water and a non-abrasive sponge.

Note
- In case that you unintentionally pull out the divider, that is located between the small and the big pan, during cleaning, make sure to put it back in the right way.
Tip
- If food residues stick to the pan, use the automated cleaning program "Steam clean" to soften the residues and make cleaning easier (see "Use the automated cleaning programs").
Cleaning table
 | |||
 | √ | √ | × |
 | √ | × | × |
NA55X/03 | √ | √ | √ |
 | √ | √ | √ |
Accessories
Using the double layer
The double layer and skewer come with the following models: NA55X/03.

The double layer is a useful accessory that allows for cooking on two levels, but it is only compatible with the big pan.

1 Remove the big pan from the appliance.

2 Place the desired food into the basket.
Note
- Refer to the food table below for recommended items to cook with the double layer.

3 Place the double layer on top of the food in the basket.
4 Add the second portion of food onto the double layer.

5 Insert the pan into the appliance and adjust the time and temperature as specified in the following table. Once ready, press the start button.
| Frozen chicken nuggets | 300 g / 11 oz | 17–20 min 180°C | |
| Thin frozen fries 400 g / 14 oz | |||
| Frozen chicken wings | 450 g / 16 oz | 16–20 min 200°C | |
| Frozen chicken burger patties | 350 g / 12 oz | ||
| Corncobs | 800–1000 g / 28–35 oz | 24–28 min 180°C - 3 pieces of corncobs | |
| Potato wedges 500 g / 18 oz | |||
| Dorade | 500–600 g / 18–21 oz | 18–20 min 200°C - 2 pieces of whole fish | |
| Baked potato (quartered) | 350 g / 12 oz | ||
| Whole mushrooms 200 g / 7 oz | 12–14 min 200°C | ||
| King prawns with skin | 400 g / 14 oz | ||
| Grilled cheese or tofu | 250 g / 9 oz | 15–18 min 180°C | - Turn the grilled cheese or tofu halfway through the cooking time |
| Mixed vegetables 500 g / 18 oz | |||
Note
- The top food item listed in the table should be placed on the top level of the double layer and the second item on the bottom level.


6 After the cooking process is complete, use oven gloves and tongs to carefully remove the food from the basket.
Caution
- Be cautious when removing the double layer as it becomes hot during cooking.
Using the skewer
The skewer can be used in combination with the double layer.
1 Thread the desired meat and vegetables onto the skewers.
![graph TD A["2 Plate"] --> B["3 Pu Box"] B --> C["4 Se Box"] C --> D["5 On F, Refe tem"]](/content/2026/06/1384907/images/787243cbdd0809cb718651238233639cc942cf1d7887e3fd867179fa150dbd8a.jpg)
2 Place the skewers into the designated grooves on the double layer.
3 Put the pan back into the appliance.
4 Set the time and temperature according to the specified table and begin the cooking process.
5 Once cooking is complete, use oven gloves and tongs to carefully remove the food from the basket.
Refer to the table for specific recommendations on cooking times and temperatures.
Basket content Portion Cooking time Temperature Note
| 5 Skewers of food 5 skewers | - Put the mixed vegetables on the bottom of the pan, and the skewers on top of the double layer. | |
| Mixed vegetables 500 g | 15–18 min 180°C |
Using the breakfast kit
The breakfast kit comes with the following models: NA55X/04.

The breakfast kit allows for cooking up to four eggs and four pieces of toast simultaneously.
Caution
- To safely remove the cooked eggs and toast from the breakfast kit, always use tongs to prevent any potential risk of burning.
1 Remove the small pan from the appliance.


2 Take the bottom plate out of the pan.
Note
- If the bottom plate is not removed, the toast slices may not fit properly into the pan.

3 Place the breakfast kit into the small pan.

4 Place up to four eggs on the breakfast kit and insert the pan back into the appliance.
5 Adjust the time and temperature according to the food table below and press the start button.
Breakfast kit Amount Cooking time Temperature Note
Hard boiled eggs 4 eggs 10–12 min
Soft boiled eggs 4 eggs 8–10 min
180 ° C
- Cook the eggs first. Add the toast halfway through the cooking process.
Toast 5 pieces 5–6 min

6 Halfway through the cooking process, add the toast slices to the breakfast kit and continue cooking.
Tip
- Consider enabling the shaking reminder to avoid forgetting to add the toast.
- If the toast does not fit into the pan, cut it in half.

7 Once cooking is complete, use tongs to carefully remove the eggs and toast. Please refer to the food table below for specific cooking times and temperatures.
Storage
1 Unplug the appliance and let it cool down.
2 Make sure all parts are clean and dry before storing.
3 Wrap the cord around the designated cord holder on the backside of the appliance.
Note
- When carrying the Airfryer, always hold it horizontally to prevent the pans from accidentally falling out, which could potentially damage them.
- Always make sure that the removable parts of the Airfryer e.g. removable mesh bottom, etc. are fixed before you carry and/or store it.
Troubleshooting
This chapter summarizes the most common problems you could encounter with the appliance. If you are unable to solve the problem with the information below, visit www.philips.com/support for a list of frequently asked questions or contact the Consumer Care Center in your country.
Problem Possible cause Solution
| The outside of the appliance becomes hot during use. | The heat inside radiates to the outside walls. | This is normal. All handles and knobs that you need to touch during use stay cool enough to touch. |
| The pan, the basket, and the inside of the appliance always become hot when the appliance is switched on to ensure the food is properly cooked. These parts are always too hot to touch. | ||
| If you leave the appliance switched on for a longer time, some areas get too hot to touch. These areas are marked on the appliance with the following icon: | ||
| As long as you are aware of the hot areas and avoid touching them, the appliance is completely safe to use. | ||
| My home-made fries do not turn out as I expected. | You did not use the right potato type. | To get the best results, use fresh floury potatoes. If you need to store the potatoes, do not store them in a cold environment like in a fridge. Choose potatoes whose package states that they are suitable for frying. |
| The amount of ingredients in the basket is too big. | Follow the instructions in this user manual to prepare home-made fries. | |
| Certain types of ingredients need to be shaken halfway through the cooking time. | Follow the instructions in this user manual to prepare home-made fries. | |
| The Airfryer does not switch on. The appliance is not plugged in. Check if the plug is inserted in the wall outlet properly. | ||
| Several appliances are connected to one outlet. | The Airfryer has a high wattage. Try a different outlet and check the fuses. | |
| On/Off button was not activated yet. | Use your thumb to press the On/Off button, ensuring the whole button is touched by finger. | |
Problem Possible cause Solution
| I see some peeling off spots inside my Airfryer. | Some small spots can appear inside the pan of the Airfryer due to the incidental touching or scratching of the coating (e.g. during cleaning with harsh cleaning tools and/or while inserting the basket). | You can prevent damage by lowering the basket into the pan properly. If you insert the basket at an angle, its side may knock against the wall of the pan, causing small pieces of coating to chip off. If this occurs, please be informed that this is not harmful as all materials used are food-safe. |
| White smoke comes out of the appliance. | You are cooking fatty ingredients. | Carefully pour off any excess oil or fat from the pan and then continue cooking. |
| The pan still contains greasy residues from previous use. | White smoke is caused by greasy residues heating up in the pan. Always clean the pan and the basket thoroughly after every use. | |
| Breading or coating did not adhere properly to the food. | Tiny pieces of airborne breading can cause white smoke. Firmly press breading or coating to food to ensure it sticks. | |
| Marinade, liquid or meat juices are splattering in the rendered fat or grease. | Pat food dry before placing it in the basket. | |
| The screen on the Airfryer shows "E1". | The device is broken / has defects. | Call the Philips service hot line or contact the Consumer Care Center in your country. |
| Your Airfryer might be stored in a place where it is too cold. | If your device was stored at a low ambient temperature, let it warm up to room temperature for at least 15 minutes before you plug it in again.If your display still shows "E1", call the Philips service hot line or contact the Consumer Care Center in your country. | |
| The screen on the Airfryer shows "E4–E12". | The device might have a malfunction. | Try to plug out and plug in the device. If this does not help please call the Philips service hot line or contact the Consumer Care Center in your country. |
| I hear some strange noise coming from the inside of the appliance. | The appliance is equipped with a fan, which is needed to transport the heat to the food, and also a water pump, which is needed for the steaming function of the appliance. | This noise is normal and intended. If the noise gets louder or changes dearly, please contact the Philips support center for further advice. |
Problem Possible cause Solution
| There is water in the cooking chamber after cooking. | The Air fryer produces steam during cooking. The steam condenses on the food and on the inside walls of the cooking chamber. The condense water remains in the cooking chamber after cooking. | A certain amount of water remaining in the cooking chamber after cooking is normal. Just wipe it out with a wet, non-abrasive cloth. |
| always flashes No water in water tank Add water in water tank. | ||
| Water tank is not placed properly Press down water tank in groove to secure it in place, and then press the Start/Pause button. | ||
| Water tube blocked Contact the consumer centre in your country and ask for further service. | ||
| always flash This is the reminder for descaling Perform the descaling process. See chapter "Descaling". | ||
| There might be some condensation water on the wall during steaming, steam cleaning, descaling | It is normal, vapor will come out from air outlet of right side and pushed it to wall by fan | Place device 20cm away from wall and don't place right air outlet of device right in front of the socket to avoid electrical problem.Do not put other kitchen appliances closed to it.Use mop to dry it. |
| The machine seems to be leaking Leaking from inner part of device(leakage of water tube etc.) | Contact the consumer centre in your country and ask for further service. | |
| Device cracked by external force or deformation | ||
| Leakage from water tank Take water tank out and install it properly againCheck if there are any cracks in the water tank,contact consumer center in your country | ||
| Insufficient steam Insufficient water in the water tank | Check the water tank to ensure there is enough water. | |
| The water tank is not fully inserted correctly | Press down water tank in groove to secure it in place, and then press the Start/Pause button. | |
| The water inlet in the groove on the top of the machine is dirty/clogged | Clean and rinse the water inlet. | |
Problem Possible cause Solution
| Clogging of the steam generator, or leakage of the steam pipeline | If it has been used for a long time, it may be necessary to perform descaling and cleaning of the steam generator.Start descaling program.If still not work, please contact consumer centre | |
| There is no sound from fan or motor when starting program of steaming,steam&airfrying, steam cleaning, descaling,but the indication of temperature and time are on and not blinking | It is normal. The appliance is working. | Wait more than 20 seconds to check the phenomenon again. |
Obsah
Hlavní části
Upozornění


![4 U a P p c f 5 St 6 Vy [2] 7 DI r o 8 St](/content/2026/06/1384907/images/59b954bf5f207ae96eb3a74da1de9ea67eb8466ab33223d7d0dc957f93d3740a.jpg)
11 Vylijte špinavou vodu.


Hoveddele
Forsigtig

3 Placer bundpladen i den lille beholder.

4 Placer kurven i den store beholder.
Bemærk
13 Tryk på knappen til rystepåmindelse for at blive mindet om at ryste maden under tilberedningen.

10 Tryk på knappen til rystepåmindelse for at blive mindet om at ryste maden under tilberedningen, hvis ingredienserne skal rystes eller vendes (se "Madtabel").
11 Tryk på start/pause-knappen for at starte tilberedningsprocessen. Temperatur- og tidsdisplayet holder op med at blinke.
Bemærk


7 Placer kurven i den store beholder.
Dampfunktion
Dampning med madtabel


3 Placer det dobbelte lag oven på maden i kurven.

Recycling

Hauptteile
Wichtig!
Vorsicht


Dampffunktion


Põhiosad
Ettevaatust


5 Pange pott tagasi Airfryerisse.
Ettevaatust


5 Sisestage pistik seinakontakti.


9 Pange pott tagasi Airfryerisse.
Ettevaatust


![4 As k p k 5 Se 6 Va [2] 7 Va k A 8 Ka](/content/2026/06/1384907/images/8236469ae0faf1c053f8cc1fb2901593f7eb823d2e3c7a7795871559abbd7032.jpg)
Märkus
4 Lisage teine osa toidust kahekordsele kihile.


![graph TD A["Ascent"] --> B["Box with food items"] B --> C["Box with food items"] C --> D["Box with food items"] D --> E["Box with food items"] E --> F["Box with food items"] F --> G["Kucent, Vaad koht"]](/content/2026/06/1384907/images/7a6c2e71e1b18f1ace24a5b87eaf09c082e6d343c7d758796444ec5af817a692.jpg)
Reciclaje

- This symbol means that electrical products shall not be disposed of with normal household waste.
Piezas principales
Importante
Precaución


![4 Co p S 9 p I 5 Pu 6 Se [2] 7 M 3 B 8 Pu](/content/2026/06/1384907/images/102278cfaeb2bb1625ddb7babc9b0011044224e1a01245973c119e027fe5f30c.jpg)
10 Retire el recipiente grande.


2 Retire la placa inferior del recipiente.
Note
Recyclage

Pièces principales
Attention


10 Retirez la grande cuve.


- Ostavite aparat da se hladi oko 30 minuta prije nego što ga dotaknete ili čistite.
- Pazite da sastojci pripremljeni u ovom aparatu budu zlatno-žuti, a ne tamni ili smedi.
- Uklonite zagorjele ostatke sastojaka. Nemojte pržiti svježe krumpire pri temperaturi većoj od 180 °C (kako bi se stvaranje akrilamida svelo na najmanju mjeru).
- Budite oprezni tijekom čišćenja gornjeg dijela komore za kuhanje: vrući su grijaći element, rub metalnih dijelova i zaštita od prskanja.
- Provjerite je li hrana u aparatu Airfryer dobro ispržena.
- Budite oprezni kad pripremate kvarljivu hranu s pomoću funkcije sinkroniziranog završetka (može doći do množenja bakterija).
- Budite pažljivi prilikom vađenja kuhane hrane i pazite da nastavci ne ispadnu.
- Držač kabela služi i kao razdjelnik, stvarajući razmak između aparata i zida kako bi se spriječilo nakupljanje topline. Nikad nemojte vaditi razdjelnik.
- Kad ikona uklanjanja kamenca počne svijetliti, očistite kamenac.
Recikliranje

- Ovaj simbol naznačuje da se električni proizvodi ne smiju odlagati s uobičajenim otpadom iz kućanstva.
- Poštujte propise svoje države o zasebnom prikupljanju električnih proizvoda.
Elektromagnetska polja (EMF)
Oprez
- Ovo je Airfryer koji prži vrućim zrakom. Posudu nemojte puniti uljem, mašću niti nekom drugom tekućinom.
- Nemojte dodirivati vruće površine. Vruću tavu primajte s kuhinjskim rukavicama.
- Aparat je namijenjen isključivo kućnoj uporabi.
- Prilikom prve uporabe možda ćete primijetiti malo dima. To je normalno.
- Aparat ne treba prethodno zagrijavati.

3 Stavite donju ploču u malu posudu.


17 Kad se oglasi zvono mjerača vremena, vrijeme kuhanja je isteklo.
2 Izvadite veliku posudu s košarom iz aparata tako da povučete ručku.

5 Vratite posudu u Airfryer.
Oprez

13 Kad se oglasi zvono mjerača vremena, vrijeme kuhanja je isteklo.


2 Napunite spremnik vodom.
Nemojte prekoračivati naznačenu maksimalnu razinu vode.


4 Spremnik za vodu postavite u utor na gornjoj strani aparata i pritisnite ga da biste ga učvrstili.

6 Izvadite veliku posudu s košarom iz aparata tako da povučete ručku.

9 Vratite posudu u Airfryer.
Oprez
16 Kad čujete zvučni signal podsjetnika na protresanje, izvadite posudu s košarom i protresite je iznad sudopera. Zatim posudu vratite u aparat.

17 Kad se oglasi zvono mjerača vremena, vrijeme kuhanja je isteklo.


2 Napunite spremnik vodom.
Nemojte prekoračivati naznačenu maksimalnu razinu vode.
Količina vode potrebna za kuhanje ovisi o vrsti hrane i trajanju kuhanja.
4 Spremnik za vodu postavite u utor na gornjoj strani aparata i pritisnite ga da biste ga učvrstili.
6 Izvadite veliku posudu s košarom iz aparata tako da povučete ručku.

9 Vratite posudu u Airfryer.
Oprez


2 Napunite spremnik za vodu vodom do maksimalne razine.

10 Uklonite i ispraznite posudu.

11 Isperite košaru i posudu da biste uklonili ostatke. Ako je na posudi i košari ostalo masnoće, očistite ih vodom sa sapunicom ili deterdžentom i spužvom, a zatim ponovno isperite. 12 Obrišite otopljenu masnoću oko grijača krpom ili kuhinjskim ručnikom. Kad upotrebljavate funkcije prženja zrakom ili kuhanja na pari i prženja zrakom, oko grijača se može nakupiti masnoće. Redovitim čišćenje parom i brisanjem održavat ćete čistoću unutrašnjosti gornjeg dijela.

2 Napunite spremnik za vodu vodom do maksimalne razine.


4 Spremnik za vodu postavite u utor na gornjoj strani aparata i pritisnite ga da biste ga učvrstili.
10 Izvadite veliku posudu.

11 Izlijte prljavu vodu.
12 Operite, isperite i osušite posudu i košaru. Komoru za kuhanje obrišite suhom krpom ili kuhinjskim ručnikom.
Preporučujemo upotrebu funkcije čišćenja parom za ispiranje unutrašnjosti kruga vode i sušenje posude.
Napomena

5 Grijaće elemente očistite četkom za čišćenje kako biste uklonili ostatke hrane.

6 Unutrašnjost aparata očistite vrućom vodom i neabrazivnom spužvom.
Napomena
Dvoslojna rešetka koristan je dodatak koji omogućuje kuhanje na dvije razine, ali je kompatibilan samo s velikom posudom.

1 Izvadite veliku posudu iz aparata.

2 Željenu hranu stavite u košaru.
Napomena
- Preporučene namirnice za kuhanje s dvostrukom rešetkom potražite u tablici u nastavku.

3 Dvoslojnu rešetku stavite iznad hrane u košari.
Komplet za doručak omogućuje istovremeno kuhanje do četiri jaja i četiri komada tosta.
Oprez
2 Izvadite donju ploču iz posude.
Napomena
3 Stavite komplet za doručak u malu posudu.

4 Stavite do četiri jaja u komplet za doručak i vratite posudu u aparat.
5 Podesite vrijeme i temperaturu sukladno tablici hrane u nastavku i pritisnite gumb za pokretanje.
Komplet za doručak
Količina Vrijeme kuhanja Temperatura Napomena
Tvrdo kuhana jaja 4 jaja 10 – 12 min
Meko kuhana jaja 4 jaja 8 – 10 min
180 ° C
- Najprije
skuhajte jaja.
Tost dodajte
nakon isteka
pola vremena
kuhanja.
Tost 5 komada 5 – 6 min

6 Nakon isteka pola vremena kuhanja, dodajte šnite tosta u komplet za doručak i nastavite kuhati.
Savjet
Attenzione


Funzione vapore


Uova sode 4 uova 10-12 min
Galvenās daļas
Uzmanību!

2 Iznemiet abas pannas no ierīces, velkot aiz roktura.

6 Ielieciet pannas atpakal Airfryer ierīcē.
Uzmanību!

2 Izņemiet lielo pannu ar grozu no ierīces, velkot aiz roktura.
5 Ielieciet pannu atpakal Airfryer ierīcē.
Uzmanību!

2 Piepildiet üdens tvertni ar üdeni.
5 lespraudiet kontaktdakšu sienas kontaktligzdā.


6 Iznemiet lielo pannu ar grozu no ierīces, velkot aiz roktura.

9 lelieciet pannu atpakal Airfryer ierīcē.
Uzmanību!


Vesela vista 1200 g/42 unces 180 °C 50–60
5 lespraudiet kontaktdakšu sienas kontaktligzdā.

6 Iznemiet lielo pannu ar grozu no ierīces, velkot aiz roktura.

9 Ielieciet pannu atpakal Airfryer ierīcē.
Uzmanību!


10 Iznemiet un iztukšojiet pannu.

![4 U2 I J 6 5 No 6 Izv [2] 7 Va s L 8 No L](/content/2026/06/1384907/images/99dceea32f8c1014856d5c492aa46c992afc6870867ce9cdfb89dce39aeee5ca.jpg)
10 Iznemiet lielo pannu.


3 lelieciet brokastu komplektu mazajā pannā.

Pagrindinès dalys
Dèmesio


Garinimo funkcija
Garinimas pagal maisto lentele


2 Pripildykite vandens bakelj vandens iki maksimalaus lygio.

2 Pripildykite vandens bakelj vandens iki maksimalaus lygio.

![4 U2 k J S v f 5 lju 6 Pa [2] 7 llg P D 8 Pa](/content/2026/06/1384907/images/9709806a2a74466a79e752643f7be769482b5a2ae94a2ad6d73195e2e4de35bd.jpg)


Fő alkatrészek
Vigyázat!


Recycling

Hoofdonderdelen
Let op


5 Zet de pan terug in de Airfryer.
Let op


- CONTENTS
- IMPORTANT
- DANGER
- WARNING
- CAUTION
- RECYCLING
- ELECTROMAGNETIC FIELDS (EMF)
- WARRANTY AND SUPPORT
- INTRODUCTION
- GENERAL DESCRIPTION
- MAIN PARTS
- CONTROL PANEL
- SMALL PAN CONTROL BUTTONS
- BIG PAN CONTROL BUTTONS
- DESCRIPTION OF FUNCTIONS
- WATER TANK
- TIME FUNCTION
- BACK BUTTON
- SHAKING REMINDER
- AIRFRY FUNCTION
- STEAM&AIRFRY FUNCTION
- STEAM FUNCTION
- NO WATER INDICATION ICON
- STEAM CLEAN FUNCTION
- DESCALING FUNCTION
- PAUSE COOKING
- PRESETS
- APPLIANCE NOISE
- SOUND NOTIFICATIONS
- BEFORE FIRST USE
- PREPARATIONS BEFORE FIRST USE
- NOTE
- COOKING INSTRUCTION
- COOKING IN DUAL PAN
- COOKING WITH TIME FUNCTION
- COOKING IN SINGLE PAN
- AIR FRY FUNCTION
- AIR FRY IN BIG PAN WITH THE FOOD TABLE
- FOOD TABLE - BIG PAN
- FOOD TABLE - SMALL PAN
- AIRFRY WITH A PRESET IN BIG PAN
- TIP
- PRESET - BIG PAN
- TIP: KEEP WARM
- STEAM&AIRFRY WITH FOOD TABLE
- STEAM&AIRFRY WITH PRESET
- PRESET TABLE
- STEAM WITH FOOD TABLE
- STEAM WITH PRESET
- MAKING HOME-MADE FRIES
- CLEANING
- USE AUTOMATED CLEANING PROGRAMS
- USING STEAM CLEANING FUNCTION
- USING DESCALING FUNCTION
- GENERAL CLEANING
- ACCESSORIES
- USING THE DOUBLE LAYER
- USING THE SKEWER
- USING THE BREAKFAST KIT
- BREAKFAST KIT AMOUNT COOKING TIME TEMPERATURE NOTE
- STORAGE
- TROUBLESHOOTING
- OBSAH
- HLAVNÍ ČÁSTI
- UPOZORNĚNÍ
- HOVEDDELE
- FORSIGTIG
- BEMÆRK
- DAMPFUNKTION
- DAMPNING MED MADTABEL
- HAUPTTEILE
- WICHTIG
- VORSICHT
- DAMPFFUNKTION
- PÕHIOSAD
- ETTEVAATUST
- MÄRKUS
- RECICLAJE
- PIEZAS PRINCIPALES
- IMPORTANTE
- PRECAUCIÓN
- RECYCLAGE
- PIÈCES PRINCIPALES
- ATTENTION
- RECIKLIRANJE
- ELEKTROMAGNETSKA POLJA (EMF)
- OPREZ
- NAPOMENA
- KOMPLET ZA DORUČAK
- KOLIČINA VRIJEME KUHANJA TEMPERATURA NAPOMENA
- SAVJET
- ATTENZIONE
- FUNZIONE VAPORE
- GALVENĀS DAĻAS
- UZMANĪBU
- PAGRINDINÈS DALYS
- DÈMESIO
- GARINIMO FUNKCIJA
- GARINIMAS PAGAL MAISTO LENTELE
- FŐ ALKATRÉSZEK
- VIGYÁZAT
- HOOFDONDERDELEN
- LET OP
Brand : PHILIPS
Model : NA552
Category : Deep fryer