
HD WEBCAM C310 - Webcam LOGITECH - Free user manual and instructions
Find the device manual for free HD WEBCAM C310 LOGITECH in PDF.
| Product type | HD Webcam |
| Brand | Logitech |
| Model | HD Webcam C310 |
| Maximum video resolution | HD 720p (1280 x 720 pixels) |
| Built-in microphone | Yes, omnidirectional microphone |
| Field of view | 60° (diagonal) |
| Focus | Fixed (optimized for distance from 60 cm to infinity) |
| Sensor | CMOS sensor |
| Embedded technologies | RightLight (brightness correction), face tracking, motion detection |
| Power | Via USB port (built-in 1.5 m cable) |
| Dimensions (approx.) | 9.0 x 4.0 x 4.0 cm |
| Weight (approx.) | 75 g |
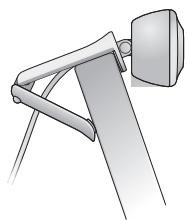
| Mounting | Flexible clip/base for screens, tripod (not included) |
| Included software | Logitech Webcam Software, Logitech Vid HD |
| System compatibility | Windows (7, 8, 10), macOS (10.10 and later) |
| Connectivity | USB 2.0 (compatible with USB 1.1) |
| Maintenance and cleaning | Clean the lens and housing with a soft, dry cloth. Do not use abrasive products. |
| Safety | Keep out of reach of children. Do not expose to moisture or extreme temperatures. |
| Spare parts and repairability | Not user serviceable. No spare parts available. Contact Logitech customer service in case of problems. |
| General information | HD webcam for video calls, streaming, and captures. 2-year warranty. |
Frequently Asked Questions - HD WEBCAM C310 LOGITECH
User questions about HD WEBCAM C310 LOGITECH
0 question about this device. Answer the ones you know or ask your own.
Ask a new question about this device
Download the instructions for your Webcam in PDF format for free! Find your manual HD WEBCAM C310 - LOGITECH and take your electronic device back in hand. On this page are published all the documents necessary for the use of your device. HD WEBCAM C310 by LOGITECH.
USER MANUAL HD WEBCAM C310 LOGITECH
Getting started with
Thank you for buying a Logitech webcam!
Use this guide to set up your Logitech webcam and to begin making video calls.
If you have questions before you start, please visit the websites listed below to learn more about Logitech webcams and video calling.
http://www.logitech.com/support
http://www.logitech.com/webcam_howto
http://www.logitech.com/whatisvid
http://www.logitech.com
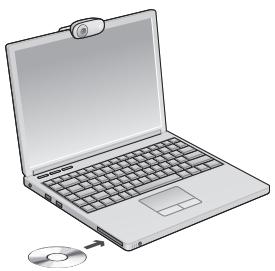
Setting up your webcam
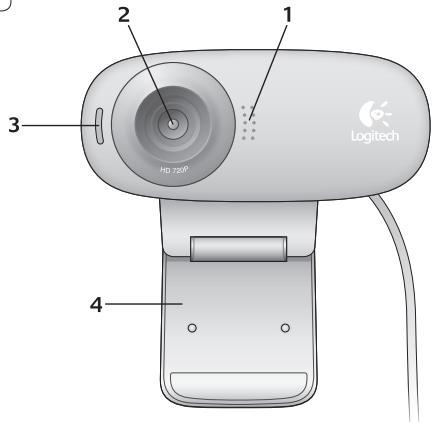
1 Place your webcam
2
Install the software
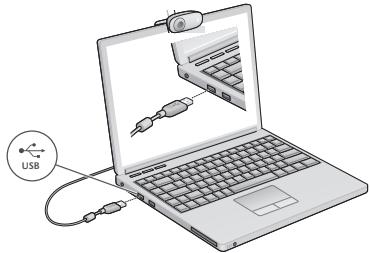
3
When prompted, connect your webcam
Getting started with video calling

Your webcam comes with Logitech® Vid™ HD
With Logitech Vid HD, video calling live over the Internet takes only a few, easy steps:
- Install Logitech Vid HD
- Create an account
- Add a friend and make a video call
Learn more: http://www.logitech.com/whatisvid
Setting up Logitech Vid HD
1
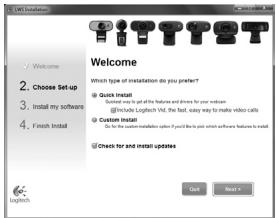
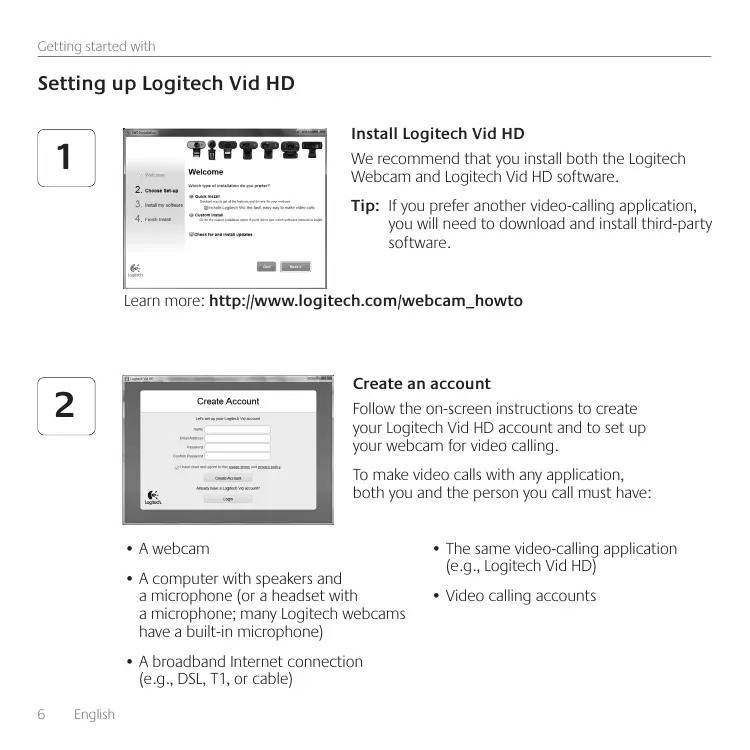
Install Logitech Vid HD
We recommend that you install both the Logitech Webcam and Logitech Vid HD software.
Tip: If you prefer another video-calling application, you will need to download and install third-party software.
Learn more: http://www.logitech.com/webcam_howto
2
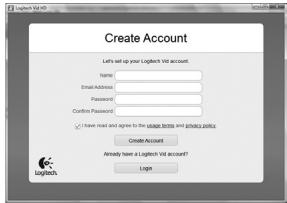
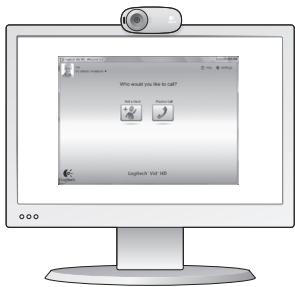
Create an account
Follow the on-screen instructions to create your Logitech Vid HD account and to set up your webcam for video calling.
To make video calls with any application, both you and the person you call must have:
A webcam
- A computer with speakers and a microphone (or a headset with a microphone; many Logitech webcams have a built-in microphone)
- A broadband Internet connection (e.g., DSL, T1, or cable)
- The same video-calling application (e.g., Logitech Vid HD)
Video calling accounts
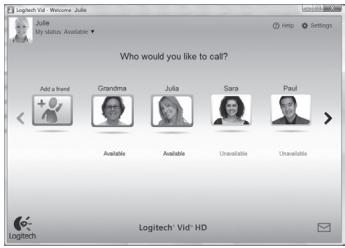
3

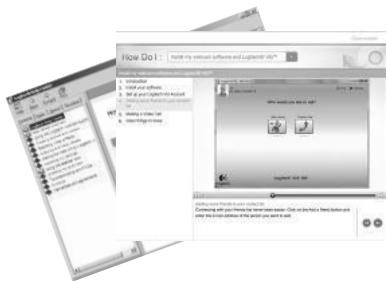
Add a friend or make a practice call

Click on the Practice Call tile to test your settings.
Tip: The Practice Call tile is always available on your Contact List so you can test your settings.

To add a friend, click on the Add a Friend tile and enter your friend's e-mail when prompted.
After your friend has accepted your invitation, click on your friend's picture to make a call.
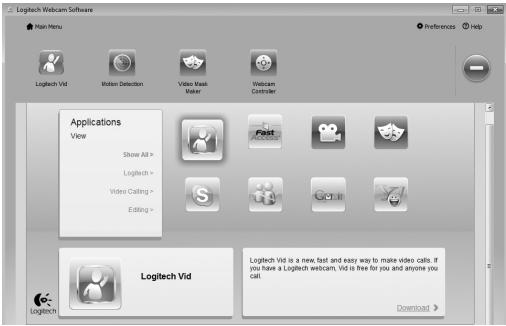
Accessing account settings and starting applications
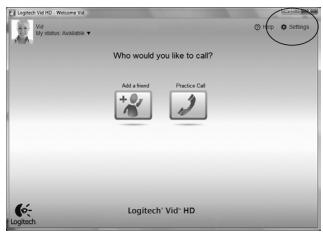

1
Logitech Webcam Software

2
Logitech Vid
Logitech automatically detects and adjusts the best settings for your webcam. If you would like to re-take your profile picture or update any of your settings, click the Settings icon.
Double-click the icons to launch your applications.
- Logitech Webcam Software
- Logitech Vid HD
Tip: The Logitech Vid HD icon is only present if you chose to install Logitech Vid HD. To learn about third-party video calling, please visit:
www.logitech.com/webcam_howto
Navigating the Logitech Webcam Software
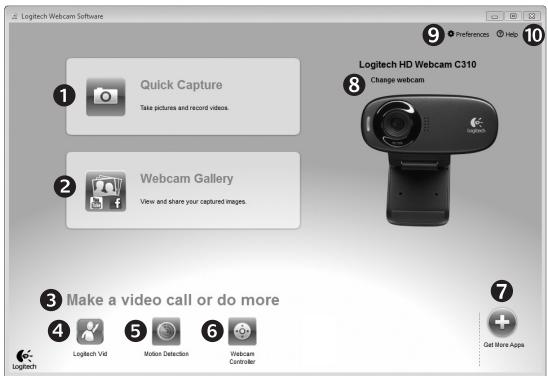
- Capture pictures and videos
- View captured images and share via e-mail, Facebook, or YouTube.
- An area for easy access to your installed webcam-related applications
-
Launch Logitech Vid HD (if installed)
-
Capture videos triggered by detected motion
- Control your video effects and webcam while on a video call
- Download additional webcam applications
-
Change webcams (when you have more than one)
-
Open Logitech Webcam Software settings
- Open help dashboard (manuals and how-to videos)
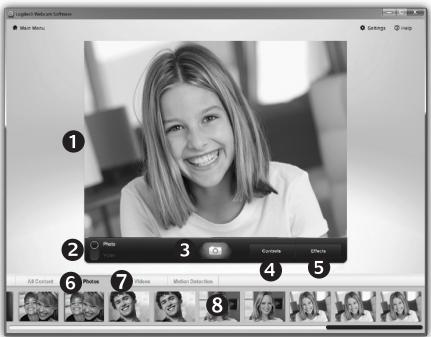
Capturing video and snapping pictures
The gallery: viewing and sharing

Quick Capture allows you to take photos or record videos easily.
You have easy access to webcam controls and settings as well as video effects to personalize your images and recordings.
- Preview window
- Capture mode: photo/video
- Capture button
- Webcam controls
-
Video effects and fun filters (for webcams that support this feature)
-
Photo thumbnails
- Video humbnails
- Click a thumb-nail to enter the gallery
Clicking on an image thumbnail in the gallery (1) opens the video or photo in the review window (2).
- Attach a video or picture file to an e-mail (3)
- Edit a photo or splice together video (4)
- Upload a picture or video to Facebook (5)
- Upload a video to YouTube (6)
You may also drag and drop a gallery image onto one of the function tiles (items 3-6) to launch an editing application or to attach or upload.
Using motion detection
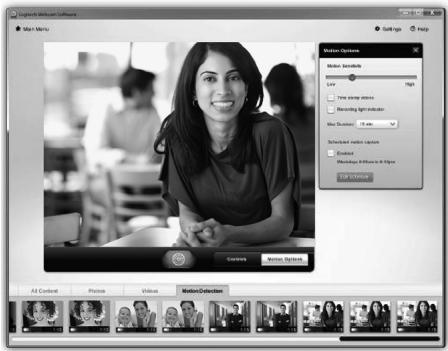
- Set up your webcam to record video when it detects movement.
- Adjust captured video duration and detection sensitivity.
- Captured video is automatically saved to your computer.
View content in the Gallery or upload it using the One-touch Upload window.
Personalizing videos and pictures
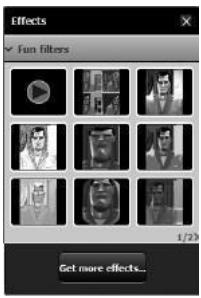
Your webcam offers video fun filters, which you can use to alter your appearance in the video stream.
You can also download more free fun filters through your Logitech Webcam Software.
Fine tuning your webcam during a video call
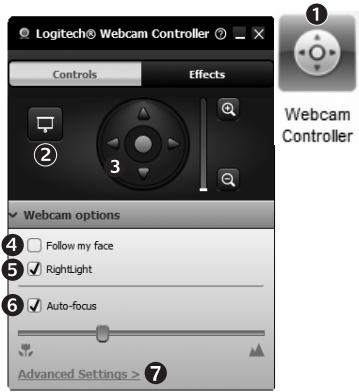
- Launch the webcam controller when on a video call.
- Hide your video image with a photo while your webcam stays connected.
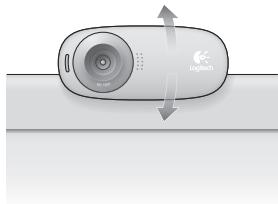
- Use pan and tilt to find the best angle.
- Use Face Tracking so you're always in the picture.
- Correct for poor lighting environments using RightLight.
- Choose between auto- or manual focus for webcams that support this feature.
- Specify webcam operating characteristics.
Tip: Not all webcam models offer all of these webcam controls.
Get more applications for your webcam
Press this button to get more webcam applications.
Download and install additional applications for your webcam, like video calling, photo and video editing, and other value-added programs.
Getting help
Click on the help icon to access a complete user manual, or watch how-to videos that show you how to get the most out of your Logitech webcam and software.
Tip: If you are not sure about a feature, click the help icon, and our manual will open to the right place.

Funciones
www.logitech.com/support
| United States | +1 646-454-3200 |
| Argentina | +00800-555-3284 |
| Brasil | +0 800-891-4173 |
| Canada | +1 866-934-5644 |
| Chile | 1230 020 5484 |
| Latin America | +1 800-578-9619 |
| Mexico | 001 800 578 9619 |
www.logitech.com
- Thank you for buying a Logitech webcam!
- Setting up your webcam
- Place your webcam
- 2
- Install the software
- 3
- Getting started with video calling
- Your webcam comes with Logitech® Vid™ HD
- Setting up Logitech Vid HD
- Install Logitech Vid HD
- Create an account
- Add a friend or make a practice call
- Accessing account settings and starting applications
- Navigating the Logitech Webcam Software
- Capturing video and snapping pictures
- The gallery: viewing and sharing
- Using motion detection
- Personalizing videos and pictures
- Fine tuning your webcam during a video call
- Get more applications for your webcam
- Getting help
- Funciones
- www.logitech.com/support
Brand : LOGITECH
Model : HD WEBCAM C310
Category : Webcam