
PL3816 - Saw POULAN - Free user manual and instructions
Find the device manual for free PL3816 POULAN in PDF.


| Product Type | Gas Chainsaw |
| Brand | Poulan |
| Model | PL3816 |
| Engine Displacement | 38 cc |
| Bar Length | 16 inches (40 cm) |
| Fuel Type | Mixed gasoline (2-stroke oil ratio 40:1) |
| Fuel Tank Capacity | 0.35 L (approx.) |
| Oil Tank Capacity | 0.2 L (approx.) |
| Weight (without bar and chain) | 4.5 kg (approx.) |
| Overall Dimensions (L x W x H) | 40 x 25 x 28 cm (approx.) |
| Chain Pitch | 3/8 inch low profile |
| Chain Gauge | 0.050 inch (1.3 mm) |
| Chain Brake | Yes, inertia activated |
| Automatic Oiler | Yes, adjustable flow |
| Anti-Vibration System | Yes |
| Primer Bulb | Yes |
| Starting System | Recoil starter with automatic choke |
| Maintenance | Clean air filter regularly; sharpen chain; replace spark plug annually |
| Safety Features | Chain brake, hand guard, low kickback chain |
| Spare Parts Available | Chain, bar, air filter, spark plug, starter assembly |
| Recommended Use | Felling small trees, limbing, cutting firewood |
Frequently Asked Questions - PL3816 POULAN
User questions about PL3816 POULAN
0 question about this device. Answer the ones you know or ask your own.
Ask a new question about this device
Download the instructions for your Saw in PDF format for free! Find your manual PL3816 - POULAN and take your electronic device back in hand. On this page are published all the documents necessary for the use of your device. PL3816 by POULAN.
USER MANUAL PL3816 POULAN
WARNING! Read and follow all Safety Rules and Operating Instructions before using this product. Failure to do so can result in serious injury.
Quick-Start Guide
NOTE: Your product may differ slightly from the item shown.

Mix 2.6 oz. of full synthetic 2-Cycle Oil with 1 gallon of gasoline for a 50:1 mixture. Shake well. Pour into fuel tank.
CAUTION: Do not use alternate fuels such as ethanol blends above 10% by volume (E-15, E-85) or any methanol blended fuel.
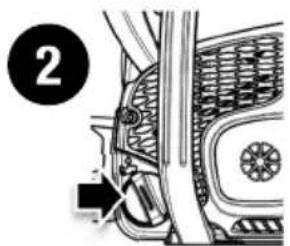
Add bar and chain oil to oil tank until full.

natural_image
Illustration of a person in safety gear handling a tool or device (no text or symbols visible)
natural_image
Illustration of a car seatbelt with a numbered label (3) and a handle, no text or symbols present.Make sure chain brake is locked by pushing forward on handguard.

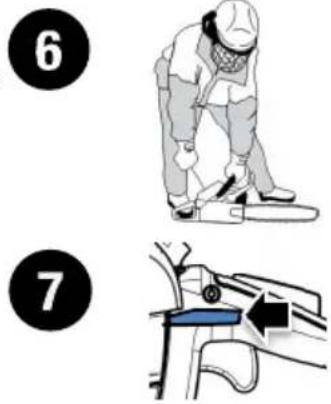
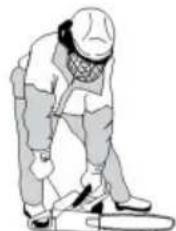
Place right foot in rear handle as shown. Using right hand, pull starter rope sharply until machine starts, or a maximum of 5 times.
Push blue choke lever to half choke position.
NOTE: In temperatures above 90°F (32°C), push blue choke lever completely in.
Pull starter rope until engine starts.

Slowly press primer (air purge) bulb 10 times.
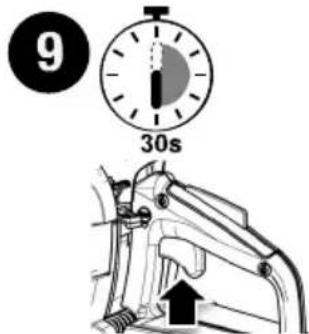
Allow engine to warm for 30 seconds. Squeeze throttle trigger to set normal idle.
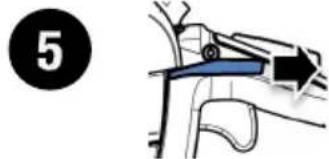
Pull blue choke lever out fully.

natural_image
Illustration of a car interior with a handle and cable, no text or symbols presentBefore accelerating to full throttle, make sure chain brake is unlocked by pulling back on handguard.
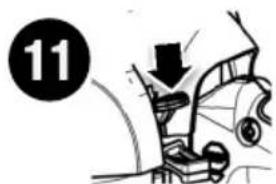
Press red switch to STOP position when finished using saw.
IMPORTANT:
- Never let your saw chain come in contact with soil/dirt during operation. This will completely dull your chain and will require installation of a new chain.
- Check your chain tension prior to each time you start the chainsaw. Check tension on a new chain after the first 15 minutes of operation. See the manual for chain tensioning instructions.
IDENTIFICATION OF SYMBOLS



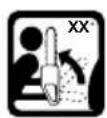


WARNING!
Chainsaws can be dangerous! Careless or improper use can result in serious or fatal injury to the operator or others.
Please read the operator's manual carefully and make sure you understand the instructions before using the machine.
Always wear:
• Approved protective helmet
• Approved hearing protection
- Protective goggles or a visor
Both of the operator's hands must be used to operate the chainsaw.
Never operate a chainsaw holding it with one hand only.
Contact of the guide bar tip with any object must be avoided.

WARNING! Tip contact may cause the guide bar to move suddenly upward and backward (so-called kickback), which may cause serious injury.
Primer (air purge) bulb.
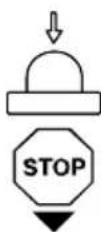
The engine is stopped by switching the ignition off using the stop switch.
Fuel fill.
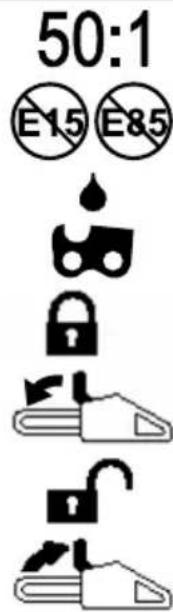
50:1 gasoline to oil ratio.
Do not use E15 or E85 blended fuels.
Bar and chain oil fill.
Lock chain brake.
Unlock chain brake.

Chain brake unlocked/locked.
Other symbols/decals on the machine refer to special certification requirements for certain markets.
The Emissions Compliance Period referred to on the Emission Compliance label indicates the number of operating hours for which the engine has been shown to meet Federal emissions requirements.
Maintenance, replacement, or repair of the emission control devices and system may be performed by any nonroad engine repair establishment or individual.


WARNING! The engine exhaust from this product contains chemicals known to the State of California to cause cancer, birth defects or other reproductive harm.
IDENTIFICATION (WHAT IS WHAT?)

NOTE: The appearance of your product may vary from the item shown.
(*) = Configuration for models equipped with chain tensioning screw located on front. Does not apply to all models.
(**) = Configuration for models equipped with chain tensioning screw located on side. Does not apply to all models.
-
Combination tool
-
Chain
-
Front hand guard
-
Muffler
-
Front handle
-
Starter rope
-
Idle speed screw
-
ON/STOP switch
-
Choke/fast idle lever
-
Primer (air purge) bulb
-
Fuel mix fill cap
-
Starter housing
-
Bar and chain oil fill cap
-
Bumper spike
-
Cylinder cover
-
Throttle lock-out
-
Rear handle
-
Throttle trigger
-
Clutch cover
-
Chain catcher
-
Guide bar
-
Chain brake
-
Cutters
-
Depth gauge
-
Drive links
-
Chain direction of travel
-
Guide bar retaining nuts
-
Chain tensioning screw
-
Manual
SAFETY

WARNING! Always disconnect spark plug wire and place wire where it cannot contact spark plug to prevent accidental starting when setting up, transporting, adjusting or making repairs except carburetor adjustments.
STANDARDS
This saw has been designed in accordance with:
ANSI B175.1-2012 American National Standards for Gasoline-Powered Chain Saws - Safety Requirements
CSA Z62.1-11 Chain Saws – Occupational Health and Safety
CSA Z62.3-11 Chain Saw Kickback Occupational Health and Safety
INTRODUCTION
A chainsaw is a high-speed wood-cutting tool. Special safety precautions must be observed to reduce the risk of accidents.
Failure to follow all safety rules and precautions can result in serious injury.
If situations occur which are not covered in this manual, use care and good judgment. If you need assistance, contact your authorized service dealer or call consumer support.
PLANNING AHEAD
- Read this manual carefully until you completely understand and can follow all safety rules, precautions, and operating instructions before attempting to use the unit.
- Restrict the use of your saw to adult users who understand and can follow safety rules, precautions, and operating instructions found in this manual.
- Wear protective gear. Always use steel-toed safety footwear with non-slip soles; snug-fitting clothing; safety chaps; heavy-duty, non-slip gloves; eye protection such as non-fogging, vented goggles or face screen; an approved safety hard hat; and sound barriers (ear plugs or mufflers) to protect your hearing. Regular users should have hearing checked regularly as chainsaw noise can damage hearing. Secure hair above shoulder length.

- Keep all parts of your body away from the chain when the engine is running.
-
Keep children, bystanders, and animals a minimum of 30 feet (10 meters) away from the work area. Do not allow other people or animals to be near the chainsaw when starting or operating the chainsaw.
-
Do not handle or operate a chainsaw when you are fatigued, ill, or upset, or if you have taken alcohol, drugs, or medication. You must be in good physical condition and mentally alert. Chainsaw work is strenuous. If you have any condition that might be aggravated by strenuous work, check with your doctor before operating a chainsaw.
- Carefully plan your sawing operation in advance. Do not start cutting until you have a clear work area, secure footing, and, if you are felling trees, a planned retreat path.
OPERATING YOUR SAW
- Do not operate a chainsaw with one hand. Serious injury to the operator, helpers, bystanders or any combination of these persons may result from one-handed operation. A chainsaw is intended for two-handed use.
- Operate the chainsaw only in a well-ventilated outdoor area.
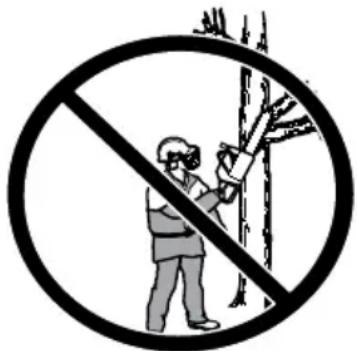
- Do not operate saw from a ladder or in a tree.

- Make sure the chain will not make contact with any object while starting the engine. Never try to start the saw when the guide bar is in a cut.
- Do not put pressure on the saw at the end of the cut. Applying pressure can cause you to lose control when the cut is completed.
- Stop the engine before setting the saw down.
- Do not operate a chainsaw that is damaged, improperly adjusted, or not completely and securely assembled. Always replace bar, chain, hand guard, or chain brake immediately if it becomes damaged, broken or is otherwise removed.
- Exposure to vibrations through prolonged use of gasoline powered hand tools could cause blood vessel or nerve damage in the fingers, hands, and joints of people prone to circulation disorders or abnormal swellings. Prolonged use in cold weather has been linked to blood vessel damage in otherwise healthy people. If symptoms occur such as numbness, pain, loss of strength, change in skin color or texture, or loss of feeling in the fingers, hands, or joints, discontinue the use of this tool and seek medical attention. An anti-vibration system does not guarantee the avoidance of these problems. Users who operate power tools on a continual and regular basis must monitor closely their physical condition and the condition of this tool.
- With the engine stopped, hand-carry the chainsaw with the muffler away from your body, and the guide bar and chain to the rear, preferably covered with a scabbard.
MAINTAINING YOUR SAW

natural_image
Line drawing of a person in traditional attire holding a chainsaw (no text or symbols)- Have all chainsaw service performed by a qualified service dealer with the
exception of the items listed in the maintenance section of this manual. For example, if improper tools are used to remove or hold the flywheel when servicing the clutch, structural damage to the flywheel can occur and cause the flywheel to burst.
- Make certain the saw chain stops moving when the throttle trigger is released. For correction, refer to Carburetor Adjustment.
- Never modify your saw in any way.
- Keep the handles dry, clean, and free of oil or fuel mixture.
- Keep fuel and oil caps, screws, and fasteners securely tightened.
- Use only genuine accessories and replacement parts as recommended.
- Your saw is equipped with a temperature limiting muffler and spark arresting screen which meets the requirements of California Codes 4442 and 4443. All U.S. forest land and the states of California, Idaho, Maine, Minnesota, New Jersey, Oregon, and Washington require by law that many internal combustion engines to be equipped with a spark arresting screen. If you operate a chainsaw in a state or locale where such regulations exist, you are legally responsible for maintaining the operating condition of these parts. Failure to do so is a violation of the law. Refer to the SERVICE section for maintenance of the spark arresting screen.
HANDLING FUEL
- Do not smoke while handling fuel or while operating the saw.
- Eliminate all sources of sparks or flame in the areas where fuel is mixed or poured. There should be no smoking, open flames, or work that could cause sparks. Allow engine to cool before refueling.
- Always have fire extinguishing tools available if you should need them.
- Mix and pour fuel in an outdoor area on bare ground; store fuel in a cool, dry, well ventilated place; and use an approved, marked container for all fuel purposes. Wipe up all fuel spills before starting saw.
- Move at least 10 feet (3 meters) from fueling site before starting engine.
- Turn the engine off and let saw cool in a non-combustible area, not on dry leaves, straw, paper, etc. Slowly remove fuel cap and refuel unit.
- Store the unit and fuel in an area where fuel vapors cannot reach sparks or open flames from water heaters, electric motors or switches, furnaces, etc.
UNDERSTANDING KICKBACK

WARNING! Avoid kickback which can result in serious injury. Kickback is the backward, upward or sudden forward motion of the guide bar occurring when the saw chain near the upper tip of the guide bar contacts any object such as a log or branch, or when the wood closes in and pinches the saw chain in the cut. Contacting a foreign object in the wood can also result in loss of chainsaw control.
ROTATIONAL KICKBACK
Rotational kickback can occur when the moving chain contacts an object at the upper tip of the guide bar. This contact can cause the chain to dig into the object, which stops the

chain for an instant. The result is a lightning fast, reverse reaction which kicks the guide bar up and back toward the operator.
■ PINCH KICKBACK
Pinch kickback can occur when the wood closes in and pinches the moving saw chain in the cut along the top of the guide bar and the saw chain is suddenly stopped. This sudden stopping of the chain results in a reversal of the chain force used to cut wood and causes the saw to move in the opposite direction of the chain rotation. The saw is driven straight back toward the operator.
■ PULL-IN
Pull-in can occur when the moving chain contacts a foreign object in the wood in the cut along the bottom of the guide bar and the saw chain is suddenly stopped. This sudden stopping pulls the saw forward and away from the operator and could easily cause the operator to lose control of the saw.
REDUCING THE CHANCE OF KICKBACK
- Recognize that kickback can happen. With a basic understanding of kickback, you can reduce the element of surprise which contributes to accidents.
- Never let the moving chain contact any object at the tip of the guide bar.
- Keep the working area free from obstructions such as other trees, branches, rocks, fences, stumps, etc. Eliminate or avoid any obstruction that your saw chain could hit while you are cutting. When cutting a branch, do not let the guide bar contact branch or other objects around it.
- Keep your saw chain sharp and properly tensioned. A loose or dull chain can increase the chance of kickback occurring. Follow manufacturer's chain sharpening and maintenance instructions. Check tension at regular intervals with the engine stopped, never with the engine running. Make sure the bar nuts are securely tightened after tensioning the chain.
- Begin and continue cutting at full speed. If the chain is moving at a slower speed, there is greater chance of kickback occurring.
-
Use wedges made of plastic or wood. Never use metal to hold the cut open.
-
Cut one log at a time.
- Use extreme caution when re-entering a previous cut.
- Do not attempt cuts starting with the tip of the bar (plunge cuts).
- Watch for shifting logs or other forces that could close a cut and pinch or fall into chain.
- Do not twist the saw as the bar is withdrawn from an undercut when bucking.
- Use the reduced-kickback guide bar and low-kickback chain specified for your saw.
MAINTAINING CONTROL
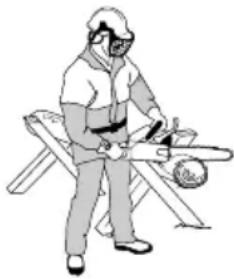
- Keep a good, firm grip on the saw with both hands when the engine is running and don't let go. A firm grip will help you reduce kickback and maintain control of the saw. Keep the fingers of your left hand encircling and your left thumb under
natural_image
Illustration of a person wearing protective gear and using a manual workbench (no text or symbols)the front handlebar. Keep your right hand completely around the rear handle whether you are right handed or left handed. Keep your left arm straight with the elbow locked.
- Position your left hand on the front handlebar so it is in a straight line with your right hand on the rear handle when making bucking cuts. Never reverse right and left hand positions for any type of cutting.
- Stand with your weight evenly balanced on both feet.
- Stand slightly to the left side of the saw to keep your body from being in a direct line with the cutting chain.
- Do not overreach. You could be drawn or thrown off balance and lose control of the saw.
- Do not cut above shoulder height. It is difficult to maintain control of saw above shoulder height.
KICKBACK SAFETY FEATURES

WARNING! The following features are included on your saw to help reduce the hazard of kickback; however, such features will not totally eliminate this danger. As a chainsaw user, do not rely only on safety devices. You must follow all safety precautions, instructions, and maintenance in this manual to help avoid kickback and other forces which can result in serious injury.
REDUCED KICKBACK GUIDE BAR
The reduced-kickback guide bar is designed with a small radius tip which reduces the size of the kickback danger zone on the bar tip. A reduced-kickback guide bar has been demonstrated to significantly reduce the number and seriousness of kickbacks when tested in accordance with safety requirements for gasoline powered chainsaws as set by ANSI B175.1.
A low-kickback chain is designed with a contoured depth gauge and guard link which deflect kickback force and allow wood to gradually ride into the cutter. Low-kickback chain has met kickback performance requirements when tested on a representative sample of chainsaws below 3.8 cubic inch displacement specified in ANSI B175.1.
■ FRONT HAND GUARD
The front hand guard is designed to reduce the chance of your left hand contacting the chain if your hand slips off the front handlebar.
The distance and “in-line” position of the hands provided by the front and rear handles work together to give balance and resistance in controlling the pivot of the saw back toward the operator if kickback occurs.
■ CHAIN BRAKE
The chain brake is designed to stop the chain in the event of kickback.
NOTE: We do not represent and you should not assume that the chain brake will protect you in the event of a kickback. Do not rely upon any of the devices built into your saw. You should use the saw properly and carefully to avoid kickback.
Repairs on a chain brake should be made by an authorized servicing dealer. Take your unit to the place of purchase if purchased from a servicing dealer, or to the nearest authorized master service dealer.
NOTE: If this saw is to be used for commercial logging, a chain brake is required and shall not be removed or otherwise disabled to comply with Federal OSHA Regulations for Commercial Logging.
ASSEMBLY
If received assembled, repeat all steps to ensure your saw is properly assembled and all fasteners are secure.
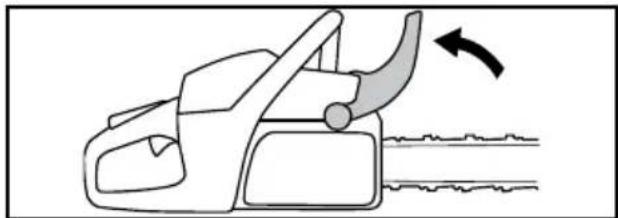
- Check that the chain brake is in the unlocked position by pulling the front hand guard towards the front handle.
natural_image
Line drawing of a chain-linker with motion arrow indicating clockwise motion (no text or symbols)-
Loosen and remove the bar nuts and the clutch cover from the saw.
-
Remove the plastic shipping spacer (A) if present.

- An adjusting pin and screw is used to adjust the tension of the chain. It is very important when assembling the bar that the adjusting pin located on the adjusting screw aligns into a hole in the bar. Turning the screw will move the adjusting pin up and down the screw. Locate this adjusting pin before you begin mounting the bar onto the saw. See following illustration.

-
Turn the adjusting screw by hand counterclockwise until the adjusting pin is positioned between the indicator marks (B) on the clutch cover. This should allow the adjusting pin to be near the correct position.
-
Slide guide bar with chain on bar bolts until guide bar stops against clutch drum sprocket. Cutters must face in the direction of rotation.

- Check that the drive links of the chain fit correctly on the drive sprocket and that the chain is in the groove on the bar.
- Fit the clutch cover and insert the adjusting pin in the cut-out in the bar.
-
Tighten the bar nut finger-tight.
-
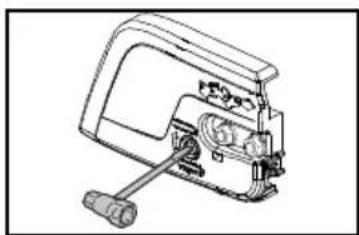
Tension the chain by turning the chain tensioning screw clockwise using the combination tool. The chain is correctly tensioned when it does not sag from the underside of the bar, but can still be turned easily by hand.
natural_image
Technical line drawing of a mechanical device with no visible text or symbolsChain tensioning-side adjust models

natural_image
Technical line drawing of a mechanical device with handle and lever (no text or symbols)Chain tensioning- front adjust models
- Hold up the bar tip and tighten the bar nuts with the combination tool.

When fitting a new chain, the chain tension has to be checked frequently until the chain is run-in. Check the chain tension regularly. A correctly tensioned chain ensures good cutting performance and long life.
STARTING AND STOPPING
Perform the following steps before every use of the machine:
- Check fuel mixture level
- Check bar lubrication
- Check chain sharpness
NOTE: Chain sharpening is a complicated task that requires special tools. We recommend that you refer chain sharpening to a professional chain sharpener.
- Check chain tension
- Inspect and clean the guide bar
- Check for damaged parts
- Check for loose caps
- Check for loose fasteners
- Check for loose parts
- Check for fuel and oil leaks
NOTE: It is normal for a small amount of oil to appear under the saw after the engine stops. Do not confuse this with a leaking oil tank.
FUELING THE ENGINE

WARNING! Be sure to read the fuel handling information in the safety rules section of this manual before you begin. If you do not understand the fuel handling information do not attempt to fuel your unit. Seek help from someone that does understand the information or call the consumer assistance help line.

WARNING! Remove the fuel cap slowly when fueling.
This equipment is designed to operate on unleaded gasoline with a minimum 87 octane (R+M/2 method), with ethanol blended up to 10% maximum by volume (E-10).
Before operation, gasoline must be mixed with a good quality full synthetic 2-cycle air-cooled engine oil designed to be mixed at a ratio of 50:1.
A 50:1 ratio is obtained by mixing 2.6 fluid ounces of full synthetic oil with 1 gallon of unleaded gasoline. DO NOT USE automotive oil or marine oil. These oils will cause engine damage.
When mixing fuel, follow the instructions printed on the container. Once the oil is added to the gasoline, shake the container momentarily to assure that the fuel is thoroughly mixed.
Fill the fuel tank completely with properly mixed fuel.
Always read and follow the safety rules relating to fuel before fueling your unit.
Purchase fuel in quantities that can be used within 30 days to assure fuel freshness.

HELPFUL TIP
During storage of your fuel mixture, the oil will separate from the gasoline.
Shake the fuel can weekly to insure proper blending of the gasoline and oil.
CAUTION: Never use unmixed gasoline in your unit. This will cause permanent engine damage and void the limited warranty.
CAUTION: Do not use alternate fuels such as ethanol blends above 10% by volume (E-15, E-85) or any methanol blended fuel. Use of these fuels can cause major engine performance problems and void the limited warranty.
BAR AND CHAIN LUBRICATION
The bar and chain require continuous lubrication. Lubrication is provided by the automatic oiler system when the oil tank is kept filled. Lack of oil will quickly ruin the bar and chain. Too little oil will cause overheating shown by smoke coming from the chain and/or discoloration of the bar. In freezing weather oil will thicken, making it necessary to thin bar and chain oil with a small amount (5 to 10%) of #1 diesel fuel or kerosene. Bar and chain oil must be free flowing for the oil system to pump enough oil for adequate lubrication.
If bar and chain oil is not available, use a good grade SAE 30 oil.
Fill the oil tank completely with oil.
CAUTION: Never use waste oil for bar and chain lubrication.
CAUTION: Always stop the engine before removing the oil cap.
STARTING POSITION

natural_image
Illustration of a person using a power tool to cut a saw (no text or symbols present)- Lay the chainsaw on a flat surface. The cutting attachment must not be in contact with the ground.
- Lock the chain brake by pushing forward on the handguard.
- Place your left hand on the handlebar and your right hand on the starter rope. Push your right foot into the rear handle to stabilize the chainsaw.
- Follow the starting instructions.
STARTING
Follow these instructions to start your chainsaw. Your chainsaw has a starting reminder decal similar to the one shown below:

■ Starting a Cold Engine

Make sure the chain brake is locked before starting.

Press the primer (air purge) bulb 10 times until fuel begins to fill the bulb. The primer (air purge) bulb does not need to be completely filled.

Pull the blue choke lever to the FULL CHOKE position. The red ON/STOP switch will be switched automatically to the ON position.
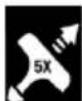
Using your right hand, pull the starter rope sharply until the machine attempts to start, or a maximum of 5 times.
NOTE: If the engine sounds as if it is trying to start before the fifth pull, stop pulling and immediately proceed to the next step.
NOTE: Do not attempt to cut material with the choke/fast idle lever in the FULL CHOKE position.
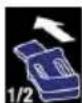
Push the blue choke lever to the HALF CHOKE position.
NOTE: In temperatures above 90irc F ( 32irc C), push the blue choke lever completely in.

Pull the starter rope sharply with your right hand until the engine starts.

Allow the engine to run for 30 seconds.
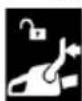
Before accelerating to full throttle, pull the front hand guard towards the front handle. The chain brake is now unlocked. Your chainsaw is now ready for use.

WARNING! The chain must not move when the engine runs at idle speed. If the chain moves at idle speed refer to CARBURETOR ADJUSTMENT within this manual.

WARNING! Do not attempt to throw or drop-start the chainsaw. Doing so will put the operator at risk of serious injury due to loss of control of the chainsaw.

WARNING! The muffler is very hot during and after use. Do not touch the muffler or allow combustible material such as dry grass or fuel to do so.

HELPFUL TIP
If your engine still does not start after following the instructions, contact consumer assistance.
■ Starting a Warm Engine

Make sure the chain brake is locked before starting.

Press the primer (air purge) bulb 10 times until fuel begins to fill the bulb. The primer (air purge) bulb does not need to be completely filled.

Pull the blue choke lever to the FULL CHOKE position.

Push the blue choke lever to the HALF CHOKE position.

NOTE: In temperatures above 90irc F ( 32irc C), push the blue choke lever completely in.

Pull the starter rope sharply with your right hand until the engine starts.
Before accelerating to full throttle, pull the front hand guard towards the front handle. The chain brake is now unlocked. Your chainsaw is now ready for use.
■ Starting a Flooded Engine
The engine may be flooded with too much fuel if it has not started after 10 pulls.
Flooded engines can be restarted by pushing the blue choke lever in completely to the OFF CHOKE position and then following the warm engine starting procedure listed above. Ensure the red ON/STOP switch is in the ON position.
Starting could require pulling the starter rope handle many times depending on how badly the unit is flooded. If the engine fails to start, refer to the TROUBLESHOOTING TABLE or call the consumer assistance help line.
CHAIN TENSION
It is normal for a new chain to stretch during the first 15 minutes of operation. You should check your chain tension each time before you start the chainsaw. See the chain tensioning instructions in the ASSEMBLY section.

WARNING! If the saw is operated with a loose chain, the chain could jump off the guide bar and result in serious injury to the operator and/or damage the chain, making it unusable.
The chain brake must be checked before each use. The engine must be running when performing this procedure.
This is the only instance when the saw should be placed on the ground with the engine running.
- Place the saw on firm ground.
- Grip the rear handle with your right hand and the front handle with your left hand.
- Apply full throttle by fully depressing the throttle trigger.
- Activate the chain brake by turning your left wrist toward the hand guard without releasing your grip around the front handle. The chain should stop immediately.

natural_image
Diagram of a hand operating a chain with a stop button, showing motion and movement (no text or symbols)CHECKING THE INERTIA ACTIVATING FUNCTION CONTROL

WARNING! When performing the following procedure, the engine must be turned off.
- Grip the rear handle with your right hand and the front handle with your left hand.
- Hold the chainsaw approximately 16-18 inches (40-45 centimeters) above a stump or other wooden surface.
- Release your grip on the front handle and use the weight of the saw to let the tip of the guide bar fall forward and contact the stump. When the tip of the bar hits the stump, the brake should activate.
WORKING TECHNIQUES
PRACTICING YOUR CUTS
Practice cutting a few small logs using the following techniques to get the "feel" of using your saw before you begin a major sawing operation.
- Squeeze the throttle trigger and allow the engine to reach full speed before cutting.
- Begin cutting with the saw frame against the log.
- Keep the engine at full speed the entire time you are cutting.
- Allow the chain to cut for you. Exert only light downward pressure. If you force the cut, damage to the guide bar, chain, or engine can result.
- Release the throttle trigger as soon as the cut is completed, allowing the engine to idle. If you run the saw at full throttle without a cutting load, unnecessary wear can occur to the chain, guide bar, and engine. It is recommended that the engine not be operated for longer than 30 seconds at full throttle.
- To avoid losing control when cut is complete, do not put pressure on saw at end of cut.
- Stop the engine before setting the saw down after cutting.
FELLING A TREE
■ PLANNING

WARNING! Check for broken or dead branches which can fall while cutting causing serious injury. Do not cut near buildings or electrical wires if you do not know the direction of tree fall, nor cut at night since you will not be able to see well, nor during bad weather such as rain, snow, or strong winds, etc. If the tree makes contact with any utility line, the utility company should be notified immediately.
Carefully plan your sawing operation in advance.
Clear the work area. You need a clear area all around the tree so you can have secure footing.
The chainsaw operator should keep on the uphill side of the terrain as the tree is likely to roll or slide downhill after it is felled.
Study the natural conditions that can cause the tree to fall in a particular direction.
Natural conditions that can cause a tree to fall in a particular direction include:
• The wind direction and speed.
- The lean of the tree. The lean of a tree might not be apparent due to uneven or sloping terrain. Use a plumb or level to determine the direction of tree lean.
• Weight and branches on one side.
• Surrounding trees and obstacles.
Look for decay and rot. If the trunk is rotted, it can snap and fall toward the operator. Check for broken or dead branches which can fall on you while cutting.
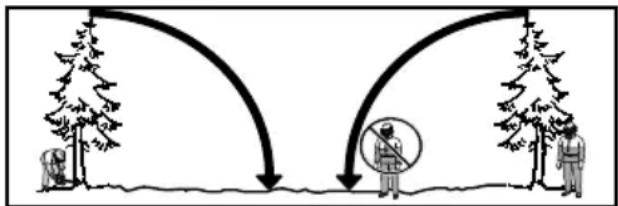
Make sure there is enough room for the tree to fall. Maintain a distance of 2-1/2 tree lengths from the nearest person or other objects. Engine noise can drown out a warning call.
flowchart
graph TD
    A["Tree"] --> B["Person with Circle"]
    B --> C["Trees"]
Remove dirt, stones, loose bark, nails, staples, and wire from the tree where cuts are to be made.
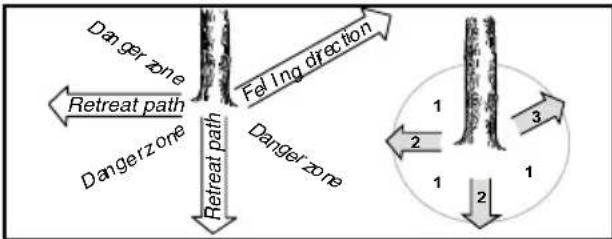
Plan a clear retreat path to the rear and diagonal to the line of fall. Note the danger zone (1), retreat path (2), and felling direction (3) in the following diagram.
flowchart
graph TD
    A["Danger zone"] --> B["Retreat path"]
    B --> C["Danger zone"]
    C --> D["Retreat path"]
    D --> E["Fel ing direction"]
    E --> F["1"]
    E --> G["2"]
    E --> H["3"]
    F --> I["1"]
    G --> J["2"]
    H --> K["1"]
■ USING THE NOTCH METHOD
The notch method is used to fell large trees. A notch is cut on the side of the tree in the desired direction of fall. After a felling cut is made on the opposite side of tree, the tree will tend to fall into the notch.

natural_image
Diagram showing three sequential steps of a tree trunk bending process, with arrows indicating direction (no text or symbols present)NOTE: If the tree has large buttress roots, remove them before making the notch. If using saw to remove buttress roots, keep saw chain from contacting ground to prevent dulling of the chain.
Make the notch cut by cutting the top of the notch first. Cut through 1/3 of the diameter of the tree. Next complete the notch by cutting the bottom of the notch. Once the notch is cut remove the notch of wood from the tree.

natural_image
Diagram showing tree bark, a circular cross-section with concentric rings, and directional arrows indicating movement (no text or symbols)After removing the wood from the notch, make the felling cut on the opposite side of the notch. This is done by making a cut about two inches (5 cm) higher than the center of the notch. This will leave enough uncut wood between the felling cut and the notch to form a hinge. This hinge will help prevent the tree from falling in the wrong direction.

NOTE: Before felling cut is complete, use wedges to open the cut if necessary to control the direction of fall. To avoid kickback and
chain damage, use wood or plastic wedges, but never steel or iron wedges.
Be alert to signs that the tree is ready to fall: cracking sounds, widening of the felling cut, or movement in the upper branches.
As tree starts to fall, stop saw, put it down, and get away quickly on your planned retreat path.
DO NOT cut down a partially fallen tree with your saw. Be extremely cautious with partially fallen trees that may be poorly supported. When a tree doesn't fall completely, set the saw aside and pull down the tree with a cable winch, block and tackle, or tractor.
CUTTING A FALLEN TREE (BUCKING)
Bucking is the term used for cutting a fallen tree to the desired log size.

WARNING! Do not stand on the log being cut. Any portion can roll causing loss of footing and control. Do not stand downhill of the log being cut.
■ IMPORTANT POINTS
- Cut only one log at a time.
- Cut shattered wood very carefully; sharp pieces of wood could be flung toward operator.
- Use a sawhorse to cut small logs. Never allow another person to hold the log while cutting and never hold the log with your leg or foot.
- Do not cut in an area where logs, limbs, and roots are tangled such as in a blown down area. Drag the logs into a clear area before cutting by pulling out exposed and cleared logs first.
- Make sure the chain will not strike the ground or any other object during or after cutting.
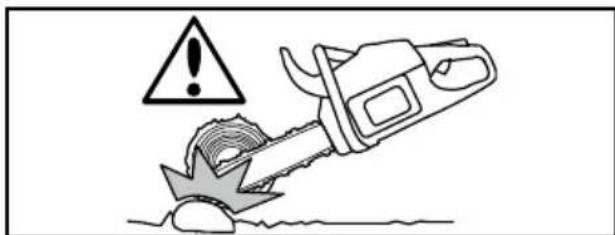

WARNING! If saw becomes pinched or hung in a log, don't try to force it out. You can lose control of the saw resulting in injury and/or damage to the saw. Stop the saw, drive a wedge of plastic or wood into the cut until the saw can be removed easily. Restart the saw and carefully reenter the cut. To avoid kickback and chain damage, do not use a metal wedge. Do not attempt to restart your saw when it is pinched or hung in a log.

natural_image
Simple line drawing of a hand holding a tool over a surface, no text or symbols present■ TYPES OF BUCKING CUTS
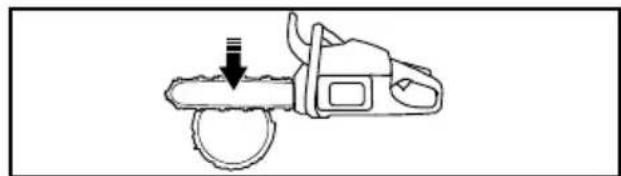
Overcutting begins on the top side of the log with the bottom of the saw against the log. When overcutting use light downward pressure.
natural_image
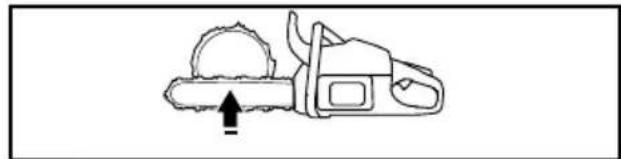
Line drawing of a chain saw with a downward arrow indicating force or direction (no text or symbols)Undercutting involves cutting on the underside of the log with top of saw against the log. When undercutting use light upward pressure. Hold saw firmly and maintain control. The saw will tend to push back toward you.
natural_image
Line drawing of a chain saw cutting into a gear (no text or symbols)
WARNING! Never turn saw upside down to undercut. The saw cannot be controlled in this position.
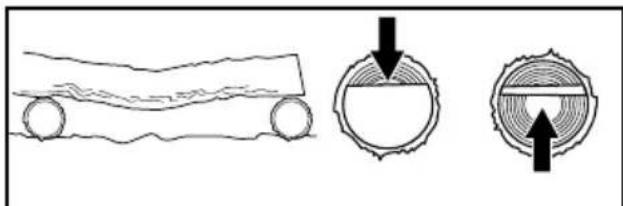
Always make your first cut on the compression side of the log. The compression side of the log is where the pressure of the log's weight is concentrated.
natural_image
Diagram showing a vehicle on water with two circular components and arrows indicating flow or movement (no text or symbols)
natural_image
Diagram showing three circular cross-sections with arrows indicating direction, no text or symbols present■BUCKING WITHOUT A SUPPORT
- Overcut through 1/3 of the diameter of the log.
- Roll the log over and finish with a second overcut.
NOTE: Watch for logs with a compression side to prevent the saw from pinching.
■ BUCKING USING A LOG OR SUPPORT STAND
- Make the first cut on the compression side of the log. Your first cut should extend 1/3 of the diameter of the log.
- Finish with your second cut.


LIMBING AND PRUNING

WARNING! Be alert for and guard against kickback. Do not allow the moving chain to contact any other branches or objects at the nose of the guide bar when limbing or pruning. Allowing such contact can result in serious injury.

WARNING! Never climb into a tree to limb or prune. Do not stand on ladders, platforms, a log, or in any position which can cause you to lose your balance or control of the saw.
■ IMPORTANT POINTS
- Work slowly, keeping both hands firmly gripped on the saw. Maintain secure footing and balance.
- Watch out for springpoles. Springpoles are small size limbs which can catch the saw chain and whip toward you or pull you off balance. Use extreme caution when cutting small size limbs or slender material.
- Be alert for springback. Watch out for branches that are bent or under pressure. Avoid being struck by the branch or the saw when the tension in the wood fibers is released.
- Keep a clear work area. Frequently clear branches out of the way to avoid tripping over them.
■ LIMBING
Always limb a tree after it is cut down. Only then can limbing be done safely and properly.
Leave the larger limbs underneath the felled tree to support the tree as you work.
Start at the base of the felled tree and work toward the top, cutting branches and limbs. Remove small limbs with one cut.
Keep the tree between you and the chain. Cut from the side of the tree opposite the branch you are cutting.
Remove larger, supporting branches with the cutting techniques described in BUCKING WITHOUT A SUPPORT.
Always use an overcut to cut small and freely hanging limbs. Undercutting could cause limbs to fall and pinch the saw.
■ PRUNING

WARNING! Limit pruning to limbs shoulder height or below. Do not cut if branches are higher than your shoulder. Get a professional to do the job.
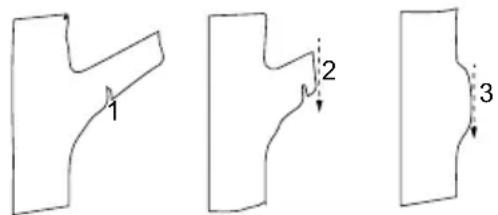
- Make the first cut one-third of the way through the bottom of the limb.
- Make the second cut all the way through the limb.
- Make the third overcut leaving a 1 to 2 inch (2.5 to 5 cm) collar from the trunk of the tree.
MAINTENANCE

WARNING! Disconnect the spark plug before performing maintenance except for carburetor adjustments.
GENERAL RECOMMENDATIONS
The warranty on this unit does not cover items that have been subjected to operator abuse or negligence. To receive full value from the warranty, the operator must maintain the unit as instructed in this manual. Various adjustments will need to be made periodically to properly maintain your unit.
Have all repairs other than the recommended maintenance described in the instruction manual performed by an authorized service dealer. If any dealer other than an authorized service dealer performs work on the product, the manufacturer may not pay for repairs under warranty. It is your responsibility to maintain and perform general maintenance.
MAINTENANCE SCHEDULE
Every 5 hours\*
- Inspect and clean air filter
- Inspect and clean chain brake
- Inspect and clean guide bar
Every 25 hours\*
- Inspect and clean spark arresting screen and muffler
Yearly
- Replace spark plug
- Replace fuel filter
- Replace air filter
* Each hour of operation is approximately 2 tanks of fuel.
MAINTENANCE PROCEDURES
■ GUIDE BAR
Conditions which require guide bar maintenance:
- Saw cuts to one side or at an angle.
- Saw has to be forced through the cut.
- Inadequate supply of oil to bar/chain.
Check the condition of guide bar each time chain is sharpened. A worn guide bar will damage the chain and make cutting difficult.
After each use, ensure ON/STOP switch is in the STOP position, then clean all sawdust from the guide bar and sprocket hole.
To maintain guide bar:
- Move ON/STOP switch to STOP.
- Loosen and remove bar nuts and clutch cover. Remove bar and chain from saw.
- Clean the oil holes (A) and bar groove (B).

- Burring of guide bar rails is a normal process of rail wear. Remove these burrs with a flat file.
- When rail top is uneven, use a flat file to restore square edges and sides.

Replace guide bar when the groove is worn, the guide bar is bent or cracked, or when excess heating or burring of the rails occurs. If replacement is necessary, use only the guide bar specified for your saw in the repair parts list or on the decal located on the chainsaw.
Inspect and clean the unit and decals
After each use, inspect complete unit for loose or damaged parts. Clean the unit and decals using a damp cloth with a mild detergent.
Wipe off unit with a clean dry cloth.
Check the chain brake
See CHAIN BRAKE in the OPERATION section.
■ MUFFLER
As the unit is used, carbon deposits build up on the muffler and spark arresting screen, and must
be removed to avoid creating a fire hazard or affecting engine performance.
Replace the spark arresting screen if breaks occur.
- Loosen and remove the nut (A) from the exhaust outlet cover (B).
- Remove the exhaust outlet cover.
- Remove the spark arresting screen (C). Handle the screen carefully to prevent damage.
- Clean the spark arresting screen gently with a wire brush. Replace screen if breaks are found.
- Replace any broken or cracked muffler parts.
- Reinstall spark arresting screen, exhaust outlet cover, and nut. Tighten nut securely to 25-35 in-lb.

■ SPARK PLUG
NOTE: For models sold in Canada, the spark ignition system complies with the Canadian standard ICES-002.
- Loosen the three screws (A) on the cylinder cover (B).
- Remove the cylinder cover.
- Pull off the spark plug boot (C).
- Remove spark plug (D) from the cylinder and discard.
- Install a new spark plug (Brisk HQT-1•) and tighten securely with a 3/4 inch (19 mm) socket wrench to 15-25 ft-lb. The spark plug gap should be 0.025 inch (0,6 mm).
- Reinstall the spark plug boot.
- Reinstall the cylinder cover and the three screws. Tighten securely to 13-18 in-lb.

■ FUEL FILTER
To replace fuel filter, drain your unit by running it dry of fuel. Remove fuel cap and its connected retainer from tank. Pull filter from tank and remove from line. Replace and reassemble.
AIR FILTER
CAUTION: Do not clean filter in gasoline or other flammable solvent to avoid creating a fire hazard or producing evaporative emissions.
A dirty air filter decreases the life and performance of the engine and increases fuel consumption and exhaust emissions. Always clean your air filter according to the maintenance schedule. Clean more frequently in dusty conditions.
A used air filter can never be completely cleaned. It is advisable to replace your air filter with a new one according to the maintenance schedule.
- Loosen the three screws (A) on the cylinder cover (B).
- Remove the cylinder cover.
- Remove the air filter cover (C) and air filter (D).
- Clean the air filter using hot soapy water. Rinse with clean cool water. Air dry completely before reinstalling.
- Reinstall the air filter and air filter cover.
- Reinstall the cylinder cover and three screws. Tighten securely to 13-18 in-lb.

■ CARBURETOR ADJUSTMENT

WARNING! The chain will be moving during most of this procedure. Wear your protective equipment and observe all safety precautions. The chain must not move at idle speed.
Indications for idle speed adjustment
The carburetor has been carefully set at the factory. Adjustments may be necessary if you notice any of the following conditions:
- The chain moves at idle. See IDLE SPEED-T ADJUSTMENT procedure.
- The saw will not idle. See IDLE SPEED-T ADJUSTMENT procedure.
Idle speed-T adjustment
Allow the engine to idle. If the chain moves, the idle is too fast. If the engine stalls, the idle is too slow.
Adjust the speed until the engine runs without chain movement (idle too fast) or stalling (idle too slow).
The idle speed screw is located in the area above the primer (air purge) bulb and is labeled "T".
Turn the idle speed screw (T) clockwise to increase the engine speed.
Turn the idle speed screw (T) counterclockwise to decrease the engine speed.
STORAGE

WARNING! Stop the engine and allow it to cool. Secure the unit before storing or transporting it in a vehicle. Store the unit and fuel in an area where fuel vapors cannot reach sparks or open flames from water heaters, electric motors, switches, furnaces, etc.

WARNING! Store the unit with all guards in place. Position so that any sharp object cannot accidentally cause injury to passersby. Store the unit out of reach of children.
- Before storing, drain all fuel from the unit. Start the engine and allow it to run until it runs completely out of fuel.
- Clean the unit before storing. Pay particular attention to the air intake area, keeping it free of debris. Use a mild detergent and sponge to clean the plastic surfaces.
- Ensure the machine is cleaned and that a complete service is carried out before long-term storage.
- The guide bar and chain should be covered with a scabbard when the machine is being transported or in storage in order to prevent accidental contact with the sharp chain. Even a non-moving chain can cause serious cuts to yourself or others that make contact with an exposed chain.
CAUTION: It is important to prevent gum deposits from forming in essential fuel system parts such as the carburetor, fuel filter, fuel hose, or fuel tank during storage. Alcohol blended fuels (called gasohol) or using ethanol or methanol can attract moisture which leads to fuel mixture separation and formation of acids during storage. Acidic gas can damage the engine.
TROUBLESHOOTING

WARNING! Always stop the unit and disconnect the spark plug before performing all of the recommended remedies below except remedies that require operation of the unit.
TROUBLE: Engine will not start or will run only a few seconds after starting.
| CAUSE | REMEDY |
| 1. Ignition switch off. | See “STARTING” in the STARTING AND STOPPING section. |
| 2. Engine flooded. | See “Starting a Flooded Engine” in the OPERATION section. |
| 3. Fuel tank empty. | Fill tank with correct fuel mixture. See “FUELING THE ENGINE” in the STARTING AND STOPPING section. |
| 4. Spark plug not firing. | Install new spark plug. See “SPARK PLUG” in the MAINTENANCE section. |
| 5. Fuel not reaching carburetor. | Check for dirty fuel filter; replace.Check for kinked or split fuel line; repair or replace. |
TROUBLE: Engine will not idle properly.
| CAUSE | REMEDY |
| 1. Idle speed requir es adjustment. | • See “CARBURETOR ADJUSTMENT” in the MAINTENANCE Section. |
| 2. Carburetor requires adjustment. | • Contact an authorized service dealer. |
TROUBLE: Engine will not accelerate, lacks power, or dies under a load.
| CAUSE | REMEDY |
| 1. Air filter dirty. | Clean or replace air filter. |
| 2. Spark plug fouled. | Clean or replace plug and regap. |
| 3. Chain brake locked. | Unlock chain brake. See “STARTING POSITION” in the STARTING AND STOPPING section. |
| 4. Caiburetor requires adjustment. | Contact an authorized service dealer. |
TROUBLE: Engine smokes excessively.
| CAUSE | REMEDY |
| 1. Too much ol mixed with gasoline. | • Empty fuel tank and refill with correct fuel mixture. |
TROUBLE: Chain moves at idle speed.
| CAUSE | REMEDY |
| 1. Ide speed requir es adjustment.2. Clutch requires repair. | See “CARBURETOR ADJUSTMENT” in the MAINTENANCE Section.Contact an authorized service dealer. |
TECHNICAL DATA
The computed kickback angle (CKA) listed on your saw and listed in the CKA table below represents angle of kickback your bar and chain combinations will have when tested in accordance with CSA (Canadian Standards Association) and ANSI standards. When purchasing replacement bar and chain, considerations should be given to the lower CKA values. Lower CKA values represent safer angles to the user, higher values indicate more angle and higher kick energies. Computed angles represented indicate total energy and angle associated without activation of the chain brake during kickback. Activated angle represents chain stopping time relative to activation angle of chain break and resulting kick angle of saw. In all cases lower CKA values represent a safer operating environment for the user.
The following guide bar and chain combinations meet kickback requirements of CSA Standards Z62.1, Z62.3, & ANSI B175.1 when used on saws listed in this manual. Use of bar and chain combinations other than those listed is not recommended and may not meet the CKA requirements per standard.
| Model | Guide Bar | Chain | CKA without chain brake | |
| P/N | Length (in/cm) | |||
| PL3314 | 582060101 | 14/35 | 91PJ 52DL | 45° |
| PL3816 | 582060102 | 16/40 | 91PJ 56DL | 45° |
 |  |  |  |  |  |  |  |  |
| Type | In | In (mm) | In (mm) | ° | ° | ° | In (mm) | In (mm) : dl |
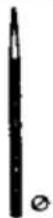
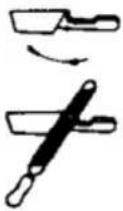
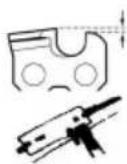
| 91PJ | 0,375 0,05 | 0 (1,3) | 5/32 (4,0) | 85° | 30° 0° | 0,025 (0,65) | 14 (35) : 5216 (40) : 56 |
U.S. EPA / CALIFORNIA / ENVIRONMENT CANADA EMISSION CONTROL WARRANTY STATEMENT
IMPORTANT: This product is compliant with U.S. EPA Phase 3 regulations for exhaust and evaporative emissions. To ensure EPA Phase 3 compliance, we recommend using only genuine replacement parts. Use of non-compliant replacement parts is a violation of federal law.
YOUR WARRANTY RIGHTS AND OBLIGATIONS: The U.S. Environmental Protection Agency, California Air Resources Board, Environment Canada and Husqvarna Consumer Outdoor Products N.A., Inc. are pleased to explain the emissions control system warranty on your year 2016 and later off-road engine. In California, all small off-road engines must be designed, built, and equipped to meet the State's stringent anti-smog standards. Husqvarna Consumer Outdoor Products N.A., Inc. must warrant the emission control system on your small off-road engine for the periods of time listed below provided there has been no abuse, neglect, or improper maintenance of your small off-road engine.
Your emission control system includes parts such as the carburetor, the ignition system and the fuel tank, line, and cap. Where a warrantable condition exists, Husqvarna Consumer Outdoor Products N.A., Inc. will repair your small off-road engine at no cost to you. Expenses covered under warranty include diagnosis, parts and labor.
MANUFACTURER'S WARRANTY COVERAGE: If any emissions related part on your engine (as listed under Emissions Control Warranty Parts List) is defective or a defect in the materials or workmanship of the engine causes the failure of such an emission related part, the part will be repaired or replaced by Husqvarna Consumer Outdoor Products N.A., Inc..
OWNER'S WARRANTY RESPONSIBILITIES: As the small off-road engine owner, you are responsible for the performance of the required maintenance listed in your instruction manual. Husqvarna Consumer Outdoor Products N.A., Inc. recommends that you retain all receipts covering maintenance on your small off-road engine, but Husqvarna Consumer Outdoor Products N.A., Inc. cannot deny warranty solely for the lack of receipts or for your failure to ensure the performance of all scheduled maintenance. As the small off-road engine owner, you should be aware that Husqvarna
Consumer Outdoor Products N.A., Inc. may deny you warranty coverage if your small off-road engine or a part of it has failed due to abuse, neglect, improper maintenance, unapproved modifications, or the use of parts not made or approved by the original equipment manufacturer. You are responsible for presenting your small off-road engine to a Husqvarna Consumer Outdoor Products N.A., Inc. authorized repair center as soon as a problem exists. Warranty repairs should be completed in a reasonable amount of time, not to exceed 30 days. If you have any questions regarding your warranty rights and responsibilities, you should contact your nearest authorized service center.
Call Husqvarna Consumer Outdoor Products N.A., Inc. at 1-800-487-5951 (USA) or 1-800-805-5523 (Canada) or send e-mail correspondence to emissions@husqvarnagroup.com.
WARRANTY COMMENCEMENT DATE: The warranty period begins on the date the small off-road engine is purchased.
LENGTH OF COVERAGE: This warranty shall be for a period of two years from the initial date of purchase, or until the end of the product warranty (whichever is longer).
WHAT IS COVERED: REPAIR OR REPLACEMENT OF PARTS. Repair or replacement of any warranted part will be performed at no charge to the owner at an approved Husqvarna Consumer Outdoor Products N.A., Inc. servicing center. If you have any questions regarding your warranty rights and responsibilities, you should contact your nearest authorized service center.
Call Husqvarna Consumer Outdoor Products N.A., Inc. at 1-800-487-5951 (USA) or 1-800-805-5523 (Canada) or send e-mail correspondence to emissions@husqvarnagroup.com.
WARRANTY PERIOD: Any warranted part which is not scheduled for replacement as required maintenance, or which is scheduled only for regular inspection to the effect of "repair or replace as necessary" shall be warranted for 2 years. Any warranted part which is scheduled for replacement as required maintenance shall be warranted for the period of time up to the first scheduled replacement point for that part.
DIAGNOSIS: The owner shall not be charged for diagnostic labor which leads to the determination that a warranted part is defective if the diagnostic work is performed at an approved Husqvarna Consumer Outdoor Products N.A., Inc. servicing center.
CONSEQUENTIAL DAMAGES: Husqvarna Consumer Outdoor Products N.A., Inc. may be liable for damages to other engine components caused by the failure of a warranted part still under warranty.
WHAT IS NOT COVERED: All failures caused by abuse, neglect, or improper maintenance are not covered.
ADD-ON OR MODIFIED PARTS: The use of add-on or modified parts can be grounds for disallowing a warranty claim. Husqvarna Consumer Outdoor Products N.A., Inc. is not liable to cover failures of warranted parts caused by the use of add-on or modified parts.
HOW TO FILE A CLAIM: If you have any questions regarding your warranty rights and responsibilities, you should contact your nearest authorized service center.
Call Husqvarna Consumer Outdoor Products N.A., Inc. at 1-800-487-5951 (USA) or 1-800-805-5523 (Canada) or send e-mail correspondence to emissions@husqvarnagroup.com.
WHERE TO GET WARRANTY SERVICE: Warranty services or repairs shall be provided at all Husqvarna Consumer Outdoor Products N.A., Inc. service centers. Call Husqvarna Consumer Outdoor Products N.A., Inc. at 1-800-487-5951 (USA) or 1-800-805-5523 (Canada) or send e-mail correspondence to emissions@husqvarnagroup.com.
MAINTENANCE, REPLACEMENT AND REPAIR OF EMISSION RELATED PARTS: Any Husqvarna Consumer Outdoor Products N.A., Inc. approved replacement part used in the performance of any warranty maintenance or repair on emission related parts will be provided without charge to the owner if the part is under warranty.
EMISSION CONTROL WARRANTY PARTS LIST: Carburetor, air filter (covered up to maintenance schedule), ignition system: spark plug (covered up to maintenance schedule), ignition module, muffler including catalyst (if equipped), fuel tank, line, and cap.
MAINTENANCE STATEMENT: The owner is responsible for the performance of all required maintenance as defined in the instruction manual.

natural_image
Illustration of a person performing a physical maneuver or exercise (no text or symbols visible)


natural_image
Abstract line drawing with geometric and organic shapes (no text or symbols)natural_image
Illustration of a person in motion, possibly playing badminton or ice hockey (no text or symbols present)

natural_image
Simple line drawing of a mechanical component with no text or symbolsnatural_image
Pure mechanical diagram showing internal components without any text, numbers, or symbolsnatural_image
Diagram of a mechanical component with an arrow indicating direction (no text or symbols present)natural_image
Three black-and-white icons showing a padlock, an open lock, and a closed handle (no text or symbols)
natural_image
Illustration of a person in traditional attire holding a chainsaw (no text or symbols)natural_image
Illustration of a person wearing protective gear and using a manual tool on a wooden board (no text or symbols)natural_image
Diagram of a manual tool emitting smoke or vapor, showing airflow direction (no text or symbols)natural_image
Technical line drawing of a mechanical assembly with no visible text or symbolsnatural_image
Mechanical assembly diagram showing gear and housing components with directional arrows (no text or labels)natural_image
Technical line drawing of a mechanical device with no visible text or symbolsnatural_image
Technical line drawing of a mechanical device with handle and lever (no text or symbols)natural_image
Illustration of a person using a power manual to cut a chain (no text or symbols)flowchart
graph TD
    A["Person inside circle"] --> B["Move away from tree"]
    B --> C["Ground"]
flowchart
graph TD
    A["Danger zone"] -->|Retreat path| B["Danger zone"]
    B -->|Felling direction| C["Tree branch 1"]
    B -->|Felling direction| D["Tree branch 2"]
    B -->|Felling direction| E["Tree branch 3"]
    C --> F["Tree branch 1"]
    D --> G["Tree branch 2"]
    E --> H["Tree branch 3"]
■ USAR EL MÉTODO DE MUESCA
natural_image
Diagram showing four stages of a geological or material processing process with arrows indicating direction (no text or symbols)natural_image
Diagram illustrating tree collapse, triangular collapse, and circular collapse with directional arrows (no text or labels)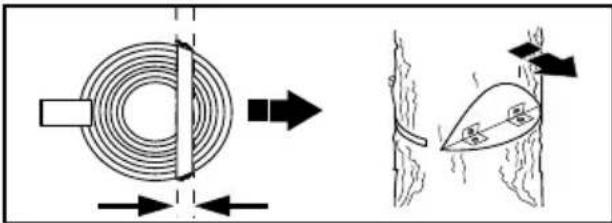
natural_image
Illustration of a chainsaw cutting down a leaf with an exclamation mark (no text or symbols)
natural_image
Simple line drawing of a hand holding a tool over a cylindrical object (no text or symbols)natural_image
Line drawing of a chain saw with a downward arrow indicating motion (no text or symbols)natural_image
Simple line drawing of a chain saw cutting into a flat blade (no text or symbols)
natural_image
Diagram showing a conveyor belt with a cross-section view of a circular structure, plus an arrow indicating direction (no text or symbols)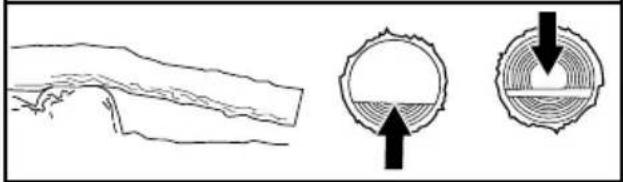
natural_image
Diagram showing three stages of a tree stump: intact, circular opening with concentric layers, and circular tree opening with downward arrows (no text or symbols)■ SEGMENTAR SIN SOPORTE
DESRAMADO Y PODA

■ BUJÍA



- Quick-Start Guide
- IMPORTANT:
- IDENTIFICATION OF SYMBOLS
- WARNING!
- IDENTIFICATION (WHAT IS WHAT?)
- SAFETY
- STANDARDS
- INTRODUCTION
- PLANNING AHEAD
- OPERATING YOUR SAW
- MAINTAINING YOUR SAW
- HANDLING FUEL
- UNDERSTANDING KICKBACK
- ROTATIONAL KICKBACK
- ■ PINCH KICKBACK
- ■ PULL-IN
- REDUCING THE CHANCE OF KICKBACK
- MAINTAINING CONTROL
- KICKBACK SAFETY FEATURES
- REDUCED KICKBACK GUIDE BAR
- ■ FRONT HAND GUARD
- ■ CHAIN BRAKE
- ASSEMBLY
- STARTING AND STOPPING
- FUELING THE ENGINE
- HELPFUL TIP
- BAR AND CHAIN LUBRICATION
- STARTING POSITION
- STARTING
- ■ Starting a Cold Engine
- ■ Starting a Warm Engine
- ■ Starting a Flooded Engine
- CHAIN TENSION
- CHECKING THE INERTIA ACTIVATING FUNCTION CONTROL
- WARNING! When performing the following procedure, the engine must be turned off.
- WORKING TECHNIQUES
- PRACTICING YOUR CUTS
- FELLING A TREE
- ■ PLANNING
- ■ USING THE NOTCH METHOD
- CUTTING A FALLEN TREE (BUCKING)
- ■ IMPORTANT POINTS
- ■ TYPES OF BUCKING CUTS
- ■BUCKING WITHOUT A SUPPORT
- ■ BUCKING USING A LOG OR SUPPORT STAND
- LIMBING AND PRUNING
- ■ LIMBING
- ■ PRUNING
- MAINTENANCE
- GENERAL RECOMMENDATIONS
- MAINTENANCE SCHEDULE
- Every 5 hours\*
- Every 25 hours\*
- Yearly
- MAINTENANCE PROCEDURES
- ■ GUIDE BAR
- Inspect and clean the unit and decals
- Check the chain brake
- ■ MUFFLER
- ■ SPARK PLUG
- ■ FUEL FILTER
- AIR FILTER
- ■ CARBURETOR ADJUSTMENT
- Indications for idle speed adjustment
- Idle speed-T adjustment
- STORAGE
- TROUBLESHOOTING
- TECHNICAL DATA
- U.S. EPA / CALIFORNIA / ENVIRONMENT CANADA EMISSION CONTROL WARRANTY STATEMENT
- ■ USAR EL MÉTODO DE MUESCA
- ■ SEGMENTAR SIN SOPORTE
- DESRAMADO Y PODA
- ■ BUJÍA
Brand : POULAN
Model : PL3816
Category : Saw