
STB 356 - Vacuum accessory HOOVER - Free user manual and instructions
Find the device manual for free STB 356 HOOVER in PDF.


| Product type | Canister vacuum with portable function |
| Brand | Hoover |
| Model | STB 356 |
| Power supply | Mains, 230 V (double insulation, no earth) |
| Variable power | Yes, adjustment by dial |
| Bag type | Paper bag, fill level indicator |
| Pre-motor filter | Standard, replaceable after 5 full bags |
| Motor exhaust filter | Standard, replaceable after 5 full bags |
| Bag capacity | Not specified, standard paper bag |
| Cord length | Not specified, storage by hook and clip |
| Weight | Approximately 5 kg (estimate) |
| Dimensions (L x W x H) | Approximately 30 x 25 x 40 cm (body) |
| Included accessories | Floor/carpet nozzle, crevice tool, upholstery brush, Caresse parquet brush, flexible hose, extension tube, shoulder strap, accessory holder |
| Main functions | Hard floor and carpet cleaning, portable use, foldable handle, mini-handle for transport |
| Maintenance | Change bag frequently for fine powders, replace filters after 5 bags, do not use without bag or filter |
| Safety | Double insulation, do not vacuum liquids, hard objects or hot ashes, unplug before maintenance |
| Spare parts | Paper bag (H59-35600279), filter kit (U37-35600280), portable kit (C48-35600191), nozzle (G107-35600942), parquet brush (G80-35600282) |
| Warranty | According to local conditions, invoice required |
| WEEE marking | Yes, mandatory recycling |
| Customer service | Hoover, phone 0892 35 00 89 (France) |
Frequently Asked Questions - STB 356 HOOVER
User questions about STB 356 HOOVER
0 question about this device. Answer the ones you know or ask your own.
Ask a new question about this device
Download the instructions for your Vacuum accessory in PDF format for free! Find your manual STB 356 - HOOVER and take your electronic device back in hand. On this page are published all the documents necessary for the use of your device. STB 356 by HOOVER.
USER MANUAL STB 356 HOOVER
This product must be assembled and operated in accordance with these instructions and used only for domestic cleaning to remove dry dirt and dust from household carpets and flooring. Accessories can be used to remove dirt and dust from the floor, ceiling, and walls.
Contents
Important safety reminders 1
Suggested use 1
Product components 2
Getting started 2
Product use 2
Bag and Filters 2
Specialties 3
3
Spare parts 4
Your guarantee 4
IMPORTANT SAFETY REMINDERS
This cleaner should only be used for its intended purpose as described in these instructions. Ensure that these are fully understood before operating this appliance.
WARNING! ELECTRICITY CAN BE EXTREMELY DANGEROUS.
This appliance is double insulated and must not be earthed.
IMPORTANT
The wires in the mains lead are colored in accordance with the following code:
BLUE - Neutral
BROWN - Live
SUGGESTED USE
STATIC ELECTRICITY
Some carpets can cause a small build-up of static electricity. Any static discharge is not hazardous to health.
Replace the paper bag frequently when picking up material such as powder or fine dust or when cleaning new carpets.
See 'Changing the paper bag'.
Only use attachments recommended or supplied by Hoover.
DO NOT
Use your cleaner outdoors, on wet surfaces or for wet pickup.
Pick up hard or sharp objects, matches, hot ashes, cigarette ends or other similar items.
Spray with, or pick up flammable liquids such as cleaning fluids, petrol, etc., or their vapors, as they may cause an explosion or fire.
Remove the plug by pulling on the supply cord.
- Do not stand on or wrap the power cord around arms or legs when using your cleaner.
- Do not continue to use this product if it appears to be faulty. If the power cord/plug is damaged, stop using the vacuum cleaner and replace it with a new one.
- The power cord must be replaced by an authorised HOOVER Service Engineer to avoid a safety hazard.
After use, switch the vacuum cleaner off and remove the plug from the electricity supply. Always switch off and remove the plug before cleaning the appliance or attempting any maintenance work.
HOOVER SERVICE
To ensure the continued safe and efficient operation of this appliance, we recommend that only an authorised HOOVER Service Engineer carries out any servicing or repairs.
GB
PRODUCT COMPONENTS
1 - STANDARD EQUIPMENT
1) Foldaway handle 2) Foldaway handle release button 3) Mini Pop-Up handle 4) On / Off button or variable power control 5) Quick release cord storage hook 6) Exhaust filter 7) Power cord 8) Integrated clip 9) Bag door 10) Bag check indicator 11) Carpet & Hard Floor nozzle
2 - ACCESSORIES (dependant on model)*
1) Shoulder strap 2) Flexible hose 3) Extension tube 4) Furniture nozzle 5) Crevice tool 6) Dusting brush 7) Accessory holder 8) Parquet Caresse nozzle
GETTING STARTED
- Remove product from box.
- Unclip foldaway handle from base of main body and fold upward into place.
- Open the bag door and check if the dust paper bag is correctly fitted.
- Ensure the pre-motor and exhaust filters are correctly fitted.
- Fit the Carpet & Hard Floor nozzle. Fully unwind cord.
- On fixed power version depress button to switch power On/Off. On variable power version rotate the knob to switch on and control the power.
- For use on hard floors, press nozzle pedal to bring brushes in contact with the hard floor.
PRODUCT USE
a) Before use undo integrated clip, turn top hook and release power cord. b) During use as a stick cleaner clip power cord into back of main handle.
After use, unclip power cord from handle and wind it around storage hooks before securing with integrated clip.
4-CONTROLS*
a) On/Off switch. Push to switch On. Push again to switch Off. b) Variable power control. Switch On and set the desired power by rotating the selector. Rotate back to switch Off.
BAG & FILTERS
IMPORTANT: Switch cleaner Off and remove plug from electricity supply before changing paper bag or removing any filters.
5 - CHANGING THE PAPER BAG
When the bag check indicator shows red, check to see if the bag is full and requires replacement.
The bag check indicator may show red even if there is a blockage elsewhere in the product.
For accurate bag check indication, the power control* must be set to maximum.
Replace the paper bag frequently when picking up material such as powder or fine dust or when cleaning new carpets.
DO NOT overfill the paper bag.
To change the paper bag: a) Lay the cleaner on a flat surface, pull back catch and remove bag door. b) Remove bag by pulling bag collar from hose inlet. Remove sticky backing from the dust flap and fold it over the inlet to avoid dust escaping from the bag. c) Before fitting a new bag, fold the corners of the bag behind the collar. d) Slide the collar along the guides and lift over the inlet tube. Collar should 'click' into place. e) Locate tabs on bag door as shown and close bag door.
- Features vary according to model
GB
DO NOT use the vacuum cleaner without a paper bag in place.
IMPORTANT: Hoover recommends that filters are replaced after five full bags have been used.
6 - REPLACING THE STANDARD PRE-MOTOR FILTER*
With paper bag removed lift the pre-motor filter from the bag housing.
Fit the new filter and replace the paper bag.
DO NOT use the vacuum cleaner without the pre-motor filter in place.
Replace the standard pre-motor filter after five full bags have been used.
7 - REPLACING THE EXHAUST FILTER
a) Lift off the filter cover.
b) Peel off the filter, fit a new filter, and replace the cover.
DO NOT use the cleaner without the exhaust filter in place.
Replace the exhaust filter after five full bags have been used.
SPECIAL FEATURES
8 - FOLD-AWAY HANDLE* a) To use the product as a portable vacuum cleaner together with the accessories and Portable Kit, press the handle release button and fold the handle backwards until it clips into place at the base of the main body. b) Fold the handle for easy storage.
9 - MINI POP-UP HANDLE
As the main handle is folded backward, the Mini Pop-Up handle automatically rises to allow the product to be easily carried or used as a portable vacuum cleaner.
10 - SHOULDER STRAP* a) With the nozzle and accessories removed, slide one end of the shoulder strap past the locking tab on the inlet tube and rotate as shown. Refit accessories depending on use. b) With the main handle folded and locked at the base, clip the other end of the shoulder strap over the peg behind the Pop-Up handle. c) Carry the cleaner over the shoulder as shown.
11 - NOZZLES
Carpet and Floor nozzle
a) Secure the nozzle to the product. b) To start cleaning, unlock the cleaner by pressing, with your foot, the locking pedal on the nozzle.
Parquet Caresse nozzle*
For wooden and delicate floors.
CALLING FOR SERVICE
A charge will be made if the cleaner is found to be in working order, has not been assembled in accordance with these instructions or has been used incorrectly.
Before calling Hoover Service run through the following checklist:
- Is there a working electricity supply to the cleaner? Check with another appliance.
- Is the paper bag full? See 'Bag & Filters' section.
- Are the filters blocked? See 'Bag & Filters' section.
- Is the hose or inlet blocked? Remove any obstruction.
If there is any doubt call your local Hoover Service Office for advice, they may be able to assist you over the telephone.
- Features vary according to model
GB
Spare Parts*
Use only original Hoover spare parts.
| CONSUMABLES | CODE |
| Paper bag (5 paper bags + 1 pre-motor filter + 1 exhaust filter) | H59 - 35600279 |
| 1 pre-motor filter + 1 exhaust filter | U37 - 35600280 |
| SPARE PARTS | CODE |
| Portable Kit (1 shoulder strap + 1 hose + 1 dusting brush) | C48 - 35600191 |
| Carpet & Hard Floor nozzle | G107 - 35600942 |
| Parquet Caresse nozzle | G80 - 35600282 |
WEEE DIRECTIVE
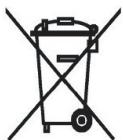

This appliance is marked according to the European directive 2002/96/EC on Waste Electrical and Electronic Equipment (WEEE). By ensuring this product is disposed of correctly, you will help prevent potential negative consequences for the environment and human health, which could otherwise be caused by inappropriate waste handling of this product. The symbol on the product indicates that this product may not be treated as household waste. Instead it shall be handed over to the applicable collection point for the recycling of electrical and electronic equipment. Disposal must be carried out in accordance with local environmental regulations for waste disposal. For more detailed information about treatment, recovery and recycling of this product, please contact your local city office, your household waste disposal service or the shop where you purchased the product.
GUARANTEE STATEMENT
The guarantee conditions for this appliance are as defined by our representative in the country in which it is sold. Details regarding these conditions can be obtained from the dealer from whom the appliance was purchased. The bill of sale or receipt must be produced when making any claim under the terms of this guarantee. Subject to change without notice.
Registered Trade Mark
Hoover Limited Pentrebach, Merthyr Tydfil
Mid Glamorgan CF48 4TU
GIAS Customer Service 08444 995599
Hoover Spares 08443 712758
- Features vary according to model
INSTRUCTIONS FOR USE
Candy Hoover Belgium NV
Candy Hoover Austria
GmbH
Dominikanerbastei 4
A-1011 Wien
www.candy-hoover.at
The appliance is intended for household use and similar applications such as: staff kitchen areas in shops, offices and other working environments; farm houses; by clients in hotels, motels and other residential type environments; bed and breakfast type environments. It is not intended for industrial use. This appliance complies with the relevant safety regulations. Any use of this appliance other than that described in this manual may cause damage to the appliance or injury to the user. The appliance must be used only for the purpose for which it was designed. The manufacturer cannot be held responsible for damage caused by improper use. This appliance is not intended for use by persons (including children) with reduced physical, sensory or mental capabilities, or lack of experience and knowledge, unless they have been given supervision or instruction concerning use of the appliance by a person responsible for their safety. Children should be supervised to ensure that they do not play with the appliance. Keep the appliance and its cord out of reach of children less than 8 years of age. If the supply cord is damaged, it must be replaced by the manufacturer, its service agent or similarly qualified persons in order to avoid a hazard. Do not use the appliance if the supply cord or the appliance itself is damaged. Do not attempt to repair the appliance yourself. Always contact the HOOVER service center for repairs. Use only original spare parts.
Before cleaning and maintenance, unplug the appliance from the power supply. Before cleaning the appliance, always remove the plug from the socket. Do not immerse the appliance in water or any other liquid.
HOOVER
This appliance is intended for household use only. The manufacturer cannot be held responsible for damage caused by improper use. Please read this manual carefully before using the appliance and keep it for future reference.
INSTRUCTIONS FOR USE
1-BASIC OPERATION
1) Connect the appliance to the power supply. 2) Press the On/Off button to switch on the appliance. 3) Adjust the suction power if necessary. 4) Press the On/Off button again to switch off. 5) After use, unplug the appliance. 6) Empty the dust container. 7) Clean the filters. 8) Store the appliance in a dry place. 9) Check the dust container level. 10) If the dust container is full, empty it. 11) Replace the filters if they are damaged.
2-ACCESSORIES (depending on model)
1) Crevice nozzle 2) Brush nozzle 3) Upholstery nozzle 4) Parquet nozzle 5) Turbo brush 6) Extension hose 7) Flexible hose 8) Parquet Caresse
CLEANING AND MAINTENANCE
Always unplug the appliance before cleaning or maintenance. Do not use abrasive cleaners or solvents. Clean the dust container and filters regularly. To clean the dust container, empty it and wash it with water. Let it dry completely before reassembling. Clean the filters with a soft brush or rinse them under running water. Let them dry completely before reinstalling. Do not use the appliance without the filters in place. If the filters are damaged, replace them with original HOOVER filters. For best performance, clean the filters regularly. The appliance is equipped with a safety device that stops the motor if the filters are clogged. If this happens, unplug the appliance and clean the filters.
INSTRUCTIONS FOR USE
3 - ADOEKEKAEH KAKDAIO UROOADOSIA
a) When the device is on (+nPoC), if it is not used for a long time, it will automatically turn off to save energy. b) To turn it off (-nOc), press and hold the button until the indicator light turns off.
When the device is on, the indicator light will be on. If the device is not used for a long time, it will automatically turn off to save energy.
4-KOOMELIA*
a) Press the button to turn the device on or off. The indicator light will show the status. b) The battery level is indicated by the number of lights. When the battery is low, the indicator light will blink. Charge the device when the battery is low.
OAE OEA EAEOEONA
WARNING: Do not use the device near water or in wet conditions to avoid electric shock.
5-AAAABXARINBBAKOAA
The device can be charged using the USB cable. Connect the cable to the device and a power source.
*The characteristics of the device may vary depending on the model.
GR
The device can be charged using the USB cable. Connect the cable to the device and a power source.
When the battery is low, the indicator light will blink. Charge the device using the USB cable.
The battery level is indicated by the number of lights. When the battery is low, the indicator light will blink.
MEN danaaai Baaoc -Unoe c oaeiyea.
The device must be used: a) Only for the purpose for which it was designed, in accordance with the instructions in this manual and any applicable safety regulations. b) The device must be checked for damage before each use. If any damage is found, do not use the device and contact the manufacturer or a qualified service center. c) Use only original spare parts and accessories recommended by the manufacturer. d) Do not use the device if it has been dropped or damaged, or if it shows signs of malfunction. e) Keep the device away from moisture and dust, and store it in a dry place when not in use.
The device is intended for use in a dry environment only.
WARNING: To reduce the risk of injury, read the entire instruction manual before using this device.
6-ANIKATUABUH TOV ABAIROO DIAURO DRIN ADO MOOTAR*
Before using the device, ensure that all safety precautions are followed and that the device is in proper working condition.
Do not use the device if it is damaged.
The device is intended for use in a dry environment only.
Before using the device, read all safety instructions and warnings carefully.
7-ANIKATANSAH VOG DIANOVEAROBS
a) Always follow the safety instructions provided in this manual.
b) If the device is not working properly, contact the manufacturer or a qualified service center.
The device is intended for use in a dry environment only.
Before using the device, read all safety instructions and warnings carefully.
AEEAAATANOCIAOA
8 - ANAIDAOUMEN ABB
a) The device must be installed in a location that is not exposed to direct sunlight, rain, or moisture. It should be placed on a stable surface and connected to the power supply using the provided cable. b) The installation should be carried out by qualified personnel only.
9 - MINI DUTYOMENKAAB
The device is designed for indoor use only. Do not expose it to water or high humidity. Ensure proper ventilation around the device.
10-IMANUQMO8*
a) To clean the device, use a soft dry cloth. Do not use any solvents or abrasive cleaners. Avoid getting any liquid into the openings. b) If the device is not working properly, check the power connection and the fuse. If the problem persists, contact the service center.
AOI E. OANAOEAC A.A.A.
AECIA
Address: 47, 176 75 Athens
Tel: 210-9478700
Fax: 210-9428541
Service: 210-9478773
Email: 210-9478775
Branch office: 41-00 Piraeus
Tel: 210-3222705
Fax: 210-3225770
NL
INSTRUCTIONS FOR USE
IMPORTANT SAFETY INSTRUCTIONS
8- FOLDABLE HANDLE
9- MINI POP-UP HANDLE
Candy Hoover Belgium NV
Haachtsesteenweg 162B
1820 Melsbroek
Tel: 02-7529411
- IMPORTANT SAFETY REMINDERS
- SUGGESTED USE
- DO NOT
- HOOVER SERVICE
- GB
- PRODUCT COMPONENTS
- STANDARD EQUIPMENT
- ACCESSORIES (DEPENDANT ON MODEL)
- GETTING STARTED
- PRODUCT USE
- BAG & FILTERS
- SPECIAL FEATURES
- CALLING FOR SERVICE
- SPARE PARTS
- WEEE DIRECTIVE
- GUARANTEE STATEMENT
- INSTRUCTIONS FOR USE
- HOOVER
- BASIC OPERATION
- ACCESSORIES (DEPENDING ON MODEL)
- CLEANING AND MAINTENANCE
- ADOEKEKAEH KAKDAIO UROOADOSIA
- KOOMELIA
- OAE OEA EAEOEONA
- AAAABXARINBBAKOAA
- GR
- ANIKATUABUH TOV ABAIROO DIAURO DRIN ADO MOOTAR
- ANIKATANSAH VOG DIANOVEAROBS
- AEEAAATANOCIAOA
- ANAIDAOUMEN ABB
- MINI DUTYOMENKAAB
- IMANUQMO
- NL
- IMPORTANT SAFETY INSTRUCTIONS
Brand : HOOVER
Model : STB 356
Category : Vacuum accessory