
SFB 10.1 C3 - Remote control SILVERCREST - Free user manual and instructions
Find the device manual for free SFB 10.1 C3 SILVERCREST in PDF.


| Product Type | Universal Remote Control |
| Brand | SilverCrest |
| Model | SFB 10.1 C3 |
| Dimensions (L x W x H) | 22.0 x 4.5 x 2.5 cm |
| Weight (with batteries) | 120 g |
| Power Source | 2 x AAA batteries (not included) |
| Range | Up to 10 meters |
| Compatibility | TV, DVD, satellite, audio devices, etc. |
| Key Functions | Power, volume, channel, mute, input, numeric keypad, menu navigation |
| Programming Method | Automatic code search or direct code entry |
| Code Storage | Non-volatile memory (codes saved after battery change) |
| Operating Temperature | 0°C to 40°C |
| Storage Humidity | Less than 80% RH |
| Cleaning | Wipe with a soft, dry cloth; do not use liquids |
| Safety Precautions | Keep away from water, do not disassemble, use only specified batteries |
| Spare Parts Availability | Not available; replace device if faulty |
| Repairability | Not repairable by user; contact manufacturer for service |
Frequently Asked Questions - SFB 10.1 C3 SILVERCREST
User questions about SFB 10.1 C3 SILVERCREST
0 question about this device. Answer the ones you know or ask your own.
Ask a new question about this device
Download the instructions for your Remote control in PDF format for free! Find your manual SFB 10.1 C3 - SILVERCREST and take your electronic device back in hand. On this page are published all the documents necessary for the use of your device. SFB 10.1 C3 by SILVERCREST.
USER MANUAL SFB 10.1 C3 SILVERCREST
User manual and service information
DE AT
Antes de empezar
Antes de começar
Technical specifications 71
Copyright....71
Safety instructions....72
Before you start 74
Important note on compatibility....74
Trademark and brand information 75
Getting started....75
Remote control buttons....75
Configuration menus....77
Menu structure....78
Setting the Menu Language (LANGUAGE) 80
Programming the remote control (CODE SETUP) 80
Brand code search (BRAND SRCH) 80
Automatic code search (AUTO SRCH) 81
Direct code input (CODE SET)....82
Flex mode 83
System configuration (CONFIGURE)....83
Setting the time (TIME SETUP) 83
Setting the date (DATE SETUP) 84
Adjusting the keypad light time (TIME) 84
Global volume adjustment (VOL THROUGH) 85
Adjusting the global volume (VPT SETUP) 85
Disabling the global volume adjustment (CANCEL VPT) 85
Global recording/playback control (PLAYBACK) 85
Child lock (KIDS LOCK) 86
Locking the configuration menu (LOCK SETUP)....86
Resetting to factory defaults (RESET) 87
The learn function (LEARNING) 87
Programming via the learn function (LEARN KEY) 87
Deleting individual button codes (DELETE KEY) 88
Deleting the device codes of an individual device (DELETE DEV)88
Deleting all button codes (DELETE ALL)....88
The macro function (MACRO)....89
Programming a macro....89
Running a macro....90
Deleting a macro 90
Configuring favourite channels (FAV CH)....90
Setting up favourites 90
Switching to favourite channel....91
Deleting all favourite channels (DEL ALL)....91
The timer function (TIMER) 91
SLEEP TIMER....91
Event timers (TIMER 1....TIMER 4)....92
Deleting a timer....93
The All on/All off feature....93
Storage when not using the product 93
Troubleshooting....93
Device does not respond to the remote control commands....93
Some buttons do not work properly....94
The LCD display does not work....94
TOP Text buttons not working in Teletext mode ....94
Environmental regulations and disposal information ..... 94
Conformity notes....94
Warranty and Service Information 95
Introduction
Thank you for choosing a SilverCrest product.
The SilverCrest SFB 10.1 C3 universal remote control, hereinafter called "remote control", is a high-end device that offers a wide range of functions. It is easy to handle and has a modern, appealing design. The remote control can learn external signals and is therefore suitable for most TVs, set-top boxes, tape and disc devices. It allows you to conveniently control the functions of up to 10 different consumer electronics devices.
Intended use
This remote control is a consumer electronics device and can be used to replace up to 10 infrared remote control units. It is suitable only for private use, not for industrial or commercial purposes. The remote control may also not be used outdoors or in tropical climates. This remote control fulfils all norms and standards relating to CE conformity. The manufacturer is not liable for any damage or problems caused by unauthorised modifications to the remote control. Only use the accessories recommended by the manufacturer. Observe the regulations and laws in the country of use.
©
©
Safety instructions
Before you use the remote control for the first time, please read and comply with these instructions and warnings, even if you are familiar with handling electronic devices! Keep these operating instructions in a safe place for future reference. If you sell the remote control or give it away, pass on the operating instructions at the same time. The User's Manual is a part of the product.

CAUTION! This icon and the word "Caution" alert you to a potentially dangerous situation. Ignoring them could lead to severe injury or even death.

WARNING! This symbol and the word "Warning" denote important information required for the safe operation of the product and for the safety of its users.

This symbol denotes further information on the topic.

CAUTION! If smoke, unusual noises or smells are noticed, remove the batteries from remote control immediately. If this occurs, the remote control should no longer be used until it has been inspected by authorized service personnel. Never inhale smoke from a possible device fire. If you do inadvertently inhale smoke, seek medical attention. Smoke inhalation can be damaging to your health.

CAUTION! The remote control and its accessories must not be damaged in order to avoid any further risks.

CAUTION! Make sure that no fire hazards (e.g. burning candles) are placed on or near the remote control as there is a risk of fire.

WARNING! Do not expose the remote control to any direct heat sources (e.g. heaters), direct sunlight or strong artificial light. The remote control must not be exposed to spray or dripping water or abrasive liquids. Do not use the remote control near water. The remote control must especially never be immersed (do not place any recipients containing liquids such as beverages, vases, etc. onto or next to the remote control). The remote control must not be subject to any great temperature changes as this could lead to condensation of moisture in the air which could cause short-circuiting. If the device has been exposed to strong temperature variations, wait for it to reach the ambient temperature before switching it on (about 2 hours). Take care that the remote control is not subject to
excessive impacts or vibrations. Do not introduce any foreign bodies into the device, otherwise the remote control can be damaged.
Batteries

CAUTION! Insert the batteries with the correct polarity. Refer to the diagram on the batteries and inside the battery compartment. Do not attempt to recharge the batteries and do not throw the batteries into a fire. Do not mix battery types (old and new or carbon and alkaline, etc.). Do not mix rechargeable and conventional batteries. Batteries must never be opened or deformed. Otherwise there is a risk of leaking chemicals. If the chemicals become in contact with your skin or eyes, rinse with plenty of fresh water immediately and seek medical aid. Batteries are no toys! If a battery has been swallowed accidentally, seek medical aid immediately. Batteries can produce internal injuries in short time. Remove the batteries when the remote control is not to be used for a long time. This will avoid any damage due to leaking. Improper use could cause explosions or leaks.

CAUTION! Children and persons with disabilities
Electrical devices are not suitable for children. This remote control may be used by children of 8 years or over or by persons with physical, sensory or mental impairments or those with no knowledge or experience providing they are supervised or they have been given instructions on the proper use of the remote control and they understand the associated risks. Children should always be supervised to ensure that they do not play with the product. The product must not be cleaned or maintained by unsupervised children. Batteries and small parts represent potential choking hazards.
Keep the packaging away from children and persons with disabilities too.

Danger of suffocation!

Maintenance / cleaning
Repairs are required if the remote control has been damaged in any way, for example if the device housing is damaged, when liquids or objects have penetrated into the remote control or when the product has been exposed to rain or moisture. Repairs are also necessary if the product does not perform normally or if it has been dropped. All repairs must be
carried out by qualified service personnel. Never open the housing of the remote control. Only use a clean, dry cloth for cleaning the remote control. Never use any corrosive liquids. Do not attempt to open the remote control housing, this would void your warranty.
Operating environment

The device is not designed for use in environments with high temperatures or humidity (e.g. bathrooms) or those with above-average levels of dust. Operating temperature and operating humidity: 5°C to 35°C, max. 85% RH.
Inserting the batteries

The programmed codes and the language settings are stored permanently and are not lost if you change the batteries. The date and time are lost.
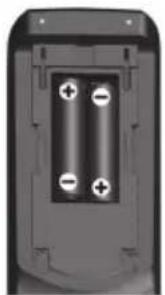
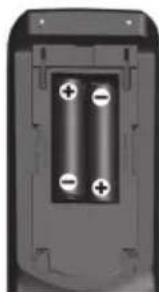
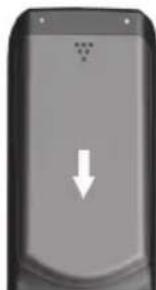
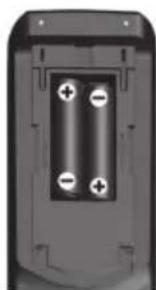
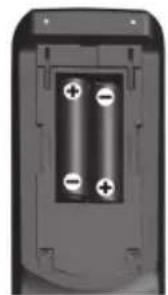
Open the battery compartment on the back of the remote control by removing the battery compartment cover in the direction shown. Insert the batteries with the correct polarity, as shown in the diagram. The correct polarity is labelled on the batteries and inside the battery compartment. Close the battery compartment cover. If the remote control range declines, replace the batteries with new batteries of the same type. The device does not give any indication when the batteries are running low.
Before you start
The remote control is powered by 2 batteries of type Micro AAA, LR03, 1.5V. They are included in the package.
On delivery, the batteries are already inserted into the battery compartment. You just need to remove the plastic film that is inserted between the batteries and the battery contacts. The procedure is as follows:
-
Open the battery compartment.
-
Remove the plastic film.
Important note on compatibility

All functions described in these operating instructions are valid only if the keypad layout of your original remote control matches exactly the one of your 10-in-1 remote control. But this only very rarely the case. This means that if you are unable to use all functions of your original remote control, it does not mean there is a fault with your 10-in-1 remote control.

Trademark and brand information
All brand and/or product names mentioned in these operating instructions and in the device code list are property of their respective owners and are used for product description and identification purposes only.
Getting started
After inserting the batteries, the display lights up and the start window appears after about 1 second. The start window shows the device, code, day of the week and time. The default setting is TV, Monday and 12.00AM. From the start window you can toggle to the device that you want to control by using the device buttons (4). The device code for the selected device is displayed at the same time.
Briefly press the S to display the selected device, the day of the week and the full date. If no button is pressed for a while, the remote control light will go off. You can set the light delay time in the "CONFIGURE" menu.
Remote control buttons
Device buttons
| Symbol | Device type |
| AMP | Audio amplifier |
| TV | Television |
| BD | Blu-ray player |
| VCR | Video recorder |
| DSAT | Digital satellite receiver |
| DVD | DVD player |
| CBL | Cable TV receiver |
| AUX1 | Auxiliary device 1 |
| CD | CD player |
| AUX2 | Auxiliary device 2 |
Numeric keypad / number buttons
| Symbol | Function |
| 1 2 ABC 3 DEF4 GHI 5 JKL 6 MNC7 PQRS 8 TUV 9 WXYZ0 L | You can use these buttons to enter channel numbers, to enter device codes manually and to enter numbers. |
Recording / playback control keypad
| Symbol | Function |
| 1. Record ; 2. TOP text red | |
| 1. Rewind ; 2. TOP text blue | |
| 1. Start playback ; 2. TOP text green | |
| Pause, pause playback | |
| 1. Stop playback, recording, rewind or fast forwardTOP text yellow | |
| Fast-forward |
Teletext keypad
| Symbol | Function |
| Access Teletext | |
| Enlarges the Teletext page display | |
| Stops automatic page scrolling for multi-page Teletext | |
| The Teletext is shown with transparent background over the TV picture. | |
| Exit Teletext |
Other buttons
| ALL OFF | 1. Powers the device on/off.2. Press this button for 3 seconds or longer to power all the programmed devices on or off. |
| FAV | Press this button to access programmed favourites. |
| EPG | Press this button to open your selected device's EPG function, as long as the device supports it. |
| S | 1. Press and hold this button for at least 3 seconds to show the "CONFIGURE" menu.2. Briefly press this button to switch from time to date display. After approx. 30 seconds the time is displayed again. You can also briefly press theEXITbutton again to toggle back to the time display.3. When programming macros or event timers, press this button to confirm the end of the command sequence you have entered.4. Pressing it when using the "LEAR returns to the previous menu level. |
| MENU | Opens the menu of the selected device. |
EXIT | 1. Press this button while the menu of the selected device is shown to return to the previous menu level or to quit the menu.2. Press this button while the remote control "CONFIGURE" menu is shown to return to the previous menu level or to quit the menu. Exce Pressing thebuttonwhen using the "LEARN KEY" function returns to the previous menu level.Executes a macro when used together with one of the number buttons 1 to 6. |
 | Mutes or restores the sound output (MUTE). |
 | Confirms a menu item in the remote control “CONFIGURE” menu or in the menu of the selected device. |
 | Menu navigation: move up |
 | Menu navigation: move down |
 | Menu navigation: move left |
 | Menu navigation: move right |
 | Increase/decrease volume |
 | 1. TV mode: Next / previous channel2. CD/DVD mode: SKIP function |
 | AV input selection for the selected device |
 | Use this button to enter two-digit channel numbers. This function depends on the selected device. To enter a two-digit channel number, first press the button and then enter the channel number. Pressing the button again allows you to enter a single-digit channel number. |
 | Toggles the remote control light on/off. |
Configuration menus
Press and hold the ☐Sign for 3 seconds to open the menu. The default sub-menu is "LANGUAGE". To program the remote control according to your needs, use the buttons to navigate to the sub-menu you want or press EXIT turn to the start window. Press the Button to open the selected sub-menu.

If no entry is made for 30 seconds in setup mode, the remote control returns to the start window. If necessary, start programming again.
Make your selection and then press OK to confirm and finish programming. The display reads "SUCCESS". The new settings are stored for the device currently selected providing no other device was selected while programming.
The following settings can be made in the "CONFIGURE" menu:
- Programming of devices you want to control
- Menu language; date and time; light delay time; volume; playback; child lock and setup lock; restore to default.
- Learning function
- Programming macros
- Saving favourites
- Timer settings
Menu structure
Below is a graphical overview of the entire menu structure:
![graph TD A["TV MON 000:12:00"] --> B["LANGUAGE"] B --> C["CODE SETUP"] C --> D["CONFIGURE"] D --> E["ENGLISH"] E --> F["DEUTSCH"] F --> G["ITALIANO"] G --> H["ESPAÑOL"] H --> I["FRANÇAIS"] C --> J["BRAND SRCH"] J --> K["AUTO SRCH"] K --> L["CODE SET"] L --> M["TIME SETUP"] M --> N["DATE SETUP"] N --…](/content/2026/06/1316168/images/1640f83a7b8714762c190b2d1793eadad56ebc83d335c6da5338249e08a8cfdc.jpg)
![graph TD A["LEARNING"] --> B["DELETE KEY"] B --> C["DELETE DEV"] C --> D["DELETE ALL"] D --> E["MACRO"] E --> F["FAV CH"] F --> G["TIMER"] G --> H["SLEEP TIMER"] H --> I["TIMER 1"] H --> J["TIMER 2"] H --> K["TIMER 3"] H --> L["TIMER 4"] E --> M["MACRO1"] M --> N["MACRO2"] N --> O["MACRO3"] O --> P[…](/content/2026/06/1316168/images/c0ff58665e769f576584bd55422c9918dbd84f4d5bf21bee1919f450a543687a.jpg)

To open the configuration menu it is necessary to keep the Button pressed (approx. 3 seconds) until the display toggles to setup mode.
Setting the Menu Language (LANGUAGE)
The "LANGUAGE" main menu item allows you to set language for the remote control. You can choose one of the following menu languages: English, German, Italian, Spanish or French. Proceed as follows:
- Press and hold the button for 3 seconds. Press, select "LANGUAGE" and then press OK

Upon factory delivery the device is set to the English language. Therefore the first option shown is "LANGUAGE".
- Press, select one of the 5 languages offered and then press OK confirm. The display reads "SUCCESS".
Press EXIT to back one menu level. To return to the start window, press one of the device buttons (4).
Programming the remote control (CODE SETUP)
This main menu item allows you to program the remote control according to your needs. The following 3 methods are available:
- Brand code search "BRAND SRCH". If the manufacturer of your device is in the device code list of the remote contr fastest programming method.
- Automatic code search "AUTO SRCH". This method runs through all the codes available on the code list and sends them to your device. This method takes a relatively long time.
- Direct code input "CODE SET". This method requires entering the code found in the device code list manually.
The operating instructions below help you program the remote control using any of the above programming methods.

Before programming a device button by using brand code search or automatic search, please carry out a "RESET" for this device button. If this device had previously been programmed using the learn function, any learned keys would not be overwritten by the new programming. For more information, see the chapter "Resetting to factory defaults (RESET)" on page 87.
Brand code search (BRAND SRCH)
- Press the device button of the device that you want to program.
- Press and hold the button for 3 seconds.
- Press, select "CODE SETUP" and press to confirm.
- Press to select "BRAND SRCH" and press to confirm. The first brand name alphabetically for the preset devices appears on the display.
- Press to navigate to the brand name you want, e.g. "SilverCrest".
- To accelerate the brand search you can enter the first or all characters of the brand name via the numeric keypad (11). Then press 📄 to go to the selected brand. If you only enter the first
character of the brand name (e.g. S for SilverCrest), pressing the button will show the first brand name starting with S. Then you need to press the buttons to manually scroll to the SilverCrest brand.
As well as the digits, the keypad buttons also have characters or symbols assigned that you can select by pressing the characters or symbols assigned are printed on the number keys.
After selecting a character and waiting for a few seconds, this character is applied and you can enter the next character. You can enter up to 11 characters for a brand name. If you make a mistake, press EXIT delete the last character and enter it again.
-
Typically, different device manufacturers use different codes for their remote controls. At this point you'll have to find the optimum code. The current code is shown under the selected brand name. You can press the buttons to select the preset codes for the desired brand.
-
Now test the code selected by pointing the remote control at the device and checking if it responds properly to the button pressed. It is not necessary to exit the setup mode to perform this test.
The following buttons cannot be used for the function test:
• ,
• the device buttons (4)
• the numeric keypad (11)
-
If most of the buttons work properly, press .the code is saved for the device button selected.
-
If no buttons work properly or only a few do, press to select the next code and repeat the test as described in step 8. Repeat this procedure as many times as necessary until you have found suitable code.
Press EXIT to go back one menu level. To return to the start window, press one of the device buttons.
Repeat the above procedure for all devices you wish to control with your new remote control.
Automatic code search (AUTO SRCH)
-
Press and hold the button for 3 seconds.
-
Press, select "CODE SETUP" and then press. Press and select "AUTO SRCH". Press OK

- Press the device button for the device you wish to program. Then press OK. The remote control starts sending all available codes. This is indicated by a flashing IR icon on the display.
By default the remote control sends the code for the ⏻ button.
If no code is assigned to the ⏻ button, the following codes will be send for the different devices:
• TV: the remote control sends the code "CH+".
- DVD/CD/VCR: the remote control sends the code "PLAY".
- DSAT/CBL: the remote control sends the code "CH+".
- AMP: the remote control sends the code "MUTE".
-
Other devices: the remote control sends the code "CH+".
-
If your device responds to the sent code by powering on or off or by executing one of the above functions, press to stop the search. At this point you are close to the correct code, but you may not yet have found the one that matches completely, as the automatic search had been stopped with a slight delay and further codes have been sent.
During the automatic search, the remote control responds to the Ⅱ and EXIT is only.
-
After you have pressed the button to stop searching you can press the buttons to send the previous or next codes manually. If your device responds again to a code, you have found a suitable code. Press to exit the automatic search. The codes are saved and the display reads "SUCCESS".
-
Or press EXIT the automatic search. This will not save any codes.
- After the remote control has finished transmitting the last available code from the code list, the search will stop and after a few seconds the start window appears.
Press EXIT go back one menu level. To return to the start window, press one of the device buttons.
Direct code input (CODE SET)
- Press and hold the button for 3 seconds.
- Press, select "CODE SETUP" and then press.
- Press, select "CODE SET" and press to confirm. OK
The selected device flashes and the currently set device code appears on the display. At this point you can select a different device by using the device buttons. Confirm your selection with OK
- The first digit of the 4-digit device code currently set flashes.
- Enter the correct 4-digit code for the device selected by using the number buttons. You can find the 4-digit code in the device code list supplied.
- Press OK to confirm the entry. The display reads "SUCCESS" followed by "CODE SET".
- Invalid CODES cannot be found in the CODE list. If you enter an invalid code "NOT FOUND" appears on the display and you can then enter the correct code.
Press EXIT go back one menu level. To return to the start window, press one of the device buttons.
Flex mode
For the different device buttons there are preset code lists for specific device groups. Normally, you will assign the corresponding device types to the device buttons. For example, you will assign programming a VCR to the Voice button, a DVD player to the device.
etc. Furthermore, the Flex mode conveniently lets you assign a device from any device group to the AUX1 button AUX2 requisite is
that you assign the code list of the desired device group (where the device belongs to) to the AUX1 button, AUX2 want to use for this device.
The code lists (e.g. 0 for TV or 2 for DVD) belonging to group can be found in the table below:
| TV | VCR | DVD | DSAT | BD | AMP | CBL | CD |
| 0 | 1 | 2 | 3 | 4 | 5 | 6 |
7
For direct code input:
-
Press and hold the button for 3 seconds.
-
Press, select "CODE SETUP" and press to confirm. OK
-
Press, select "CODE SET" and press to confirm. OK
-
Then press the device button AUX1 that you wish to program and press OK to confirm.
-
The first digit of the 4-digit device code currently set flashes.
-
Enter the correct 4-digit code for the selected device using the number buttons, then enter the number of the corresponding code list (0 to 7) and press OK to confirm.
-
Press OK to confirm the entry. The display reads "SUCCESS" followed by "CODE SET".
-
Invalid CODES cannot be found in the CODE list. If you enter an invalid code "NOT FOUND" appears on the display and you can then enter the correct code.
Press EXIT to go back one menu level. To return to the start window, press one of the device buttons. On the left of the time the code assigned to the device button AUX1 is shown in the display. The
selected code list (0 to 7) is also displayed to the left of the day of the week.
Before you can program the device buttons AUX1 using AUX2
brand code search or automatic search, it is necessary to assign the code list to the device button. To do so, proceed as described in the previous section, select the number 0001 as your code and select the number of the desired code list (0 to 7). This assigns the code list to the device button AUX1 you AUX2 proceed with programming.
At this point, programming the device buttons AUX1 work AUX2 the same way as described in the "Automatic code search (AUTO SRCH)" and "Brand code search (BRAND SRCH)" chapters.
System configuration (CONFIGURE)
Setting the time (TIME SETUP)
-
Press and hold the button for 3 seconds.
-
Press, select "CONFIGURE" and press
-
Press, select "TIME SETUP" and press
to confirm.
to confirm.


-
Press, select between "12HR" and "24HR".
-
Press to toggle to time setting mode. The hour display flashes.
-
Press and select the correct value for the hour. You can also adjust the value by using the numeric keypad (11).
-
Press to toggle to minute setting mode.
-
Press and select the correct value for the minutes. You can also adjust the value by using the numeric keypad (11).
-
If you selected "12HR" in step 4, you can press to select the PM/AM setting. Press to toggle between PM and AM.
-
Pres OK to confirm your entry and save the setting. The disp reads "SUCCESS" followed by "TIME SETUP".
Press EXIT go back one menu level. To return to the start window, press one of the device buttons.
Setting the date (DATE SETUP)
-
Press and hold the button for 3 seconds.
-
Press, select "CONFIGURE" and press to confirm.
-
Press, select "DATE SETUP" and press to confirm.
-
The current date appears and the year flashes. Press the buttons to set the correct year.
-
Press until the month display flashes. Press the buttons to set the correct month.
-
Press until the day display flashes. Press the buttons to set the correct day. Press confirm your entries. The display reads "SUCCESS" followed by "DATE SETUP".
-
Once the date has been set properly, in the upper right corner of the display the abbreviated day of the week is shown.
Press EXIT go back one menu level. To return to the start window, press one of the device buttons.
Adjusting the keypad light time (TIME)
-
Press and hold the button for 3 seconds.
-
Press, select "CONFIGURE" and press to confirm.
-
Press, select "LIGHT-TIME" and press to confirm.
-
Press to set the light duration of the remote control in 5-second increments between 0 and 60 seconds. If you select 0 seconds, the light remains off when any button is pressed. When set to 0 seconds, the light can be switched on manually by pressing the button. In this case it will light for 5 seconds.
-
Press OK to confirm your entry and save the setting. The display reads "SUCCESS" followed by "LIGHT-TIME".
Press EXIT go back one menu level. To return to the start window, press one of the device buttons.

Please note that setting a longer light duration will shorten the battery life.
Global volume adjustment (VOL THROUGH)
The global volume adjustment/mute feature allows you to assign the volume adjustment of a device that does not have this feature (e.g. a DVD player) to a different device (e.g. a TV). The advantage is that it is not necessary to press a device button (in the above example, the TV device button) first and then another device button to switch back to the playback device (the DVD player in the above example).
Adjusting the global volume (VPT SETUP)
Switching on:
- Press and hold the button for at least 3 seconds.
- Press, select "CONFIGURE" and press to confirm.
- Press / select "VOL THROUGH" and press to confirm.
- Press, select "VPI SETUP" and press to confirm. The display reads "TO DEV".
- Next press the device button of the device that you want to assign the volume control to, e.g. DVD. Then the display shows "FROM DEV".
- Next, press the device button of the device from which you want to use the volume control to, e.g. TV. Then the display will show "SUCCESS" followed by "VOL THROUGH".
After you have finished performing these steps, you can use the and buttons to adjust the volume and also mute the sound of the even while in DVD mode.

Disabling the global volume adjustment (CANCEL VPT)
Switching off:
- Press and hold the button for at least 3 seconds.
- Press, select "CONFIGURE" and press to confirm.
- Press / select "VOL THROUGH" and press to confirm.
- Press, select "CANCEL VPT" and press to confirm. The display briefly shows "SUCCESS" to confirm.
This cancels the global volume adjustment/mute function.
Press EXIT go back one menu level. To return to the start window, press one of the device buttons.
Global recording/playback control (PLAYBACK)
This function allows you to control a VCR, DVD player or Blu-ray player with the recording / playback control buttons (5) without having to select the corresponding device first by using the device buttons.
To use this function, a valid code for the desired device needs to be assigned to the corresponding device button. This function is limited to the VCR, DVD, and device buttons. The default setting is "OFF".
- Press and hold the button for 3 seconds.
- Press, select "CONFIGURE" and press to confirm.
-
Press, select "PLAYBACK" and press to confirm.
-
Press, select "VCR" for a video recorder, "DVD" for a
DVD player or "BD" for a Blu-ray player. Or select "OFF" to disable this function. Confirm your selection with OK The display reads "SUCCESS" followed by "PLAYBACK".
Press EXIT go back one menu level. To return to the start window, press one of the device buttons.
Child lock (KIDS LOCK)
This feature allows you to lock one or more device buttons so that the associated device cannot be operated any more. The
EXIT buttons will still be working without any restrictions. All devices assigned to non-locked device buttons can still be controlled without any restrictions.
-
Press and hold the button for 3 seconds.
-
Press, select "CONFIGURE" and press to confirm.
-
Press, select "KIDS LOCK" and press to confirm.
-
Press the device button of the device that you wish to lock for children.
-
Press and choose between "ON" or "OFF" to enable or disable the child lock.
-
Press OK to confirm your entry and save the setting. The display reads "SUCCESS" followed by "KIDS LOCK".
Press EXIT to go back one menu level. To return to the start window, press one of the device buttons.
Locking the configuration menu (LOCK SETUP)
This menu item lets you lock access to all configuration menus. While the lock is enabled, "LOCKED" is displayed if a configuration menu is accessed. The only option available will be the unlock option.
-
Press and hold the S button for 3 seconds.
-
Press, select "CONFIGURE" and press to confirm.
-
Press, select "LOCK SETUP" and press to confirm.
"LOCK" appears on the display. Press OK confirm. The display reads "SUCCESS" followed by "LOCK SETUP". The configuration menus are now locked.
- If you now attempt to change anything in a menu, the message "LOCKED" appears.
Press EXIT go back one menu level. To return to the start window, press one of the device buttons.
-
To unlock, press and hold the S button for 3 seconds.
-
Press, select "CONFIGURE" and press to confirm.
-
Press, select "LOCK SETUP" and press to confirm.
"LOCK" appears on the display.
- Press, select "UNLOCK" and press to confirm. OK
The display reads "SUCCESS" followed by "LOCK SETUP".
- The configuration menus are now unlocked.
Press EXIT go back one menu level. To return to the start window, press one of the device buttons.
Resetting to factory defaults (RESET)
-
Press and hold the button for 3 seconds.
-
Press, selected "CONFIGURE" and press to confirm. OK
-
Press, select "RESET" and press to confirm. OK
-
Press and choose between "ALL RESET" and "MODE".
-
Press to confirm your entry.
Choosing "ALL RESET" will restore the settings for all devices. The procedure is as follows:
- After choosing "ALL RESET", press confirm. The display will read "CONFIRM RST".
You can still press EXIT cancel the reset at this point.
- Press OK confirm your entry. The display reads "OK" and then returns to the start window.
The day of the week and the time are not reset.
Choosing "MODE" restores the settings for the selected device only. The procedure is as follows:
-
After you confirm your selection "MODE" by pressing OK the display shows the device currently selected. Select the device you want by pressing the corresponding device button.
-
After confirming your choice with OK, the display will read "CONFIRM RST".
You can still press EXIT to cancel the reset at this point.
- Press OK to confirm your entry. The display reads "OK" and then returns to the start window.
Press EXIT to go back one menu level. To return to the start window, press one of the device buttons.
The learn function (LEARNING)
Programming via the learn function (LEARN KEY)
This function allows the remote control to learn individual buttons for a selected device.
-
Press the device button for the device that you wish to program.
-
Press and hold the button for 3 seconds.
-
Press, selected "LEARNING" and press to confirm.
-
Press, select "LEARN KEY" and press to confirm.
-
The display reads "SELECT KEY".
All buttons except the device buttons support learning.
-
Press the button that you wish to learn a command. The display reads "WAITING".
-
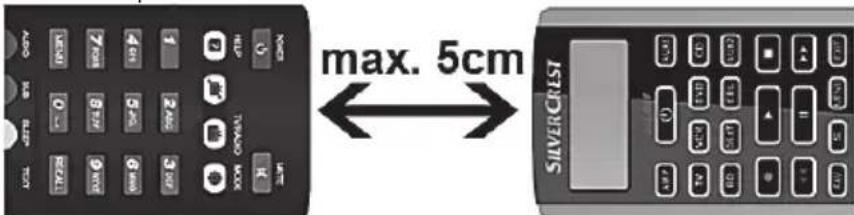
Place the original remote control so its IR LED and the IR LED (2) of your 10-in-1 remote control face each other and are no greater than 5 cm apart.
-
Next press the button on the original remote control from which you wish to copy the signal. The successful detection of the button code is indicated by "SUCCESS" on the display.
-
Repeat steps 5 to 8 for each button that you wish to learn a function.
-
If the transmission of the original code fails or no code is sent during the next 30 seconds, "FAIL" appears on the display. In repeat steps 5 to 8.
You can quit learning mode by pressing the button if the display reads "SELECT KEY". Pressing any of the device buttons takes you back to the start window.

If you experience any problems with the learn function, the batteries of the original remote control could be low. Replace them if necessary.
Deleting individual button codes (DELETE KEY)
This function allows you to delete the learned code for an individual button for a selected device.
-
Press the device button for the device that you wish to program.
-
Press and hold the button for 3 seconds.
-
Press, select "LEARNING" and press to confirm.
-
Press, select "DELETE KEY" and press to confirm.
-
The display reads "SELECT KEY".
-
Press the button for which you want to delete the code. The display reads "SURE DELET".
-
Press OK confirm. The display reads "DELETED" and then again "SELECT KEY".
-
Repeat steps 6 and 7 for each button for which you wish to delete the code.
Press EXIT to back one menu level. To return to the start window, press one of the device buttons.
Deleting the device codes of an individual device (DELETE DEV)
This function allows you to delete all learned codes for a selected device.
-
Press and hold the button for 3 seconds.
-
Press, select "LEARNING" and press to confirm.
-
Press, select "DELETE DEV" and press to confirm.
-
The display reads "SELECT DEV".
-
Press the device button of the device for which you want to delete the code. The display reads "SURE DELET".
-
Press OK confirm. The display reads "DELETED" and then again "SELECT DEV".
-
Repeat steps 5 and 6 for each device for which you wish to delete the codes.
Press EXIT to go back one menu level. To return to the start window, press one of the device buttons.
Deleting all button codes (DELETE ALL)
This function allows you to delete all learned codes for all devices at once.
-
Press and hold the button for 3 seconds.
-
Press, select "LEARNING" and press to confirm.

- Press, select "DELETE ALL" and press to confirm. The display reads "SURE DELET".
- Press OK confirm. The display reads "DELETED" and then again "DELETE ALL".
Press EXIT go back one menu level. To return to the start window, press one of the device buttons.
The macro function (MACRO)
The macro function lets you save up to 16 commands for a device that will be sent in sequence when pressing one single button. Please remember that one command is used for device selection, leaving 15 commands free to be assigned.
Example: Power on TV > Select channel 11 > Display Teletext > Open Teletext page 222.
Programming a macro
- Press and hold the button for 3 seconds.
- Press, select "MACRO" and press to confirm. OK
- Press , select "MACRO1" (or "MACRO2"..... "MACRO6" and press OK confirm.
- The display reads "SET UP". Press to confirm.
- If you select a macro that already has a command sequence assigned, the display reads "MACRO HAS". In this case you have to delete this macro before entering commands or select a different, free macro.
- The device currently selected is shown.
- Enter the command sequence you want using the buttons. Always start with the device button for the device you wish to record the macro for. The number of commands already entered is shown on the left hand side of the display.
- By default, the different macro commands are transmitted sequentially every second. As this could be too fast for some devices, you can adjust the delay time in 2-second increments from 5 to 41 seconds.
- To do this, press the button after a button command. Each press of the button delays the pause time after the last command for 2 more seconds and the set value is shown on the display.
- After you have finished entering the command sequence, press S The display reads "SUCCESS".
You can press up to 16 buttons per macro, including the device button. After this, the macro is applied automatically and the display reads "SUCCESS".
Example command sequence for programming a macro
You want to start by switching your television on. After a 21 second pause, the satellite receiver is to be switched on as well. Switching the satellite receiver on takes about 22 seconds. So you should enter a delay time of 25 seconds. The next step is to select preset channel 32.
The command sequence to enter is as follows:
![graph LR A["TV"] --> B["ALL OFF"] B --> C["Pause 21 Sec. (9 times MACRO)"] D["DSAT"] --> E["ALL OFF"] E --> F["Pause 25 sec. (11 times MACRO)"] G["3 DEF"] --> H["2 ABC"] H --> I["S"]](/content/2026/06/1316168/images/508e7727fc125b370097f77f30b39456b923bcdb3d9105e1262053277e178a17.jpg)
The delay time in this example are random and do not relate to the devices to be controlled.
Press EXIT to back one menu level. To return to the start window, press one of the device buttons.
Running a macro
- Press the

- Within the next 5 seconds, press the number button 1 to 6 which corresponds to the macro you want.
- The command sequence programmed for this macro is sent.
If you do not press the corresponding number button within

5 seconds after you press the button, the remote control backlight flashes 3 times.
The same happens if the button you press after pressing the

button has no macro assigned to it.
Deleting a macro
-
Press and hold the button for at least 3 seconds.
-
Press, select "MACRO" and press to confirm.

- Press select "MACRO1" (or "MACRO2".....
"MACRO6" and press OK confirm. The display reads "SET UP".
- Press, select "DELETE" and press to confirm. The
display reads "SURE DELET".
- Press OR to confirm. The display reads "DELETED". The selected macro is shown again on the display.
Press EXIT to go back one menu level. To return to the start window, press one of the device buttons.
Configuring favourite channels (FAV CH)
This function is supported in the modes TV, DSAT, CBL and AUX (if the AUX device button has been programmed accordingly) only You can save preferred channels as favourites.
Setting up favourites
-
Press the device button for the device that you wish to program.
-
Press and hold the button for at least 3 seconds.
-
Press, select "FAV CH" and press to confirm.
-
Press , select "CONFIGURE" and press to confirm. The display reads FAV-CH01.
-
Press, select "FAV-CH01" (or "FAV-CH02"..... "FAV-
CH15") and press OK confirm. The display reads "SELECT KEY".
-
Enter the channel that you wish to save. You can save up to 6 entries (digits or -/--) per channel preset. The entered digits are not shown on the display. When you have finished, press to save your input. The display reads "SUCCESS". Then the next favourite channel preset appears on the display. Press to select a different favourite preset.
-
After entering 6 buttons for one preset, it is saved automatically when you press the 6th button. The display reads "SUCCESS". Then the next favourite channel preset appears on the display. Press to select a different favourite preset.
-
If you select a favourite preset that is in use already, your entry overwrites any existing channel.
Press EXIT to back one menu level. To return to the start window, press one of the device buttons.
Switching to favourite channel
Press the FAV in once or more to switch your favourite channels in sequence. Once you reach the last saved favourite channel, the selection starts again from the beginning.
Deleting all favourite channels (DEL ALL)
It is only possible to delete all favourite channels at once. Individual favourite channels cannot be deleted but they can be overwritten.
-
Press the device button for the device that you wish to program.
-
Press and hold the button for at least 3 seconds.
-
Press, select "FAV CH" and press to confirm. OK
-
Press, select "DELETE ALL" and press to confirm. The display reads "SURE DELET".
-
Press OK to confirm. The display reads "DELETED" and then "SETUP". Next you can program more favourite channels or exit the menu.
Press EXIT go back one menu level. To return to the start window, press one of the device buttons.
The timer function (TIMER)
SLEEP TIMER
This feature lets you set a delay time after which a selected device will switch off.
-
Press the device button for the device that you wish to program.
-
Press and hold the button for at least 3 seconds.
-
Press, select "TIMER" and press to confirm. OK
-
Press, select "SLEEP TIMER" and press to confirm. OK
The display reads "SET TIMER" and suggests a delay time of 30. The first digit flashes.
-
Use the number buttons to enter a value between 01 and 99 minutes. Press OK to confirm. The display reads "SUCCESS" and then "SLEEP TIMER".
-
When the sleep timer is programmed, the icon appears on the left of the display.
Press EXIT to go back one menu level. To return to the start window, press one of the device buttons.
Event timers (TIMER 1....TIMER 4)
The remote control includes 4 event timers that allow the remote control to send a preset command sequence at a set time.
-
Press and hold the button for at least 3 seconds.
-
Press, select "TIMER" and press to confirm. The display reads "SLEEP TIMER".
-
Press 1, select a desired timer from "TIMER1" to "TIMER4" and press confirm. The display shows a 4-digit time. The first two digits representing the hour flash. Here, you set the time at which you want the command sequence to be sent.
-
You can use the number buttons to set a time from 00:00 to 23:59.
Use the buttons to toggle between the 4 digits, e.g. to correct any mistakes. Press OK confirm the set time.

The timer is always set in 24-hour format. If you have the remote control preferences to the 12-hour format, please note the following:
In this case the remote control automatically converts the 24-hour format to the 12-hour format. Example: To program a timer for 03:30PM, enter 15:30.
- Now enter the date for the timer. You can then set the year, the month and the day in sequence. Press to adjust the
value which is currently flashing. You can use the 🔊 buttons to toggle between the different values. Press OK to confirm the set date.
-
Next, press the device button for the device you want and then enter the command sequence (max. 15 commands) that you want to send at the set time. The number of commands already entered is shown on the left hand side of the display.
-
By default, the different timer commands are transmitted sequentially every second. As this could be too fast for some devices, you can adjust the delay time in 2-second increments from 5 to 41 seconds. To do so, press the MACRC button, more than once, if necessary. The current delay time is indicated on the display.
-
When you are done, press to confirm your entry. The display reads "SUCCESS".
-
You can press up to 15 buttons per event timer, including the device button. After this, the programming is applied automatically and the display reads "SUCCESS".
-
If required, you can program more event timers.
-
When an event timer is programmed, the icon appears on the left of the display.
After an event timer has completed it is erased automatically.
Press EXIT to go back one menu level. To return to the start window, press one of the device buttons.
Deleting a timer
To delete a programmed timer ("SLEEP TIMER", "TIMER1" to "TIMER4"):
-
Press and hold the button for at least 3 seconds.
-
Press, select "TIMER" and press to confirm. OK
-
Select the timer that you wish to delete and press OK confirm. The display reads "CLEAR". Press OK to confirm. The display reads "SUCCESS". The selected timer is deleted. The display shows the name of the selected timer ("SLEEP TIMER", "TIMER1" to "TIMER4").
Press EXIT go back one menu level. To return to the start window, press one of the device buttons.
The All on/All off feature
If you have programmed your remote control to control several devices, this feature lets you switch all of them on or off at the same time b
ALL OFF pressing one button. To do so, press and hold the button (3) for a few seconds. This switches all the devices on or off at the start. Depending on the number of devices programmed, this can take up to 10 seconds. The following is required for this feature to work:
- A clear line of sight between the remote control and each device you want to switch on/off.
• All devices need to support powering on/off via remote control. - The automatic code search, brand code search and macro functions must be disabled.
Storage when not using the product

If you will not be using the remote control for a long period of time, remove the batteries to prevent any leaking. Store the cleaned device in a dry, cool place.
Troubleshooting
Device does not respond to the remote control commands
- Please check that you have selected the correct device with the remote control.
- Point the remote control directly at the device.
- Check if the remote control has been programmed with the correct code for your device.
- It is possible that the device is not compatible with programming using the code list. In this case, please program the remote control by using the learn function.
- The batteries are low or empty. Replace the batteries with new batteries of the same type. See also the chapter "Inserting the batteries".
Some buttons do not work properly
- It is possible that not all functions of your original remote control are supported.
- The code entered does not support all the functions of your device. Try to find a code that matches your device better.
- Program any buttons that do not work properly using the learn function.
- Before programming a device button using brand code search or automatic search, please carry out a RESET for this button first. If this device had previously been programmed using the learn function, any learned keys would not be overwritten by the new programming.
The LCD display does not work
- The batteries are low or empty. Replace the batteries with new batteries of the same type. See also the chapter "Inserting the batteries".
TOP Text buttons not working in Teletext mode
- While the "PLAYBACK" function is enabled, the recording/playback control buttons (5) are used to control the selected tape or disc player. In this case, these buttons cannot be used for the TV TOP Text functions.
Environmental regulations and disposal information

Devices marked with this symbol are subject to European Directive 2012/19/EU. All electrical and electronic devices must be disposed of separately from household waste at official disposal centres.
Proper disposal of old devices prevents damage to the environment or your health. For further information about proper disposal, contact your local council, recycling centre or the shop where you bought the device. Respect the environment. Old batteries do not belong in with domestic waste. They must be handed in at a collection point for waste batteries. Please note that batteries must be disposed of fully discharged at appropriate collection points for old batteries. If disposing of batteries which are not fully discharged, take precautions to prevent short circuits. Dispose of all packaging in an environmentally-friendly manner. Cardboard packaging can be taken to paper recycling containers or public collection points for recycling. Any film or plastic contained in the packaging should be taken to your public collection points for disposal.
Conformity notes

This device complies with the basic and other relevant requirements of EMC Directive 2004/108/EC and the RoHS Directive 2011/65/EU. The corresponding Declaration of Conformity can be found at the end of this User Manual.
Warranty and Service Information
Warranty of TARGA GmbH
This device is sold with three years warranty from the date of purchase. Please keep the original receipt in a safe place as proof of purchase. Before using your product for the first time, please read the enclosed documentation. Should any problems arise which cannot be solved in this way, please call our hotline. Please have the article number and, if available, the serial number to hand for all enquiries. If it is not possible to solve the problem on the phone, our hotline support staff will initiate further servicing procedures depending on the fault. Within the warranty period the product will be repaired or replaced free of charge as we deem appropriate. No new warranty period commences if the product is repaired or replaced. Consumables such as batteries, rechargeable batteries and lamps are not covered by the warranty.
Your statutory rights towards the seller are not affected or restricted by this warranty.

Service

Phone: 0207 - 36 50 744
E-Mail: service.GB@targa-online.com

Phone: 01 - 242 15 83
E-Mail: service.IE@targa-online.com

Phone: 800 - 62 175
E-Mail: service.MT@targa-online.com

Phone: 800 - 92 496
E-Mail: service.CY@targa-online.com
IAN: 113023

Manufacturer
TARGA GmbH
Coesterweg 45
59494 SOEST
GERMANY
Inhaltsverzeichnis
Einleitung 97
EU Declaration of Conformity
Address:
Targa GmbH
Coesterweg 45
59494 Soest. Germany
Product:
RemoteControl
Model:
SilverCrest SFB 10.1 C3
Identification number:
IAN 113023
The product complies with the requirements of the following European directives:
2004/108/EC
Electromagnetic Compatibility
2011/65/EU
Restriction of the use of certain hazardous
substances in electrical and electronic equipment
Compliance was proved by the application of the following standards:
EMC:
EN 55013: 2001 +A1: 2003 +A2: 2006
EN 55020: 2007 +A11: 2011
Rohs:
EN 50581: 2012
Year of CE marking:
2015
Soest, 14 th of July, 2015

- ANTES DE EMPEZAR
- ANTES DE COMEÇAR
- TROUBLESHOOTING....93
- ENVIRONMENTAL REGULATIONS AND DISPOSAL INFORMATION ..... 94
- CONFORMITY NOTES....94
- WARRANTY AND SERVICE INFORMATION 95
- INTRODUCTION
- INTENDED USE
- SAFETY INSTRUCTIONS
- BATTERIES
- CAUTION! CHILDREN AND PERSONS WITH DISABILITIES
- DANGER OF SUFFOCATION
- MAINTENANCE / CLEANING
- OPERATING ENVIRONMENT
- INSERTING THE BATTERIES
- BEFORE YOU START
- IMPORTANT NOTE ON COMPATIBILITY
- TRADEMARK AND BRAND INFORMATION
- GETTING STARTED
- REMOTE CONTROL BUTTONS
- CONFIGURATION MENUS
- MENU STRUCTURE
- SETTING THE MENU LANGUAGE (LANGUAGE)
- PROGRAMMING THE REMOTE CONTROL (CODE SETUP)
- BRAND CODE SEARCH (BRAND SRCH)
- AUTOMATIC CODE SEARCH (AUTO SRCH)
- DIRECT CODE INPUT (CODE SET)
- FLEX MODE
- SYSTEM CONFIGURATION (CONFIGURE)
- SETTING THE TIME (TIME SETUP)
- SETTING THE DATE (DATE SETUP)
- ADJUSTING THE KEYPAD LIGHT TIME (TIME)
- GLOBAL VOLUME ADJUSTMENT (VOL THROUGH)
- ADJUSTING THE GLOBAL VOLUME (VPT SETUP)
- DISABLING THE GLOBAL VOLUME ADJUSTMENT (CANCEL VPT)
- GLOBAL RECORDING/PLAYBACK CONTROL (PLAYBACK)
- CHILD LOCK (KIDS LOCK)
- LOCKING THE CONFIGURATION MENU (LOCK SETUP)
- RESETTING TO FACTORY DEFAULTS (RESET)
- THE LEARN FUNCTION (LEARNING)
- PROGRAMMING VIA THE LEARN FUNCTION (LEARN KEY)
- DELETING INDIVIDUAL BUTTON CODES (DELETE KEY)
- DELETING THE DEVICE CODES OF AN INDIVIDUAL DEVICE (DELETE DEV)
- DELETING ALL BUTTON CODES (DELETE ALL)
- THE MACRO FUNCTION (MACRO)
- PROGRAMMING A MACRO
- EXAMPLE COMMAND SEQUENCE FOR PROGRAMMING A MACRO
- RUNNING A MACRO
- DELETING A MACRO
- CONFIGURING FAVOURITE CHANNELS (FAV CH)
- SETTING UP FAVOURITES
- SWITCHING TO FAVOURITE CHANNEL
- DELETING ALL FAVOURITE CHANNELS (DEL ALL)
- THE TIMER FUNCTION (TIMER)
- SLEEP TIMER
- EVENT TIMERS (TIMER 1....TIMER 4)
- DELETING A TIMER
- THE ALL ON/ALL OFF FEATURE
- STORAGE WHEN NOT USING THE PRODUCT
- TROUBLESHOOTING
- DEVICE DOES NOT RESPOND TO THE REMOTE CONTROL COMMANDS
- SOME BUTTONS DO NOT WORK PROPERLY
- THE LCD DISPLAY DOES NOT WORK
- TOP TEXT BUTTONS NOT WORKING IN TELETEXT MODE
- ENVIRONMENTAL REGULATIONS AND DISPOSAL INFORMATION
- CONFORMITY NOTES
- WARRANTY AND SERVICE INFORMATION
- WARRANTY OF TARGA GMBH
- SERVICE
- MANUFACTURER
- INHALTSVERZEICHNIS
- EU DECLARATION OF CONFORMITY
Brand : SILVERCREST
Model : SFB 10.1 C3
Category : Remote control