
EXR-5S - Arranger keyboard ROLAND - Free user manual and instructions
Find the device manual for free EXR-5S ROLAND in PDF.
User questions about EXR-5S ROLAND
0 question about this device. Answer the ones you know or ask your own.
Ask a new question about this device
Download the instructions for your Arranger keyboard in PDF format for free! Find your manual EXR-5S - ROLAND and take your electronic device back in hand. On this page are published all the documents necessary for the use of your device. EXR-5S by ROLAND.
USER MANUAL EXR-5S ROLAND
Thank you for choosing a Roland EXR-5s/EXR-3s Interactive Arranger with a superior Roland sound source, an intuitive user interface, a USB port, V-LINK compatibility and a host of other useful functions.
To get the most out of the EXR-5s/EXR-3s and to ensure many years of trouble-free service, we urge you to read through this Owner's Manual thoroughly.
To avoid confusion, let's agree to use the word "button" for all keys on the front panel, and use "key" only when referring to the EXR-5s/EXR-3s's keyboard.
Before using this instrument, carefully read the "Important notes" (p. 10). They provide information concerning the proper operation of the EXR-5s/EXR-3s. Be sure to keep this manual in a safe place for future reference.
Copyright © 2005 ROLAND EUROPE. All rights reserved. No part of this publication may be reproduced in any form without the written permission of Roland Europe S.p.a.
Manual del Usuario
Superior sound source
The EXR-5s/EXR-3s's sounds are based on full-length (uncompressed) waveforms, which is unique in this price range. This produces vibrant, realistic sounds quite unlike anything you would expect from a budget-friendly arranger keyboard. The EXR-5s/EXR-3s's tone generator is 64-voice polyphonic. Combined with the new amplification system and Digital Bass Enhancer function, the EXR-5s/EXR-3s sounds truly amazing, with a clear high end and a powerful low range.
Cover function
The EXR-5s/EXR-3s sports the acclaimed Cover function found on the G-70 and other EXR-series instruments. Simply by pressing one of the COVER buttons, you can change the orchestration of Standard MIDI Files – and now also of Music Styles.
Flash memory and USB
The EXR-5s/EXR-3s comes with 84 Music Styles in ROM, additional Music Styles in the Flash area and several Standard MIDI Files. The additional Styles and SMFs reside in the EXR-5s/EXR-3s's Flash memory area, whose contents can be expanded and managed via a USB connection with your PC or Macintosh computer.
New concept
The EXR-5s/EXR-3s is 19-part multitimbral, with 3 parts that can be played via the keyboard (Main, Split and Dual). The Main part can be used to play melodies or for drumming, while the Split and Dual parts allow you to quickly add a second sound to your solo playing.
Furthermore, the EXR-5s/EXR-3s provides a new selection routine for Music Styles, Tones, songs, and User Programs: the FAMILY ▶▶ buttons can be used for selecting specific groups, while the SELECT ▶▶ buttons allow you to choose a setting within the selected group.
Funciones
The EXR-5s/EXR-3s comes loaded with 103 all-new Music Styles prepared by Roland's legendary Style foundry. As usual, several patterns are available (INTRO, ORIGINAL, VARIATION, FILL and ENDING), with additional options via the BAND ORCHESTRATOR buttons.
And much, much more...
A metronome and several educational functions are provided, while three digital effects processors (Reverb, Chorus and MFX) can be used to further enhance the already amazing sound quality.
The EXR-5s/EXR-3s can play back GM, GM2, GS and XG song data, so that you can virtually use any Standard MIDI File available at your Roland dealer or on the Internet.
Note: The EXR-5s/EXR-3s supports XG Light and therefore only provides the basic set of compatible functions.
The EXR-5s is also equipped with a floppy disk drive (2DD/2HD) for data management and importing Music Styles prepared for older Roland arranger instruments.
Have fun!
Microsoft and Windows are registered trademarks of Microsoft Corporation USA in the United States and other countries.
Apple and Macintosh are registered trademarks of Apple Computer Corporation USA in the United states and other countries.
Mac OS is a registered trademark of Apple Computer Corporation.
Other names of companies, products, or standards are the trademarks or registered trademarks of their respective owners.
Arranger excelente
USING THE UNIT SAFELY
INSTRUCTIONS FOR THE PREVENTION OF FIRE, ELECTRIC SHOCK, OR INJURY TO PERSONS
About ⚠️ WARNING and ⚠️ CAUTION Notices
| ⚠ WARNING | Used for instructions intended to alert the user to the risk of death or severe injury should the unit be used improperly. |
| ⚠ CAUTION | Used for instructions intended to alert the user to the risk of injury or material damage should the unit be used improperly.* Material damage refers to damage or other adverse effects caused with respect to the home and all its furnishings, as well to domestic animals or pets. |
About the Symbols
| The △ symbol alerts the user to important instructions or warnings. The specific meaning of the symbol is determined by the design contained within the triangle. In the case of the symbol at left, it is used for general cautions, warnings, or alerts to danger. | |
| The ⬇ symbol alerts the user to items that must never be carried out (are forbidden). The specific thing that must not be done is indicated by the design contained within the circle. In the case of the symbol at left, it means that the unit must never be disassembled. | |
| The ● symbol alerts the user to things that must be carried out. The specific thing that must be done is indicated by the design contained within the circle. In the case of the symbol at left, it means that the power-cord plug must be unplugged from the outlet. |
- Before using this instrument, make sure to read the instructions below, and the Owner's Manual.

- Do not open or perform any internal modifications on the unit.

- Do not attempt to repair the EXR-5s/EXR-3s, or replace parts within it (except when this manual provides specific instructions directing you to do so). Refer all servicing to your retailer, the nearest Roland Service Center, or an authorized Roland distributor, as listed on the "Information" page.

- Never use or store the EXR-5s/EXR-3s in places that are:
- Subject to temperature extremes (e.g., direct sunlight in an enclosed vehicle, near a heating duct, on top of heat-generating equipment); or are
- Damp (e.g., baths, washrooms, on wet floors); or are
- Humid; or are
- Exposed to rain; or are
- Dusty; or are
- Subject to high levels of vibration.
- This unit should be used only with a rack or stand that is recommended by Roland.


- Make sure you always have the unit placed in such a way that it is level and sure to remain stable. Never place it on stands that could wobble, or on inclined surfaces.

- The instrument should only be connected to a power supply of the type described in the operating instructions, or as marked on the adapter supplied with the EXR-5s/EXR-3s.

WARNING
- Do not excessively twist or bend the adapter's power cord, nor place heavy objects on it. Doing so can damage the cord, producing severed elements and short circuits. Damaged cords are fire and shock hazards!

ATENCIÓN
- This instrument, either alone or in combination with an amplifier and headphones or speakers, may be capable of producing sound levels that could cause permanent hearing loss. Do not operate for a long period of time at a high volume level, or at a level that is uncomfortable. If you experience any hearing loss or ringing in the ears, you should immediately stop using the unit, and consult an audiologist.
- Do not allow any objects (e.g., flammable material, coins, pins); or liquids of any kind (water, soft drinks, etc.) to penetrate the unit.


- In households with small children, an adult should provide supervision until the child is capable of following all rules essential for the safe operation of the EXR-5s/EXR-3s.

- Protect the unit from strong impact. (Do not drop it!)

- Do not force the EXR-5s/EXR-3s's adapter to share an outlet with an unreasonable number of other devices. Be especially careful when using extension cords—the total power used by all devices you have connected to the extension cord's outlet must never exceed the power rating (watts/amperes) for the extension cord. Excessive loads can cause the insulation on the cord to heat up and eventually melt through.

WARNING
- Before using the EXR-5s/EXR-3s in a foreign country, consult with your retailer, the nearest Roland Service Center, or an authorized Roland distributor, as listed on the "Information" page.

CAUTION
- The EXR-5s/EXR-3s should be located so that its location or position does not interfere with its proper ventilation.

- This unit for use only with Roland keyboard stand KS-12. Use with other stands is capable of resulting in instability causing possible injury.

- Always grasp only the plug on the adapter when plugging into, or unplugging from, an outlet or this unit.

- Try to prevent cords and cables from becoming entangled. Also, all cords and cables should be placed out of the reach of children.

- Never climb on top of, nor place heavy objects on the unit.

- Never handle the adapter's power cord or its plugs with wet hands when plugging into, or unplugging from, an outlet or this unit.

- If you need to move the instrument, take note of the precautions listed below. Make sure to have a firm grip, to protect yourself from injury and the instrument from damage.

- Disconnect the adapter.
- Disconnect all cords coming from external devices.
- Remove the music stand.
- Before cleaning the unit, turn off the power and unplug the adapter from the outlet.

- Whenever you suspect the possibility of lightning in your area, disconnect the adapter from the outlet.

- Should you remove screws, make sure to put them in a safe place out of children's reach, so there is no chance of them being swallowed accidentally.

-
Important notes .... 10
-
Panel descriptions....14
-
First steps....21
Setting up 21
Demo songs....22
Playing without accompaniment....24
- Playing with accompaniment (Arranger) 28
Selecting Music Styles....31
Balance....33
-
Playing back songs 34
-
Changing the Music Style or song orchestration .....43
Cover function 43
Using the Band Orchestrator function....45
-
Recording your music....47
-
Additional Music Style functions .....56
One Touch ....56
Using the Music Assistant....57
Melody Intelligence ....58
Bass Inversion (Bass Inv) 60
- Keyboard part functions .....62
Selecting sounds for the Main, Split and Dual parts .....62
Piano Mode....59
Drum sounds and sound effects ("SFX")....65
Transpose....67
Octave settings....70
- Performance functions and effects .....71
Performance functions ....71
Using effects....74
V-LINK function 82
Contenido
Bass Inversion (Bass Inv) 60
Bass Inversion (Bass Inv)....60
- Working with User Programs 99
Writing your settings to a User Program....99
Selecting a User Program....101
-
MIDI functions.... 103
-
Data management.... 109
Working with the Flash memory....109
Archiving data using a computer (USB)....118
Disk functions [EXR-5s only] 122
-
Using the outputs and an optional footswitch ..... 130
-
Miscellaneous.... 131
Functions for educational purposes....131
Initializing your EXR-5s/EXR-3s (Factory) .....132
-
Specifications.... 133
-
Lists.... 135
Tones selectable via the front panel....135
Drum Sets....138
Music Styles ....141
Chord Intelligence....142
MIDI Implementation Chart....144
- Menú Function....85
Chord Intelligence ....142
In addition to the items listed under "Using the unit safely" (p. 4), please read and observe the following:
Power supply
- Do not use this instrument on the same power circuit with any device that will generate line noise (such as an electric motor or variable lighting system).
- Before connecting the EXR-5s/EXR-3s to other devices, turn off the power to all units. This will help prevent malfunctions and/or damage to speakers or other devices.
Placement
- Using the EXR-5s/EXR-3s near power amplifiers (or other equipment containing large power transformers) may induce hum. To alleviate the problem, change the orientation of this instrument or move it further away from the source of interference.
- This instrument may interfere with radio and television reception. Do not use it in the vicinity of such receivers.
- Observe the following when using the unit's floppy disk drive. For further details, refer to "Before using floppy disks (handling the floppy disk drive) [EXR-5s only]".
- Do not place the unit near devices that produce a strong magnetic field (e.g., loudspeakers).
• Install the EXR-5s/EXR-3s on a solid, level surface. - Do not move the unit or subject it to vibration while the drive is operating.
- Do not expose the EXR-5s/EXR-3s to direct sunlight, place it near devices that radiate heat, leave it inside an enclosed vehicle, or otherwise subject it to temperature extremes. Excessive heat can deform or discolor the instrument.
- To avoid possible breakdown, do not use the unit in a wet area, such as an area exposed to rain or other moisture.
- Do not allow objects to remain on top of the EXR-5s/EXR-3s. This can be the cause of malfunction.
1. Notas importantes
- For everyday cleaning wipe the EXR-5s/EXR-3s with a soft, dry cloth or one that has been slightly dampened with water. To remove stubborn dirt, use a mild, non-abrasive detergent. Afterwards, be sure to wipe the instrument thoroughly with a soft, dry cloth.
- Never use benzene, thinner, alcohol or solvents of any kind, to avoid the possibility of discoloration and/or deformation.
Repairs and data
- Please be aware that all data contained in the instrument's memory may be lost when it is sent for repairs. In certain cases (such as when circuitry related to memory itself is out of order), we regret that it may not be possible to restore the data. Roland assumes no liability concerning such loss of data.
Additional precautions
- Please be aware that the memory contents can be irretrievably lost as a result of a malfunction, or the improper operation of the instrument.
- Use a reasonable amount of care when using the instrument's buttons, other controls, and jacks/connectors. Rough handling can lead to malfunctions.
- Never strike or apply strong pressure to the display.
- When connecting/disconnecting cables, grasp the connector itself—never pull on the cable. This way you will avoid causing shorts, or damage to the cable's internal elements.
- A small amount of heat will radiate from the instrument during normal operation. This is perfectly normal.
- To avoid disturbing your neighbors, try to keep the instrument's volume at reasonable levels. You may prefer to use headphones, so you do not need to be concerned about those around you (especially late at night).
- When you need to transport the instrument, package it in the box (including padding) that it came in. Otherwise, you will need to use equivalent packaging materials, or a flightcase.
- Use only a recommended footswitch (DP-2, DP-6, sold separately). By connecting any other footswitch, you risk causing malfunction and/or damage to the EXR-5s/EXR-3s.
- When the EXR-5s/EXR-3s is used at excessive volumes, the protection system of its power amplifier stage may come on and mute the speakers. In that case, reduce the volume setting and wait a few seconds.
Mantenimiento
Before using floppy disks (handling the floppy disk drive) [EXR-5s only]
- Install the unit on a solid, level surface in an area free from vibration. If the unit must be installed at an angle, be sure the installation does not exceed the permissible range: upward, 2°; downward, 18°.
- Avoid using the EXR-5s immediately after it has been moved to a location with a level of humidity that is greatly different than its former location. Rapid changes in the environment can cause condensation to form inside the drive, which will adversely affect the operation of the drive and/or damage floppy disks. When the EXR-5s has been moved, allow it to become accustomed to the new environment (allow a few hours) before operating it.
- To insert a disk, push it gently but firmly into the drive—it will click into place. To remove a disk, press the EJECT button firmly. Do not use excessive force to remove a disk which is lodged in the drive.
- Never attempt to remove a floppy disk from the drive while the drive is operating (the indicator is lit); damage could result to both the disk and the drive.
- Remove any disk from the drive before switching the instrument on or off.
- To prevent damage to the disk drive's heads, always try to hold the floppy disk in a level position (not tilted in any direction) while inserting it into the drive. Push it in firmly, but gently. Never use excessive force.
- To avoid the risk of malfunction and/or damage, insert only floppy disks into the disk drive. Never insert any other type of disk. Avoid getting paper clips, coins, or any other foreign objects inside the drive.
Handling floppy disks [EXR-5s only]
- Floppy disks contain a plastic disk with a thin magnetic coating. Microscopic precision is required to enable storage of large amounts of data on such a small surface area. To preserve their integrity, please observe the following when handling floppy disks:
- Never touch the magnetic medium inside the disk.
- Do not use or store floppy disks in dirty or dusty areas.
- Do not subject floppy disks to temperature extremes (e.g., direct sunlight in an enclosed vehicle). Recommended temperature range: 10^ 50^ ( 50^ 122^ ).
- Do not expose floppy disks to strong magnetic fields, such as those generated by loudspeakers.
- Floppy disks have a "WRITE" tab which can protect the disk from accidental erasure. It is recommended that the tab be kept in the PROTECT position, and moved to the WRITE position only when you wish to write new data onto the disk.
![ROLAND EXR-5S - Handling floppy disks [EXR-5s only] - 1](/content/2020/05/130990/images/f9985f83edaa453d54f108646ceeeaf3408000ec558897bbe425454a7bbc6919.jpg)
text_image
Rear side of the disk WRITE (you can save data to the disk) PROTECT (you cannot save data) Protect tab- Disks containing important performance data for this instrument should always be locked (have their write protect tab slid to the PROTECT position) before you insert them into the drive of another instrument.
- The identification label should be firmly affixed to the disk. If the label comes loose while the disk is in the drive, it may be difficult to remove the disk.
- Put the disk back into its case for storage.
Liability and copyright
- Should data contained and stored on a floppy disk be lost, it is unfortunately impossible to restore them. Roland Europe S.p.a. assumes no liability concerning such loss of data.
- Unauthorized recording, distribution, sale, lending, public performance, broadcasting, or the like in whole or in part, of a work (musical composition, video, broadcast, public performance, or the like) whose copyright is held by a third party is prohibited by law.
- Do not use this unit for purposes that could infringe on a copyright held by a third party. Roland assumes no responsibility whatsoever with regard to any infringements of third-party copyrights arising through your use of this unit.
Press this button to switch the EXR-5s/EXR-3s on and off.
② BENDER/MODULATION lever
By performing left/right movements, you can bend your solo notes down (left) or up (right). Press this lever towards the rear of the instrument to add modulation (usually vibrato) to the notes you are playing.
③ PHONES 1/2 sockets [EXR-5s only]
This is where you can connect two pairs of optional headphones (Roland RH-25, RH-50 or RH-120). By doing so, you switch off the EXR-5s's speakers.
④ VOLUME knob
Use this knob to set the global volume of your EXR-5s/EXR-3s.
⑤ BALANCE [ACCOMP] [KEYBOARD] buttons
Use the BALANCE buttons to change the volume of the corresponding section (accompaniment/song, or the parts you play on the keyboard).
① Botón [POWER ON]
Press this button to switch the keyboard's velocity sensitivity on or off. When it is switched off, you can specify the fixed velocity value that should be used for all notes you play.
⑦ [METRONOME] button
This button allows you switch the metronome on and off. Holding it for more than one second calls up a FUNCTION parameter you can set.
⑧ [MELODY INTELLIGENCE] button
This button allows you to switch the Melody Intelligence function on/off. Melody Intelligence is a function that adds a harmony part to your melody playing. See p. 58. Holding it for more than one second calls up a FUNCTION parameter you can set for selecting the harmony type.
⑨ [USB] button
This button allows you to select the function of the USB port should perform: (i) mass storage (archiving and retrieving settings to/from a computer) or (ii) USB/MIDI (whereby the USB port has the same function as the MIDI IN and MIDI OUT connectors). See pages 103 and 118 for details.
Press it together with ONE TOUCH to select the EXR-5s/EXR-3s's demo function (see p. 22).
⑩ [ONE TOUCH] button
Press this button to select the desired One Touch settings. One Touch memories contain a number of settings that complement the currently selected Music Style. There are two One Touch memories per Music Style. See p. 56.
⑪ [V-LINK] button
Press this button to take advantage of the EXR-5s/EXR-3s's V-LINK functionality for controlling video material via certain performance functions and the right-most keys on the EXR-5s/EXR-3s's keyboard. By using V-LINK-compatible video equipment, visual effects can be easily linked to, and made part of the expressive elements of a performance. By connecting the EXR-5s/EXR-3s to an optional Edirol DV-7PR or V-4, you can switch images in synchronization with music, or use the EXR-5s/EXR-3s's performance functions or right-most keys to switch clips, control playback speed, etc.
⑥ Botón [KEYBOARD TOUCH]
During song and Music Style playback, this button flashes to indicate the tempo and beats (BEAT function).
⑫ KEYBOARD CONTROL section
Press the button to play different sounds with your left and right hands. Press the button to play two sounds simultaneously.
Use the TRANPOSE button to transpose the keyboard (see p. 67).
⑬ BAND ORCHESTRATOR section
Press one of these buttons to choose the desired orchestration for the selected Music Style. See page 45.
⑭ ARRANGER & SONG CONTROLS section
TAP TEMPO button: Press this button at least twice to set the Arranger's or Recorder's playback tempo.
SYNC START/STOP button: This button performs two functions: In Arranger mode (while using the automatic accompaniment), it allows you to switch the SYNC START and SYNC STOP function on and off.
In Song mode, it can be used to specify the beginning ("A") and end ("B") of the passage that should be repeated.
The remaining buttons in this section allow you to control Arranger or Recorder playback. See pages 28 and 34.
⑮ COVER section
The buttons in this section provide access to pre-programmed templates that allow you to quickly modify Music Styles' or Standard MIDI File's character. See page 43.
When the Minus One function is on, these buttons allow you to quickly mute several Standard MIDI File parts (these mute functions are not available while you are using the Arranger function).
⑯ KEYBOARD MODE section
These two buttons allow you to quickly configure the EXR-5s/EXR-3s for use with (ARRANGER BAND) or without (PIANO SOLO) automatic accompaniment. At power-on, the EXR-5s/EXR-3s selects the PIANO SOLO mode.
⑬ Section BAND ORCHESTRATOR
Press them simultaneously to activate PIANO MODE, which allows you to use the EXR-5s/EXR-3s's Arranger (automatic accompaniment) without splitting the keyboard (see p. 59).
⑰ [MUSIC ASSISTANT] button
This button allows you to work with pre-programmed registrations (additional User Programs). See p. 57.
⑱ [SONG] button
This button allows you to select the EXR-5s/EXR-3s's Song mode and to specify that the INTRO, ORIGINAL, etc., buttons should be used to operate the on-board Recorder.
⑲ [STYLE] button
Press this button if you want to select Music Styles. By activating this button, you also specify that the INTRO, ORIGINAL, etc., buttons are used for selecting a Style Division, while the numeric buttons can be used to select the desired Style memory.
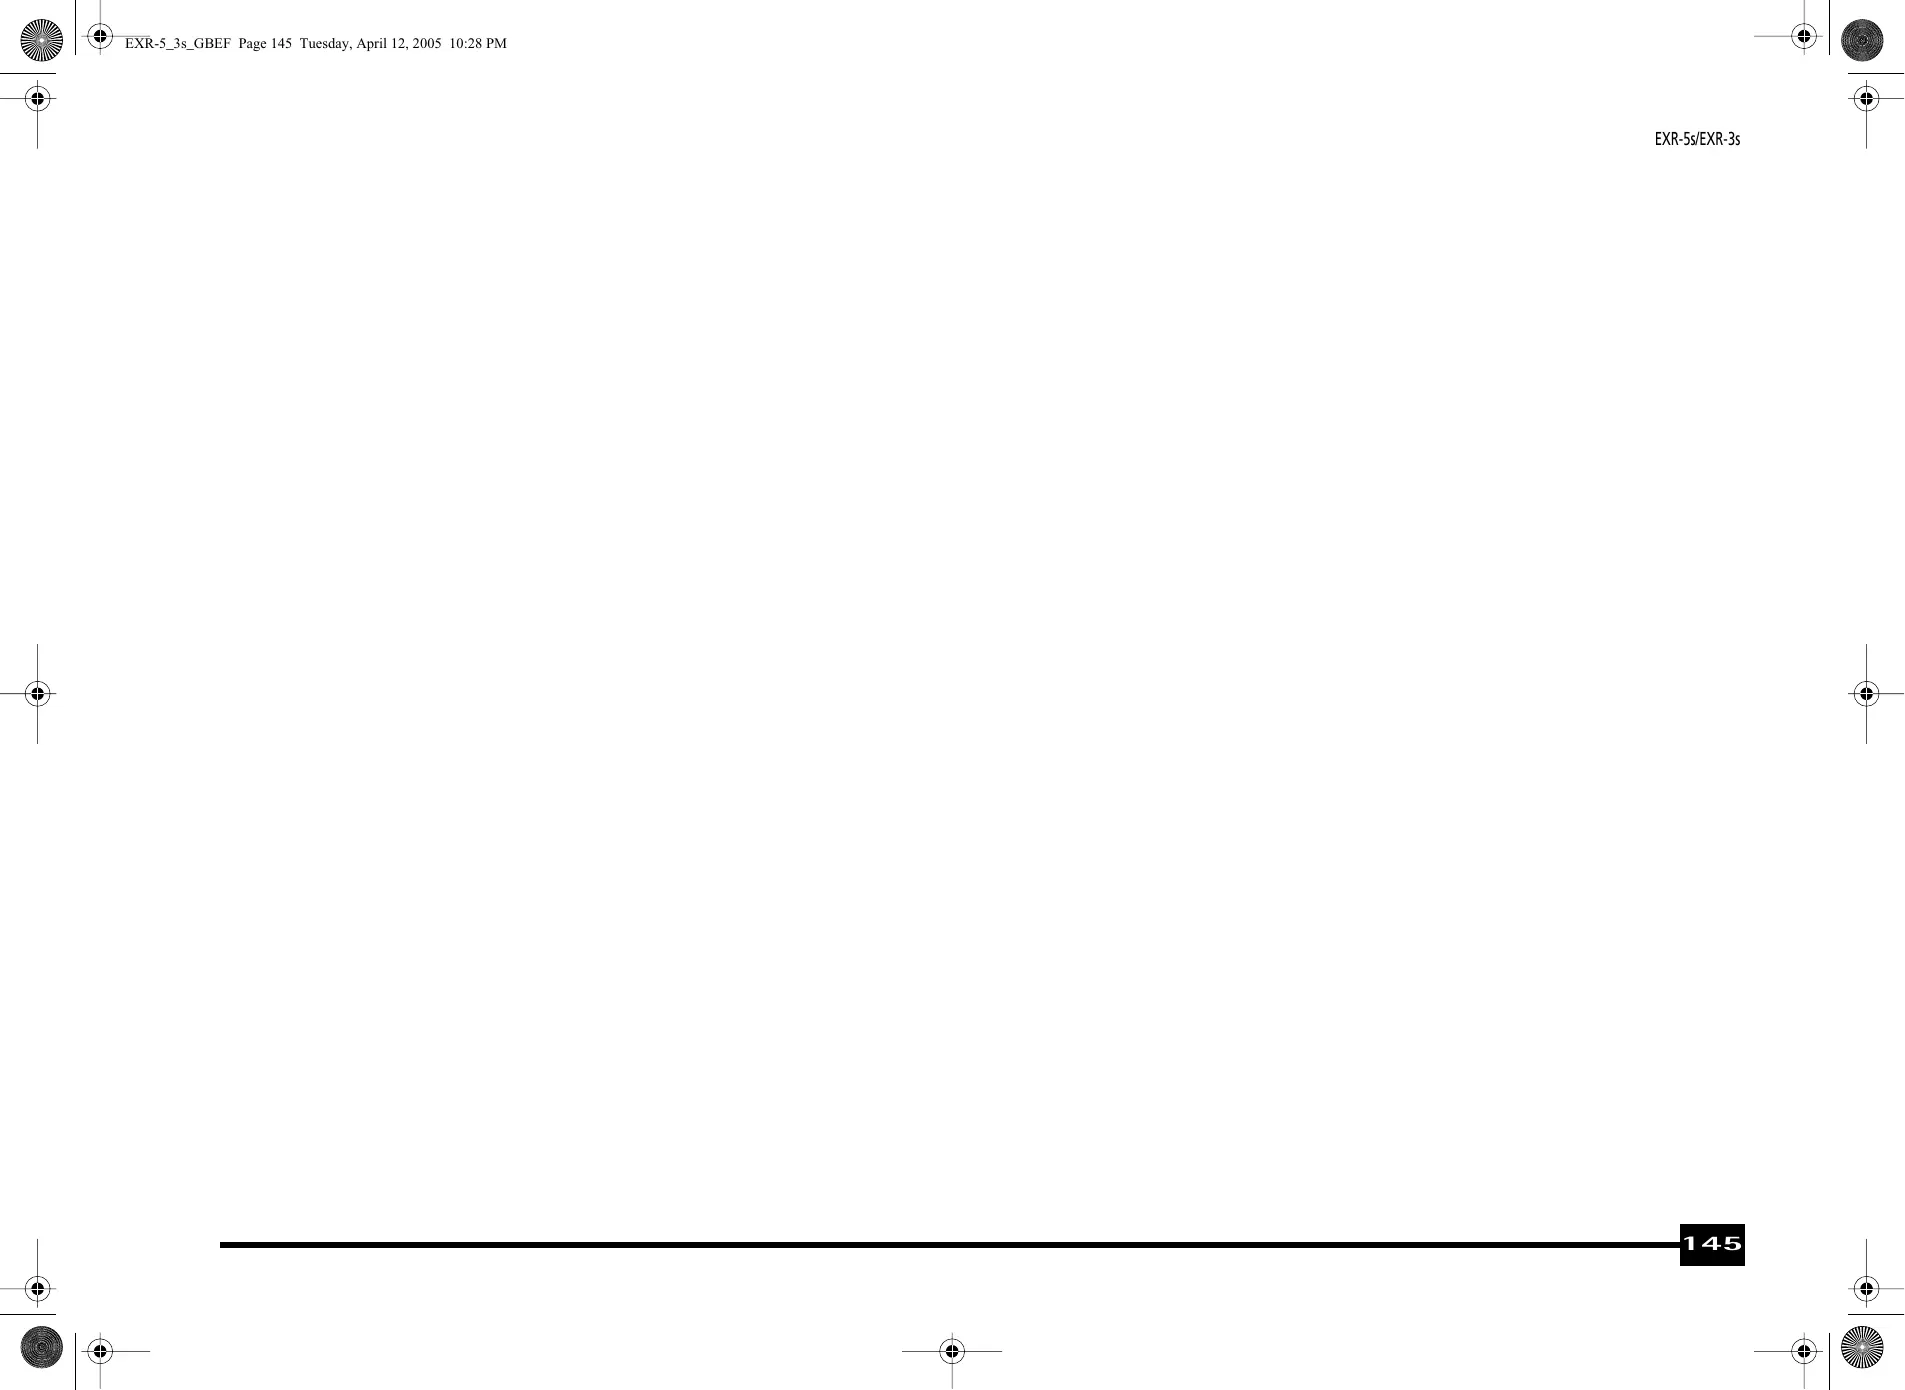
⑳ [TONE] button
Press this button if you want to use the FAMILY and numeric buttons for assigning a sound ("Tone") or Drum Set to the Main, Split or Dual part. See p. 62.
②1 DATA ENTRY buttons
FAMILY and SELECT ▶▶ buttons: The FAMILY and SELECT ▶▶ buttons are used to select Tones, Styles, Music Assistant memories, Songs, and Function parameters. The FAMILY ▶▶ buttons allow you to select a group. You can press them, hold them, or press one while holding the other to change the scrolling speed.
The SELECT ▶▶ buttons allow you to choose items within the selected group or family. You can press them, hold them, or press one while holding the other to change the scrolling speed. After selecting the last item of the currently selected group, pressing ▶ again takes you to the first entry of the following group. Conversely, pressing ▶ again after selecting the first entry of a group takes you to the last entry of the preceding group.
Numeric key pad: These buttons allow you to enter numbers (for Tone, Style, Music Assistant memory, song, track selection), values and characters (for entering names).
The TEMPO/DATA ☐/☐ buttons allow you to set the arranger or Song tempo and the value of the selected FUNCTION parameter.
⑳ [FUNCTION] button
This button provides access to the FUNCTION menu. You can use the FAMILY and SELECT ▶▶ buttons to select the desired function.
⑳ [DISK] button [EXR-5s only]
Press this button to access the Disk functions. They are used for loading data from floppy, saving data to disk, and managing floppy disks. See p. 122.
Note: You can also save and load data via USB.
⑳ [USER PROGRAM/WRITE] button
Press this button whenever you want to select a User Program (a set of registrations). Press and hold it to save the current panel and parameter settings to a User Program. See page 99.
⑲ TONE section
These buttons allow you to select the "best" sound of the indicated family (i.e. the "best" piano, organ, guitar/bass, etc. sound). After selecting one of these favorites, you can use FAMILY ▶ and SELECT ▶ to select other families and other Tones within the active family.
②6 Disk drive [EXR-5s only], in the middle below the keyboard (not pictured)
This is where you insert floppy disks with Standard MIDI Files or Music Styles you may already own. The drive accepts 2DD (720k) and 2HD (1.44MB) floppy disks.
These sockets allow you to connect the EXR-5s/EXR-3s to your HiFi amplifier, a mixer, a cassette deck, a keyboard amplifier, etc. If the external amplifier is mono, be sure to connect it to the OUTPUT L/MONO socket.
② DC IN socket
This is where you need to connect the supplied adapter (PSB-4U for the EXR-5s, ACO for the EXR-3s).
Note: Be sure to only use the adapter supplied with your EXR-5s/EXR-3s. Other adapters may damage your Interactive Arranger.
③ Cord hook
After connecting the adapter cable, wind it around the cord hook to the socket's right to prevent accidental power failures.
④ FOOTSWITCH socket
This is where you can connect an optional DP-2, DP-6, or BOSS FS-5U footswitch that allows you to hold ("sustain") the notes you play with your right hand. It can also be used for controlling other parameters (see "FSW° (Footswitch Assign)" (p. 89)).
⑤ MIDI OUT/IN sockets
Connect the MIDI OUT socket to the MIDI IN jack of your computer (or MIDI instrument) to transfer MIDI data from the EXR-5s/EXR-3s to the computer or external MIDI instrument. Connect the MIDI IN socket of the EXR-5s/EXR-3s to the computer's MIDI OUT jack to receive data from the computer.
Note: The EXR-5s/EXR-3s can also transmit/receive MIDI data via its USB port. To do so, you need to install the appropriate USB drivers from the supplied CD-ROM.
① Zócalos OUTPUT R, L/MONO
① Prises OUTPUT R, L/MONO
The USB port can be used for transmitting/receiving MIDI messages or for archiving purposes with a computer.
⑦ PHONES 1/2 sockets [EXR-3s only]
This is where you can connect two pairs of optional headphones (Roland RH-25, RH-50 or RH-120). By doing so, you switch off the EXR-3s's speakers.
⑥ Puerto USB
text_image
VOLUME Roland EXR-5sThe first thing you need to do is connect the supplied PSB-4U (EXR-5s) or ACO (EXR-3s) adapter to a suitable wall outlet.
(1) Unpack the EXR-5s/EXR-3s and place it on a stable surface.
(2) Connect the small end of the adapter cable to the EXR-5s/EXR-3s's DC IN jack, and the other end to a suitable wall outlet.
(3) Press the POWER ON button to switch on the EXR-5s/EXR-3s.
(4) Use the VOLUME knob to set the EXR-5s/EXR-3s's output volume.
Note: When the EXR-5s/EXR-3s is used at excessive volumes, the protection system of its power amplifier stage may come on and mute the speakers. In that case, reduce the volume setting and wait a few seconds.
(5) Press POWER ON again to switch the EXR-5s/EXR-3s back off again.
If you wish to connect the EXR-5s/EXR-3s to a keyboard or HiFi amplifier, do so before performing step (3) and switch on the amp before performing step (4).
Your EXR-5s/EXR-3s comes with 1 song demo, 8 Tone demos, various Style demos, and 1 Cover demo.
- The song demo illustrates the possibilities of the EXR-5s/EXR-3s as a whole.
- Tone demos show off the EXR-5s/EXR-3s's amazing sound quality.
- Style demos give you an impression of the quality of the on-board Music Styles.
- The Cover demo shows you how easily the orchestration of a Music Style can be changed.
(1) Hold down the USB button while pressing ONE TOUCH.
(2) If necessary, use the VOLUME control to change the playback volume.
(3) Press START/STOP to stop playback.
Playing back a Tone demo song
(1) Press the TONE button.
Playback of the Tone demo song starts automatically.
You can now press START/STOP to stop playback of the currently selected Tone song. If you press this button again, the next Tone demo song will be played back.
(2) Press START/STOP to stop Tone demo song playback.
text_image
TONE Roland EXR-5sPlayback of a Style demo song
(1) Press the STYLE button.
Playback of the Style demo song starts automatically. You can now press START/STOP to stop playback of the currently selected Style demo song. If you press this button again, the next Style demo song will be played back.
(2) Press /STOP to stop Style demo song playback.
Playback of a Cover demo song
(1) Press one of the COVER buttons to select a Cover demo song.
Playback of the Cover demo song starts automatically.
(2) Use the COVER buttons to select other Cover settings. This is not really necessary, as the EXR-5s/EXR-3s changes them automatically during this demo.
(3) Press /STOP to stop Cover demo song playback.
Leaving the Demo mode
(1) Hold down the USB button while pressing ONE TOUCH to leave the Demo mode.
Playing without accompaniment
When you switch on the EXR-5s/EXR-3s, it selects PIANO SOLO mode. This means that you can use the EXR-5s/EXR-3s like a digital piano, or a synthesizer.
The accompaniment function (called "Arranger") and ONE TOUCH button are not available in PIANO SOLO mode, while only the Main part is active.
The EXR-5s/EXR-3s provides three parts for your live playing (and many more for Arranger backing and Song playback):
| Main | As its name suggests, this is the most important part. As long as the Split part is off, the Main part is assigned to the entire keyboard. |
| Split | When you switch on this part, it is assigned to the left half of the keyboard, while the Main part can be played with your right hand. |
| Dual | This part can be added to the Main part and is also assigned to the entire keyboard. This allows you to play two sounds simultaneously. |
Using the Main part
(1) To activate the Main part and assign it to the entire keyboard, press the PIANO SOLO button.
The ARRANGER icon disappears, the Arranger stops (if it was playing), and the EXR-5s/EXR-3s automatically selects a piano sound for you.
(2) Play a few notes on the keyboard.
(3) If necessary, select another sound by pressing one of the 8 TONE buttons. See p. 62 for details.
(4) If necessary, you can hold down the TONE button and use BALANCE ACCOMP (softer) or KEYBOARD (louder) to change the Main part's volume.
Note: Unlike previous Roland arranger instruments, the EXR-5s/EXR-3s no longer distinguishes between "melodic" parts and a Manual Drums part. You can therefore also play a Drum Set with the Main part.
Note: You can also press the START/STOP button to add a rhythm accompaniment to your playing. This is based on the currently selected Music Style. See p. 31 for how to select a different one.
Note: See p. 28 and "Automatic playback control (Sync Start & Stop)" (p. 30) for other ways to start Music Style playback (the drums, that is).
Using the Main and Split parts
text_image
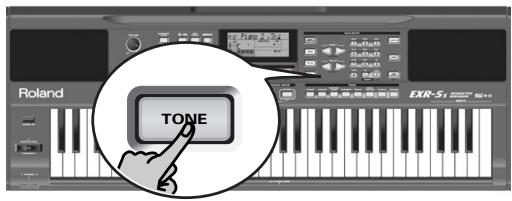
SPLIT Roland XR-51(1) If you wish to play different sounds with your left and right hands, press the button.
The SPLIT icon appears and the EXR-5s/EXR-3s now automatically selects a sound for the Split part that complements the sound assigned to the Main part.
(2) Play a few notes on the keyboard.
At first, the keyboard is split at the G3 (note number "55"). If necessary, you can select a different split point. See "KeySplit* (Split point)" (p. 88).
To change the balance between the Main and Split sounds, proceed as follows:
(3) Hold down the SPLIT button and use BALANCE ACCOMP (decrease) or KEYBOARD (increase) to change the Split part's volume.
text_image
Split Main(4) To assign another sound to the Split part, hold down the [SPLIT] button and proceed like for the Main part (page 24).
Alternatively, press and hold one of the eight TONE buttons (Main part) while pressing another TONE button (Split part).
Note: You cannot assign Drum Sets to the Split part.
Note: You can also add a monophonic bass part ("Auto Bass") to the Split part. See "Auto Bass*: status and volume" (p. 92).
Using the Main and Dual parts
(1) If you wish to play two sounds simultaneously, press the DUAL button.
The DUAL icon appears and the EXR-5s/EXR-3s now automatically selects a sound for the Dual part that complements the sound assigned to the Main part.
You can also activate the Dual mode by holding down one of the eight TONE buttons while pressing another. The first TONE button's sound is then assigned to the Main part, while the second sound is assigned to the Dual part.
(2) Play a few notes on the keyboard.
To change the balance between the Main and Dual sounds, proceed as follows:
(3) Hold down the DUAL button and use BALANCE ACCOMP (decrease) or KEYBOARD (increase) to change the Dual part's volume.
(4) To assign another sound to the Dual part, hold down the DUAL button and proceed like for the Main part (page 24).
Note: You cannot assign Drum Sets to the Dual part.
You can switch on the metronome when practising a new song.
(1) Press the METRONOME button.
The 🎨 icon appears in the display and you hear the metro-nome sound.
(2) Press and hold METRONOME to select the Metro TS function.
(3) Use the /+ buttons to set another time signature. The possibilities are: 1/4, 2/4, 3/4, 4/4, 5/4, 6/4, 6/8, 9/8.
(4) Press another "big" button in the DATA ENTRY section to leave this function.
(5) Press the METRONOME button again to switch the metronome off.
4. Playing with accompaniment (Arranger)
Let us now take advantage of the EXR-5s/EXR-3s's accompaniment function. This function is called "Arranger".
natural_image
Illustration of a hand pressing down on a piano keyboard (no text or symbols)Starting/using the Arranger
(1) Press the ARRANGER BAND button.
The ARRANGER icon appears in the display and the keyboard is split into two halves. The keys you press in the left half are used to specify the key of the accompaniment. The right half of the keyboard allows you to play a tune to the accompaniment.
(2) Press the /STOP button to start Arranger playback. The -LINK button now flashes to indicate the tempo and beats (BEAT function).
Note: If the ARRANGER icon is displayed, playing in the left half of the keyboard while the Arranger is stopped, will sound a stereo string sound (to which you can add a monophonic bass sound, see "Auto Bass*: status and volume" (p. 92)). The left half of the keyboard is thus not muted (like on previous Roland arranger instruments). This "EP Chord" function can be switched off, however (page 94).
(3) Play a chord (or just one note) with your left hand.
(4) To quickly return to the beginning of the accompaniment pattern (RE-START function), press the REC button while the accompaniment is running.
(5) Play another chord (or note) to change the Arranger's key.
text_image
RE-START REC
text_image
INTRO ORIGINAL FILL VARIATION ENDING REPEAT A-B MINUS ONE Roland EXR-51
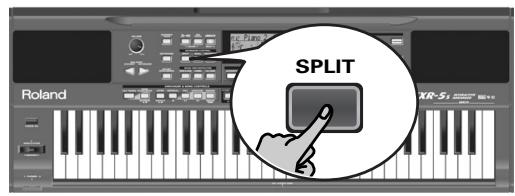
(6) Press the following buttons to use other patterns of the currently selected Music Style:
| Button | Function |
| INTRO | Selects an introduction. Press this button before activating [START/STOP]. |
| ORIGINAL | Simple accompaniment version. |
| FILL | Transition ("Fill In") to VARIATION or ORIGINAL. |
| VARIATION | Slightly more complex accompaniment version. |
| ENDING | Phrase that indicates the end of the song. Use this button instead of [START/STOP] to stop playback. |
These buttons select Music Style "patterns". The icon corresponding to the button you press appears in the display. Also, the ARRANGER chord field in the display indicates the name of the chord you played last. This chord is used by the accompaniment.
As soon as you feel comfortable with the Arranger, you should try to play a melody with your right hand while using your left for specifying Arranger chords.
To return to the Music Style's default tempo, simultaneously press ☐ and ☑.
You can also press the TAP TEMPO button several times at the desired tempo.
Automatic playback control (Sync Start & Stop)
Press SYNC START/STOP (the SYNC START icon appears). "Sync Start" means that the Arranger starts playing back the selected Music Style as you play a note or a chord with your left hand (to the left of the split point). In PIANO mode, Arranger playback will start when you press any note.
Cambiar el tempo
The EXR-5s/EXR-3s also provides a SYNC STOP option: quickly press SYNC START/STOP twice ("double-click") so that the SYNC START icon starts to flash. This will cause the Arranger to stop as soon as you release all keys in the chord recognition area. This is great for songs where you need breaks (i.e. one or several beats of silence).
Stopping Arranger playback
(8) Press START/STOP again to stop playback.
You can also press ENDING. In that case, you first hear an ending phrase. When it is finished, Arranger playback stops automatically.
Alternatively, you can press the SYNC START/STOP button twice in succession to activate the SYNC STOP function. If you then release all keys in the left half of the keyboard, playback stops at the same time.

text_image
TAP TEMPO Roland EXR-5Selecting Music Styles
The EXR-5s provides three memory areas for Music Styles (the EXR-3s has two):
USER STL: (Memory 000) This is where a Music Style loaded from the Flash memory or floppy disk (MSA, MSD and MSE series, optional [EXR-5s only]) is temporarily stored. The data in this RAM memory are erased when you switch off the EXR-5s/EXR-3s. (The EXR-3s doesn't have a floppy disk drive.) ROCK (001\~008), DANCE (009\~024), BEAT (025\~039), 16BEAT (040\~053), JAZZ (054\~058), LATIN (059\~066), TRADIT (067\~073), BALLROOM (074\~084): These are the Style families in the EXR-5s/EXR-3s's internal ROM memory. These Styles cannot be erased (but you can modify them in real-time using the Cover and Band Orchestrator functions, see pages 43 and 45).
FLASH: (Memories 101\~199) This is a Flash area inside the EXR-5s/EXR-3s that already contains 80 Styles when the EXR-5s/EXR-3s is shipped. You can expand the number of Styles in this area by copying more Styles from your computer (via USB) or by saving the Styles loaded from disk [EXR-5s only]. There are 99 Flash memory slots in all, but the actual number of Styles you can save there depends on the data size of the Styles. [EXR-5s only] DISK: (Memories 201\~...) This area refers to a floppy disk you inserted into the EXR-5s's drive. The number of available Styles depends on the floppy disk, of course. The Style you select is transferred to the EXR-5s's USER STL memory (see above), which is why it takes a little longer before you can use it. (You could, however, save it to a Flash memory, see p. 109.)
(1) Press the ARRANGER/BAND button.
Check whether the ARRANGER and a
INTRO ORIGINAL FILL VARIATION ENDING icon are displayed.
(2) Press the STYLE button.
(3) If you want to use a style on floppy disk [EXR-5s only], insert the disk into the drive.
(4) Use FAMILY ◀▶ to select the memory area that contains the desired Music Style (see above).
The FAMILY buttons allow you to jump to the desired "family" (which also include the Flash and USER STL areas).
The display now shows the name of the selected family.
(5) Use SELECT ▶▶ to specify the desired Style within the selected group.
The first press of SELECT ▶ (or ◀) shows the name of the first Music Style within the selected group. It is already selected, so if you need the first Style, there is actually no need to press SELECT ▶. You must use SELECT ▶ or ▶, however, to select another Style within the same group. You can also use the numeric buttons to select Styles. See also "Working with the FAMILY, SELECT and numeric buttons" (p. 36). After selecting memory 101 (Flash) or 201 (first disk memory [EXR-5s only]), the display shows a flashing YES message.
Note: If you forgot to insert a floppy disk into the drive, the display shows "No Disk" when you attempt to select the "disk family".
(6) If necessary, confirm your selection by pressing the +/YES button.
The display briefly shows "LOADING" (only after selecting a Style from the inserted floppy disk).
[EXR-5s only] If you selected a Music Style on floppy disk, the
DISK icon now flashes, and the EXR-5s automatically selects the USER STL memory that now contains the Music Style you loaded from floppy disk.
If you press +/YES during Arranger playback, the new Style is used at the next downbeat (1st beat of the next measure). Otherwise, the EXR-5s/EXR-3s displays its name and uses that Style when you press /STOP .
Note: [EXR-5s only] See page 112 for how to save the Music Style in the USER STL memory to the Flash memory.
The BALANCE ▶▶ buttons allow you to change the volume balance between the Arranger (or Song) parts and the Keyboard parts (the ones you can play yourself).
Balance
(1) Press BALANCE ACCOMP if the Arranger (or Song parts) are too soft.
(2) Press BALANCE [KEYBOARD] if you think your solo playing should be louder.
By holding down (or ) while pressing these buttons, you can modify the volume of those Keyboard parts.
Note: See p. 91 for setting the volume of individual parts.
5. Playing back songs
The EXR-5s/EXR-3s allows you to play back commercially available music data files (called Standard MIDI Files) or your own songs you saved to disk or to the EXR-5s/EXR-3s's Flash memory. Your own songs are saved as Standard MIDI Format 0 files and can also be played back using any other SMF compatible sequencer (or software).
(1) Press the SONG button (it lights) to switch to Song mode. This is necessary because, otherwise, pressing the START/STOP button will start Arranger playback. So be sure to check whether the SONG button lights and whether the ARRANGER and INTRO ORIGINAL FILL VARIATION ENDING icons are no longer displayed. Only then will the ARRANGER & SONG CONTROLS buttons allow you to control song playback (see above).
(2) [EXR-5s only] If you want to play back a song from floppy disk, insert the disk into the drive (front right).
(3) Use FAMILY ▶▶ to select the memory area that contains the song you wish to play back.
The EXR-5s/EXR-3s provides three memory areas for songs: USERSONG: (Memory 000) This where the song data you record are temporarily stored. The data in this RAM memory are erased when you switch off the EXR-5s/EXR-3s.
FLASH: (Memories 101\~199) This is the Flash area inside the EXR-5s/EXR-3s that already contains several songs when the EXR-5s/EXR-3s is shipped. You can expand the number of songs in this area by copying more songs from your computer (via USB). There are 99 Flash memory slots in all, but the actual number of songs you can save there depends on the data size of the songs.
[EXR-5s only] DISK: (Memories 201\~...) This area refers to a floppy disk you insert into the EXR-5s's drive. The number of available songs depends on the floppy disk, of course.
(4) Use SELECT ▶▶ or the numeric buttons to specify the desired song within the selected group.
This is only necessary for the Flash memory or a floppy disk (there is only one USERSONG memory).
The first press of SELECT ▶ (or ▶) shows the name of the first song within the selected group. It is already selected, so if you need the first song, there is actually no need to press SELECT ▶. You must use SELECT ▶ or ▶, however, to select another song within the same group. After selecting memory 101 (the first Flash memory), the display looks as follows. You can also use numeric buttons to select songs.
Working with the FAMILY, SELECT and numeric buttons
You can press FAMILY ▶ or ▶ either repeatedly (brief presses) to go back or advance, or hold down ▶ or ▶ to quickly select another family. The fastest way to scroll through the available families is by holding down ▶ while pressing ▶ (go backwards), or by holding down ▶ while pressing ▶ (advance). The same methods are available for the SELECT ▶ buttons. As a reminder: the FAMILY buttons are used for selecting groups, while the SELECT buttons allow you to select items within a group.
If you prefer to use the numeric buttons, enter three figures (e.g. "001" for entry "1"). If you only enter two figures (or only one), the EXR-5s/EXR-3s takes slightly longer to accept your entry.
Note: If the number you enter lies beyond the last available entry, the EXR-5s/EXR-3s does not change.
Note: Enter "000" (or "0") to select the USERSONG memory.
After selecting memory 101 (Flash) or 201 (first disk memory [EXR-5s only]), the display shows a flashing YES message. You can ignore this if you like, and proceed with the next step (or you can press YES/+ and then proceed).
Note: If you forgot to insert a floppy disk into the drive, the display shows "No Disk" when you attempt to select a file on disk.
(5) After making sure that the correct song has been selected, you can press START/STOP (now called ▶/■) to load it and immediately start playback.
The V-LINK button now flashes to indicate the tempo and beats (BEAT function).
You can already select a new song while the current one is still playing back. If you want to listen to it before the current song is finished, stop playback by pressing START/STOP, then press that button again. Otherwise, wait until the current song is finished, then press the START/STOP button to start playback of the new song.
Note: Please bear in mind that starting playback of the selected song on disk will erase the song in the USERSONG memory. Be sure to save it to disk before proceeding (see p. 125).
(6) You can change the song tempo with the /+ buttons or TEMPO .
Doing so, however, means that the tempo will still change if the song you are playing back contains tempo change messages. Furthermore, every time you jump back to the beginning or another position of the song using ▶, ▶ or ▶, the programmed song tempo is reset.
(7) Feel free to experiment with the COVER function (see p. 43).
Note: In Song mode, the EXR-5s/EXR-3s automatically selects the PIANO SOLO keyboard mode. If you like, you can play along with the song (and even use the Split or Dual part).
Note: In certain cases, the display may show the message XG Light or GM2 rather than a Tone name. Such a message means that the EXR-5s/EXR-3s is using a Tone that cannot be selected via the front panel. There are 798 such "hidden" Tones whose sole purpose is to ensure XG/GM2 playback compatibility.
Additional playback functions
The [INTRO], [ORIGINAL], etc. buttons have two functions: one in Style mode (printed above the buttons), and another one in Song mode (printed below the buttons).
Selecting the Song mode
The ARRANGER & SONG CONTROLS buttons have two functions: they can be used for selecting Music Style patterns (when the ARRANGER icon is displayed), or for Song navigation (when the SONG button lights).
To select the Song mode (and the SONG CONTROL functions), you need to press the button. Only then will the following functions be available.
Fast Forward, Rewind, and Reset
- To fast forward (jump to a measure later in the song), press ▶.
- To rewind (return to a measure that lies before the current position), press ◀.
The measure indication in the upper right corner of the display will help you locate the measure you need.
- Press (Reset) to jump back to the first measure of the song. You need to stop playback before using the button. Note: In certain cases, and may not be available. This is only the case for very large songs, however.
Note: By pressing ◀, ◀ or ▶, you also recall the song's pre-programmed tempo value.
Loop playback (Repeat)
Another clever feature of the EXR-5s/EXR-3s's Recorder is that you can program playback loops. You can do so during playback or while the Recorder is stopped.
text_image
INTRO REPEAT A-B(1) Press MARKER A-B where you want the loop to begin (the IFA icon appears in the bottom right corner of the display).
(2) Fast forward to the measure where you want the loop to end and press MARKER A-B again (the B-II icon appears). You can also program loops on the fly. Remember, however, that the Recorder always memorizes the beginning (downbeat) of the next measure.
(3) If the icon isn't already displayed, press the REPEAT A-B button to activate the loop you have just programmed. This button allows you to switch the EXR-5s/EXR-3s's Repeat function on and off.
(4) To play back the loop, press the START/STOP button (now called ▶/■).
The Recorder jumps to measure "A" and starts playing. At the end of measure "B", the Recorder immediately jumps back to the beginning of measure "A" and continues playing back the passage.
If necessary, repeat steps (1) and (2) to set other marker positions.
Note: The playback tempo is reset every time the Recorder reaches the "A" measure.
Note: In certain cases, the Marker function may not be available. This only happens with very large songs, however.
Live performance with song backing (Minus One)
Your EXR-5s/EXR-3s allows you to mute parts you wish to play yourself or don't need in a given situation. This is called "Minus One" playback.
(1) Press the SONG button if it doesn't light.
You can now select a Song, if you like (see p. 35).
(2) Press the MINUS ONE button (the "MinusOne" message appears in the display).
The 5 COVER buttons light to indicate that all tracks will be played back.
(3) Press one of the COVER buttons to switch off the corresponding track(s). The assigned track icon flashes.
(Example: if you switch off the DRUMS button, the 10 icon starts flashing.)
When a button lights, the corresponding track(s) is/are audible (i.e. not muted). You can also mute several tracks by switching off the corresponding COVER buttons.
The MINUS ONE icon appears and the selected part is muted.
Note: The Main part does not automatically adopt the Tone and related settings of the melody part.
If you like, you can also mute several parts.
The term "track" is used only for your convenience. We borrowed it from tape recorders that allow for recording several musical parts by the same person (one part after the other).
In the case of the EXR-5s/EXR-3s, the term is only used to indicate that we are dealing with separate musical parts. Here indeed (like with computer-based sequencers) what really counts are the MIDI channels.
Songs you record with the EXR-5s/EXR-3s, and the Standard MIDI Files you play back can consist of up to 16 tracks (i.e. MIDI channels). In many instances, only certain tracks are used, but the following are almost certainly present in every Standard MIDI File:
Track 2: bass
Track 4: melody
Track 10: drums
The COVER buttons allow you to mute the following tracks:
RIGHT-Refers to track "4" of the selected Standard MIDI File. Music data for educational purposes (especially piano music) use this track for the right-hand part. Mute this track to play the right hand yourself while listening to the left-hand part of the Standard MIDI File. The EXR-5s/EXR-3s contains an excellent stereo piano Tone you could use.
LEFT-Refers to track "3" of the selected Standard MIDI File. Music data for educational purposes (especially piano music) use this track for the left-hand part. See also above.
OTHERS-Mutes all tracks that cannot be muted with the remaining COVER buttons, more specifically: 1, 3, 6\~9, 12\~16.
BASS-Mutes track "2", which is assigned to the bass part of a Standard MIDI File.
DRUMS-Mutes track "10", which is assigned to the drum part of a Standard MIDI File.
Note: You also switch off several buttons simultaneously.
¿Qué son pistas?
(4) Press ▶ and ▶/■ to start playback.
(5) Press ▶/■ again to stop playback.
(6) Press MINUS ONE again (or one of the "big" DATA ENTRY buttons) to switch the function of the same name back off again.
Note: The Minus One setting can be saved along with the selected song and its Cover settings. See page 109.
Changing the track assignments
If the song files you are using do not conform to the GM system (and therefore do not correspond to the RIGHT, LEFT, BASS or DRUM assignments of the Minus One function), you can proceed as follows to assign other tracks (MIDI channels) to the COVER [RIGHT], [LEFT], [BASS] and [DRUMS] buttons:
(1) Press the MINUS ONE button to activate the function of the same name.
(2) Press and hold the RIGHT, LEFT, BASS or DRUM button.
(3) While holding that button, use the -/+ buttons to assign the desired MIDI channel to the button you are holding. Example: To assign MIDI channel "10" to the RIGHT button, press DATA ENTRY + until the display looks as follows:
VALUE

RIGHT
(4) Press MINUS ONE again (or one of the "big" DATA ENTRY buttons) to switch the function of the same name back off again.
Note: The Minus One setting can be saved along with the selected song and its Cover settings. See page 109.
6. Changing the Music Style or song orchestration
Your EXR-5s/EXR-3s is a novel arranger instrument and Standard MIDI File player with two functions for "customizing" the Styles or songs you play back via easy-to-use routines.
Cover function
The Cover function is derived from Roland's revolutionary DisCover 5 keyboard. The EXR-5s/EXR-3s provides five different templates you can select via the following buttons: ACOUSTIC, POP, ROCK, DANCE, and ETHNIC.
The Cover function is available both for Style (see p. 28) and song playback (see p. 34). It provides "masks" that change the instrumentation of the selected song. Simply by selecting another preset, you can cause a reggae song (or Style) to be played back by a heavy metal band, etc. Even though the arrangement (rhythm, riffs) does not change, the overall character can be modified beyond recognition.
(1) Press one of the COVER buttons. That button now lights (there is no indication in the display).
The COVER buttons have the following meanings. You may notice that their function is akin to the EQ presets found on a ghetto blaster or similar device (except that they change the sounds themselves rather than the tone color).
| Button | Function |
| ACOUSTIC | Adds an “unplugged” touch to the song or Music Style. |
| POP | Uses an orchestration that resembles the hits you hear on the radio. |
| ROCK | Adds a rather “heavy” character to the song or Music Style. |
| DANCE | Produces an “electronic” character. |
| ETHNIC | Changes the song’s or Music Style’s mood to a something akin to world-music. |
(2) Press the START/STOP button to start song (if the SONG button lights) or Arranger playback (if the SONG button is dark).
(3) If you like the new version better than the original one, you can save the song in the EXR-5s/EXR-3s's Flash memory (page 109).
Cover changes to a Music Style need to be written to a User Program.
Please note the following for the Cover settings and Style selection: Whenever you select another Music Style, it is used without Cover setting (COVER is reset).
Note: It is also possible to switch off ALL Cover buttons to return to the original song or Music Style orchestration.
Note: The COVER information is part of the song data only the EXR-5s/EXR-3s understands. You can still play back the newly saved version of this song on another sequencer or SMF player (after transferring it to your computer via USB, for example), but the COVER information will be ignored.
The Band Orchestrator function allows you to vary the accompaniment patterns played by the Arranger. You can leave out parts, thin out the drum part, etc. – in real-time (i.e. while you are playing).
text_image
BAND ORCHESTRATOR DRUM & BASS COMBO FULL BANDDRUM &BASS
COMBO
FULL BAND
(1) Press the ARRANGER/BAND button to select the Arranger mode.
(2) Select the Music Style you wish to use for playing (or use the one that is currently selected).
See page 31.
(3) Press one of the following buttons to select the desired level of musical "complexity" (the corresponding icon is displayed):
Obviously, these buttons should be used during Arranger playback.
| DRUM & BASS | The simplest accompaniment that only contains the drum and bass lines. |
| COMBO | Accompaniment pattern with only a few instruments (i.e. a band). |
| FULL BAND | Accompaniment pattern with a lush arrangement (several melodic instrument lines). |
The corresponding icon appears in the display (only one of them can be displayed at any one time).
Note: Immediately after switching on the EXR-5s/EXR-3s, the Orchestrator selects the "FULL BAND" level.
Note: The effect of these three levels also depends on whether the [VARIATION] or [ORIGINAL] button was pressed. In effect, the combination of the [ORIGINAL]/[VARIATION] and [DRUM&BASS]/[COMBO]/[FULL BAND] buttons provides 6 accompaniment patterns per Music Style (3 x 2).
The last selection you make can be saved to a User Program. See p. 99.
7. Recording your music
Your EXR-5s/EXR-3s contains a 16-track Recorder you can use for recording your own songs.
Basic song recording
Let us first look at the most straight-forward way of recording your renditions with Arranger backing.
(1) Press the ARRANGER/BAND button.
The ARRANGER icon appears. You can now use your left hand for transposing the Arranger's key in realtime.
7. Grabar su música
text_image
RE-START REC
text_image
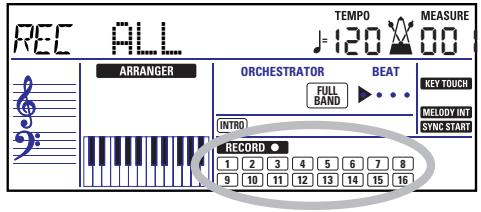
REC ALL TEMP0 120 MEASURE ARRANGER ORCHESTRATOR BEAT FULL BAND INTRO RECORD 1 2 3 4 5 6 7 8 9 10 11 12 13 14 15 16 KEY TOUCH MELODY INT SYNC START(2) Press the STYLE button and select a Music Style (or select a Music Assistant memory).
(3) Select the desired Arranger division by pressing INTRO, ORIGINAL or VARIATION.
(4) Press the START/STOP button.
(5) Use TAP TEMPO or the -/+ buttons to set desired tempo.
(6) Press START/STOP again to stop Arranger playback.
(7) Assign the desired Tone to the right half of the keyboard. Press TONE and use the FAMILY & SELECT ▶▶ buttons, the numeric buttons or the buttons in the TONE section. See also page 62.
(8) Press the REC button.
The display should look as shown above (if it doesn't, use the FAMILY ▶▶ buttons ("REC MODE") to select REC ⚪11):
(The RECORD ● and 1\~16 icons flash.) You are now in ALL mode, which means that everything you and the EXR-5s/EXR-3s's Arranger play will be recorded.
Note: If you select "REC ALL" with the FAMILY buttons, the song in the EXR-5s/EXR-3s'S USERSONG memory is erased. You may want to save the current song first (see p. 109). If you only pressed [REC ●], the EXR-5s/EXR-3s selects the Single mode if the USERSONG memory already contains data. See page 52 for details about that mode.
(9) Start recording in one of the following ways:
- Press the START/STOP button to start Arranger playback with the selected Division.
The V-LINK button now flashes to indicate the tempo and beats (BEAT function).
Note: If you start recording without the Arranger and want to bring it in at a later stage, it would be a good idea to switch on the metronome by pressing the METRONOME button.
- Activate the SYNC START/STOP button and press one or several keys to the left of the Split point.
Note: It is also possible to record in PIANO SOLO mode (after pressing the button of the same name). In that case, you should definitely use the metronome. The song's time signature can be set with the MetroTS function. See page 27.
(10) Stop recording in one of the following ways:
- Press START/STOP.
- Press the ENDING button to start the Ending phrase. As soon as it ends, Arranger playback and song recording stop.
Listening to your song
(1) Press the SONG button.
(2) Press START/STOP to start playback.
(3) Press START/STOP once again to stop playback.
(4) Press ▶ to return to the beginning of the song.
Other recording functions
The EXR-5s/EXR-3s's 16-track Recorder can be used in several ways. Let us therefore have a look at the other recording modes.
About the recording modes
●Modes
The EXR-5s/EXR-3s provides two modes for recording new music, and two for adding parts or correcting passages of existing music:
Recording a new song:
| ALL | In this mode, you can record everything you and the EXR-5s/EXR-3s can play simultaneously:Arranger (accompaniment).Keyboard parts (Main and Split or Dual).Changes to the COVER settings for the Music Style. |
| Keyboard | In this mode, you can record using the Keyboard parts. The track can be freely selected.• Main and Split or Dual |
Adding parts to an existing song
| Single | In this mode you can record onto one track at a time. The track can be freely selected. |
| Punch I/O | This mode allows you to re-record a short section of an otherwise perfect part. |
Note: Each time you select ALL or Keyboard mode, the data in the USERSONG memory are erased.
Escuchar su canción
The EXR-5s/EXR-3s provides one "live" song memory, which can contain one song at a time. After completing a song, you should save it (see p. 125).
To keep you from accidentally erasing the song in the EXR-5s/EXR-3s's internal memory, the EXR-5s/EXR-3s automatically selects Single after your first recording. Bear in mind that selecting "ALL" or "Keyboard" will erase the song in the USERSONG memory. Do not select "ALL" or "Keyboard" for adding parts to an existing song – use "Single" or "Punch I/O" instead.
Conversely, you cannot select "Single" or "Punch I/O" if the USERSONG memory doesn't yet contain data.
And finally: playing back a Standard MIDI File erases the song in the EXR-5s/EXR-3s's memory. In return, the SMF data will be available (and can be supplemented with your own renditions in "Single" or "Punch I/O" mode).
More about ALL mode
In addition to what you learned on p. 47, here are a few considerations:
After pressing the REC ● button, the 16 track and RECORD ● icons start flashing, signalling that all 16 tracks are available for recording.
text_image
REC ALL TEMP0 MEASURE 120 00 ARRANGER ORCHESTRATOR BEAT FULL BAND KEY TOUCH INTRO RECORD ● 1 2 3 4 5 6 7 8 9 10 11 12 13 14 15 16Here is what the tracks correspond to (after recording a song with Arranger backing):
| 1 Accomp 1 | 9 Accomp 6 |
| 2 Arranger bass | 10 Arranger drums |
| 3 Accomp 2 | 11 → Split* |
| 4 → Main | 12 → Auto Bass* (see p. 92) |
| 5 Accomp 3 | 13 |
| 6 → Dual* | 14 |
| 7 Accomp 4 | 15 Melody Intell. (see p. 58) |
| 8 Accomp 5 | 16 (→ Main**) |
(*) Only one of these can be used alongside the Main part.
(**) If you assign a Drum Set to the Main part. In that case, track 4 is not used.
For your convenience, the Keyboard parts are flagged with a "→" symbol in the above graphic.
Parts you do not hear during recording are not recorded. The track icons 1\~16 thus do not show you what will be recorded, but rather what can be recorded.
Keyboard recording mode
In Keyboard mode, you can record the Keyboard parts. The Arranger is not available. Essentially, this mode allows you to record either one layered part using up to two sounds (Main + Dual) or two parts (Split to the left, Main to the right). If you select a Drum Set for the Main part, you can only record a drum part.
Note: When you select the Keyboard mode, song data in the EXR-5s/EXR-3s's internal memory will be overwritten by your new recording.
(1) Press the REC ● button.
(2) Press FAMILY ▶▶ to make the display look as follows:
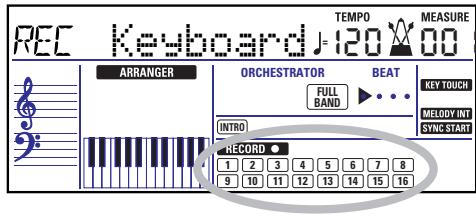
text_image
REC Keyboard 120° TEMP MEASURE ARRANGER ORCHESTRATOR BEAT FULL BAND INTRO RECORD 1 2 3 4 5 6 7 8 9 10 11 12 13 14 15 16 KEY TOUCH MELODY INT SYNC STARTThe RECORD ● and track icons flash.
(3) To create a split, press the SPLIT button.
You can also record without metronome if you like.
Note: If you assign a Drum Set to the Main part, your drum performance is recorded onto track 16.
Single recording mode
This mode is only available if the EXR-5s/EXR-3s's song memory already contains data. When you press REC ●, the RECORD ● icon and the icon of the first empty track flash. You could therefore record a new part straight away. (If all tracks already contain data, Track 1 will be selected.)
You can, however, also substitute an already recorded part with a new version.
(1) Press the REC ● button.
(2) Press FAMILY ▶▶ to select "Single".
(3) Use the SELECT ◀▶ or numeric buttons to select the track you wish to record to.
You can only select one track at a time (hence the name "Single"). If you select a track that already contains data, your new version will overwrite the existing one.
(4) If necessary, assign the desired Tone to the part you are about to record (see p. 62).
If you select track 10 , you can select Drum Sets rather than Tones. Track 10 is reserved for drum parts.
Note: If you use the Single recording mode for adding parts to a Standard MIDI File recorded with another instrument or sequencer, track 16 (or any other track defined as "second drum track") may also use a Drum Set that can be changed.
Note: Even though the Main part can be used for recording all tracks in Single mode, the MFX only applies to track/MIDI channel 4.
(5) Press START/STOP to start recording.
After a two-measure count-in (see p. 91), you will hear all parts that have already been recorded. Start playing (and recording) your new part.
(6) Press START/STOP to stop recording.
(7) Return to step (3) to record additional parts.
In this mode, you can re-record part of a track (the second chorus, for example). The important aspect of this mode is that newly recorded material does not erase the material before or after the passage you redo.
By contrast, in Single mode, the entire track you record is replaced by your new material. (So if you don't play anything during recording, the entire track will be empty afterwards.) Like the Single mode, Punch I/O can only be selected if the EXR-5s/EXR-3s's memory already contains song data.
Punch I/O
(1) Press the REC ● button.
(2) Press FAMILY ▶▶ to make the display look as shown above.
The flashing track icon (only one) depends on the first track that already contains data. In the above example, track 1 contains data, which is why its icon flashes.
(3) Use the SELECT ▶▶ or numeric buttons to select the track you wish to record to.
You can only select one track at a time.
(4) Press /STOP to start playback of the (old) song data.
The RECORD ● icon and the icon of the selected track flash.
(5) When the Recorder reaches the measure where you wish to start recording, press REC ● again.
The RECORD ● icon now lights steadily.
(6) Play the passage you want to redo.
(7) Press REC ● again to deactivate recording. Song playback still continues, so...
(8) Press START/STOP to stop playback.
(9) Press /STOP to listen to the new version. If you are not satisfied, return to step (3) above. Return to step (3) to correct another track.
Using a footswitch for punching in/out
You can also use an optional footswitch for starting and stopping recording. Doing so has the advantage that you can use both hands for playing (or the left hand for Pitch Bend/Modulation effects and the right for playing the melody.)
- Connect an optional DP-2, DP-6, or BOSS FS-5U footswitch to the FOOTSWITCH socket on the EXR-5s/EXR-3s's rear panel.
- Press the FUNCTION button (it must light).
Note: See also "Working with the FAMILY, SELECT and numeric buttons" (p. 36).
- Use the / buttons to select "Punch I/O".
- Press SONG to return to the recording function.
- Continue with step (1) under "Punch I/O". In steps (5) and (7), press the footswitch (rather than the REC button).
8. Additional Music Style functions
Apart from the basic Music Style functions covered on page 28 and following, your EXR-5s/EXR-3s also provides the following functions. Most of the following functions are only available after pressing the ARRANGER/BAND button (the ARRANGER icon must be displayed).
One Touch
The One Touch function automates quite a few tasks:
- The Arranger selects the preset Style tempo.
- Suitable Reverb and Chorus settings.
- The EXR-5s/EXR-3s selects sounds for the Main, Split and Dual parts that are is suitable for the selected Style. There are 2 One Touch memories per Style with different settings for the above parameters.
Here is how to select one:
(1) Select the desired Music Style (see p. 31).
(2) Press the ONE TOUCH button.
The number field in the upper left corner reads "OT", followed by the number of the selected One Touch memory. If the DATA ENTRY TONE button lights, the display now shows a Tone name ("Piano 2" in the example above).
(3) Press the ONE TOUCH button again if you need "OT2". One Touch needs to be activated again every time you select a new Music Style.
Note: One Touch is also available for USB and disk Styles, but it is less meaningful.
Using the Music Assistant
Another practical function for quickly making the right settings for a song you want to play is to take advantage of the EXR-5s/EXR-3s's novel MUSIC ASSISTANT function. It prepares everything for working with the Arranger (Style, Tones, effects, etc.). The Music Assistant is not available for song playback.
The following parameters are changed automatically when you select a Music Assistant memory:
- Music Style
- Tempo
• Sounds for the Main, Split and Dual parts
- Effect settings
- Band Orchestrator
- Keyboard Touch
(1) Press the MUSIC ASSISTANT button.
It lights and the display shows the name of the last Music Assistant setting you selected (or of the first Music Assistant memory).
(2) Use FAMILY ▶▶ to select the "family" (i.e. genre) that contains the desired Music Assistant settings.
The following families are available: Ballad, Ballroom, Dancing, Easy List, Evrgreen, JazzSwng, PopHit and General.
(3) Use SELECT ▶▶ to specify the desired Music Assistant memory within the selected family.
The first press of SELECT ▶ (or ▶) shows the name of the first Music Assistant setting within the selected group. It is already selected, so if you need the first setting, there is actually no need to press SELECT ▶. You must use SELECT ▶ or ▶, however, to select another Music Assistant setting within the same group. You can also use the numeric buttons. See also "Working with the FAMILY, SELECT and numeric buttons" (p. 36).
Note: If necessary, you can now change the settings you do not like (e.g. select another sound for the Main part, etc.) and then save your new version to a User Program (see p. 99).
Melody Intelligence
The Melody Intelligence function adds a second voice (harmony notes) to the melodies you play with your right hand. In fact, the Melody Intelligence function uses both halves of the keyboard to determine which notes to play:
- It looks at the melody notes in the right half; and...
- It analyzes the chords you play in the left half to see which notes it must add to your melody.
Press the MELODY INTELLIGENCE button so that the corresponding icon (see right illustration) appears in the display.
Changing the Melody Intelligence harmony type
The EXR-5s/EXR-3s contains 18 different voicings (harmony types) for the MELODY INTELLIGENCE function. These voicings specify the number of harmony notes and the way in which they are added to your melody.
To select a different harmony type, press an hold the MELODY INTELLIGENCE button until the "MI" message appears in the upper left corner of the display. Then use the /+ buttons to select the desired voicing. See above for the available types (right).
Note: The Melody Intelligence setting can be saved to a User Program memory.
In PIANO mode, the Main part is assigned to the entire keyboard. Though the EXR-5s/EXR-3s initially assigns a piano sound to the Main part, you can select any other one and save your setting to a User Program.
The main difference between PIANO SOLO and PIANO mode is that the Arranger's melodic parts are available here, which is not the case in PIANO SOLO mode.
But there is no split for chord recognition (you may remember that the EXR-5s/EXR-3s's keyboard is split when you switch on the ARRANGER BAND button): the Arranger decodes every chord you play – no matter where you play it. Causing the Arranger to play another chord requires that you play at least a triad (i.e. the three notes that make up a chord). Feel free to play more than three chord notes, but remember that two notes won't cause the Arranger to play another chord.
When you use an optional sustain pedal, all notes you play simultaneously are recognized as a chord – irrespective of whether you play them with your left or right hand.
(1) Simultaneously press the ARRANGER BAND and PIANO SOLO buttons (both buttons light).
Piano Mode
The display briefly shows "PianoMod" and the ARRANGER icon flashes.
(2) Press STYLE and use the SELECT ▶▶ buttons to select a Music Style. See also p. 31.
(3) Press TONE and use FAMILY ▶▶ and SELECT ▶▶ (or the TONE buttons) to assign a different sound to the Main part.
You can also add the DUAL part (page 26). Even the SPLIT part could be used, yet chord recognition remains active for the entire keyboard.
(4) Press ARRANGER BAND or PIANO SOLO to leave PIANO mode.
Bass Inversion (Bass Inv)
Use this function to change the way in which the Arranger reads the chords you play.
Bass Inversion (Bass Inv)
Bass Inversion (Bass Inv)
When this function is off (default), the Acc Bass part plays the root of the chords that feed the Arranger. If you play a "C" (or C chord), the bass sounds a "C"; if you play an A minor chord (or if you press "A" and the "C" to its right), the bass sounds an A, etc. By activating Bass Inversion, you can specify the note played by the A. Bass part (the lowest note of your chords). Switch on Bass Inversion for songs that rely on bass rather than on chord patterns (for example C - C/B - C/Bb, etc.).
(1) Press the FUNCTION button.
(2) Use FAMILY ▶▶ to select "ARR SET". The EXR-5s/EXR-3s's Function parameters are divided into 9 logical "families". As the Bass Inversion parameter is an Arranger function, you need to select the Arranger settings (hence ARR SET).
(3) Use SELECT ▶▶ to select the "BassInv" parameter.
(4) Press the + button to select "ON" for "VALUE". Note: See also "Working with the FAMILY, SELECT and numeric buttons" (p. 36).
(5) Press another "big" button in the DATA ENTRY section to leave this function.
Note: This setting can be saved to a User Program (see p. 99).
Here are yet other functions related to Music Styles. These can be set via the FUNCTION menu, or are covered elsewhere:
- Balance between the Keyboard parts and the Music Style parts (see p. 33)
• Volume of certain Music Style parts (see p. 92) - Arranger split point (see p. 88)
- Hold function for the Arranger notes (see p. 93).
9. Keyboard part functions
Selecting sounds for the Main, Split and Dual parts
The EXR-5s/EXR-3s contains about 470 melodic sounds you can use for playing melodies (others are more like sound effects). Those sounds need to be assigned to a Keyboard part, of which there are three: Main, Split and Dual (see also p. 24).
Selecting any of the available sounds
Unlike previous arranger-type instruments, the EXR-5s/EXR-3s no longer works with banks, numbers and variations: all available sounds can be selected via the same streamlined procedure.
(1) Press the DATA ENTRY TONE button (it must light).
(2) To assign another sound to the Split or Dual part, hold the or button while performing the following steps.
Note: Now skip to step (5) if you prefer to enter the Tone number using the numeric key pad (0\~9). That is indeed the only way to select any available Tone.
(3) Use FAMILY ▶▶ to select the desired Tone family.
See above for the available families. By selecting another family, you immediately jump to the first sound of that group.
Note: See page 135 for a list of the available sounds.
(4) Use SELECT ▶▶ to specify a sound within the selected family.
The first press of SELECT ▶ (or ▶) shows the name of the first Tone within the selected group. It is already selected, so if you need the first sound, there is actually no need to press SELECT ▶. You must use SELECT ▶ or ▶, however, to select another Tone within the same group.
Note: This only selects the "best" sounds within the current family (the names printed in bold in the Tone list on p. 135).
(5) Use the numeric buttons 0\~9 to select other sounds within the current family that are skipped by the SELECT buttons.
Note: This setting can be saved to a User Program (see p. 99).
You can also use the numeric buttons. See also "Working with the FAMILY, SELECT and numeric buttons" (p. 36) and replace "song" with "sound" in the explanations.
Using the TONE buttons
The TONE buttons allow you to select 7 melodic sounds and one Drum Set directly (without using TONE, the FAMILY, SELECT and/or numeric buttons).
These buttons are assigned to our "favorite" sounds for the indicated categories, thus allowing you to quickly select "a piano", "a string sound", etc. The assignments to these buttons can be changed.
Note: The TONE DRUMS button is only available for the Main part.
Assigning another Tone to a TONE button
To assign another sound to one of the 8 TONE buttons, first select it using the procedure described above, the press and hold the desired TONE button. The display briefly shows the message "Memrized".
Note: You can only assign Tones of the following families to the various buttons:
PIANO: Piano, E.Piano, Keyboard, Chr Perc
ORGAN: Organ, Accordion
GUITAR/BASS: A. Guitar, E. Guitar, Bass
STRINGS: Strings
VOCAL: Vocal
SAX/BRASS: Sax, Wind, Acc. Brass
SYNTH: Syn Brass, Syn Lead, Poly Syn, Pad, Ethnic, Pression, SFX
DRUMS: Drums.
Note: These assignments are saved (and loaded) along with the User Program data (see pages 111 and 125).
GUITAR/BASS: A. Guitar, E. Guitar, Bass
STRINGS: Strings
VOCAL: Vocal
SAX/BRASS: Sax, Wind, Acc. Brass
SYNTH: Syn Brass, Syn Lead, Poly Syn, Pad, Ethnic, Prcssion, SFX
DRUMS: Drums.
GUITAR/BASS: A. Guitar, E. Guitar, Bass
STRINGS: Strings
VOCAL: Vocal
SAX/BRASS: Sax, Wind, Acc. Brass
SYNTH: Syn Brass, Syn Lead, Poly Syn, Pad, Ethnic, Prcssion, SFX
DRUMS: Drums.
Drum sounds and sound effects ("SFX")
Drum Sets
The last 20 "sounds" (511\~530) are so-called "Drum Sets". When you select such a Set, every key is assigned to a different sound. With the left-most key, you can play a bass drum sound (also called "kick"). The white key next to it triggers a snare drum sound, etc. Try it out by pressing several keys, either in succession or simultaneously.
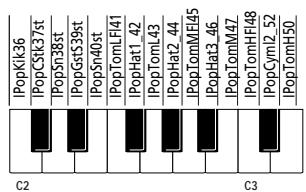
text_image
IPopKil36 PopCSK37st IPopSn38st IPopGstS39st IPopSn40st IPopTomFL41 PopHat1 42 IPopTomL43 IPopHat2 44 IPopTomME45 IPopHat3 46 IPopTomM47 IPopTomH48 IPopCymI2 52 IPopTomM50 C2 C3Drum Sets are collections of over 90 sounds, each assigned to a different key.
Note: Drum Sets can only be assigned to the Main part (so neither to the Split, nor the Dual part).
Note: One Kit (530) is actually a sound effects (SFX) kit that cannot be used for "drumming" but rather for triggering various sound effects.
Note: This setting can be saved to a User Program (see p. 99).
Sound effects ("SFX")
The EXR-5s/EXR-3s also contains individual sound effects (like "Train, "Kitty", "HrseGllp", etc.) and individual drum and percussion sounds (449\~470) that are assigned to the entire range of the part you select them for (Main, Split or Dual).
Note that those sounds do not work like the Drum Sets: only one sound is assigned to the keyboard – and can be played melodically (though "Train" melodies are probably "interesting" at best).
It might therefore be a good idea to proceed as follows:
(1) Press the SPLIT button.
(2) Decide whether you want to play the sound effect or percussion sound with your left or right hand.
If you want to use your left hand, assign a sound between "449" and "510" to the Split part. To play the effect with your right hand, assign it to the Main part.
(3) Change the split point (page 88) in such a way that only a few keys are assigned to the percussion sound/sound effect ("C6" for right-hand effect playing, "C3" for left-hand effect playing).
(4) To obtain a meaningful effect, you may also have to change the MAIN Oct or SPLT Oct setting (page 91).
If you assign a sound effect/percussion sound to the Split part, the key ranges could be set as shown below.
The Transpose function changes the pitch of the notes and chords you play. Instead of figuring out what other keys you need to press to accommodate the singer or an instrumentalist, you can set the required Transpose value and go on playing the song the way you practised it, while sounding in a different key. There are two transpose functions: one ("USRTrnsp") whose setting can be saved to a User Program, and a second one ("GLBTrnsp") that applies to all sections and whose setting is added to (or subtracted from) the "USR Transp" value. Its setting is never saved.
Let us begin with the "USRTrnsp" function, which is assigned to the button:
Transposición
text_image
TRANSPOSE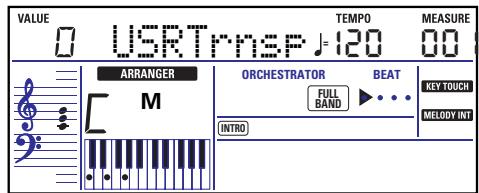
text_image
VALUE 0 USRTnspJ120 MEASURE 00 ARRANGER M ORCHESTRATOR BEAT FULL BAND INTRO KEY TOUCH MELODY INT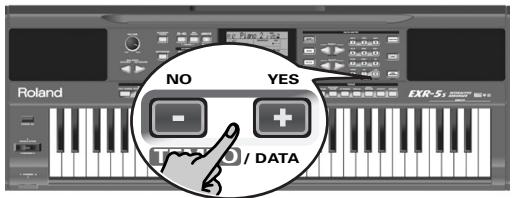
text_image
NO YES Roland EXR-51 DATA(1) Press the TRANSPOSE button.
The display now looks as shown in the middle.
(2) Use the /+ and/or numeric buttons ( 09 ) to set the desired transposition interval.
The setting range is -12\~12 semitones. A "semitone" is one step between a white and a black key (or two adjacent white keys, i.e. between "E"/"F" and "B"/"C").
No transposition (C major)
text_image
Musical notation with treble and bass clefs, showing a right-hand arrow indicating a structural change.Press ☐ or ☐ repeatedly to transpose the keyboard up or down. You can also directly enter the desired interval by pressing the corresponding numeric key.
To transpose the keyboard down, hold down ☐ while pressing ☐\~☐ (in that case, you can transpose the pitch down by up to 9 semitones).
Here's an example: to hear an "E" each time you play a "C", select "4". All other notes will be shifted by the same amount, so that you end up sounding in E major when you actually play in C major, etc.
The corresponding value and the TRANSPOSE icon appear in the display.
(3) To switch the Transpose function back off, repeat steps (1) and (2), this time entering the value "0" (no transposition). Note: This setting can be saved to a User Program (see p. 99).
Note: There is also a function that allows you to specify which section(s) the Transpose function should apply to. See "Trans-Mod*" (p. 87).
(4) Press another "big" button in the DATA ENTRY section to leave this function.
Global transpose function ("GLB")
There is also a "master transpose control" that alters the pitch of all sections of the EXR-5s/EXR-3s. Its value is added to the current transposition interval until you reset it to "0" or until you switch off your EXR-5s/EXR-3s.
(1) Press the TRANSPOSE button.
The display now shows the "USR TrnsF" message.
(2) Press the SELECT ▶ button once to select the following parameter:

(3) Use the -/+ and/or numeric buttons ( 09 ) to set the desired transposition interval.
The setting range is -6\~0\~5 semitones. This setting is added to (or subtracted from) the "USRTrnsp" value of all sections and all User Programs.
Press ☐ or ☐ repeatedly to transpose the keyboard up or down. You can also directly enter the desired interval by pressing the corresponding numeric key.
To transpose the keyboard down, hold down ☐ while pressing ☐\~☐ (in that case, you can transpose the pitch down by up to 6 semitones)
As soon a you select a value other than "0", the TRANSPOSE icon starts flashing to signal that the EXR-5s/EXR-3s is applying global transposition to all sections.
(4) To switch the global transposition back off, repeat step (3), this time entering the value "0" (no transposition).
The TRANSPOSE icon stops flashing (and disappears if the "USRTrnsp" function is off).
Note: This setting is not saved to a User Program and will be cancelled when you switch off the EXR-5s/EXR-3s.
(5) Press another "big" button in the DATA ENTRY section to leave this function.
Función Global transpose ("GLB")
Transposition globale ("GLB")
The EXR-5s/EXR-3s allows you to transpose the Keyboard parts (Main, Split, Dual) up or down by 4 octaves.
Ajustes de octava
To change the octave transposition of a part, hold down TONE (Main part), SPLIT (Split part) or DUAL (Dual part), while pressing □ (down) or ⊕ (up).
Other Keyboard part functions
Here are yet other functions related to the Keyboard parts.
These can be set via the FUNCTION menu, or are covered elsewhere:
- Keyboard velocity (see p. 71)
• Master Tune (see p. 87)
• Volume of the Keyboard parts (see p. 91) - Intelligence function for the Split part (see p. 88)
- Hold function for the Split part (see p. 88).
10. Performance functions and effects
Performance functions
Keyboard Touch (velocity sensitivity)
The EXR-5s/EXR-3s is velocity sensitive, which means that the volume and brightness of the Main, Split and Dual notes depend on the force/speed with which you strike the keys.
All acoustic instruments (piano, violin, flute, drums, etc.) are velocity sensitive. The harder you play, the louder and brighter the resulting notes will be, which creates a perfectly natural effect. (That explains why the KEYBOARD TOUCH function is on when you power on the EXR-5s/EXR-3s.)
If the EXR-5s/EXR-3s is your first musical instrument ever, you may feel distracted by the volume and timbre variations of the notes you play.
(1) If the KEY TOUCH icon is not displayed, press the KEYBOARD TOUCH button to activate the EXR-5s/EXR-3s's velocity sensitivity.
(2) Press the button again to switch the KEYBOARD TOUCH function off, if you don't need it.
(3) To set a fixed velocity value, press and hold the KEYBOARD TOUCH button until the "KbdTouch" message is displayed.
(4) Use the numeric buttons and/or -/+ to set the velocity value that should be used for all notes you play (1\~127).
"1" is very low (usually inaudible), while "127" corresponds to maximum striking force (loud, bright notes). The value is only used when the KEY TOUCH icon is not displayed (otherwise, all notes use the velocity values that correspond to the force with which you strike the keys).
(5) Press another "big" button in the DATA ENTRY section to leave this function.
Note: Some sounds use "velocity switching". This means that by hitting the keys harder and softer, you alternate between two sounds. So only switch off this parameter if doing so makes you feel more comfortable.
Note: This setting can be saved to a User Program (see p. 99).
Note: Keyboard Touch applies to all parts you can play yourself (the "Keyboard parts"): Main, Split, and Dual.
Pitch Bend and Modulation
The BENDER/MODULATION lever to the left of the keyboard can be used to add two kinds of effects to the Keyboard-part notes. You can even use these effects simultaneously if you like.
(1) Press the lever towards the rear of the EXR-5s/EXR-3s to add a vibrato effect ("wobble") to the notes you are playing.
The Modulation axis can also be used for switching between the slow and fast Rotary speeds (if the "Rotary" effect is assigned to the MFX).
(2) Turn the lever to the left to temporarily lower the pitch of the notes you are playing. Turn it to the right to raise the pitch of your notes.
(3) In either case, you can release the lever if you no longer need the effect.
Note: If necessary, you can change the Pitch Bend interval. See "PB Range° (Pitch Bend Range)" (p. 88).
Note: Modulation is not available when the MFX type="Rotary". In that case, the modulation axis of the lever is used for switching between the fast and slow speeds.
Footswitch
The EXR-5s/EXR-3s's FOOTSWITCH socket (rear panel) allows you to connect optional DP-2, DP-6, or BOSS FS-5U footswitch.
The footswitch can be used for sustaining the notes you are playing (default), as Soft or Sostenuto pedal, to change the Rotary effect speed (MFX), and more. See "FSW° (Footswitch Assign)" (p. 89) and "Using the outputs and an optional foot-switch" (p. 130).
To use it for holding the notes you are playing, proceed as follows:
(1) Connect a DP-2, DP-6, or BOSS FS-5U footswitch to the FOOTSWITCH jack.
(2) Play a note with your right hand.
(3) Press the footswitch.
(4) Release the key.
The note(s) you played keep on sounding after you release the corresponding keys.
(5) To stop the note(s) from sounding, release the footswitch.
The EXR-5s/EXR-3s contains digital Reverb and Chorus effects processors. You can switch them on/off and select other types. You can also set the Send level (the amount of Reverb or Chorus) to be applied to the various Keyboard parts. Please bear in mind that the Chorus effect cannot be combined with the MFX (so you need to choose between Chorus or MFX for the Main part).
Using the multi-effects processor (MFX)
The multi-effects (MFX) processor can be used for processing the Main part. It can generate various effects (47), some of which are combinations of two effects, while the Reverb and Chorus processors only generate effects that are somehow related to ambiance (REV) or modulation (CHR).
(1) Press the FUNCTION button (it must light).
Utilizar efectos
(2) Use FAMILY ▶▶ to select "EFFECTS".
The EXR-5s/EXR-3s's function parameters are divided into 9 logical "families". For the following, we need to select the effects group.
(3) Use SELECT ▶▶ to select the "MFX" parameter.
Note: See also "Working with the FAMILY, SELECT and numeric buttons" (p. 36).
The "Off" message means that the MFX is not being used.
(4) To switch on the MFX, select one of the remaining 47 types using the /+ buttons. Off: The MFX is off.
Enhancer: An Enhancer controls the overtone structure of the high frequencies, adding sparkle and tightness to the sound.
Overdrv1\~4: Overdrive creates a soft distortion similar to that produced by tube amplifiers. Several types of overdrive are available: (1) Small combo amp, (2) Combo amp, (3) Large double-stack amp (2 cabinets), (4) Large double-stack amp (3 cabinets).
Distort1\~4: This effect produces a more intense distortion than Overdrive. The numbers refer to different kinds of distortion.
Phaser: Adds a phase-shifted sound to the original sound, producing a twisting modulation that creates spaciousness and depth.
AutoWah: The Auto Wah cyclically controls a filter to create cyclic change in timbre.
Rotary: Simulates the sound of a classic rotary speaker. This effect is most suitable for electric organ. If you select this type, you can use the MODULATION axis of the BENDER/MODULATION lever for switching between the slow and fast modulation speeds: press the lever towards the back of the EXR-5s/EXR-3s to alternate between slow and fast undulations.
StFlangr: This is a stereo Flanger. It produces a metallic resonance that rises and falls like a jet airplane taking off or landing.
SpFlangr: A Step Flanger is a Flanger effect with clearly noticeable steps rather than continuous pitch changes.
Compress: A compressor reduces signal peaks and boosts low levels, smoothing out unevenness in volume.
Limiter: A limiter prevents the volume from exceeding a certain level without boosting low levels.
HexaCho: Hexa Chorus uses six layers of chorused sound to give richness and spatial spread to the sound.
Trem Cho: Tremolo Chorus is a chorus effect with added Tremolo (cyclic modulation of the volume).
StChorus: This is a stereo chorus.
Space-D: A multiple Chorus that gives no impression of modulation, but produces a transparent Chorus effect (the perfect "stereo maker").
StDelay: Delay is an effect that allows you repeat the input signal, thus creating echoes (repetition).
Mod Dly: This effect adds modulation to the delayed sound, producing an effect similar to a Flanger.
3Tap Dly: The Triple Tap Delay produces three delay sounds; center, left and right.
4Tap Dly: Delay with four repetition lines.
TmCtrDly: This effect controls the delay time in realtime.
Reverb: A nice Reverb effect.
GteRevNr: Gate Reverb is a special type of Reverb in which the reverberant sound is suddenly cut off (and does not gradually decrease).
GteRevRv: A gated Reverb effect that sounds "backwards".
GteRevS1: The reverberant sound moves from right to left.
GteRevS2: The reverberant sound moves from left to right.
2PtchShf: A Pitch Shifter changes the pitch of the original sound. This 2-voice effect has two pitch shifters, and adds two transposed copies to the original sound.
FbPtchShf: Pitch Shifter with several echoes.
OD▶Chors: This effect connects an Overdrive and a Chorus in series. ("Series" means that the first effect is also processed by the second.)
OD▶Flger: Connects an Overdrive and a Flanger in series.
OD▶Delay: Connects an Overdrive and a Delay in series.
DS▶Chors: Connects distortion and a Chorus in series.
DS▶Flger: Connects distortion and a Flanger in series.
DS▶Delay: This effect connects distortion and a Delay in series.
EH▶Chors: Connects an Enhancer and a Chorus in series.
EH▶Flger: Connects an Enhancer and a Flanger in series.
EH▶Delay: Connects an Enhancer and a Delay in series.
Cho▶Dly: Connects a Chorus and a Delay in series.
FL▶Delay: Connects a Flanger and a Delay in series.
Cho▶Flgr: Connects a Chorus and a Flanger in series.
Cho/Dly: This effect connects a Chorus and a Delay in parallel. ("Parallel" means that the input signal is processed by two effects that do not interact.)
FL/Delay: This effect connects a Flanger and a Delay in parallel.
Cho/Flgr: This effect connects a Chorus and a Flanger in parallel.
Note: This setting can be saved to a User Program (see p. 99).
Note: By default, MFX type selection is linked to Tone selection for the Main part. This can be switched off, however, see "Tone MFX°" (p. 95). Note that this does not apply to all Tones.
(5) While selecting an MFX type, play a few notes on the keyboard to audition the effect.
(6) Press another "big" button in the DATA ENTRY section to leave this function.
Note: If the MFX is on, the Main part is no longer processed by the Chorus effect. But the MFX also contains Chorus algorithms (either in isolation or in combination with other effects).
Reverb
Reverb is an effect that gives you the impression of playing in a concert hall, a room or another acoustic environment that reflects the sounds that are being produced.
When you switch on the EXR-5s/EXR-3s, all three Keyboard parts (Main, Dual, Split) as well as the Arranger and Song parts are processed by the internal Reverb effect.
If you don't need that, you can either switch off the Reverb processor (in which case none of the EXR-5s/EXR-3s's 19 parts are processed) or prevent just one Keyboard part from being processed. You cannot change the amount of Reverb that is added to the Arranger or pre-recorded Song parts.
●Switching the Reverb on/off
Use the following procedure if you want no Reverb at all (for none of the EXR-5s/EXR-3s's parts), or to select another Reverb type.
(1) Press the FUNCTION button (it must light).
(2) Use FAMILY ▶▶ to select "EFFECTS".
The EXR-5s/EXR-3s's function parameters are divided into 9 logical "families". For the following, we need to select the effects group.
(3) Use SELECT ▶▶ to select the "REV" parameter.
Note: See also "Working with the FAMILY, SELECT and numeric buttons" (p. 36).
(4) Use the /+ buttons to select "Off" if you don't need the Reverb processor. Otherwise, select one of the eight available types:
| Type | Explanation |
| Room 1~3 | These types simulate the Reverb characteristics of a room. The higher the number (1, 2, or 3), the "bigger" the room becomes. |
| Hall 1, 2 | These types simulate the Reverb of a small (1) or large (2) concert hall and thus sound far "bigger" than the Room types above. |
| Plate | Digital simulation of a metal plate that is sometimes used for creating Reverb effects. Works well for percussive sounds. |
| Delay | A Delay effect (no Reverb). Works a lot like an echo effect and thus repeats the sounds. |
| Pan Delay | This is a stereo version of the preceding Delay effect. It creates repetitions that alternate between the left and right channels. |
(5) Play a few notes on the keyboard to audition the effect.
●Changing the amount of Reverb processing for the Keyboard parts
To change the Reverb depth (i.e. how much Reverb is added to a part), proceed as follows:
(6) If the FUNCTION button still lights, use SELECT ◀▶ to select one of the following parameters.
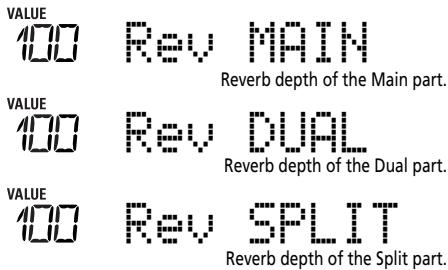
text_image
VALUE 100 Rev MAIN Reverb depth of the Main part. VALUE 100 Rev DUAL Reverb depth of the Dual part. VALUE 100 Rev SPLIT Reverb depth of the Split part.(If FUNCTION doesn't light, first perform steps (1) and (2) above.)
(7) Use / to select "0" if you don't want the selected Keyboard part to be processed by the Reverb effect. Otherwise, set the desired value.
If you selected an MFX type (see p. 74), the Rev MAIN parameter no longer affects the Main part directly, but rather the MFX signal.
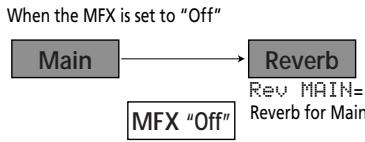
flowchart
graph LR
    A["Main"] --> B["Reverb"]
    B --> C["MFX 'Off'"]
    style A fill:#fff,stroke:#000
    style B fill:#d4edda,stroke:#000
    style C fill:#fff,stroke:#000
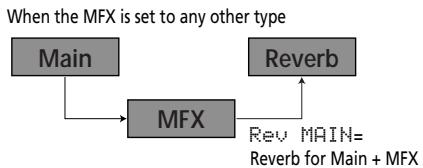
flowchart
graph TD
    A["Main"] --> C["MFX"]
    B["Reverb"] --> C["MFX"]
    C --> D["Rev MAIN= Reverb for Main + MFX"]
"Rev Main= 100" then means: Reverb depth of the processed Main signal coming out of the MFX. This can be used for a variety of interesting applications: Distortion (MFX) + Reverb (REV), Rotary (MFX) + Plate (REV), etc.
(8) Play a few notes on the keyboard to audition the effect. Do not forget to activate the Split or Dual part if you wish to audition its Reverb depth.
Note: This setting can be saved to a User Program (see p. 99).
(9) Press another "big" button in the DATA ENTRY section to leave this function.
Chorus
Chorus broadens the spatial image of the sound and creates a stereo impression. You can choose from 8 types.
When you switch on the EXR-5s/EXR-3s, none of the Keyboard parts (Main, Dual, Split) are processed by the internal Chorus effect. Note also that the Chorus effect doesn't affect the Main part if the MFX is set to anything but "Off".
If you don't need Chorus, you can either switch off the Chorus processor (in which case none of the EXR-5s/EXR-3s's 19 parts are processed) or prevent just one Keyboard part from being processed. You cannot change the amount of Chorus that is added to the Arranger or pre-recorded Song parts.
●Switching the Chorus effect on/off
Use the following procedure if you want no Chorus at all (for none of the EXR-5s/EXR-3s's parts), or to select another Chorus type.
(1) Press the FUNCTION button (it must light).
(2) Use FAMILY ▶▶ to select "EFFECTS".
(3) Use SELECT ▶▶ to select the "CHR" parameter:
Chorus 1 Chorus 4 S-Delay Chorus 2 FB Chorus SDelayFl Chorus 3 Flanger
Note: See also "Working with the FAMILY, SELECT and numeric buttons" (p. 36).
(4) Use the ☐/☐ buttons to select "☐f" if you don't need the Chorus processor. Otherwise, select one of the eight available types (see the list above).
(5) Play a few notes on the keyboard to audition the effect.
●Changing the amount of Chorus processing for the Keyboard parts
To change the Chorus depth (i.e. how much Chorus is added to a part), proceed as follows:
(6) If the FUNCTION button still lights, use SELECT ◀▶ to select one of the following parameters.
VALUE


Chorus depth of the Main part*.
VALUE


Chorus depth of the Dual part.
VALUE


Chorus depth of the Split part.
(*) Though this parameter is displayed even when MFX is set to something else than "Off", the Main part is not processed by the Chorus effect.
(If FUNCTION doesn't light, first perform steps (1) and (2) above.)
(7) Use ☐/☐ to select "0" if you don't want the selected Keyboard part to be processed by the Chorus effect. Otherwise, set the desired value.
If you selected an MFX type (see p. 74), the Chr MAIN parameter has no effect (even though it is displayed).
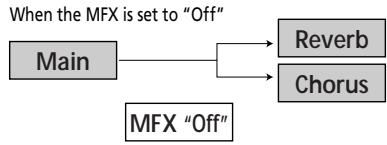
flowchart
graph TD
    A["Main"] --> B["Reverb"]
    A --> C["Chorus"]
    D["MFX "Off""] --> E["Reverb"]
    D --> F["Chorus"]
When the MFX is set to any other type

flowchart
graph TD
    A["Main"] --> B["MFX"]
    B --> C["Reverb"]
    B --> D["Chorus"]
(8) Play a few notes on the keyboard to audition the effect. Do not forget to activate the Split or Dual part if you wish to audition its Chorus depth.
Note: This setting can be saved to a User Program (see p. 99).
(9) Press another "big" button in the DATA ENTRY section to leave this function.
V-LINK function
V-LINK is a function that provides for the integration of music and visual material. By using V-LINK-compatible video devices (i.e. an Edirol DV-7PR), visual effects can be easily linked to, and made part of the expressive elements of a performance.
By using the EXR-5s/EXR-3s with an Edirol DV-7PR, you can:
- Use the EXR-5s/EXR-3s's keyboard (highest octave) to switch images (clips). Press and hold a key for longer transition ("fade"). Briefly press a key for fast transitions.
- The numeric buttons 0\~9 are used for switching palettes (only if the USER PROGRAM button lights).
- Use the BENDER axis of the BENDER/MODULATION lever to change the playback speed of the picture material or to select a different color.
(1) Connect the EXR-5s/EXR-3s's MIDI OUT socket to the MIDI IN socket of the external video processor (or to a UM-1 interface).
(2) Press the V-LINK button (it lights blue).
(3) Use the BENDER, the assigned buttons or "V-LINK" keys (highest octave) to manipulate the video pictures in sync with your music (see below).
(4) Press V-LINK again to switch off this function (the button goes dark).
V-LINK functions that the EXR-5s/EXR-3s can control (and corresponding MIDI messages)
The EXR-5s/EXR-3s provides the following functions for controlling V-LINK compatible video equipment.
- Keyboard: Clip 1\~8→ Program Change: 00H\~08H Press the keys in the highest octave to switch clips.
- Keyboard velocity: Dissolve Time CC23 The velocity of the keys in the highest octave controls the speed of transition between images.
- 1\~0 buttons (if the USER PROGRAM button lights): Palette 1\~10→CC00 (Bank Select)/00H\~09H While the V-LINK button lights, press buttons 1\~0 to switch palettes 1\~10. (The numeric buttons also perform their "normal" functions.)
- BENDER axis of the BENDER/MODULATION lever: Playback Speed→Pitch Bend Moving the lever toward the right will speed up playback, and moving it toward the left will slow down playback. At the center position, playback speed will be normal.
-
MODULATION axis of the BENDER/MODULATION lever: Clip color CC24 (Color CB), CC25 (Color CR) Press the lever towards the rear of the EXR-5s/EXR-3s to change the color. There are five steps that can be selected by pressing the lever several times: green, violet, blue, red, original clip color.
-
Utilizar los botones COVER para cambiar el efecto (VFX1\~4). Las señales V-Link se pueden transmitir mediante MIDI OUT.
(1) Conecte el zócalo MIDI OUT del EXR-5s/EXR-3s al zócalo MIDI IN del procesador de vídeo externo (o un interface UM-1).
(2) Pulse el botón V-LINK (se iluminará en azul).
(3) Utilice el BENDER, los botones asignados o las teclas "V-LINK" (octava superior) para manipular las imágenes del vídeo en la sincronización con su música (vea a continuación).
(4) Pulse el botón V-LINK otra vez para desactivar esta función (el botón se oscurece).
The EXR-5s/EXR-3s's Function mode contains more advanced settings you may not need every day. They allow you to fine-tune your instrument's response. It would therefore be a good idea to familiarize yourself with these parameters. Most settings ("*") can be written to a User Program (see p. 99). Other parameters ("o") are saved to the Flash memory when you leave the Function mode.
Editing parameters (general procedure)
You can edit the EXR-5s/EXR-3s's Function parameters via the display. Here is a general outline of the procedure for all parameters discussed below:
11. Menú Function
(1) Press FUNCTION.
(2) Use FAMILY ▶▶ to select the Function group that contains the desired parameter:
KB SET: KbdTouch, MsterTune, USRTnsp, TransMod, GLB-Trnsp, PB Range, KeySplit, SpltHold, SpltInt, SpltDual, FSW, Port Main, Port Dual, Mode Main, Mode Dual
■ METRONOM: Mtro TS, MetroVol, Count-In
■ OCTAVE: MAIN Oct, DUAL Oct, SPLT Oct
■ VOLUME: Main Vol, Dual Vol, SplitVol, Auto Bass, AccDrums, AccBass, Accomp1\~Accomp6, Song1\~Song16
■ ARR SET: ArrChord, Arr Hold, EP Chord, Bass Inv, MI (Melody Intelligence), InEnCHRD
KB SET: KbdTouch, MsterTune, USRTrnsp, TransMod, GLBTrnsp, PB Range, KeySplit, SpltHold, SpltInt, SpltDual, FSW, Port Main, Port Dual, Mode Main, Mode Dual
■ METRONOM: Mtro TS, MetroVol, Count-In
■ OCTAVE: MAIN Oct, DUAL Oct, SPLT Oct
■ VOLUME: Main Vol, Dual Vol, SplitVol, Auto Bass, Acc-Drums, AccBass, Accomp1\~Accomp6, Song1\~Song16
■ ARR SET: ArrChord, Arr Hold, EP Chord, Bass Inv, MI (Melody Intelligence), InEnCHRD
KB SET: KbdTouch, MsterTune, USRTnsp, TransMod, GLB-Trnsp, PB Range, KeySplit, SpltHold, SpltInt, SpltDual, FSW, Port Main, Port Dual, Mode Main, Mode Dual
■ METRONOM: Mtro TS, MetroVol, Count-In
■ OCTAVE: MAIN Oct, DUAL Oct, SPLT Oct
■ VOLUME: Main Vol, Dual Vol, SplitVol, Auto Bass, AccDrums, AccBass, Accomp1\~Accomp6, Song1\~Song16
■ ARR SET: ArrChord, Arr Hold, EP Chord, Bass Inv, MI (Melody Intelligence), InEnCHRD
■ EFFECTS: REV (Reverb), CHR (Chorus), MFX, Tone MFX, Rev MAIN, Chr MAIN, Pan MAIN, Rev DUAL, Chr DUAL, Pan DUAL, RevSPLIT, ChrSPLIT, PanSPLIT
■ KB SCALE: Scale C/C#/D/Eb/E/F/F#/G/Ab/A/Bb/B, Scale Mode
■ MIDI: Local, MidiTxRx, Sync Rx, Style PC, LyricsTx, NTARx14, PicthBnd, Modulatn, ProgChng, Velo Rx, Clock Tx, StartStp, SongPosP
■ UTILITY: InitFLASH, Resume
■ WriteSNG (see p. 109)
■ WriteSTL (see p. 112)
■ RemoveSNG (see p. 115)
■ Remove STL (see p. 116)
■ WriteUPG (see p. 112)
■ ReadUPG (see p. 113)
■ RemovUPG (see p. 117)
(3) Use SELECT ▶▶ to select the parameter you wish to edit (see below).
Note: In FUNCTION mode, SELECT ◀▶ do not allow you to jump from one family to the next.
The "VALUE" message and a setting appear to signal that you can change ("edit") the selected parameter.
(4) Use the DATA ENTRY ☐/☐ or numeric buttons (only for values) to modify the setting of the selected parameter.
Note: See also "Working with the FAMILY, SELECT and numeric buttons" (p. 36).
Note: To return to the default value of the currently selected parameter, press ☐ and ☐ simultaneously.
(5) Use FAMILY ▶▶ to select another Function parameter.
(6) Continue with step (3).
(7) Press another "big" button in the DATA ENTRY section to leave this function.
■ EFFECTS: REV (Reverb), CHR (Chorus), MFX, Tone MFX, Rev MAIN, Chr MAIN, Pan MAIN, Rev DUAL, Chr DUAL, Pan DUAL, RevSPLIT, ChrSPLIT, PanSPLIT
■ KB SCALE: Scale C/C#/D/Eb/E/F/F#/G/Ab/A/Bb/B, Scale Mode
■ MIDI: Local, MidiTxRx, Sync Rx, Style PC, LyricsTx, NTARx14, PicthBnd, Modulatn, ProgChng, Velo Rx, Clock Tx, StartStp, SongPosP
■ UTILITY: InitFLASH, Resume
(1\~127, Default setting: 110) Use this parameter to set the EXR-5s/EXR-3s's fixed velocity value that will be used when the KEY TOUCH icon is not displayed. See p. 71.
Note: This parameter can also be selected by pressing and holding KEYBOARD TOUCH.
■ MstrTune° (Master Tune)
(427.4\~452.6, Default setting: 440.0) This parameter allows you to change the EXR-5s/EXR-3s's overall tuning, which may be necessary when you accompany a singer, an acoustic instrument, or when you play to a recording on CD or cassette.
■ USRTrnsp\*
(-12\~12, Default setting: 0) Use this parameter to transpose the EXR-5s/EXR-3s in semitones. If you're not sure what transposition is, see p. 67. This parameter can also be selected by pressing the TRANSPOSE button.
■ GLBTrnsp
(-6\~5, Default setting: 0) Use this parameter to temporarily transpose the EXR-5s/EXR-3s in semitones. If you're not sure what transposition is, see (see p. 69). This parameter can also be selected by pressing the TRANSPOSE button and pressing SELECT ▶ once.
TransMod\*
(Default setting: Int+Song) This parameter allows you to specify which parts should be affected by the Transpose setting:
Int: The Keyboard and Arranger parts will be transposed. Notes received via MIDI, however, will be played without change.
Song: Only the Song parts will be transposed. This is only meaningful when you play back a Standard MIDI File or one of your own songs with the EXR-5s/EXR-3s's Recorder.
MIDI: Only the notes received via MIDI will be transposed.
Int+Sng, Int+MIDI, Sng+MIDI, All: These are combinations of the above. Int could be useful to transpose only the Keyboard parts so that you can play to a Recorder song in "your" key but sound in the song's key.
Parámetros KB SET
Kbd Touch\*
(0\~24, Default setting: 2) This parameter allows you to set the interval that will be used when you push the BENDER/MODULATION lever fully to the left or to the right (Pitch Bend effect). You can set this parameter in semitone steps, with a maximum of 24 semitones (2 octaves), the default value being "2", which should be OK in most situations.
Note: Pitch Bend is only available for the Main, Dual and Split parts. See also p. 72.
■ KeySplit\* (Split point)
(48\~84, Default setting: 60) Use this parameter to set the split point for the Arranger mode and the Split part. The note you set here is the lowest note you can play with the Main part. The number refers to a note. "60" corresponds to the note "C4".
Note: You can also select this parameter by pressing and holding the ARRANGER/BAND button.
■ SpltHold\* (Hold function for the Split part)
(On/Off, Default setting: Off) The SplitHold function memorizes the chords you play while the Split part is on and holds the corresponding notes until you play another chord.
■ Spltlnt\* (Split Chord Intelligence)
(On/Off, Default setting: Off) When you activate the SPLIT button, the EXR-5s/EXR-3s's Split Chord Intelligence function allows you to play major chords by pressing just one key, minor chords by pressing two keys, and more complex chords by pressing three keys. This system thus follows Arranger control, which is why it would be a good idea to select "On" whenever you are using the Split part while the ARRANGER icon is displayed.
SplitDual°
(Auto/Manual, Default setting: Auto) Normally, the Tone assignment for the Split and Dual parts changes whenever you select another sound for the Main part. Though this may be great in several situations, it can become rather impractical, when you are used to switching the Dual part (or Split part) on and off in the course of a song. In such cases, select "Manual" to preserve your own sound selection for the Split or Dual part.
■ PB Range° (Pitch Bend Range)
(Default setting: Sustain) After connecting an optional DP-2, DP-6, or BOSS FS-5U to the FOOTSWITCH socket on the rear panel, you can use this parameter for assigning a function to the footswitch.
Sustain: Also called "Hold" or "Damper", this function allows you to use the footswitch to hold the notes you play on the keyboard in much the same way as on an acoustic piano.
Sostenut: In this case, the footswitch functions as Sostenuto pedal (another pedal found on grand and digital pianos that allows you to sustain only those notes you played at the time you pressed the pedal).
Note: This function only applies to the Keyboard parts.
Soft: In this case, the footswitch functions as Soft pedal (a pedal found on grand and digital pianos that reduces the volume).
Note: This function only applies to the Keyboard parts.
Rotary S/F: Allows you to select the slow or fast speed of the Rotary effect. This only works, if the "Rotary" type is assigned to the MFX (see p. 74).
UsrPrgUp: Selects the next User Program (i.e. "10" if "9" is currently active).
UsrPrgDw: Selects the previous User Program (i.e. "19" if "20" is currently active).
Start/Stop: Starts and stops Arranger or Song playback. Same function as the START/STOP button.
Bass Inv: Switches the Bass Inversion function on and off (see p. 60).
Punch I/O: The footswitch can be used to activate and switch off punch in/out recording (see p. 54).
■ Port Main
(Off, 1\~127, Default setting: Off) Portamento is an effect that produces gradual pitch changes between the notes you play. The higher the value, the longer it takes before the pitch of the newly played note is reached.
This parameter allows you to set two parameters simultaneously for the Main part (there is a second parameter for the Dual part): the Portamento switch and the Portamento time. When you select a value between "1" and "127", the Portamento switch is automatically set to "on" (127).
■ Port Dual
(Off, 1\~127, Default setting: Off) This parameter allows you to set two parameters simultaneously for the Dual part: the Portamento switch and the Portamento time. See above for an explanation.
■ Mode Main, Mode Dual

Mode Main
(Mon/Pol, Default setting: Pol) These parameters allow you to specify whether the part in question (Main or Dual) can be played polyphonically ("Pol") or monophonically ("Mon"). "Polyphonic" means that you can play chords, while "monophonic" means that you can only play one note at a time. This may be useful for violin, woodwind and similar sounds, because the acoustic instrument in question cannot (or usually doesn't) play chords. If you press two keys after selecting "Mon", only the note of the last key you pressed sounds (nobody actually presses two keys at exactly the same time).
METRONOM parameters
■ Metro TS° (metronome time signature)
(1/4\~6/4, 6/8, 9/8, Default setting: 4/4) This parameter allows you to set the metronome's time signature (number of beats per bar). Please bear in mind that this setting changes whenever you select a Music Style with a different time signature. See also p. 27 for how to use the metronome. This parameter can also be selected by holding down the METRONOME button.
■ Metro Vol° (metronome volume)
(0\~127, Default setting: 100) Use this parameter whenever you think the metronome is too loud/soft with respect to the music. The default value is usually an appropriate setting.
(On/Off, Default setting: Off) This parameter allows you to switch the count-in function for punch-in and normal recording (see p. 53) on or off. When on, the metronome will count down two measures (8 beats for a song with a 4/4 time signature).
OCTAVE parameters
■ MAIN Oct\*, DUAL Oct\*, SPLIT Oct\* (octave transposition)
(-4 0 4 , Default setting: 0) These three parameters allow you to shift the octave of the part in question (Main, Split, or Dual) up or down by up to four octaves. This can be useful for Techno/Dance songs where you need a piano sound that plays in two different octaves.
To achieve this, assign two different (or the same) piano sounds to Main and Dual, activate the button, and set DUAL Octv to "-1" (or "1").
Note: When a Drum Set is assigned to the Main part, the pitch of the drum/percussion sounds is not transposed. Instead, the keys are assigned to other drum/percussion sounds ("shifted"). Example: after setting "MAIN Oct" to "-1", the bass drum can be played with the C3 key (rather than the C2), while other sounds are available to the left of the C3.
VOLUME parameters
■ Main Vol*, Dual Vol*, SpltVol*: volume
VOLUME 127 Main Vol
(0\~127, Default setting: 127 Main/110 Dual/100 Split) These three parameters allow you to set the volume of the Main, Dual, and Split parts respectively. Please note that the settings you make here have no effect if you used BALANCE ACCOMP to set the maximum volume for the Arranger/Song parts.
Note: The volume of the Dual part can also be set by holding down DUAL while pressing ACCOMP or KEYBOARD. The same is true of the Split part, except that you need to press and hold SPLIT.
Count-In
(OFF, 0\~127, Default setting: OFF) Whenever the Split part is active, this parameter allows you to set the volume of the Auto Bass part (in which case the Auto Bass part is switched on). This part sounds monophonic bass notes based on the chords you play. If the Bass Inversion function (see p. 60) is off, the Auto Bass part sounds the root notes (fundamentals) of the chords you play with your left hand (using the Split part).
The Auto Bass part can also be added to the EP Chord part (see below), and then follows the same rules as that part. The Auto Bass' volume and status can be set independently for "Split use" and "EP Chord use".
In either case, select OFF if you don't need the Auto Bass part.
■ AccDrums\*, AccBass\*, Accomp1\*\~Accomp6\*: volume
(0\~127, Default setting: 100 AccDrums/100 AccBass/
100 Accomp1\~6) These three parameters allow you to set the volume of three Music Style sections: the drums, the bass and the Accomp parts (1\~6). You can use these parameters if you think the original "mix" of the selected Music Style is not quite right.
■ Song1\~Song16: volume
(-64\~0\~63) These volume parameters apply to the respective tracks of the song you are currently playing back. In most cases, you may want to change the volume of track 4 (melody), 2 (bass) or 10 (drums). Finding another track (1, 5\~9, 11\~16) that's too loud or too soft may take some time, because their usage is more or less free. Be aware, however, that not all Standard MIDI Files use all 16 tracks that are available (so that changing the volume of track 16 may produce no audible change at all, for example).
These are relative parameters: the value you set here is subtracted from (negative values) or added to (positive values) the song parts' volume. Note that the upper limit (defined by the MIDI standard) is "127". It may thus be impossible to increase the volume of a track (because it already uses "127"). Select "0" if you like a track's volume the way it is.
Be aware that the changes you make here must be saved along with the song data. They are not written to a User Program. See pages 109 and 125 for how to save songs.
ARR SET parameters
■ ChordInt\* (Arranger Chord intelligence)
(Md1, Md2, Off, Default setting: Md1) This parameter allows you to select the chord intelligence system to be used by the EXR-5s/EXR-3s: the Roland system ("Md1", which makes more sense from an educational point of view, see page 142), or the "Md2" system, which can be used in the following way:
| Major chords | Press the key that corresponds to the chord's fundamental. |
| Minor chords | Fundamental + any black key to the left of the fundamental. |
| Seventh chords | Fundamental + any white key to the left of the fundamental. |
| Minor seventh chords | Fundamental + any black key to the left + any white key to the left. |
In either case, pressing just a few keys is therefore enough for obtaining full chords. If you are used to playing full chords, you can switch this function off.
■ ArrHold\* (Arranger Hold)
(On/Off, Default setting: On) The Arranger Hold function memorizes the chords you play with your left hand and keeps playing the corresponding notes until you play another chord. If you switch off ArrHold, the melodic Arranger parts (A.Bass, Accomp) stop playing as soon as you release the key(s) in the left half of the keyboard, leaving you only with the drum accompaniment.
For your convenience, this function is switched on every time you power on the EXR-5s/EXR-3s.
■ EP Chord° (left-hand St. Strings + bass)
(On/Off, Default setting: On) The EP Chord function (for "Educational Purposes") activates a stereo string sound and monophonic bass (if Auto Bass is set to "On") whenever (a) the
ARRANGER icon is displayed and (b) the Arranger is stopped. This allows you to play chords (and a bass line) with your left hand in Arranger mode – without using the EXR-5s/EXR-3s's accompaniment function.
If you select "Off", however, the left half of the keyboard will be muted when conditions (a) and (b) are met and if the SPLIT icon is not displayed.
■ Bass Inv\*
(On/Off) Use this parameter to change the way in which the Arranger reads the chords you play. See p. 60.
■ MI\* (Melody Intelligence harmony type)
(Default setting: Traditnl) This parameter allows you to select the desired harmony type for the Melody Intelligence function. Note: This parameter can also be selected by pressing and holding the MELODY INTELL button. See p. 58.
InEnCHRD\* (Intro/Ending chord recognition)
(On/Off, Default setting: Off) This parameter allows you to block chord recognition during playback of the Intro or Ending pattern of the selected Music Style in PIANO mode. Unlike the "normal" patterns (Original, Variation), Intro and Ending patterns usually contain chord changes. If you select "Off", chord recognition is active during Intro/Ending playback, so that the accompaniment may jump from one key to another. To avoid this, select "On".
■ Rev\* (Reverb Type)
(Default setting: Hall 2) Use this parameter to select the kind of Reverb that best suits your musical purposes, or to switch the Reverb processor "Off". See p. 77.
■ Chr\* (Chorus Type)
(Default setting: Chorus 3) This parameter allows you to specify the type of Chorus effect, or to switch the Chorus processor "Off". See p. 80.
■ MFX\* (MFX type)
(Default setting: Rotary) This parameter allows you to select the desired MFX type and to switch the MFX processor off. See p. 74 for details about the MFX. Selecting "Off" means that the MFX is off.
Note: MFX type selection can also be linked to Tone selection for the Main part.
■ Tone MFX°
(On/Off, Default setting: On) This parameter allows you to link the selection of an MFX type to the Tone you assign to the Main part. That way, a Distortion/Overdrive effect will be selected for a rock guitar sound, Rotary for an organ, etc.
■ Rev MAIN\*
(0\~127, Default setting: 100) This parameter allows you to set the Reverb Send Level for the Main part (i.e. how much Reverb should be added to the Main notes). Select "0" if the Main part may not be processed by this effect.
■ Chr MAIN\*
(0\~127, Default setting: 0) This parameter allows you to set the Chorus Send Level for the Main part (i.e. how much Chorus should be added to the Main notes). If you want this part to be processed by the Chorus effect, you need to select a value different from "0". This parameter is only used when the MFX parameter is set to "Off".
Parámetros EFFECTS
(Rnd, R63\~0\~L63, Default setting: 0) This parameter allows you to set the stereo position of the Main part (i.e. its placement between the left and right speakers). "Rnd" means that the stereo position changes randomly for each note you play. Values starting with "L" correspond to the left speaker. "O" refers to the center, and values starting with "R" correspond to the right speaker.
■ Rev DUAL\*
(0\~127, Default setting: 100) This parameter allows you to set the Reverb Send Level for Dual part (i.e. how much Reverb should be added to the Dual notes). Select "0" if the Dual part may not be processed by this effect.
■ Chr DUAL\*
(0\~127, Default setting: 0) This parameter allows you to set the Chorus Send Level for the Dual part (i.e. how much Chorus should be added to the Dual notes). If you want this part to be processed by the Chorus effect, you need to select a value different from "0".
Pan DUAL\*
(Rnd, R63\~0\~L63, Default setting: 0) This parameter allows you to set the stereo position of the Dual part (i.e. its placement between the left and right speakers). "Rnd" means that the stereo position changes randomly for each note you play. Values starting with "L" correspond to the left speaker. "O" refers to the center, and values starting with "R" correspond to the right speaker.
■ Rev SPLIT\*
(0\~127, Default setting: 100) This parameter allows you to set the Reverb Send Level for the Split part. Select "0" if the Split part may not be processed by this effect.
■ Chr SPLIT\*
(0\~127, Default setting: 0) This parameter allows you to set the Chorus Send Level for the Split part. If you want this part to be processed by the Chorus effect, you need to select a value different from "0".
Pan MAIN\*
(Rnd, R63\~0\~L63, Default setting: 0) This parameter allows you to set the stereo position of the Split part (i.e. its placement between the left and right speakers). "Rnd" means that the stereo position changes randomly for each note you play. Values starting with "L" correspond to the left speaker. "O" refers to the center, and values starting with "R" correspond to the right speaker.
KB SCALE parameters
■ Scale C\*\~Scale B\* (Scale Tune)
(-64\~63, Default setting: 0 for all notes) These parameters allow you to stray away from the usual semitone-interval scale (used in western music) by changing the pitch of the notes so as to accommodate other musical cultures or tuning methods (oriental, baroque music, etc.).
As you will notice, you can change the pitch of every note of one octave (C, C#, D, Eb, E...). The settings you make here apply to all notes of the same name (i.e. to every "C", every "C#", etc.). Most of the time, you will probably select the value "50" or "-50" as they correspond exactly to half a semitone up or down (quarter tone). Other settings may also be interesting, though.
■ Scl Mode\*
(MN, ALL, Default setting: MN) This parameter allows you to specify which parts the Scale settings (see above) should apply to: only the Main part ("MN") or all parts ("ALL"). In some cases, choosing "ALL" may produce a more satisfactory result.
MIDI parameters
See page 103.
Pan SPLIT\*
This function initializes (formats) the EXR-5s/EXR-3s's Flash memory, which is only necessary if the data in the Flash memory become unreadable.
Note: Executing this function erases all Standard MIDI Files and Music Styles in the EXR-5s/EXR-3s's Flash area.
Press YES/+ in response to the flashing YES message. The "Sure?" message appears and the YES message starts flashing. Press YES/+ to initialize the Flash area (or NO/- if you changed you mind).
After showing the "Complete" message, the EXR-5s/EXR-3s leaves this function.
Resume
Select this function to recall the EXR-5s/EXR-3s's factory Function settings.
Note: Resume does not reset the MIDI parameters of the FUNCTION mode (see p. 103).
Press YES/+ in response to the flashing YES message. After showing the "Complete" message, the EXR-5s/EXR-3s leaves this function.
Note: There is no "Sure?" question that gives you time to think. Only press YES/+ if you are certain you want to recall ALL factory Function settings.
Parámetros UTILITY
12. Working with User Programs
The EXR-5s/EXR-3s is equipped with 100 User Program memories that allow you to store almost all settings (or registrations) you make on the front panel and via the Function menu (see p. 85).
Note: MIDI settings (see p. 103) are not saved to a User Program because the EXR-5s/EXR-3s memorizes them automatically.
Writing your settings to a User Program
It is a good idea to write your settings frequently, even if you still need to do some editing afterwards. Those intermediary saves allow you to return to the previous stage whenever you do not like your last modifications.
(1) Press and hold the USER PROGRAM/WRITE button. The EXR-5s/EXR-3s now displays "-Write?".
(2) Enter the number of the memory where you wish to save your settings using the numeric buttons 0\~9.
The "YES" message starts flashing.
(3) Press YES/+ to confirm the number.
(4) Now use the numeric buttons 0\~9 to name your User Program.
The available characters are:
$$ \begin{array}{c} _! # \& ^ {\prime} - a ^ {\wedge} \ 0 1 2 3 4 5 6 7 8 9 \ A B C D E F G H I J K L M \ N O P Q R S T U V W X Y Z \end{array} $$
Note: Each time you press another numeric button (for entering characters), the cursor advances automatically to the next position. This works like a mobile phone.
(5) Press the YES/+ button to save your settings to the selected memory. (Press NO/- if you don't want to save them after all.)
The display now responds with the "Complete" message.
Notes about writing User Programs
Leaving the User Program environment
Press any other "big" DATA ENTRY button to leave the User Program environment.
Meaning of the asterisk

7 USERPROG
At some stage, you may come across an asterisk message next to the User Program number.
It means that the last User Program you selected is still in effect but that the current settings no longer correspond to the ones in that memory. Such changes may include the status of the Reverb or Chorus effect, a changed volume value, etc.
Before selecting another User Program or switching off the EXR-5s/EXR-3s, you should therefore write these settings to the same (or a different) User Program if you want to keep them. Otherwise, you lose these changes.
Mode selection
The mode (Arranger, p. 28, Piano Solo, p. 24, Piano, p. 59) is also memorized when you write a User Program.
User Programs and the USER STL memory
The last Music Style you selected before writing a User Program is also memorized. This even applies to the USER STL memory that may contain a Style loaded from floppy disk [EXR-5s only] or the Flash memory (see p. 34).
[EXR-5s only] The 100 User Programs can be saved to the Flash memory (see p. 111) or a floppy disk (see p. 125) as a set.
Selecting a User Program
Though the User Program memory you specified above is already selected, there will be times when you need to select another memory. In that case, here is what you need to do:
(1) Briefly press USER PROGRAM/WRITE (it lights). Do not hold this button down because doing so will start the Write procedure (see above).
The display now shows the number of the User Program you selected last, or "1" if you have not yet selected a User Program since switching on the EXR-5s/EXR-3s.
The asterisk "*" indicates that the EXR-5s/EXR-3s is still using the last manual changes you may have made before selecting the User Program function. The number to the left of the USERPROG message therefore only means "this is the last memory you selected".
None of its settings are being used for the time being. By pressing another "big" button in the DATA ENTRY section, you can leave the User Program mode without changing your manual settings. This may be important to remember if you were about to write your settings and accidentally pressed the wrong button (or didn't press it long enough).
To actually select a User Program...
(2) Use the numeric buttons 0\~9 to select a memory.
The settings of the selected User Program will be recalled.
Note: You can also use the FAMILY and SELECT ▶▶ buttons to select User Programs.
Note: As soon as you modify any setting (on the front panel or in the Function menu), the asterisk appears next to the User Program number.
(3) Press any other "big" button in the DATA ENTRY section to leave this mode.
MIDI is short for "Musical Instrument Digital Interface". The word refers to many things, the most obvious being a connector type that is used by musical instruments and other devices to exchange messages relating to the act of making music.
Each time you play on the EXR-5s/EXR-3s's keyboard or start the Arranger (or Song), your instrument transmits MIDI data to its MIDI OUT socket or the USB port. If you connect the MIDI OUT socket to the MIDI IN socket of another instrument, that instrument may play the same notes as one of the EXR-5s/EXR-3s's parts, select sounds, etc. If you connect the USB port to a computer, etc., the MIDI sockets are bypassed. So be sure to only use the EXR-5s/EXR-3s's USB port if you want to work with a computer-based sequencer.
MIDI is a universal standard, which means that musical data can be sent to and received by instruments of different types and manufacturers. Furthermore, MIDI allows you to connect your EXR-5s/EXR-3s to a computer or hardware sequencer.
Connect your EXR-5s/EXR-3s as shown below.
13. Funciones MIDI
(using the supplied USB cable)
-0-
The EXR-5s/EXR-3s transmits and receives data
(*) If you connect the EXR-5s/EXR-3s's USB port to a computer, etc., the MIDI IN and OUT ports are no longer used. This only works when the USB icon is NOT displayed.
MIDI can simultaneously transmit and receive messages on 16 channels, so that up to 16 instruments can be controlled. Nowadays, most instruments –like your EXR-5s/EXR-3s– are multitimbral, which means that they can play several musical parts with different sounds.
All EXR-5s/EXR-3s parts are set to receive MIDI messages. If they do not seem to respond to the messages you send from the external controller, you should check whether the external controller's MIDI OUT is connected to the MIDI INput of your EXR-5s/EXR-3s.
The EXR-5s/EXR-3s's transmit and receive channels of all parts have been set in keeping with a tacit Roland standard and are therefore shared by all recent EM, E, G, and RA series instruments. You cannot change them. They also correspond to the track assignments of the 16-track Recorder:
1 Accomp 1
2 Arranger bass
3 Accomp 2
4 → Main
5 Accomp 3
6 → Dual
7 Accomp 4
8 Accomp 5
9 Accomp 6
10 Arranger drums
11 → Split
12 → Auto Bass
13 V-Link
14 V-Link
15 Melody Intell. (see p. 58)
16 (→Main*)
(*) If you assign a Drum Set to the Main part.
MIDI Function parameters
See "Editing parameters (general procedure)" (p. 85) for how to select and set these Function parameters (they belong to the "MIDI" family).
Note: With the exception of "Local", all MIDI parameter settings are saved as soon as you leave the Function mode.
Local
(On/Off, Default setting: On) The Local parameter allows you to establish or remove the connection between the EXR-5s/EXR-3s's keyboard/Recorder and the internal tone generator.
Canales
When set to "ON" (default), playing on the EXR-5s/EXR-3s's keyboard or playing back a Recorder song will cause the corresponding notes to sound. If you select "OFF", the corresponding MIDI messages are no longer sent to the internal tone generator – but they are still transmitted to the MIDI OUT or USB port and hence to external MIDI instruments.
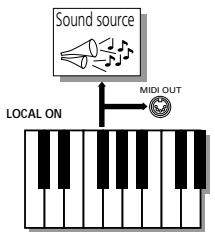
text_image
Sound source MIDI OUT LOCAL ON
text_image
Sound source LOCAL OFF MIDI OUTNote: The setting of this parameter is not memorized when you switch the EXR-5s/EXR-3s off.
■ MIDI TxRx° (MIDI transmission and reception)
This parameter allows you to specify which EXR-5s/EXR-3s parts should transmit and receive MIDI messages:
| Option | Meaning |
| ALL | All parts. |
| KBD | Only the Keyboard parts (see ➔ in the table above). |
| STL | Only the Arranger parts (AccDrums~Accomp 6). |
| SNG | Only the Song parts (1~16). |
| OFF | None of the EXR-5s/EXR-3s's parts transmits/receives MIDI messages. |
■ Sync Rx° (MIDI synchronization)
Use this parameter to specify how the EXR-5s/EXR-3s should be synchronized (as slave) to an external MIDI sequencer, computer, drum machine, etc.
"Synchronization" is a learned term for the fact that one device (or function) is set to start and stop at the same time as another device (or function), and to run at the same tempo (BPM).
Please note that synchronization is only possible when you connect the external device's MIDI OUT socket to the EXR-5s/EXR-3s's MIDI IN socket (though you can also work the other way around; in that case, see the sequencer's manual for details).
Off In this case, the EXR-5s/EXR-3s is not synchronized with other MIDI devices. It is thus impossible to start/stop it via MIDI.
On Arranger playback and Song recording/playback are synchronized if the EXR-5s/EXR-3s receives MIDI Start and Stop messages followed by MIDI Clock signals. If the EXR-5s/EXR-3s receives only a Start message, it will wait a moment to see if there are also MIDI Clock messages coming. If there are, it will synchronize to them. If there are no MIDI Clock messages, it will follow its own tempo. In either case, you can stop playback or recording with a MIDI Stop message.
■ Style PC° (Style Select TxRx Channel)
(OFF, 1\~16, Default setting: 10) As its name implies, the Style Select channel is used to receive and transmit program changes that cause the EXR-5s/EXR-3s or the external instrument to select another Music Style.
■ Lyrics Tx° (Transmit Lyrics messages)
(On/Off, Default setting: Off) The EXR-5s/EXR-3s can transmit Lyrics messages contained in Format 0 Standard MIDI Files you play back. It cannot display them, but it allows you to transmit them to a device capable of displaying Lyrics messages (such as the Roland LVC-1). This filter allows you to enable (On) or disable (Off) the transmission of Lyrics data.
■ NTA Rx14° (Note-to-Arranger reception on/off)
(On/Off, Default setting: On) NTA is short for "Note-to-Arranger", or the notes you play in the left half of the keyboard to feed the Arranger with chord information. These notes can also be received via MIDI (from an accordion, a digital piano, an organ, for example). If you want to use the Arranger without playing on the EXR-5s/EXR-3s's keyboard, you must transmit these notes on MIDI channel 14 (from your computer or external MIDI instrument to the EXR-5s/EXR-3s) and select "On" here.
NTA notes can only be received (they are not transmitted). The notes you play on the EXR-5s/EXR-3s's keyboard are indeed transmitted to the Arranger, from there to the Arranger parts, and used to play the accompaniment in the right key. Since all Music Style notes are transmitted via MIDI, there is no need to send the NTA notes separately.
■ PitchBnd° (Pitch Bend)
(On/Off, Default setting: On) This filter allows you to enable (On) or disable (Off) the transmission and reception of Pitch Bend messages. These messages are used to temporarily increase or decrease the pitch of the Keyboard-part notes (Main, Dual, Split).
■ Modulatn° (Modulation)
(On/Off, Default setting: On) This filter allows you to enable (On) or disable (Off) the transmission and reception of Modulation messages. These messages are used to add vibrato to the notes you play (control change CC01).
■ ProgChng° (Program Change)
(On/Off, Default setting: On) This filter allows you to enable (On) or disable (Off) the transmission and reception of Program Change messages. These messages are used to select Tones, Styles, or User Programs.
■ Velo Rx° (Receive Velocity)
(On, 1\~127, Default setting: On) This filter allows you to enable (On) or disable the reception of velocity messages. This only applies to note messages received via MIDI. Choose the velocity value to be substituted for the actual values the EXR-5s/EXR-3s receives (1\~127), or select "On" to use the velocity values as is.
■ Clock Tx° (synchronization)
(On/Off, Default setting: On) This parameter allows you to determine whether (On) or not (Off) the Arranger and Recorder send MIDI Clock messages when you start them. These messages are necessary for synchronizing external MIDI instruments/sequencers/software to the EXR-5s/EXR-3s.
■ Velo Rx° (Receive Velocity)
(On/Off, Default setting: On) This option allows you to specify whether or not the Arranger and Recorder send Start/Stop/ Continue messages when you start or stop them. Select "Off" when you wish to control the tone generator of a MIDI organ, etc., without starting or stopping its automatic accompaniment.
■ Song PosP° (Song Position Pointer)
(On/Off, Default setting: On) The EXR-5s/EXR-3s's Recorder also sends and receives Song Position Pointer messages that indicate the exact location of the notes that are being played back. Select "Off" if you don't want the Recorder to send or receive these messages.
■ StartStp° (Start/Stop/Continue)
Working with the Flash memory
Let us first have a look at the remaining Function parameters. They allow you to save newly recorded songs and Styles loaded from a floppy disk [EXR-5s only] to the EXR-5s/EXR-3s's Flash memory, and to remove such files.
Saving songs to a Flash memory
Songs you record or edit with the EXR-5s/EXR-3s's Recorder (or that you modify using the Cover functions) can be saved to its Flash memory or floppy disk [EXR-5s only]. See page 125 for how to save them to floppy and page 34 for how to select songs in the Flash memory.
(1) Press FUNCTION.
(2) Use FAMILY ▶▶ to select the "WriteSNG" parameter.
Wait until the display looks as shown above, then proceed with the following step.
The EXR-5s/EXR-3s automatically selects a Flash memory that doesn't yet contain data. (The first character, "S", flashes.)
Note: If no vacant Flash memory remains or if the memory capacity is exhausted, the display shows the "Mem Full" message when you select this function. In that case, it will be impossible to save your song. You can, however, delete another song ("Remove") and repeat step (2) and following.
Note: The "No Song" message means that there are no song data that could be saved.
(3) If necessary, use the SELECT ▶▶ buttons to move the cursor to another character position (that character flashes).
(4) Use the numeric buttons to assign a character to that position.
The available characters are as shown on the previous page. Note: Each time you press another numeric button (for entering characters), the cursor advances automatically to the next position. This works like a mobile phone.
(5) Repeat steps (3) and (4) to assign the desired characters to the remaining positions.
(6) After entering the name, press the YES/+ button to save the song to the EXR-5s/EXR-3s's Flash memory. The display now counts down:
71 Writing
At the end of the saving operation, the display briefly shows the "Complete" message.
Note: Press NO/− if you do not wish to save the song after all.
(7) Press another "big" button in the DATA ENTRY section to leave this function.
Archiving User Programs in the Flash area
This function allows you to save the contents of the internal User Programs (all 100 of them) to the Flash area. User Programs are always archived as a set.
Use this function if all 100 User Programs contain settings you don't want to overwrite (by saving other registrations) or lose (in the unlikely event of a memory failure). There is also a function that allows you to load archived User Programs (page 113).
Note: The User Program set data also contain the TONE button assignments (page 64).
(1) Press FUNCTION.
(2) Use FAMILY ▶▶ to select the "WriteUPG" parameter. Wait until the display looks as follows, then proceed with the next step:

Though you could save the file with the current default name ("USPR_000"), a proper name will help you identify the file at all times. We therefore suggest you take the time to specify a meaningful name.
The first character of the default name ("UserPrg") flashes.
Note: If the memory capacity is exhausted, the display shows the "Mem Full" message when you select this function. In that case, it will be impossible to archive the User Program set. You can, however, delete another set ("Remove") and repeat steps (2) and following.
(3) If necessary, use the SELECT ▶▶ buttons to move the cursor to another character position (that character flashes).
(4) Use the numeric buttons to assign a character to that position.
The available characters are:
text_image
_ ! # $ % & ' - @ ^ ' 0123456789 A B C D E F G H I J K L M N O P Q R S T U V W X Y Z(5) Repeat steps (3) and (4) to assign the desired characters to the remaining positions.
Note: Each time you press another numeric button (for entering characters), the cursor advances automatically to the next position. This works like a mobile phone.
(6) After entering the name, press the YES/+ button to save the User Program set to the EXR-5s/EXR-3s's Flash memory.
At the end of the saving operation, the display briefly shows the "Complete" message.
Note: Press NO/− if you do not wish to archive the User Program Set after all.
(7) Press another "big" button in the DATA ENTRY section to leave this function.
Saving Styles to a Flash memory [EXR-5s only]
Music Styles you load from floppy disk (and which are copied to the USER STL memory at that time) can be saved to a Flash memory.
(1) Press FUNCTION.
(1) Use FAMILY ▶▶ to select the "WriteSTL" parameter. Wait until the display looks as follows, then proceed with the next step:
Wrt
TANGO
TEMPO ♩=985
The EXR-5s automatically selects a Flash destination memory that doesn't yet contain data. (The first character flashes.)
Note: If no vacant Flash memory remains or if the memory capacity is exhausted, the display shows the "Mem Full" message when you select this function. In that case, it will be impossible to save the Music Style. You can, however, delete another Style ("Remove") and repeat step (2) and following. Note: The "No Style" message means that there are no Style data that could be saved.
(2) If necessary, use the SELECT ▶▶ buttons to move the cursor to another character position (that character flashes).
(3) Use the numeric buttons to assign a character to that position.
The available characters are:
$$ -! # * 8 ^ {7} - a ^ {\wedge} $$
$$ \texttt {0 1 2 3 4 5 6 7 8 9} $$
$$ \texttt {A B C D E F G H I J K L M} $$
$$ \texttt {N O P Q R S T U V W X Y Z} $$
(4) Repeat steps (2) and (3) to assign the desired characters to the remaining positions.
Note: Each time you press another numeric button (for entering characters), the cursor advances automatically to the next position. This works like a mobile phone.
(5) After entering the name, press the YES/+ button to save the Style to the EXR-5s's Flash memory.
The display now counts down:
71 Writing
At the end of the saving operation, the display briefly shows the "Complete" message.
Note: Press NO/– if you do not wish to save the Music Style after all.
(6) Press another "big" button in the DATA ENTRY section to leave this function.
Loading a User Program set from the Flash memory
This "ReadUPG" function allows you to transfer a set of 100 User Programs (i.e. for all memories) to the EXR-5s/EXR-3s's internal memory. This will overwrite the User Programs that currently reside in the internal memories. You cannot load individual User Programs from an archived set.
Note: If you wish to use the User Programs in the internal memory at a later stage, first archive them (page 111) or save them to disk [EXR-5s only] before proceeding. See p. 125.
Note: The User Program set data also contain the TONE button assignments (page 64) and other settings. After loading a User Program set, the eight TONE buttons may therefore select other sounds than before, while some parameter settings change.
$$ \texttt {0 1 2 3 4 5 6 7 8 9} $$
$$ A B C D E F G H I J K L M $$
$$ \texttt {N O P Q R S T U V W X Y Z} $$
$$ \texttt {0 1 2 3 4 5 6 7 8 9} $$
$$ \text { A B C D E F G H I J K L M } $$
$$ \texttt {N O P Q R S T U V W X Y Z} $$
(1) Press FUNCTION.
(2) Use FAMILY ▶▶ to select the "ReadUPG" parameter. Wait until the display shows the name of the first User Program set, then proceed with the following step.
(3) Use the SELECT ◀▶ buttons to select the set you wish to load.
(4) Press the YES/+ button.
The display now shows the "Sure?" message, while YES starts flashing.
(5) Press the YES/+ button again to load the User Program set (or NO/- if you do not want to load it after all). While the data are being loaded, the display shows the "Reading" message. Once the file has been loaded, the display briefly shows the "Complete" message.
(6) Press another "big" button in the DATA ENTRY section to leave this function.
Removing songs from the Flash memory
Songs you no longer need can be deleted (which is called "Remov" here) to make room for new songs.
(1) Press FUNCTION.
(2) Use FAMILY ▶▶ to select the "RemovSNG" parameter. Wait until the display shows the name of the first song memory (101), then proceed with the following step.
Note: The "No Song" message means that there are no song data that could be deleted.
(3) Use the SELECT ▶▶ buttons to select the song you wish to delete.
(4) Press the YES/+ button.
The display now shows the "Sure?" message, while YES starts flashing.
(5) Press the YES/+ button again to delete the song (or NO/- if you do not want to delete it after all).
The display now shows the following message:
Removing
Once the file has been deleted, the display briefly shows the "Complete" message.
(6) Press another "big" button in the DATA ENTRY section to leave this function.
Removing Styles from the Flash memory [EXR-5s only]
Styles you no longer need can be deleted (which is called "Remov" here) to make room for new Styles.
(1) Press FUNCTION.
(2) Use FAMILY ▶▶ to select the "RemovSTL" parameter. Wait until the display shows the name of the first Style memory (101), then proceed with the following step.
Note: The "No Style" message means that there are no Music Style data that could be deleted.
(3) Use the SELECT ▶▶ buttons to select the Music Style you wish to delete.
(4) Press the YES/+ button.
The display now shows the "Sure?" message, while YES starts flashing.
(5) Press the YES/+ button again to delete the Style (or NO/- if you do not want to delete it after all). The display now shows the following message:
Removing
Once the file has been deleted, the display briefly shows the "Complete" message.
(6) Press another "big" button in the DATA ENTRY section to leave this function.
Removing a User Program set from the Flash memory
The "RemovUPG" function allows you to erase User Program sets from the EXR-5s/EXR-3s's Flash memory. This may be necessary to make room for new files (e.g. when the "Memory Full" message appears). Be careful, though, to only delete files you are absolutely (positively) sure you will never need again. Once a file has been deleted, it is gone forever.
Note: As a rule, you should first make a backup copy of your disk on your computer. After all, most files really only become indispensable once they are no longer available...
(2) Use FAMILY ▶▶ to select the "RemovLPG" parameter. Wait until the display shows the name of the first User Program set, then proceed with the following step.
Note: The "No Files" message means that there are no set data that could be deleted.
(3) Use the SELECT ▶▶ buttons to select the User Program set you wish to delete.
(4) Press the YES/+ button.
The display now shows the "Sure?" message, while YES starts flashing.
(5) Press the YES/+ button again to delete the User Program Set (or NO/- if you do not want to delete it after all). The display now shows the following message:
Renoving
Once the file has been deleted, the display briefly shows the "Complete" message.
(6) Press another "big" button in the DATA ENTRY section to leave this function.
(1) Pulse FUNCTION.
The EXR-5s/EXR-3s's USB port can be used for two purposes: (a) for transmitting/receiving MIDI data or (b) for exchanging files with a computer.
As long as the USB icon is not displayed, the USB port transmits and receives MIDI data (the MIDI IN and OUT sockets are bypassed if you connect a USB cable to this port). If the icon is displayed, however, your EXR-5s/EXR-3s will appear as an external drive on your PC's or Mac's desktop:
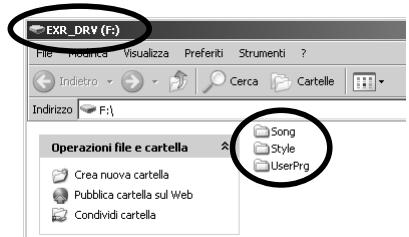
The drive letter ("F:" in the above illustration) depends on the number of drives recognized by Windows (and is of no importance for MacOS).
Note: USB communication (i.e. for MIDI applications) is possible between the EXR-5s/EXR-3s and Windows Me/XP or later (for Windows users), or between the EXR-5s/EXR-3s and Mac OS 9.0.4 or later (for Macintosh users). This requires that you install the appropriate drivers from the supplied CD-ROM.
Data transfer, on the other hand, is possible with Windows 2000/Me/XP or later/Mac OS 9.04 or later. If you encounter problems with your system, please contact your nearest Roland service center for details.
Once recognized, you can copy files to the "Song", "UserPrg" or "Style" folder by dragging and dropping them using the usual routines. The "Style", "UserPrg" and "Song" folders cannot be deleted and must not be renamed. You can empty them by dragging all files they contain to the trash, though.
Proceed as follows (Windows XP):
(1) Restart your PC.
(2) Switch on your EXR-5s/EXR-3s.
(3) Press the EXR-5s/EXR-3s's USB button.
The display shows the error message "No Cable" to signal that USB communication is impossible.
(4) Connect the EXR-5s/EXR-3s's USB port to a free USB port of your computer using the supplied cable.
The USB icon appears and the display shows "PC<->EXR".
If you prefer to use another cable, choose one with the correct USB jack types: a "square" one ("type B") for the EXR-5s/EXR-3s and probably a "flat" one (type "A") for your computer.
Note: If you do not connect a USB cable within 15 seconds, the EXR-5s/EXR-3s returns to its normal mode.
Note: Never switch off the EXR-5s/EXR-3s while the "Writing" message is displayed, because doing so would damage all data in the EXR-5s/EXR-3s's Flash area. (See "InitFLSH (Flash initialization)" (p. 98) if you need to repair the Flash area after an erroneous operation.)
Note: The "Wait... Connection Proceeding" message may appear when you press the USB button. This only happens after using the USB port for MIDI communication. It means that Windows XP is reconfiguring the USB port for data transfer use. This may take a while, so please be patient.
natural_image
Two connected USB devices shown in a simple layout (no text or symbols)Computer/Ordenador/Ordinateur
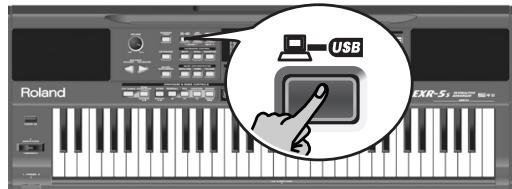
text_image
USB Roland EXR-51Proceed as follows (other operating systems):
(1) Switch on your Mac or PC if it isn't on already.
(2) Switch on your EXR-5s/EXR-3s if it isn't on already.
(3) Press the EXR-5s/EXR-3s's USB button.
The display shows the error message "No Cable" to signal that USB communication is impossible.
Note: If you do not connect a USB cable within 15 seconds, the EXR-5s/EXR-3s returns to its normal mode.
(4) Connect the EXR-5s/EXR-3s's USB port to a free USB port of your computer using the supplied cable.
The USB icon appears and the display shows "PC<->EXR".
If you prefer to use another cable, choose one with the correct USB jack types: a "square" one ("type B") for the EXR-5s/EXR-3s and probably a "flat" one (type "A") for your computer).
Note: Do not connect the EXR-5s/EXR-3s to a USB hub. Always connect it directly to your computer.
Note: Never switch off the EXR-5s/EXR-3s while the "Writing" message is displayed, because doing so would damage all data in the EXR-5s/EXR-3s's Flash area. (See "InitFLSH (Flash initialization)" (p. 98) if you need to repair the Flash area after an erroneous operation.)
For all operating systems:
Note: If you press the USB button without connecting the USB cable, the display shows the error message "No Cable" to signal that USB communication is impossible. Connect a cable to cause this message to disappear.
(5) Open the "My Computer" window (Windows) and check whether your computer has found an "EXR_DRV" (or just "Removable Disk").
(6) Open that drive by double-clicking on its icon.
(7) Open the "Style", "UserPrg" or "Song" folder. This depends on whether you want to delete/rename/add Music Styles or Standard MIDI Files.
(8) Do one of the following:
- Copy the desired Music Styles from the "Style" folder to your computer's hard disk using drag & drop.
- Copy the desired songs from the "Song" folder to your computer's hard disk using drag & drop.
- Copy the desired User Program sets from the "UserPrg" folder to your computer's hard disk using drag & drop.
- Copy the desired Music Styles from your computer's hard disk to the "Style" folder using drag & drop. (See also the explanation below step (10).)
- Copy the desired songs from your computer's hard disk to the "Song" folder using drag & drop.
- Copy the desired User Program sets from your computer's hard disk to the "UserPrg" folder using drag & drop.
(9) To disconnect the EXR-5s/EXR-3s from your computer:
- Macintosh: Drag the "EXR_DRV" (or "Removable Disk") icon to the trash. - OR-
- Windows: Click on the removal icon on the task bar. Wait until a drop-down menu appears and select the entry that says something to the effect of "Stop USB disk EXR_DRV". You should now see a window that says something to the effect of "The USB device XX can now be safely removed from the system". Click on the [OK] button.
-THEN-
- Disconnect the USB cable from your computer and the EXR-5s/EXR-3s.
(10) Press the USB button again.
The display shows the "Sure?" message.
(11) Press YES/+ (the USB icon disappears). (Press NO/- to remain in USB mode.)
If you copied Music Styles from your computer to the Flash area, the display now shows "Wait... Converting Styles" to indicate that files with the extension ".STL" are converted to the EXR-5s/EXR-3s's Music Style format (".STH").
Note that this conversion is only necessary for Music Styles in the EXR-5s/EXR-3s's Flash area that do not yet have the ".STH" extension.
Note: This operation adds a few bytes to every converted Music Style. In rare circumstances (when the Flash area is nearly full), this may lead to the impossibility to convert all Styles that still have the extension ".STL". The EXR-5s/EXR-3s then displays the "MemFull" message to signal that the conversion was aborted before reaching the last ".STL" file. All Styles up to that point have been converted, though, and can be used.
The EXR-5s's Disk functions allow you to save the Recorder Song in the USER SNG memory to disk, to save and load your files to and from disk, to delete files on a floppy disk, and to format disks.
Though you can use 2DD or 2HD floppies, 2HD disks have twice the capacity of 2DD disks, so use 2HDs whenever you can.
Whenever the disk drive writes data to or reads data from disk, the Disk icon (DISK) flashes in the display. Do not remove the floppy disk while this icon is displayed as that may damage both the disk drive and the disk (so that it becomes unreadable).
Loading User Programs from disk
This load function is called LOAD UPr. It allows you to transfer a set of 100 User Programs (i.e. for all memories) to the EXR-5s's internal memory. This will overwrite the User Programs that currently reside in the internal memories.
Note: If you wish to use the User Programs in the internal memory at a later stage, first save them to disk before proceeding. See p. 125.
Note: The User Program set data also contain the TONE button assignments (page 64). After loading a User Program set, the eight TONE buttons may therefore select other sounds than before.
(1) Insert a disk into the drive.
(2) Press DISK to select the Disk mode.
The "LOAD UPr" function is already selected, so there is nothing else you need to do. (Otherwise, use FAMILY ▶▶ to select this parameter.)
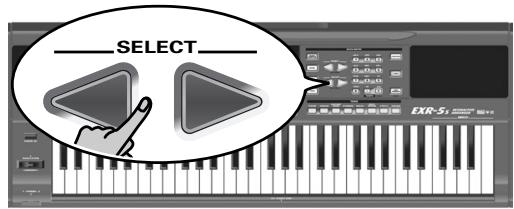
text_image
SELECT EXR-53(3) Use SELECT ▶▶ to select the User Program Set you wish to load.
The YES message next to it starts flashing.
(4) Press the YES/+ button to load the selected file.
Note: Press NO/- if you do not want to load the selected file after all.
If you pressed YES/+ , the display now shows the message "Loading". Once the data have been loaded, the "Complete" message briefly appears.
(5) Press another "big" button in the DATA ENTRY section to leave this function.
Possible error messages
| No Disk | You forgot to insert a floppy disk into the drive. |
| No Files | The disk you inserted contains no User Program data. |
| NoFormat | The floppy disk is either not formatted or uses a format the EXR-5s doesn't recognize. Press YES/+ to format it now (careful: this will erase all data on disk). |
| Disk Err | The disk is probably damaged and cannot be used. |
| File Err | The file you selected is damaged and cannot be loaded. |
Loading songs from disk
LOAD Sn9 allows you to load a song on floppy disk into the EXR-5s/EXR-3s's User memory.
(1) Insert a disk into the drive.
(2) Press DISK to select the Disk mode.
(3) Select the "LOAD Sng" function using FAMILY ▶▶.
(4) Use SELECT ▶▶ to select the song you wish to load. The YES message next to it starts flashing.
(5) Press the YES/+ button to load the selected file.
Note: Press NO/- if you do not want to load the selected file after all.
If you pressed YES/+ , the display now shows the message "Loading". Once the data have been loaded, the "Complete" message briefly appears.
(6) Press another "big" button in the DATA ENTRY section to leave this function.
Note: See also "Possible error messages" above.
Loading Music Styles from disk
LOAD St.1 allows you to load a Music Style on floppy disk into the EXR-5s/EXR-3s's User memory.
(1) Insert a disk into the drive.
(2) Press DISK to select the Disk mode.
(3) Select the "LOAD St1" function using FAMILY ▶▶.
(4) Use SELECT ▶▶ to select the Music Style you wish to load.
The YES message next to it starts flashing.
(5) Press the YES/+ button to load the selected file.
Note: Press NO/- if you do not want to load the selected file after all.
If you pressed YES/+ , the display now shows the message "Loading". Once the data have been loaded, the "Complete" message briefly appears.
(6) Press another "big" button in the DATA ENTRY section to leave this function.
Note: See also "Possible error messages" (p. 123).
Saving files to disk
The EXR-5s provides the following Save functions:
SAVE Upr: Use this function to save the contents of the internal User Program memories (all 100 of them) to a floppy disk.
Note: The User Program set data also contain the TONE button assignments (page 64).
SAVE Sn9: This allows you to save the song in the USERSONG memory to a floppy disk. A song saved to disk becomes a Standard MIDI File.
(1) Insert a disk into the drive.
Every floppy contains a square tab that allows you to "close" a little window. With the tab in that position, you can save data to the disk. Do not forget to write-enable the disk by closing this little window prior to inserting the floppy disk.
(2) Press DISK and use FAMILY ▶▶ to select "SAVE Upr" or "SAVE Sn9".
(3) If necessary, use the SELECT ▶▶ buttons to move the cursor to another character position (that character flashes).
Note: Each time you press another numeric button (for entering characters), the cursor advances automatically to the next position.
(4) Use the numeric buttons to assign a character to that position.
The available characters are as shown above.
(5) Repeat steps (3) and (4) to assign the desired characters to the remaining positions.
Though you could save the file with the current default name ("SONG_001", or "USPR_000"), a proper name will help you identify the file at all times. We therefore suggest you take the time to specify a meaningful name.
Note: If you select "SPACE" (☐ button), the display will insert a "_". That's because MS-DOS® does not allow you to use spaces.
(6) After entering the name, press the YES/+ button to save the data to floppy disk.
The display now counts down ("Saving").
At the end of the saving operation, the display briefly shows the "Complete" message.
Note: If the message "Protect" appears, you forgot to switch off the disk's Write protection. Press the EJECT button of the disk drive, remove the floppy and close the tab, insert the disk again and press YES/+
Note: Press NO/- if you do not want to save the selected file after all.
(7) Press another "big" button in the DATA ENTRY section to leave this function.
Possible error messages
| No Disk | You forgot to insert a floppy disk into the drive. |
| Protect | See above. |
| Disk Full | The remaining disk capacity does not allow to save your data to this disk. |
| NoFormat | The floppy disk is either not formatted or uses a format the EXR-5s doesn't recognize. Press YES/+ to format it now (careful: this will erase all data on disk). |
| Disk Err | The disk is probably damaged and cannot be used. |
| OverWrt? | The name you assigned to the data already exists on the floppy disk you inserted. If you press YES/+ to continue, the file on disk will be overwritten (and the corresponding data will be erased). Either insert another floppy disk, or press DISK and enter another name for the data you want to save. |
Deleting files on disk
The Delete functions allow you to erase files from the inserted floppy disk. This may be necessary to make room for new files (e.g. when the "Disk Full" message appears). Be careful, though, to only delete files you are absolutely (positively) sure you will never need again. Once a file has been deleted, it is gone forever.
Note: As a rule, you should first make a backup copy of your disk on your computer. After all, most files really only become indispensable once they are no longer available...
DEL UFP: Use this function to delete a User Program Set from disk. Be aware that by doing so, you actually erase 100 User Program settings.
DEL Sn9: This allows you to delete a song file on disk.
(1) Insert the disk with the file you want to delete into the drive.
(2) Press DISK to select the Disk mode.
(3) Use SELECT ▶▶ to select "DEL UPr" or "DEL Sn9".
(4) Use SELECT ▶▶ to select the file you wish to delete (example: "USPR_005"). The YES message starts flashing.
(5) Press the YES/+ button.
To be on the safe side, the EXR-5s now asks you whether you really want to delete the file ("Sure?").
(6) Press YES/+ to delete the file, or NO/- to abort the operation.
If you pressed YES/+ , the display now shows the message "Deleting". Once the data have been deleted, the "Complete" message briefly appears.
(7) Press another "big" button in the DATA ENTRY section to leave this function.
| No Disk | You forgot to insert a floppy disk into the drive. |
| Protect | You forgot to switch off the disk's Write protection. Press the EJECT button of the disk drive, remove the floppy and close the tab, insert the disk again and press YES/+ . |
| NoFormat | The floppy disk is either not formatted or uses a format the EXR-5s doesn't recognize. Press YES/+ to format it now (careful: this will erase all data on disk). |
| Disk Err | The disk is probably damaged and cannot be used. |
| No Files | The disk contains no files of the selected type. Insert another disk. |
Format
Before being able to save files to a disk, you need to prepare a floppy disk. This is called "formatting". If the floppy you are about to use is IBM PC formatted, there is no need to format it, though disk access is faster with disks formatted on the EXR-5s. Otherwise proceed as follows:
(1) Insert a disk into the drive.
Every floppy contains a square tab that allows you to "close" a little window. With the tab in that position, you can format the disk. Do not forget to write-enable the disk by closing this little window prior to inserting the floppy disk.
(2) Press DISK to select the Disk mode.
(3) Use FAMILY ▶▶ to select "FORMAT". The "Sure?" message appears and the YES message starts flashing.
(4) Press YES/+ to format the disk.
Note: If you do not want to format your floppy, press NO/-. Note: By formatting a disk, you erase all files it contains. It would be a good idea to first check what it contains (e.g. on your PC).
The value to the left of the "Format9" message now counts from "1" to "100" while the disk icon flashes to indicate that the disk is being accessed. When the disk is formatted, the message "Complete" is briefly displayed.
If you like, you can also record your performance (or a Recorder songs) to cassette, MD, etc. To this end, you need to connect the EXR-5s/EXR-3s's OUTPUT sockets to the external device's REC IN jacks.
Use a standard 1/4" phone cable for doing so. Another use for these outputs is to connect the EXR-5s/EXR-3s to your HiFi or keyboard amplifier (such as the Roland KC-550/350/150). Using a HiFi amplifier requires the use of an adapter plug (RCA/phono→1/4" jack). If you like, you can also purchase two Roland PJ-1M cables.
Note: By connecting the OUTPUT jacks, you do not switch off the EXR-5s/EXR-3s's amplification system.
You can connect an optional DP-2, DP-6, or BOSS FS-5U foot switch to the FOOTSWITCH jack in order to hold the notes even after releasing the keys, or to perform other functions (see p. 89).
Functions for educational purposes
The EXR-5s/EXR-3s provides two functions that may come in handy for music teachers or for those who use the EXR-5s/EXR-3s in class:
Deactivating or activating the Demo function
The EXR-5s/EXR-3s's Demo function can be switched off so that pressing USB+ONE TOUCH will have no effect at all. This may be useful in situations where the EXR-5s/EXR-3s is used in class. Here is how to deactivate the Demo function:
(1) Switch off the EXR-5s/EXR-3s.
(2) Hold down the USB, ONE TOUCH and ACOUSTIC buttons while switching the EXR-5s/EXR-3s back on again. The display briefly shows "DISABLED".
This setting is remembered, so that next time you want to listen to a demo song, you have to repeat the above procedure.
Deactivating or activating the Arranger
Use the following procedure to ensure that the Arranger cannot be started or stopped:
(1) Switch off the EXR-5s/EXR-3s.
(2) Hold down the ACOUSTIC and ARRANGER/BAND buttons while you switch the EXR-5s/EXR-3s back on again. The display briefly shows "DISABLED". It is now impossible to start/stop the Arranger using the START/STOP button.
Repeat the above procedure when you want to use the Arranger again.
16. Miscelánea
Deactivating or activating the Arranger and Demo functions
A third "educational" option is to switch off both the Demo and the Arranger functions in one go:
(1) Switch off the EXR-5s/EXR-3s.
(2) Hold down the ACOUSTIC and START/STOP buttons while you switch the EXR-5s/EXR-3s back on again.
The display briefly shows "DISABLED". It is now impossible to start/stop the Arranger or demo song playback.
Repeat the above procedure when you want to use the Arranger and Demo function again.
Initializing your EXR-5s/EXR-3s (Factory)
After working extensively with your EXR-5s/EXR-3s, you may want to recall the original factory settings. Note that the Recorder song will be empty and that the User Programs contain the factory settings after initializing your EXR-5s/EXR-3s.
Here is how to initialize your EXR-5s/EXR-3s:
(1) Power off your EXR-5s/EXR-3s.
(2) Hold down the USER PROGRAM/WRITE button while turning your EXR-5s/EXR-3s back on again.
The message "Factory" informs you that the EXR-5s/EXR-3s has been initialized.
Note: This does not affect the data in the EXR-5s/EXR-3s's Flash memory. See page 98 for how to initialize that area.
Keyboard: 61 keys, velocity sensitive
Sound source: PCM samples
Max polyphony: 64 voices
Tones: 510 panel sounds (542 XG compatible voices/256 GM2 compatible sounds)
Drum Sets: 20 Drum Sets (11 XG compatible/9 GM2 compatible)
Multitimbral parts: 19
Compatibility: GM2, GS, XG Lite
Display type: New large backlit custom display
Panel controls: VOLUME knob, ACCOMP/KEYBOARD BALANCE buttons, TEMPO/DATA buttons, BENDER/MODULATION lever, FAMILY buttons, SELECT buttons, numeric buttons 0\~9, 8 assignable TONE family buttons
Music Styles: 103 Styles in Flash memory (84 factory + 80 changeable)
One Touch: 2 x 84
Orchestrator: 3 levels: Drum&Bass, Combo, Full Band
Style Cover: 5: Acoustic, Pop, Rock, Dance, Ethnic
Songs: Realtime SMF player
16-track Recorder: 4 easy modes (ALL, Keyboard, Single, Punch In/Out)
Song Cover: 5: Acoustic, Pop, Rock, Dance, Ethnic
Flash Memory: For Music Styles, User Program sets and Songs
User Programs: 100
Effects: Reverb: 8 types, Chorus: 8 types, Multi-FX: 47 types
Data storage: EXR-5s→FDD 3.5" 2HD/2DD (Styles, Songs/SMF, User Programs)
EXR-3s & EXR-5s→ File save & load from PC via USB (Styles, Songs)
Metronome: Time Signature setting (1/4, 2/4, 3/4, 4/4, 5/4, 6/4, 6/8, 9/8), Volume setting
Other functions: 3easy modes: Piano/Solo, Arranger/Band, Piano Mode, Music Assistant: 126 settings, Split (2 Tones: Split [L] + Main [R]), Dual (2 Tones: Main + Dual), Melody Intelligence: 18 types, Octave (-4\~4), Transpose (-12\~12), V-Link
System updates: Yes
Style Cover: 5: Acoustic, Pop, Rock, Dance, Ethnic
Song Cover: 5: Acoustic, Pop, Rock, Dance, Ethnic
Effets: Réverb: 8 types, Chorus: 8 types, Multi-FX: 47 types
Connections: USB: MIDI communication and file transfer, MIDI IN, OUT
Outputs: L/Mono, Right (1/4" phone jacks), Phones 1/2, DC IN (adapter)
Others: EXR-5s→ Output Power: 10W+10W with "Digital Bass Enhancer", Stereo Speakers: 2 x ∅13cm, Bass Reflex EXR-3s→ Output Power: 5W+5W with "Digital Bass Enhancer", Stereo speakers: 2 x ∅12cm
Power supply: 12V/3.5A (EXR-5s), 12V/1A (EXR-3s)
Dimensions: 1020 x 355 x 132 mm
Weight: 8kg (EXR-5s), 7kg (EXR-3s)
Supplied accessories: EXR-5s→ Owner's Manual, PSB-4U adapter, music rest, USB cable EXR-3s→ Owner's Manual, ACO adapter, music rest, USB cable
Note: Specifications are subject to change without prior notice.
Alimentation: 12V/3.5A (EXR-5s), 12V/1A (EXR-3s)
Dimensions: 1020 x 355 x 132mm
Poids: 8kg (EXR-5s), 7kg (EXR-3s)
- Lists
Tones selectable via the front panel
| Tone no.PC | CC00 | CC32 | Name | Family | Tone no.PC | CC00 | CC32 | Name | Family | Tone no.PC | CC00 | CC32 | Name | Family | |||
| 1 | 1 | 8 | 2 | StPiano1 | PIANO | 82 | 17 | 8 | 2 | TrmOrgan | ORGAN | 163 | 39 | 22 | 2 | Sqr Bass | BASS |
| 2 | 1 | 16 | 2 | EuropnPf | PIANO | 83 | 17 | 9 | 2 | Organ109 | ORGAN | 164 | 33 | 2 | 2 | Ac.Bass2 | BASS |
| 3 | 2 | 0 | 2 | Piano 2 | PIANO | 84 | 17 | 17 | 2 | 60sOrgn2 | ORGAN | 165 | 33 | 3 | 2 | Ac.Bass3 | BASS |
| 4 | 4 | 0 | 2 | Honkytnk | PIANO | 85 | 17 | 18 | 2 | 60sOrgn3 | ORGAN | 166 | 34 | 1 | 2 | FngrdBs2 | BASS |
| 5 | 1 | 0 | 2 | Piano 1 | PIANO | 86 | 17 | 31 | 2 | PopOrgan | ORGAN | 167 | 34 | 4 | 2 | FngrdBs4 | BASS |
| 6 | 2 | 8 | 2 | StPiano2 | PIANO | 87 | 17 | 32 | 2 | RockOrgn | ORGAN | 168 | 34 | 7 | 2 | FingrSlp | BASS |
| 7 | 3 | 0 | 2 | Piano 3 | PIANO | 88 | 17 | 33 | 2 | Even Bar | ORGAN | 169 | 35 | 3 | 2 | Pckd Bs2 | BASS |
| 8 | 3 | 1 | 2 | EG+Rhds1 | PIANO | 89 | 17 | 40 | 2 | OrganBss | ORGAN | 170 | 35 | 8 | 2 | Mt PckBs | BASS |
| 9 | 3 | 2 | 2 | EG+Rhds2 | PIANO | 90 | 18 | 1 | 2 | Organ201 | ORGAN | 171 | 36 | 1 | 2 | FrtlsBs2 | BASS |
| 10 | 3 | 8 | 2 | StPiano3 | PIANO | 91 | 18 | 8 | 2 | ChorsOr2 | ORGAN | 172 | 36 | 2 | 2 | FrtlsBs3 | BASS |
| 11 | 4 | 8 | 2 | OldUprgt | PIANO | 92 | 18 | 10 | 2 | Dtdnd Or2 | ORGAN | 173 | 36 | 3 | 2 | FrtlsBs4 | BASS |
| 12 | 5 | 0 | 2 | E.Piano1 | E.PIANO | 93 | 18 | 32 | 2 | PercOrg2 | ORGAN | 174 | 36 | 4 | 2 | SnFrtlss | BASS |
| 13 | 5 | 8 | 2 | StSoftEP | E.PIANO | 94 | 20 | 16 | 2 | ChrchOr3 | ORGAN | 175 | 36 | 5 | 2 | MrSmooth | BASS |
| 14 | 5 | 47 | 2 | DynoRhds | E.PIANO | 95 | 21 | 16 | 2 | PuffOrgn | ORGAN | 176 | 36 | 8 | 2 | FrtlsBs5 | BASS |
| 15 | 5 | 48 | 2 | Wurly | E.PIANO | 96 | 22 | 0 | 2 | AccrdnFr | ACCORDN | 177 | 36 | 48 | 2 | FtFrtlss | BASS |
| 16 | 6 | 10 | 2 | EPLegend | E.PIANO | 97 | 22 | 8 | 2 | Accrdnlt | ACCORDN | 178 | 37 | 8 | 2 | ResoSlap | BASS |
| 17 | 6 | 24 | 2 | HardFMEP | E.PIANO | 98 | 24 | 0 | 2 | Bandneon | ACCORDN | 179 | 38 | 0 | 2 | SlpBass2 | BASS |
| 18 | 6 | 32 | 2 | EP Phase | E.PIANO | 99 | 23 | 0 | 2 | Harmonic | ACCORDN | 180 | 39 | 1 | 2 | SynBs101 | BASS |
| 19 | 5 | 16 | 2 | FM+SA EP | E.PIANO | 100 | 23 | 1 | 2 | Harmonc2 | ACCORDN | 181 | 39 | 2 | 2 | JunoBass | BASS |
| 20 | 5 | 24 | 2 | 60sEPno | E.PIANO | 101 | 25 | 0 | 2 | NylStrGt | A.GUITAR | 182 | 39 | 3 | 2 | 106Bass | BASS |
| 21 | 5 | 25 | 2 | HardRhds | E.PIANO | 102 | 25 | 24 | 2 | VeloHrmx | A.GUITAR | 183 | 39 | 8 | 2 | AcidBass | BASS |
| 22 | 5 | 26 | 2 | MllwRhds | E.PIANO | 103 | 26 | 9 | 2 | Nyln+Stl | A.GUITAR | 184 | 39 | 9 | 2 | TB303Bss | BASS |
| 23 | 6 | 0 | 2 | E.Piano2 | E.PIANO | 104 | 25 | 40 | 2 | Reqnt Gt | A.GUITAR | 185 | 39 | 10 | 2 | TeknBass | BASS |
| 24 | 6 | 8 | 2 | Dtnd EP2 | E.PIANO | 105 | 25 | 49 | 2 | FlmncoGt | A.GUITAR | 186 | 39 | 19 | 2 | ClaviBss | BASS |
| 25 | 6 | 16 | 2 | St.FM EP | E.PIANO | 106 | 26 | 0 | 2 | StIstrGt | A.GUITAR | 187 | 39 | 20 | 2 | Hammer | BASS |
| 26 | 100 | 5 | 2 | Nyln+Rhd | E.PIANO | 107 | 26 | 8 | 2 | 12-strGt | A.GUITAR | 188 | 39 | 21 | 2 | JngIBass | BASS |
| 27 | 7 | 24 | 2 | Harpsi 2 | KEYBOARD | 108 | 26 | 16 | 2 | Mandolin | A.GUITAR | 189 | 39 | 23 | 2 | PopSynBs | BASS |
| 28 | 7 | 16 | 2 | StHarpsi | KEYBOARD | 109 | 25 | 8 | 2 | Ukulele | A.GUITAR | 190 | 39 | 24 | 2 | LghtSnBs | BASS |
| 29 | 8 | 0 | 2 | Clav. | KEYBOARD | 110 | 25 | 16 | 2 | NylonGto | A.GUITAR | 191 | 39 | 25 | 2 | FatTBBss | BASS |
| 30 | 8 | 8 | 2 | CompClav | KEYBOARD | 111 | 25 | 32 | 2 | NylonGt2 | A.GUITAR | 192 | 40 | 0 | 2 | SynBass2 | BASS |
| 31 | 7 | 0 | 2 | Harpscr | KEYBOARD | 112 | 26 | 32 | 2 | SteelGt2 | A.GUITAR | 193 | 40 | 1 | 2 | SynBs201 | BASS |
| 32 | 7 | 8 | 2 | Cpld Hps | KEYBOARD | 113 | 26 | 33 | 2 | Stl+Body | A.GUITAR | 194 | 40 | 2 | 2 | Mod Bass | BASS |
| 33 | 8 | 39 | 2 | PulsClav | KEYBOARD | 114 | 32 | 0 | 2 | GtHrmncs | A.GUITAR | 195 | 40 | 3 | 2 | Seq Bass | BASS |
| 34 | 9 | 0 | 2 | Celesta | CHR PERC | 115 | 32 | 16 | 2 | AcGtHrmx | A.GUITAR | 196 | 40 | 8 | 2 | BeefFMBs | BASS |
| 35 | 11 | 0 | 2 | MusicBox | CHR PERC | 116 | 100 | 0 | 2 | Atmspher | A.GUITAR | 197 | 40 | 9 | 2 | XWr Bass | BASS |
| 36 | 12 | 0 | 2 | Vibraphn | CHR PERC | 117 | 100 | 2 | 2 | NylnHarp | A.GUITAR | 198 | 40 | 16 | 2 | RubbrBss | BASS |
| 37 | 13 | 0 | 2 | Marimba | CHR PERC | 118 | 121 | 0 | 2 | GtFrtnoz | A.GUITAR | 199 | 40 | 17 | 2 | SH101Bs1 | BASS |
| 38 | 14 | 0 | 2 | Xylphone | CHR PERC | 119 | 27 | 0 | 2 | Jazz Gt. | E.GUITAR | 200 | 40 | 18 | 2 | SH101Bs2 | BASS |
| 39 | 15 | 0 | 2 | TubIBell | CHR PERC | 120 | 27 | 8 | 2 | PedalStl | E.GUITAR | 201 | 40 | 19 | 2 | SmthBass | BASS |
| 40 | 99 | 2 | 2 | SftCryst | CHR PERC | 121 | 28 | 1 | 2 | CleanGt2 | E.GUITAR | 202 | 40 | 20 | 2 | MildBass | BASS |
| 41 | 99 | 4 | 2 | LoudGlock | CHR PERC | 122 | 28 | 4 | 2 | JCCInGt. | E.GUITAR | 203 | 40 | 21 | 2 | DetunBss | BASS |
| 42 | 99 | 16 | 2 | ChrIBell | CHR PERC | 123 | 28 | 23 | 2 | MidTneGT | E.GUITAR | 204 | 40 | 29 | 2 | AttckPls | BASS |
| 43 | 113 | 0 | 2 | TnkIBell | CHR PERC | 124 | 29 | 0 | 2 | Muted Gt | E.GUITAR | 205 | 121 | 2 | 2 | Str Slap | BASS |
| 44 | 10 | 0 | 2 | GlcknspI | CHR PERC | 125 | 30 | 0 | 2 | OvdrvGt | E.GUITAR | 206 | 121 | 5 | 2 | BassSld | BASS |
| 45 | 12 | 1 | 2 | HardVibe | CHR PERC | 126 | 31 | 0 | 2 | Dist Gt | E.GUITAR | 207 | 49 | 16 | 2 | StStrngs | STRINGS |
| 46 | 12 | 8 | 2 | StVibrap | CHR PERC | 127 | 31 | 16 | 2 | Power Gt | E.GUITAR | 208 | 50 | 10 | 2 | StSlwStr | STRINGS |
| 47 | 13 | 8 | 2 | StMarimb | CHR PERC | 128 | 27 | 1 | 2 | MellowGt | E.GUITAR | 209 | 50 | 8 | 2 | LegtoStr | STRINGS |
| 48 | 13 | 16 | 2 | Barafon | CHR PERC | 129 | 27 | 2 | 2 | JazzGt.2 | E.GUITAR | 210 | 51 | 0 | 2 | SynStrngs | STRINGS |
| 49 | 13 | 17 | 2 | Barafon2 | CHR PERC | 130 | 28 | 0 | 2 | CleanGt. | E.GUITAR | 211 | 45 | 9 | 2 | SuspnStr | STRINGS |
| 50 | 13 | 24 | 2 | Log drum | CHR PERC | 131 | 28 | 3 | 2 | OpenHrd1 | E.GUITAR | 212 | 46 | 0 | 2 | PzzctStr | STRINGS |
| 51 | 15 | 8 | 2 | ChrchBill | CHR PERC | 132 | 28 | 8 | 2 | ChorusGt | E.GUITAR | 213 | 41 | 0 | 2 | Violin | STRINGS |
| 52 | 15 | 9 | 2 | Carillon | CHR PERC | 133 | 28 | 48 | 2 | CleanGt3 | E.GUITAR | 214 | 41 | 8 | 2 | SlwVioln | STRINGS |
| 53 | 99 | 0 | 2 | Crystal | CHR PERC | 134 | 29 | 1 | 2 | Mt DstBs | E.GUITAR | 215 | 42 | 0 | 2 | Viola | STRINGS |
| 54 | 99 | 1 | 2 | SynMalIt | CHR PERC | 135 | 29 | 8 | 2 | Funk Pop | E.GUITAR | 216 | 43 | 0 | 2 | Cello | STRINGS |
| 55 | 99 | 3 | 2 | RndGlock | CHR PERC | 136 | 29 | 16 | 2 | Funk Gt2 | E.GUITAR | 217 | 44 | 0 | 2 | Contrbss | STRINGS |
| 56 | 99 | 5 | 2 | GlcknChm | CHR PERC | 137 | 29 | 24 | 2 | Jazz Man | E.GUITAR | 218 | 56 | 10 | 2 | DoublHit | STRINGS |
| 57 | 99 | 6 | 2 | ClrBells | CHR PERC | 138 | 30 | 4 | 2 | Gt Pinch | E.GUITAR | 219 | 41 | 1 | 2 | Violin2 | STRINGS |
| 58 | 99 | 7 | 2 | XmasBell | CHR PERC | 139 | 31 | 1 | 2 | Dist.Gt2 | E.GUITAR | 220 | 41 | 9 | 2 | SlVioln2 | STRINGS |
| 59 | 99 | 8 | 2 | VbrBells | CHR PERC | 140 | 31 | 2 | 2 | Dazed Gt | E.GUITAR | 221 | 42 | 1 | 2 | Viola2 | STRINGS |
| 60 | 99 | 9 | 2 | DigiBell | CHR PERC | 141 | 31 | 8 | 2 | Fdbck Gt | E.GUITAR | 222 | 43 | 1 | 2 | Cello2 | STRINGS |
| 61 | 99 | 17 | 2 | AirBells | CHR PERC | 142 | 31 | 9 | 2 | FdbckGt2 | E.GUITAR | 223 | 45 | 0 | 2 | Trem Str. | STRINGS |
| 62 | 99 | 18 | 2 | BellHarp | CHR PERC | 143 | 31 | 17 | 2 | PowerGt2 | E.GUITAR | 224 | 45 | 8 | 2 | SlwTrmol. | STRINGS |
| 63 | 99 | 19 | 2 | Gamelimb. | CHR PERC. | ||||||||||||
| Tone no. | PC | CC00 | CC32 | Name | Family |
| 422 | 110 | 0 | 2 | Bagpipe | ETHNIC |
| 423 | 111 | 0 | 2 | Fiddle | ETHNIC |
| 424 | 112 | 1 | 2 | Shanai 2 | ETHNIC |
| 425 | 16 | 1 | 2 | Santur 2 | ETHNIC |
| 426 | 16 | 8 | 2 | Cimbalom | ETHNIC |
| 427 | 47 | 24 | 2 | Yang Qin | ETHNIC |
| 428 | 105 | 1 | 2 | Sitar 2 | ETHNIC |
| 429 | 105 | 2 | 2 | DtnSitar | ETHNIC |
| 430 | 105 | 8 | 2 | Tambra | ETHNIC |
| 431 | 105 | 16 | 2 | Tamboura | ETHNIC |
| 432 | 106 | 1 | 2 | MtdBanjo | ETHNIC |
| 433 | 106 | 16 | 2 | Gopicht | ETHNIC |
| 434 | 107 | 1 | 2 | Tsugaru | ETHNIC |
| 435 | 108 | 8 | 2 | TaishoKt | ETHNIC |
| 436 | 109 | 0 | 2 | Kalimba | ETHNIC |
| 437 | 112 | 0 | 2 | Shanai | ETHNIC |
| 438 | 112 | 8 | 2 | Pungi | ETHNIC |
| 439 | 112 | 16 | 2 | Hichriki | ETHNIC |
| 440 | 113 | 8 | 2 | Bonang | ETHNIC |
| 441 | 113 | 9 | 2 | Gender | ETHNIC |
| 442 | 113 | 10 | 2 | GamInGng | ETHNIC |
| 443 | 113 | 11 | 2 | StGameln | ETHNIC |
| 444 | 48 | 0 | 2 | Timpani | PRCSSION |
| 445 | 115 | 0 | 2 | StIDrums | PRCSSION |
| 446 | 116 | 8 | 2 | Castnets | PRCSSION |
| 447 | 117 | 0 | 2 | Taiko | PRCSSION |
| 448 | 113 | 16 | 2 | RAMACybl | PRCSSION |
| 449 | 114 | 0 | 2 | Agogo | PRCSSION |
| 450 | 114 | 8 | 2 | Atarigan | PRCSSION |
| 451 | 116 | 0 | 2 | Woodblck | PRCSSION |
| 452 | 117 | 8 | 2 | ConcrtBD | PRCSSION |
| 453 | 117 | 9 | 2 | CncrBDMt | PRCSSION |
| 454 | 118 | 0 | 2 | MeloTom1 | PRCSSION |
| 455 | 118 | 1 | 2 | Real Tom | PRCSSION |
| 456 | 118 | 8 | 2 | MeloTom2 | PRCSSION |
| 457 | 118 | 9 | 2 | Rock Tom | PRCSSION |
| 458 | 119 | 0 | 2 | SyntDrum | PRCSSION |
| 459 | 119 | 8 | 2 | 808 Tom | PRCSSION |
| 460 | 119 | 9 | 2 | ElecPerc | PRCSSION |
| 461 | 120 | 0 | 2 | Rev Cym | PRCSSION |
| 462 | 120 | 1 | 2 | Rev Cym2 | PRCSSION |
| 463 | 120 | 8 | 2 | Rev Snr1 | PRCSSION |
| 464 | 120 | 9 | 2 | RevSnr 2 | PRCSSION |
| 465 | 120 | 16 | 2 | RevKick1 | PRCSSION |
| 466 | 120 | 17 | 2 | RevConBD | PRCSSION |
| 467 | 120 | 24 | 2 | RevTom 1 | PRCSSION |
| 468 | 120 | 25 | 2 | RevTom 2 | PRCSSION |
| 469 | 123 | 2 | 2 | Thunder | SFX |
| 470 | 123 | 3 | 2 | Wind | SFX |
| 471 | 124 | 0 | 2 | Bird | SFX |
| 472 | 124 | 2 | 2 | HrseGllp | SFX |
| 473 | 124 | 3 | 2 | Bird 2 | SFX |
| 474 | 125 | 1 | 2 | Telphn 2 | SFX |
| 475 | 126 | 0 | 2 | Helicptr | SFX |
| 476 | 126 | 1 | 2 | CarEngne | SFX |
| 477 | 126 | 3 | 2 | Car-Pass | SFX |
| 478 | 126 | 5 | 2 | Siren | SFX |
| 479 | 126 | 6 | 2 | Train | SFX |
| 480 | 127 | 0 | 2 | Applause | SFX |
| 481 | 127 | 1 | 2 | Laughing | SFX |
| 482 | 127 | 2 | 2 | Screaming | SFX |
| 483 | 128 | 3 | 2 | Xplosion | SFX |
| 484 | 122 | 0 | 2 | BrtNoise | SFX |
| 485 | 122 | 1 | 2 | FIKClick | SFX |
| 486 | 123 | 0 | 2 | Seashore | SFX |
| 487 | 123 | 1 | 2 | Rain | SFX |
| 488 | 123 | 4 | 2 | Stream | SFX |
| 489 | 123 | 5 | 2 | Bubble | SFX |
| 490 | 124 | 1 | 2 | Dog | SFX |
| 491 | 124 | 4 | 2 | Kitty | SFX |
| 492 | 124 | 5 | 2 | Growl | SFX |
| 493 | 125 | 0 | 2 | Telphn 1 | SFX |
| 494 | 125 | 2 | 2 | DoorCrk | SFX |
| 495 | 125 | 3 | 2 | Door | SFX |
| 496 | 125 | 4 | 2 | Scratch | SFX |
| 497 | 125 | 5 | 2 | WndChims | SFX |
| 498 | 125 | 7 | 2 | Scratch2 | SFX |
| 499 | 126 | 2 | 2 | Car-Stop | SFX |
| 500 | 126 | 4 | 2 | CarCrash | SFX |
| 501 | 126 | 7 | 2 | Jetplane | SFX |
| 502 | 126 | 8 | 2 | Starship | SFX |
| 503 | 126 | 9 | 2 | BurstNs | SFX |
| 504 | 127 | 3 | 2 | Punch | SFX |
| 505 | 127 | 4 | 2 | HeartBt | SFX |
| 506 | 127 | 5 | 2 | Footstps | SFX |
| 507 | 127 | 6 | 2 | Applaus2 | SFX |
| 508 | 128 | 0 | 2 | Gun Shot | SFX |
| 509 | 128 | 1 | 2 | MachnGun | SFX |
| 510 | 128 | 2 | 2 | Lasergun | SFX |
| Tone no. | PC | CC00 | CC32 | Name | Family |
| 333 | 82 | 0 | 2 | Saw Wave | SYN LEAD |
| 334 | 82 | 2 | 2 | PulseSaw | SYN LEAD |
| 335 | 82 | 6 | 2 | GR-300 | SYN LEAD |
| 336 | 82 | 16 | 2 | WaspSyn | SYN LEAD |
| 337 | 82 | 46 | 2 | SeqncdSw | SYN LEAD |
| 338 | 83 | 0 | 2 | SnCallpe | SYN LEAD |
| 339 | 83 | 2 | 2 | PurPanLd | SYN LEAD |
| 340 | 85 | 0 | 2 | Charang | SYN LEAD |
| 341 | 85 | 1 | 2 | WireLead | SYN LEAD |
| 342 | 85 | 8 | 2 | DistLead | SYN LEAD |
| 343 | 81 | 1 | 2 | Square | SYN LEAD |
| 344 | 81 | 2 | 2 | HollwMin | SYN LEAD |
| 345 | 81 | 5 | 2 | Shmoog | SYN LEAD |
| 346 | 81 | 6 | 2 | LMSquare | SYN LEAD |
| 347 | 81 | 8 | 2 | SineWave | SYN LEAD |
| 348 | 81 | 16 | 2 | DistSqre | SYN LEAD |
| 349 | 82 | 1 | 2 | P5 Saw | SYN LEAD |
| 350 | 82 | 3 | 2 | FelineGR | SYN LEAD |
| 351 | 82 | 5 | 2 | VeloLead | SYN LEAD |
| 352 | 82 | 7 | 2 | LA Saw | SYN LEAD |
| 353 | 82 | 8 | 2 | Dr. Solo | SYN LEAD |
| 354 | 82 | 9 | 2 | SawWave2 | SYN LEAD |
| 355 | 82 | 10 | 2 | Saw | SYN LEAD |
| 356 | 82 | 36 | 2 | NatrLead | SYN LEAD |
| 357 | 83 | 1 | 2 | VentSyn | SYN LEAD |
| 358 | 84 | 0 | 2 | ChiffrLd | SYN LEAD |
| 359 | 87 | 0 | 2 | 5thSawWv | SYN LEAD |
| 360 | 87 | 1 | 2 | BigFives | SYN LEAD |
| 361 | 88 | 0 | 2 | Bss&Lead | SYN LEAD |
| 362 | 88 | 1 | 2 | Big&Raw | SYN LEAD |
| 363 | 88 | 2 | 2 | Fat&Prky | SYN LEAD |
| 364 | 88 | 7 | 2 | DlydLead | SYN LEAD |
| 365 | 91 | 0 | 2 | Polysyn | POLY SYN |
| 366 | 91 | 1 | 2 | 80sPlySn | POLY SYN |
| 367 | 97 | 0 | 2 | Ice Rain | POLY SYN |
| 368 | 100 | 1 | 2 | WarmAtms | POLY SYN |
| 369 | 101 | 0 | 2 | Brightns | POLY SYN |
| 370 | 89 | 0 | 2 | Fantasia | POLY SYN |
| 371 | 89 | 1 | 2 | Fantasia2 | POLY SYN |
| 372 | 97 | 1 | 2 | HarmRain | POLY SYN |
| 373 | 97 | 2 | 2 | Africanwd | POLY SYN |
| 374 | 97 | 8 | 2 | ClaviPad | POLY SYN |
| 375 | 98 | 8 | 2 | Rave | POLY SYN |
| 376 | 90 | 0 | 2 | Warm Pad | PAD |
| 377 | 90 | 1 | 2 | ThickPad | PAD |
| 378 | 90 | 3 | 2 | RotryStr | PAD |
| 379 | 90 | 4 | 2 | Soft Pad | PAD |
| 380 | 92 | 0 | 2 | SpcVoice | PAD |
| 381 | 92 | 1 | 2 | Heavenll | PAD |
| 382 | 92 | 3 | 2 | Itopia | PAD |
| 383 | 94 | 1 | 2 | Tine Pad | PAD |
| 384 | 94 | 2 | 2 | PannrPad | PAD |
| 385 | 96 | 0 | 2 | SweepPad | PAD |
| 386 | 96 | 1 | 2 | PolarPad | PAD |
| 387 | 96 | 9 | 2 | Shwimmer | PAD |
| 388 | 98 | 0 | 2 | Sndtrack | PAD |
| 389 | 100 | 6 | 2 | AmbntPad | PAD |
| 390 | 102 | 1 | 2 | Goblinsn | PAD |
| 391 | 103 | 5 | 2 | ResoPnnr | PAD |
| 392 | 104 | 0 | 2 | StarThme | PAD |
| 393 | 90 | 2 | 2 | Horn Pad | PAD |
| 394 | 90 | 5 | 2 | Sine Pad | PAD |
| 395 | 93 | 0 | 2 | BowdGlss | PAD |
| 396 | 94 | 0 | 2 | MetalPad | PAD |
| 397 | 95 | 0 | 2 | Halo Pad | PAD |
| 398 | 96 | 8 | 2 | Converge | PAD |
| 399 | 96 | 10 | 2 | CelstIPd | PAD |
| 400 | 98 | 1 | 2 | Ancestrl | PAD |
| 401 | 98 | 2 | 2 | Prologue | PAD |
| 402 | 102 | 0 | 2 | Goblin | PAD |
| 403 | 102 | 2 | 2 | 50sSciFi | PAD |
| 404 | 103 | 0 | 2 | EchDrops | PAD |
| 405 | 103 | 1 | 2 | EchoBell | PAD |
| 406 | 103 | 2 | 2 | Echo Pan | PAD |
| 407 | 103 | 3 | 2 | EchoPan2 | PAD |
| 408 | 103 | 4 | 2 | BigPannr | PAD |
| 409 | 103 | 6 | 2 | WtrPiano | PAD |
| 410 | 104 | 1 | 2 | StrThme2 | PAD |
| 411 | 16 | 0 | 2 | Santur | ETHNIC |
| 412 | 47 | 0 | 2 | Harp | ETHNIC |
| 413 | 76 | 8 | 2 | Kawala | ETHNIC |
| 414 | 78 | 0 | 2 | Shakuhch | ETHNIC |
| 415 | 105 | 0 | 2 | Sitar | ETHNIC |
| 416 | 106 | 0 | 2 | Banjo | ETHNIC |
| 417 | 106 | 8 | 2 | Rabab | ETHNIC |
| 418 | 106 | 24 | 2 | Oud | ETHNIC |
| 419 | 107 | 0 | 2 | Shamisen | ETHNIC |
| 420 | 108 | 0 | 2 | Koto | ETHNIC |
| 421 | 108 | 16 | 2 | Kanoon | ETHNIC |
| Tone no. | PC | CC00 | CC32 | Name | Family |
| 244 | 56 | 2 | 2 | 6th Hit | STRINGS |
| 245 | 56 | 3 | 2 | Euro Hit | STRINGS |
| 246 | 56 | 4 | 2 | TechnHit | STRINGS |
| 247 | 56 | 8 | 2 | ImpctHit | STRINGS |
| 248 | 56 | 9 | 2 | PhllyHit | STRINGS |
| 249 | 56 | 16 | 2 | LoFiRave | STRINGS |
| 250 | 53 | 8 | 2 | St.Choir | VOCAL |
| 251 | 54 | 40 | 2 | Humming | VOCAL |
| 252 | 54 | 0 | 2 | VoiceOoh | VOCAL |
| 253 | 55 | 0 | 2 | SynVox | VOCAL |
| 254 | 86 | 0 | 2 | Solo Vox | VOCAL |
| 255 | 53 | 0 | 2 | ChoirAah | VOCAL |
| 256 | 53 | 9 | 2 | MelloChr | VOCAL |
| 257 | 53 | 32 | 2 | ChrAahs2 | VOCAL |
| 258 | 55 | 8 | 2 | SynVoice | VOCAL |
| 259 | 55 | 19 | 2 | AnaVoice | VOCAL |
| 260 | 100 | 3 | 2 | Harpvox | VOCAL |
| 261 | 100 | 4 | 2 | HllwRels | VOCAL |
| 262 | 67 | 8 | 2 | BlwTenor | SAX |
| 263 | 67 | 7 | 2 | BrthyTnr | SAX |
| 264 | 65 | 0 | 2 | SoprnSax | SAX |
| 265 | 66 | 0 | 2 | Alto Sax | SAX |
| 266 | 67 | 0 | 2 | TenorSax | SAX |
| 267 | 68 | 0 | 2 | BartnSax | SAX |
| 268 | 65 | 8 | 2 | SoprSax2 | SAX |
| 269 | 66 | 1 | 2 | AltoSax2 | SAX |
| 270 | 66 | 8 | 2 | HyprAlto | SAX |
| 271 | 67 | 1 | 2 | TenrSax2 | SAX |
| 272 | 67 | 9 | 2 | SprTenor | SAX |
| 273 | 74 | 48 | 2 | FluteVib | WIND |
| 274 | 73 | 0 | 2 | Piccolo | WIND |
| 275 | 69 | 0 | 2 | Oboe | WIND |
| 276 | 71 | 0 | 2 | Bassoon | WIND |
| 277 | 72 | 1 | 2 | Clarinet | WIND |
| 278 | 76 | 0 | 2 | PanFlute | WIND |
| 279 | 79 | 0 | 2 | Whistle | WIND |
| 280 | 70 | 0 | 2 | EnglHorn | WIND |
| 281 | 72 | 0 | 2 | JzClrint | WIND |
| 282 | 72 | 8 | 2 | BsClarnt | WIND |
| 283 | 74 | 0 | 2 | Flute | WIND |
| 284 | 75 | 0 | 2 | Recorder | WIND |
| 285 | 77 | 0 | 2 | BottlBlw | WIND |
| 286 | 80 | 0 | 2 | Ocarina | WIND |
| 287 | 57 | 0 | 2 | Trumpet | AC BRASS |
| 288 | 57 | 8 | 2 | FlglHorn | AC BRASS |
| 289 | 58 | 0 | 2 | Trombone | AC BRASS |
| 290 | 59 | 0 | 2 | Tuba | AC BRASS |
| 291 | 60 | 0 | 2 | MtdTrump | AC BRASS |
| 292 | 61 | 0 | 2 | FrenchHms | AC BRASS |
| 293 | 62 | 0 | 2 | Brass 1 | AC BRASS |
| 294 | 62 | 16 | 2 | BrssFall | AC BRASS |
| 295 | 62 | 24 | 2 | TwnTrmpt | AC BRASS |
| 296 | 62 | 26 | 2 | TrombnSc | AC BRASS |
| 297 | 57 | 1 | 2 | Trumpet2 | AC BRASS |
| 298 | 57 | 2 | 2 | Trumpet3 | AC BRASS |
| 299 | 57 | 3 | 2 | DrkTrmpt | AC BRASS |
| 300 | 57 | 24 | 2 | BrightTp | AC BRASS |
| 301 | 57 | 25 | 2 | Warm Tp. | AC BRASS |
| 302 | 58 | 1 | 2 | Trombne2 | AC BRASS |
| 303 | 58 | 2 | 2 | Trombne3 | AC BRASS |
| 304 | 58 | 4 | 2 | BrightTb | AC BRASS |
| 305 | 59 | 1 | 2 | Tuba 2 | AC BRASS |
| 306 | 60 | 2 | 2 | MtTrmpt2 | AC BRASS |
| 307 | 61 | 1 | 2 | Fr.Horn2 | AC BRASS |
| 308 | 61 | 8 | 2 | FrHornSl | AC BRASS |
| 309 | 61 | 16 | 2 | HornOrch | AC BRASS |
| 310 | 62 | 1 | 2 | Brass 2 | AC BRASS |
| 311 | 62 | 8 | 2 | Brass 3 | AC BRASS |
| 312 | 62 | 25 | 2 | TwinBons | AC BRASS |
| 313 | 62 | 27 | 2 | TrmbnSc2 | AC BRASS |
| 314 | 63 | 0 | 2 | SynBrss1 | SYNBRASS |
| 315 | 63 | 5 | 2 | JmpBrass | SYNBRASS |
| 316 | 63 | 16 | 2 | OctSnBrs | SYNBRASS |
| 317 | 64 | 17 | 2 | VeloBrs2 | SYNBRASS |
| 318 | 63 | 1 | 2 | PolyBrss | SYNBRASS |
| 319 | 63 | 3 | 2 | SYBrass | SYNBRASS |
| 320 | 63 | 4 | 2 | JunoBrss | SYNBRASS |
| 321 | 63 | 8 | 2 | SynBrss3 | SYNBRASS |
| 322 | 63 | 9 | 2 | QuakBrss | SYNBRASS |
| 323 | 63 | 18 | 2 | Octv Brs | SYNBRASS |
| 324 | 64 | 0 | 2 | SynBrss2 | SYNBRASS |
| 325 | 64 | 1 | 2 | SoftBrss | SYNBRASS |
| 326 | 64 | 8 | 2 | SynBrss4 | SYNBRASS |
| 327 | 64 | 16 | 2 | VeloBrs1 | SYNBRASS |
| 328 | 82 | 4 | 2 | Big Lead | SYN LEAD |
| 329 | 81 | 0 | 2 | Sqr Wave | SYN LEAD |
| 330 | 81 | 3 | 2 | MellowFM | SYN LEAD |
| 331 | 81 | 4 | 2 | CC Solo | SYN LEAD |
| 332 | 81 | 17 | 2 | 260 Sync | SYN LEAD |
| Tone no.PC | CC00 | CC32 | Name | Family | |
| 511 | 1 | 0 | 2 | STNDARD1 | DRUMS* |
| 512 | 2 | 0 | 2 | STNDARD2 | DRUMS* |
| 513 | 9 | 0 | 2 | ROOM | DRUMS* |
| 514 | 10 | 0 | 2 | Hip Hop | DRUMS* |
| 515 | 11 | 0 | 2 | Drum'Bss | DRUMS* |
| 516 | 12 | 0 | 2 | TechHous | DRUMS* |
| 517 | 14 | 0 | 2 | R&B | DRUMS* |
| 518 | 17 | 0 | 2 | POWER | DRUMS* |
| 519 | 26 | 0 | 2 | TR808909 | DRUMS* |
| 520 | 27 | 0 | 2 | DANCE | DRUMS* |
| 521 | 31 | 0 | 2 | NewTR909 | DRUMS* |
| 522 | 33 | 0 | 2 | Jazz Kit | DRUMS* |
| 523 | 41 | 0 | 2 | BRUSH | DRUMS* |
| 524 | 49 | 0 | 2 | ORCHSTRA | DRUMS* |
| 525 | 50 | 0 | 2 | ETHNIC | DRUMS* |
| 526 | 3 | 0 | 2 | STNDARD3 | DRUMS* |
| 527 | 25 | 0 | 2 | ELECTRNC | DRUMS* |
| 528 | 34 | 0 | 2 | JAZZ | DRUMS* |
| 529 | 51 | 0 | 2 | KICK&SNR | DRUMS* |
| 530 | 57 | 0 | 2 | SFX | DRUMS* |
| (*) See below for details. | |||||
Names in bold type: can be selected with the SELECT ▶▶ buttons. Use the numeric buttons 0\~9 for selecting the other Tones.
Drum Kits
| PC: 1 [CC32: 2]STANDARD 1 | PC: 2 [CC32: 2]STANDARD 2 | PC: 3 [CC32: 2]STANDARD 3 | PC: 9 [CC32: 2]ROOM | PC: 10 [CC32: 2]HIP HOP | PC: 11 [CC32: 2]DRUMBSS | PC: 12 [CC32: 2]TECHHOUS | PC: 14 [CC32: 2]R&B | PC: 17 [CC32: 2]POWER | PC: 25 [CC32: 2]ELECTRONIC | |
| C-1 | 0 | ********** | ********** | ********** | ********** | ********** | ********** | ********** | ********** | ********** |
| 1 | ********** | ********** | ********** | ********** | ********** | ********** | ********** | ********** | ********** | |
| 2 | ********** | ********** | ********** | ********** | ********** | ********** | ********** | ********** | ********** | |
| 3 | ********** | ********** | ********** | ********** | ********** | ********** | ********** | ********** | ********** | |
| 4 | ********** | ********** | ********** | ********** | ********** | ********** | ********** | ********** | ********** | |
| 5 | ********** | ********** | ********** | ********** | ********** | ********** | ********** | ********** | ********** | |
| 6 | ********** | ********** | ********** | ********** | ********** | ********** | ********** | ********** | ********** | |
| 7 | ********** | ********** | ********** | ********** | ********** | ********** | ********** | ********** | ********** | |
| 8 | ********** | ********** | ********** | ********** | ********** | ********** | ********** | ********** | ********** | |
| 9 | ********** | ********** | ********** | ********** | ********** | ********** | ********** | ********** | ********** | |
| 10 | ********** | ********** | ********** | 909 Kick 3 | 909 Kick 3 | 909 Kick 3 | 909 Kick | Kick 1 | ********** | |
| 11 | ********** | ********** | ********** | House Kick | House Kick | 909 Kick2 | House Kick | Kick 2 | ********** | |
| 12 | ********** | ********** | ********** | TR-808 Kick | 909 Kick | TR-808 Kick | TR-808 Kick | ********** | ********** | |
| 13 | ********** | ********** | ********** | 909 Kick | HipHop Kick | HipHop Kick | HipHop Kick | ********** | ********** | |
| 14 | ********** | ********** | ********** | 909 Kick2 | SimpleKick | SimpleKick | 909 Kick2 | ********** | ********** | |
| 15 | ********** | ********** | ********** | TR-909 OHHsh | TR-909 OHHsh | TR-909 OHHsh | R&B OHHsh | ********** | ********** | |
| 16 | ********** | ********** | ********** | TR-909 OHH | TR-909 OHH | TR-909 OHH | R&B OHH | ********** | ********** | |
| 17 | ********** | ********** | ********** | Ah | Ah | Ah | Ah | ********** | ********** | |
| 18 | ********** | ********** | ********** | Ha | Ha | Ha | Ha | ********** | ********** | |
| 19 | ********** | ********** | ********** | ShutHa | ShutHa | ShutHa | ShutHa | ********** | ********** | |
| 20 | ********** | ********** | ********** | ShutHi | ShutHi | ShutHi | ShutHi | ********** | ********** | |
| 21 | ********** | ********** | ********** | One | One | One | One | ********** | ********** | |
| 22 | ********** | ********** | ********** | Two | Two | Two | Two | ********** | ********** | |
| 23 | ********** | ********** | ********** | Three | Three | Three | Three | ********** | ********** | |
| 24 | ********** | ********** | ********** | Four | Four | Four | Four | ********** | ********** | |
| 25 | Snare Roll | Snare Roll | Snare Roll | Snare Roll | Snare Roll | Snare Roll | Snare Roll | Snare Roll | Snare Roll | |
| 26 | Finger Snap | Finger Snap | Finger Snap | Finger Snap | Snap | Snap | Snap | Finger Snap | Finger Snap | |
| 27 | High-Q | High-Q | High-Q | High-Q | High-Q | High-Q | High-Q | High-Q | High-Q | |
| 28 | Slap | Slap | Slap | Slap | Slap | Slap | Slap | Slap | Slap | |
| 29 | ScratchPush | ScratchPush | ScratchPush | Scratch Push2 | Scratch Push2 | Scratch Push2 | Scratch Push2 | ScratchPush | Scratch Push2 | |
| 30 | ScratchPull | ScratchPull | ScratchPull | Scratch Pull2 | Scratch Pull2 | Scratch Pull2 | Scratch Pull2 | ScratchPull2 | Scratch Pull2 | |
| 31 | Sticks | Sticks | Sticks | Sticks | Sticks | Sticks | Sticks | Sticks | Sticks | |
| 32 | SquareClick | SquareClick | SquareClick | SquareClick | SquareClick | SquareClick | SquareClick | SquareClick | SquareClick | |
| 33 | Mtmm.Click | Mtmn.Click | Mtmn.Click | Mtmn.Click | Mtmn.Click | Mtmn.Click | Mtmn.Click | Mtmn.Click | Mtmn.Click | |
| 34 | Mtmn.Bell | Mtmn.Bell | Mtmn.Bell | Mtmn.Bell | Mtmn.Bell | Mtmn.Bell | Mtmn.Bell | Mtmn.Bell | Mtmn.Bell | |
| 35 | Kick 1 | Std2 Kick2 | Std.1 Kick2 | Room Kick 2 | HipHop Kick | TR-808 Kick | 909 Kick | 909 Kick 3 | Power Kick2 | |
| 36 | Kick 2 | Std.2 Kick1 | Std.1 Kick1 | Room Kick 1 | SimpleKick | 909 Kick2 | House Kick | SimpleKick | Power Kick1 | |
| 37 | Side Stick | Side Stick | Side Stick | Side Stick | Side Stick | Side Stick | Side Stick | Side Stick | Side Stick | |
| 38 | Snare 2 | Std.2 Snare1 | Std.1 Snare1 | Room Snare 1 | HipHop Snare | Jungle Snare | Techno Snare | R&B Snare | Dance Snare1 | |
| 39 | 909Clap | 808Clap | 808Clap | 808Clap | FunkClap | 909Clap | 909Clap | R&B Clap | 808Clap | |
| 40 | Snare 1 | Std.2 Snare2 | Std.1 Snare2 | Room Snare 2 | HipHop Snare2 | Ps Snare | House Snare | 909Snare2 | Power Snare1 | |
| 41 | Real Tom 6 | Real Tom 6 | Real Tom 6 | Room Tom 5 | Real Tom 6 | 808 Tom2 | Synth Drum 2 | Real Tom 6 | Rock Tom 4 | |
| 42 | Close HiHat | Jazz CldJHH | Close HiHat | Room Chh | HipHopCHH | R&B CHH | TR-909 CHH | R&B CHH | Room Chh | |
| 43 | Real Tom 6 | Real Tom 6 | Real Tom 6 | Room Tom 5 | Real Tom 6 | 808 Tom2 | Synth Drum 2 | Real Tom 6 | Rock Tom 4 | |
| 44 | Pedal HiHat | Pedal HiHat | Pedal HiHat | Room HiHat | HipHopCHH | R&B CHH | TR-909 CHH | R&B CHH | Pedal HiHat | |
| 45 | Real Tom 4 | Real Tom 4 | Real Tom 4 | Room Tom 2 | Real Tom 4 | 808 Tom2 | Synth Drum 2 | Real Tom 4 | Rock Tom 4 | |
| 46 | Open HiHat | Jazz Open HH | Open Hi Hat | R8 Ohl2 | HipHopOHH | HipHopOHH | TR-909 OHH | R&B OHH | R8 Ohl2 | |
| 47 | Real Tom 4 | Real Tom 4 | Real Tom 4 | Room Tom 2 | Real Tom 4 | 808 Tom2 | Synth Drum 2 | Real Tom 4 | Rock Tom 4 | |
| 48 | Real Tom 1 | Real Tom 1 | Real Tom 1 | Room Tom 2 | Real Tom 1 | 808 Tom2 | Synth Drum 2 | Real Tom 1 | Rock Tom 1 | |
| 49 | Crash Cym.1 | Crash Cym.1 | Crash Cym.1 | Crash Cym.1 | Crash Cym.1 | 909 Crash | 909 Crash | 909 Crash | Crash Cym.1 | |
| 50 | Real Tom 1 | Real Tom 1 | Real Tom 1 | Room Tom 2 | Real Tom 1 | 808 Tom2 | Synth Drum 2 | Real Tom 1 | Rock Tom 1 | |
| 51 | Ride Cymbal | Ride Cymbal | Ride Cymbal | Ride Cymbal | Ride Cymbal | Ride Cymbal | Ride Cymbal | Ride Cymbal | Ride Cymbal | |
| 52 | China Cymbal | China Cymbal | China Cymbal | China Cymbal | ReverseCymbI | China Cymbal | ReverseCymbI | China Cymbal | ReverseCymbI | |
| 53 | Ride Bell | Ride Bell | Ride Bell | Ride Bell | Ride Bell | Ride Bell | Ride Bell | Ride Bell | Ride Bell | |
| 54 | Tambourine | Tambourine | Tambourine | Tambourine | Tambourine | Tambourine | Tambourine | Tambourine | Tambourine | |
| 55 | Splash Cym. | Splash Cym. | Splash Cym. | Splash Cym. | Splash Cym. | Splash Cym. | Splash Cym. | Splash Cym. | Splash Cym. | |
| 56 | Cowbell | Cowbell | Cowbell | Cowbell | 808cowbe | Cowbell | Cowbell | Cowbell | Cowbell | |
| 57 | Crash Cym.2 | Crash Cym.2 | Crash Cym.2 | Crash Cym.2 | Crash Cym.2 | Crash Cym.2 | Crash Cym.2 | Crash Cym.2 | Crash Cym.2 | |
| 58 | Vibraslap | Vibraslap | Vibraslap | Vibraslap | Vibraslap | Vibraslap | Vibraslap | Vibraslap | Vibraslap | |
| 59 | Ride Cymbal | Ride Cymbal | Ride Cymbal | Ride Cymbal | Ride Cymbal | Ride Cymbal | Ride Cymbal | Ride Cymbal | Ride Cymbal | |
| 60 | Bongo High | Bongo High | Bongo High | Bongo High | Bongo High | Bongo High | Bongo High | Bongo High | Bongo High | |
| 61 | Bongo Lo | Bongo Lo | Bongo Lo | Bongo Lo | Bongo Lo | Bongo Lo | Bongo Lo | Bongo Lo | Bongo Lo | |
| 62 | Mute H.Conga | Mute H.Conga | Mute H.Conga | Mute H.Conga | 808 Congo | Mute H.Conga | Mute H.Conga | Mute H.Conga | Mute H.Conga | |
| 63 | Conga Hi Opn | Conga Hi Opn | Conga Hi Opn | Conga Hi Opn | 808 Congo | Conga Hi Opn | Conga Hi Opn | Conga Hi Opn | Conga Hi Opn | |
| 64 | Conga Lo Opn | Conga Lo Opn | Conga Lo Opn | Conga Lo Opn | 808 Congo | Conga Lo Opn | Conga Lo Opn | Conga Lo Opn | Conga Lo Opn | |
| 65 | High Timbale | High Timbale | High Timbale | High Timbale | High Timbale | High Timbale | High Timbale | High Timbale | High Timbale | |
| 66 | Low Timbale | Low Timbale | Low Timbale | Low Timbale | Low Timbale | Low Timbale | Low Timbale | Low Timbale | Low Timbale | |
| 67 | Agogo | Agogo | Agogo | Agogo | Agogo | Agogo | Agogo | Agogo | Agogo | |
| 68 | Agogo | Agogo | Agogo | Agogo | Agogo | Agogo | Agogo | Agogo | Agogo | |
| 69 | Cabasa | Cabasa | Cabasa | Cabasa | Cabasa | Cabasa | Cabasa | Cabasa | Cabasa | |
| 70 | Maracas | Maracas | Maracas | Maracas | 808marac | Maracas | Maracas | Maracas | Maracas | |
| 71 | ShrtWhistle | ShrtWhistle | ShrtWhistle | ShrtWhistle | ShrtWhistle | ShrtWhistle | ShrtWhistle | ShrtWhistle | ShrtWhistle | |
| 72 | LongWhistle | LongWhistle | LongWhistle | LongWhistle | LongWhistle | LongWhistle | LongWhistle | LongWhistle | LongWhistle | |
| 73 | Short Guiro | Short Guiro | Short Guiro | Short Guiro | Short Guiro | Short Guiro | Short Guiro | Short Guiro | Short Guiro | |
| 74 | Long Guiro | Long Guiro | Long Guiro | Long Guiro | Long Guiro | Long Guiro | Long Guiro | Long Guiro | Long Guiro | |
| 75 | Claves | Claves | Claves | Claves | 808clave | Claves | Claves | Claves | Claves | |
| 76 | Woodblock | Woodblock | Woodblock | Woodblock | Woodblock | Woodblock | Woodblock | Woodblock | Woodblock | |
| 77 | Woodblock | Woodblock | Woodblock | Woodblock | Woodblock | Woodblock | Woodblock | Woodblock | Woodblock | |
| 78 | Mute Cuica | Mute Cuica | Mute Cuica | Hoo | Mute Cuica | Hoo | Hoo | Mute Cuica | Mute Cuica | |
| 79 | Open Cuica | Open Cuica | Open Cuica | Open Cuica | Open Cuica | Hoo | Hoo | Open Cuica | Open Cuica | |
| 80 | Mute Triangl | Mute Triangl | Mute Triangl | Mute Triangl | Mute Triangl | Mute Triangl | Mute Triangl | Mute Triangl | Mute Triangl | |
| 81 | Open Triangl | Open Triangl | Open Triangl | Open Triangl | Open Triangl | Open Triangl | Open Triangl | Open Triangl | Open Triangl | |
| 82 | Shaker | Shaker | Shaker | Shaker | Shaker | Shaker | Shaker | Shaker | Shaker | |
| 83 | Jingle Bell | Jingle Bell | Jingle Bell | Jingle Bell | Jingle Bell | Jingle Bell | Jingle Bell | Jingle Bell | Jingle Bell | |
| 84 | Bar Chimes | Bar Chimes | Bell Tree | Bell Tree | Bell Tree | Bell Tree | Bell Tree | Bell Tree | Bell Tree | |
| 85 | Castanets | Castanets | Castanets | Castanets | Castanets | Castanets | Castanets | Castanets | Castanets | |
| 86 | Mute Surdo | Mute Surdo | Mute Surdo | Mute Surdo | Mute Surdo | Mute Surdo | Mute Surdo | Mute Surdo | Mute Surdo | |
| 87 | Open Surdo | Open Surdo | Open Surdo | Open Surdo | Open Surdo | Open Surdo | Open Surdo | Open Surdo | Open Surdo | |
| 88 | ||||||||||
| 89 | ||||||||||
| 90 | ||||||||||
| 91 | ||||||||||
| 92 | ||||||||||
| 93 | ||||||||||
| 94 | ||||||||||
| 95 | ||||||||||
| PC: 26 [CC32: 2]TR-808/909 | PC: 27 [CC32: 2]DANCE | PC: 31 [CC32: 2]New TR-909 | PC: 33 [CC32: 2]Jazz Kit | PC: 34 [CC32: 2]JAZZ | PC: 41 [CC32: 2]BRUSH | PC: 49 [CC32: 2]ORCHESTRA | PC: 50 [CC32: 2]ETHNIC | PC: 51 [CC32: 2]KICK & SNARE | PC: 57 [CC32: 2]SFX | |
| ********** | ********** | ********** | ********** | ********** | ********** | ********** | ********** | ********** | ********** | |
| ********** | ********** | ********** | ********** | ********** | ********** | ********** | ********** | ********** | ********** | |
| ********** | ********** | ********** | ********** | ********** | ********** | ********** | ********** | ********** | ********** | |
| ********** | ********** | ********** | ********** | ********** | ********** | ********** | ********** | ********** | ********** | |
| ******* | ********** | ********** | ********** | ********** | ********** | ********** | ********** | ********** | ********** | |
| ********** | ********** | ********** | ********** | ********** | ********** | ********** | ********** | ********** | ********** | |
| ********** | ********** | ********** | ********** | ********** | ********** | ********** | ********** | ********** | ********** | |
| ********** | ********** | |||||||||
| ********** | ********** | 909 Kick 3 | House Kick | House Kick | House Kick | House Kick | House Kick | House Kick | House Kick | |
| ********** | ********** | TR-808 Kick | HipHop Kick | HipHop Kick | HipHop Kick | HipHop Kick | HipHop Kick | HipHop Kick | HipHop Kick | |
| ********** | ********** | SimpleKick | TR-909 OHHsh | Trer-909 OHHsh | Trer-909 OHHsh | Trer-909 OHHsh | Trer-909 OHHsh | Trer-909 OHHsh | Trer-909 OHHsh | |
| ********** | ********** | Trer-909 OHH | Trer-909 OHH | Trer-909 OHH | Trer-909 OHH | Trer-909 OHH | Trer-909 OHH | Trer-909 OHH | Trer-909 OHH | |
| ********** | ********** | Ah | Ha | Ha | Ha | Ha | Ha | Ha | Ha | |
| ********** | ********** | ShutHa | ShutHa | ShutHa | ShutHa | ShutHa | ShutHa | ShutHa | ShutHa | |
| ********** | ********** | One | One | One | One | One | One | One | One | |
| ********** | ********** | Two | Two | Two | Two | Two | Two | Two | Two | |
| ********** | ********** | Three | Three | Three | Three | Three | Three | Three | Three | |
| ********** | ********** | Four | Four | Four | Four | Four | Four | Four | Four | |
| Snare Roll | Snare Roll | Snare Roll | Snare Roll | Snare Roll | Snare Roll | Snare Roll | Snare Roll | Snare Roll | Snare Roll | |
| Finger Snap | Finger Snap | Snap | Finger Snap | Finger Snap | Finger Snap | Finger Snap | Finger Snap | Finger Snap | Finger Snap | |
| High-Q | High-Q | High-Q | High-Q | High-Q | High-Q | Jazz Cisd.HH | Castanets | Castanets | Castanets | |
| Slap | Slap | Slap | Slap | Slap | Slap | Pedal HiHat | Crash Cym.1 | Crash Cym.1 | Crash Cym.1 | |
| Scratch Push2 | Scratch Push2 | Scratch Push2 | ScratchPush | ScratchPush | ScratchPush | Jazz Open HH | Snare Roll | Snare Roll | Snare Roll | |
| Scratch Pull2 | Scratch Pull2 | Scratch Pull2 | ScratchPull | ScratchPull | ScratchPull | Ride Cymbal | Concert Snr | Concert Snr | Concert Snr | |
| Sticks | Sticks | Sticks | Sticks | Sticks | Sticks | Sticks | Concert Cym. | Concert Cym. | Srcth Push2 | |
| SquareClick | SquareClick | SquareClick | SquareClick | SquareClick | SquareClick | SquareClick | Concert BD | Concert BD | Scrcth Pull2 | |
| Mtrnm.Click | Mtrnm.Click | Mtrnm.Click | Mtrnm.Click | Mtrnm.Click | Mtrnm.Click | Mtrnm.Click | Jingle Bell | Jingle Bell | Gt.CuNoise2 | |
| Mtrnm.Bell | Mtrnm.Bell | Mtrnm.Bell | Mtrnm.Bell | Mtrnm.Bell | Mtrnm.Bell | Mtrnm.Bell | Bell Tree | Bell Tree | Gt.CuNoise2 | |
| TR-909 Kick | Dance Kick 2 | 909 Kick | Jazz Kick 2 | Jazz Kick 2 | Jazz Kick 2 | Jazz Kick 1 | Bar Chimes | Bar Chimes | Dist.CutNoiz | |
| TR-808 Kick | Elec Kick 2 | 909 Kick2 | Jazz Kick 1 | Jazz Kick 1 | Jazz Kick 1 | Concert BD | Wadaiko | Wadaiko | Dist.CutNoiz | |
| 808 Rimshot | Side Stick | Side Stick | Side Stick | Side Stick | Side Stick | Side Stick | Wadaiko Rim | Wadaiko | Bass Slide | |
| 808 Snare 1 | Power Snare2 | 909 Snare | Jazz Snare 1 | Jazz Snare 1 | Brush Swirl | Concert Snr | Shimedako | Shimedako | Pick Scrape | |
| 808dap | 808dap | 909Clap | Hand clap2 | Hand clap2 | Brush Slap1 | Castanets | Atarigane | Atarigane | High-Q | |
| 909 Snare 1 | Elec Snare 1 | 909Snare2 | Jazz Snare | Jazz Snare 2 | Brush Swirl | Concert Snr | Hyoushigi | Std.1 Kick1 | Slap | |
| 808 Tom 2 | Synth Drum 2 | 808 Tom 2 | Real Tom 6 | Real Tom 6 | Lite Tom 4 | Timpani | Ohkawa | Std.1 Kick2 | ScratchPush | |
| 808_chh | CR-78 chh | TR-909 CHH | Jazz Cisd.HH | Jazz Cisd.HH | Brs Chh | Timpani | H Kotsuzumi | Std.2 Kick1 | ScratchPull | |
| 808 Tom 2 | Synth Drum 2 | 808 Tom 2 | Real Tom 6 | Real Tom 6 | Lite Tom 4 | Timpani | L Kotsuzumi | Std2 Kick2 | Sticks | |
| 808_chh | 808_chh | TR-909 CHH | Jazz Pedl.HH | Pedal HiHat | Pedal HiHat | Timpani | Ban_Gu | Kick 1 | SquareClick | |
| 808 Tom 2 | Synth Drum 2 | 808 Tom 2 | Real Tom 4 | Real Tom 4 | Lite Tom 4 | Timpani | Big Gong | Kick 2 | Mtrnm.Click | |
| 808_ohh | CR-78 ohh | TR-909 OHH | Jazz Open HH | Jazz Open HH | Brush Ohh | Timpani | Small Gong | Soft Kick | Mtrnm.Bell | |
| 808 Tom 2 | Synth Drum 2 | 808 Tom 2 | Real Tom 4 | Real Tom 4 | Lite Tom 4 | Timpani | Bend Gong | Jazz Kick 1 | Gt.FretNoise | |
| 808 Tom 2 | Synth Drum 2 | 808 Tom 2 | Real Tom 1 | Real Tom 1 | Lite Tom 4 | Timpani | RAMA Cymbal | Jazz Kick 2 | Gt.Cut Noise | |
| 808 Crash | Crash Cym.1 | 909 Crash | Crash Cym.1 | Crash Cym.1 | Brush Crash | Timpani | RAMA Cymbal | Concert BD | Gt.Cut Noise | |
| 808 Tom 2 | Synth Drum 2 | 808 Tom 2 | Real Tom 1 | Real Tom 1 | Lite Tom 4 | Timpani | Gamelan Gong | Room Kick 1 | String Slap | |
| Ride Cymbal | Ride Cymbal | Ride Cymbal | Ride Cymbal | Ride Cymbal | Brush Ride | Timpani | Udo_Short | Room Kick 2 | Fl.KeyClick | |
| China Cymbal | ReverseCymbal | China Cymbal | China Cymbal | China Cymbal | China Cymbal | Timpani | Udo_Long | Power Kick1 | Laughing | |
| Ride Bell | Ride Bell | Ride Bell | Ride Bell | Ride Bell | Brush RideBL | Timpani | Udo_slap | Power Kick2 | Screaming | |
| Tambourine | Tambourine | Tambourine | Tambourine | Tambourine | Tambourine | Tambourine | Bendir | Elec Kick 2 | Punch | |
| Splash Cym. | Splash Cym. | Splash Cym. | Splash Cym. | Splash Cym. | Splash Cym. | Splash Cym. | Req_Dum | Elec Kick 1 | Heart Beat | |
| 808cowbe | Cowbell | 808cowbe | Cowbell | Cowbell | Cowbell | Cowbell | Req_tlk | Elec Kick | Footsteps | |
| Crash Cym.2 | Crash Cym.2 | Crash Cym.2 | Crash Cym.2 | Crash Cym.2 | Crash Cym.2 | Con.Cymbal2 | Tabla_Te | TR-808 Kick | Footsteps | |
| Vibraslap | Vibraslap | Vibraslap | Vibraslap | Vibraslap | Vibraslap | Vibraslap | Tabla_Na | TR-909 Kick | Applause | |
| Ride Cymbal | Ride Cymbal | Ride Cymbal | Ride Cymbal | Ride Cymbal | Ride Cymbal | Concert Cym. | Tabla_Tun | Dance Kick 2 | DoorCreaking | |
| Bongo High | Bongo High | Bongo High | Bongo High | Bongo High | Bongo High | Bongo High | Tabla_Ge | Std.1 Snare1 | Door | |
| Bongo Lo | Bongo Lo | Bongo Lo | Bongo Lo | Bongo Lo | Bongo Lo | Bongo Lo | Tabla_Ge Hi | Std.1 Snare2 | Scratch | |
| 808 Conga | Mute H.Conga | 808 Conga | Mute H.Conga | Mute H.Conga | Mute H.Conga | Mute H.Conga | Talking Drum | Std.2 Snare1 | Wind Chimes | |
| 808 Conga | Conga Hi Opn | 808 Conga | Conga Hi Opn | Conga Hi Opn | Conga Hi Opn | Conga Hi Opn | Bend tlk_drm | Std.2 Snare2 | Car-Engine | |
| 808 Conga | Conga Lo Opn | 808 Conga | Conga Lo Opn | Conga Lo Opn | Conga Lo Opn | Conga Lo Opn | Caxixi | Tight Snare | Car-Stop | |
| High Timbale | High Timbale | High Timbale | High Timbale | High Timbale | High Timbale | High Timbale | Djembe | Concert Snr | Car-Pass | |
| Low Timbale | Low Timbale | Low Timbale | Low Timbale | Low Timbale | Low Timbale | Low Timbale | Djembe_rim | Jazz Snare 1 | Car-Crash | |
| Agogo | Agogo | Agogo | Agogo | Agogo | Agogo | Agogo | Low Timbale | Jazz Snare 2 | Siren | |
| Agogo | Agogo | Agogo | Agogo | Agogo | Agogo | Agogo | Timbl Paila | Room Snare 1 | Train | |
| Cabasa | Cabasa | Cabasa | Cabasa | Cabasa | Cabasa | Cabasa | High Timbale | Room Snare 2 | Jetplane | |
| 808marac | Maracas | 808marac | Maracas | Maracas | Maracas | Maracas | Cowbell | Dance Snare1 | Helicopter | |
| ShrtWhistle | ShrtWhistle | ShrtWhistle | ShrtWhistle | ShrtWhistle | ShrtWhistle | ShrtWhistle | Bongo High | Power Snare1 | Starship | |
| LongWhistle | LongWhistle | LongWhistle | LongWhistle | LongWhistle | LongWhistle | LongWhistle | Bongo Lo | Rev.Snare | Gun Shot | |
| Short Guiro | Short Guiro | Short Guiro | Short Guiro | Short Guiro | Short Guiro | Short Guiro | Mute H.Conga | Power Snare2 | Machine Gun | |
| Long Guiro | Long Guiro | Long Guiro | Long Guiro | Long Guiro | Long Guiro | Long Guiro | Conga Hi Opn | Elec Snare 1 | Lasergun | |
| 808clave | Claves | 808clave | Claves | Claves | Claves | Claves | Conga MtLow | Dance Snare2 | Explosion | |
| Woodblock | Woodblock | Woodblock | Woodblock | Woodblock | Woodblock | Woodblock | Conga Slap | Elec Snare 2 | Dog | |
| Woodblock | Woodblock | Woodblock | Woodblock | Woodblock | Woodblock | Woodblock | Conga Lo Opn | House Snare | Horse-Gallop | |
| Mute Cuica | Hoo | Mute Cuica | Mute Cuica | Mute Cuica | Mute Cuica | Mute Cuica | Conga Slide | Elec. Snare | Bird | |
| Open Cuica | Hoo | Open Cuica | Open Cuica | Open Cuica | Open Cuica | Open Cuica | Mut Pandiero | Elec Snare 3 | Rain | |
| Mute Triangl | Mute Triangl | Mute Triangl | Mute Triangl | Mute Triangl | Mute Triangl | Mute Triangl | Opn Pandiero | 808 Snare 1 | Thunder | |
| Open Triangl | Open Triangl | Open Triangl | Open Triangl | Open Triangl | Open Triangl | Open Triangl | Open Surdo | 808 Snare 2 | Wind | |
| Shaker | Shaker | Shaker | Shaker | Shaker | Shaker | Shaker | Mute Surdo | 909 Snare 1 | Seashore | |
| Jingle Bell | Jingle Bell | Jingle Bell | Jingle Bell | Jingle Bell | Jingle Bell | Jingle Bell | Tamborim | 909 Snare 2 | Stream | |
| Bell Tree | Bell Tree | Bell Tree | Bell Tree | Bell Tree | Bell Tree | Bell Tree | Agogo | Brush Swirl | Bubble | |
| Castanets | Castanets | Castanets | Castanets | Castanets | Castanets | Castanets | Agogo | Brush Tap | Kitty | |
| Mute Surdo | Mute Surdo | Mute Surdo | Mute Surdo | Mute Surdo | Mute Surdo | Mute Surdo | Shaker | Brush Slap1 | Bird 2 | |
| Open Surdo | Open Surdo | Open Surdo | Open Surdo | Open Surdo | Open Surdo | Open Surdo | Low Whistle | Brush Slap2 | Growl |
| C-1 | 0 | 1 |
| 2 | 3 | |
| 4 | ||
| 5 | 6 | |
| 7 | 8 | |
| 9 | 10 | |
| 11 | ||
| C0 | 12 | 13 |
| 14 | 15 | |
| 16 | ||
| 17 | 18 | |
| 19 | 20 | |
| 21 | 22 | |
| 23 | ||
| C1 | 24 | 25 |
| 26 | 27 | |
| 28 | ||
| 29 | 30 | |
| 31 | 32 | |
| 33 | 34 | |
| 35 | ||
| C2 | 36 | 37 |
| 38 | 39 | |
| 40 | ||
| 41 | 42 | |
| 43 | 44 | |
| 45 | 46 | |
| 47 | ||
| C3 | 48 | 49 |
| 50 | 51 | |
| 52 | ||
| 53 | 54 | |
| 55 | 56 | |
| 57 | 58 | |
| 59 | ||
| C4 | 60 | 61 |
| 62 | 63 | |
| 64 | ||
| 65 | 66 | |
| 67 | 68 | |
| 69 | 70 | |
| 71 | ||
| C5 | 72 | 73 |
| 74 | 75 | |
| 76 | ||
| 77 | 78 | |
| 79 | 80 | |
| 81 | 82 | |
| 83 | ||
| C6 | 84 | 85 |
| 86 | 87 | |
| 88 | ||
| 89 | 90 | |
| 91 | 92 | |
| 93 | 94 | |
| 95 | ||
| C7 | 96 |
Chord Intelligence ("Md1" setting)
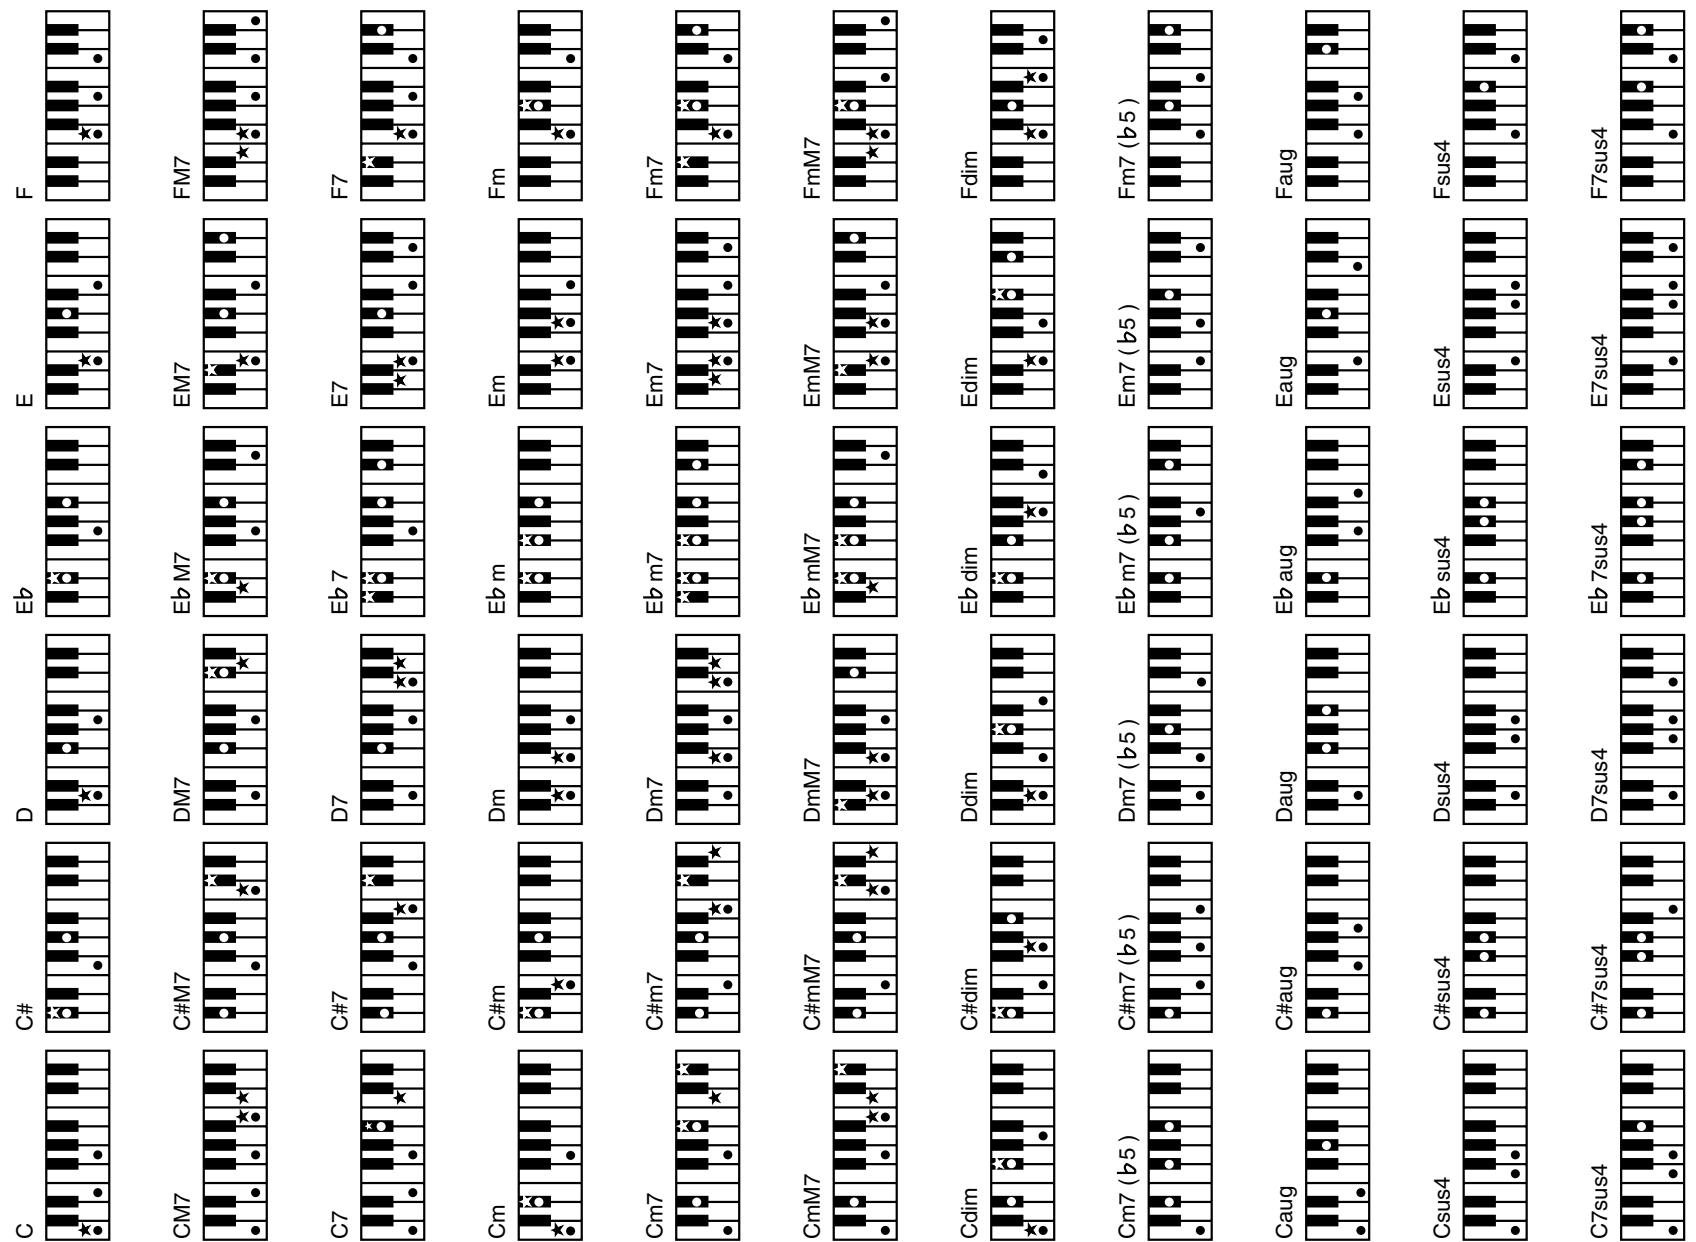
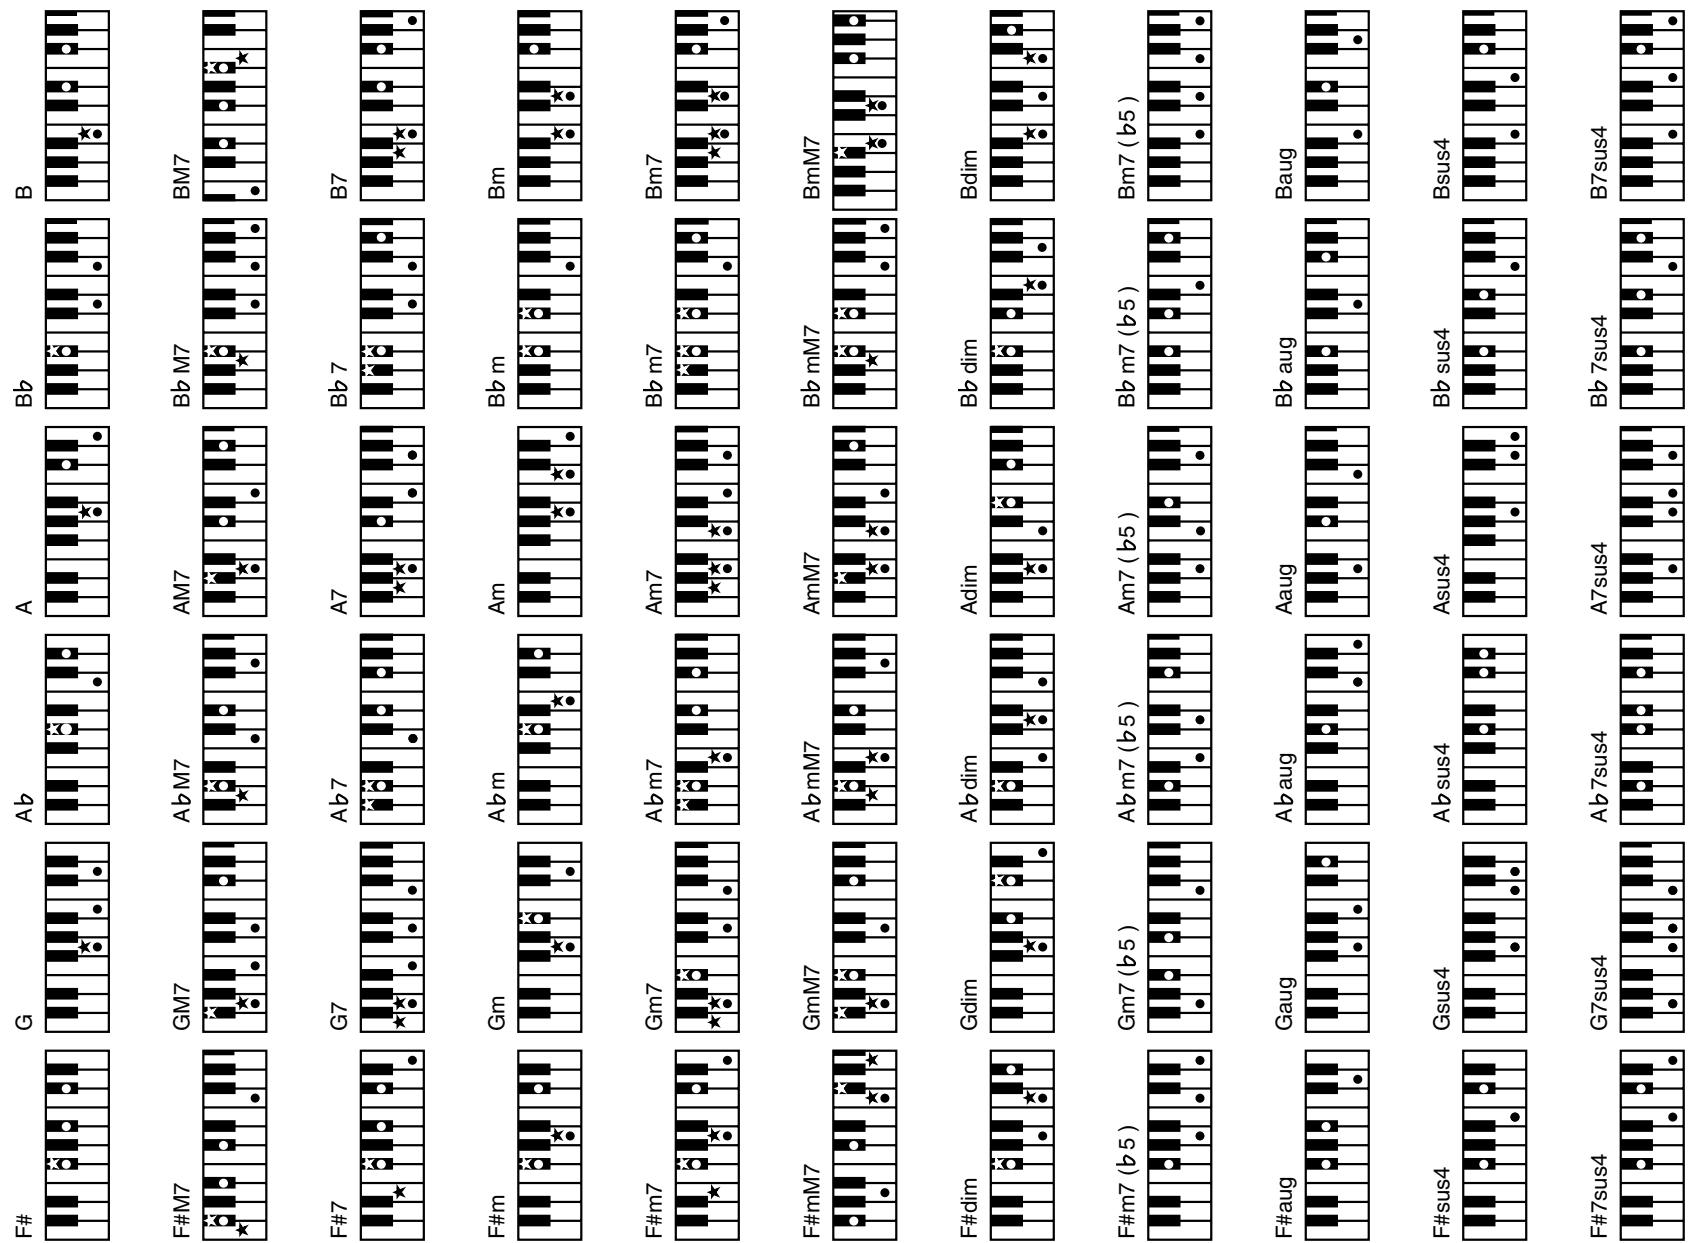
text_image
F# G Ab A Bb B F#M7 GM7 AbM7 AM7 BbM7 BM7 F#7 G7 Ab7 A7 Bb7 B7 F#m Gm Abm Am Bbm Bm F#m7 Gm7 Abm7 Am7 Bbm7 Bm7 F#mM7 GmM7 AbmM7 AmM7 BbmM7 BmM7 F#dim Gdim Abdim Adim Bbdim Bdim F#m7 (b5) Gm7 (b5) Abm7 (b5) Am7 (b5) Bbm7 (b5) Bm7 (b5) F#aug Gaug Abaug Aaug Bbaug Baug F#sus4 Gsus4 Absus4 Asus4 Bbsus4 Bsus4 F#7sus4 G7sus4 Ab7sus4 A7sus4 Bb7sus4 B7sus4★= Keys you need to press to hear this chord. ●= Constituent notes of this chord.
MIDI Implementation Chart
[Interactive Arranger] Model: EXR-5s/EXR-3s
Date: April 2005
Version: 1.01
| Function... | Transmitted | Recognized | Remarks | |
| Basic Channel | Default Changed | 1~16 1~16, Off | 1~16 1~16, Off | 32 Parts 2 Logical Parts |
| Mode | Default Message Altered | Mode 3 Mode 3, 4 (M=1) ***** | Mode 3 Mode 3, 4 (M=1) | *2 |
| Note Number | True Voice | 0~127 ***** | 0~127 0~127 | |
| Velocity | Note ON Note OFF | O X | O X | |
| After Touch | Key's Ch's | X X | O O | |
| Pitch Bend | O *1 | O *1 | ||
| Control Change | 0,32 1 5 6, 38 7 10 11 22, 23, 24, 25 64 65 66 67 84 91 93 98, 99 100, 101 | O *1 O *1 O O O O O X O X O O O X O O O O O O O O O O O O O O O O O O O O O O O O O O O O O O O O O O O O O O O O O O O O O O O O O O O O O O O O O O O O O O O O O O O O O O O O O O O O O O O O O O O O O O O O O O O O O O O O O O O O | Bank Select Modulation Portamento Time Data Entry Volume Panpot Expression V-Link control Hold 1 Portamento Sostenuto Soft Portamento Control Effect 1 Depth Effect 3 Depth NRPN LSB, MSB RPN LSB, MSB | Bank Select Modulation Portamento Time Data Entry Volume Panpot Expression V-Link control Hold 1 Portamento Sostenuto Soft Portamento Control Effect 1 Depth Effect 3 Depth NRPN LSB, MSB RPN LSB, MSB |
| Program Change | True # | O *1 ***** | O *1 0~127 | Program Number 1~128 |
| System Exclusive | O | O | ||
| System Common | Song Position Pointer Song Sel Tune | O *1 X X X | X X X | |
| System Real Time | Clock Commands | O *1 O O | O O | |
| Aux Messages | All Sounds Off Reset All Controllers Local On/Off All Notes Off Active Sense Reset | X X O *1 X O X | O (120, 126, 127) O (121) O O (123-125) O X | |
| Notes | *1 O X is selectable *2 Recognized as M=1 even if M≠1 | |||
Mode 1: OMNI ON, POLY
Mode 3: OMNI OFF, POLY
O: Yes
X: No
Information
When you need repair service, call your nearest Roland Service Center or authorized Roland
| AFRICAEgyptAl Fanny Trading Office9, EBN Hagar A1 Askalany Street,ARD EI Golf, Heliopolis,Cairo 11341, EGYPTEL: 20-2-417-1828REUNIONMaison FO - YAM Marcel25 Rue Jules Hermann,Chaudron - BP79 97 491Ste Clotilde Cedex,REUNION ISLANDTEL: (0262) 218-429SOUTH AFRICAThat Other Music Shop(PTY)Ltd.11 Melle St., Braamfontein,Johannesbourg,SOUTH AFRICATEL: (011) 403 4105FAX: (011) 403 1234Paul Bothner(TPY)Ltd.17 Werdmuller Centre,Main Road, Claremont 7708SOUTH AFRICATEL: (021) 674 4030ASIACHINARoland Shanghai Electronics Co.,Ltd.5F. No.1500 Pingliang RoadShanghai 200090, CHINATEL: (021) 5580-0800Roland Shanghai Electronics Co.,Ltd.(BEIJING OFFICE)10F. No.18 3 Section Anhuaxili Chaoyang District Beijing100011 CHINATEL: (010) 6426-5050Roland Shanghai Electronics Co.,Ltd.(GUANGZHOU OFFICE)2/F., No.30 Si You Nan Er JieYi Xiang, Wu Yang Xin Cheng, Guangzhou 510600, CHINATEL: (020) 8736-0428HONG KONGTom Lee Music Co., Ltd. Service Division22-32 Pun Shan Street, Tsuen Wan, New Territories,HONG KONGTEL: 2415 0911Parsons Music Ltd.8th Floor, Railway Plaza, 39 Chatham Road South, T.S.T,Kowloon, HONG KONGTEL: 2333 1863INDIARivera Digitec (India) Pvt. Ltd.409, Nirman Kendra Mahalaxmi Flats Compound Off. Dr. Edwin Moses Road,Mumbai-400011, INDIATEL: (022) 2493 9051INDONESIAPT Citra IntiRamaJ1. Cideng Timur No. 15J-150 Jakarta PusatINDONESIATEL: (021) 6324170KOREACosmos Corporation1461-9, Seocho-Dong,Seocho Ku, Seoul, KOREATEL: (02) 3486-8855MALAYSIALRoland Asia Pacific Sdn. Bhd.45-1, Block C2, Jalan PJU 1/39, Dataran Prima, 47301 Petaling Jaya, Selangor, MALAYSIA | PHILIPPINESG.A. Yupango & Co. Inc.339 Gil J, Puyat AvenueMakati, Metro Manila 1200,PHILIPPINESTEL: (02) 899 9801SINGAPORESWEE LEE MUSICCOMPANY PTE. LTD.150 Sims Drive,SINGAPORE 387381TEL: 6846-3676TRISTOFORI MUSIC PTE LTDBlk 3014, Bedok Industrial Park E,#02-2148, SINGAPORE 489980TEL: 6243-9555TAIWANROLAND TAIWANENTERPRISE CO., LTD.Room 5, 9fl. No. 112 ChungShan N.Road Sec.2, Taipei,TAIWAN, R.O.C.TEL: (02) 2561 3339THAILANDTheera Music Co., Ltd.330 Verng Nakorn Kasem, Soi 2, Bangkok 10100, THAILANDTEL: (02) 2248821VIETNAMSaigon MusicSuite DP-840 Ba Huyen Thanh Quan StreetHochiminh City, VIETNAMTEL: (08) 930-1969AUSTRALIA/NEW ZEALANDAUSTRALIA/NEW ZEALANDRoland CorporationAustralia Pty.,Ltd.38 Campbell AvenueDee Why West. NSW 2099AUSTRALIAFor AustraliaTel: (02) 9982 8266For New ZealandTel: (09) 3098 715CENTRAL/LATIN AMERICAARGENTINAInstrumentos Musicales S.A.Av.Santa Fe 2055(1123) Buenos AiresARGENTINATEL: (011) 4508-2700BARBADOSA&B Music Supplies LTD12 Webster Industrial ParkWildey, St.Michael, BarbadosTEL: (246)430-1100BRAZILRoland Brasil Ltda.Rua San Jose, 780 Sala BParque Industrial San JoseCotia - Sao Paulo - SP, BRAZILTEL: (011) 4615 5666CHILEComercial Fancy II S.A.Rut.: 96.919.420-1Nataniel Cox #739, 4th FloorSantiago - Centro, CHILETEL: (02) 688-9540COLOMBIACentro Musical Ltda.Cra 43 B No 25 A 41 Bododega 9Medellin, ColombiaTEL: (574)3812529 | COSTA RICAJUAN Bansbach InstrumentosMusicalesAve.1. Calle 11, Apartado 10237,San Jose, COSTA RICATEL: 258-0211CURACAOZeelandia Music Center Inc.Orionweg 30Curacao, Netherland AntillesTEL: (305)5926866DOMINICAN REPUBLICInstrumentos Fernando GiralezCalle Proyecto Central No.3Ens.La EsperillaSanto Domingo,Dominican RepublicTEL: (809) 683 0305ECUADORMas MusikaRumichaca 822 y ZarumaGuayaquil - EcuadorTEL: (593-4)2302364EL SALVADOROMNI MUSIC75 Avenida Norte y FinalAlameda Juan Pablo II,Edificio No.4010 San Salvador,EL SALVADORTEL: 262-0788GUATEMALACasa InstrumentalCalzada Roosevelt 34-01,zona 11Ciudad de GuatemalaGuatemalaTEL: (502) 599-2888HONDURASAlmacen Pajaro Azul S.A. de C.V.BO.Paz Barahona3 Ave.11 Calle S.OSan Pedro Sula, HondurasTEL: (504) 553-2029MARTINIQUEMusique & SonZ.L.Les Mangle97232 Le LamantinMartinique F.W.I.TEL: 596 596 426860Gigamusic SARL10 Rte De La Folie97200 Fort De FranceMartinique F.W.I.TEL: 596 596 715222MEXICOCasa Veerkamp, s.a. de c.v.Av. Toluca No. 323, Col. Olivarde los Padres 01780 MexicoD.F. MEXICOTEL: (55) 5668-6699NICARAGUABansbach InstrumentosMusicales NicaraguaAltamira D'Este Calle Principalde la Farmacia 5ta.Avenida1 Cuadra al Lago.#503Managua, NicaraguaTEL: (505)277-2557PANAMASUPRO MUNDIAL, S.A.Boulevard Andrews, Albrook,Panama City, REP. DEPANAMATEL: 315-0101PARAGUAYDistribuidora DeInstrumentos MusicalesJ.E. Olear y ESQ ManduviraAsuncion PARAGUAYTEL: (595) 21 492147PERUAudionetDistribuciones Musicales SACJuan Fanning 530MirafloresLima - PeruTEL: (511) 4461388 | TRINIDADAMR LtdGround FloorMaritime PlazaBarataria Trinidad W.I.TEL: (868)638 6385URUGUAYTodo Musica S.A.Francisco Acuna de Figueroa1771C.P.: 11.800Montevideo, URUGUAYTEL: (02) 924-2335VENEZUELASinstrumentos MusicalesAllegro,C.A.Av.las industrias edf.Guitarimport#7 zona Industrial de TurumoCaracas, VenezuelaTEL: (212) 244-1122EUROPEAUSTRIARoland ElektronischeMusikinstrumente HmbH.Austrian OfficeEduard-Bodem-Gasse 8,A-6020 Innsbruck, AUSTRIATEL: (0512) 26 44 260BELGIUM/FRANCE/HOLLAND/LUXEMBOURGRoland Central Europe N.V.Houtstraat 3, B-2260, Oeveel(Westerlo) BELGIUMTEL: (014) 575811CZECH REP.K-AUDIOKardasovska 626,CZ-198.00 Praha 9,CZECH REF.TEL: (2) 666 10529DENMARKRoland Scandinavia A/SNordhavnsvej 7, Postbox 880,DK-2100 CopenhagenDENMARKTEL: 3916 6200FINLANDRoland Scandinavia As, FilialFinlandElannontie 5FIN-01510 Vantaa, FINLANDTEL: (09) 68 24 020GERMANYRoland ElektronischeMusikinstrumente HmbH.Oststrasse 96, 22844Norderstedt, GERMANYTEL: (040) 52 60090GREECESTOLLAS S.A.Music Sound Light155, New National RoadPatras 26442, GREECETEL: 2610 435400HUNGARYRoland East Europe Ltd.Warehouse Area 'DEPO' Pf.83H-2046 Torokbalint,HUNGARYTEL: (23) 511011IRELANDRoland IrelandG2 Calmount Park, CalmountAvenue, Dublin 12Republic of IRELANDTEL: (01) 429444ITALYRoland Italy S. p. A.Viale delle Industrie 8,20020 Arese, Milano, ITALYTEL: (02) 937-78300 | NORWAYRoland Scandinavia Avd.Kontor NorgeLilleakerveien 2 Postboks 95Lilleaker N-0216 OsloNORWAYTEL: 2273 0074POLANDMX MUSIC SP.Z.O.O.UL. Gibraltar 4PL-03664 Warszawa POLANDTEL: (022) 679 44 19PORTUGALRoland Iberia, S.L.Portugal OfficeCais das Pedras, 8/9-1 Dt4050-465, Porto, PORTUGALTEL: 22 608 00 60ROMANIAFBS LINESPiata Libertatii 1,535500 Gheorgheni,ROMANIATEL: (266) 364 609RUSSIAMuTek3-Bogatyskaya Str. 1.k.l107 564 Moscow, RUSSIATEL: (095) 169 5043SPAINRoland Iberia, S.L.Paseo Garcia Faria, 33-3508005 Barcelona SPAINTEL: 93 493 91 00SWEDENRoland Scandinavia A/SSWEDISH SALES OFFICEDanvik Center 28, 2 tr.S-131 30 Nacka SWEDENTEL: (08) 702 00 20SWITZERLANDRoland (Switzerland) AGLandstrasse 5, Postfach,CH-4452 Itingen,SWITZERLANDTEL: (061) 927-8383UKRAINETIC-TACMira Str. 19/108P.O. Box 180295400 Munkachevo,UKRAINETEL: (03131) 414-40UNITED KINGDOMRoland (U.K.) Ltd.Atlantic Close, SwanseaEnterprise Park, SWANSEASAT 9FJ,UNITED KINGDOMTEL: (01792) 702701MIDDLE EASTBAHRAINMoon StoresNo.16, Bab Al Bahrain Avenue,P.O.Box 247, Manama 304,State of BAHRAINTEL: 17 211 005CYPRUSRadex Sound Equipment Ltd.17, Diagorou Street, Nicosia,CYPRUSTEL: (022) 66-9426IRANMOCO INC.No.41 Nike St., Dr.Shariyati Ave,Roberoye Cerahe MirdamadTehran, IRANTEL: (021) 285-4169ISRAELHalilit P. Greenspoon & SonsLtd.8 Retzif Ha'aliya Hashnya St.Tel-Aviv-Yafo ISRAELTEL: (03) 6823666 | JORDANAMMAN Trading Agency245 Prince Mohammad St,Amman 1118, JORDANTEL: (06) 464-1200KUWAITEASA HUSAIN AL-YOUSIFI &SONS CO.Abdullah Salem Street,Safat, KUWAITTEL: 243-6399LEBANONChahine S.A.L.Gerge Zeidan St., ChahineBldg., Achrafieh, P.O.Box: 16-5857Beirut, LEBANONTEL: (01) 20-1441OMANTALENTZ CENTRE LL.C.P.O.BOX 37, MUSCAT,POSTAL CODE 113TEL: 931-3705QATARAl Emadi Co. (Badie Studio &Stores)P.O. Box 62, Doha, QATARTEL: 4423-554SAUDI ARABIAaDawliah UniversalElectronics APLCorniche Road, AldossaryBldg., 1st Floor, Alkhobar,SAUDI ARABIAP.O.Box 2154, Alkhobar 31952SAUDI ARABIATEL: (03) 898 2081SYRIATechnical Light & SoundCenterRawda, Abdul Qader Jazairi St.Bldg. No. 21, P.O.BOX 13520,Damascus, SYRIATEL: (011) 223-5384TURKEYAnt Muzik Aletleri Ithalat VeIhracat Ltd StiSiraselviler CaddesiSiraselviler Pasaji No74/20Taksim - Istanbul, TURKEYTEL: (0212) 2449624U.A.E.Zak Electronics & MusicalInstruments Co. L.L.C.Zabeel Road, Al Sherooq Bldg.,No. 14, Grand Floor, Dubai,U.A.E.TEL: (04) 3360715NORTH AMERICACANADARoland Canada Music Ltd.(Head Office)5480 Parkwood WayRichmond B.C., V6V 2M4CANADATEL: (604) 270 6626Roland Canada Music Ltd.(Toronto Office)170 Admiral BoulevardMississauga On LST 2N6CANADATEL: (905) 362 9707U.S.A.Roland Corporation U.S.5100 S. Eastern AvenueLos Angeles, CA 90040-2938,U.S.A.TEL: (323) 890 3700 |
As of January 15, 2005 (ROLAND)