
MC 4417 CD/MP3 - Hi-Fi System AEG - Free user manual and instructions
Find the device manual for free MC 4417 CD/MP3 AEG in PDF.
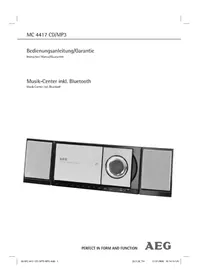


| Product Type | Hi-Fi System |
| Brand | AEG |
| Model | MC 4417 CD/MP3 |
| Dimensions (W x H x D) | Approx. 430 x 330 x 250 mm |
| Weight | Approx. 4.5 kg |
| Power Supply | AC 230V, 50Hz |
| Power Consumption | 30 W |
| Frequency Response | 20 Hz - 20 kHz (CD) |
| Output Power | 2 x 10 W RMS |
| Supported Media | CD, CD-R, CD-RW, MP3 |
| Radio Tuner | FM/AM with presets (20 FM, 10 AM) |
| Headphone Jack | Yes (3.5 mm) |
| Remote Control | Included |
| Display | LED/LCD |
| Inputs | AUX (RCA) |
| Outputs | Speaker terminals, headphone |
| Speaker Impedance | 4 ohms |
| Included Speakers | 2-way bass reflex |
| Maintenance | Clean with soft dry cloth. Do not use solvents. |
| Safety | Do not expose to moisture. Refer to manual for full safety instructions. |
| Spare Parts | Available from authorized AEG service centers. |
| Reparability | Consult qualified technician for repairs. |
| General Information | User manual available in PDF format. |
Frequently Asked Questions - MC 4417 CD/MP3 AEG
User questions about MC 4417 CD/MP3 AEG
0 question about this device. Answer the ones you know or ask your own.
Ask a new question about this device
Download the instructions for your Hi-Fi System in PDF format for free! Find your manual MC 4417 CD/MP3 - AEG and take your electronic device back in hand. On this page are published all the documents necessary for the use of your device. MC 4417 CD/MP3 by AEG.
USER MANUAL MC 4417 CD/MP3 AEG
Instruction Manual/Guarantee
Musik-Center inkl. Bluetooth
Musik Center incl. Bluetooth

PERFECT IN FORM AND FUNCTION
AEG
English
Contents
Overview of the Components ......Page 3
Instruction Manual Page 12
Technical Data Page 18
Overview of the Components


4 English
General Safety Instructions
Read the operating instructions carefully before putting the appliance into operation and keep the instructions including the warranty, the receipt and, if possible, the box with the internal packing. If you give this device to other people, please also pass on the operating instructions.
- To avoid the risk of fire or an electric shock, you should not expose the device to rain or moisture. Consequently, do not use the device in the immediate vicinity of water - for example near a bath tub, a swimming pool or in a damp cellar.
- Use the device only for the intended purpose.
- Only connect the device at a properly installed plug socket. Pay attention that the specified voltage corresponds to the voltage of the plug socket.
- When using external mains supply, pay attention to the correct polarity and voltage. Always place the batteries in the correct direction.
- Assemble the device in such a way that the available ventilation openings are not covered.
- Never open the housing of the device. Incorrect repairs can constitute a considerable risk for the user. Should the device become damaged, in particular the mains supply cable, do not operate the device any longer, but rather have it repaired by an expert. Check the mains supply cable regularly for damage.
- For safety reasons a broken or damaged mains lead may only be replaced by an equivalent lead from the manufacturer, our customer service department or a similar qualified person.
- If the device is not used for a longer period, remove the plug connector from the plug socket or take out the batteries.
These symbols may be found on the machine and are intended to indicate the following:

The lightning symbol should advise the user of parts in the inside of the device which carry dangerously high voltage levels.

The symbol with an exclamation mark should advise the user of important operation or maintenance instructions in the accompanying documentation.

Devices bearing this symbol work with a "class 1 laser" for tracing the CD. The built-in safety switches should prevent the user being exposed to dangerous laser light, which is invisible to the human eye, when the CD compartment is opened.
Under no circumstances should these safety switches be bypassed or manipulated, as this could result in a danger of exposure to the laser light.
Children and Frail Individuals
- In order to ensure your children's safety, please keep all packaging (plastic bags, boxes, polystyrene etc.) out of their reach.
WARNING!
Caution! Do not allow small children to play with the foil as there is a danger of suffocation!
- In order to protect children or frail individuals from the hazards of electrical equipment, please ensure that this device is only used under supervision. This device is not a toy. Do not allow small children to play with it.
Symbols in these Instructions for Use
Important information for your safety is specially marked. It is essential to comply with these instructions in order to avoid accidents and prevent damage to the machine:
WARNING:
This warns you of dangers to your health and indicates possible injury risks.
CAUTION:
This refers to possible hazards to the machine or other objects.
i NOTE: This highlights tips and information.
Special safety information

This device works with a class 1 laser.
Overview of the Components
1 CD compartment
2 IR Sensor for the remote control
3 ⏻ /I button (Standby/On)
4 FUNCTION Function selector button
5 PAIRING/ANSWER button (connect/answer)
6 - ▷/□+ (volume) buttons
7 ▶▶▶I/I◀◀ buttons
(forward search/reverse search)
8 ■/BAND/HANG UP button
9 ▶/II button (Play/Pause)
10 _ ▲ (open/close) CD compartment
11 LCD display
12 USB connection
13 SD/MMC Card slot
14 PHONES Headphones connection
15 Microphone
Reverse Side
16 FM ANT. throw-out aerial
17 SPEAKERS R/L Loudspeaker connections
18 AM ANT antenna connection
19 Mains connection
Remote Control
1 ⏻ STANDBY button
2 MUTE (sound off) button
3 TIMER button
4 ▶/II button (Play/Pause)
5 ▶▶▶I button (forward search)
6 ST/MO/ID3 button
7 VOLUME UP/DN (volume) buttons
8 DBBS button
9 Number buttons
10 SLEEP button
11 EQ button
12 FOLDER UP/DN buttons
(up / down album/Radio memory preset)
13 PLAY MODE button (repeat/random)
14 /PAIRING button
15 I◀◀ button (reverse search)
16 /■/BAND button
17 FUNCTION Function selector button
18 MEMORY/CLOCK button (memory/time)
19 OPEN/CLOSE button (open/close)
Intended Use
This device is used for:
• The reception of radio programmes - Playing back/recording audio cassettes - Playing back audio/MP3 CDs - Playing back files via Bluetooth - Telephoning using a hands-free kit via Bluetooth.
It is intended exclusively for this purpose and may only be used as such. It may only be used in the manner described in these instructions for use. The device must not be used for commercial purposes.
Any other use of this device is considered to be contrary to the intended use and may result in damage to materials or even personal injury.
The firm ETV – Elektro-Technische Vertriebsgesellschaft mbH does not accept any liability for damage caused as a result of the use of this device contrary to its intended use.
Start-up of the device/Introduction
- Read the operating instructions thoroughly before the start-up!
- Select an appropriate location for the device, e.g. a dry, flat, non-slip surface on which the device can be easily operated.
- Make sure that the device is adequately ventilated!
- Connect the loudspeakers to the back of the music centre to the sockets marked "Speaker R and L" (17).
- Remove the protective film from the display if it is still present.
Power Supply
- Insert the plug into a properly installed 230 V, 50 Hz power socket.
- Please ensure that the mains voltage corresponds to the information on the type plate.
- The stored time and stations are lost as soon as the power supply is interrupted.
Setting the Time (in Standby Mode)
- Press the MEMORY/CLOCK button (18 on the remote control). The words "12 HR" appear in the display.
- Use the ▶▶▶I/I◀◀ buttons (7/5/15) to choose between the 24 hour and 12 hour display. Press the MEMORY/CLOCK button to confirm.
i NOTE:
The following appears in the case of the 12 hour display
AM = in the morning,
PM = in the afternoon / evening.
- Press the ▶▶▶I/I◀◀ buttons to set the hours. Press the MEMORY/CLOCK button to confirm.
- Press the ▶▶▶I/I◀◀ buttons in order to set the minutes.
- Press the MEMORY/CLOCK button again to store the time.
Remote Control Batteries (not supplied)
- Open the lid of the battery compartment on the back of the remote control.
- Insert 2 batteries of type R03 "AAA" 1.5 V. Ensure that the polarity is correct (see the floor of the battery compartment)!
- If the remote control is not used for a prolonged period, remove the batteries in order to prevent battery acid leaking.
CAUTION:
- Different battery types or new and used batteries must not be used together.
- Batteries are not to be disposed of together with domestic wastes. Dispose of the used batteries at the relevant collection bin or at your dealer's.
WARNING:
Do not expose the batteries to high temperatures or direct sunlight. Never throw batteries into the fire. There is a danger of explosion!
CD deck transport protection
- In order to switch on the device, press the ⏻/1 STANDBY button (3/1).
- Open the CD compartment (1) by pressing the ▲ OPEN/CLOSE button (10/19). The CD compartment opens upwards.
- Remove the transport protection from the CD player if present before use.
- Press the ▲ OPEN/CLOSE button to close the CD compartment again.
General Operation
NOTE:
Some keys are found both on the device itself and on the remote control. Keys with the same designation have the same function.
©/I STANDBY (3/1)
Switch the device to standby mode with the ⬆ STANDBY button (the time is displayed). If this button is pressed once more, the device switches on again.
Volume (6/7)
This is used to set the individual volume. The letters "VOL" and a figure appear in the display. This corresponds to the volume that has been set as far as "VOL MAX" or "VOL MIN".
PHONES Headphone Socket (14)
Use headphones with a 3.5 mm stereo jack plug; insert them into the headphone socket. The loudspeakers are then switched off.
DBBS (8 on the remote control)
To increase or decrease the bass output.
BBS ON = on, BBS OFF = off.
Infrared remote control
For operating the music centre from a distance of up to 5 metres without a lead. If the range of the remote control is reduced, the batteries have to be replaced. During operation ensure that there is nothing blocking the direct line between the remote control and the sensor (2) on the machine.
USB Connection (12)
This device has been developed in accordance with the latest technical developments in the USB field. Unfortunately the large number of different types of USB storage media on offer today makes it impossible to guarantee full compatibility with all USB storage media. For this reason there may be problems in rare cases with playing back from USB storage media. This is not a malfunction of the device.
- In order to switch on the device please press the ∅ STANDBY switch (3/1).
- Now press the FUNCTION button (4/17) to select the USB mode. INSERT USB appears in the display.
- Connect a USB storage medium.
- Press ▶/II (9/4) to play back the music data.
For operating instructions please see the section "Playing CDs/MP3s".
△ CAUTION:
Before removing the USB storage medium, switch the device to TUNER operation using the FUNCTION button.
SD/MMC Card Slot (13)
- If you would like to play back data on an SD/MMC card please insert it into the opening provided.
- Now press the FUNCTION button (4/17) to select the CARD mode. INSERT CARD appears in the display.
- Press ▶/II (9/4) to play back the music data.
For operating instructions please see the section "Playing CDs/MP3s".
Listening to the Radio
- Press the FUNCTION button (4/17) repeatedly until "TUNER" appears in the display.
- Press the ☐/■/BAND/HANG UP button (8/16) to select between FM or MW.
VHF = FM, Medium wave = MW (mono)
- Tune in to the desired station with the help of the ▶▶I/I◀◀ buttons (7/5/15).
- The FM.ST control lamp " (in the display) only lights up if the selected station is being received in stereo quality. If reception is too weak and there is noise on the station being received, this lamp will flicker. Try to improve reception by turning and bending or twisting and altering the length of the antenna (16). In the case of FM stations you can use the ST/MO/ID3 button (6 on the remote control) to switch between MONO and STEREO reception. Where reception is bad we recommend switching to MONO.
- For the reception of AM stations connect an AM antenna to the AM ANT connections (18). If reception is too weak and the station being received hisses, try to improve reception by turning the AM antenna. In this frequency band programs are transmitted in "mono" only.
- If you have found the desired station, press the MEMORY/CLOCK button (18 on the remote control). The word MEMORY lights up and the station memory number flashes.
- In order to select the program location, press the FOLDER UP/DN buttons (12 on the remote control).
- To store this position, press the MEMORY/CLOCK button. Please note that the programme storage location must be entered within five seconds as the procedure is then cancelled.
To select a stored station press the FOLDER UP or FOLDER DN button (12 on the remote control).
Playing CDs/MP3
This is how you play a CD
- Press the FUNCTION button (4/17) repeatedly until "DISC" appears in the display.
- In order to open the CD compartment (1), press the ▲ OPEN/CLOSE (open/close) button (10/19). The CD compartment opens upwards.
- Place an audio CD with the printed side facing upwards on to the central cone so that the CD locks into place. Then close the CD compartment lid by pressing the ▲ OPEN/CLOSE button again.
- AUDIO CDs:
In the display the symbols "DISC" appear together with the number of tracks and the total playing time. Press the ▶/II button (9/4) to play back the CD. The CD is played from the first track onwards. The track currently being played and the time that has elapsed are shown in the display.
CDs in MP3 Format:
In the display, the symbols "DISC" and "MP3" appear together with the number of folders (e.g., A04) and the total number of tracks (e.g., T126). Press the ▶/II key to play the CD. The CD is played back from the first track onwards and from the first folder. The song currently being played and the elapsed time are shown in the display. With the FOLDER UP or FOLDER DN (12 on the remote control), you can select the individual folders.
- To remove a CD, press the ☐/■/BAND/HANG UP key (8) (16 on the remote control), open the CD deck with the ▲ OPEN/CLOSE (open/close) key, and take out the CD carefully.
Always keep the CD deck closed.
i NOTE:
- In the case of CDs in MP3 format that contain folders, when the device changes to a different folder, 01 appears for the first track of the new folder.
- If a disc is inserted incorrectly or no disc is inserted, the letters "READING" and "NO DISC" (no disc) appear in the display.
- Playback of CDs produced by the user cannot be guaranteed due to the large variety of software and CD media available.
Description of the CD buttons
▶/II (9/4)
You can briefly interrupt and resume playback using this button. The elapsed playing time flashes in the display. Pressing again continues playback.
▶▶I/I◀◀ (7/5/15)
With an audio CD or a CD in MP3 format playing:
With ▶▶I you can jump to the next or previous track, etc. If the button is kept pressed down, the machine starts to search through the tracks (the sound is muted).
The ◀◀◀ button can be used as follows:
Press once = This starts the current track again from the beginning.
Press twice = This jumps back to the previous track.
Press three times = This plays the song before, etc. If the button is kept pressed down, the machine starts to search through the tracks (the sound is muted).
In radio mode:
To tune the desired radio station.
BAND/HANG UP (8/16)
The CD stops.
In radio mode:
To change between FM and MW.
In Bluetooth mode:
In order to finish/refuse a telephone call.
MUTE (2 on the remote control)
Used for switching off the sound immediately. The word "MUTE" flashes in the display. To cancel this function, press the MUTE key again.
EQ (11 on the remote control)
(Preset equalizer function). Various sound modes are available (CLASSIC, ROCK, POP, JAZZ, FLAT).
ST/MO/ID3 (6 on the remote control)
In FM radio mode:
To change between STEREO and MONO.
For a CD in MP3 format:
Keep pressed down: If ID-3 Tag information has been stored this appears in the display in the form of an LED ticker display. Keep the button pressed down again to switch the function off again.
PLAY MODE (13 on the remote control)
Press once: (the emits a fixed light). The current track is repeated continuously.
Press twice: (the ALL emits a fixed light).
The whole CD is played continuously.
Press three times: the display contains "X" and the track number that is to be played first. All tracks are played back in random order.
Press four times: all functions are cancelled. The normal play mode is resumed.
16 English
Only for CDs in MP3 format:
Press once: the current track is repeated continuously (appears in the display).
Press twice: the selected folder of the MP3 CD is repeated continuously (CAL-BUM appears in the display). With the FOLDER UP/DN buttons (12 on the remote control) you can select the individual folders.
Press three times: the whole CD is played continuously (✗ ALL appears in the display).
Press four times: the display shows "" and the track number that is to be played first. All tracks are played back in random order.
Press five times: the function is deactivated and the CD is played in the normal mode.
FOLDER UP/DN (12 on the remote control)
Only for CDs in MP3 format:
Press these buttons during playback to move one folder upwards or downwards. The display, e.g., A001T001, appears briefly. Then the MP3 CD begins to play back automatically. If this button is pressed in stop mode, the display also appears briefly. Then start playback with the ▶/II button.
In radio mode:
To tune the desired radio station.
SLEEP (10 on the remote control)
With the device switched on, this sets the period in 10-minute steps from 90 to 10 minutes after which the device switches to standby. Press the button repeatedly until the required duration is shown in the display. When this function is activated, the "2" symbol appears in the display. The device switches off automatically after the set time.
To call up the remaining time, press the SLEEP button. This time can also be subsequently shortened or switched off again (OFF).
TIMER (3 on the remote control)
You can set the device so that it switches on and off again at a certain time.
- Switch the device to standby mode with the Ⓐ/I STANDBY button (the time is displayed).
- Keep the TIMER button pressed down until "SELECT SOURCES" appears in the display. Use the FUNCTION button (4/17) to select the switch-on mode.
- Press the TIMER button and use the "W/O+ LUME UP/DN buttons (6/7) to select the switch-on volume VOL.
- When the TIMER button is pressed, the word "SET ON TIMER" appears in the display.
- Press the TIMER button again. The hours figure begins to flash. Use the ▶▶▶I/I◀◀ buttons (7/5/15) to select the switch-on time (hours).
- Press the TIMER button and use the ▶▶▶I/I◀◀ buttons to select the switch-on time (minutes).
- When the TIMER button is pressed, the word "SET OFF TIMER" appears in the display. Press the TIMER button again. The hours figure begins to flash.
- When setting the switch-off time, please proceed in the same way as described above.
- Press the TIMER button again. The device switches back to standby. "©" appears in the display and the timer is activated.
In order to deactivate the timer, press the TIMER button. The symbol "∅" disappears from the display.
MEMORY/CLOCK (18 on the remote control)
This is used for setting the time, storing stations, and programming playback.
If this button is pressed down for approximately 3 seconds, the time is shown briefly in the display.
Programmed Play
This can be used to program any desired sequence of tracks.
- Press the ☐/☐/BAND/HANG UP key (8/16).
- Press the MEMORY/CLOCK key (18 on the remote control). "01 PR 01" ("title" PR "memory location") appears in the display together with the word PROGRAM. Use the ▶▶▶I/I◀◀ buttons (7/5/15) to select the desired track and then press the MEMORY/CLOCK button again. The display changes to memory slot PR 02.
- Select the next track with the ▶▶▶I/I◀◀ key and press the MEMORY/CLOCK key again. Repeat the procedure until all the desired tracks are selected.
i NOTE:
In the case of CDs in MP3 format you can use the FOLDER UP/DN buttons (12 on the remote control) to select the individual folders. The first track number of the respective folder is displayed.
- Press the ▶/II key (9/4). The playback starts. The first track number selected appears in the display. The words "DISC" and "PROGRAM" appear in the display. Press this button to pause briefly the playback.
- Press once the ☐/■/BAND/HANG UP key to stop the playback while retaining the program. The programmed number of tracks, e.g. 08 PROG is shown in the display.
- To resume the playback of the program press first the MEMORY/CLOCK key once and then the ▶/II key.
- To delete the program, press the /BAND/HANG UP key twice. PROG CLEAR is shown briefly in the display and the word PROGRAM goes off.
The device stops automatically once the entire sequence of programmed tracks is completed. 08 PROG is shown in the display, for example. The programmed order of tracks remains in the memory until you change to a different mode, remove the CD from the CD compartment or switch off the device.
It is also possible to combine the programmed tracks with the REPEAT function. After you have programmed and started the device, please press the PLAY MODE button (13 on the remote control) up to three times and then you can use the functions as described under "PLAY MODE".
Playing back Music in MP3 Format
With this device it is possible to play back pieces of music in MP3 format. The device also supports all standard CD types: CD, CD-RW, CD-R.
This machine is able to play MP3 CDs. Up to 200 tracks can be compressed and stored on these CDs. Your machine detects an MP3 CD automatically (the total number of tracks and folders appears in the display). If you would like to play one of these CDs, proceed as described under "Playing CDs/MP3". Tracks can be programmed as described under "Playing Back Programmed Tracks".
Please note:
There are a number of different recording and compression methods, as well as quality differences between CDs and self-recorded CDs.
Furthermore, the music industry does not adhere to fixed standards (copy protection).
For these reasons it is possible that in rare cases there are problems with the playback of CDs and MP3 CDs. This is not a malfunction of the device.
Bluetooth Operation
Bluetooth technology is a wireless radio connection between devices over a short distance.

NOTE:
The working radius is restricted to approximately 3 metres.
Currently Bluetooth technology is mainly used for the hands-free operation of mobile telephones. With this device it is possible to use both the hands-free function and play back music from a device which is compatible with Bluetooth.
NOTE:
In order to be able to use this mode the connected device must support the A2DP profile.
- A2DP (Advanced Audio Distribution Profile) A Bluetooth profile that is required in order to transfer stereo music and audio files between playback devices and receiving devices without wires.
For Optimum Sound Quality during a Telephone Call
Do not set the volume too high. Otherwise there may be feedback (a whistling noise) from the loudspeakers.
Registering Devices (PAIRING)
Before you can use the Bluetooth function, the devices have to be paired with one another.
As there are many different models and manufacturers of such devices, it is only possible here to give a general description of how to operate such devices. For more detailed information please see the operating instructions of your Bluetooth device.
i NOTE:
- The Bluetooth function has to be activated on your device (e.g. mobile telephone).
- It is not possible to pair several Bluetooth devices simultaneously with the radio.
- Press the FUNCTION button (4/17) repeatedly until "BLUETOOTH" appears in the display.
- Hold the /PAIRING/ANSWER button (5/14) down. "PAIRING" appears in the display.
- Register the radio in your mobile telephone as described in the operating instructions for your mobile telephone. The device designation "KW1007" appears as a choice in your mobile telephone.
- Now enter the password "0000" in your mobile telephone. The radio is now registered in your mobile telephone.
- Once the registration has been successfully performed, " appears in the display of the radio together with the name of the mobile telephone.
i NOTE:
- Depending on the make of your mobile telephone, you may have to repeat the registration (PAIRING).
- Bluetooth compatibility cannot be guaranteed for devices which are put on the market in future.
- In order to guarantee an optimum connection, please ensure that the battery of your mobile telephone is fully charged.
- Some makes of mobile telephone have an energy-saving mode. Please deactivate the energy-saving mode, as you may otherwise have problems when telephoning via Bluetooth.
i NOTE:
- In order to be able to conduct an incoming or outgoing telephone call, Bluetooth has to remain activated in your mobile telephone. This also applies to the playing back of music files via the A2DP profile. Please consult the operating instructions for your mobile telephone.
- Please ensure that you speak in the direction of the built-in microphone. The connection of an external microphone is not possible.
Transferring Music (A2DP)
- Press the FUNCTION button (4/17) repeatedly until "BLUETOOTH" appears in the display.
- If you have not done so already, connect the devices as described in the previous paragraph.
- Select and start the desired music file in your Bluetooth device.
i NOTE:
Turn the volume of your Bluetooth device to a pleasant volume.
Outgoing Calls
- Press the FUNCTION button (4/17) repeatedly until "BLUETOOTH" appears in the display.
- If you have not done so already, connect the devices as described in the previous paragraph.
- Dial the appropriate telephone number with your mobile telephone in the usual manner. "DIALING" appears in the display.
- As soon as the person you are calling answers, the word "CALLING" appears in the display.
- To hang up, press the ☐/☐/BAND/HANG UP button (8/16). "CALL END" appears in the display.
Incoming Calls
In the case of incoming calls, a ringing tone is heard from the loudspeakers, and if the caller has a CLIP (Calling Line Identification Presentation) capable telephone, the caller's number appears in the display of the radio. Otherwise, "IN CALL" appears in the display.
- To accept an incoming call, press the /PAIRING/ANSWER button (5/14) to confirm. You will now hear the caller through the loudspeakers.
- To terminate the call, press the "BAND/HANG UP" button (8/16). "CALL END" appears in the display.
i NOTE:
- You can transfer the call back to your mobile telephone. To do so, keep the ⬆PAIRING/ANSWER button pressed. "TRANSFER" appears in the display.
i NOTE:
- Depending on the features of your mobile telephone, you will hear either your own ringing tone or the standard ringing tone of the radio.
Cleaning and Maintenance
- Always remove the mains plug before cleaning the machine.
- Any marks on the surface can be wiped off with a slightly damp cloth without any additives.
Technical Data
Model: ....MC 4417 CD/MP3
Power supply: 230 V, 50 Hz
Output rating: 100 W PMPO
Protection class:....II
Net weight: 3.1 kg
Radio section:
Frequency ranges: ....VHF / FM 87.5 - 108.0 MHz ....MW / AM 522 - 1620 kHz
This device has been tested according to all relevant current CE guidelines, such as electromagnetic compatibility and low voltage directives, and has been constructed in accordance with the latest safety regulations.
Subject to technical changes without prior notice!

Meaning of the "Dustbin" Symbol
Protect our environment: do not dispose of electrical equipment in the domestic waste.
Please return any electrical equipment that you will no longer use to the collection points provided for their disposal.
This helps avoid the potential effects of incorrect disposal on the environment and human health.
This will contribute to the recycling and other forms of reutilisation of electrical and electronic equipment.
Information concerning where the equipment can be disposed of can be obtained from your local authority.
WARRANTY CARD


- MUSIK-CENTER INKL. BLUETOOTH
- ENGLISH
- GENERAL SAFETY INSTRUCTIONS
- CHILDREN AND FRAIL INDIVIDUALS
- WARNING
- SYMBOLS IN THESE INSTRUCTIONS FOR USE
- CAUTION
- SPECIAL SAFETY INFORMATION
- OVERVIEW OF THE COMPONENTS
- REVERSE SIDE
- REMOTE CONTROL
- INTENDED USE
- START-UP OF THE DEVICE/INTRODUCTION
- POWER SUPPLY
- SETTING THE TIME (IN STANDBY MODE)
- REMOTE CONTROL BATTERIES (NOT SUPPLIED)
- CD DECK TRANSPORT PROTECTION
- GENERAL OPERATION
- NOTE
- ©/I STANDBY (3/1)
- VOLUME (6/7)
- PHONES HEADPHONE SOCKET (14)
- DBBS (8 ON THE REMOTE CONTROL)
- INFRARED REMOTE CONTROL
- USB CONNECTION (12)
- △ CAUTION
- SD/MMC CARD SLOT (13)
- LISTENING TO THE RADIO
- PLAYING CDS/MP
- THIS IS HOW YOU PLAY A CD
- I NOTE
- DESCRIPTION OF THE CD BUTTONS
- II (9/4)
- I/I◀◀ (7/5/15)
- BAND/HANG UP (8/16)
- MUTE (2 ON THE REMOTE CONTROL)
- EQ (11 ON THE REMOTE CONTROL)
- ST/MO/ID3 (6 ON THE REMOTE CONTROL)
- PLAY MODE (13 ON THE REMOTE CONTROL)
- FOLDER UP/DN (12 ON THE REMOTE CONTROL)
- SLEEP (10 ON THE REMOTE CONTROL)
- TIMER (3 ON THE REMOTE CONTROL)
- MEMORY/CLOCK (18 ON THE REMOTE CONTROL)
- PROGRAMMED PLAY
- PLAYING BACK MUSIC IN MP3 FORMAT
- PLEASE NOTE
- BLUETOOTH OPERATION
- FOR OPTIMUM SOUND QUALITY DURING A TELEPHONE CALL
- REGISTERING DEVICES (PAIRING)
- TRANSFERRING MUSIC (A2DP)
- OUTGOING CALLS
- INCOMING CALLS
- CLEANING AND MAINTENANCE
- TECHNICAL DATA
- MEANING OF THE "DUSTBIN" SYMBOL
- WARRANTY CARD
Brand : AEG
Model : MC 4417 CD/MP3
Category : Hi-Fi System