
SMW 800 D3 - Microwave SILVERCREST - Free user manual and instructions
Find the device manual for free SMW 800 D3 SILVERCREST in PDF.


| Product Type | Microwave Oven |
| Brand | SilverCrest |
| Model | SMW 800 D3 |
| Power Output | 800 W |
| Capacity | 20 L |
| Turntable Diameter | 25.5 cm |
| Control Type | Rotary knobs and push buttons |
| Timer | 30 minutes max |
| Power Levels | 5 |
| Defrost Function | Yes, by weight or time |
| Interior Light | Yes |
| Child Lock | Yes |
| Dimensions (W x H x D) | 45.2 x 26.0 x 34.5 cm |
| Weight | 10.5 kg |
| Voltage | 230 V ~ 50 Hz |
| Power Consumption | 1150 W |
| Frequency | 2450 MHz |
| Interior Material | Stainless steel |
| Cleaning | Wipe with damp cloth; avoid abrasives |
| Safety Features | Automatic shut-off, door interlocks |
| Spare Parts Availability | From manufacturer or authorized service |
| Repairability | Accessible internal components; requires screwdriver |
Frequently Asked Questions - SMW 800 D3 SILVERCREST
User questions about SMW 800 D3 SILVERCREST
0 question about this device. Answer the ones you know or ask your own.
Ask a new question about this device
Download the instructions for your Microwave in PDF format for free! Find your manual SMW 800 D3 - SILVERCREST and take your electronic device back in hand. On this page are published all the documents necessary for the use of your device. SMW 800 D3 by SILVERCREST.
USER MANUAL SMW 800 D3 SILVERCREST
natural_image
Two kitchen appliances: a microwave oven and a black microwave oven, displayed without any visible text or symbols.MICROWAVE SMW 800 D3
TARGA GMBH
Conelarwing 45
59494 SO. GEIMANY
Last Information Update - Hμ/via molariac, norgupcoco
Operating instructions and safety instructions
DR CY
- Introduction....3
- Safety instructions .... 4
- Intended use.... 11
- Copyright 11
- Package contents.... 12
- Technical specifications .... 12
- Before you start.... 13
7.1. How the microwave works.... 13
7.2. Suitable cookware....13
- Controls 14
8.1. Rotary knob (9).... 14
9. Getting started 15
9.1. First-time setup 15
9.1.1. Selecting a position.... 15
9.1.2. Connecting and preparing the microwave.... 15
9.1.3. Setting the time 17
9.1.4. Setting the kitchen timer 17
9.1.5. Setting the child lock 17
9.2. Using the microwave.... 18
9.2.1. Microwave mode.... 18
9.2.2. Microwave/Quick Start mode....19
9.2.3. Grill mode....19
9.2.4. Combination mode.... 21
9.3. Automatic programmes....22
9.4. Starting an automatic programme.... 23
9.5. The individual automatic programmes 24
9.5.1. Pasta programme....24
9.5.2.Fish programme 24
9.5.3. Rice programme 25
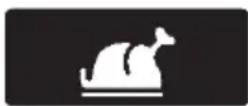
9.5.4. Chicken programme....25
9.5.5. Heating programme....25
9.5.6. Potatoes programme 26
9.5.7. Meat/joints programme....26
9.5.8. Meat kebabs programme 26
9.5.9. Liquids programme....27
9.5.10. Vegetables programme 27
9.6. Defrosting 27
9.7. Start time delay 28
10. Cleaning / Maintenance.... 29
10.1. Maintenance....29
10.2. Cleaning....29
- Storage when not in use.... 30
- Troubleshooting 30
- Environmental regulations and disposal information.... 30
- Food-grade use.... 30
- Conformity notes .... 31
- Warranty and servicing advice.... 31
1. Introduction
Congratulations!
By purchasing the SilverCrest Microwave SMW 800 D3, hereinafter referred to as the microwave, you have opted for a quality, long-lasting product.
These operating instructions contain important information about the safe use of the microwave and tips and information on everyday use and disposal. Before using the microwave, study the operating Instructions carefully and only use it in the areas described and for the purposes described. If you sell the microwave or give it away, make sure you provide these operating instructions with it. The operating instructions are part of the appliance.
2. Safety instructions
IMPORTANT SAFETY INSTRUCTIONS. READ CAREFULLY AND KEEP FOR FUTURE REFERENCE!

DANGER! This symbol and the word "Danger" denote a potentially dangerous situation. Ignoring it can lead to severe injury or even death.

WARNING! This symbol and the word "Warning" denote important information required for the safe operation of the product and for the safety of its users.

DANGER! This symbol denotes the risk of injuries or burns from hot surfaces on the microwave.

DANGER! This symbol denotes danger for human health and risk of death and/or risk of damage to equipment due to fire.

This symbol denotes further information on the topic.
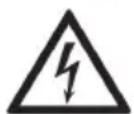
DANGER! This symbol denotes danger for human health and risk of death and/or risk of damage to equipment due to electric shock.
Operating environment

This microwave is only suitable for use in dry inside spaces. It is not for use in rooms with a high temperature or humidity (e.g. bathrooms), and must be kept free of excessive dust.

DANGER! Microwave energy
- Do not try to operate the appliance with the door open, as this could lead to a dangerous dose of microwave radiation. Do not attempt to break or manipulate the safety locks.
- Do not jam anything between the front of the appliance and the door and avoid contamination on the sealing surfaces.
- WARNING! If the door or the door seals are damaged, do not continue to use the microwave. Get it repaired immediately by a qualified expert.
- WARNING! Never try to repair the appliance yourself. Removing the casing can release microwave energy. Make sure you use a qualified professional to carry out repairs and also to replace the lamp inside the casing.
- Those fitted with a pacemaker should consult their doctor on potential risks before using the microwave for the first time.

DANGER! Electric shock
- Only connect the appliance to a properly installed, earthed mains socket whose voltage tallies with the information on the rating plate.
- Always use a mains socket that is easily accessible so the mains plug can quickly be removed in the event of an emergency.
-
Lay the mains cable so it does not present a trip hazard.
-
If the mains cable of this appliance is damaged, it must be replaced by the manufacturer, its customer service or a similarly qualified person, in order to avoid any possible danger.
- Make sure that the mains cable cannot be damaged by sharp edges or hot spots.
- Make sure that the mains cable does not get damp or wet while in use. Make sure it cannot get crushed or squashed.
- When disconnecting the mains plug from the mains socket, always pull on the mains plug and never on the mains cable.
- If you notice visible damage to the microwave or the mains cable, switch the appliance off immediately, disconnect the mains plug from the mains socket and contact our hotline (see "Warranty and servicing advice" section).
- If you are not using the appliance, in the event of a fault or if you wish to clean it, disconnect the mains plug from the mains socket to ensure it is completely without power.
- Never pour liquid into the ventilation holes or safety door locks. If liquid does get into them, disconnect the mains plug immediately and do not continue to use the appliance. Contact customer services (see “Warranty and servicing advice” chapter).
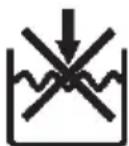
Never immerse the appliance or the connection cable in water or other liquids.

DANGER! Fire hazard
- The microwave is not designed to be operated with an external timer or separate remote control system. Do not leave the microwave unattended when it is switched on. Fire hazard!
- Do not operate the microwave near devices which emit heat themselves, e.g. oven or hob.
- The microwave must only be used free-standing.
- The appliance must not be placed in a cabinet.
- The appliance shall be placed against a wall.
- The minimum installation height is 85cm.
- When selecting a position, always maintain a minimum distance to adjacent walls. Note the chapter on "Selecting a position".
- Never leave the microwave unattended if you are heating food in plastic or paper packaging. Fire hazard!
- Do not put combustible materials near the microwave of the ventilation holes. Do not cover the ventilation holes. Fire hazard!
- Remove any metallic packaging from food to be heated. Fire hazard!
- If making popcorn, only use popcorn bags which are designed to be used in the microwave. Fire hazard!
- The microwave oven is designed to heat food and drinks. Drying food or clothes and heating cushions, slippers, sponges, damp cloths and similar can lead to injuries, ignition or fire.
- The microwave is not designed for the storage of food or other items.
- Never exceed the cooking times given by the manufacturer. Fire hazard!
- Remove residues of oil or fat from the cooking space before heating more food in the microwave. Residues can ignite. Fire hazard!
- Do not heat fat or oil. Fire hazard through ignition!
- If smoke appears, switch off the appliance or disconnect the mains plug and keep the door closed in order to stifle any flames.
- Do not put plastic containers in the microwave directly after using the grill or combination mode, as they can melt due to the high level of residual heat.
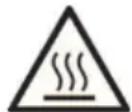
Hot surface
- The door or the outer surface may get hot when the appliance is operating.

WARNING! Risk of injury
- This appliance is intended to be used in household and similar applications such as:
staff kitchen areas in shops, offices and other working environments;
farm houses;
by clients in hotels, motels and other residential environments; bed and breakfast type environments.
- This microwave may be used by children of 8 years and older and by persons with reduced physical, sensory or mental capacities or those persons who have lack of knowledge or
experience, as long as they are supervised or they have received instructions regarding the proper use of the appliance and they understand the associated risks.
- Cleaning and user maintenance must not be carried out by children unless they are older than 8 years old and supervised.
- Keep children younger than 8 years away from the appliance and its mains cable.
- Do not allow children to play with the appliance.
- Keep children away from the microwave door while the appliance is in use. There is a risk of getting burnt.
- The contents of baby bottles and jars of baby food must be stirred or shaken and the temperature checked before use in order to avoid burns.
- Do not heat liquids or food in sealed containers. Risk of explosion!
- Heating drinks in the microwave can lead to a delayed onset of boiling (boil delay), so be careful when handling the container.
- Do not touch the microwave door, ventilation holes, accessories or tableware during or immediately after use. Risk of getting burnt!
- Open packaging such as jars or popcorn bags so that the opening points away from you. The steam coming out can cause burns.
- When you open the door, never stand right in front of the microwave. The steam coming out can cause burns.
- Do not use the microwave for deep-frying. Risk of getting burnt!
- Cooking utensils used can get very hot as the food is heated. Use pot holders or oven gloves. Risk of getting burnt!
- Heating of drinks can cause delayed boiling. Risk of injury!
- When heating liquids, always use open containers to prevent the build-up of pressure and allow air bubbles to dissipate. Risk of explosion!
- Do not heat eggs in their shells or whole hard boiled eggs in the microwave, as they can explode even after the heating process in the microwave.
- Pierce food with a thick skin such as potatoes, sausages and chestnuts before cooking.

WARNING! Damage to equipment
- In "Microwave" and "Combination" mode, never operate the appliance empty.
- Only use cookware which are suitable for use in microwaves.
- Never put metal cookware or baking trays in the microwave. These reflect the microwaves and can lead to the formation of sparks.
- Do not poke objects into the ventilation holes or the safety door lock.
- Do not lean on the microwave door.
- The oven should be cleaned regularly and food residues removed.
- Failure to maintain the oven in a clean condition could lead to deterioration of the surface that could adversely affect the life of the appliance and possibly result in a hazardous situation.
3. Intended use
This microwave is used for defrosting, heating and preparing food. It has not been designed for corporate or commercial applications. Use the microwave for private purposes only. Any use other than that mentioned above does not correspond to the intended use. The microwave may also not be used outdoors or in tropical climates. This microwave fulfils all relevant standards and directives relating to CE Conformity. Any modifications to the microwave other than recommended changes by the manufacturer may result in these standards no longer being met. The manufacturer shall not be liable for any damage or malfunctions resulting from such modifications.
Observe the regulations and laws in the country of use.
4. Copyright
All the contents of this operating instructions are protected by copyright and provided to the reader for information only. Copying data and information without the prior explicit written consent of the author is strictly forbidden. This also applies to any commercial use of the contents and information. All texts and diagrams are up-to-date as of the date of printing. Subject to change without notice.
5. Package contents
- Microwave oven
- Roller ring
- Drive star
- Glass plate
- Grill stands
• These operating instructions - Quick Guide
These operating instructions have a fold-out cover. On the inside of the cover, the microwave is shown with figures indicated. The meanings of the numbers are as follows:
1 Display
2 Glass plate
3 Drive star
4 Roller ring
5 Door handle
6 Grill button ∪
7 Combination button COMB.
8 Stop button STOP
9 Rotary knob / Start/Quick Start button
10 Timer/Clock button
11 Defrost button
12 Microwave button
13 Grill stands
6. Technical specifications
| Model SMW 800 D3 | |
| Power supply 230-240 VAC, 50 Hz | |
| Total max. power consumption 1200 - 1250 W | |
| Microwave max. power consumption 1200 - 1250 W | |
| Grill max. power consumption 950 - 1000 W | |
| Microwave output power 750 - 800 W | |
| Cooking space volume approx. 20 litres | |
| Dimensions (W x D x H) approx. 46 x 39 x 28.5 cm | |
| Weight | approx. 12.9 kg |
The technical data and design may be changed without prior notice.
7. Before you start
Remove the microwave from the packaging. Remove all packaging material and check that all parts are complete and undamaged. If you find anything missing or damaged, please contact the manufacturer.
7.1. How the microwave works
The microwave generates electromagnetic waves which create strong vibrations in the water molecules contained in the food. These vibrations create heat. The heat is generated directly in the food and the process is very gentle. The cookware is only heated indirectly by the food. Food with a high moisture content heats quicker than dryer food.
Tips for getting good results from your food:
Use appropriate utensils and do not place food directly on the glass plate (2).
◆ Cookware must not extend beyond the edge of the glass plate (2).
If possible, arrange the food so the thickest parts are at the edge.
In order to prevent the food drying out, select the shortest cooking time given to start with. You can extend the time if required. If you select the time setting too high, food can overcook, begin to smoke or even catch fire.
- Special covers to cover food in the microwave are available from retail outlets. These prevent the cooking space being contaminated by food splatters.
To achieve even cooking results, it makes sense to turn large pieces of food (e.g. joints) at least once. The same applies to foods which can only be eaten if cooked through properly, such as poultry or mince.
7.2. Suitable cookware
Microwave mode
◆ Cookware made of heat-resistant glass or porcelain
- Cookware made of heat-resistant plastic. Use oven bags with holes to prevent the build-up of pressure.
- Special plastic cookware for microwaves is available from retail outlets.
◆ Cookware must not contain metal.
Grill mode
All heat-resistant cookware and containers suitable for a conventional oven. Plastic cookware must not be used in grill mode.
The food to be grilled can be placed directly on the grill stands (13) which are placed on the glass plate (2).
Combination microwave and grill mode
In combination mode, the microwave and grill are switched on alternately. The cookware must be suitable for microwave use and also heat resistant. Plastic cookware is not suitable. Cookware must not contain metal.
8. Controls
6 Grill button
7 Combination button
8 Stop button
9 Rotary knob / Start/Quick Start button
10 Timer/Clock button
11 Defrost button
12 Microwave button

8.1. Rotary knob (9)
The rotary knob (9) can be rotated to the left and to the right. It can be turned all the way around. As a rule, turning to the left reduces numbers while turning to the right increases numbers.
Examples:
- When setting the clock, turning to the left reduces the hours/minutes and turning to the right increases them.
- From standby mode, you can turn to the left to access the automatic programmes and to the right to access quick start microwave mode.
9. Getting started
9.1. First-time setup

WARNING! Damage to equipment
Never operate the microwave empty. It could overheat!
9.1.1. Selecting a position

WARNING! Fire hazard
This microwave is not suitable for fitting in a cupboard. Adequate ventilation of the appliance cannot be guaranteed in closed cupboards. Fire hazard!
Refer to the diagram below when selecting a position:
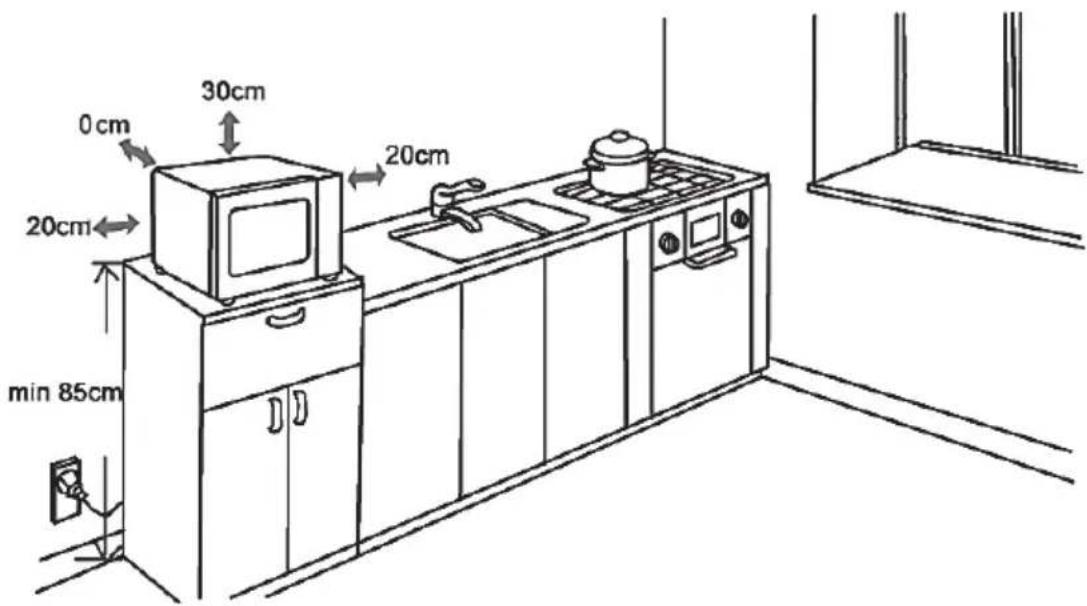
Also, please make sure that ...
• the microwave is on a firm, even surface.
- the mains socket used is easily accessible so that the mains plug can be quickly disconnected in the event of an emergency.
• the feet of the microwave must not be removed
• the microwave is not placed above an oven or heater
- using the microwave can cause interference with radio and television reception, so the microwave should be placed as far away as possible from radios and televisions.
9.1.2. Connecting and preparing the microwave
Once you have found a suitable position, you can prepare the microwave for use.
- Remove the packaging.
-
Remove any stickers on the appliance.
-
Do not remove the light-grey cover plate in the cooking space (right-hand side)! This protects the electromagnetic field tubes.
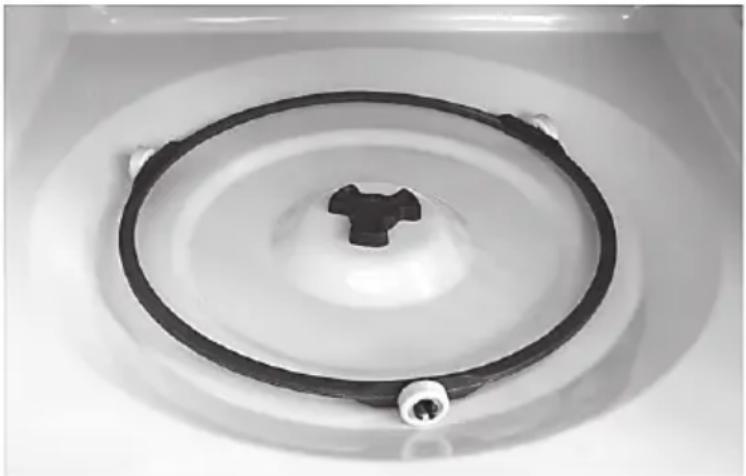
- Place the roller ring (4) in the recess inside the cooking space.
- Insert the axle of the drive star (3) through the hole in the centre of the cooking space. Twist the drive star (3) until it slots onto the drive axle beneath the hole.
natural_image
Close-up of a circular mechanical component with a central knob, placed on a white surface (no text or symbols visible)- Place the glass plate (2) centrally on the roller ring (4). The 3 glass lugs on the bottom of the glass plate (2) should fit into the drive star (3).
- Close the door.
- Insert the mains plug into a suitable mains socket which meets the requirements in the "Technical specifications" chapter. A beep sounds and the display (1) lights up for around 5 seconds.

The microwave must be connected to a properly earthed mains socket. Ideally, the microwave should have its own power circuit.
If you are not sure whether the socket you have selected meets the specifications, please consult an electrician.
Now heat the microwave once without any food in order to remove any production-related residues in the cooking space.
- Place a container full of water on the glass plate (2), the container must be suitable for use in the microwave and grill. Close the door.
- Select grill mode by pressing the "Grill" button (6). The symbol 📄 appears in the display (1) and the time shows "0:10".
- Use the rotary knob (9) to select a cooking time of 5 minutes and press the Start/Quick Start button ◆ (9). The symbol [flashes] in the display (1) and the set time counts down.
- After the set cooking time, you will hear 5 beeps, the display (1) flashes "END" and the appliance automatically switches off.
- Open the door and allow the appliance to cool completely.

When you first use the appliance, production-related residues can cause a slight smell and a slight built-up of smoke. This is normal and passes quickly. Make sure there is adequate ventilation! Open a window if necessary.
- Clean the microwave, the glass plate (2) and the roller ring (4) as described in the chapter on "Cleaning" and then dry everything off thoroughly.
9.1.3. Setting the time
- Hold down the Timer/Clock 📋/💡 button (10) for approx. 3 seconds. "Hr 12" is shown on the display (1). You can now switch between the 12 hour clock "Hr 12" and the 24 hour clock "Hr 24" by turning the rotary knob (9). Confirm by pressing the Start/Quick Start 🔒 button (9). The hour digits flash.
- Select the current hour by twisting the rotary knob (9) and confirm by pressing the Start/Quick Start button (9). The minutes digits flash.
- Select the current minute by twisting the rotary knob (9) and confirm by pressing the Start/Quick Start button ◆ (9).
You have now finished setting the time. The current time is displayed, even when the display lighting is switched off.
9.1.4. Setting the kitchen timer
The microwave has a kitchen timer which you can use independently of the microwave. The time can be set between 10 seconds and 95 minutes.
- Press the Timer/Clock button (10)
- Turn the rotary button (9) to set the time you want.
- Press the Start/Quick Start button ⏻ (9) to start the kitchen timer.
The time set now counts down. When the time is up, the appliance beeps and the current time is shown in the display (1).
You can cancel the time countdown on the kitchen timer at any point by pressing the Stop STOP (8) button. The kitchen timer is cancelled and the current time is shown in the display (1).
While the kitchen time is set and counting down, you can use the microwave functions as normal. The microwave function currently in use is shown in the display (1). Press the Timer/Clock button ☐/☐ (10) to show the current status of the kitchen timer for approx. 3 seconds. If the cooking or grilling process is complete and the door (5) is opened, the display (1) shows the remaining time counting down on the kitchen timer.
9.1.5. Setting the child lock
The child lock function gives you the option of preventing the microwave being started by children or other personnel who are not familiar with its use.
- Activating the child lock: Press the stop button (8) for about 3 seconds until a beep sounds. The symbol appears in the display (1).
The child lock is now activated. All the buttons and the rotary knob do not work.
- Deactivating the child lock: Press the stop button (8) again for about 3 seconds until a beep sounds. The symbol disappears in the display (1).
9.2. Using the microwave

You can cancel what you are entering at any time by pressing the stop button (8). This puts the microwave back in standby mode.
9.2.1. Microwave mode
WARNING! Fire hazard
Never use the grill stands (13) or other metallic objects in microwave mode. This can create sparks.

During the cooking process, water drops can form on the door and the casing of the microwave. This is not a malfunction. After cooling, wipe the moisture away with a dry cloth.
- Press the Microwave button (12). The display (1) shows "P800" (800 Watts) and the symbol.
- Select the power you want (P100 to P800) using the rotary knob (9).
- Confirm by pressing the Start/Quick Start button (9).
- Select the operating time you want using the rotary knob (9) from 10 seconds to 95 minutes.
- Confirm by pressing the Start/Quick Start button ⏻ (9). The microwave starts the cooking process set and the symbol flashes on the display (1).

Pause cooking process: Press the Stop button (8) once to pause the cooking process.
To continue the cooking process, press the Start/Quick Start button ⏻ (9). The microwave continues with the cooking process set at the pre-set power level and remaining running time.
Cancel cooking process: Press the Stop button (8) twice to cancel the cooking process. The current time is shown on the display (1).
Display power level set: If you press the Microwave button (12) during the cooking process, the display (1) briefly shows the current power level (P100 to P800) set.
The end of the cooking process is indicated by a flashing "End" on the display (1) and the appliance beeps 5 times. If the microwave door is not opened, the 5 beeps are repeated every 2 minutes.
"End" flashes on the display (1) until the door is open.
9.2.2. Microwave/Quick Start mode
When you need quick results, you can use the Quick Start function to start cooking at full power (800 Watts) for between 30 seconds and 95 minutes.
- Press the Start/Quick Start button ⏻ (9) once. The display (1) shows “:30” and the 📋 symbol flashes. The microwave then starts the cooking process and the time counts down.
- Press the Start/Quick Start button ⏻ (9) as often as you want to extend the cooking time to a maximum of 95 minutes. The time currently selected is shown on the display (1).
Alternatively, you can also proceed as follows:
- Twist the rotary knob (9) to the right until the symbol and the time you want are shown on the display (1).
- Press the Start/Quick Start button (9) once. The cooking process starts, the time counts down and the symbol flashes.
9.2.3. Grill mode
Use the grill function to grill sausages, poultry, steaks, burgers, peppers, etc. and for cheese on toast, toasted sandwiches, gratins, etc.

To guarantee an ideal distance between the food to be grilled and the grill, always use the grill stands (13) in grill mode. Always place the grill stands (13) on the glass plate (2).
- Press the Grill button (6). The display (1) shows "0:10" and the symbol.
- Select the cooking time you want using the rotary knob (9) up to a maximum of 95 minutes.
- Confirm by pressing the Start/Quick Start ◆ button (9). The microwave starts the grill mode set and the symbol flashes on the display (1).
- Turn the food being grilled when half the set time is up.
After half the time set, the unit beeps twice to indicate that the food can be turned if required.
- Open the door. The time on the display (1) stops.
- Turn the food. Please note that the food can already be hot and use oven gloves or pot holders if necessary.
- Close the door and press the Start/Quick Start button ◆ button (9) to continue the programme. The remaining time continues to count down on the display (1).
If you do not think the food needs turning, do nothing and simply allow the programme to continue.
The end of the grilling process is indicated by a flashing "End" on the display (1) and the appliance beeps 5 times. If the microwave door is not opened, the 5 beeps are repeated every 2 minutes.
"End" flashes on the display (1) until the door is open.
Tips for good grilling results

Before grilling, pre-heat the microwave for around 10 minutes using the grill function.
The table below sets out the recommended quantities and processing times for various foods. The foods listed below should be no more than 2 cm thick to guarantee cooking in the time specified. For pieces of meat which are thicker than 2 cm, the cooking time on each side should be extended accordingly.
We recommend turning the food only once to prevent the meat drying out.
| Ingredients Recommended | quantity Recommended time |
| Sausage | approx. 100 g per sausage 15 minutes per side |
| Pork steak | approx. 120 g per steak 18 minutes per side |
| Chicken steak | approx. 100 g per steak 20 minutes per side |
| Burger | approx. 125 g per burger 20 minutes per side |
9.2.4. Combination mode
WARNING! Fire hazard
Never use the grill stands (13) or other metallic objects in combination mode. This can create sparks.
This mode combines the microwave and the grill. It is perfect for when food needs to be cooked and also grilled.
In combination mode, the cooking time set is split on a percentage basis between microwave and grill modes.
| Mode Microwave mode Grill mode | ||
| Combination 1 C-1 | 55% 45% | |
| Combination 2 C-2 | 30% 70% | |

Please note that the time to be set depends on a number of factors. The quantity and composition of the food play an important role. We recommend checking the cooking results occasionally and adjusting the cooking time if necessary.
Combination 1 mode
Combination 1 mode is suitable for poultry dishes, omelettes and lasagne, for example. The proportion of microwave mode is 55 percent, with the grill time making up the remaining 45 percent of the cooking time set.
- Press the Combination button COMB. (7). The display (1) shows "C - 1" and ≡, ∪ at the same time.
- Confirm by pressing the Start/Quick Start button (9).
- Select the cooking time you want using the rotary knob (9) up to a maximum of 95 minutes.
- Confirm by pressing the Start/Quick Start button (9). The microwave starts the combination mode set and the and symbols flash on the display (1).
The end of the cooking process is indicated by a flashing "End" on the display (1) and the appliance beeps 5 times. If the microwave door is not opened, the 5 beeps are repeated every 2 minutes.
"End" flashes on the display (1) until the door is open.
Combination 2 mode
Combination 2 mode is suitable for gratin or fish, for example. The proportion of microwave mode is 30 percent, with the grill time making up the remaining 70 percent of the cooking time set.
- Press the Combination button COMB. (7). The display (1) shows "C - 1" and ≡, ∥ at the same time.
- Turn the rotary knob (9) until the display (1) shows "C - 2".
- Confirm by pressing the Start/Quick Start button (9).
- Select the cooking time you want using the rotary knob (9) up to a maximum of 95 minutes.
- Confirm by pressing the Start/Quick Start button (9). The microwave starts the combination mode set and the and symbols flash on the display (1).
The end of the cooking process is indicated by a flashing "End" on the display (1) and the appliance beeps 5 times. If the microwave door is not opened, the 5 beeps are repeated every 2 minutes.
"End" flashes on the display (1) until the door is open.
9.3. Automatic programmes
This microwave has 10 automatic programmes. When using these programmes, you do not need to set the time and power. Simply select the programme you want and enter the quantity. The microwave does the rest and calculates the perfect time based on what you have entered.
| Display items Program Symbol Quantit | y | ||
| A-01 | Pasta |  | 100 - 300g |
| A-02 | Fish 100 - 1000g |  | |
| A-03 | Rice 100 - 1000g | 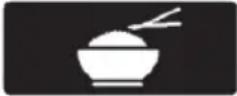 | |
| A-04 | Chicken 800 - 14 |  | |
| A-05 | Heating 100 - 10 | 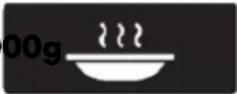 | |
| A-06 | Potatoes 150 - 6 |  | |
| A-07 | Meat/Joints 300 |  | |
| A-08 | Meat kebabs 10 |  | |
| A-09 | Liquids 1 - 3 cups |  | |
| A-10 | Vegetables 200 |  | |
DANGER! For automatic programmes which use both the microwave and the grill function, do not use covers or non-heat-resistant cookware! Risk of fire!

Please note that an automatic programme calculates the programme time and power level for fresh foods. Frozen foods must be defrosted before use or they will not cook in the pre-set time.
9.4. Starting an automatic programme

Do not put the food directly onto the glass plate (2), always put it in a suitable container or on a plate. Containers or plates should be sufficiently large or have a sufficiently high rim to catch any liquid coming out of the food.
- Twist the rotary knob (9) to the left to get to the automatic programme selection menu. The number (A-01 to A-10) flashes on the display (1) to show the automatic programme currently selected. The associated programme symbol also flashes next to the number.
While setting an automatic programme, the display (1) also shows the symbol ☐ and the symbol for the heating mode used (☐ and/or ). ☐
- Use the rotary knob (9) to select the automatic programme you want. You can twist left or right to select the programme. Confirm your selection by pressing the Start/Quick Start button (9).
- Now use the rotary knob (9) to select the approximate weight of your food. Confirm your selection by pressing the Start/Quick Start button (9).
Please note that different weights/quantities are assigned to the different automatic programmes.
- The automatic programme selected starts. The symbols for the automatic programme selected, the symbol and the symbol for the heating mode used all flash on the display (1). For the automatic programme A-07, either the symbol ☑ the symbol flashes depending on the progress of the programme. While the programme is running the symbols indicate the heating mode currently used. The remaining time is also shown counting down.
The end of the cooking process is indicated by a flashing "End" on the display (1) and the appliance beeps 5 times. If the microwave door is not opened, the 5 beeps are repeated every 2 minutes.
"End" flashes on the display (1) until the door is open.

For automatic programmes A-04 (chicken), A-07 (meat/joints) and A-08 (meat kebabs), the food should be turned after around 2/3 of the cooking time in order to achieve even results. The microwave beeps twice to indicate the point at which the food should be turned. The display (1) also shows "turn".
- Open the door. The time on the display (1) stops.
- Turn the food. Please note that the food can already be hot and use oven gloves or pot holders if necessary.
- Close the door and press the Start/Quick Start button ◆ button (9) to continue the programme. The remaining time continues to count down on the display (1).
If you do not think the food needs turning, do nothing and simply allow the programme to continue.

The size, shape and specific types of food have a decisive influence on cooking results. If your food is not yet cooked through when the automatic programme is finished, we recommend continuing to cook using the microwave quick start programme. If the automatic programme also uses the grill function, the grill function can also be used for additional cooking. Please note that the level of browning of the dishes will also increase.
9.5. The individual automatic programmes

9.5.1. Pasta programme
| Heating mode used | Microwave |
| Programme time (volume-dependent) | 25:00 to 35:00 minutes |
- Use a tall container to prevent boiling over.
- Add as much water as you would normally use for boiling. The pasta should always be covered with water.
- Now carefully add the pasta to the water and start the "Pasta" programme.
- Once the programme has finished, leave the pasta to rest for 2-3 minutes before draining it.

9.5.2. Fish programme
| Heating mode used | Microwave |
| Programme time (volume-dependent) | 3:30 to 16:00 minutes |
- Spread the fish evenly over a microwave-safe plate.
• Season the fish to taste and add a little butter or other fat. - Start the "Fish" programme.

9.5.3. Rice programme
| Heating mode used | Microwave |
| Programme time (volume-dependent) | 15:00 to 51:00 minutes |
- Use a tall container to prevent boiling over.
- Add water to the container. As a rule of thumb, use twice as many millilitres of water as grams of rice. So use 400 millilitres of water for 200 grams of rice. In this case, when programming select 200 grams, as it is only the weight of the rice that counts.
- Allow the rice to expand for around 3 to 5 minutes.
- Cover the container with a suitable lid, but do not make an air-tight seal.
- Start the "Rice" programme.
9.5.4. Chicken programme
| Heating mode used | Microwave and grill function |
| Programme time (volume-dependent) | 43:00 to 54:00 minutes |
- Place the chicken on a microwave-safe plate.
- Season the chicken to taste.
- Start the "Chicken" programme.
- To prevent the chicken drying out, it must always be turned. This also allows the grill to brown the underside of the meat better. After around 2/3 of the programme time, the microwave pauses the automatic programme and beeps twice. The display (1) also shows "turn".

We recommend pouring off any liquid produced during the cooking process before turning.
This makes the end results a little crispier.
- Turn the chicken and then press the Start/Quick Start button ⏻(9) to continue the "Chicken" programme.

9.5.5. Heating programme
| Heating mode used | Microwave |
| Programme time (volume-dependent) | 1:10 to 10:10 minutes |
- Spread the food to be heated evenly over a microwave-safe plate.
- Start the "Heating" programme.

9.5.6. Potatoes programme
| Heating mode used | Microwave |
| Programme time (volume-dependent) | 03:50 to 11:00 minutes |
- If possible, use similar sized, unpeeled potatoes.
- Pierce the skins several times.
- Spread the potatoes on a microwave-safe plate or other suitable container. Ideally, the potatoes should not touch.
- Start the "Potatoes" programme.

9.5.7. Meat/joints programme
| Heating mode used | Microwave and grill function |
| Programme time (volume-dependent) | 42:30 to 79:30 minutes |
• Season the meat/joint to taste.
- Place the meat on a microwave-safe plate.
- Then start the "Meat/Joints".
- To prevent the joint drying out, it must always be turned. This also allows the grill to brown the underside of the meat better. After around 2/3 of the programme time, the microwave pauses the automatic programme and beeps twice. The display (1) also shows "turn".
- Turn the joint and then press the Start/Quick Start button ◆ button (9) to continue the "Meat/Joints" programme.

9.5.8. Meat kebabs programme
| Heating mode used | Microwave and grill function |
| Programme time (volume-dependent) | 12:00 to 36:00 minutes |
• Season the kebabs to taste.
- Place the kebabs on a microwave-safe plate.
- Start the "Meat kebabs" programme.
- To achieve even results and prevent the kebabs drying out, they must be turned. After around 2/3 of the programme time, the microwave pauses the automatic programme and beeps twice. The display (1) also shows "turn".
- Turn the kebabs and then press the Start/Quick Start button ◆ button (9) to continue the "Meat kebabs" programme.

9.5.9. Liquids programme
| Heating mode used | Microwave |
| Programme time (volume-dependent) | 1:30 to 4:00 minutes |
- Place the liquid to be heated (drinks, sauces, etc.) in a microwave-safe container, e.g. glass or mug and place this on the glass plate (2) in the microwave.
- If you put multiple containers in the microwave at once, make sure they do not touch.
• Start the "Liquids" programme.

To prevent the liquids suddenly boiling, we recommend:
- placing a glass rod in the liquid while it is being heated
leaving the liquid in the microwave for 20-30 seconds after heating.

9.5.10. Vegetables programme
| Heating mode used | Microwave |
| Programme time (volume-dependent) | 3:30 to 10:30 minutes |
- Place the vegetables on a microwave-safe plate or in another suitable container.
- Start the "Vegetables" programme.
9.6. Defrosting
This function gives you a simple way of defrosting frozen foods. All you need to do is enter the weight of the food to be defrosted. The power level and defrost time are then calculated automatically.
- Press the Defrost button Ⓤ(11). The ≡, Ⓤ symbols appear on the display (1) with the minimum weight "100g".
- Use the rotary knob (9) to select the correct weight for the food to be defrosted between 100g and 1800g.
- Confirm the weight you have entered by pressing the Start/Quick Start button (9). The defrost process begins. On the display (1), the remaining defrost time calculated by the microwave and the symbols flash.
After half the set time, the unit beeps twice and "turn" is shown on the display (1). This indicates that the food can be turned over if necessary.
- Open the door. The remaining defrost time is indicated on the display (1).
- Turn the food.
- Close the door and press the Start/Quick Start button ◆ button (9) to continue the programme. The remaining time continues to count down on the display (1).
If you do not think the food needs turning, do nothing and simply allow the programme to continue. After a short time, "turn" disappears and the display (1) continues to count down the remaining time.
The display shows a flashing "End" to indicate the end of the defrost process and beeps 5 times. If the microwave door is not opened, the 5 beeps are repeated every 2 minutes.
"End" flashes on the display (1) until the door is open.
9.7. Start time delay
This function allows you to programme the microwave so that a programme you select starts at the time you want.

To delay the start time, it is crucial that the clock is set correctly.
The start time delay does not work for the "Defrost" programme, the "A-05" (heating) programme and the "Microwave mode / Quick Start" function.
- Set the microwave function you want (microwave mode, grill mode, combination mode or automatic programme).
Microwave mode: Press the Microwave button (12), select the power level and adjust the cooking time you want using the rotary knob (9)
Grill mode: Press the Grill button (6), adjust to the grilling time you want using the rotary knob (9).
Combination mode: Press the Combination button COMB. (7). Select the mode "C-1" or "C-2" you want using the rotary knob (9).
Automatic programmes: Use the rotary knob (9) to select an automatic programme (apart from A-05) and confirm this by pressing the Start/Quick Start button ⏻ (9). Twist the rotary knob to select the weight of the food.
- Press the Timer/Clock button 📄/ circ (10). The hour digits flash on the display (1).
- Select the hour for the start time you want by twisting the rotary knob (9) and confirm by pressing the Start/Quick Start button (9). The minutes digits flash on the display (1).
- Select the minute for the start time you want by twisting the rotary knob (9) and confirm by pressing the Start/Quick Start button (9).
The programmed start time now flashes on the display (1). At the same time, the relevant symbols to match the microwave function selected (microwave mode, grill mode, combination mode or automatic programmes) also flash.
At the set start time, the unit beeps twice and the selected programme is started automatically.
It is possible to cancel the programmed start time and the whole process programmed at any time. To do this, press the Stop button (8). The current time is now shown on the display (1).
10. Cleaning / Maintenance
10.1. Maintenance

WARNING! Servicing is required if the microwave is damaged in any way, for example, if liquid or objects have entered the casing, if the microwave is exposed to rain or moisture, if it is not working properly or if it has been dropped. If you notice any smoke, unusual noises or strange smells, switch the microwave off immediately and disconnect the mains plug from the mains socket. Keep the door closed to stifle any flames. If this occurs, the microwave should no longer be used until it has been inspected by authorised service personnel. All servicing work must be carried out by qualified specialist personnel. Never open the casing of the microwave.
10.2. Cleaning

DANGER! Unplug the mains plug from the mains socket before you start to clean, there is the risk of electric shock!

DANGER! Wait until the microwave has cooled down. Risk of getting burnt!

DANGER! Never immerse the microwave itself in water, there is a risk of electric shock!

WARNING! Do not use oven cleaner spray to clean the cooking space, as this can produce residues on the heating rods which cannot be removed.
To clean, remove the glass plate (2) and the roller ring (4). These parts can then be cleaned in hot water with washing-up liquid. Rinse all parts with clean water and dry them thoroughly. Never use abrasive materials for cleaning.
The glass plate (2) can also be cleaned in the dishwasher.
To clean the inside and outside surfaces of the microwave, use a slightly dampened cloth and a little washing-up liquid. Never use any solvents or cleaners that may damage the plastic. Then dry all parts thoroughly.
Regularly clean the door, the window, the door seals and adjacent parts with a damp cloth. Do not use abrasives.
11. Storage when not in use
If you do not wish to use the microwave, keep it in a clean, dry, dust-free place away from direct sunlight.
12. Troubleshooting
Nothing on display (1).
- Check that the mains plug is correctly inserted into the mains socket.
- The mains socket is defective. Test the appliance in a different mains socket that you are certain is working.
- The display (1) is faulty. Consult the manufacturer.
Nothing happens when you press buttons.
- Please check if the child lock feature is enabled. Deactivate it if necessary.
The desired process does not start.
- The microwave door is not shut properly. Close the door.
The glass plate (2) makes noises as it turns.
- Check that the glass plate (2) is seated properly on the roller ring (4). Position it correctly.
- Check whether the roller ring (4) or the bottom of the microwave is dirty. Clean both.
13. Environmental regulations and disposal information
natural_image
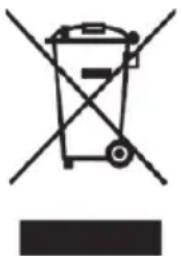
Symbol of a trash bin with crossed lines indicating no waste or restriction, and a solid rectangle below (no text or labels)Appliances marked with this symbol are subject to the European Directive 2012/19/EU. All electrical and electronic devices must be disposed of separately from household waste at official disposal centres. Avoid damage to the environment and risks to your personal health by disposing of the appliance properly. For further information about proper disposal, contact your local government, disposal bodies or the shop where you bought the appliance.
Dispose of all packaging in an environmentally friendly manner. Cardboard packaging can be taken to paper recycling centres or public collection points for recycling. Any film or plastic contained in the packaging should be taken to your public collection points for disposal.
14. Food-grade use

This symbol designates products whose physical and chemical composition has been tested and found to be non-hazardous to health when used in contact with food in accordance with the requirements of Ordinance EG 1935/2004.
15. Conformity notes

This appliance complies with the basic and other relevant requirements of the EMC Directive 2014/30/EU, the Low-Voltage Directive 2014/35/EU, the ERP Directive 2009/125/EC and the RoHS Directive 2011/65/EU.
In order to receive the complete EU declaration of conformity, please send an e-mail to the following e-mail address: ce@targa.de
16. Warranty and servicing advice
Warranty of TARGA GmbH
Dear Customer,
This device is sold with three years warranty from the date of purchase. In the event of product defects, you have legal rights towards the seller. These statutory rights are not restricted by our warranty as described below.
Warranty conditions
The warranty period commences upon the date of purchase. Please keep the original receipt in a safe place as it is required as proof of purchase. If any material or manufacturing faults occur within three years of purchase of this product, we will repair or replace the product free of charge as we deem appropriate.
Warranty period and legal warranty rights
The warranty period is not extended in the event of a warranty claim. This also applies to replaced and repaired parts. Any damage or defects discovered upon purchase must be reported immediately when the product has been unpacked. Any repairs required after the warranty period will be subject to charge.
Scope of warranty
The device was carefully manufactured in compliance with stringent quality guidelines and subjected to thorough testing before it left the works. The warranty applies to material and manufacturing faults. This warranty does not cover product components which are subject to normal wear and which can therefore be regarded as wearing parts, or damage to fragile components such as switches, rechargeable batteries or components made of glass. This warranty is void if the product is damaged, incorrectly used or serviced. To ensure correct use of the product, always comply fully with all instructions contained in the user manual. The warnings and recommendations in the user manual regarding correct and incorrect use and handling of the product must always be observed and complied with. The product is solely designed for private use and is not suitable for commercial applications. The warranty is rendered void in the event of incorrect handling and misuse, if it is subjected to force, and also if any person other than our authorised service technicians interfere with the device. No new warranty period commences if the product is repaired or replaced.
Submitting warranty claims
To ensure speedy handling of your complaint, please note the following:
Before using your product for the first time, please read the enclosed documentation carefully. Should any problems arise which cannot be solved in this way, please call our hotline.
- Always have your receipt, the product article number as well as the serial number (if available) to hand as proof of purchase.
- If it is not possible to solve the problem on the phone, our hotline support staff will initiate further servicing procedures depending on the fault.

Service

Phone: 020 - 70 49 04 03
E-Mail: service.GB@targa-online.com

Phone: 01-4370121
E-Mail: service.IE@targa-online.com

Phone: 027 78 11 03
E-Mail: service.MT@targa-online.com
Phone: 02 - 20 09 025
E-Mail: service.CY@targa-online.com
IAN: 274476 / 274486

Manufacturer
Please note that the following address is not a service address. First contact the service point stated above.
TARGA
GmbH
Coesterweg 45
59494 SOEST
GERMANY
Περιεχόμενα
natural_image
Top-down view of a circular mechanical component with a central knob and mounting base (no text or symbols visible)natural_image
Symbol of a trash bin with crossed lines indicating no waste or discharge (no text or labels)natural_image
Top-down view of a circular mechanical component with a central knob and mounting base (no text or symbols visible)natural_image
Symbol of a trash bin crossed with two crossed lines, no text or numbers present


- MICROWAVE SMW 800 D3
- Cleaning / Maintenance.... 29
- Introduction
- Congratulations!
- Safety instructions
- Operating environment
- DANGER! Microwave energy
- DANGER! Electric shock
- DANGER! Fire hazard
- Hot surface
- WARNING! Risk of injury
- WARNING! Damage to equipment
- Intended use
- Copyright
- Package contents
- Technical specifications
- Before you start
- How the microwave works
- Tips for getting good results from your food:
- Suitable cookware
- Microwave mode
- Grill mode
- Combination microwave and grill mode
- Controls
- Rotary knob (9)
- Examples:
- Getting started
- First-time setup
- Selecting a position
- WARNING! Fire hazard
- Refer to the diagram below when selecting a position:
- Also, please make sure that ...
- Connecting and preparing the microwave
- Setting the time
- Setting the kitchen timer
- Setting the child lock
- Using the microwave
- Microwave mode
- Microwave/Quick Start mode
- Grill mode
- Tips for good grilling results
- Combination mode
- Combination 1 mode
- Combination 2 mode
- Automatic programmes
- Starting an automatic programme
- The individual automatic programmes
- Pasta programme
- Fish programme
- Rice programme
- Chicken programme
- Heating programme
- Potatoes programme
- Meat/joints programme
- Meat kebabs programme
- Liquids programme
- Vegetables programme
- Defrosting
- Start time delay
- Cleaning / Maintenance
- Maintenance
- Cleaning
- Storage when not in use
- Troubleshooting
- Nothing on display (1).
- Nothing happens when you press buttons.
- The desired process does not start.
- The glass plate (2) makes noises as it turns.
- Environmental regulations and disposal information
- Food-grade use
- Conformity notes
- Warranty and servicing advice
- Warranty of TARGA GmbH
- Warranty conditions
- Warranty period and legal warranty rights
- Scope of warranty
- Submitting warranty claims
- Service
- Manufacturer
- Περιεχόμενα
Brand : SILVERCREST
Model : SMW 800 D3
Category : Microwave