
SMW 900 EDS B4 - Microwave SILVERCREST - Free user manual and instructions
Find the device manual for free SMW 900 EDS B4 SILVERCREST in PDF.


| Product type | Microwave oven with grill |
| Brand | SilverCrest |
| Model | SMW 900 EDS B4 |
| Microwave power | 900 W |
| Grill power | 1000 W |
| Cavity capacity | 20 L |
| Control type | Electronic with LED display |
| Dimensions (W x D x H) | 455 x 390 x 280 mm |
| Net weight | 11.5 kg |
| Power supply | 230 V ~ 50 Hz, 1300 W input |
| Functions | Microwave, Grill, Combi, Defrost, Auto cook programs |
| Auto programs | 8 auto menus for popular dishes |
| Defrost function | By weight or time |
| Child lock | Yes, press and hold Stop for 3 seconds |
| Door interlock | Safety switches prevent operation when door open |
| Interior light | LED cavity light |
| Turntable | Glass plate, 245 mm diameter, removable |
| Cleaning and care | Wipe with damp cloth, use mild detergent; avoid abrasives |
| Spare parts availability | Order via SilverCrest service hotline or website |
| Repairability index | 5.5/10 (estimated) |
| Manual languages | DE, EL, EN (PDF) |
Frequently Asked Questions - SMW 900 EDS B4 SILVERCREST
User questions about SMW 900 EDS B4 SILVERCREST
0 question about this device. Answer the ones you know or ask your own.
Ask a new question about this device
Download the instructions for your Microwave in PDF format for free! Find your manual SMW 900 EDS B4 - SILVERCREST and take your electronic device back in hand. On this page are published all the documents necessary for the use of your device. SMW 900 EDS B4 by SILVERCREST.
USER MANUAL SMW 900 EDS B4 SILVERCREST
Operating instructions
GR CY
Before reading, unfold the page containing the illustrations and familiarise yourself with all functions of the device.
GR CY
GB/IE/CY Operating instructions Page 1
Contents
Introduction 3
Intended use....3
Package contents 3
Description of the appliance 4
Technical data 4
Important safety instructions....5
Before you begin 13
Basic principles of microwave cookery 13
Use suitable cookware 14
First use 15
Setting up the device 15
Preparing the appliance 16
Inserting the turntable 17
Operation 17
Setting the clock....17
Standby mode....18
Setting the kitchen timer....18
Child safety lock 18
Query functions 18
Pause/cancel cooking or defrosting operations 19
Heating and cooking 19
Microwave operation 19
Grill function 21
Combination cooking mode "Grill" 22
Convection operation 23
Convection operation with preheating 23
Combination cooking mode "Convection" 24
Automatic menu 25
Starting the Automatic Menu 25
Baking pizza 29
Defrosting 31
Defrosting by weight 31
Defrosting by time 33
Read these operating instructions carefully before using the appliance for the first time, and retain them for future reference. Please pass these operating instructions on to any future owner(s).
Recipes 34
Rissoles 34
Baking frozen ready-made bread rolls 34
Potato gratin 34
Muffins. 35
Courgette soup 36
Chocolate apple cake 37
Meat loaf. 38
Cleaning and care 39
Troubleshooting 40
Disposal 41
Warranty and service 41
Importer 42
Introduction
Congratulations on the purchase of your new device.
You have selected a high-quality product. The operating instructions are part of this product. They contain important information on safety, usage and disposal. Before using the product, please familiarise yourself with all operating and safety instructions. Use the product only as described and for the specified areas of application. Please also pass on these operating instructions to any future owner.
Intended use
This appliance is intended for the heating up and preparation of foodstuff s according to the described procedures.
Any modifications to the appliance shall be deemed to be improper use and implies substantial danger of accidents.
The manufacturer accepts no responsibility for damage(s) attributable to misuse. This appliance is intended solely for use in private homes.
Do not use it for commercial applications, or in industrial or laboratory situations!
Package contents
• Stainless Steel Microwave
- Turntable
- Grill stand
- Operating instructions
- Quick guide (2 items)
Description of the appliance
Figure A:
① Display
② Door opener button
3 Turntable
4 Rollers
⑤ Ventilation slits
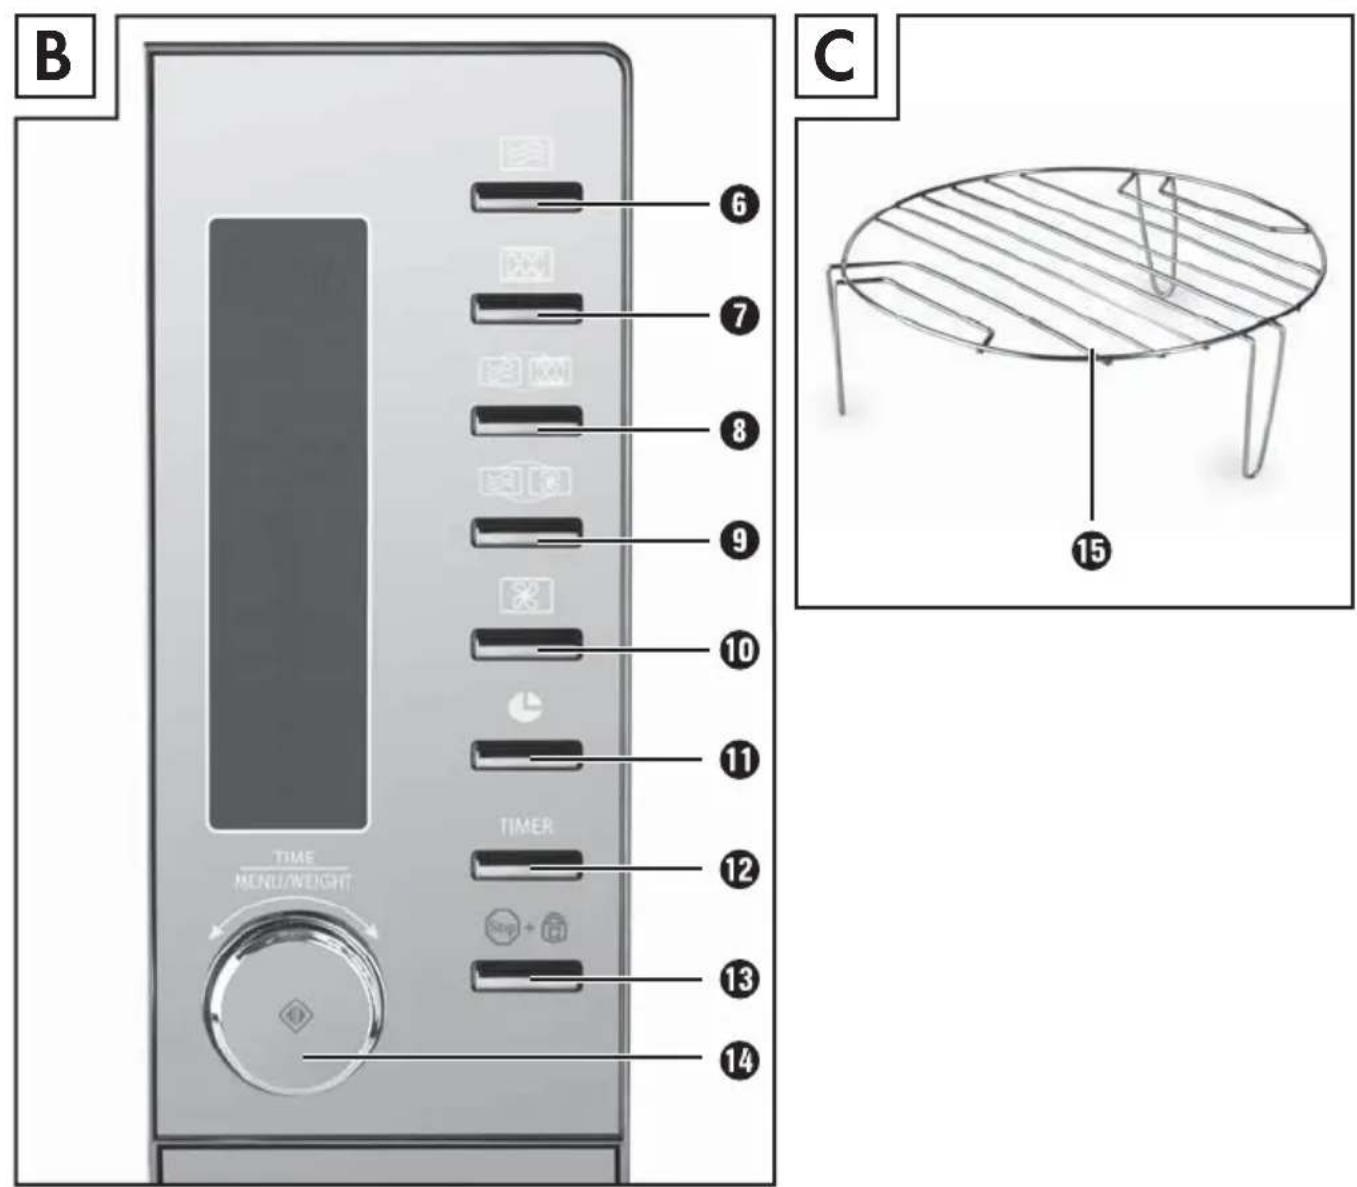
Figure B:
6 Microwave button
7 Grill button
8 Microwave/grill combination button
9 Microwave/convection combination button
10 Convection button
⑪ Clock button
⑫ TIMER button (kitchen timer)
13 Stop/child safety lock button
14 Control dial/start/quick start button


Figure C:
15 Grill stand
Technical data
| Rated voltage 230 - 240 V | ~, 50 Hz |
| Maximum power consumption:Microwave oven 1400 WGrill 1500 WConvection 1950 W | |
| Maximum power delivery: | |
| Microwave oven 900 W +/- 10% | |
| Microwave frequency: 2450 MHz | |
| All of the parts of this appli-ance that come into contact with food are food-safe. |
Important safety instructions
Read the safety advice and these operating instructions carefully before using the appliance, and keep them for future reference.

A warning notice at this hazard level indicates a potentially hazardous situation.
If the hazardous situation is not avoided, it could result in death or serious physical injury.
▶ Follow the instructions in this warning notice to avoid the risk of death or serious injury.

WARNING - RISK OF INJURY/FIRE!
A warning notice at this hazard level indicates a potentially hazardous situation.
Failure to avoid this hazardous situation could result in injury.
▶ Follow the instructions in this warning notice to prevent injury.
CAUTION - PROPERTY DAMAGE
A warning notice at this hazard level indicates a potential for property damage.
Failure to avoid this situation could result in property damage.
▶ Follow the instructions in this warning notice to prevent property damage.
NOTE
▶ A note provides additional information that will assist you in using the appliance.
Safety precautions for the avoidance of excessive exposure to microwave energy
▶ Do not try to operate the appliance while the door is open, as this can lead to you being exposed to a potentially harmful dose of microwave radiation. It is also important not to break open or manipulate the safety locks.
▶ Do not jam anything between the front of the appliance and the door, and make sure that there is no food or cleaning agent residue left on the seals.
△DANGER! ELECTRIC SHOCK!
▶ Never submerse the appliance, the power cable or the plug in water or other liquids.
- Keep the power cable well away from sources of heat. Do not route it in front of the microwave oven door. The heat could damage the cable.
▶ Never pour fluids into the ventilation openings or the safety locks. If liquids ever get into the vents, switch off the microwave oven immediately and pull the plug from the mains power socket.
Have the appliance checked by qualified specialists.
⚠ WARNING - RISK OF INJURY!
If the door or the door seal is damaged, do not continue using the appliance under any circumstances. Have the appliance repaired as soon as possible by qualified specialists.
▶ Never attempt to repair the appliance yourself. Removal of the appliance housing could cause the release of microwave energy. Arrange for the repair to be carried out only by qualified specialists.
This appliance may be used by children aged 8 years or more and by persons with reduced physical, sensory or mental capabilities or lack of experience and/or knowledge if they are supervised, or have been instructed in the safe use of the appliance and have understood the potential risks.
▶ Do not allow children to use the appliance as a plaything.
WARNING - RISK OF INJURY!
▶ Cleaning and user maintenance must not be carried out by children, unless they are aged 8 or over and are supervised.
▶ Children younger than 8 years of age must be kept away from the appliance and the power cable.
▶ Use this appliance only for its intended purpose as described in this manual. Do not use any caustic chemicals or vapours in this appliance. This microwave oven is designed especially for heating, cooking or grilling foodstuff s. It is not intended for use in industrial applications or laboratories.
- Do not operate the microwave oven if the power cable or plug are damaged. To avoid injury, arrange for damaged power cables or plugs to be exchanged by qualified specialists before re-using the appliance.
- Keep children well away from the microwave oven when it is in use. Risk of burns!
▶ Under no circumstances should you remove the microwave oven housing.
▶ If the lamp in the interior of the microwave oven needs replacing, have this done by a qualified specialist.
▶ Never touch the microwave oven door, housing, ventilation openings, accessories or the crockery directly after the grill, combi or automatic menu process. The parts will be very hot. Allow them to cool down before cleaning them.
▶ Ensure that the plug is easily accessible at all times, so that it can be removed quickly in the event of an emergency.
WARNING - RISK OF INJURY!
▶ People fitted with a heart pacemaker should consult their doctor about the possible risks of using a microwave oven before using it.
▶ Do not allow the power cable to hang down from a table or work surface. Children could pull on it.
▶ After heating, always open containers, popcorn bags, etc. so that the opening faces away from your body. Escaping steam could cause scalds.
▶ Never stand directly in front of the microwave oven when opening the door. Escaping steam could cause scalds.
- Do not fry foods in the microwave. Hot oil can damage parts of the appliance and utensils and even cause skin burns.
▶ Always shake up or stir heated up jars of baby food or baby bottles! The contents can heat up unevenly and burn or scold your baby. Always check the temperature before you feed your baby!
▶ Do not modify the microwave oven.
- Microwave radiation is dangerous! Maintenance and repairs requiring the removal of access covers, which are intended for protection against contact with microwave radiation, are to be carried out by trained specialists only.
▶ Always check the temperature of the food before eating, to avoid a potentially life-threatening burning injury, for instance, to babies. Cooking utensils can become hot from the heat emitted by the food, therefore you may require oven gloves to touch them. Cooking utensils must also be checked to ensure they are microwaveable.
WARNING - RISK OF INJURY!
Caution! Hot surface!
⚠ WARNING - RISK OF FIRE!
▶ Never leave the microwave oven unattended if you are heating foodstuff s packed in plastics or paper.
- Do not place fl ammable materials close to the microwave oven or the ventilation openings.
Remove all metallic closures from the packaging of the foodstuff that you intend to warm up. Risk of fi re!
- When making popcorn, use only microwaveable popcorn bags.
▶ Do not use the microwave oven to warm up cushions filled with kernels, cherry stones or gels. Risk of fire!
- Do not use the microwave oven for storing foodstuffs or other objects.
▶ Do not exceed the cooking times given by the manufacturer.
▶ Do not place any objects on the microwave oven when it is in use. This will block the ventilation openings!
▶ Do not place the microwave oven next to other appliances discharging heat, for example, an oven.
Clean the microwave oven thoroughly after warming up greasy foods, especially if they were not covered. Allow the appliance to cool down completely before cleaning it. Residues such as fat or grease cannot be allowed to collect on the heating elements of the grill. They could possibly ignite.
WARNING - RISK OF FIRE!
- Do not thaw frozen fat or oil in the microwave oven. The fat or oil could ignite.
- Do not use an external timer switch or a separate remote control system to operate the appliance.
This microwave is designed for heating foods and drinks. Drying foods or clothing or the warming of heating pads, slippers, sponges, damp cloths or similar can lead to injuries, ignition of the material or fi res.
This cooking appliance should be cleaned regularly and all food residues should be removed.
⚠️ CAUTION – PROPERTY DAMAGE!
▶ Never operate the microwave when it is empty.
The only exception to this is the first use (see section "First use"), during which the microwave may be operated empty for a brief period in the "Grill" operating mode "Grill".
▶ Never insert any foreign objects into the ventilation openings or the door safety locks.
- Do not use metallic utensils which could reflect microwaves and lead to sparking. Do not place cans in the microwave oven.
- Do not place plastic containers in the microwave oven immediately after a grill, combi or automatic menu process. The plastic could melt.
The microwave oven may not be set up in areas with high humidity or where moisture could collect.
CAUTION - PROPERTY DAMAGE!
▶ Do not heat liquids and other foods in airtight containers, as these may explode and damage the appliance.
▶ Do not lean on the microwave oven door.
- Insufficient cleanliness of the appliance could lead to the destruction of the upper surfaces, which themselves affect its useful lifespan and could possibly lead to dangerous situations.
▶ Use only microwave-suitable cookware.
NOTES ON SAFE USE
▶ To minimize the risk of fi re in the microwave: When heating food in plastic or paper containers, always keep an eye on the microwave when it is in operation, as these materials can catch fi re.
- When heating drinks in the microwave, bubbling may be delayed when the drink boils. Therefore, be careful when handling the container. To avoid sudden bubbling-up:
- If possible, place a glass rod in the fluid for as long as it is being heated.
- To avoid unexpected bubbling-up, leave the liquid to stand in the microwave oven for about 20 seconds after heating.
▶ Puncture the skins of potatoes, sausages and similar food items. Otherwise, they could explode.
▶ Be careful when heating liquids. Use only open containers, so that any air bubbles produced can escape.
NOTES ON SAFE USE
If the appliance starts to give off smoke, switch it off immediately or remove the plug from the mains, and keep the door closed to smother any flames that might otherwise escape.
- Eggs in their shells and hard-boiled eggs should not be heated in the microwave oven as they could explode, even after completion of the heating process.
Food with thick skins, such as potatoes, whole pumpkins, apples and chestnuts must be pricked before cooking.
▶ Do not move the microwave oven when it is in use.
EARTHING INFORMATION / CORRECT INSTALLATION
This appliance must be earthed. This appliance is to be connected only to a correctly earthed power socket. An individual circuit solely for the connection of the microwave is recommended.

DANGER! Improper use of the earthing connector could increase the risk of an electric shock.

NOTE: If you have any questions about earthing or the electrical aspects of these instructions, please consult an electrician or a maintenance technician.
Neither the manufacturer nor the dealer can accept liability for damage to the microwave oven or injury to persons resulting from failure to comply with the instructions for electrical connection.
INTERFERENCE WITH OTHER APPLIANCES
The operation of the microwave may cause interference on your radio, television or similar appliances. If such interference occurs, it can be reduced or corrected by the following remedial measures:
-Clean the door and the seals of the microwave.
- Realign the aerial of your radio or television.
- Set up the microwave in a different place to the receiver.
-Move the microwave away from the receiver.
- Plug the microwave into another wall socket. The microwave and the receiver should be connected to different circuits.
Before you begin
Basic principles of microwave cookery
- Arrange the food in a sensible manner.
■ Place the thickest parts near the edges.
■ Pay attention to the cooking time. Select the shortest possible stated cooking time and increase as required. Food that is cooked too long can begin to smoke or catch fire.
■ Cover the food during cooking with a lid suitable for microwave cookery. The lid prevents splashing and helps in the even cooking of the food.
■ While cooking, turn the food in the microwave once so that items such as chicken or hamburgers are cooked more quickly.
Large pieces of food, such as joints of meat, must be turned at least once.
■ Completely rearrange foods, such as meatballs, after half the cooking time. Turn them and move the meatballs from the middle of the plate to the edge.
Use suitable cookware
The ideal material for a microwave oven is microwave-permeable, allowing the energy to penetrate the container to heat the food. Microwaves cannot permeate metal. For this reason, metal containers and cookware should not be used.
When using the microwave for heating, do not use products made of recycled paper. These can contain minute fragments of metal, which can generate sparks and/or fi res.
We recommend the use of round/oval cookware instead of square or oblong containers, as food in corner areas tends to overcook. The following list provides general hints to assist you in selecting the correct cookware.
| Cookware | Micro-wave oven | Grill | Convection | Combination |
| Heatproof glass Yes Yes Yes Yes | ||||
| Non-heatproof glass No No No No | ||||
| Heatproof ceramic Yes Yes Yes Yes | ||||
| Microwave-suitable plastic dishes | Y e s | N | o | |
| Kitchen roll Yes No No No | ||||
| Metal tray/plate No Yes Yes No | ||||
| Grill stand 15 | No Yes Yes No | |||
| Aluminium foil & foil containers | No Yes Yes No |
WARNING - RISK OF FIRE!
▶ Never use the grill stand ⑮ or other metallic objects when you are using the appliance in the microwave mode or in combination cooking mode (the exception here is the turntable ③). Metals reflect the microwave radiation and this leads to the generation of sparks. This can cause a fire and irreparably damage the appliance!
First use
NOTE ON HEATING UP FOR THE FIRST TIME
▶ Never operate the microwave in "Microwave" mode when it is empty!
- When heating up for the first time, operate the microwave without food or accessories in the operating mode "Grill" (Gr 3)!
(see section "Preparing the appliance")
Setting up the device
WARNING - RISK OF FIRE!
This microwave oven is not suitable for installation in a kitchen cabinet. Sufficient ventilation for the appliance cannot be assured in enclosed cabinets. The appliance could be damaged and there is an additional risk of a fire!
CAUTION - PROPERTY DAMAGE!
- Do not install the microwave above a cooker or any other appliance generating heat. Installation in such a location could cause damage to the appliance and thus invalidation of the warranty.
■ Select an level surface offering sufficient space for the adequate ventilation of the appliance:
Ensure that you maintain a minimum clearance of 10 cm from neighbouring walls/surfaces. Make sure that the door of the microwave oven can be opened easily.
Keep a gap of at least 20 cm free above the microwave.
■ Ensure that the power plug is easily accessible, so that it can be easily reached and unplugged in case of danger.
■ Do not remove the feet underneath the microwave oven.
Do not block the ventilation slits ⑤. If you do, it could cause damage to the appliance.
■ Install the appliance as far away as possible from radios and televisions. The operation of the microwave oven can cause interference to radio and television reception.
Preparing the appliance
■ Remove the packaging material and the protective films from the panel and the door opener button ②.
CAUTION - PROPERTY DAMAGE!

Do not remove the light grey mica cover plate, which is mounted inside the cooking chamber to protect the magnetron.
Insert the plug into a mains power socket. Use a 230-240 V, 50 Hz, mains power socket with a 16 amp fuse. It is recommended that the microwave oven is powered from its own power circuit. If you are unsure about how to connect the microwave oven, consult a specialist.
■ Before the first regular usage of the microwave oven the appliance must be heated up to remove any remaining production residues.
■ After inserting the mains plug into the socket, open the microwave door once by pressing the door opener button ②.
Switch the appliance on in Grill mode without any food or accessories (turntable 3 and grill stand 15):
NOTE ON HEATING UP FOR THE FIRST TIME
▶ Only operate the microwave without food or accessories when heating up for the first time.
Operate the microwave for a maximum of 5 minutes when empty!
1) Press the Grill button ⑦ "Gr 1" appears on the display ①.
2) Turn the control dial 14, until "Gr 3" and the and symbols appear on the display 1 and confirm your choice by pressing the start/quick start button 14
3) Use the control dial 14 to set a cooking time of 5 minutes.
4) Press start/quick start 14 to start the grilling process.
NOTE
The appliance may generate light smoke and a slight smell during initial use. This is due to the production residues and is not harmful. Provide for sufficient ventilation. For example, open a window.
After 5 minutes, the appliance will switch itself off automatically. Wait until it has cooled down completely.
5) Remove the plug from the mains power socket and clean the inside of the appliance with a moist cloth and then dry it carefully.
Inserting the turntable
Place the turntable ③ centrally on the axle in the cooking area. Ensure that it slides completely onto the axle and is firmly seated.
Operation
Setting the clock
After inserting the mains plug into the socket, open the microwave door once. The display ① shows "1:00". Close the door again.
1) Press the clock button ⑪. "Hr 12" appears on the display ①.
2) Turn the control dial 14 to select the required mode (24 HR or 12 HR) and confirm your selection by pressing the start/quick start button 14
NOTE
The time display does not appear until you subsequently turn the control dial 14 at which point you can set the time.
3) Turn the control dial 14 ◆ to select the required hour and confirm your selection by pressing the start/quick start button 14 ◆
4) Turn the control dial 14 to select the required minute and confirm your selection by pressing the start/quick start button 14
The time display is now programmed.
To read the current time of day while the microwave oven is in operation, press the Clock button ⓘ; the time is then shown on the display ⓘ for a few seconds.
Standby mode
The microwave oven automatically switches to standby mode and the time is displayed if no button is pressed for a long time. A few seconds after switching to standby mode, the display lighting is also dimmed.
Setting the kitchen timer
The microwave oven is provided with a kitchen timer which you can use independently of the microwave operation.
1) Press the timer button ⑫ when the appliance is in standby mode. "0:00" and the symbol ⚙ will appear on the display ①.
2) Set the desired time using the control dial 14. You can select any time from 10 seconds to 95 minutes.
3) Press the start/quick start button 14. The appliance beeps. The time starts counting down. After approx. 3 seconds the current time is shown once again. The cooking timer continues to run in the background. If you wish to check the progress of the kitchen timer, press the timer button 12. The timer appears for a short time on the display.
As soon as the programmed time period has expired, you will hear some beeps.
Child safety lock
Activate this setting to prevent accidental activation by children and other persons not familiar with the operation of the appliance.
The symbol for the child safety lock 🔒 appears on the display ①, and the appliance cannot be put into operation for as long as this function is activated.
Press and hold the stop/child safety lock button 13 Stop + until you hear a beep and the child safety lock symbol appears on the display 1. The buttons and the control dial are now deactivated.
To deactivate the child safety lock, press and hold the stop/child safety lock button 13 Stop + 📋 until you hear a beep and the symbol for the child safety lock disappears.
Query functions
Query the time during operation
During the cooking process, press the clock button ⑪. The time is shown on the display ① for a few seconds.
Query the power level during operation
During the cooking process press the microwave button ⑥. The current power level appears for a few seconds on the display ①.
Pause/cancel cooking or defrosting operations
Press the stop button 13 Stop + once to pause a cooking or defrosting process. The appliance pauses the process and stops countdown of the remaining time. Press the start/quick start button 14 to resume the process.
Press the stop button 13 Stop + twice to stop the cooking process. The appliance reverts to standby mode.
Heating and cooking
NOTE
This microwave is equipped with a cooling function. This means that after a cooking or grill process of at least two minutes, the appliance fan will continue running for approximately 3 minutes. This is not a malfunction of the appliance! The rapid cooling helps to prolong the life of the appliance.
Microwave operation
NOTE
During the cooking process, drops of water can form on the oven door or on the housing. This is normal and is not an indication of a malfunction. When the appliance has cooled down, wipe the moisture off with a dry cloth.
RISK OF FIRE!
▶ Never use the grill stand 15 or other metallic objects when you are using the appliance in microwave mode. Metals reflect the microwave radiation and this leads to the generation of sparks. This can cause a fire and irreparably damage the appliance!
Selecting the power level
1) Press the microwave button 6 "900" (900 watts power level) appears on the display ①.
2) Use the control dial 14 to set the required power output.
3) Press the start/quick start button 14 to confirm the power level.
Programming the cooking time
After you have selected the power level, programme in the desired cooking time:
Turn the control dial 14, until the desired cooking time has been set.
The increments for setting the time with the control dial 14 are as follows:
—from 0 sec to 5 min: in 10-second increments
—from 5 to 10 min: in 30-second increments
-from 10 to 30 min: in 1-minute increments
—from 30 to 95 min: in 5-minute increments
Aborting/stopping an input process
Press the stop button 13 Stop + once to cancel and end the input. The appliance reverts to standby mode.
Starting the cooking process
When you have set the power and cooking time, you can start the cooking process: To start the cooking process, press the start/quick start button 14. The microwave symbol appears on the display 1. The programmed time counts down. When the set time has elapsed, "End" and "Hot" will appear alternately in the display 1. You will hear a series of beeps.
Quick start function 1
In standby mode, turn the control dial 14 ◆ to the right and set the required cooking time. Start cooking at 900 W by pressing the start/quick start button 14 ◆.
Quick start function 2
With this function, you can start cooking immediately for 30 seconds (or longer, up to 95 minutes) at 900 W.
Press the start/quick start button 14 once. The microwave symbol and "00:30" appear on the display 1. The microwave starts the cooking process for 30 seconds. The time starts counting down. If you wish to cook for longer than 30 seconds, press the start/quick start button 14 repeatedly until the desired time is reached.
The time increments are set as follows:
-from 30 sec to 5 min: in 30-second increments
-from 5 to 95 min: in 1-minute increments
Grill function
WARNING - RISK OF FIRE!
▶ When using the grill function, do not use any form of lid or cookware that is not heat resistant, as these could melt or set on fire!
NOTE
▶ Always use the grill stand ⑮ when grilling. This way you will achieve optimal grilling results. Always place the grill stand ⑮ on the turntable ③.
There are 3 grill levels available:
- Grill function "Top heat" (Gr 1):
With this function, the heat comes only from above. Only the upper grill is activated. Therefore, this grill function is ideal for making topped sandwiches and gratins.
Grill function "Bottom heat" (Gr 2):
With this function, the heat comes only from below. Only the lower grill is activated. Therefore, this grill function is ideal for dishes or food that needs to be cooked/grilled from below.
- Grill function "Top and bottom heat" (Gr 3):
With this function, the heat comes from above and below. The upper and lower grills are activated. This grill function is ideal for thin slices of meat, steaks, rissoles, sausages or chicken pieces.
1) Press the grill button ⑦ once to activate the grill function. The symbols for the grill function "top heat" and "Gr 1" appear on the display ①.
2) Use the control dial 14 to set the required grill function:
"Gr 1" for top heat,
"Gr 2" for bottom heat,
"Gr 3" for top and bottom heat.
Confirm your selection by pressing the start/quick start button 14
3) Set the required cooking time with the control dial 14. The maximum possible cooking time setting is 95 minutes.
4) To start the grill function, press the start/quick start button 14.
The display ① shows the symbol for the selected grill function 📌 / 📌 / 📌. The programmed time counts down. When the set time has elapsed, "End" and "Hot" will appear alternately on the display ①. You will hear a series of beeps.
Combination cooking mode "Grill"
This function combines the grill function and the normal microwave operation. In combination mode, a certain amount of time is automatically set aside for cooking and the remaining time for grilling in a single process. You may notice a quiet clicking noise when the oven is switching between modes.
WARNING - RISK OF FIRE!
▶ Never use the grill stand ⑮ or other metallic objects, when you are using the appliance in combination cooking mode. Metals reflect the microwave radiation and this leads to the generation of sparks. This can cause a fire and irreparably damage the appliance!
When using the combination cooking mode "grill", do not use any form of lid or cookware that is not heat-resistant, as these could melt or set on fire!
The following 4 combinations are available:
■ Combination 1 (C 1):
In Combination 1 the microwave component is 30% and the grill element amounts to 70% of the cooking time. This is suitable for fi sh dishes or gratins. The microwave function and the grill function "top heat" are used.
■ Combination 2 (C 2):
In Combination 2, the microwave component is 55% and the grill element amounts to 45% of the cooking time. This is suitable for omelettes, puddings or lasagne. The microwave function and the grill function "top heat" are used.
■ Combination 3 (C 3):
In Combination 3, the microwave component is 30% and the grill element amounts to 70% of the cooking time. This is suitable for potatoes. The microwave function and the grill functions "top and bottom heat" are used.
■ Combination 4 (C 4):
In Combination 4 the microwave component is 55% and the grill element amounts to 45% of the cooking time. This is suitable for poultry dishes. The microwave function and the grill functions "top and bottom heat" are used.
1) Press the microwave/grill combination button ⑧ once to activate combination 1 (C 1). and C 1" appear on the display ①.
2) Set the required combination with the control dial 14.
"C 1" for combination 1, "C 2" for combination 2, "C 3" for combination 3, "C 4" for combination 4.
Confir rm your selection by pressing the start/quick start button 14
3) Set the required cooking time with the control dial 14. The maximum possible cooking time setting is 95 minutes.
4) To start, press the start/quick start button 14.
The symbols of the cooking process being used 📋, 📌 appear on the screen ①. The programmed time counts down. When the set time has elapsed, "End" and "Hot" will appear alternately in the display ①. You will hear a series of beeps.
Convection operation
When cooking with convection, hot air circulates in the oven. Hot air is especially recommended for cooking gratins or crispy dishes. You can set a temperature of 110° C- 200° C and a maximum cooking time of 95 minutes.
1) Press the convection button ⑩. "200C" (= 200°C) appears on the display ① and the convection symbol ②.
2) Turn the control dial 14 ◆ to select the required temperature and confirm your selection by pressing the start/quick start button 14 ◆
3) Set the required cooking time with the control dial 14.
4) To start the cooking process, press the start/quick start button 14.
The convection symbol appears on the display ①. The programmed time counts down. When the set time has elapsed, "End" and "Hot" will appear alternately in the display ①.
You will hear a series of beeps.
Convection operation with preheating
You can also preheat your microwave before you start a cooking process:
1) Select the desired temperature by pressing the convection button ⑩ once and use the control dial ⑭ set the desired temperature. Do NOT confirm this setting by pressing the start/quick start button ⑮
2) To start preheating, press the convection button ⑩. "30:00" appears on the display ① and the convection symbol ✕ flashes. The time starts counting down. As soon as the set temperature has been reached, you will hear a beep and the time will stop.
3) Open the door and place the food to be cooked inside.
4) Turn the control dial 14 ◆ to select the required temperature and confirm the temperature by pressing the start/quick start button 14 ◆
5) Set the required cooking time with the control dial 14. The maximum possible cooking time setting is 95 minutes.
6) To start, press the start/quick start button 14.
The convection symbol 📄 appears permanently on the display ①. The programmed time counts down. When the set time has elapsed, "End" and "Hot" will appear alternately in the display ①.
You will hear a series of beeps.
Combination cooking mode "Convection"
This function combines the convection function with the normal microwave operation. With this, for example, meat is juicy and tender but still crisp.
WARNING - RISK OF FIRE!
▶ Never use the grill stand ⑮ or other metallic objects, when you are using the appliance in combination cooking mode. Metals reflect the microwave radiation and this leads to the generation of sparks. This can cause a fire and irreparably damage the appliance!
1) Press the microwave/convection combination button ⑨. The pre-selected temperature "200C" and the symbols and appear on the display ①.
2) Select the desired temperature using the control dial 14: 110°C, 140°C, 170°C or 200°C. Confirm your selection by pressing the start/quick start button 14
3) Set the required cooking time with the control dial 14. The maximum cooking time is 95 minutes. Confir rm the set cooking time by pressing the start/quick start button 14.
The combination process starts. The symbols for the combination cooking mode "Convection", appear on the display ①. The programmed time counts down. When the set time has elapsed, "End" and "Hot" will appear alternately in the display ①. You will hear a series of beeps.
Automatic menu
It is not necessary to program the duration of the cooking process and the power level for foods that are prepared in the automatic menu mode. You only need to enter the type of food you wish to cook and its weight.
WARNING - RISK OF FIRE!
▶ Do not use lids or non-heat-resistant dishes for programmes using the grill function (A-01, A-02, A-03, A-04, A-05) as they can melt or catch fire!
NOTE
The microwave calculates the time/powerful level for fresh foods. Frozen foods will not be fully cooked with the timings set by the microwave (except for automatic programme "Pizza"). If required, defrost frozen foods using the defrost programme beforehand (see section "Defrosting").
Starting the Automatic Menu
1) Turn the control dial ⑭ (in standby mode) slowly to the left to call up the automatic menu mode. A number (e.g. "A - 02" for automatic menu 2 (pork)) and the "Pork" symbol appears on the display ①. Use the control dial ⑭ to select the appropriate automatic menu for your dish.
NOTE
If you turn the control die14 left to access the automatic menu mode, you can select the automatic menus in the order A01, A02, A03... by turning the dial to the right again.
| Display Symbol Food Weight | |||
| A-01 |  | Beef 200–1400 g | |
A-02 Pork 200–1 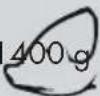 | |||
| A-03 |  | Poultry | 400–1400 g |
| A-04 |  | Fish 200–1200 g | |
| A-05 Pizza |  | * P1 150–450 gP2 150–450 gP3 150–450 g | |
A-06 Fruit/vegetc  - 1000 g - 1000 g | |||
| A-07 | 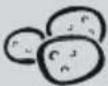 | Potatoes 100–800 g | |
A-08 Heating up 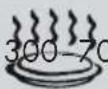 0 g 0 g | |||
A-09 Beverages : 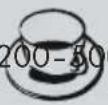 D ml D ml | |||
A-10 Entrees 30C 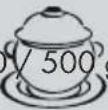 g g | |||
| A-11 |  | Defrostingby weight | - |
| A-12 |  | Defrostingby time | - |
*For more information about the pizza programmes, read the section "Baking pizza".
2) Confirm your selection by pressing the start/quick start button 14.
3) Turn the control dial 14 ◆ to select the weight and confirm this by pressing the start/quick start button 14 ◆
The cooking process starts. The symbols for the cooking and grill functions that are being used for the selected automatic programme appear on the display ①. Microwave function ☐, grill function "Top heat", grill function "Bottom heat". The calculated time starts running down.
NOTE
To ensure uniform heating or cooking, some foods should be turned after 2/3 of the cooking time. The microwave oven will stop automatically after this time. You will hear four beeps and "Turn" appears on the display ①.
| Display Symbol Food turn over after... | |||
| A-01 |  | Beef 2/3 of the time | |
| A-02 |  | Pork 2/3 of the time | |
| A-03 |  | Poultry 2/3 of the time | |
| A-04 |  | Fish 2/3 of the time | |
1) Turn the foods. Be careful, the food may already be very hot.
2) Press the start/quick start button 14 to resume cooking.
▶ If you do not want to turn the food, just wait for the beeps to stop. The appliance will automatically resume cooking. We recommend that you do turn the food. This will ensure even cooking.
NOTE
If the meal is not properly cooked upon completion of the automatic menu, continue cooking as described here.
- Use the cooking process specified in the following table to finish cooking. Start this for a few minutes each time and check the cooking results.
- When further cooking a pizza using the automatic menu "P2", pause the cooking process by pressing the stop/child safety lock button Stop + as soon as the pizza is properly cooked.
| Display Symbol Food | Finish cooking with... | ||
| A-01 |  | Beef | Combination cooking mode "Grill" - C3 |
| A-02 |  | Pork | Combination cooking mode "Grill" - C3 |
| A-03 |  | Poultry | Combination cooking mode "Grill" - C3 |
| A-04 |  | Fish | Combination cooking mode "Grill" - C3 |
| A-05 Pizza |  | Automatic menu "Pizza" - P2 | |
| A-06 | 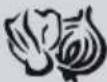 | Fruit/vegetables | Microwave at 900 W power |
| A-07 |  | Potatoes | Microwave at 900 W power |
| A-08 |  | Heating up | Microwave at 900 W power |
| A-09 |  | Beverages | Microwave at 900 W power |
| A-10 |  | Entrees | Microwave at 900 W power |
| A-11 |  | Defrosting by weight | Microwave at 100 W power |
| A-12 | 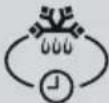 | Defrosting by time | Microwave at 100 W power |

RISK OF INJURY!
After a cooking cycle, the turntable ③ is very hot! You should therefore always use an oven cloth or heat resistant oven gloves when removing it from the cooking area.
NOTE
▶ Please note that the size, shape and the type of foodstuff affects the result of the cooking process.
Example 1:
Proceed as follows to cook 400 g vegetables or fruit:
1) Turn the control dial 14, (in standby mode) until "A-06" appears on the display 1 and confirm your choice by pressing the start/quick start button 14
2) Set the weight to "400" with the control dial 14.
3) Press the start/quick start button 14 to start the cooking process.
Example 2:
To heat 300 ml water, proceed as follows:
1) Turn the control dial 14, (in standby mode) until "A-09" appears on the display 1 and confirm your choice by pressing the start/quick start button 14.
2) Set the weight to "300" with the control dial 14.
3) Press the start/quick start button 14 to start the cooking process.
Example 3:
To heat 300 g of entrees, proceed as follows:
1) Turn the control dial 14, (in standby mode) until "A-10" appears on the display 1 and confirm your choice by pressing the start/quick start button 14.
2) As "300" appears as the first selection on the display ①, press the start/quick start button ⑭ to start the cooking process.
Baking pizza
You can use the automatic programme "Pizza" to prepare delicious pizza in the microwave. You have the choice between the pizza programmes "P-01" (deep-frozen pizza), "P-02" (chilled pizza) and "P-03" (fresh pizza).
1) Turn the control dial 14 (in standby mode) slowly to the left until "A-05" appears on the display 1.
2) Press the start/quick start button 14.
3) Use the control dial 14 ◆ to select the appropriate pizza programme:
- "P-01" for deep-frozen pizza, temperature approx. -18°C Weight 150 g-450 g ("P-01" appears on the display ①). - "P-02" for chilled pizza, temperature approx. 5°C, Weight 150 g-450 g ("P-02" appears on the display ①). - "P-03" for fresh pizza, temperature approx. 20°C, Weight 150 g-450 g ("P-03" appears on the display ①).
4) Confirm your selection by pressing the start/quick start button 14
5) Use the control dial 14 to select the weight and confirm this by pressing the start/quick start button 14. The cooking process will start.
NOTE
If you cook pizza, you can place it directly on the turntable ③. It will cook very crispy. Ensure that the edge of the pizza does not extend up to the walls of the cooking area during cooking.
Example:
Proceed as follows to cook a deep-frozen pizza with a weight of 450 g:
1) Turn the control dial 14 ◆ (in standby mode) slowly to the left until "A-05" appears on the display 1.
2) Press the start/quick start button 14.
3) Use the control dial 14 select the programme "P-01".
4) Press the start/quick start button 14.
5) Set the weight to "450" with the control dial 14.
6) Press the start/quick start button 14 to start the cooking process. The appliance calculates the time required automatically.
Defrosting
Defrosting by weight
NOTE
▶ Always place the food to be defrosted on dishes suitable for use in a microwave oven. Never directly onto the turntable ③!
You can use this function to defrost meat, poultry, fi sh, fruit/vegetables and pizza. The defrosting time and the power level are calculated and set automatically once you have entered the weight.
1) In standby mode turn the control dial 14 anticlockwise until "A -11" and appear on the display 1 (see section "Automatic menu").
2) Press the start/quick start button 14.
3) Now select the food to be defrosted by turning the control dial 14. The display ① shows the following for the respective food:
| Display Symbol Food | ||
| d-01 | 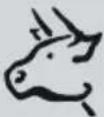 | Beef |
| d-02 Pork |  | |
| d-03 | 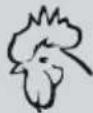 | Poultry |
| d-04 | 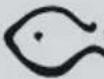 | Fish |
| d-05 | 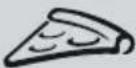 | Pizza |
| d-06 Fruit/vegetables | 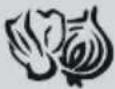 | |
| d-07 Potatoes | 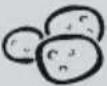 | |
4) Once the desired food item appears on the display ①, press the start/quick start button ⑭.
5) Now select the weight by turning the control dial 14.
The following weights can be set:
| Display Symbol Food Weight | |||
| d-01 |  | Beef 100 - 1800 g | |
| d-02 |  | Pork 100 - 1800 g | |
| d-03 |  | Poultry 100 - 1800 g | |
d-04 Fish 100 -  | |||
| d-05 |  | Pizza 100 - 900 g | |
| d-06 |  | Fruit/vegetables 100 - 900 g | |
| d-07 |  | Potatoes 100 - 900 g | |
6) Once the desired weight appears on the display ①, press the start/quick start button ⑭. The appliance automatically calculates the defrosting time.
NOTE
To ensure optimum defrosting, it is necessary to turn the food during the thawing process. The appliance reminds you of the need to turn by beeping and "turn" appears on the display ①. Open the appliance door, turn the food and then reclose the door. Press the start/quick start button ⑭ to resume the thawing process.
▶ If you do not want to turn the food, just wait for the beeps to stop. The appliance will automatically continue the thawing process. We recommend that you do turn the food. This will ensure an even thawing.
Defrosting by time
NOTE
▶ Always place the food to be defrosted on dishes suitable for use in a microwave oven. Never directly onto the turntable ③!
1) In standby mode, turn the control dial 14 anticlockwise until "A-12" and appear on the display ①.
2) Press the start/quick start button 14.
3) Set the desired time using the control dial 14.
4) Press the start/quick start button 14 to start the thawing process. The time starts counting down.
NOTE
To ensure optimum defrosting, it is necessary to turn the food during the thawing process. The appliance reminds you of the need to turn by beeping and "turn" appears on the display ①. Open the appliance door, turn the food and then reclose the door. Press the start/quick start button ⑭ to resume the thawing process. If you do not want to turn the food, just wait for the beeps to stop. The appliance will automatically continue the thawing process. We recommend that you do turn the food. This will ensure an even thawing.
Recipes
Rissoles
Preparation
1) Shape approx. 125 g of minced beef into a patty (roughly 75 mm in diameter and 35 mm thick).
2) Distribute the rissoles evenly on the turntable ③.
3) You will get the best results if you use the convection and microwave functions alternately. Wait until each set cooking process is finished and then set the next operation:
1 Convection 200°C, 4:00 mins.
2 Microwave 900 W, 5:30 mins.
3 Convection 200°C, 2:00 mins (depending on personal taste, a time of up to 4:00 mins is also possible).
Baking frozen ready-made bread rolls
1) Select the convection function to bake the rolls.
2) Place 3 - 4 rolls on the turntable ③.
Preheating of the microwave is not required. Select the following settings for the baking process:
■ Convection 170°C, duration: 12 minutes
If you wish to bake additional rolls directly afterwards, shorten the baking time for these by about 1-2 minutes, as the appliance is now already preheated.
Potato gratin
Ingredients
- 750 g waxy potatoes, peeled
- 300 g cream
- 100 g grated cheese with a fat content of 25% to 30% fat in dry measure.
● Spices to taste (e.g. salt/pepper)
Use a microwave-proof, round dish with a lid, height 5-6 cm and a diameter of about 22 cm.
Preparation
1) Cut the potatoes into slices approximately 3-4 mm thick.
2) Lay about half of the potatoes in the casserole dish in the style of roof tiles.
3) Sprinkle the potatoes with about half of the cheese.
4) Then add half of the spices and about 150 g of cream.
5) Lay the rest of the sliced potatoes on top, also in the style of roof tiles.
6) Sprinkle the remaining cheese over the potatoes and pour the remaining cream over them.
7) Sprinkle the remaining spices over the gratin.
8) Cover the dish with the lid and place it in the centre of the turntable ③.
Preparation
You will get the best results if you use the convection and microwave functions alternately. Wait until each set cooking process is finished and then set the next operation:
1 Microwave 900 W, 10:00 mins.
2 Convection 200°C, 13:00 mins.
3 Microwave 900 W, 10:00 mins.
Preheating is not required.
Muffi ns
Ingredients
This recipe yields 10 to 20 muffi ns.
● Baking margarine (80% fat content) or salted butter
- 170 g granulated sugar (up to 0.3 mm grain size)
- 3 eggs (55–60 g with shell/size M)
- 225 g wheat fl our
- 7 g baking powder
- 0.25 g salt
Preparation
1) Mix all ingredients well.
2) Add the muffi n pastry into standard commercial paper baking cases (diameter 45 mm, height 28 mm)
3) Preheat the oven with the convection function to 170°C.
NOTE
If the number of muffi ns requires multiple baking operations are necessary, preheating is required only for the fi rst batch.
4) Distribute the muffins evenly on the turntable ③.
5) Select the following settings for the baking process:
■ Convection 170°C, duration: 12 minutes
Courgette soup
Ingredients
• 1 courgette (approx. 250 g)
- 80 ml water
- 2 teaspoons of powdered vegetable stock
- approx. 150 g processed cheese (with herbs)
- 100 ml cream
Preparation
1) Finely dice the courgette.
2) Place the courgette, water and the powdered vegetable stock into a suitable microwaveable container.
3) Start microwave cooking at 700 watts for about 6 minutes.
4) Add the processed cheese and cream.
5) Start microwaving again for 10 minutes at 600 watts.
NOTE
▶ You can purée the soup with a hand blender before serving. This gives the soup a creamy consistency.
Chocolate apple cake
Ingredients
- 125 g butter
- 125 g sugar
- 1 packet of vanilla sugar
- 2 eggs
- 125 g fl our
- 2 tbsp. cocoa powder
• 1/2 packet baking powder - 1 apple
- a little icing sugar
Preparation
1) Mix the sugar, softened butter, vanilla sugar, eggs, fl our, baking powder and cocoa powder to make a dough.
2) Peel and core the apples. Chop the apples into small pieces.
3) Fold the apple pieces into the dough.
4) Put the dough into a microwaveable dish.
5) Cook the cake at 900 watts for approx. 9 minutes in the microwave.
6) Allow the cake to cool a bit after cooking before knocking out of the form.
7) Sprinkle a little icing sugar over the cake.
NOTE
The cooking time can vary depending on the shape.
Meat loaf
Ingredients
- 500 g minced meat (half and half)
• 1/2 onion - 1 egg
• 1/2 bread roll - Pepper, salt, paprika powder
For the sauce:
- 75 ml water
• 1 tbsp mustard - 2 tbsp. tomato ketchup
- 2 tbsp. gravy
- Nutmeg, parsley, paprika powder
● a little sauce thickener (if required)
Preparation
1) Soften the bread in a little water.
2) Finely dice the onion.
3) Mix the mince, onion, egg and the softened bread to make a meat loaf dough and season with salt and pepper.
4) Form a meat loaf and place it in a microwaveable dish. Sprinkle the meat-loaf with paprika powder and cover the dish.
5) Cook the meat loaf for about 18-22 minutes at 700 watts.
6) After cooking, remove 2 tbsp. of stock and mix it with the water, tomato ketchup and mustard to make a gravy.
7) Pour the gravy over the meat loaf and cook without a lid using the grill combination 1 (C 1) for about 10 minutes.
8) If necessary, add a little sauce thickener to the gravy.
NOTE
The cooking time can vary depending on the shape of the meat loaf.
Cleaning and care

Before cleaning, switch the microwave oven off and remove the plug from the mains power socket. Otherwise, there is the great risk of receiving an electric shock!

Never immerse the device in water or other liquids. This could result in you receiving a fatal electric shock and the appliance could be damaged.
● Always keep the interior of the microwave oven clean.
- If splashes of food or spilt liquids stick to the walls of the microwave, wipe them off with a damp cloth.
- Use a mild detergent if the microwave is more heavily soiled.
- Avoid using cleaning sprays and other aggressive cleaning agents, as they can cause stains, smears or clouding of the door surface.
- Clean the external surfaces with a damp cloth.
- To avoid damage to the functional components in the interior of the microwave, do not allow liquids to seep in through the ventilation slits ⑤.
- Remove splashes or soiling. Clean the door, both sides of the viewing window, door seals and adjacent components with a damp cloth. Do not use abrasive cleaning agents.
- If condensation accumulates on or around the outside of the door, wipe it off with a soft cloth. This can happen if the microwave is operated in extremely humid conditions.
- Clean the turntable ③ regularly. Rinse it in warm, soapy water.
- Clean the grill stand 15 in warm washing up water and dry it well.
- Remove odours regularly. Put a deep microwave bowl with a cup of water, juice and peel of a lemon into the microwave. Heat for 5 minutes. Wipe off thoroughly and rub dry with a soft cloth.
- If the bulb in the microwave needs replacing, arrange for it to be exchanged by a dealer or consult our Service Department.
Troubleshooting
| PROBLEM POSSIBLE CAUSE POSSIBLE SOLUTIONS | ||
| There is nothing on the display 1. | The plug is not inserted into a mains power socket. | Check the plug. |
| The mains power socket is defective. | Try another mains power socket. | |
| The display 1 is defective. | Contact Customer Service. | |
| The appliance does not respond to pressing the buttons. | The child safety lock is activated. | Deactivate the child safety lock (see section "Operation"). |
| The appliance does not start the cooking/heating process. | The door is not properly closed. | Close the door properly. |
| The turntable 3 makes a loud noise when turning. | The turntable 3 is not correctly positioned on the axle. | Insert the turntable 3 correctly into the cooking area. |
| The small rollers 4 and/or the floor of the cooking area are unclean. | Clean the rollers 4 and the floor of the cooking area. | |
| "E01" appears on the display 1 and you hear beeps. | The microwave has over-heated. | Terminate the current programme immediately.Remove the plug from the mains power socket, open the microwave door and allow the appliance to cool down. |
| "E02" appears on the display 1 and you hear beeps. | There is a sensor error. | Stop the programme and let the appliance cool down.Then restart the microwave.If the error occurs again, contact Customer Support. |
| There is an error during the heating up of the appliance. | Stop the programme and let the appliance cool down.Then restart the microwave.If the error occurs again, contact Customer Support. | |
PROBLEM POSSIBLE CAUSE POSSIBLE SOLUTIONS
| "E03" appears on the display 1 and you hear beeps. | The microwave has switched into fault protection due to a short circuit or open-circuit voltage. | Stop the programme and remove the power plug. If possible, eliminate the problem, e.g. metals in the cooking area, which can lead to the above problem when using the microwave function. Otherwise, please contact our Customer Support. |
| The light inside the microwave is not working. | The light bulb is possibly defective. | Contact the Customer Service department. |
RISK OF INJURY!
▶ Never try replace the light bulb yourself. Opening the appliance housing could cause the release of microwave energy.
Disposal

Do not dispose of the appliance in your normal domestic waste. This product is subject to the provisions of European Directive 2012/19/EU.
Dispose of the appliance via an approved waste disposal company or your municipal waste disposal facility.
Please comply with all applicable regulations.
Please contact your waste disposal facility if you are in any doubt.

Dispose of all packaging materials in an environmentally friendly manner.
Warranty and service
This appliance is provided with a 3-year warranty valid from the date of purchase. This appliance has been manufactured with care and inspected meticulously prior to delivery.
Please retain your receipt as proof of purchase. In the event of a warranty claim, please contact your Customer Service unit by telephone. This is the only way to guarantee free return of your goods.
NOTE
The warranty only covers claims for material and manufacturing defects, not for transport damage, worn parts or damage to fragile components such as buttons or rechargeable batteries.
This product is intended solely for private use and not for commercial purposes. The warranty shall be deemed void in cases of misuse or improper handling, use of force and modifications/repairs which have not been carried out by one of our authorised Service centres.
Your statutory rights are not restricted by this warranty. The warranty period is not prolonged by repairs effected under the warranty. This also applies to replaced and repaired components.
Any damage and defects present at the time of purchase must be reported immediately after unpacking, but no later than two days after the date of purchase. Repairs carried out after expiry of the warranty period shall be subject to charge.
GB Service Great Britain
Tel.: 0871 5000 720 (£ 0.10/Min.)
E-Mail: kompernass@lidl.co.uk
IAN 275170
IE Service Ireland
Tel.: 1890 930 034
(0,08 EUR/Min., (peak))
(0,06 EUR/Min., (off peak))
E-Mail: kompernass@lidl.ie
IAN 275170
CY Service Cyprus
Tel.: 8009 4409
E-Mail: kompernass@lidl.com.cy
IAN 275170
Importer
KOMPERNASS HANDELS GMBH
BURGSTRASSE 21
44867 BOCHUM
GERMANY
www.kompernass.com
Περιεχόμενα
Εισαγωγή 45
KOMPERNASS HANDELS GMBH
BURGSTRASSE 21
44867 BOCHUM
GERMANY
www.kompernass.com
Inhaltsverzeichnis
Einleitung 91
KOMPERNASS HANDELS GMBH
BURGSTRASSE 21
44867 BOCHUM
GERMANY
www.kompernass.com
KOMPERNASS HANDELS GMBH
BURGSTRASSE 21
44867 BOCHUM
DEUTSCHLAND / GERMANY
www.kompernass.com


- GR CY
- CONTENTS
- RECIPES 34
- CLEANING AND CARE 39
- TROUBLESHOOTING 40
- DISPOSAL 41
- WARRANTY AND SERVICE 41
- IMPORTER 42
- INTRODUCTION
- INTENDED USE
- PACKAGE CONTENTS
- DESCRIPTION OF THE APPLIANCE
- FIGURE A
- FIGURE B
- FIGURE C
- TECHNICAL DATA
- IMPORTANT SAFETY INSTRUCTIONS
- A WARNING NOTICE AT THIS HAZARD LEVEL INDICATES A POTENTIALLY HAZARDOUS SITUATION
- WARNING - RISK OF INJURY/FIRE
- CAUTION - PROPERTY DAMAGE
- A WARNING NOTICE AT THIS HAZARD LEVEL INDICATES A POTENTIAL FOR PROPERTY DAMAGE
- NOTE
- SAFETY PRECAUTIONS FOR THE AVOIDANCE OF EXCESSIVE EXPOSURE TO MICROWAVE ENERGY
- △DANGER! ELECTRIC SHOCK
- ⚠ WARNING - RISK OF INJURY
- WARNING - RISK OF INJURY
- ⚠ WARNING - RISK OF FIRE
- WARNING - RISK OF FIRE
- ⚠️ CAUTION – PROPERTY DAMAGE
- NEVER OPERATE THE MICROWAVE WHEN IT IS EMPTY
- NOTES ON SAFE USE
- EARTHING INFORMATION / CORRECT INSTALLATION
- INTERFERENCE WITH OTHER APPLIANCES
- BEFORE YOU BEGIN
- BASIC PRINCIPLES OF MICROWAVE COOKERY
- USE SUITABLE COOKWARE
- FIRST USE
- NOTE ON HEATING UP FOR THE FIRST TIME
- SETTING UP THE DEVICE
- PREPARING THE APPLIANCE
- INSERTING THE TURNTABLE
- OPERATION
- SETTING THE CLOCK
- STANDBY MODE
- SETTING THE KITCHEN TIMER
- CHILD SAFETY LOCK
- QUERY FUNCTIONS
- QUERY THE TIME DURING OPERATION
- QUERY THE POWER LEVEL DURING OPERATION
- PAUSE/CANCEL COOKING OR DEFROSTING OPERATIONS
- HEATING AND COOKING
- MICROWAVE OPERATION
- RISK OF FIRE
- SELECTING THE POWER LEVEL
- PROGRAMMING THE COOKING TIME
- ABORTING/STOPPING AN INPUT PROCESS
- STARTING THE COOKING PROCESS
- QUICK START FUNCTION 1
- QUICK START FUNCTION 2
- GRILL FUNCTION
- GRILL FUNCTION "TOP HEAT" (GR 1)
- GRILL FUNCTION "BOTTOM HEAT" (GR 2)
- GRILL FUNCTION "TOP AND BOTTOM HEAT" (GR 3)
- COMBINATION COOKING MODE "GRILL
- COMBINATION 1 (C 1)
- COMBINATION 2 (C 2)
- COMBINATION 3 (C 3)
- COMBINATION 4 (C 4)
- CONVECTION OPERATION
- CONVECTION OPERATION WITH PREHEATING
- COMBINATION COOKING MODE "CONVECTION
- AUTOMATIC MENU
- STARTING THE AUTOMATIC MENU
- RISK OF INJURY
- EXAMPLE 1
- EXAMPLE 2
- EXAMPLE 3
- BAKING PIZZA
- EXAMPLE
- DEFROSTING
- DEFROSTING BY WEIGHT
- DEFROSTING BY TIME
- RECIPES
- RISSOLES
- PREPARATION
- BAKING FROZEN READY-MADE BREAD ROLLS
- POTATO GRATIN
- INGREDIENTS
- MUFFI NS
- COURGETTE SOUP
- CHOCOLATE APPLE CAKE
- MEAT LOAF
- CLEANING AND CARE
- DISPOSAL
- WARRANTY AND SERVICE
- GB SERVICE GREAT BRITAIN
- IE SERVICE IRELAND
- CY SERVICE CYPRUS
- IMPORTER
- ΠΕΡΙΕΧΌΜΕΝΑ
- INHALTSVERZEICHNIS
Brand : SILVERCREST
Model : SMW 900 EDS B4
Category : Microwave