
CSE1935S - Saw MCCULLOCH - Free user manual and instructions
Find the device manual for free CSE1935S MCCULLOCH in PDF.


| Product type | Gas chainsaw |
| Brand | McCulloch |
| Model | CSE1935S |
| Displacement | 35 cm³ |
| Power | 1.5 kW |
| Guide bar length | 40 cm (16 inches) |
| Chain pitch | 3/8 inch |
| Chain gauge | 0.050 inch |
| Fuel tank capacity | 0.25 L |
| Chain oil tank capacity | 0.15 L |
| Weight (without bar and chain) | 4.2 kg |
| Sound level (LwA) | 108 dB(A) |
| Vibration level (front/rear) | 3.8 / 4.5 m/s² |
| Fuel type | 2-stroke gasoline-oil mixture (40:1) |
| Starting | Manual recoil starter with integrated choke |
| Chain brake | Yes, inertia-activated |
| Chain tensioning | Tool-less, side knob adjustment |
| Routine maintenance | Air filter cleaning, chain sharpening, bar lubrication |
| Available spare parts | Guide bar, chain, spark plug, air filter, carburetor |
| Repairability | Repairability index: 7.5/10 (estimated) |
| Warranty | 2 years parts and labor |
Frequently Asked Questions - CSE1935S MCCULLOCH
User questions about CSE1935S MCCULLOCH
0 question about this device. Answer the ones you know or ask your own.
Ask a new question about this device
Download the instructions for your Saw in PDF format for free! Find your manual CSE1935S - MCCULLOCH and take your electronic device back in hand. On this page are published all the documents necessary for the use of your device. CSE1935S by MCCULLOCH.
USER MANUAL CSE1935S MCCULLOCH
natural_image
Line drawing of a chain-linking device with lever and gear (no text or symbols)CSE1935S
CSE2040S

natural_image
Line drawing of a chain-linking device with lever and gear (no text or symbols)CSE1835
CSE2040

EAC
GB Original Instructions Electric Chainsaw
Ori inalanl itun Elektro-Kettensäge
Read before use and retain for future reference
IC I E INFORMA IONEN
Due to a constant product improvement programme, the factory reserves the right to modify technical details mentioned in this manual without prior notice.
natural_image
Technical line drawing of a hairpin with labeled parts and an arrow indicating a specific part (no text or symbols present)2
natural_image
Technical line drawing of a mechanical tool with no visible text or symbols3

natural_image
Illustration of a person using a power tool to cut a saw (no text or symbols present)4

natural_image
Technical line drawing of a mechanical component with no visible text or symbols5

natural_image
Technical line drawing of a car front panel with no visible text or symbolsD


natural_image
Diagram of a car's side profile with an arrow indicating motion (no text or symbols)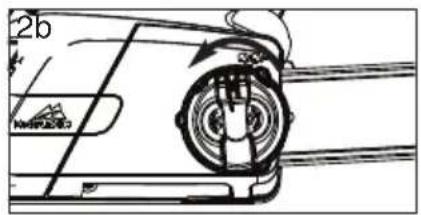
natural_image
Technical illustration of a mechanical chain assembly with an inset showing a close-up of the component (no text or symbols present)
natural_image
Technical line drawing of a vehicle's front wheel assembly (no text or symbols)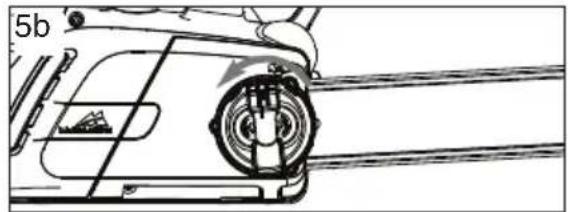
natural_image
Technical line drawing of a mechanical component with no visible text or symbols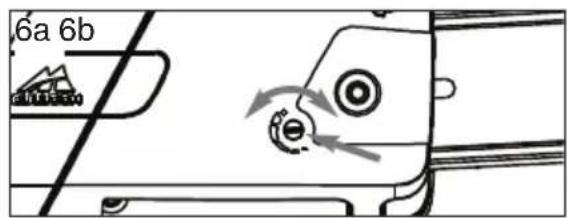

natural_image
Technical line drawing of a vehicle's front wheel assembly (no text or symbols)
natural_image
Diagram of a vehicle's front and rear compartments with no visible text or symbols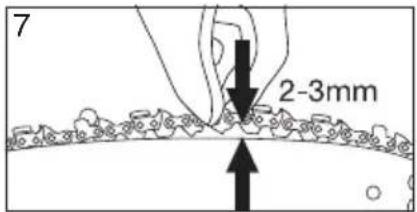

natural_image
Technical line drawing of a vehicle's front wheel assembly (no text or symbols)E
G


4

natural_image
Line drawing of a robotic arm gripping a tool, with no visible text or symbols
natural_image
Line drawing of a screwdriver inserted into a mechanical component (no text or symbols)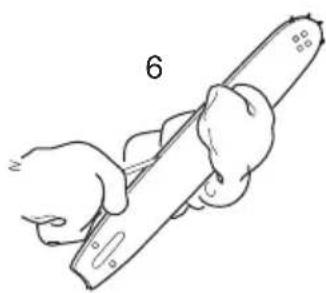
natural_image
Illustration of hands holding a tool or ruler, no text or symbols present
natural_image
Mechanical assembly diagram showing a gear mechanism with no visible text or symbols
natural_image
Line drawing of a hand holding a tool, showing a curved arrow indicating motion (no text or symbols)F

natural_image
Technical line drawing of a vehicle's front and side components, showing engine, dashboard, and sensor assembly (no text or labels)G

12

natural_image
Line drawing of a pair of saw tools, one crossed the other by a diagonal line (no text or symbols)13


14

natural_image
Diagram showing two components: a flat strip being inserted into a clip and a coiled cable with a wavy line, both without any text or symbols.15
natural_image
Mechanical component diagram showing a handle with mounting holes and a curved arrow indicating motion (no text or symbols)H

2
natural_image
Technical line drawing of a chain saw cutting process (no text or symbols)
3
natural_image
Line drawing of a chain saw cutting a blade, showing blade and blade blades (no text or symbols)
4

natural_image
Illustration of a wooden saw cutting through a wooden frame with a knife inserted (no text or symbols)H
5

6

natural_image
Four-step diagram illustrating a mechanical or fluidic process with no text, numbers, or symbols.7

natural_image
Three line drawings of a truck showing different scenarios: moving, wheel turning, and settling (no text or symbols)8
9

10
natural_image
Diagram showing two stages of tree bark cutting, one with a tool and arrow indicating direction (no text or symbols)


natural_image
Technical line drawing of a mechanical device with a coiled cable and a 1/10 scale indicator (no text or symbols beyond the scale)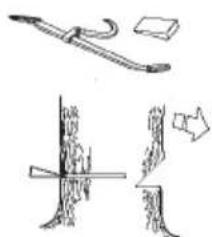
natural_image
Illustration of a tree stump with a tool and a box, showing wood shavings and a drop (no text or symbols)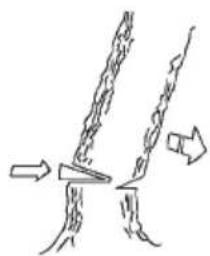
natural_image
Diagram showing two elongated structures with arrows indicating direction, no text or symbols present!

natural_image
Six circular diagrams showing a crossed-out construction or excavation with no text or symbolsA. GENERAL DESCRIPTION
Example of identification label
1) Guaranteed sound power according to directive 2000/14/EC
2) Class II tool
3) CE marking of conformity
4) Rated frequency
5) Rated power
6) Alternating current
7) Rated voltage
8) Type
9) Product code
10) Year of manufacture
11) Maximum length of guide bar
12) Manufacturer's name and address
13) Article number (Electric Chainsaw)
14) Model
15) Serial number
B. SAFETY PRECAUTIONS
MEANING OF SYMBOLS

Wamin
Prote tive goggles or visor, prote tive elmet an earing prote tion

Prote tive t-proof gloves

Prote tive long, t-proof tro sers
C ain brake: ea tivate, a tivate


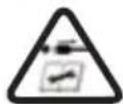
emove pl g from t e mains imme iately if t e able is amage or t

Keep bystanders away
General Power Tool Safety Warnings

WARNING Read all safety warnings and all instructions. Failure to follow the warnings and
Instructions may result in electric shock, fire and/or serious injury.
Save all warnings and instructions for future reference. The term "power tool" in the warnings refers to your mains-operated (corded) power tool or battery-operated (cordless) power tool.
Wor area safety
a) oo wor area clean and well lit. Cluttered or dark areas invite accidents.
b) Do not operate lower tools in ex-losive atmos heres, such as in the presence of flammable liquids, gases or dust. Power tools create sparks which may ignite the dust or fumes.
6) ee children and bystanders away while o erating a
ower tool. Distractions can cause you to lose
control.
2 Electrical safety
a) Power tool lugs must match the outlet. Never modify the lug in any way. Do not use any ada tor lugs with earthed (grounded ower tools. Unmodified plugs and matching outlets will reduce risk of electric shock.
b) Avoid body contact with earthed or grounded surfaces, such as i es, radiators, ranges and refrigerators. There is an increased risk of electric shock if your body is earthed or grounded.
c) Do not ex ose ower tools to rain or wet conditions. Water entering a power tool will increase the risk electric shock.
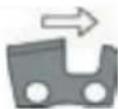
Corre t ire tion of t e tting teet .
Always gript e ma ine wit two an s


Ki kba k anger


Do not expose to rain or moist re.


C ain oil

efrain from

T m t e ma ine off

Dis onnette I before a spin or leanin.

d) Do not abuse the cord. Never use the cord for carrying, ulling or un lugging the ower tool. ee cord away from heat, oil, shar edges or moving arts. Damaged or entangled cords increase the risk of electric shock.
e) When operating a over tool outdoors, use an extension cord suitable for outdoor use. Use of a cord suitable for outdoor use reduces the risk of electric shock.
f) If o erating a ower tool in a dam location is unavoidable, use a residual current device (RCD protected su ly. Use of an RCD reduces the risk off electric shock.
a) Stay alert, watch what you are doing and use common sense when operating a power tool. Do not use a power tool while you are tired or under the influence of drugs, alcohol or medication. A moment of inattention while operating power tools may result in serious personal injury.
b) Useersonal rotective equi ment. Always wear eye
rotection. Protective equipment such as dust mask,
non-skid safety shoes, hard hat, or hearing protection
used for appropriate conditions will reduce personal
injuries.
c) Prevent unintentional starting. Ensure the switch is in the off- position before connecting to ower source and/or battery ac , ic ing u or carrying the tool. Carrying power tools with your finger on the switch or energising power tools that have the switch on invites accidents.
3 Personal safety
d) Remove any adjusting key or wrench before turning the power tool on. A wrench or a key left attached to a rotating part of the power tools may result in personal injury.
e) o not overreach. eep proper footing and balance at all times. This enables better control of the power tool in unexpected situations.
f) ress properly. o not wear loose clothing or jewellery. Keep your hair, clothing and gloves away from moving parts. Loose clothes, jewellery or long hair can be caught in movingparts.
g) If devices are provided for the connection of dust e traction and collection facilities ensure these are connected and properly used. Use of dust collection can reduce dust-related hazards. ower tool use and care
a) o not force the power tool. se the correct power tool for your application. The correct power tool will do the job better and safer at the rate for which it was designed.
b) o not use the power tool if the switch does not turn it on and off. Any power hold that can be controlled with the switch is dangerous and must be repaired.
c) isconnect the plug from the power source and or the battery pack from the power tool before making any adjustments changing accessories or storing power tools. Such preventive safety measures reduce the risk of starting the power tool accidentally.
d) Store idle power tools out of the reach of children and do not allow persons unfamiliar with the power tool or these instructions to operate the power tool. Power tools are dangerous in the hands of untrained users.
e) aintain power tools. Heck for misalignment or binding of moving parts breakage of parts and any other condition that may affect the power tool's operation. If damaged have the power tool repaired before use. Many accidents are caused by poorly maintained power tools.
f) eep cutting tools sharp and clean. Properly maintained cutting tools with sharp cutting edges are less likely to bind and are easier to control.
g) se the power tool accessories and tool bits etc. in accordance with these instructions taking into account the working conditions and the work to be performed. Use of the power tool for operations: different from those intended could result in a hazardous situation.
- Service
a) ave your power tool serviced by a qualified repair person using only identical replacement parts. This will ensure that the safety of the power tool is maintained.
ety r g :
- eep all parts of the body away from the saw chain when the chain saw is operating. Before you start the chain saw make sure the saw chain is not contacting anything. A moment of inattention while operating chain saws may cause entanglement by your clothing or body with the saw chain.
- Always hold the chain saw with your right hand on the rear handle and your left hand on the front handle. Holding the chain saw with a reversed hand configuration increases the risk of personal injury and should never be done.
- old the power tool by insulated gripping surfaces only because the saw chain may contact hidden wiring or its own cord. Saw chains contacting a "live" wire may make exposed metal parts of the power tool "live" and could give the operator an electric shock.
- ear safety glasses and hearing protection. Further protective equipment for head hands, legs and feet is recommended. Adequate protective clothing will reduce personal injury by flying debris or accidental contact with the saw chain.
- o not operate a chain saw in a tree. Operation of chain saw while up a tree may result in personal injury.
- Always keep proper footing and operate the chain saw only when standing on fi ed secure and level surface. Slippery or unstable surfaces such as
ladders may cause a loss of balance or control of the chain saw.
- hen cutting a limb that is under tension be alert for spring back. When the tension in the wood fibres is released the spring loaded limb may strike the operator and/or throw the chains saw out of control.
- see treme caution when cutting brush and saplings. The slender material may catch the saw chain and be whipped forward toward you or pull you off balance.
- carry the chain saw by the front handle with the chain saw switched off and away from your body. hen transporting or storing the chain saw always fit the guide bar cover. Proper handling of the chain saw will reduce the likelihood of accidental contact with the moving saw chain.
- ollow instructions for lubricating chain tensioning and changing accessories. Improperly tensioned or lubricated chain may either break or increase the chance for kickback.
- eep handles dry clean and free from oil and grease. Greasy, oily handles are slippery causing loss of control.
- ut wood only. o not use chain saw for purposes not intended. or e ample do not use chain saw for cutting plastic masonry or non wood building materials. Use of the chain saw for operations different than intended could result in a hazardous situation.
auses and operator prevention of kickback
Kickback may occur when the nose or tip of the guide bar touches an object, or when the wood closes in and pinches the saw chain in the cut.
Tip contact in some cases may cause a sudden reverse reaction, kicking the guide bar up and back towards the operator.
Pinching the saw chain along the top of the guide bar may push the guide bar rapidly back towards the operator.
Either of these reactions may cause you to lose control of the saw which could result in serious personal injury. Do not rely exclusively upon the safety devises built into your saw. As a chain saw user, you should take several steps to keep your cutting jobs free from accident or injury.
Kickback is a result of tool misuse and/or incorrect operating procedures or conditions and can be avoided by taking proper precautions as given below:
- aintain a firm grip with thumbs and fingers encircling the chain saw handles with both hands on the saw and position your body and arm to allow you to resist kickback forces. Kickback forces can be controlled by the operator, if proper precautions are taken. Do not let go off the chainsaw.
- o not overreach and do not cut above shoulder height. This helps prevent unintended tip contact and enables better control of the chain saw in unexpected situations.
- nly use replacement bars and chains specified by the manufacturer. Incorrect replacement bars and chains may cause chain breakage and/or kickback.
- ollow the manufacturer's sharpening and maintenance instructions for the saw chain. Decreasing the depth gauge height can lead to increased kickback.
Additional Safety Recommendations
- anual use. All persons using this machine must read the user manual completely with extreme care. The user manual must be included with the machine in the case of sale or loan to another person.
- precautions prior to machine use. Never permit this machine to be used by any persons who are not perfectly familiar with the manual instructions. Inexperienced persons must follow a training period operating on a saw horse only.
-
control checks. Check the machine with care before use each time, especially if it has been subject to strong impact, or if it shows any signs of malfunction. Perform all operations described in the chapter "Maintenance & Storage – Before each use".
-
Repairs and Maintenance. All the machine parts that can be replaced personally, are clearly explained in the "Assembly / disassembly" instructions chapter. Where necessary, all other machine parts must be replaced exclusively by an Authorised Service Centre.
-
t in . i 4) When using this machine the user must wear the following approved individual protective clothing: close-fitting protective clothing, safety boots with non-slip soles, crush-proof toe protectors and cut-proof protection, cut-proof vibration-proof gloves, protective goggles or safety visor, ear protection muffs and helmet (if there is any danger of falling objects).
-
eat preca ti ns i rati ns and ise o e s. Avoid using the machine for long periods of time: the noise and vibrations can be dangerous causing irritation, stress, fatigue and hypacusia (hearing problems). Prolonged machine use exposes the user to vibrations that can generate “white finger phenomenon” (Raynaud’s Phenomenon), carpal tunnel syndrome and similar disturbances.
-
eat preca tins o ica a ents. Avoid all chain oil contact with skin and eyes.
-
eat preca ti ns - eat. During use, sprocket and chain reach very high temperatures, take care not to touch these parts while hot.
-
R This machine produces an electromagnetic field during operation. This field may under some circumstances interfere with active or passive medical implants. To reduce the risk of serious or fatal injury, we recommend persons with medical implants to consult their physician and the medical implant manufacturer before operating this machine.
transp rt and st ra e preca ti ns. i ) Each time the work area is changed to another location, disconnect the machine from the mains supply and activate the chain brake lever. Mount the guide bar cover guard each time before transporting or storage. Always carry the machine by hand with the bar facing backwards, or when transporting the machine in a vehicle, always attach it securely to prevent damage.
ic ac reacti n. i 4) The kickback reaction consists of a violent upwards-reverse action of the bar towards the user. This generally occurs if the upper part of the bar nose (called the "kickback danger zone") comes into contact with some object, or if the chain is blocked in the wood. Kickback can make the user loose control of the machine provoking dangerous and even fatal accidents. The chain brake lever and other safety devices are not sufficient to protect the user against injury: the user must be well aware of the conditions that can provoke the reaction, and prevent them by paying very close attention according to experience, together with prudent and correct machine handling (for example: never cut several branches at a time because this can cause accidental impact on the "kickback danger zone" r area sa et
-
Never allow children or people unfamiliar with these instructions to use the product. Local regulations may restrict the age of the operator.
-
Only use the product in the manner and for the functions described in these instructions.
-
Check the whole work area carefully to check for any danger source (e.g.: roads, paths, electric cables, dangerous trees, etc)
-
Keep all bystanders and animals well clear of the work area (where necessary, fence off the area and use warning signs) at a minimum distance of 2.5 x the trunk height; in any case no less than ten metres.
-
The operator or user is responsible for accidents or hazards occurring to other people or their property.
ectrica sa et
-
It is recommended that you use a Residual Current Device (R.C.D.) with a tripping current of not more than 30mA. Even with a R.C.D. installed 100% safety cannot be guaranteed and safe working practice must be followed at all times. Check your R.C.D. every time you use it.
-
Before use, examine cable for damage, replace it if there are signs of damage or ageing.
-
Do not use the product if the electric cables are damaged or worn.
-
Immediately disconnect from the mains electricity supply if the cable is cut, or the insulation is damaged. Do not touch the electric cable until the electrical supply has been disconnected. Do not repair a cut or damaged cable. Replace it with a new one.
-
Your electric cable must be untangled, tangled cables can overheat and reduce the efficiency of your product.
-
Always make sure that the cable/ extension cord is kept behind the user, ensuring that it does not create a source of danger for the user or for other persons, and check that it cannot be damaged (by heat, sharp objects, sharp edges, oil, etc);
-
Position the cable so that it will not be caught on branches and the like, during cutting.
-
Always switch off at the mains before disconnecting any plug, cable connector or extension cable.
-
Switch off, remove plug from mains and examine electric supply cable for damage or ageing e re winding cable for storage. Do not repair a damaged cable, replace it with a new one. Use only Husqvarna Outdoor Products replacement cable.
-
Remove the plug from the mains before leaving the product unattended for any period.
-
Always wind cable carefully, avoiding kinking.
-
Use only on AC mains supply voltage shown on the product rating label.
-
The chainsaw is double insulated to EN60745. Under no circumstances should an earth be connected to any part of the product.
a es
-
Mains cables and extensions are available from your local Approved service centre
-
Only use approved extension cables
-
Extension cables and leads should only be used if they are designed for outdoor use and comply with H07 RN-F or IEC 60245 designation 66.
-
If you want to use an extension cable when operating your product, only the following cable dimensions should be used:
M de s
- 5.0 mm ^2 : max length 40 m
- 5.0 mm ^2 : max length 60 m
- 8.0 mm ^2 : max length 100 m
M de s
4
4
- 5.0 mm ^2 : max length 50 m
- 8.0 mm ^2 : max length 90 m
.SAFETY EQUIPMENT DESCRIPTION
SWITCH BLOCK
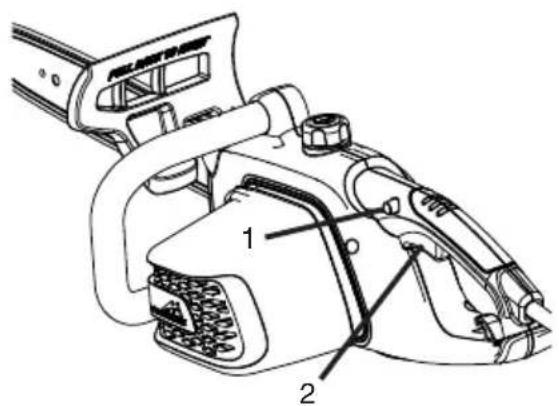
Your machine is equipped with a device that when deactivated, stops the switch from being pressed thus preventing accidental start-up.
Your machine is equipped with a device that blocks the chain immediately as soon as the switch is released; If this device should not work at any time, the machine must NOT be used and must be taken to an Authorised Service Centre.
RONT HAND ARD CHAIN BRAKE LE ER
The front hand guard is designed to prevent your left hand from coming into contact with the chain (on condition that the machine is held correctly according to instructions). The front hand guard also acts as a chain brake, including a device that blocks the chain in less than 0.15 of a second in the case of kickback. The chain brake is released when the front hand guard is pulled backwards and clicked in position (the chain is able to move). The chain brake is activated when the front hand guard is pushed forward (the chain is blocked). The chain brake can be activated using the left wrist by pushing forwards, or when the wrist comes into contact with the front hand guard as a result of kickback. When the machine is used with the bar in horizontal position, for example during tree felling, the chain brake offers less protection.
N.B.: When the chain brake is activated, a safety switch cuts off all current to the motor.

CHAIN CATCHER
This machine is equipped with a chain catcher located under the sprocket. This mechanism is designed to stop the backward chain movement in the case of chain breaking or derailing. These situations can be avoided by ensuring correct chain tension (Refer to chapter "D. Assembly/disassembly").
REAR HAND ARD
This acts to protect breaking or derailing. the hand in the case of chain
D. ASSEMBLY / DISASSEMBLY
BAR AND CHAIN ASSEMBLY
Assembly methods change according to the type of your machine- so please take care to refer to the illustrations and machine type marked on the label. Take great care when assembling to ensure this is performed correctly.

natural_image
Technical line drawing of a mechanical component with no visible text or symbols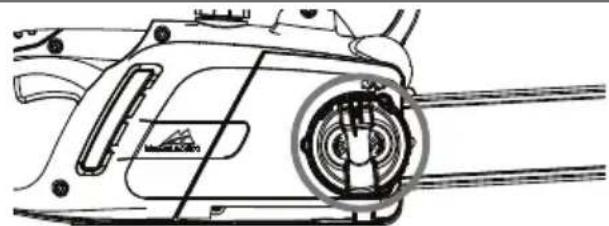
natural_image
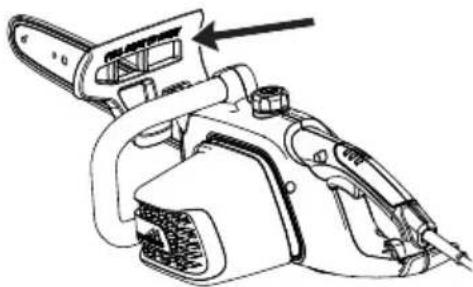
Technical line drawing of a mechanical component with internal gear assembly (no text or symbols)- Check that the chain brake is not activated. If so, deactivate it. 2a. Unscrew the bar retaining nut and remove the 2b. Unscrew the bar retaining knob and remove drive sprocket cover. the drive sprocket cover.
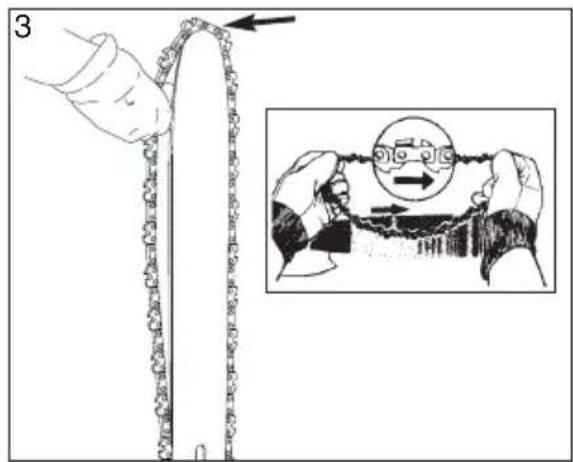
3 Position the chain over the bar, starting at the nose sprocket, fitting into the bar guide groove. Ensure that the sharp side of the cutting teeth face in a frontward direction on the upper part of the bar. Wear Gloves.
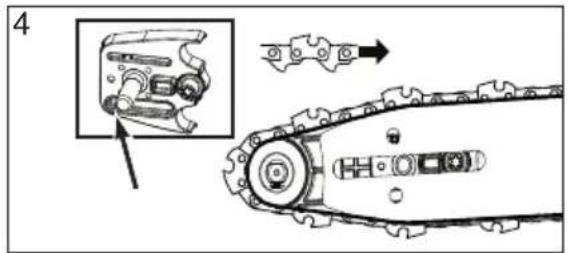
- Ensure the chain tensioner pin is as far back towards the drive sprocket as possible. Mount the bar on the bar retaining screw and the chain tensioner pin and position the chain over the drive sprocket. Replace the drive sprocket cover, ensuring the drive teeth of the chain are engaged in the drive sprocket and in the guide groove.
5a. Screw the bar retaining nut by hand until loosely 5b, Screw the bar retaining knob until loosely tightened. tightened.
6a. To tension the chain, screw the chain tensioner 6b. To tension the chain, screw the chain screw in a clockwise direction using the spanner/ tensioner outer knob in a clockwise direction. screwdriver provided. To reduce tension screw in an To reduce tension screw in an anti-clockwise anti-clockwise direction when performing this operation, direction. (when performing this operation, ( keep the bar nose raised upwards) keep the bar nose raised upwards)
- Tension the chain until the tension is correct. Pull the chain away from the bar and ensure gap measures approx 2-3mm
8a. Tighten the bar retaining nut using the spanner/ 8b. Tighten the bar until securely tightened. screwdriver provided
Tensioning the chain too tightly will overload the motor and cause damage, insufficient tension can provoke chain derailing, whereas a chain tightened correctly provides the best cutting characteristics and prolonged work life. Check the tension regularly because the chain length tends to stretch with use (especially when the chain is new; after the first assembly, the chain tension must be checked after 5 minutes machine operation); in any case do not tighten the chain immediately after use, but wait until it cools down. In cases where the loosened chain needs to be adjusted, always unscrew the bar retaining nut / knob before adjusting the chain tensioning screw / knob; adjust the tension and tighten the bar retaining nut / knob accordingly.

E. START-UP AND STOPPING
Start-up: grip both handles firmly, release the chain brake lever whilst ensuring hand is still on front handle, press and maintain the switch block pressed in, then press the switch (at this point the switch block can be released).
St : The machine will stop whenever the switch is released. In the case where the machine does not stop, activate the chain brake, disconnect the cable from the main line socket and take the machine to the Authorised Service Centre.
. AR AND AIN U RI ATION
Insufficient lubrication will provoke
chain breaking and can cause serious and even fatal injury.
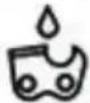
Bar and chain lubrication is performed by an automatic pump.
Refer to "Maintenance & Storage" for indications on ensuring that the chain oil is sufficiently distributed.
a
Always use new oil only (special type for chains) with adequate viscosity: the oil must adhere well and guarantee good running properties in both winter and summer. If chain oil is not available, EP 90 transmission oil can be used.
Never use waste oil because this is this harmful to health, the machine and the environment. Make sure that the oil is suitable for the temperature of the environment where the tool will be used: For temperatures under 0°C certain oils become thicker, overloading the pump and causing damage. Contact your Authorised Service Centre for advice on oil choice.
ta
Unscrew the oil tank cap, and fill the tank taking care not to spill any oil (if this occurs clean the machine carefully) and then screw the cap back on tightly.
G. AINTENAN E AND STORAGE

In cases where work environments are particularly dirty or dusty, the operations described must be performed more frequently than mentioned in the instructions.
r a u
Check that the chain oil pump functions correctly: direct the bar towards a clear surface at a distance of about 20 centimetres; after the machine has run for about a minute, the surface should show clear traces of oil.
Check that excessive strength is not needed for activating and deactivating the chain brake. Also check that it is not activated too easily and that it is not blocked. Then check chain brake function as follows: release the chain brake, grip the machine correctly and start up the machine, activate the chain brake by pushing the front hand guard forward with the left wrist or arm but without removing the hand from the handle . If the chain brake is working correctly, the chain should be stopped immediately. Check that the chain is sharpened correctly, in good working condition and that the tension is correct. If the chain is irregularly worn, or if the cutting teeth are only 3 mm long, the chain must be replaced . Clean the air vents regularly to prevent motor overheating
Check that the switch and switch block function correctly (to be performed with the chain brake released): press the switch and the switch block and ensure that they return to idle position as soon as they are released; check that it is impossible to press the switch without activating the switch block. Check that the chain catcher and the right hand guard are in correct condition without any visible faults such as damaged material.
r - ur u
Check the bar condition, if necessary clean the lubrication holes and the guide grooves carefully; If the groove is worn or shows signs of deep notching, it must be replaced. Clean the drive sprocket regularly and check that it has not been subject to excess wear. Lubricate the nose sprocket with bearing grease through the hole shown in the illustration.
a ar ar
If the chain does not cut correctly, or requires hard bar pressure against the wood, and if the sawdust is very fine, this is a sign that it is not sharpened correctly. If the cutting action produces no sawdust, this means the cutting edge has been worn completely and the chain is pulverising the wood during cutting. A well-sharpened chain crosses through the wood without effort or pressure and produces large long wood shavings.
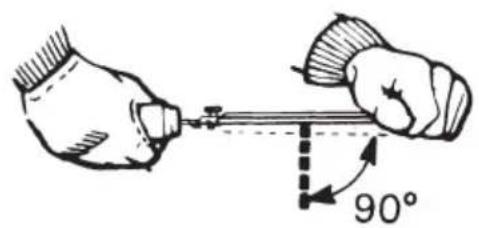
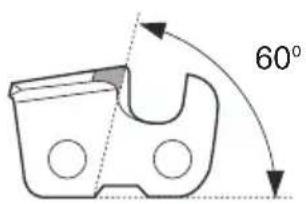
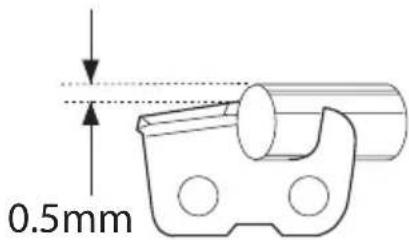
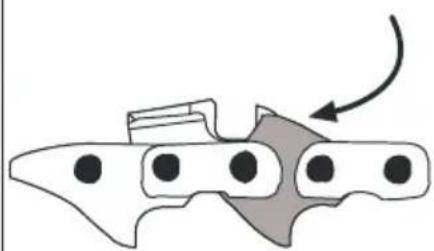
The cutting side of the chain is composed of the cutting link with a cutting tooth and a cutting limit gauge. The difference between these determines the cutting depth; a file guide and a 4mm diameter round file are needed to obtain good sharpening results; Follow the instructions below: Once the chain has been mounted and the tension is correctly adjusted, and the chain brake is activated, position the file guide perpendicular to the bar as shown in the illustration, filing the cutting teeth at the angle shown, always working from the interior towards the exterior, lessening the pressure during the return stage (it is very important to follow the instructions perfectly: excessive or insufficient sharpening angles or an incorrect file diameter will increase the risk of kickback.) To obtain higher precision on side angles, it is advisable to position the file so that it exceeds the upper cutter by about 0.5 mm. File all the teeth on one side first, then turn the machine over and repeat the operation. Make sure that after sharpening operations, all teeth are the same length and that the height of the depth gauge is 0.6 mm lower than the upper cutter: check the height using a proper template and file (with a flat file) all protruding parts, rounding off the front part of the depth gauge, paying attention to not file the kickback protection tooth
r ur u
Take the machine to the Authorised Service Centre for general revision and control check on brake components.
St ra
Store the product in a cool dry place and out of reach of children. Do not store outdoors.
(fig.1) When using the machine, prevent:
- cutting in conditions where the trunk could split during cutting (wood under pressure, dry dead trees, etc): sudden splitting can be very dangerous.
- the bar or the chain from becoming blocked in the cutting notch: if this should occur, disconnect the machine from the main electricity supply and try to raise the trunk using an appropriate tool as a lever; do not attempt to free the machine by shaking or pulling as this could cause damage or injury.
- situations that can lead to kickback reactions.
- using the product above shoulder height
- cutting wood with foreign objects e.g. nails (fig.1) uring machine use:
- When cutting on stopping ground, always work uphill of the trunk to avoid being hit if the trunk should roll downhill.
- When felling trees, always finish the job: a partially cut tree could break and fall.
- At the end of each cutting operation the user will notice a considerable change in the strength necessary for controlling the machine. Great care must be taken not to loose control. Below is a description of two different types of cutting operation:
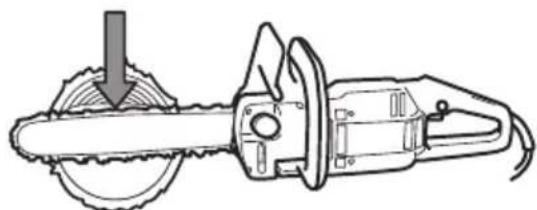
Cutting action by pulling the chain (from top to bottom) (fig.) can lead to dangerous sudden movement of the machine towards the trunk with consequential loss of control. Where possible, use the spiked bumper during cutting operations.
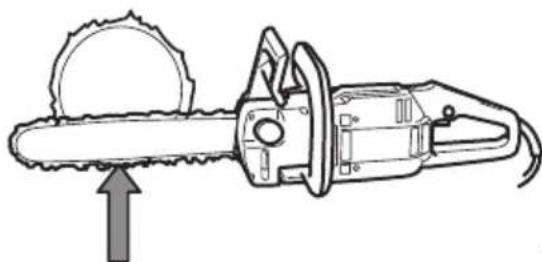
Cutting action pushing the chain (from bottom to top) (fig.) will lead to the danger of a sudden movement of the machine in the direction of the user, with the risk of hitting the user, or an impact of the "kickback danger zone" on the trunk resulting in strong kickback; extreme care must be taken when cutting in this manner.
The safest method for using the machine, is to block the log on a sawhorse, cutting from top to bottom, on the portion outside the sawhorse. (fig.)
pi e umper use.
Where possible, use the spiked bumper to ensure safer cutting action: plant it in the bark or surface of the trunk in order to maintain more control over the machine. Below are descriptions of typical cutting procedure to be adopted for specific situations. However, these should be assessed each time to calculate whether the method is most suitable or not, In order to use a method with the least possible risk.
run n the gr un . (Risk of touching the ground with the chain once the bar has passed through the trunk (fig. ) Cut from top to bottom through the whole trunk. Towards the end of the cut, proceed very carefully to prevent the chain from hitting the ground. If it is possible, cut 2/3 of the trunk, roll it over, and cut the remaining third from top to bottom to limit the risk of the chain touching the ground. Trunk supported at one end only (Risk of trunk breaking during cutting action). (fig. )
Begin the cut from underneath for about 1/3 of the diameter, and then finish the cutting action from the top to meet the undercut.
Trunk supported at both ends. (Risk of pinching the chain). (fig.)
Begin the cut from above for about 1/3 of the diameter, and then continue from underneath to meet the overcut.
run a ing nas pe. Always stand on the uphill side of the log. When 'cutting through', to maintain complete control, release the cutting pressure near the end of the cut without relaxing your grip on the chainsaw handles. Do not let the chain contact the ground.
ree fe ing.
: Never attempt to fell a tree if you do not have the necessary experience, and in any case never fell trees that have trunks with a diameter larger than the length of the bar! This operation is reserved for expert machine users with adequate equipment.
When felling a tree, the aim is to have the tree fall in the most convenient position for the following limbing and bucking operations. (Avoid trees falling on top of other trees: Felling trees that are entangled with other trees is a very dangerous operation).
First of all decide which is the best direction for the tree to fall by evaluating the following: objects or other plants around the tree, the inclination, the curve, wind direction, and greatest branch concentration. Take into account dead or broken branches that may break off during felling creating a further danger risk.
During tree felling operations in critical conditions, always remove ear protection immediately after cutting operations to be able to listen for unusual noises and any warning signals.
re iminar cutting perati ns an i entif ing the retreat path.
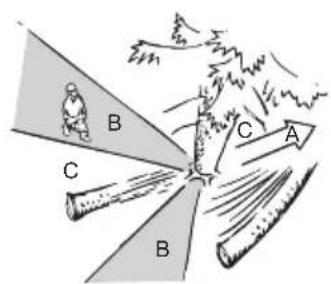
Eliminate any branches that interfere with the job (fig.8), starting from top to bottom, and then, always keeping the trunk between the user and the machine eliminate the more difficult branches afterwards, piece by piece. Eliminate all plants that interfere with work operations and control the area for possible obstacles (rocks, roots, ditches, etc.) when planning the retreat path (to follow during tree fall); Refer to the illustration (fig.9) for the directions to be maintained (A. predicted tree fall direction. B. Retreat path. C. Danger zone).
(fig.1)
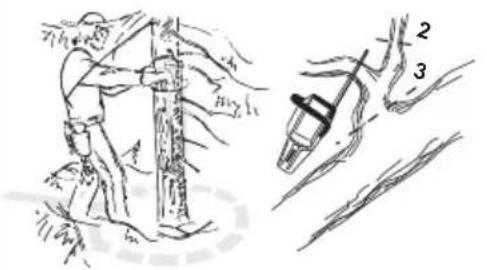
In order to ensure that the user has complete control over the tree fall, the cutting instructions are as follows: The cut that controls the fall direction of the tree is to be executed first: First of all cut the UPPER PART of the directional notch on the side the tree must fall. Remain on the right hand side of the tree and cut using the chain pull method; then cut the LOWER PART that must meet the end of the upper part. The depth of the directional notch must be ^1/4 of the trunk diameter, with an angle of at least 45° between upper and lower cut. The meeting point between the two sides of the notch is called “directional cut line” This line must be perfectly horizontal at right angles (90°) to the felling direction.
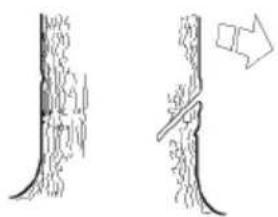
The felling cut that provokes the tree fall, is performed at 3 to 5cm above the lower part of the directional felling cut line, finishing at a distance of 1/10 of the trunk from the notch. Remain on the left hand side of the tree and cut using the chain pulling method and the spiked bumper. Check that the tree does not move in a direction other than that predicted for the fall. As soon as possible insert a felling lever or wedge into the cut. The uncut part of the trunk is called the "hinge", as it is intended to guide the tree as it falls; in cases where the cuts are not sufficient, not straight, or have been cut through completely, the tree fall cannot be controlled (extremely dangerous!). For this reason the various cuts must be performed with great precision.
When cutting operations are completed the tree will begin to fall. Where necessary help tree fall using wedges or felling levers.
im ing
Once the tree has been felled, the trunk must be limbed: in other words, the branches are removed from the trunk. Do not underestimate this operation because the large majority of kickback accidents occur during this stage. For this reason pay close attention to the position of the bar nose during cutting operations and always work on the left hand side of the trunk.
I. ENVIRONMENTAL INFORMATION
This section contains information useful for maintaining the characteristic of ecocompatibility included in the origin design of the machine, and as regards proper use and disposal of chain oil
The operations of filling the oil tank should be carried out in such a way as to avoid spilling oil and contaminating the soil and the environment.
Do not dispose of the machine inappropriately when it is no longer usable. Deliver it to an authorized organization for proper disposal in compliance with the regulation in force.
The symbol ☐ on the product or on its packaging indicates that this product may not be treated as household waste. Instead it shall be handed over to the applicable collection point for the recycling of electrical and electronic equipment. By ensuring this product is disposed of correctly, you will help prevent potential negative consequences for the environment and human health, which could otherwise be caused by inappropriate waste handling of this product. For more detailed information about recycling of this product, please contact your local council office, your household waste disposal service or the shop where you purchased the product.
J. TROUBLESHOOTING TABLE
| Motor does not start with | Motor turns the machine Motor turns Braking difficulty starts but improperly or devices do or loses does not cut at reduced not stop the power properly speeds chain properly | |||
| Make sure the main line is powered | ● | |||
| Make sure the machine is properly plugged in | ● | |||
| Make sure your cable/ext. cord is not damaged | ● | |||
| Make sure that chain brake is not activated | ● | |||
| Check that chain is properly assembled and tensioned | ● | ● | ||
| Check chain lubrification as in chapters F and G | ● | |||
| Make sure that the chain is sharp | ● | |||
| Check cut-out switch is activated | ● | |||
| Contact your authorised centre | ● | ● | ● | |
.RE LA EMENT ARTS
35cm Chain Guide Bar
Part no.: Part no.: 76 6 4
40cm Chain Guide Bar
6 Part no.: 76 6 Part no.:
L. EC DECLARATION OF CONFORMITY
Husqvarna AB, S-561 82, Huskvarna, Sweden
Declare under our sole responsibility that the product(s);
Designation......
Designation of Type(s)......
Identification of Series......
Year of Construction......
Conforms to the essential requirements & provisions of the following EC Directives:
based on the following EU harmonized standards applied:
Notified Body that carried out the EC type-examination
in accordance with article 8 section 2c....TÜV R Reinland LGA Products GmbH
Tillystraße 2
D-90431 Nürnberg
Germany
Certificate no.: BM 50268379
The maximum A weighted sound pressure level L_pA at the workstation, measured according to EN60745-2-13, is given in the table.
The maximum hand / arm vibration weighted value a_h measured according to EN60745-2-13, on a sample of the above product(s) is given in the table.
The declared vibration total value has been measured in accordance with a standard test method and may be used for comparing one tool with another.
The declared vibration total value may also be used in a preliminary assessment of exposure.
The vibration emission during actual use of the power tool can differ from the declared total value depending on the ways in which the tool is used
Operators should identify safety measures to protect themselves that are based on an estimation of exposure in the actual conditions of use (taking account of all parts of the operating cycle such as the times when the tool is switched off and when it is running idle in addition to the trigger time).
2000/14/EC: The Measured Sound Power L_WA & Guaranteed Sound Power L_WA values are according to the tabulated figures.
Conformity Assessment Procedure...... Annex V
Ulm 12/02/2013
P. Lamelli
Global R&D Director - Hand held
Keeper of Technical Documentation

Dry Weight (Kg) 4.3 4.5 4.4 4.6
Power (kW) 1.8 1.9 2.0 2.0
Oil tank volume (cm ^3 ) 240 240 240 240
Maximum length of guide bar (cm) 35 35 40 40
Chain pitch (mm) 9.52 9.52 9.52 9.52
Chain gauge (mm) 1.3 1.3 1.3 1.3
Measured Sound Power LWA (dB(A)) 106 106 106 106 106106 106
Guaranteed Sound Power L_WA (dB(A)) 110 110 110 110
Sound pressure L_pA (dB(A)) 95 95 95 95
Uncertainty K_pA (dB(A)) 2.5 2.5 2.5 2.5
Hand / arm vibration a_h (m/s ^2 ) 7.28 7.28 8.08 8.08
Uncertainty K_ah (m/s ^2 ) 1.5 1.5 1.5
(Ohm) 0.382 0.382 0.382 0.382
Depending on the characteristics of the local electricity supply network, use of this product may result in short voltage drops at the instant of switching on. This may influence other electrical equipment e.g a momentary dimming of a lamp. If the of your electricity supply is less than the value shown in the
table (applicable to your model) then these effects will not occur. The value of the network impedance may be determined by contacting your electricity supply authority
E E E S E SE ES S E S
natural_image
Diagram of a car interior showing dashboard, steering wheel, and dashboard lock (no text or labels)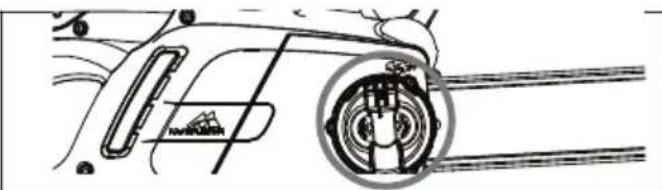
natural_image
Technical line drawing of a vehicle's wheel assembly (no text or symbols)transmissions EP 90.
L. EC DÉCLARATION DE CONFORMITÉ
Husqvarna AB, S-561 82, Huskvarna, Sweden
(Ω) 0.382 0.382 0.382 0.382
r o o or
WAARSCHUWING Lees alle
natural_image
Technical line drawing of a mechanical component with no visible text or symbols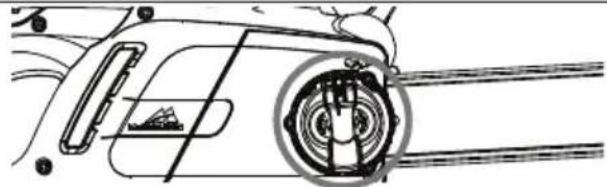
natural_image
Technical line drawing of a car's front wheel assembly (no text or symbols)are r l a esla rea s n


e se r re n e
ede le

e ør

ans as nen
Ta s øpsle ør j s er ng eller rengjør ng

are r ele rs s ø
Elektrisk sikkerhet
natural_image
Technical line drawing of a car interior showing dashboard, steering wheel, and gear mechanism (no text or labels)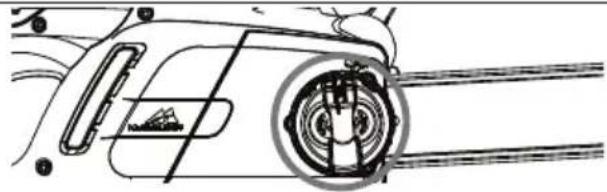
natural_image
Technical line drawing of a car's front wheel assembly (no text or symbols)G. VEDLIKEHOLD OG LAGRING
I. MILJ∅ INNFORMASJON
natural_image
Diagram showing two views of a car's front and side views of the engine, including internal components and structural details (no text or labels)k s as n r isir sk s ä rs sk

kär i ask s an skar
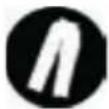
kär i ask sb r

br s LL


ä sna bar k nak nfr n nä n sa närska a r skur n
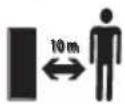
H sk ar b ra
natural_image
Technical line drawing of a vehicle's front and side views showing engine, dashboard, and wheel components (no text or labels)
natural_image
Technical line drawing of a car interior showing dashboard, steering wheel, and gear mechanism (no text or labels)L. EC DECLARATION OF CONFORMITY
Husqvarna AB, S-561 82, Huskvarna, Sweden
Torrvikt (Kg) 4.3 4.5 4.4 4.6
Effekt (kW) 1.8 1.9 2.0 2.0
Global R&D Director - Håndholdt
natural_image
Technical line drawing of a vehicle's front and side views, showing engine compartment and gear assembly (no text or symbols)
natural_image
Technical line drawing of a car interior showing dashboard, wheel, and dashboard components (no text or labels)IAIN ELA AAY ELACA ENA
Director Global I+D - Portátil
R RR NT N R NT RR PT R
natural_image
Technical line drawing of a mechanical component with no visible text or symbols
natural_image
Technical line drawing of a car's front wheel assembly (no text or symbols). A ELA E O S PROBL MAS
natural_image
Technical line drawing of a mechanical component with no visible text or symbols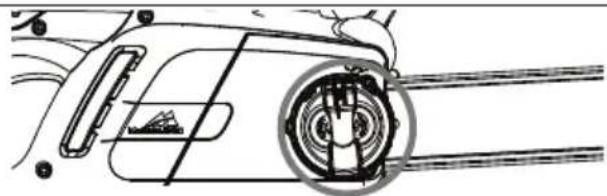
natural_image
Technical line drawing of a car's front wheel assembly (no text or symbols). A ELLA I ICE CAG A I
Incertezza K_pA(dB(A)) 2.5 2.5 2.5 2.5
Vibrazione mano / braccio a _h (m/s ^2 ) 7.28 7.28 8.08 8.08
Incertezza K_ah (m/s ^2 ) 1.5 1.5 1.5 1.5
o i o i (Ω) 0.382 0.382 0.382 0.382
r o o or t or 6
natural_image
Technical line drawing of a car interior showing dashboard, steering wheel, and gear mechanism (no text or labels)
natural_image
Technical line drawing of a car interior showing wheel and dashboard components (no text or symbols)(Ω) 0.382 0.382 0.382 0.382
000- - 6 z
natural_image
Technical line drawing of a mechanical component with no visible text or symbols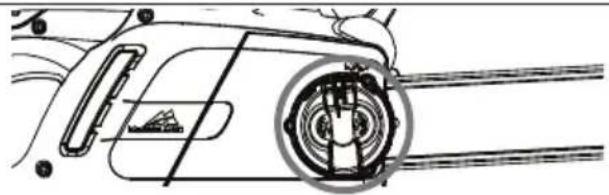
natural_image
Technical line drawing of a car interior showing dashboard, wheel, and dashboard components (no text or labels)Modely CSE1835, CSE1935S:
D. MONTÁŽ / DEMONTÁŽ
MONTÁŽ LIŠTY A PILOVÉHO ŘETĚZU
natural_image
Technical line drawing of a car interior showing dashboard, steering wheel, and gear mechanism (no text or labels)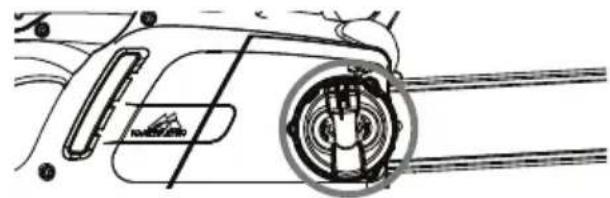
natural_image
Technical line drawing of a car's front wheel assembly (no text or symbols)(Ω) 0.382 0.382 0.382 0.382
ov e o č N 000- -
natural_image
Technical line drawing of a mechanical component with no visible text or symbols
natural_image
Technical line drawing of a car's front wheel assembly (no text or symbols)Delenie ret'aze (mm) 9.52 9.52 9.52 9.52
Hrúbka reťaze(mm) 1.3 1.3 1.3 1.3
Nameraná hodnota úrovne hluku LWA (dB(A)) 106 1065106 1066 1
odeli CSE1835, CSE1935S:
natural_image
Diagram of a car interior showing dashboard and steering wheel (no text or labels)
natural_image
Technical line drawing of a car's front wheel assembly (no text or symbols)Negotovost K_pA (dB(A)) 2.5 2.5 2.5 2.5
Tresljaji roke/dlani a_n (m / s^2) 7.28 7.28 8.08 8.08
Negotovost K_ah (m/s ^2 ) 1.5 1.5 1.5 1.5
(Ω) 0.382 0.382 0.382 0.382
zj v kl d
C. OPIS SIGURNOSNE OPREME
Vaš uređaj je opremljen s napravom 1) koja, kad je isključena, sprječava slučajno uključivanje ako je prekidač pritisnut.
Vaš uređaj je opremljen s napravom koja blokira lanac odmah čim se otpusti prekidač. Ako u bilo kojem trenutku ta naprava ne radi, uređaj NE SMIJETE koristiti i trebate ga odnijeti u ovlašteni servisni centar.
Prednji štitnik za ruku ) napravljen je kako bi spriječio vašu lijevu ruku da dode u kontakt s lancem (pod uvjetom da uređaj držite ispravno u skladu s uputama). Prednji štitnik za ruku radi i kao kočnica lanca, uključujući napravu koja blokira lanac za manje od 0.15 sekunde u slučaju da je došlo do povratnog udara. Kočnica lanca se otpušta kad je prednji štitnik pomaknut prema natrag i uskočio u poziciju uz zvuk klik (lanac se može micati). Kočnica lanca je aktivirana kada je štitnik prednje ruke pomaknut prema naprijed (lanac je blokiran). Kočnica lanca može biti aktivirana upotrebom lijevog ručnog zgloba pomicanjem prema naprijed, ili ako zglob dođe u kontakt s prednjim štitnikom za ruku radi povratnog udara.
(Ω) 0.382 0.382 0.382 0.382
6 k p r
natural_image
Technical line drawing of a vehicle's front and side views, showing structural components without any text or symbols
natural_image
Technical line drawing of a vehicle's front wheel assembly (no text or symbols)natural_image
Technical line drawing of a vehicle's front wheel and dashboard (no text or symbols)
natural_image
Technical line drawing of a car interior showing engine compartment and wheel assembly (no text or symbols)Kēdes zāga drošī as rīd ā
- 5,0 mm²: maks. garums 50 m
-8,0 mm²: maks. garums 90 m
C. DROŠIBAS IERIČU APRAKSTS
natural_image
Technical line drawing of a mechanical component with no visible text or symbols
natural_image
Technical line drawing of a car's front wheel assembly (no text or symbols)- 5,0 mm² : lungime max. 40 m
- 5,0 mm² : lungime max. 60 m
- 8,0 mm² : lungime max. 100 m
ele S S S:
- 5,0 mm² : lungime max. 50 m
- 8,0 mm² : lungime max. 90 m
UL E BL CARE AC MU A RULU
R EC M A BRA E R A LA
natural_image
Technical line drawing of a car interior showing front and side views with no visible text or symbolsnatural_image
Technical line drawing of a mechanical component with no visible text or symbols
natural_image
Technical line drawing of a car's front wheel assembly (no text or symbols)natural_image
Technical line drawing of a car interior showing front and side views with no visible text or symbolsnatural_image
Technical line drawing of a mechanical component with no visible text or symbols
natural_image
Technical line drawing of a mechanical component with a circular inset detail (no text or symbols)natural_image
Technical line drawing of a mechanical component with no visible text or symbols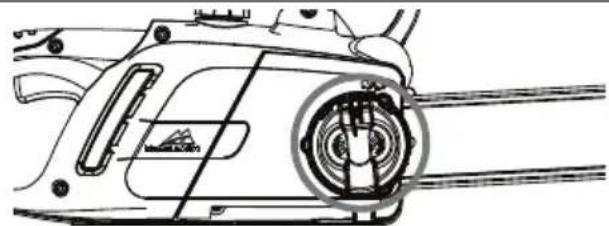
natural_image
Technical line drawing of a car's front wheel assembly (no text or symbols)- Provjerite da kočnica lanca nije aktivirana. Ako je aktivirana, deaktivirajte je.
2a. Odvijte maticu koja pridržava vodilicu i uklonite poklopac lančanika. 2b. Odvijte dugme za zadržavanje koje pridržava vodilicu i uklonite poklopac lančanika.
3 Postavite lanac preko vodilice, počevši od lančanika na vrhu vodilice, i postavite lanac u žlijeb na vodilici. P ž Budite sigurni da je oštra strana zubaca okrenuta prema naprijed na gornjem dijelu vodilice. Nosite rukavice.
- Proverite da je klin zatezača lanca postavljen što je moguće više unatrag, prema disku lančanik. Montirajte vodilicu na vijak za zadržavanje vodilice i klina zatezača lanca i postavite lanac preko pogonskog lančanika. Vratite poklopac pogonskog lančanika, osiguravajući da su pogonski zubi lanca zakačeni na pogonski lančanik i da su u žlijebu vodiča.
5a. Zategnite rukom vijak koji pridržava vodilicu. 5b. Zategnite rukom dugme za zadržavanje koje pridržava vodilicu.
natural_image
Technical line drawing of a mechanical component with no visible text or symbols
natural_image
Technical line drawing of a car's front wheel assembly (no text or symbols)natural_image
Technical line drawing of a mechanical component with no visible text or symbols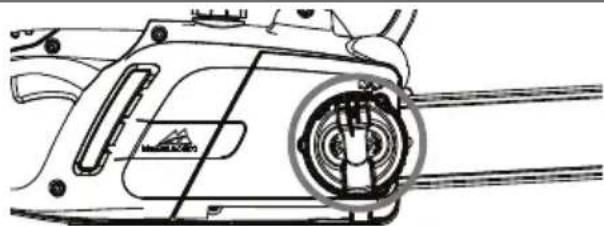
natural_image
Technical line drawing of a car's front wheel assembly (no text or symbols)Our policy of continuous improvement means that the specification of products may be altered from time to time without prior notice.
is part f t e H sqvama Gr p. pyrig t © 2014 Husqvama AB (publ). All rights reserved. McCulloch and t er pr d t and feat re marks are registered r nregistered trademarks f H sqvama AB (p b) r f an affiliated mpany wit in t e H sqvarna Gr p
Husqvarna AB
S-561 82
Huskvarna
Sweden

- EAC
- IC I E INFORMA IONEN
- GENERAL DESCRIPTION
- SAFETY PRECAUTIONS
- MEANING OF SYMBOLS
- General Power Tool Safety Warnings
- Electrical safety
- Personal safety
- ety r g :
- Additional Safety Recommendations
- ectrica sa et
- a es
- M de s
- .SAFETY EQUIPMENT DESCRIPTION
- SWITCH BLOCK
- RONT HAND ARD CHAIN BRAKE LE ER
- CHAIN CATCHER
- REAR HAND ARD
- ASSEMBLY / DISASSEMBLY
- BAR AND CHAIN ASSEMBLY
- START-UP AND STOPPING
- AR AND AIN U RI ATION
- Insufficient lubrication will provoke
- a
- ta
- AINTENAN E AND STORAGE
- r a u
- r - ur u
- a ar ar
- r ur u
- St ra
- (fig.1) When using the machine, prevent:
- pi e umper use.
- ree fe ing.
- re iminar cutting perati ns an i entif ing the retreat path.
- (fig.1)
- im ing
- ENVIRONMENTAL INFORMATION
- .RE LA EMENT ARTS
- EC DECLARATION OF CONFORMITY
- EC DÉCLARATION DE CONFORMITÉ
- Elektrisk sikkerhet
- VEDLIKEHOLD OG LAGRING
- MILJ∅ INNFORMASJON
- IAIN ELA AAY ELACA ENA
- Modely CSE1835, CSE1935S:
- MONTÁŽ / DEMONTÁŽ
- MONTÁŽ LIŠTY A PILOVÉHO ŘETĚZU
- odeli CSE1835, CSE1935S:
- OPIS SIGURNOSNE OPREME
- DROŠIBAS IERIČU APRAKSTS
- UL E BL CARE AC MU A RULU
Brand : MCCULLOCH
Model : CSE1935S
Category : Saw