
BKS 4540 - Saw AL-KO - Free user manual and instructions
Find the device manual for free BKS 4540 AL-KO in PDF.


| Product type | Electric saw |
| Brand | AL-KO |
| Model | BKS 4540 |
| Power | 1200 W |
| Supply voltage | 230 V / 50 Hz |
| Blade diameter | 190 mm |
| Max. cutting depth | 65 mm |
| No-load speed | 4500 rpm |
| Weight | 4.2 kg |
| Dimensions (L x W x H) | 380 x 250 x 280 mm |
| Cable length | 3 m |
| Blade type | Carbide |
| Main functions | Straight cuts, angled cuts up to 45° |
| Safety devices | Blade guard, safety switch, blade brake |
| Maintenance and cleaning | Clean after each use, lubricate moving parts, check screw tightness |
| Spare parts available | Blades, carbon brushes, power cable, blade guard |
| Repairability | Repairability index: 7.6/10 |
Frequently Asked Questions - BKS 4540 AL-KO
User questions about BKS 4540 AL-KO
0 question about this device. Answer the ones you know or ask your own.
Ask a new question about this device
Download the instructions for your Saw in PDF format for free! Find your manual BKS 4540 - AL-KO and take your electronic device back in hand. On this page are published all the documents necessary for the use of your device. BKS 4540 by AL-KO.
USER MANUAL BKS 4540 AL-KO




Table of contents
EN Translation of the original operating instructions.... 27
AL-KO KOBER GROUP Kötz, Germany
This documentation or excerpts therefrom may not be reproduced or disclosed to third parties without the express permission of the AL-KO KOBER GROUP.

FUEL

WARNING!


WARNING!
CHECK OIL SUPPLY

WARNING!

WARNING!


WARNING!
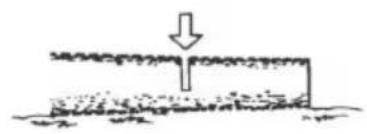
(A) Undercut (B) Felling cut

WARNING!

WARNING!

WARNING!
2. Oil connection


Saw chain

WARNING!
Intended / not intended use....28
Remainder driven....28
Parts location....30
Symbols on the machine....31
For safe operation....33
Installing guide bar and saw chain....35
Fuel and chain oil....36
Operation....38
Sawing....40
Maintenance....42
Maintenance of Saw Chain and Guide Bar....44
Storage....46
Waste disposal and environmental protection....46
Troubleshooting guide....47
Specifications....48
Warranty....49
EC declaration of conformity....49

CAUTION!
Before using our products, please read this manual carefully to understand the proper use of your unit.
Keep this manual handy.

CAUTION!
Instructions contained in warnings within this manual marked with a symbol concern critical points which must be taken into consideration to prevent possible serious bodily injury, and for this reason you are requested to read all such instructions carefully and follow them without fail.

CAUTION!
This mark indicates instructions which must be followed in order to prevent accidents which could lead to serious bodily injury or death.

CAUTION!
This mark indicates instructions which must be followed, or it leads to mechanical failure, breakdown, or damage.

CAUTION!
Read these notes before you start working with the saw and keep them.
Read the instructions carefully. Familiarize yourself with the control elements so that you are able to safely operate the device. Always keep these Operating Instructions together with the chain saw.

CAUTION!
Risk of hearing defects!
Under normal operating conditions, this device can expose the operator to a noise level of 80 dB(A) or more.
The chain-saw shall be held with the right hand on the rear handle and the left hand on the front handle.

CAUTION!
Noise protection!
Please observe the local regulations when operating your device.
INTENDED / NOT INTENDED USE
The chain saw serves trunks, square timbers and for cutting branches, according to the available cutting length. Only materials from wood may be worked on. Sufficient personal protection equipment (PPE) is required according to the operating instructions during the use. This product is not designed for use by a trained operator for pruning and dismantling standing tree crowns. For damage or injuries which resulting from misapplication are responsible by the user/operator and not the manufacturer. Suitable sawing chains, guide bars combinations may be used as mentioned in the operating instructions only for the machine. A component of the intended use is also the attention of the safety references, as well as the operating instructions in the operating instructions. Persons, who serve the machine, must make themselves trained and familiar with this product and think over all the possible dangers. Beyond that the valid rules for the prevention of accidents are to be kept in every detail. Other general rules within ranges according to industrial medicine and in terms of safety are to be considered. Changes in the machine completely exclude an support of the manufacturer and from it developing damage and lead to expiring the warranty. This equipment is designed for use in home garden.

WARNING!
Please observe the national regulations for the use of chain saws! (Work safety, environment)
REMAINDER DRIVEN
Also when appropriate using the tool always remains a certain residual risk, which cannot be excluded. From the kind and construction of the tool the following potential endangerments can be derived:
■ Contact with the unprotected sawing chain (cuts) ■ Unexpected, sudden movement of the sawing sword (cuts) ■ Damage of the ears, if no prescribed protection of the ears is carried Inhale from poisonous particle, exhaust gases of the combustion engine ■ Contact of gasoline on the skin
Noise. A degree of noise from the machine is not avoidable. Route noisy work is to be licensed and limits for certain periods. Keep rest periods and they may need to restrict the working hours to a minimum. For their personal protection and protection of people working nearby, an appropriate hearing protection shall be worn
Vibration. Warning: The actual existing vibration emission value during use of the machine can deviate from the manual or the manufacturer specified. This can be caused by the following factors, before or during each of use should be considered:
If the machine is used correctly If the method of cutting the material and how it is processed correctly The use of the machine state is in the regulatory Sharpness condition of cutting tool or cutting tool real
The grab handles are mounted back to optional vibration handles and are they fixed to the machine body.
If you notice an unpleasant sensation or skin discoloration during use of the machine on your hands once you stop working. Place an adequate work breaks. In disregard of adequate work breaks, there may be a hand-arm vibration syndrome.
PARTS LOCATION


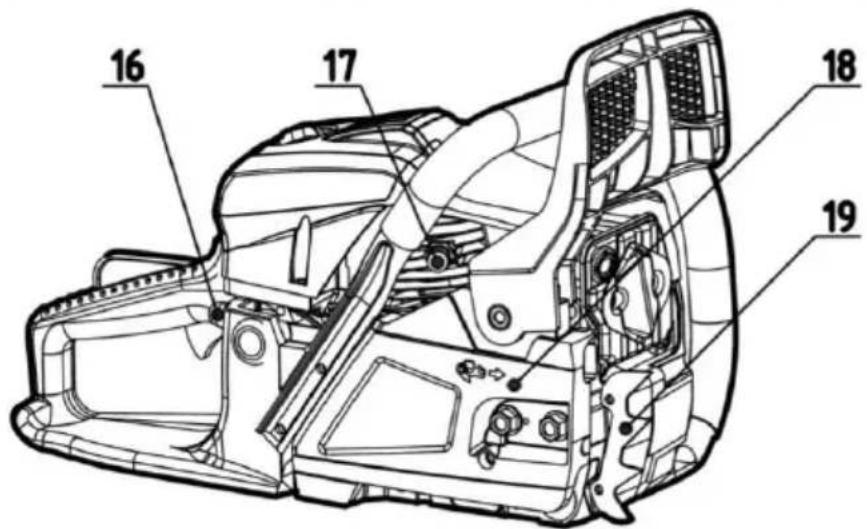
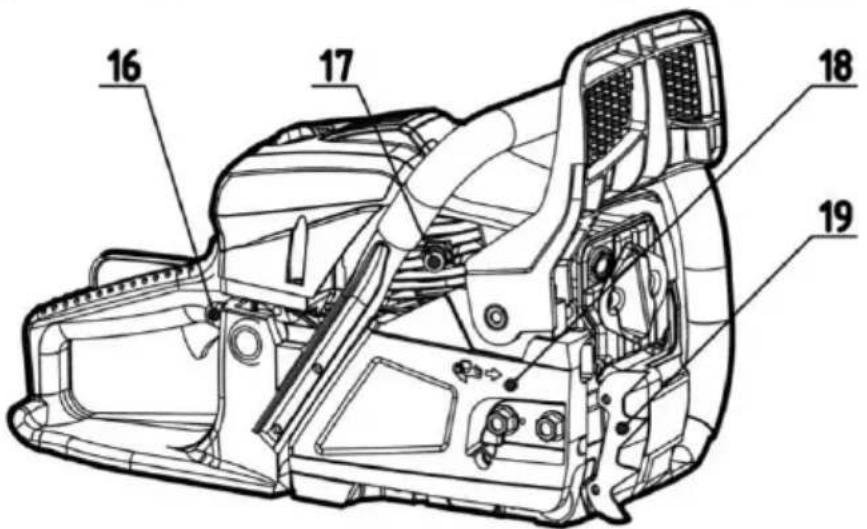
| 1 Saw chain 11 Engine switch | ||
| 2 Guide bar 12 Fuel tank | ||
| 3 Front hand guard 13 Oil tank | ||
| 4 Starter handle 14 Front handle | ||
| 5 Air filter cover 15 Guide bar cover | ||
| 6 Air filter lock nut 16 Primer bulb | ||
| 7 Choke knob 17 Decompression valve (if equipped) | ||
| 8 Throttle trigger lock-out 18 Clutch cover | ||
| 9 Rear handle 19 Spiked bumper |
10 Throttle trigger
SYMBOLS ON THE MACHINE
 | Read, understand and follow all warnings. |
 | Warning! Danger of kickback. Beware of chain saw kickback and avoid contact with bar tip. |
 | Do not use chain saw one-handed. |
 | Always use chain saw two-handed. |
 | Appropriate ear, eye, and head protection must be worn |
 | Read operator's instruction book before operating this machine. |
 | Always wear safety and anti-vibration(AV) gloves when operating the device. |
 | Always wear safety and slip-resistant boots when operating the device. |
For safe operation and maintenance, symbols are carved in relief on the machine. According to these indications, please be careful not to make any mistake.


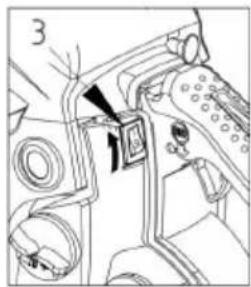
 STOP STOP | Operate the engine switch Flipping the switch to the "O" position, immediately the engine stops. Position: rear at the left side of the rear handle |
 PULL PULL | Operate the choke knob Pull out the choke knob, close the choke; push in the choke knob, open the choke. Position: Air filter cover |
 | Adjust the oil pump If you turn the rod by screwdriver follow the arrow to the "MAX" position, the chain oil flow more, and if you turn to the "MIN" position, less. Position: Bottom of the power unit |
 | The screw under the "H" stamp is The High-speed mixture adjustment screw. Position: upper-left of the rear handle |
 | The screw under the "L" stamp is The Slow-speed mixture adjustment screw Position: upper-left of the rear handle |
 | The screw up the "T" stamp is the idle speed adjustment screw. Position: upper-left of the rear handle |
 | Shows the directions that the chain brake is released (white arrow) and activated (black arrow). Position: Front of the guide rail |
 | Shows the direction of the saw chain installation. Position: Front of the guide rail |
 | Guaranteed sound power level: 115 dB(A) |
 | Engine manual start |
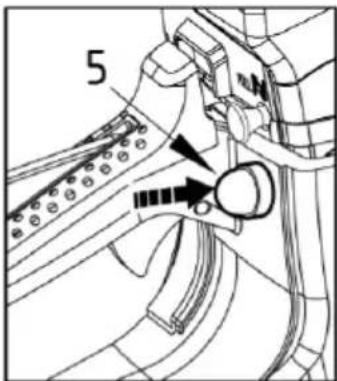
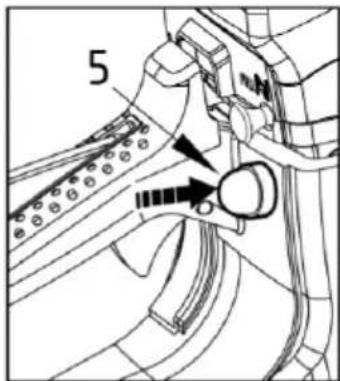
 | Decompression valve (if applicable) Push in the decompression valve button to open the valve. |
FOR SAFE OPERATION
Before operate the product
Before using our products, please read this manual carefully to understand the proper use of your unit.
■ Never operate a chain saw when you are fatigued, ill, or upset, or under the influence of medication that may make you drowsy, or if you are under the influence of alcohol or drugs.
Operate the chain saw only in well ventilated areas. Never start or run the engine inside a closed room or building. Exhaust fumes contain dangerous carbon monoxide.
Never cut in high wind, bad weather, when visibility is poor, or in very high or low temperatures. Always check the tree for dead branches that could fall during the felling operation.
Use safety and slip-resistant footwear, snug-fitting clothing, and eye, hearing, and head protection devices. Use anti-vibration (AV) gloves. It is believed that a condition called Raynaud's phenomenon, which affects the fingers of certain individuals, may be brought about by exposure to vibration and cold, causing loss of color and numbness in the fingers. The following precautions are strongly recommended because the minimum exposure that might trigger the ailment is unknown. Keep your body warm, especially the head, neck, feet, ankles, hands, and wrists. Maintain good blood circulation by performing vigorous arm exercises during frequent work breaks and by not smoking. Keep the saw chain sharp and the saw, including the AV system, well maintained. A dull chain will increase cutting time, and pressing a dull chain through wood will increase the vibrations transmitted to your hands. A saw with loose components or with damaged or worn AV buffers will also tend to have higher vibration levels. Limit the hours of operation. All the above-mentioned precautions do not guarantee that you will not sustain white finger disease or carpal tunnel syndrome. Therefore, continual and regular users should monitor closely the condition of their hands and fingers. If any of the above symptoms appear, seek medical advice immediately.
Always use caution when handling fuel. Wipe up all spills and then move the chain saw at least ten (10) feet (3m) from the fueling point before starting the engine.
Eliminate all sources of sparks or flame (i.e., smoking, open flames, or work that can cause sparks) in the areas where fuel is mixed, poured, or stored. Do not smoke while handling fuel or while operating the chain saw.
Do not allow other persons to be near the chain saw when starting the engine or cutting wood. Keep bystanders and animals out of the work area. Children, pets, and bystanders should be a minimum of 30 feet (10m) away when you start or operate the chain saw.
Never start cutting until you have a clear work area, secure footing, and a planned retreat path from the falling tree.
Always hold the chain saw firmly with both hands when the engine is running. Use a firm grip with thumb and fingers encircling the chain saw handles.
Keep all parts of your body away from the saw chain when the engine is running. Before you start the engine, make sure the saw chain is not contacting anything.
Always carry the chain saw with the engine stopped, the guide bar and saw chain to the rear, and the muffler away from your body.
Always inspect the chain saw before each use for worn, loose, or changed parts. Never operate a chain saw that is damaged, improperly adjusted, or is not completely and securely assembled. Be sure that the saw chain stops moving when the throttle control trigger is released.
All chain saw service, other than the items listed in the Operator's Manual, should be performed by competent chain saw service personnel. (e.g., if improper tools are used to remove the flywheel, or if an improper tool is used to hold the flywheel in order to remove the clutch, structural damage to the flywheel could occur which could subsequently cause the flywheel to disintegrate).
Always shut off the engine before setting it down.
Use extreme caution when cutting small size brush and saplings because slender material may catch the saw chain and be whipped toward you or pull you off balance. When cutting a limb that is under tension, be alert for spring back so that you will not be struck when the tension in the wood fibers is released. Keep the handles dry, clean and free of oil or fuel mixture. Guard against kickback. Kickback is the upward motion of the guide bar which occurs when the saw chain at the nose of the guide bar contacts an object. Kickback can lead to dangerous loss of control of the chain saw. When transporting your chain saw, make sure the appropriate guide bar cover is in place. Securely place the machine during transport to prevent loss of fuel, damage or injury. Kickback Safety precautions for Chain Saw Users

WARNING!
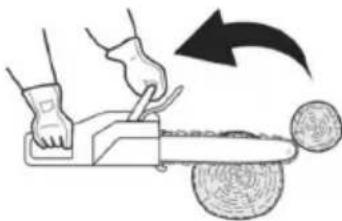
Kickback may occur when the nose or tip of the guide bar touches an object, or when the wood closes in and pinches the saw chain in the cut.

Tip contact in some cases may cause a lightning fast reverse reaction, kicking the guide bar up and back towards the operator. Pinching the saw chain along the top of the guide bar may push the guide bar rapidly back towards the operator. Either of these reactions may cause you to lose control of the saw which could result in serious personal injury.
Do not rely exclusively on the safety devices built into your saw. As a chain saw user you should take several steps to keep cutting jobs free from accident or injury.

(1) With a basic understanding of kickback, you can reduce or eliminate the element of surprise. Sudden surprise contributes to accidents. (2) Keep a good grip on the saw with both hands, the right hand on the rear handle, and the left hand on the front handle, when the engine is running. Use a firm grip with thumbs and fingers encircling the chain saw handles. A firm grip will help you reduce kickback and maintain control of the saw. Don't let go. (3) Make certain that the area in which you're cutting is free from obstructions. Do not let the nose of the guide bar contact a log, branch, or any other obstruction which could be hit while you are operating the saw. (4) Cut at high engine speeds. (5) Do not overreach or cut above shoulder height. (6) Follow manufacturer's sharpening and maintenance instructions for the saw chain. (7) Only use replacement bars and chains specified by the manufacturer or the equivalent.
INSTALLING GUIDE BAR AND SAW CHAIN

A standard saw unit package contains the items as shown below:
(1) Power unit (2) Saw chain (3) Guide bar (4) Guide bar cover (5) Plug wrench (6) File
Open the box and install the guide bar and the saw chain on the power unit as follows.

WARNING!
The saw chain has very sharp edges. Use protective gloves for safety.
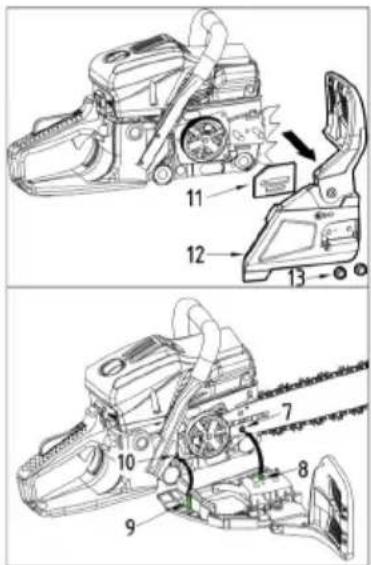
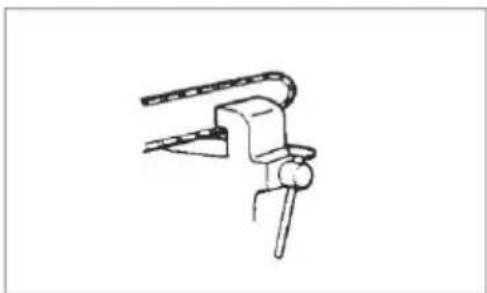
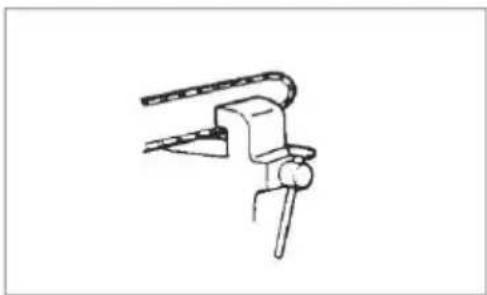
1. Pull the guard towards the front handle to check that the chain brake is not on. 2. Loosen two nuts (12), then remove the clutch cover (13) and the spacer (11). 3. Gear the chain to the sprocket and, while fitting the saw chain around the guide bar, mount the guide bar to the power unit. Fit the chain tensioner nut (8) into the lower hole (7) of the guide bar, then install the clutch cover, and fasten the mounting nut to finger tightness. Make sure the pin (9) on the clutch cover has inserted in the hole (10) on the engine base.
(7) Hole (8) Chain tensioner nut (9) Clutch cover (10) Hole (11) Spacer (12) Clutch cover (13) Nuts

Pay attention to the correct direction of the saw chain.
(1) Moving direction


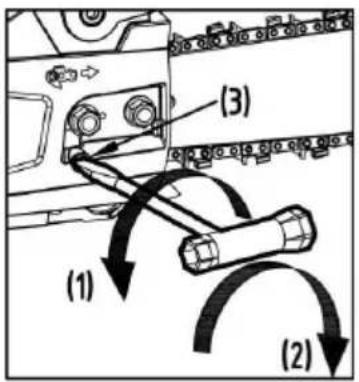
1. Mount the guide bar then fit the saw chain around the bar and sprocket. 2. Fit the chain tensioner nut into the lower hole of the guide bar, then install the chain cover, and fasten the mounting nut to finger tightness. 3. While holding up the tip of the bar, adjust the chain tension by turning the tensioner screw until the tie straps just touch the bottom side of the bar rail. 4. Tighten the nuts securely with the bar tip held up (12 ~ 15 Nm). Then check the chain for smooth rotation and proper tension while moving it by hand. If necessary, readjust with the chain cover loose.
5. Tighten the tensioner screw.
(1) Loosen (2) Tighten (3) Chain tension adjusting screw

CAUTION!
It is very important to maintain the proper chain tension. Rapid wear of the guide bar or the chain coming off easily can be caused by improper tension. Especially when using a new chain, take good care of it since it should expand when first used.
The spiked bumper belongs to the chain saw. It must be screwed onto the chain saw before the initial use. Please fix the spiked bumper with two screws on the forefront of the chain saw.

FUEL AND CHAIN OIL
FUEL
The engines are lubricated by oil specially formulated for air-cooled 2-cycle gasoline engine use. If oil is not available, use an antioxidant added quality oil expressly labeled for air-cooled 2-cycle engine use.
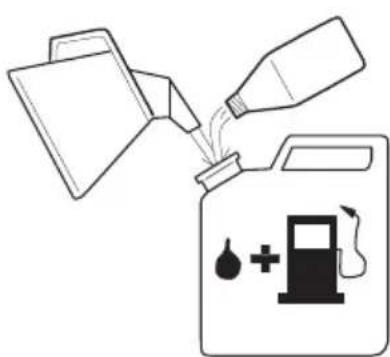
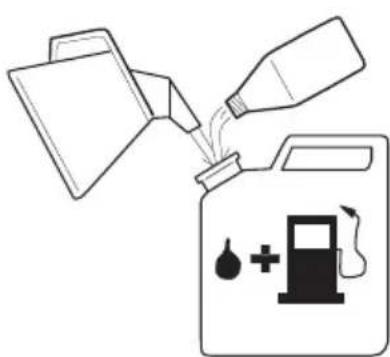
RECOMMENDED MIXING RATIO GASOLINE 40 : OIL 1
(JASO FC or ISO EGC grade formulated for air-cooled, two-stroke engines). These engines are certified to operate on unleaded gasoline.


WARNING!
The fuel is highly flammable. Do not smoke or bring any flame or sparks near fuel.

CAUTION!
1 FUEL WITH NO OIL (RAW GASOLINE) – It will cause severe damage to the engine inner parts very quickly. 2 OIL FOR 4-CYCLE ENGINE USE or WATER COOLED 2-CYCLE ENGINE USE – It can cause spark plug fouling, exhaust port blocking, or piston ring sticking.
HOW TO MIX FUEL
1 Measure out the quantities of gasoline and oil to be mixed. 2 Put some of the gasoline into a clean, approved fuel container. 3 Pour in all of the oil and agitate well. 4 Pour in the rest of gasoline and agitate again for at least one minute. 5 Put a clear indication on the outside of the container to avoid mixing up with gasoline or other containers.
CHAIN OIL
Use special chain saw oil all year round.


Do not use waste or regenerated oil that can cause damage to the oil pump.
OPERATION


STARTING ENGINE
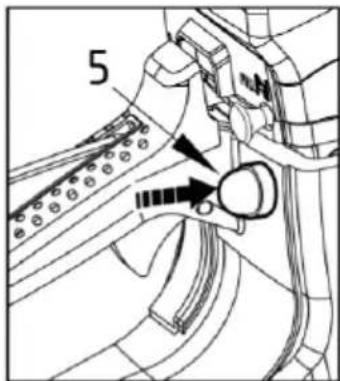
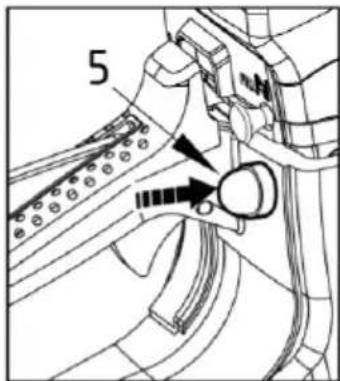
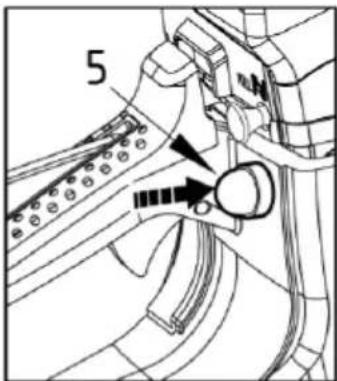
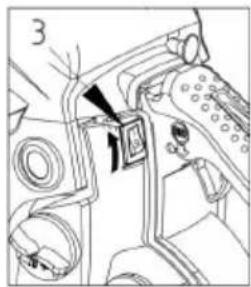
1. Untwist and remove the fuel cap and oil cap. Rest the caps on a dust-free place. 2. Put fuel into the fuel tank and fill the chain oil into the oil tank to 80% of the full capacity. 3. Fasten the fuel cap and oil cap securely and wipe up any fuel spillage around the unit. 4. Put the switch to the "I" position. 5. Continuously push the primer bulb until fuel comes into the bulb.
(1) Oil (4) Choke knob
(2) Fuel (5) Primer bulb
(3) Engine switch
6. Pull out the choke knob. The choke will close and the throttle lever will then be set in the starting position.
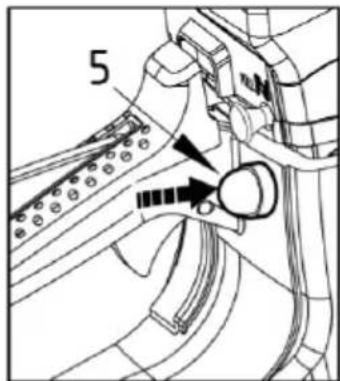

When restarting immediately after stopping the engine, set the choke in the open position.


Once the choke knob has been pulled out, it will not return to the running position even if you press the throttle trigger or press down on the knob with your finger. When you wish to return the choke knob to the running position, press the throttle trigger instead.
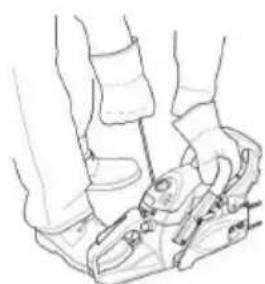
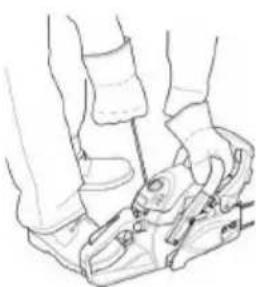
1. Push the front handle guard down toward the front to activate the chain brake. 2. Push in the decompression valve button. (If applicable)

When firing occurs, the decompression valve will return to the close position automatically. You should push in the decompression valve button before each starting.

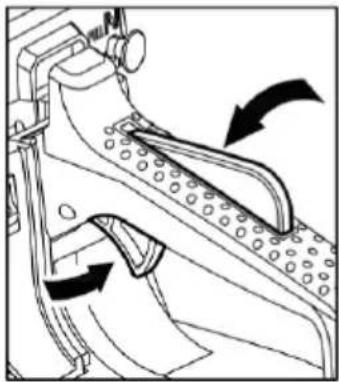
1. While holding the saw unit securely on the ground, pull the starter rope vigorously. 2. When firing occurs, press the throttle trigger to allow the choke to return to the running position and pull the starter handle again to start the engine. 3. Pull up the front handle guard toward the front handle to release the brake. Then, allow the engine to warm up with the trigger pulled slightly.


WARNING!
Before you start the engine, make sure the saw chain is not contacting anything. Make sure the chain brake is always activated before each starting.
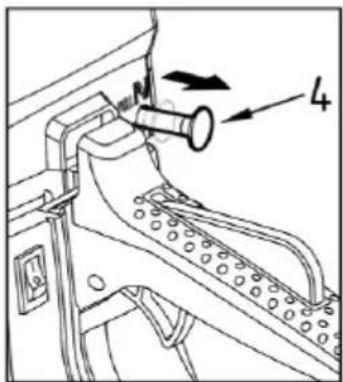
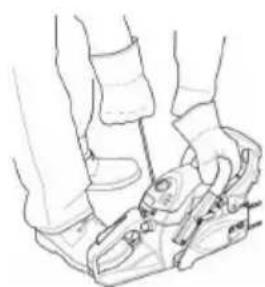
CHECKING OIL SUPPLY
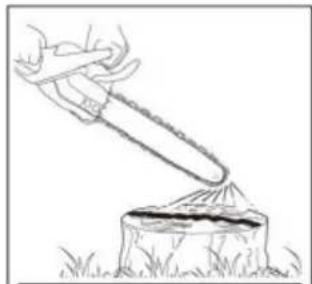
After starting the engine, run the chain at medium speed and see if chain oil is scattered off as shown in the figure.
The chain oil flow can be changed by inserting a screwdriver in the hole on bottom of the clutch side. Adjust according to your work conditions.

(1) Chain oil flow adjusting shaft
Turn the shaft counter-clockwise – Flow rich,
Turn the shaft clockwise – Flow lean.

CAUTION!
The oil tank should become nearly empty by the time fuel is used up. Be sure to refill the oil tank every time when refueling the saw.
CHECKING FUNCTIONAL OF THE CLUTCH
Before each use, you shall confirm that there is no chain movement when the chain saw running at idling speed.

WARNING!
When running, the machine must always be firmly held in both hands, with the left hand on the front hand-grip and the right hand on the rear hand grip, even if the operator is left-handed.

CHAIN BRAKE
The chain brake is a device which stops the chain instantaneously if the chain saw recoils due to kickback.
Normally, the brake is activated automatically by inertial force. It can also be activated manually by pushing the brake lever (Front handle guard) down toward the front. When the brake operates, a white cone pops up from the base of the brake lever. (1) Front handle (2) Release
(3) Brake (4) Front handle guard
To release the brake, pull up the front handle guard toward the front handle until a "click" sound is heard.

WARNING!
When the brake operates, release the throttle lever to slow down the engine speed. Continuous operation with the brake engaged will generate heat from the clutch and may cause trouble.
Be sure to confirm brake operation during the daily inspection.
How to confirm:
1) Turn off the engine.
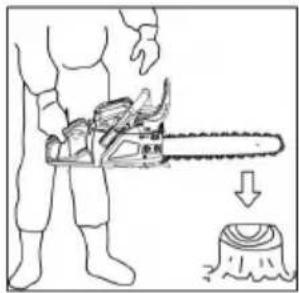
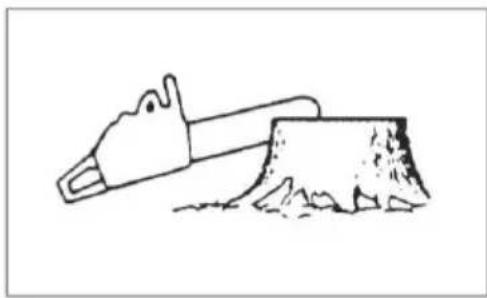
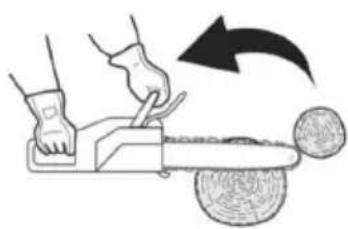
2) Holding the chain saw horizontally, release your hand from the front handle, hit the tip of the guide bar against a stump or a piece of wood, and confirm brake operation. Operating level varies by bar size. If the brake is not effective, ask our dealer for inspection and repair.
STOPPING ENGINE
1. Release the throttle trigger to allow the engine to idle for a few minutes.
2. Move the switch lever downward.
(1) Engine switch

SAWING


WARNING!
Before proceeding to your job, read the "For Safe Operation" section. It is recommended to first practice sawing easy logs. This also helps you get accustomed to your unit.
Always follow all the safety regulations which can restrict the use of the machine.

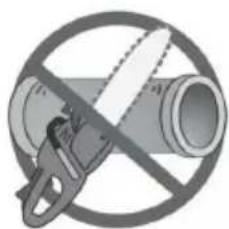
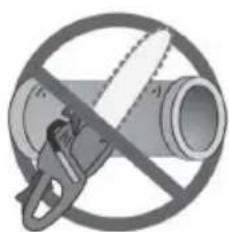
Always follow the safety regulations. The chain saw must only be used for cutting wood. It is forbidden to cut other types of material. Vibrations and kickback vary with different materials and the requirements of the safety regulations would not be respected. Do not use the chain saw as a lever for lifting, moving or splitting objects. Do not lock it over fixed stands. It is forbidden to hitch tools or applications to the P.T.O. that are not specified by the manufacturer.


It is not necessary to force the saw into the cut. Apply only light pressure while running the engine at full throttle.
It is recommended that daily inspection before use and after dropping or other impacts to identify significant damage or defects.
Racing the engine with the chain seized in a cutaway can damage the clutch system. When the saw chain is caught in the cut, do not attempt to pull it out by force, but use a wedge or a lever to open the cut.
Guard against kickback
This saw is also equipped with a chain brake that will stop the chain in the event of kickback if operating properly. You must check the chain brake operation before each usage by running the saw at full throttle for 1 or 2 seconds and pushing the front hand guard forward. The chain should stop immediately with the engine at full speed. If the chain is slow to stop or does not stop then replace the brake band and clutch drum before use.
It is extremely important that the chain brake be checked for proper operation before each use and that the chain be sharp in order to maintain the kickback safety level of this saw. Removal of the safety devices, inadequate maintenance, or incorrect replacement of the bar or chain may increase the risk of serious personal injury due to kickback.
Felling a tree
1 Decide the felling direction considering the wind, lean of the tree, location of heavy branches, ease of job after felling, and other factors. 2 While clearing the area around the tree, arrange a good foothold and retreat path. 3 Make a notch cut one-third of the way into the tree on the felling side. 4 Make a felling cut from the opposite side of the notch and at a level slightly higher than the bottom of the notch.

WARNING!
When you fell a tree, be sure to warn your neighboring workers of the danger.
(A) Notch cut (B) Felling cut
- Logging and limbing

WARNING!
1 Always ensure your foothold as well as stability of the tree. 2 Be alert to the rolling over of a cut log. 3 Read the instructions in "For Safe Operation" to avoid kick-back of the saw. Before starting work, check the direction of bending force inside the log to be cut. Always finish cutting from the opposite side of bending direction to prevent the guide bar from being caught in the cutaway.
Cutting an unpillowed log
Saw down halfway, then roll the log over and cut from the opposite side.


Cutting a pillowed log
In the area A in the picture right above, saw up from the bottom one-third and finish by sawing down from the top. In the area B, saw down from the top one-third and finish by sawing up from the bottom.

Limbing a felled tree
First check which way the limb is bent. Then make a shallow cut into the compressed side to prevent the limb from being torn. Cut through from the tensed side.

WARNING!
Be alert to the spring back of a cut limb.
Pruning
Cut up from the bottom, finish down from the top.


WARNING!
1 Do not use an unstable foothold or a stepladder. 2 Do not overreach. 3 Do not cut above shoulder height. 4 Always use both hands to grip the saw.


WARNING!
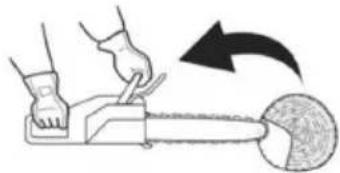
The Spiked bumper must always be put on while using the chain saw on tree trunk. Push the spiked bumper into the tree trunk by using the rear handle. Push the front handle in the direction of cutting line. The spiked bumper must be remaining set for further saw guiding if necessary. Use a spiked bumper when cutting trees and thick branches can ensure your safety and decrease the working strength and vibration level.
If there is a barrier between the cutting material and the chainsaw, turn off the machine. Wait until it stops completely. Wear safety gloves and remove the barrier. If the chain must be removed, follow the instructions in the relevant section of the manual, such as the installation section. A trial run must be conducted after cleaning and reinstallation. If vibration or mechanical noise is discovered, stop using the machine and contact your dealer.
MAINTENANCE


WARNING!
Before cleaning, inspecting, or repairing your unit, make sure that the engine has stopped and is cool. Disconnect the spark plug to prevent accidental starting.
Follow the instructions to carry out regular maintenance, pre-operating procedures, and daily maintenance routines. Improper maintenance may result in serious damage to the machine.

Maintenance after each use
1. Air filter
Dust on the cleaner surface can be removed by tapping a corner of the cleaner against a hard surface. To clean dirt in the meshes, split the cleaner into halves and brush. When using compressed air, blow from the inside. To assemble the cleaner halves, press the rim until it clicks.

2. Oiling port
Dismount the guide bar and check the oiling port for clogging.
(1) Oiling port

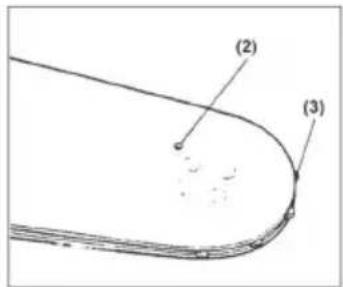
3. Guide bar
When the guide bar is dismounted, remove sawdust from the bar groove and the oiling port.
Grease the nose sprocket from the feeding port on the tip of the bar.
(1) Oiling port (2) Grease port (3) Sprocket
4. Others
Check for fuel leakage and loose fastenings and damage to major parts, especially handle joints and guide bar mounting. If any defects are found, make sure to have them repaired before operating again.


Periodical service points
1. Cylinder fins
Dust clogging between the cylinder fins will cause overheating of the engine. Periodically check and clean the cylinder fins after removing the air cleaner and the cylinder cover. When installing the cylinder cover, make sure that switch wires and grommets are positioned correctly in place.

2. Fuel filter
(a) Using a wire hook, take out the filter from the filler port. (1) Fuel filter (b) Disassemble the filter and wash, or replace with a new one if needed.

WARNING!
■ After removing the filter, use a pinch to hold the end of the suction pipe. When assembling the filter, take care not to allow filter fibers or dust inside the suction pipe.

3. Spark plug
Clean the electrodes with a wire brush and reset the gap to 0.65mm as necessary.
Spark plug type: NHSP LD L8RTF or CHAMPION RCJ7Y or NGK BPMR7A
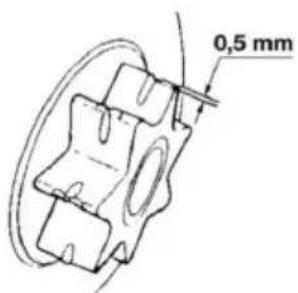
4. Sprocket
Check for cracks and for excessive wear interfering with the chain drive. If the wear is considerable, replace it with new one. Never fit a new chain on a worn sprocket, or a worn chain on a new sprocket.
5. Front and Rear dampers
Replace if adhered part is peeled or crack is observed on the rubber part. Replace if the inside of the rear damper metal has been beaten by the stopper bolt and the clearance of the metal increased.

WARNING!
Use only the spare parts which are named in this manual. Use of other spare parts can cause serious injury.
MAINTENANCE OF SAW CHAIN AND GUIDE BAR


Saw chain

WARNING!
It is very important for smooth and safe operation to keep the cutters always sharp.
Your cutters need to be sharpened when:
Sawdust becomes powder-like. You need extra force to saw in. The cut way does not go straight. Vibration increases. Fuel consumption increases.
Cutter setting standards:

WARNING!
Be sure to wear safety gloves.
Before filing:
■ Make sure the saw chain is held securely. ■ Make sure the engine is stopped. Use a round file of proper size for your chain.
Chain type:
BKS 4540: Oregon 21BPX
File size: 4.8mm
Place your file on the cutter and push straight forward.
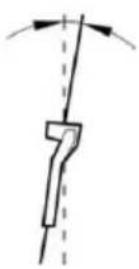
Keep the file position as illustrated.
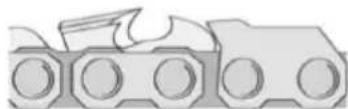
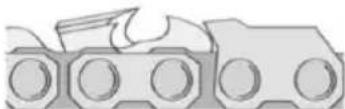
After every cutter has been set, check the depth gauge and file it to the proper level as illustrated.

WARNING!
Be sure to round off the front edge to reduce the chance of kickback or tie-strap breakage.
Make sure every cutter has the same length and edge angles as illustrated.
| Type of chain | File diameter Top plate angle Down angle | Head tilt angle (55°) | Depth gauge standard | ||
 |  |  |  |  | |
| Vise ro-tate angle | Vise tilt angle Side angle | ||||
 |  |  | |||
| 21BPX 3/16" 30° 10° 85° 0.025" | |||||
 |  | ||||
| Depth gauge File | |||||


Guide bar
■ Reverse the bar occasionally to prevent partial wear. The bar rail should always be a square. Check for wear of the bar rail. Apply a ruler to the bar and the outside of a cutter. If a gap is observed between them, the rail is normal. Otherwise, the bar rail is worn. Such a bar needs to be corrected or replaced.
(1) Ruler (2) Gap (3) No gap (4) Chain
tilts

WARNING!
The table contains a list of all possible combinations between bar and chain, indicating those which may be used on each machine, marked with the symbol “*”.
| Pitch Guide bar Chain Chain saw | model | ||||
| Zoll Length In-ches/cm | Groove widthInches/mm | Code Code | BKS 4540 | ||
| 0.325" 16"/40cm 0.058"/1.5mm Oregon | 168PXBK095 | Oregon21BPX066X | * | ||
For replacement use only above bars and chains. If you use non-approved combinations it may cause serious personal injury and damage to the machine.
STORAGE
1 Empty the fuel tank and run the engine out of fuel. 2 Empty the oil tank. 3 Clean the entire unit. 4 Store the unit in a dry place out of the reach of children.
5 Always put the guide rail cover on during storage and transportation.
WASTE DISPOSAL AND ENVIRONMENTAL PROTECTION
Never pour remainders of chain lubricant or 2-stroke fuel mixture into the drain, sewerage system, or soil. Dispose of them in a proper, environmentally friendly way, e.g., at a special collecting point or dump. If your device becomes useless in the future or you no longer need it, do not dispose of it with your domestic refuse. Dispose of it in an environmentally friendly manner. Thoroughly empty the oil/lubricant and fuel tanks and dispose of the remainders at a special collecting point or dump. Please also dispose of the device itself at an appropriate collecting/recycling point. By doing so, plastic and metal parts can be separated and recycled. Information concerning the disposal of materials and devices is available from your local administration.
TROUBLESHOOTING GUIDE
| PROBLEM CAUSE REMEDY | ||
1) Starting failure WARNING!Make sure the icing prevention system is not working. WARNING!Make sure the icing prevention system is not working. | Check fuel for water or sub-standard mixture | Replace with proper fuel |
| Check for engine flooding Remove and dry the spark plugthen pull the starter again with no choke | ||
| Check spark ignition Replace with a new plug | ||
| 2) Lack of power / Poor ac-celeration / Rough idling | Check fuel for water or sub-standard mixture | Replace with proper fuel |
| Check air filter and fuel filter for clogging | Clean | |
| Check carburetor for inadequate adjustment | Readjust speed needles | |
| Check oil for substandard quality | Replace3) Oil does not come out | |
| Check oil passage and ports for clogging | Clean | |
If the unit seems to need further service, please consult an authorized service shop in your area.
SPECIFICATIONS
| Type BKS 4540 | |
| Art-no. 113 187 | |
| Displacement 45.02cc | |
| Max engine power 1.7kW | |
| Length guide bar (OREGON) | 40cm168PXBK095 |
| Useable cutting length 37cm | |
| Saw Chain (OREGON) 21BPX066X | |
| Pitch - chain sprocket 0.325in | |
| Drive train tooth count 7z / 7T | |
| Chain brake yes | |
| Idling rotational speed 3000 ± 300 r/min | |
| Max. rotational speed (with cutting at- tachment) | 11000 r/min |
| Max. Chain speed 21.2 m/s | |
| Fuel tank capacity 550ml | |
| Chain oil tank capacity 260ml | |
| Fuel mixture ratio 40:1 | |
| Net weight without chain and guide bar, empty tanks | 5.1kg |
| Fuel Consumption at maximum engine power | 460 g / kWh |
| Sound power level LWA (EN ISO 11681) (K=3) | 112.4 dB(A) |
| Sound pressure value LPA (EN ISO 11681) (K=3 ) | 99.5 dB(A) |
| Max. vibration acceleration avhw (K=1.5) | |
| Front handle 8.9 m/s | 2 |
| Rear handle | 10.7 m/s2 |
| Guaranteed sound power level LWA (2000/14/EC+2005/88/EC) | 115 dB(A) |
WARRANTY
We will address claims for any defects in materials and workmanship during the statutory period of limitation by means of repairs or replacements of our choice. The period of limitation is governed by the laws of the country in which the machine was purchased.
Our warranty applies only if:
The machine has been properly handled. The operating instructions have been adhered to. Original replacement parts have been used.
The warranty is no longer in effect if:
Efforts have been made to repair the machine. Technical modifications have been made to the machine. The machine has not been used for its intended purpose.
The warranty does not cover:
■ Damage to paint work through normal use. Parts subject to wear as indicated in the replacement parts list with a box [xxx xxx (x)]. Internal combustion engines – separate warranty conditions of the respective engine manufacturer apply.
The warranty period begins with the purchase by the first buyer. The warranty period begins on the date that appears on the original purchase receipt. In the event of a warranty claim, please contact your supplier or the nearest authorised customer service centre with this warranty declaration and the purchase receipt in hand. This warranty does not affect the legal warranty claims by the purchaser against the seller.
EC DECLARATION OF CONFORMITY
We hereby declare that this product, in the form in which it is marketed, meets the requirements of the harmonised EU guidelines, EU safety standards, and the product-specific standards.
Product Manufacturer Executive Officer
Model EU directives Harmonised standards
| BKS 4540 | 2006/42/EC |
| 2014/30/EU | |
| Sound power level | 2000/14/EC |
EN ISO 11681-1:2011
EN ISO 14982:2009
EN ISO 22868:2011
EN ISO 3744
measured / guaranteed
BKS 4540 - 112 / 115 dB(A)
Building sample examination to
GSPG §4 BM 1027 MSR Conformity evaluation
BKS 4540 - 14SHW0123-02 2000/14/EC Annex V

FUEL

WARNING!


STARTING THE ENGINE


WARNING!
CHECKING THE OIL SUPPLY

WARNING!
SAWING


WARNING!


Cross-cutting and pruning

WARNING!

WARNING!

WARNING!

WARNING!
2. Oil connection

Saw chain

WARNING!
CE DECLARATION OF CONFORMITY....97

CAUTION!

FUEL

WARNING!




STARTING THE ENGINE

WARNING!
■ CHECK OIL SUPPLY

WARNING!
SAWING


WARNING!
Sawing and pruning

WARNING!

WARNING!

WARNING!

WARNING!

WARNING!
2. Oil connection

Saw chain

WARNING!
EC DECLARATION OF CONFORMITY

FUEL

WARNING!



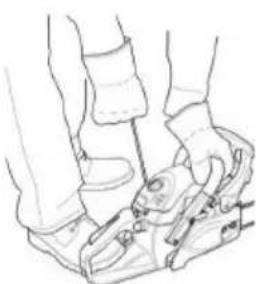
ENGINE START

WARNING!

WARNING!

WARNING!

WARNING!
Pruning

WARNING!

WARNING!
3. Bar

Chain

WARNING!

FUEL AND CHAIN OIL

FUEL

WARNING!


STARTING THE ENGINE
1 Unscrew and remove the fuel and oil filler caps. Place the cap in a dust-free location.


When the saw is switched on, the decompression valve automatically returns to the closed position; the valve button must be pressed again before each start.


WARNING!
CHECK OIL SUPPLY

WARNING!

WARNING!
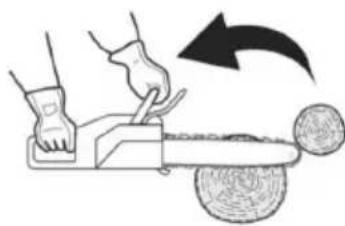


Cutting a log that is not supported
Cut the log halfway through, then roll it over and finish the cut on the other side.
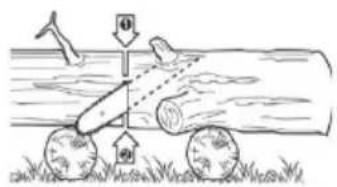
Cutting a supported log
Trimming

WARNING!

WARNING!
3. Guide bar


| 1 Lanac pile 11 Prekidač motora | ||
| 2 Vodilica (mač) 12 Spremnik goriva | ||
| 3 Prednji štitnik za ruke 13 Spremnik ulja | ||
| 4 Ručica pokretača 14 Prednji rukohvat | ||
| 5 Poklopac filtra za zrak 15 Zaštitni pokrov vodilice | ||
| 6 Sigurnosna matica filtra za zrak 16 Loptica za pumpanje | ||
| 7 Tipka zračne zaklopke 17 Dekompresijski ventil (ako postoji) | ||
| 8 Blokada poluge za gas 18 Poklopac spojke | ||
| 9 Stražnji rukohvat 19 Kandža za stablo |
10 Throttle trigger
SYMBOLS ON THE MACHINE
1 Pull the guard toward the front handle to make sure the chain brake is not engaged. 2 Loosen the two nuts (12), then remove the clutch cover (13) and the spacer (11). 3 Place the chain on the sprocket, fit the chain around the guide bar, and mount the guide bar onto the power unit. Insert the chain tensioning nut (8) into the lower hole (7) of the guide bar, mount the clutch cover, and hand-tighten the safety nut firmly. Make sure that the pin (9) of the clutch cover engages in the hole (10) on the lower part of the engine.
(7) Hole (8) Chain tensioning nut (9) Clutch cover (10) Hole (11) Spacer (12) Clutch cover (13) Nuts

Make sure the chain runs in the correct direction.
(1) Direction of travel
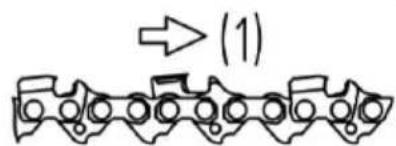

1 Mount the guide bar and place the chain on the guide bar and sprocket.
2 Insert the chain tensioning nut into the lower hole of the guide bar, mount the chain cover, and hand-tighten the safety nut firmly.
3 Hold the guide bar with the tip pointing upward and adjust the chain tension by turning the tensioning screw until the tension straps just touch the lower part of the guide bar.
4 Hold the guide bar with the tip pointing upward and tighten the nuts (12-15 Nm). Then move the chain by hand and check that it moves smoothly and is properly tensioned. If necessary, adjust the chain while the cover is loosened.
5 Tighten the clamping screw.
(1) Loosening (2) Tightening (3) Chain tensioning screw

CAUTION!
Correct chain tension is very important. Incorrect tension can lead to premature wear of the guide bar or frequent chain derailment. Especially with a new chain, handle it with care, as it may still stretch during initial use.
The tree spikes are part of the chainsaw. Before first use, they must be screwed onto the chainsaw. The spikes must always be secured on the front side with two screws.

FUEL AND CHAIN OIL

FUEL

WARNING!
Fuel is highly flammable. Do not smoke near fuel and avoid flames and sparks.

CAUTION!
1 FUEL WITHOUT OIL (RAW GASOLINE) – Very quickly leads to severe damage to the internal parts of the engine.

Do not use old oil or processed oil that can damage the oil pump.
OPERATION


STARTING THE ENGINE
1 Hold the saw firmly on the ground and pull the starter rope vigorously. 2 As soon as it starts, press the throttle trigger to return the choke knob to its operating position and start the engine with the starter handle. 3 Pull the front hand guard up towards the handle to release the brake. Then let the engine warm up with the throttle trigger slightly pulled.


WARNING!
Before starting the engine, check that the saw is not touching objects or people. Before each start, ensure the chain brake is activated.

CHECKING THE OIL SUPPLY
After starting the engine, let the chain run at medium speed and check that oil is being sprayed as shown in the figure.
(1) Oil flow adjustment shaft

WARNING!
1 Release the throttle trigger and let the engine idle for a few minutes.

WARNING!
Before starting work, read the chapter "Safety Instructions for Work"; first test the saw on simple logs. This will help you become familiar with the device.


Always observe safety regulations. The chainsaw may only be used for cutting wood. Other materials must not be processed with the saw. Vibrations and the risk of kickback differ with other materials, so you might no longer be able to comply with safety regulations. Do not use the chainsaw as a lever for lifting, moving, or separating objects. Do not mount it on fixed stands. Tools and other devices that do not match the manufacturer's specifications must not be connected to the drive shaft.
Do not force the saw into the cut. When working at full throttle, only light pressure is needed.
The saw should be checked for damage every day before each use and after any fall or other accident.
If the engine speed increases while the chain is stuck in the cut, this can damage the clutch. If the chainsaw gets stuck in the cut, do not try to free it by force; instead, use a wedge or a lever to spread the cut.
Cutting and removing branches

WARNING!

WARNING!

WARNING!
When working on trunks, always use the tree claw. The tree claw is pressed into the trunk using the rear handle. Then press the front handle in the direction of the cut line. The claws must remain positioned as needed to guide further sawing work. Using the claws when sawing trees and thick branches increases safety, makes work easier, and reduces vibration load.
If an obstacle is found between the material being cut and the chainsaw, turn off the saw. Wait until it has completely stopped. Wear protective gloves and remove the obstacle. If the chain needs to be removed, follow the instructions in the relevant chapter on chain assembly. After cleaning and reassembly, carry out a test run. In case of vibrations or mechanical noises, do not continue working with the chainsaw and contact your dealer.
MAINTENANCE
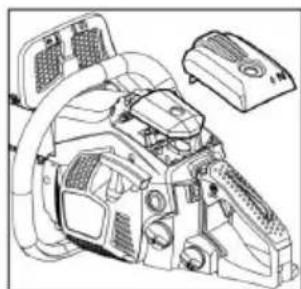

WARNING!
Before any cleaning, inspection, or repair of the device, you must ensure that the engine is switched off and has cooled down. To avoid accidental starting, disconnect the spark plug.
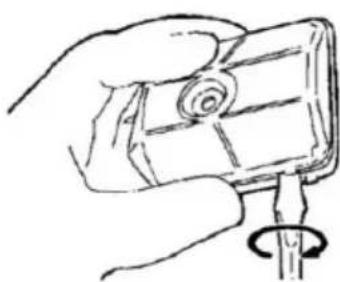
Follow the instructions for regular maintenance, preparation before use, and daily routine maintenance. Improper maintenance can lead to serious damage to the device.
3. Guide bar
Regular maintenance work
1. Cylinder fins
Dust accumulation between the cylinder fins leads to engine overheating. Regularly check and clean the cylinder fins; for this purpose, remove the air filter and cylinder cover. When mounting the cylinder cover, ensure that the wires and switch bushings are correctly inserted.

2. Fuel filter

Saw chain

WARNING!
For smooth, safe operation, the chain links must be sharp.
Sharpening is required if:
- sawdust becomes like fine powder ■ inserting the saw requires more force the cut is not straight vibrations increase fuel consumption increases.
Regulations for adjusting chain links:

WARNING!
Wear protective gloves.
Before filing:

FUEL

CAUTION!


STARTING THE ENGINE

CAUTION!
CHECKING OIL SUPPLY

CAUTION!
SAWING


WARNING!


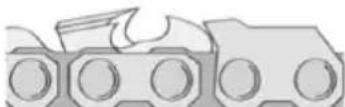

WARNING!

WARNING!

WARNING!


2. Fuel filter

Cutting chain

WARNING!

FUEL AND CHAIN OIL

FUEL

WARNING!


STARTING THE ENGINE

WARNING!
CHECKING THE OIL SUPPLY

WARNING!
CUTTING


WARNING!


WARNING!
Shortening

WARNING!

WARNING!
2. Oil connection
3. Guide bar
Chain

WARNING!
1 Pull the front hand guard towards the front handle to make sure that the chain brake is not engaged. 2 Loosen the two nuts (12), then remove the clutch cover (13) and the spacer (11). 3 Fit the chain onto the chain sprocket, place the saw chain around the guide bar, and mount the guide bar onto the drive unit. Insert the chain tensioning nut (8) into the lower hole (7) of the guide bar, mount the clutch cover, and hand-tighten the lock nut. Make sure that the pin (9) of the clutch cover engages in the hole (10) at the bottom of the engine.
(7) Hole (8) Chain tensioning nut (9) Clutch cover (10) Hole (11) Spacer (12) Clutch cover (13) Nuts

FUEL AND CHAIN OIL

FUEL

WARNING!


STARTING THE ENGINE


1 Hold the saw firmly on the ground and pull the starter rope strongly.

WARNING!
CHECKING THE OIL SUPPLY

WARNING!
1 Release the throttle and let the engine run at idle for a few minutes.

WARNING!


Felling and limbing

WARNING!

WARNING!

WARNING!

WARNING!

WARNING!
2. Oil connection
3. Guide bar
Chain

WARNING!

FUEL AND CHAIN OIL
FUEL

WARNING!


STARTING THE ENGINE

WARNING!
CHECKING THE OIL SUPPLY

WARNING!
CUTTING


WARNING!


WARNING!

WARNING!

WARNING!
2. Oil connector

Saw chain

WARNING!
Placement of the machine....264
Symbols on the machine.... 265
Safe operation....267

FUEL

WARNING!


STARTING THE ENGINE


WARNING!
CHECKING THE OIL SUPPLY

WARNING!
SAWING


WARNING!


WARNING!

WARNING!

WARNING!
2. Oil hole
3. Guide bar

Saw chain

WARNING!


FUEL AND CHAIN OIL

FUEL

WARNING!


STARTING THE ENGINE

WARNING!
CHECKING OIL SUPPLY

WARNING!
CUTTING


WARNING!


WARNING!

WARNING!

WARNING!

WARNING!
3. Svärd

Sågkedja

WARNING!
Delenes plassering....311
Symboler på maskinen.... 312
For sikker drift....314

| 1 Sagkjede 11 Motorbryter | ||
| 2 Sverd 12 Drivstofftank | ||
| 3 Fremre håndbeskyttelse 13 Oljetank | ||
| 4 Starthåndtak 14 Fremre håndtak | ||
| 5 Oljefilterdeksel 15 Sverdslire | ||
| 6 Luftfilter läsemutter 16 Fyllebulb | ||
| 7 Choke-knapp 17 Dekompresjonsventil (hvis relevant) | ||
| 8 Gassperre 18 Kløtsjdeksel | ||
| 9 Bakre håndtak 19 Pigg |
10 Gassperre
SYMBOLER PÅ MASKINEN
DRIVSTOFF OG KJEDEOLJE

DRIVSTOFF

ADVARSEL!


STARTE MOTOREN


ADVARSEL!
Before starting the engine, make sure the chain does not come into contact with anything. Make sure the chain brake is always activated before each start.

CHECKING THE OIL SUPPLY

WARNING!
CUTTING
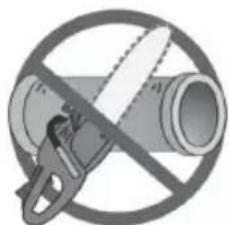

WARNING!
Limb a felled tree

WARNING!

WARNING!

WARNING!
2. Oil filler opening
3. Guide bar
MAINTENANCE OF SAW CHAIN AND GUIDE BAR

Saw chain

WARNING!

Depth gauge file (1)
(2)

Sverd

SYMBOLS ON THE CHAIN SAW

FUEL AND CHAIN OIL

FUEL

WARNING!




STARTING THE ENGINE

WARNING!
CHECKING CHAIN LUBRICATION
CHECKING THE CLUTCH OPERATION

WARNING!
SAWING


WARNING!


WARNING!

WARNING!

WARNING!
2. Oil port
3. Blade flange
Periodic maintenance

Tooth standards:
Saw chain

WARNING!
FUEL AND CHAIN OIL

FUEL

WARNING!




STARTING THE ENGINE

WARNING!
CHECK THE OIL LEVEL

WARNING!

WARNING!


WARNING!

WARNING!

WARNING!
2. Oil nipple

SAFETY INSTRUCTIONS
FUEL AND CHAIN OIL

FUEL

ATTENTION!


STARTING THE ENGINE

ATTENTION!
CHECKING THE OIL SUPPLY

ATTENTION!
CUTTING

ATTENTION!

ATTENTION!


__SUPPIMER__

2. Oil connection

Cutting chain

Wolfgang Hergeth Managing Director
Translation of original operating instructions
Table of contents

Fuel and chain oil

Fuel

WARNING!

Starting the engine


WARNING!
Checking the oiling system

WARNING!
SAWING


WARNING!

WARNING!

WARNING!

WARNING!

WARNING!
2. Chain connection
3. Saw chain guide bar

Saw chain

WARNING!

Saw chain guide bar

FUEL

CAUTION!


STARTING THE ENGINE

CAUTION!

CAUTION!
SAWING

CAUTION!


CAUTION!

CAUTION!

CAUTION!

Saw chain

CAUTION!

CAUTION!

WARNING!


ENGINE START

WARNING!
CHECKING OIL SUPPLY

WARNING!

WARNING!


WARNING!
WARNING!
2. Oil supply

3. Guide bar

Saw chain

WARNING!
Art. No. 113187
| Pos. | Artikelnummer |
| 1 | 414321 |
| 6 | 414322 |
| 7 | 414323 |
| 8 | 414325 |
| 9 | 414326 |
| 23 | 414324 |
| 24 | 414327 |
| 26 | 414328 |
| 29 | 414329 |
| 30 | 414330 |
| 31 | 414331 |
| 32 | 414332 |
| 33 | 414333 |
| 34 | 414334 |
| 35 | 414335 |
| 36 | 414336 |
| 37 | 414337 |
| 38 | 414338 |
| 39 | 414339 |
| 40 | 414340 |
| 41 | 414341 |
| 42 | 414342 |
| 44 | 414343 |
| 45 | 414344 |
| 46 | 414345 |
| 47 | 414346 |
| 48 | 414347 |
| Pos. | Artikelnummer |
| 51 | 414350 |
| 52 | 414351 |
| 53 | 414352 |
| 54 | 414353 |
| 55 | 414354 |
| 56 | 414355 |
| 57 | 414356 |
| 58 | 414357 |
| 59 | 414358 |
| 60 | 414359 |
| 61 | 414360 |
| 62 | 414361 |
| 63 | 414362 |
| 64 | 414363 |
| 65 | 414364 |
| 66 | 414365 |
| 67 | 414366 |
| 68 | 414367 |
| 69 | 414368 |
| 70 | 414448 |
| 71 | 414348 |
| 72 | 414349 |
| 73 | 414517 |
| 74 | 414518 |
Art. No. 113187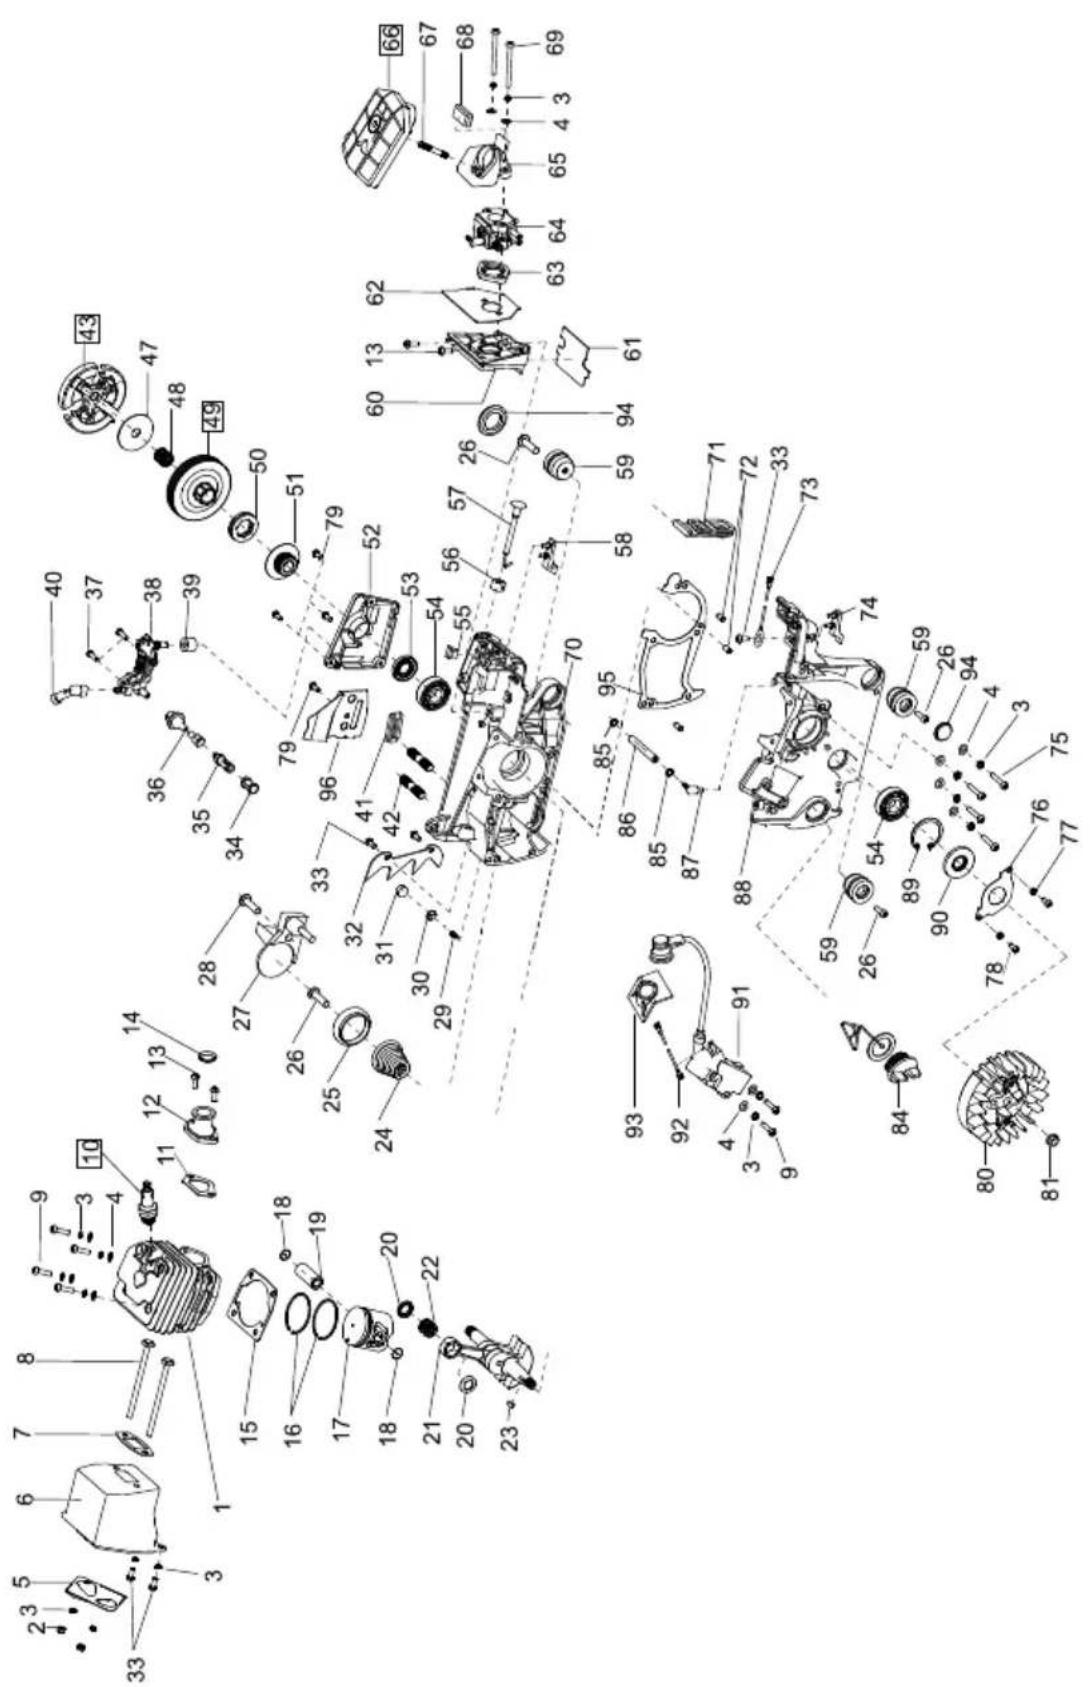
Art. No. 113187
| Pos. | Art.-Nr. |
| 1 | 414369 |
| 2 | 414370 |
| 3 | 414371 |
| 4 | 414372 |
| 5 | 414373 |
| 6 | 414374 |
| 7 | 414375 |
| 8 | 414376 |
| 9 | 414377 |
| 10 | 414378 |
| 11 | 414379 |
| 12 | 414380 |
| 13 | 414381 |
| 14 | 414382 |
| 15 | 414383 |
| 16 | 414384 |
| 17 | 414385 |
| 18 | 414386 |
| 19 | 414387 |
| 20 | 414388 |
| 21 | 414389 |
| 22 | 414390 |
| 23 | 414391 |
| 24 | 414392 |
| 25 | 414393 |
| 26 | 414394 |
| 27 | 414395 |
| 28 | 414396 |
| 29 | 414397 |
| 30 | 414398 |
| 31 | 414399 |
| 32 | 414400 |
| 33 | 414401 |
| 34 | 414402 |
| 35 | 414403 |
| 36 | 414404 |
| 37 | 414405 |
| 38 | 414406 |
| 39 | 414407 |
| 40 | 414408 |
| 41 | 414409 |
| 42 | 414410 |
| 43 | 414411 |
| 47 | 414412 |
| 48 | 414413 |
| 49 | 414414 |
| 50 | 414415 |
| Pos. | Art.-Nr. |
| 51 | 414416 |
| 52 | 414417 |
| 53 | 414418 |
| 54 | 414419 |
| 55 | 414420 |
| 56 | 414421 |
| 57 | 414422 |
| 58 | 414423 |
| 59 | 414424 |
| 60 | 414425 |
| 61 | 414426 |
| 62 | 414427 |
| 63 | 414428 |
| 64 | 414429 |
| 65 | 414430 |
| 66 | 414431 |
| 67 | 414432 |
| 68 | 414433 |
| 69 | 414434 |
| 70 | 414435 |
| 71 | 414436 |
| 72 | 414437 |
| 73 | 414438 |
| 74 | 414439 |
| 75 | 414440 |
| 76 | 414441 |
| 77 | 414442 |
| 78 | 414443 |
| 79 | 414444 |
| 80 | 414445 |
| 81 | 414446 |
| 84 | 414449 |
| 85 | 414450 |
| 86 | 414451 |
| 87 | 414452 |
| 88 | 414453 |
| 89 | 414454 |
| 90 | 414455 |
| 91 | 414456 |
| 92 | 414457 |
| 93 | 414458 |
| 94 | 414459 |
| 95 | 414460 |
| 96 | 414461 |
| Country | Company | Telephone | Fax |
| A | AL-KO KOBER Ges.m.b.H. | (+43)3578/2515-100 | (+43)3578/2515-31 |
| AUS | AL-KO INTERNATIONAL Pty. Ltd. | (+61)3/9767-3700 | (+61)3/9767-3799 |
| B/L | Eurogarden NV | (+32)16/805427 | (+32)16/805425 |
| BG | Valerii S&M Group SJ | (+359)2 942 34 02 | (+359)2 942 34 10 |
| CH | AL-KO KOBER AG | (+41)56/418-31 53 | (+41)56/4183160 |
| CZ | AL-KO KOBER Spol. S.R.O. | (+420)382/210381 | (+420)382/212782 |
| D | AL-KO GERÄTE GmbH | (+49)8221/203-0 | (+49)8221/97-8199 |
| DK | AL-KO GINGE A/S | (+45)98821000 | (+45)98825454 |
| EST/LT/LV | SIA AL-KO KOBER | (+371)67/627-326 | ((+371)67/807-018 |
| F | AL-KO S.A.S. | (+33)3/8576-3500 | (+33)3/8576-3581 |
| GB | Rochford Garden Machinery Ltd. | (+44)1963/828050 | (+44)1963/828052 |
| H | AL-KO KFT | (+36)29/5370-50 | (+36)29/5370-51 |
| HR | Brun.ko.-prom d.o.o. | (+385)1 3096 567 | (+385)1 3096 567 |
| I | AL-KO KOBER GmbH / SRL | (+39)039/9329-311 | (+39)039/9329-390 |
| IN | AGRO-COMMERCIAL | (+91)3322874206 | (+91)3322874139 |
| IQ | Avro Gulistan Com | (+946)750 450 80 64 | |
| IRL | Cyril Johnston & Co. Ltd. | (+44)2890813121 | (+44)2890914220 |
| LY | ASHOFAN FOR AGRICULT. ACC. | (+218)512660209 | (+218)512660209 |
| MA | BADRA Sarl | (+212)022447128 | (+212)022447130 |
| MK | Techno Geneks | (+389)2 2551801 | (+389)2 2520175 |
| N | AL-KO GINGE A/S | (+47)64/86-2550 | (+47)64/86-2554 |
| NL | O.DE LEEUW GROENTECHNIEK | (+31)38/444 6160 | (+31)38/444 6358 |
| PL | AL-KO KOBER Sp. z.o.o. | (+48)61/816-1925 | (+48)61/816-1980 |
| RO | SC PECEF TEHNICA SRL | (+40)344 40 30 30 | (+40)244 51 44 86 |
| RUS | OOO AL-KO KOBER | (+7)499/16708-42 | (+7)499/96600-00 |
| RUS | ZAO AL-KO St. Petersburg GmbH | (+7)812/446-1084 | (+7)812/446-1084 |
| S | GINGE Svenska AB | (+46)31/57-3580 | (+46)31/57-5620 |
| SK | AL-KO KOBER Slovakia Spol. S.R.O. | (+421)2/4564-8267 | (+421)2/4564-8117 |
| SLO | Darko Opara s.p. | (+386)1 722 58 50 | (+386)1 722 58 51 |
| SRB | Agromarket d.o.o. | (+381)34 308 000 | (+381)34 308 16 |
| TR | ZIMAS A.S. | (+90)232 4580586 | (+90)232 4572697 |
| UA | TOV AL-KO KOBER | (+380)44/392-07-08 | (+380)44/392-07-09 |



- TABLE OF CONTENTS
- FUEL
- WARNING
- CHECK OIL SUPPLY
- OIL CONNECTION
- SAW CHAIN
- CAUTION
- INTENDED / NOT INTENDED USE
- REMAINDER DRIVEN
- PARTS LOCATION
- FOR SAFE OPERATION
- BEFORE OPERATE THE PRODUCT
- INSTALLING GUIDE BAR AND SAW CHAIN
- FUEL AND CHAIN OIL
- RECOMMENDED MIXING RATIO GASOLINE 40 : OIL
- HOW TO MIX FUEL
- CHAIN OIL
- OPERATION
- STARTING ENGINE
- CHECKING OIL SUPPLY
- CHECKING FUNCTIONAL OF THE CLUTCH
- CHAIN BRAKE
- HOW TO CONFIRM
- STOPPING ENGINE
- SAWING
- GUARD AGAINST KICKBACK
- FELLING A TREE
- LOGGING AND LIMBING
- CUTTING AN UNPILLOWED LOG
- CUTTING A PILLOWED LOG
- LIMBING A FELLED TREE
- PRUNING
- MAINTENANCE
- MAINTENANCE AFTER EACH USE
- AIR FILTER
- OILING PORT
- GUIDE BAR
- OTHERS
- PERIODICAL SERVICE POINTS
- CYLINDER FINS
- FUEL FILTER
- SPARK PLUG
- SPROCKET
- FRONT AND REAR DAMPERS
- MAINTENANCE OF SAW CHAIN AND GUIDE BAR
- CUTTER SETTING STANDARDS
- BEFORE FILING
- STORAGE
- WASTE DISPOSAL AND ENVIRONMENTAL PROTECTION
- TROUBLESHOOTING GUIDE
- WARRANTY
- OUR WARRANTY APPLIES ONLY IF
- THE WARRANTY IS NO LONGER IN EFFECT IF
- THE WARRANTY DOES NOT COVER
- EC DECLARATION OF CONFORMITY
- BUILDING SAMPLE EXAMINATION TO
- GSPG §4 BM 1027 MSR CONFORMITY EVALUATION
- STARTING THE ENGINE
- CHECKING THE OIL SUPPLY
- CROSS-CUTTING AND PRUNING
- SAWING AND PRUNING
- ENGINE START
- BAR
- CHAIN
- CUTTING A LOG THAT IS NOT SUPPORTED
- CUTTING A SUPPORTED LOG
- TRIMMING
- CUTTING AND REMOVING BRANCHES
- REGULAR MAINTENANCE WORK
- SHARPENING IS REQUIRED IF
- REGULATIONS FOR ADJUSTING CHAIN LINKS
- CUTTING CHAIN
- CUTTING
- SHORTENING
- FELLING AND LIMBING
- OIL CONNECTOR
- OIL HOLE
- SVÄRD
- SÅGKEDJA
- DRIVSTOFF OG KJEDEOLJE
- DRIVSTOFF
- ADVARSEL
- STARTE MOTOREN
- LIMB A FELLED TREE
- OIL FILLER OPENING
- SVERD
- CHECKING CHAIN LUBRICATION
- CHECKING THE CLUTCH OPERATION
- OIL PORT
- BLADE FLANGE
- PERIODIC MAINTENANCE
- TOOTH STANDARDS
- CHECK THE OIL LEVEL
- OIL NIPPLE
- SAFETY INSTRUCTIONS
- ATTENTION
- SUPPIMER
- TRANSLATION OF ORIGINAL OPERATING INSTRUCTIONS
- CHECKING THE OILING SYSTEM
- CHAIN CONNECTION
- SAW CHAIN GUIDE BAR
- OIL SUPPLY
Brand : AL-KO
Model : BKS 4540
Category : Saw