
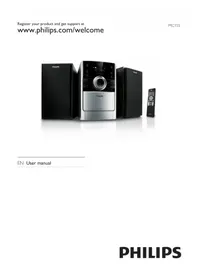
MC145 Micro Hi-Fi System - Hi-Fi System PHILIPS - Free user manual and instructions
Find the device manual for free MC145 Micro Hi-Fi System PHILIPS in PDF.


| Product Type | Micro Hi-Fi System |
| Brand | Philips |
| Model | MC145 |
| Dimensions (Main Unit) | Approx. 160 x 250 x 220 mm |
| Weight (Main Unit) | Approx. 3.5 kg |
| Power Supply | AC 220-240 V, 50/60 Hz |
| Power Consumption | 30 W (typical) |
| Supported Media | CD, CD-R, CD-RW, MP3-CD |
| Radio Tuner | FM/MW (AM) with presets |
| Speaker Output Power | 2 x 10 W RMS |
| Audio Input | 3.5 mm auxiliary input |
| USB Playback | Yes (MP3, WMA) |
| Bluetooth | Not included (wired only) |
| Remote Control | Included |
| Display | LCD with dimmer |
| Care and Cleaning | Wipe with dry cloth; do not use liquids. |
| Safety | Do not expose to moisture; ensure ventilation. |
| Spare Parts Availability | Contact Philips support for replacement parts. |
| Repairability | Designed for professional repair only. |
| General Information | User manual available in multiple languages. |
Frequently Asked Questions - MC145 Micro Hi-Fi System PHILIPS
User questions about MC145 Micro Hi-Fi System PHILIPS
0 question about this device. Answer the ones you know or ask your own.
Ask a new question about this device
Download the instructions for your Hi-Fi System in PDF format for free! Find your manual MC145 Micro Hi-Fi System - PHILIPS and take your electronic device back in hand. On this page are published all the documents necessary for the use of your device. MC145 Micro Hi-Fi System by PHILIPS.
USER MANUAL MC145 Micro Hi-Fi System PHILIPS
MC145

Let's make things better.

PHILIPS
| Controls and connections | 4-5 | CD player, CD handling | 9-10 |
| General information | 6 | Radio, RDS | 11-12 |
| Remote control, power supply | 6 | Tape deck | 13-15 |
| Basic functions | 7 | Troubleshooting | 16 |
| Clock/Timer | 8 | Technical data | 16 |
Important notes for users in the U.K.
Mains plug
This apparatus is fitted with an approved 13 Amp plug. To change a fuse in this type of plug proceed as follows:
1 Remove fuse cover and fuse.
2 Fix new fuse which should be a BS1362 5 Amp, A.S.T.A. or BSI approved type.
3 Refit the fuse cover.
If the fitted plug is not suitable for your socket outlets, it should be cut off and an appropriate plug fitted in its place.
If the mains plug contains a fuse, this should have a value of 5 Amp. If a plug without a fuse is used, the fuse at the distribution board should not be greater than 5 Amp.
Note: The severed plug must be disposed of to avoid a possible shock hazard should it be inserted into a 13 Amp socket elsewhere.
How to connect a plug
The wires in the mains lead are coloured with the following code: blue = neutral (N), brown = live (L).
As these colours may not correspond with the colour markings identifying the terminals in your plug, proceed as follows:
- Connect the blue wire to the terminal marked N or coloured black.
- Connect the brown wire to the terminal marked L or coloured red.
- Do not connect either wire to the earth terminal in the plug, marked E (or 1/2 ) or coloured green (or green and yellow).
Before replacing the plug cover, make certain that the cord grip is clamped over the sheath of the lead - not simply over the two wires.
Copyright in the U.K.
Recording and playback of material may require consent. See Copyright Act 1956 and The Performer's Protection Acts 1958 to 1972.
Norge
Philips Consumer Electronics
Philips, Glaslaan 2
5616 JB Eindhoven, The Netherlands
CONTROLS AND CONNECTIONS
English


CONTROLS AND CONNECTIONS
On top and front
1 STANDBY-ON ⏻....switches the unit on and to standby 2 Display 3 Sound controls:
DSC......DIGITAL SOUND CONTROL
enhances sound characteristics
INCREDIBLE SURROUND
creates a phenomenal stereo effect
DBB......DYNAMIC BASS BOOST
enhances the bass
4 OPEN-CLOSE....opens the CD lid 5 VOLUME ∧ ∨ ...... adjusts the volume [6] RDS/NEWS ...... displays various RDS information and switches the news announcement on and off
TAPE COUNTER.....displays the tape counter
7 BAND......selects the wave band TIMER ON/OFF.....activates and deactivates the timer 8 CLOCK/TIMER .....selects the clock/timer function 9 PUSH....opens the cassette compartment 10 ▶ ---- skips CD tracks, searches forward on a CD and fast forwards the tape PRESET ▲ ---- selects preset radio stations 11 ◀◀ ---- skips CD tracks, searches backward on a CD and rewinds the tape
▼ PRESET ......selects preset radio stations
12 3.5 mm headphone socket Note: Connecting the headphones switches off the speakers. 13▶II....starts and pauses CD play and starts tape play
TUNING ▶......tunes to radio stations
14 ■......stops CD and tape play and erases the CD program
←TUNING......tunes to radio stations
15 CD SYNCHRO RECORD......starts tape recording 16 REPEAT....repeats the CD or the program REVERSE MODE....switches the different tape reverse options 17 SHUFFLE....plays CD tracks in random order SIDE A/B....switches tape direction 18 PROGRAM......CD: programs tracks and reviews the program Radio: programs radio stations 19 SELECT SOURCE....selects the sound source: C, TUNER, TAPE or AUX
On the back
20 SUBWOOFER.....connect an active subwoofer here 21 SPEAKERS 8 Ω .....connect the supplied speakers here 22 AUX IN.....connect to the audio output of an additional appliance 23 AM AERIAL.....connect the supplied AM frame aerial here 24 AC MAINS......After all other connections have been made, connect the mains lead here and to the wall socket. 25 FM AERIAL 75 Ω...connect the supplied aerial wire here
On the remote control
○......switches the unit to standby
AUX, CD,
TAPE, TUNER.....selects the sound source
TV VOLUME -/+...decreases/increases the volume on a Philips TV
DBB......DYNAMIC BASS BOOST
enhances the bass
DSC......DIGITAL SOUND CONTROL
enhances sound characteristics
INC. SURR. ......creates a phenomenal stereo effect
REPEAT.....repeats the CD or the program
plays CD tracks in random order
PROGRAM......CD: programs tracks and reviews the program
Radio: programs radio stations
<<, ▶CD: searches backward/forward
Radio: tunes to radio stations
Tape: searches backward/forward
II pauses CD play
VOLUME -/+ .....decreases/increases the volume
PREV. ◀, NEXT ►
CD: skips CD tracks backward/forward
Radio: selects a preset radio station
Tape: rewinds/fast forwards the tape
PLAY ▶ ....starts CD and tape play and switches cassette sides
STOP ■......stops CD and tape play and erases the CD program
Note: Select the desired sound source first (e.g. CD), then press the required function key (e.g. PLAY ▶).
GENERAL INFORMATION REMOTE CONTROL POWER SUPPLY
Supplied accessories
- 2 speaker boxes
- Remote control
- 2 batteries for the remote control, size AAA
- AM/MW frame aerial
- FM aerial wire
- Mains lead
General maintenance
Do not expose the unit, batteries or CDs to humidity, rain, sand or excessive heat (caused by heating equipment or direct sunlight).

You can clean the unit with a soft, slightly dampened lint-free cloth. Do not use any cleaning agents as they may have a corrosive effect.

Environmental information
All redundant packing material has been omitted. We have done our utmost to make the packaging easily separable into three mono materials: cardboard (box), polystyrene foam (buffer) and polyethylene (bags, protective foam sheet).
Your unit consists of materials which can be recycled if disassembled by a specialized company. Please observe the local regulations regarding the disposal of packing materials, exhausted batteries and old equipment.

Batteries for the remote control
- Open the battery compartment of the remote control and insert 2 batteries, type AAA, R03 or UM-4 (preferably alkaline).
Remove batteries if they are flat or if the unit is not going to be used for a long time.
Batteries contain chemical substances, so they should be disposed of properly.
Speaker connections
The speaker terminals are click-fit connectors. Use them as shown below.
- Connect the unmarked wire to the red terminal and the marked (black) wire to the black terminal.


Mains
The type plate is located on the back of the unit.
1 Check whether the mains voltage as shown on the type plate corresponds to your local mains voltage. If it does not, consult your dealer or service organisation. 2 Connect the mains cable to the AC MAINS inlet and the wall socket. This switches on the mains supply.
Safety information
To disconnect the unit from the mains completely, remove the mains plug from the wall socket.
Place the unit on a solid surface. Make sure there is sufficient space around the unit to prevent overheating.
This set complies with the radio interference requirements of the European Community.
For users in the U.K.: please follow the instructions on page 2.

Switching on
To switch the unit on, press STANDBY-ON ⊙ on the unit (AUX, CD, TAPE or TUNER on the remote control).
To switch the unit to standby, press STANDBY-ON ◎ again (○ on the remote control).
To avoid overheating of the unit a safety circuit has been built in. Therefore your unit may disconnect under extreme conditions. If this happens, switch the unit off and let it cool down before reusing it.
Volume and sound adjustment
- Adjust the volume using VOLUME ∧ ∨ (VOLUME −/+ on the remote control).
→ The volume level between VOL 0 and VOL 32 is displayed.
- Press DSC repeatedly to select the desired sound characteristics.
→ ↘, √ or ↘ is shown.
- Press DBB to switch the bass enhancement on and off.
→ DBB is shown.
- Press INCREDIBLE SURROUND (INC. SURR. on the remote control) to switch the surround sound effect on and off.
→ "yes" is shown and the button is backlit.
Note: The effect of INCREDIBLE SURROUND may vary with different types of music.
Using additional appliances
You may use an additional appliance, e.g. tape player with the unit. Refer to the instruction manual of the appliance for connections and operations.
1 Insert the red plug of a cinch cable to the red AUX IN socket. 2 Insert the white plug of the cinch cable to the white AUX IN socket. 3 Connect the other ends of the cinch cable to the audio outputs of an additional appliance. 4 Press SELECT SOURCE repeatedly to display FLUX. 5 Operate your appliance as usual and adjust the volume and sound at the MC 145 unit.
Note: AUX IN is not suitable for connecting a turntable.
CLOCK/TIMER

Clock setting
You may set the clock by using a time signal which is broadcast with RDS stations. This only works if the RDS station is sending this signal.
Automatic clock setting
1 Tune to an RDS station (see "RADIO").
2 Keep CLOCK/TIMER on the unit pressed for more than 2 seconds.
→SEARCH RDS TIME is displayed for a maximum of 90 seconds. Then the time is displayed.
Note: If NO RDS TIME is displayed, no time signal has been received. In that case you will have to set the clock manually.
Manual clock setting
1 Switch to standby. 2 Press CLOCK/TIMER on the unit. → The clock digits flash. 3 Press ◀ TUNING ▶ on the unit to set the hour. 4 Press ▼ PRESET ▲ on the unit to set the minutes. 5 Press CLOCK/TIMER on the unit to confirm the settings.
Displaying the time
- When the unit is switched on, press CLOCK/TIMER to switch the time display on and off.
Timer setting
You may use the unit as an alarm clock, with the CD, tuner or tape switching on at a set time.
1 Adjust the volume to be used for the alarm. 2 Switch to standby. 3 Keep CLOCK/TIMER on the unit pressed for more than 2 seconds.
→ TIMER flashes and the actual source is displayed.
4 Press SELECT SOURCE on the unit to select the desired sound source: CD, TUNER or TAPE.
Note: REC TUN is only used for a timed recording. See "TAPE DECK" for details.
5 Press CLOCK/TIMER on the unit to confirm the source. → The symbol of the source and ON is displayed, the clock digits flash. 6 Press ◀◀ TUNING ▶▶ on the unit to set the desired hour and ▼ PRESET ▲ to set the desired minute. 7 Press CLOCK/TIMER on the unit to confirm the settings. → TIMER is shown and the timer is armed.
Note: If more than 90 seconds elapses without a button being pressed, the unit quits the timer setting mode.
Timer deactivation and activation
- Press TIMER ON/OFF during standby, to switch the timer off and on. → If the timer is armed TIMER is shown.

Playing a CD
1 Press SELECT SOURCE repeatedly to display CD. 2 Press OPEN-CLOSE to open the CD lid. → OPEN is displayed. 3 Insert an audio CD (printed side up) and close the lid. → RCPD is displayed and the CD player stops. The total number of tracks and the total playing time of the CD are displayed. 4 Press ▶II (PLAY ▶ on the remote control) to start playback. → The current track number and the elapsed play time are displayed. 5 Press ■ (STOP ■ on the remote control) to stop playback. → The total number of tracks and the total playing time of the CD are displayed.
- You can pause playback by pressing ▶II (II on the remote control). → The time at which playback was interrupted flashes. - Continue playback by pressing ▶II (PLAY ▶ on the remote control).
Note: Playback will also stop if: - you open the CD lid, - the end of the CD is reached, or - you select the tuner, tape or AUX.
REPEAT and SHUFFLE
Repeating the CD or the program
1 During playback press REPEAT to start repeated playback. → REPEAT is shown. The entire CD (or program if available) is played repeatedly.
2 Press REPEAT again to return to normal playback. → REPEAT disappears.
Playing tracks in random order
1 Press SHUFFLE to start shuffle play. → SHUFFLE is shown and SHUFFLE flashes twice. The tracks of the entire CD (or program if available) are played in random order.
2 Press SHUFFLE again to return to normal playback. → SHUFFLE disappears.
Note: Repeat and shuffle can be combined.
Selecting a track and searching Selecting a track during playback
- Briefly press ◀◀ or ▶▶ (PREV. ◀◀ or NEXT ▶▶ on the remote control) once or several times to skip to the beginning of the current, previous or next track(s). → Playback continues with the selected track.
Selecting a track while playback is stopped
1 Briefly press ◀◀ or ▶▶ (PREV. ◀◀ or NEXT ▶▶ on the remote control) once or several times to skip to the previous or next track(s).
2 Press ▶II (PLAY ▶ on the remote control) to start CD play. → Playback starts with the selected track.
Searching for a passage during CD play
1 Keep ◀◀ or ▶▶ pressed (◀◀ or ▶▶ on the remote control) to find a particular passage in a backward or forward direction. → Fast playback starts at a low volume.
2 Release the button when you reach the desired passage. → Normal playback continues.
Note: During shuffle play and while playing a program, searching is only possible within the particular track.
CD PLAYER CD HANDLING

Programming track numbers
You may select up to 20 tracks and store them in the memory in a desired sequence. You may store any track more than once.
1 Press SELECT SOURCE repeatedly to display CD. Or, if CD is already selected, press ■ (STOP ■ on the remote control) to stop CD playback.
2 Press PROGRAM to start programming.
→ PROGRAM flashes and the track number 1 is displayed.
3 Select a desired track with ◀◀ or ▶▶ (PREV. ◀◀ or NEXT ▶▶ on the remote control).
4 Press PROGRAM to store this track.
→ The number of selected tracks and the playing time of the program is displayed briefly.
5 Select and store all desired tracks in this way. If PROG is displayed next to a track number, this track is already programmed.
Note: If you try to store more than 20 tracks, FULL is displayed.
6 Press ▶II (PLAY ▶ on the remote control) to listen to your selection of tracks.
Reviewing the program
- Keep PROGRAM pressed for more than 2 seconds to review your program. → The display shows all stored tracks in sequence.
Note: Reviewing the program does not interrupt playback.
Erasing the program
1 Press ■ (STOP ■ on the remote control) to stop playback. 2 Press ■ (STOP ■ on the remote control) to erase the program. → PROGRAM goes off, CERRED is displayed briefly and the program is erased.
Note: The program will also be erased if you:
- interrupt the power supply,
- open the CD lid.
CD player and CD handling
The lens of the CD player should never be touched. If the CD player cannot read CDs correctly, use a commonly available cleaning CD to clean the lens. If this does not help, take the unit to an authorized repair workshop.

Other cleaning methods may destroy the lens. Always keep the lid closed to avoid dust on the lens.
The lens may cloud over when the unit is suddenly moved from cold to warm surroundings. This prevents the CD player from working properly. Leave the CD player in a warm environment until the moisture evaporates.
Active mobile phones near the CD player may cause malfunctions.
To take the CD out of its case easily, press the center spindle while lifting the CD. Always pick up the CD by the edge and put it back in its box after use.

To clean the CD, wipe it in a straight line from the center toward the edge using a soft, lint-free cloth. A cleaning agent may damage the disc! Never write on a CD or attach a sticker to it.


Tuning to radio stations
1 Press SELECT SOURCE repeatedly to display TUNER. 2 Select a wave band by pressing BAND repeatedly. → The selected waveband is shown. 3 Keep ◀◀ TUNING ▶ (◀◀ or ▶▶ on the remote control) pressed for approximately 1 second. → SEARCH is displayed and the radio tunes to a station with sufficient strength. If an FM station is received in stereo, STEREO is shown. 4 Repeat searching until you find the desired station. - To tune to a weak station, briefly press ◀ TUNING ▶ (◀ or ▶ on the remote control) as often as necessary for optimum reception.
Programming radio stations
You may store up to 30 radio stations. The unit can select and program stations by itself or you may choose them yourself.
Automatic programming
Automatic programming will start at a chosen preset number. From this preset number upwards, former programmed radio stations will be overwritten. The unit will only program stations which are not in the memory already.
1 Press ▼ PRESET ▲ (PREV. ◀ or NEXT ▶ on the remote control) to select the preset number where programming should start. 2 Keep PROGRAM on the unit pressed for more than 2 seconds. → RUTO is displayed and available stations are programmed. Then the radio station using the highest preset number is played.
Manual programming
1 Tune to a desired radio station (see "Tuning to radio stations"). 2 Press PROGRAM on the unit. → PROGRAM flashes. 3 Press ▼ PRESET ▲ (PREV. ◀ or NEXT ▶ on the remote control) to assign a number from 1 to 30 to this station. 4 Press PROGRAM on the unit to confirm the setting. → PROGRAM goes off, the preset number and the frequency of the preset station are displayed.
Tuning to preset stations
- Press ▼ PRESET ▲ (PREV. ◀ or NEXT ▶ on the remote control) until the preset number of the desired station is displayed.
RDS

RDS
Radio Data System is a service that allows FM stations to send additional information. If you are receiving an RDS station, and the station name are displayed.
When automatic programming is used, RDS stations will be programmed first.
Scrolling through different RDS information
- Press RDS/NEWS on the unit repeatedly to scroll through the following information (if broadcast):
- Program type such as: NEWS, SPORT, POP 11,... – Radio text messages
- Frequency
- Station name
Note: If you press RDS/NEWS and NO RDS is displayed, no RDS signal is being received.
News announcement
You may set up the tuner in such a way that listening to CD or tape is interrupted by the news of a RDS station. This only works if the RDS program type NEWS is broadcast while sending the news.
1 Tune to the desired RDS station (see "RADIO"). 2 Keep RDS/NEWS on the unit pressed for 2 seconds.
→ NEWS ON is displayed briefly and 📄 starts flashing.
3 Play a CD or tape as usual.
→ While news are broadcast the unit will switch to tuner and NEWS is displayed. The news function is switched off.
- You can switch off the news announcement by keeping RDS/NEWS pressed for 2 seconds.
Note: To avoid unwanted recordings, the news announcement does not work while recording a cassette.
RDS programm types
NO TYPE.....No RDS program type
NEWS......News services
AFFIRIS.....Politics and current affairs
INFO......Special information programs
SPORT ....Sports
EDUCATE......Education and advanced training
DRAMA ......Radio plays and literature
CULTURE.....Culture, religion and society
SCIENCE.....Science
VARIED ....Entertainment programs
POP M ......Pop music
ROCK M ......Rock music
MOR M ......Light music
LIGHT M .....Light classical music
CLASSICS ....Classical music
OTHER M ......Special music programs
EON
Enhanced Other Network allows you to search for an RDS station offering a certain program type. If EON is available, |EON| is shown.
1 While receiving an RDS station, press RDS/NEWS on the unit, until the program type is displayed. 2 Press ▼ PRESET ▲ (PREV. ◀ or NEXT ▶ on the remote control), until the desired program type is displayed. 3 Press TUNING ▶▶ (▶▶ on the remote control) to start searching.
→ The radio tunes to an RDS station broadcasting this program type. If this program type is not available TYPE NOT FOUND is displayed.
Notes:— If EON is not available, the preset RDS stations are searched for the selected program type.
- If you are using the news announcement with an EON station, the whole network is searched for news.

1 Press SELECT SOURCE repeatedly to display TAPE. 2 Press PUSH to open the cassette compartment. 3 Insert a recorded cassette with the open side down and close the cassette compartment. 4 Press ▶II (PLAY ▶ on the remote control) to start playback. → The cassette side(s) currently in use, : and the tape counter are displayed. 5 Press ■ (STOP ■ on the remote control) to stop playback.
Switching cassette sides
You may change cassette sides without taking the cassette out of the compartment. The cassette side can be switched manually or automatically at the end of the tape.
Switching sides while playback is stopped
- Press SIDE A/B on the unit to switch tape sides. →R or B is displayed and the tape counter is reset to 000.
Switching sides during playback
- During playback press SIDE A/B (PLAY ▶ on the remote control) to switch tape sides.
→R : or S : is displayed and the tape counter is reset to □□□. Playback continues with the chosen cassette side.
Automatic side switch
You may choose if the playback should stop, or should continue with the other cassette side, when the end of the tape is reached.
- Press REVERSE MODE repeatedly on the unit to select either:
- or : Playback stops at the end of the tape. - + or + : The cassette side is switched once. - + or + and REPEAT: Both cassette sides are played repeatedly; up to 5 times each side.
Winding the tape
1 Press ■ (STOP ■ on the remote control) to stop playback. 2 Press ◀◀ or ▶▶ to rewind or fast forward the tape. → ▶ or ▶ and the tape counter are displayed, ( < or > ) flashes. 3 Press ■ (STOP ■ on the remote control) to stop tape winding.
Monitoring the tape while winding
1 Press ▶ II (PLAY ▶ on the remote control) to start playback. → The cassette side(s) currently in use, / and the tape counter are displayed. 2 Keep or pressed (or on the remote control) to find a particular passage in a backward or forward direction. → : disappears and fast playback starts at a low volume. 3 Release the button when you have reached the desired passage. → Normal playback continues.
TAPE DECK

Tape counter
During the use of the tape deck a tape counter is displayed. The counter should help you to find titles or passages on a cassette. The counter can be reset to ☐☐☐.
Displaying the counter during recording
- Press TAPE COUNTER during recording to switch between the counter and the display of the source.
Resetting the counter
1 Press ■ (STOP ■ on the remote control) to stop playback.
2 Press ■ (STOP ■ on the remote control) to reset the tape counter.
→ □□□ is displayed.
General information on recording
Recording is permissible provided that copyright or other rights of third parties are not infringed upon.
For recording on this unit you should use a cassette of the type NORMAL (IEC type I) or CHROME (IEC type II). The deck is not suitable for recording on cassettes of the type METAL (IEC type IV).
The recording level is set automatically. The controls VOLUME, INCREDIBLE SURROUND, DSC, and DBB do not affect the recording.
At the very beginning and end of the tape, no recording will take place in the 7 seconds during which the leader tape passes the recorder heads.
Protecting tapes from accidental erasure
Keep the cassette side to be protected in front of you and snap off the left tab. Now, recording on this side is no longer possible.
To record again on this side of the cassette, cover the hole with a piece of adhesive tape.


Recording from the radio
1 Press SELECT SOURCE repeatedly to display TUNER. 2 Tune to the desired radio station (see under "RADIO"). 3 Press PUSH to open the cassette compartment. 4 Insert a blank, unprotected cassette and close the cassette compartment. 5 Press RECORD on the unit to start recording. →RECORD is displayed briefly and RECORD is shown. 6 Press ■ (STOP ■ on the remote control) to stop recording.

Recording from the CD player (CD SYNCHRO)
1 Press SELECT SOURCE repeatedly to display C D. 2 Insert a CD and, if desired, program track numbers. 3 Press PUSH to open the cassette compartment. 4 Insert a blank, unprotected cassette and close the cassette compartment. - You can choose the cassette side(s) P, B or R+B by pressing REVERSE MODE. When selecting R+B the cassette sides are switched automatically at the end of the tape. CD playback is paused during the side switch. 5 Press CD SYNCHRO RECORD on the unit. → Recording starts. CD play starts 7 seconds later, to let the leader tape pass the recorder heads.
Note: If the first track to be recorded is chosen by◀◀ or ▶▶, CD playback and tape recording start simultaneously.
6 Press ■ (STOP ■ on the remote control) to stop recording.
Note: If RECORD is pressed during CD playback, recording starts immediately (use ▶II to pause CD playback).
Record Timer
You may record from the radio at a set time. You have to define a preset radio station to record from, a start time and a stop time. You can choose the cassette side(s) P, B or P+B by pressing REVERSE MODE.
1 Select the preset radio station to record from. 2 Switch to standby. 3 Keep CLOCK/TIMER on the unit pressed for more than 2 seconds. → TIMER flashes and the actual source is displayed.
4 Press SELECT SOURCE repeatedly to display REC TUN.
5 Press CLOCK/TIMER on the unit to confirm the source. →ON is displayed, RECORD and the clock digits flash.
6 Press ◀◀ TUNING ▶▶ on the unit to set the desired hour and ▼ PRESET ▲ to set the desired minute.
7 Press CLOCK/TIMER on the unit to confirm the start time. →OFF is displayed, RECORD and the clock digits flash.
8 Press ◀◀ TUNING ▶▶ on the unit to set the desired hour and ▼ PRESET ▲ to set the desired minute.
9 Press CLOCK/TIMER on the unit to confirm the settings. → TIMER is shown and the recording timer is set.
Tape deck maintenance
To ensure proper recording and playback quality, clean parts A, B and C after approx. 50 hours of operation. Use a cotton swab slightly moistened with alcohol or head-cleaner fluid.
Press ▶II and clean the rubber pressure rollers (A). Press ▶II again and clean the capstans (B) and the heads (C).
Note: The heads (C) can also be cleaned by playing a cleaning tape once.

TROUBLESHOOTING
TECHNICAL DATA
WARNING
Under no circumstances should you try to repair the unit yourself as this will invalidate the guarantee.
If a fault occurs, first check the points listed, before taking the unit for repair.
If you are unable to solve a problem by following these hints, consult your dealer or service center.
Problem Possible cause Solution No sound, Volume is turned down. Turn up the volume.
| no power | Headphone is connected. Disconnect headphone. |
| Mains cable is not securely connected. Connect mains cable properly. |
No reaction to Electrostatic discharge. Disconnect the unit from the power supply, reconnect after a few seconds.
Poor radio Weak radio signal. Direct the aerial for optimum reception.
| reception | Interference caused by electrical equipment Keep the unit away from electrical such as TVs, computers, engines, etc. equipment. | |
| NO DISC is displayed | The CD is badly scratched or dirty. | Replace or clean the CD. |
| No CD, or CD is inserted upside down. | Insert a CD with label upwards. | |
| The laser lens is steamed up. | Wait until the lens has cleared. | |
| The CD skips tracks | The CD is damaged or dirty. | Replace or clean the CD. |
| SHUFFLE or PROGRAM is active. | Switch off SHUFFLE or PROGRAM. | |
| Poor cassette sound quality | Dust and dirt on the heads, capstans or pressure rollers. | Clean heads, capstans, and pres |
| Use of unsuitable cassette type (METAL) for recording. | Only use NORMAL or CHROME for recording. | |
| CHECK TAPE is displayed | Cassette tab(s) may be snapped off. | Apply a piece of adhesive tape of the hole. |
| Remote control does not function properly | Batteries are inserted incorrectly. | Insert batteries correctly. |
| Batteries are flat. | Insert fresh batteries. | |
| The unit is too far away. | Move the unit nearer. | |
Amplifier
Standby power consumption....8 W
Output power.....2 × 10 W RMS 1 / 8 Ω / 1 kHz / THD 10 %
Output power....200 W PMPO
Music power....2 × 20 W
Signal-to-noise ratio ≥ 75 dBA (IEC)
Input sensitivity AUX....0.5 V (max. 2 V)
SUBWOOFER output.....>20,000 Ω
Impedance, speakers ≥ 8 Ω
Impedance, headphones....32 Ω–1000 Ω
±1dB
Tuner
FM range 87.50–108.00 MHz
MW range 531-1602 kHz
Sensitivity at 75 Ω:
Mono, 26 dB signal-to-noise ratio....2.8 μV
Stereo, 46 dB, signal-to-noise ratio....61.4 μV
Total harmonic distortion ....≤ 5 %
Frequency response....63–12,500 Hz (± 3 dB)
Signal-to-noise ratio ≥ 50 dBA
CD player
Frequency range....20–20,000 Hz
Signal-to-noise ratio 75 dBA
Tape deck
Frequency response....80–12,500 Hz (8 dB)
Signal-to-noise ratio 50 dBA
Wow and flutter ≤ 0.4 % DIN
Bass reflex speakers
Dimensions (w × h × d)....165 × 240 × 240 mm
Weight (each)......approx. 1.5 kg
General
Dimensions (w × h × d)....165 × 240 × 250 mm
Weight (without speakers)......approx. 3 kg
Subject to modification
GENERAL INFORMATION REMOTE CONTROL MAINS SUPPLY
Mains

Start-up
Playing a CD
RDS program types
NO TYPE.....No RDS program type
NEWS......News service
SCIENCE.....Sciences
VARIED .....Entertainment programs


Power supply
Turning on

FM range 87.50–108.00 MHz
MW range 531-1602 kHz
Dimensions (W × H × D) ....165 × 240 × 240 mm
Weight (each)....approx. 1.5 kg
General
Dimensions (W × H × D) ....165 × 240 × 250 mm
Weight (without speakers)....approx. 3 kg.
Mains operation
Switching on
Playing a CD

Recording from the radio
- IMPORTANT NOTES FOR USERS IN THE U.K
- MAINS PLUG
- HOW TO CONNECT A PLUG
- COPYRIGHT IN THE U.K
- NORGE
- CONTROLS AND CONNECTIONS
- ON TOP AND FRONT
- ON THE BACK
- ON THE REMOTE CONTROL
- GENERAL INFORMATION REMOTE CONTROL POWER SUPPLY
- SUPPLIED ACCESSORIES
- GENERAL MAINTENANCE
- ENVIRONMENTAL INFORMATION
- BATTERIES FOR THE REMOTE CONTROL
- BATTERIES CONTAIN CHEMICAL SUBSTANCES, SO THEY SHOULD BE DISPOSED OF PROPERLY
- SPEAKER CONNECTIONS
- MAINS
- THE TYPE PLATE IS LOCATED ON THE BACK OF THE UNIT
- SAFETY INFORMATION
- THIS SET COMPLIES WITH THE RADIO INTERFERENCE REQUIREMENTS OF THE EUROPEAN COMMUNITY
- SWITCHING ON
- VOLUME AND SOUND ADJUSTMENT
- USING ADDITIONAL APPLIANCES
- CLOCK/TIMER
- CLOCK SETTING
- AUTOMATIC CLOCK SETTING
- MANUAL CLOCK SETTING
- DISPLAYING THE TIME
- TIMER SETTING
- TIMER DEACTIVATION AND ACTIVATION
- PLAYING A CD
- REPEAT AND SHUFFLE
- REPEATING THE CD OR THE PROGRAM
- PLAYING TRACKS IN RANDOM ORDER
- SELECTING A TRACK AND SEARCHING SELECTING A TRACK DURING PLAYBACK
- SELECTING A TRACK WHILE PLAYBACK IS STOPPED
- SEARCHING FOR A PASSAGE DURING CD PLAY
- CD PLAYER CD HANDLING
- PROGRAMMING TRACK NUMBERS
- REVIEWING THE PROGRAM
- ERASING THE PROGRAM
- CD PLAYER AND CD HANDLING
- TUNING TO RADIO STATIONS
- PROGRAMMING RADIO STATIONS
- AUTOMATIC PROGRAMMING
- MANUAL PROGRAMMING
- TUNING TO PRESET STATIONS
- RDS
- SCROLLING THROUGH DIFFERENT RDS INFORMATION
- NEWS ANNOUNCEMENT
- RDS PROGRAMM TYPES
- EON
- SWITCHING CASSETTE SIDES
- SWITCHING SIDES WHILE PLAYBACK IS STOPPED
- SWITCHING SIDES DURING PLAYBACK
- AUTOMATIC SIDE SWITCH
- WINDING THE TAPE
- MONITORING THE TAPE WHILE WINDING
- TAPE DECK
- TAPE COUNTER
- DISPLAYING THE COUNTER DURING RECORDING
- RESETTING THE COUNTER
- GENERAL INFORMATION ON RECORDING
- PROTECTING TAPES FROM ACCIDENTAL ERASURE
- RECORDING FROM THE RADIO
- RECORDING FROM THE CD PLAYER (CD SYNCHRO)
- RECORD TIMER
- TAPE DECK MAINTENANCE
- TROUBLESHOOTING
- TECHNICAL DATA
- WARNING
- AMPLIFIER
- TUNER
- CD PLAYER
- BASS REFLEX SPEAKERS
- GENERAL
- GENERAL INFORMATION REMOTE CONTROL MAINS SUPPLY
- START-UP
- RDS PROGRAM TYPES
- POWER SUPPLY
- TURNING ON
- MAINS OPERATION
Brand : PHILIPS
Model : MC145 Micro Hi-Fi System
Category : Hi-Fi System