
SL D07 BEB - Washing machine HOTPOINT - Free user manual and instructions
Find the device manual for free SL D07 BEB HOTPOINT in PDF.
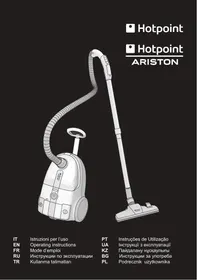



| Brand | HOTPOINT |
| Model | SL D07 BEB |
| Product type | Canister vacuum cleaner with Trolley system |
| Energy efficiency class | A |
| Annual energy consumption | 25 kWh/year |
| Rated input power | 700 W |
| Acoustic power level | 78 dB(A) |
| Dust emission class | B |
| Filtration type | Pure Clean Hepa 13 (washable filter) |
| Suction system | With bag (Pure Clean) or bagless (Dual System) |
| Main functions | Trolley System, Remote Power Control, Start & Pause, electronic power regulator |
| Included accessories | Multi/deluxe brush, parquet brush, turbo brush, furniture brush, crevice nozzle, delicate surfaces nozzle |
| Power supply | 220-240 V |
| Power cord length | 7 m (red marker) |
| Dust container volume | Not specified (bag or removable container) |
| Maintenance and cleaning | Clean filters every 4 months, replace Hepa 13 filter once a year, change Pure Clean bag when indicator is red |
| Safety | Safety device preventing lid closure if bag is not properly installed |
| Recommended spare parts | Original Pure Clean bags, Hepa 13 filters |
Frequently Asked Questions - SL D07 BEB HOTPOINT
User questions about SL D07 BEB HOTPOINT
0 question about this device. Answer the ones you know or ask your own.
Ask a new question about this device
Download the instructions for your Washing machine in PDF format for free! Find your manual SL D07 BEB - HOTPOINT and take your electronic device back in hand. On this page are published all the documents necessary for the use of your device. SL D07 BEB by HOTPOINT.
USER MANUAL SL D07 BEB HOTPOINT
EN Operating instructions
FR Mode d'emploi
RU Инструкция по эксплуатации
TR Kullanma talimatları
PT
UA
KZ
BG
PL
Remote Power Control (C)
II Remote Power Control, if present, allows you
Air Fresh Hepa 13 (I)
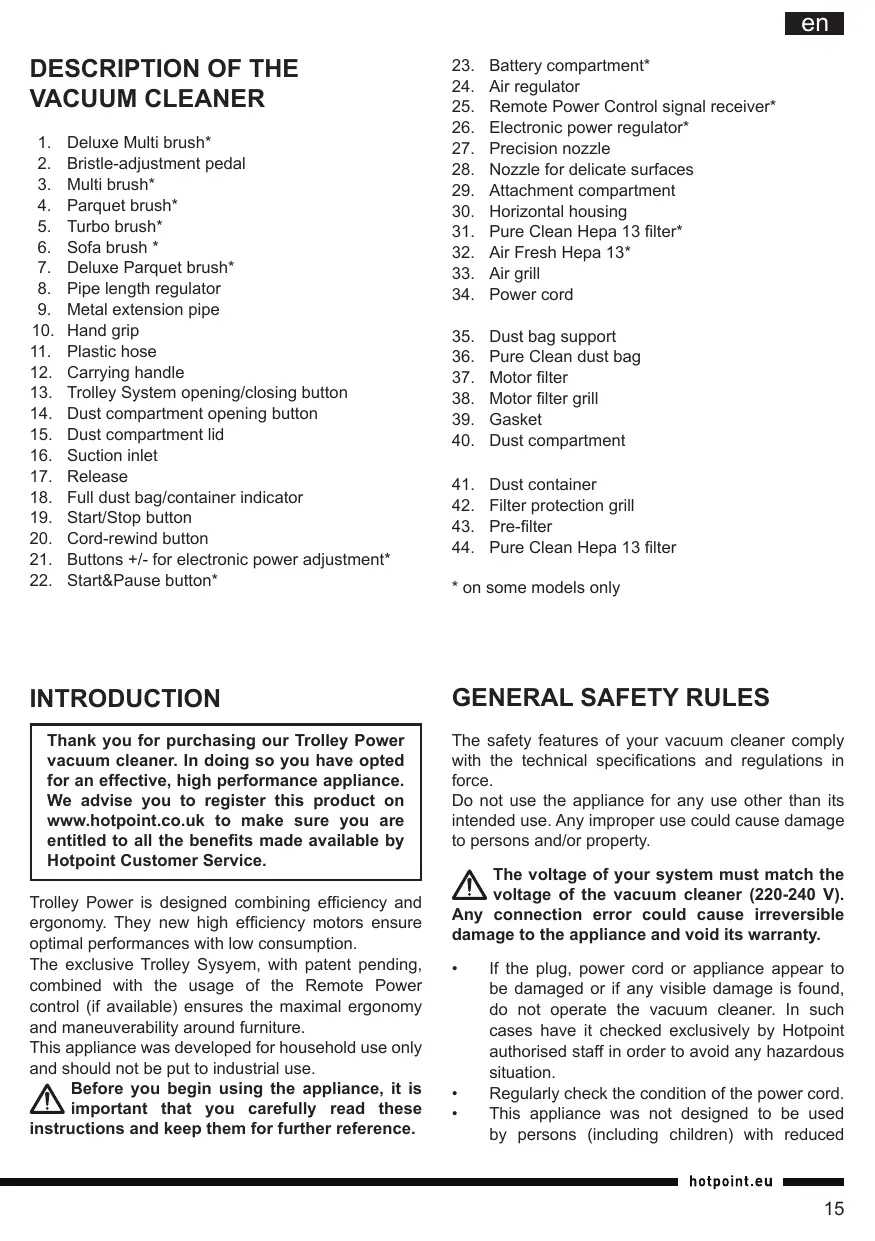
- Deluxe Multi brush*
- Bristle-adjustment pedal
- Multi brush*
- Parquet brush*
- Turbo brush*
- Sofa brush*
- Deluxe Parquet brush*
- Pipe length regulator
- Metal extension pipe
- Hand grip
- Plastic hose
- Carrying handle
- Trolley System opening/closing button
- Dust compartment opening button
- Dust compartment lid
- Suction inlet
- Release
- Full dust bag/container indicator
- Start/Stop button
- Cord-rewind button
- Buttons +/- for electronic power adjustment*
- Start&Pause button*
INTRODUCTION
Thank you for purchasing our Trolley Power vacuum cleaner. In doing so you have opted for an effective, high performance appliance. We advise you to register this product on www.hotpoint.co.uk to make sure you are entitled to all the benefits made available by Hotpoint Customer Service.
Trolley Power is designed combining efficiency and ergonomics. The new high efficiency motors ensure optimal performances with low consumption.
The exclusive Trolley System, with patent pending, combined with the usage of the Remote Power control (if available) ensures the maximal ergonomics and maneuverability around furniture.
This appliance was developed for household use only and should not be put to industrial use.
Before you begin using the appliance, it is important that you carefully read these instructions and keep them for further reference.
- Battery compartment*
- Air regulator
- Remote Power Control signal receiver*
- Electronic power regulator*
- Precision nozzle
- Nozzle for delicate surfaces
- Attachment compartment
- Horizontal housing
- Pure Clean Hepa 13 filter*
- Air Fresh Hepa 13*
- Air grill
- Power cord
- Dust bag support
- Pure Clean dust bag
- Motor filter
- Motor filter grill
- Gasket
- Dust compartment
- Dust container
- Filter protection grill
- Pre-filter
- Pure Clean Hepa 13 filter
- on some models only
GENERAL SAFETY RULES
The safety features of your vacuum cleaner comply with the technical specifications and regulations in force.
Do not use the appliance for any use other than its intended use. Any improper use could cause damage to persons and/or property.
The voltage of your system must match the voltage of the vacuum cleaner (220-240 V). Any connection error could cause irreversible damage to the appliance and void its warranty.
If the plug, power cord or appliance appear to be damaged or if any visible damage is found, do not operate the vacuum cleaner. In such cases have it checked exclusively by Hotpoint authorised staff in order to avoid any hazardous situation. Regularly check the condition of the power cord. This appliance was not designed to be used by persons (including children) with reduced
physical, sensory or mental capabilities. Nor, in addition, persons lacking experience or familiarity with the product, unless they are supervised or instructed on the use of the appliance by a person responsible for their safety.
Supervise children to prevent them from playing with the appliance. Never leave the appliance unattended when it is plugged into an electrical outlet. Never use the power cord to move or carry the appliance around. After use, disconnect the plug from the electrical outlet and rewind the power cord. Do not bend the power cord and keep it away from sharp edges to avoid any damage. Never leave or use the appliance over or close to flames, ovens, flammable materials or other sources of heat. Do not use the vacuum cleaner on persons or animals. Keep the suction ends away from your body while it is in operation. Before changing an attachment, when cleaning or maintaining the appliance, and in any case after every use, unplug it from the electrical outlet. Should you suspect a failure, immediately unplug it from the electrical outlet. Never immerse the vacuum cleaner in water
or any other liquid. Never spray any liquid substances onto the appliance.
- Do not leave the appliance in the open air and exposed to inclement weather conditions.
- For safety, we advise you to keep the vacuum cleaner always lower than your own position when cleaning the stairs.
Never suck up any liquid or damp substances as this could affect the operation of the appliance.
- Never suck up any flammable materials or incandescent objects such as ash, cigarette ends etc. Some parts of the vacuum cleaner could catch fire.
- Never suck up any sharp or cutting objects as this could damage the appliance. If very fine dust or powders are sucked up such as flour, etc. small electrostatic discharges could occur. When sucking up materials previously mentioned, we advise not to use the metal extension pipe, but only the plastic flexible hose and to set a low suction power level.
- For your safety, every repair or maintenance action should be carried out on the appliance only by Hotpoint authorised staff.
- No responsibility shall be accepted in case of damage resulting from any improper use of the appliance.
COMMISSION DELEGATED REGULATION (EU) NO 665/2013
| Brand | Hotpoint-Ariston | Hotpoint-Ariston | Hotpoint-Ariston |
| Model | SL D10 BDB | SL D10 BAW | SL D07 BEB |
| Energy Efficiency class | C | C | A |
| Annual energy consumption in kWh/ year, rounded to one decimal place (1) | 36 | 36 | 25 |
| Carpet cleaning performance class | D | D | E |
| Hard floor cleaning performance class | B | B | C |
| Dust re-emission class | B | B | B |
| Sound power level in db(A) | 80 | 80 | 78 |
| Rated input power in W | 1000 | 1000 | 700 |
(1) Indicative annual energy consumption (kWh per year), based on 50 cleaning tasks. Actual annual energy consumption will depend on how the appliance is used.
BEFORE FIRST USE
Remove all adhesives, protective plastic materials and cardboard packaging. Make sure all adhesive parts are removed with a soft damp cloth.
Assembling
- Fasten the plastic flexible hose (11) to the suction inlet (16) until it clicks into place. To remove it, press the release (17) and pull it out.
- Fit the metal extension pipe (9) into the hand grip (10) until it locks into place. Use the length regulator (8) to adjust the length of the pipe.
- Fit the attachment you need (see chapter "Attachments") into the end of the metal extension pipe until it locks into place.
If your appliance is equipped with a Remote Power Control, you will need to insert the batteries supplied (see paragraph "Remote Power Control" under chapter "Features").
USING
THE VACUUM CLEANER (A)
The appliance is equipped with a safety device that prevents the dust-compartment lid from closing unless the dust bag has been correctly installed. Do not force the dust bag lid to close and make sure all the parts are in the correct position to allow you to close the lid.
Do not use the vacuum cleaner without filters, Pure Clean dust bag, dust bag support or dust container, as the appliance could get damaged.
- Unwind the power cord (34) and plug the appliance into an electrical outlet (220/240V).
We advise you to unwind the entire power cord (yellow marker: 6,5m; red marker: 7m) to avoid any overheating and damage.
- Press the start/stop button (19) to start the appliance.
- Press the Trolley System opening/closing button (13) to extend the carrying handle (12) to the desired length until it locks into place. Then manoeuvre the vacuum cleaner using the carrying handle when cleaning the house.
- To select the desired suction intensity (based on the model) use the +/- button and electronically adjust the power (21) of the Remote Power Control; or manually rotate the electronic power regulator (26).
We advise you to use a low suction power on delicate surfaces such as curtains, fabrics, cushions etc to avoid any damage; or at least open the air regulator to reduce the suction effect.
- To pause the vacuum cleaner, if this feature is available, you can use the standby button (22) on the Remote Power Control or the Start & Stop function (based on the model). Just insert the brush into its horizontal housing (30).
- To switch off the appliance press the start/stop button again.
- Disconnect the plug from the electrical outlet and press the cord-rewind button (20) until rewinding is complete.
Make sure the cord does not get entangled during rewinding. 8. Secure the floor head into its horizontal / vertical housing and store the appliance. Do not start the vacuum cleaner if the plastic flexible hose is entangled, as this could damage the appliance.
FEATURES
Electronic power regulator (B)
The electronic power regulator (26) (if available) allows to set the suction power required.
On some models, the ideal power levels are indicated, according to the surface to be cleaned: awnings, carpets and hard floors.
The Eco function (if available) allows to save 25% energy, compared with the consumption relative to max suction power, ensuring at the same time cleaning efficacy.
Remote Power Control (C)
The Remote power control (if available) enables you to adjust the suction power directly and effortlessly from the hand grip, with no need to bend. When using the vacuum cleaner, you can keep it on standby by pressing the Start & Pause button (22).
To insert or change the batteries of your Remote Power Control:
- Open the battery compartment (23).
- Insert two AAA batteries, making sure of the positive and negative poles.
- Close the battery compartment until it clicks into place.
Trolley System (D)
The Trolley System allows you to move your vacuum cleaner easily when cleaning and carry it from room to room effortlessly.
- Press the opening/closing button on the Trolley System (13) to pull out the carry handle (12) until it locks into place at the desired length.
- Having completed your cleaning, press the opening/closing button on the Trolley System and close the carrying handle until it locks into place.
Use the Trolley System's carrying handle to store the appliance, making sure you have correctly locked it into place.
Start & Pause (E)
The Start & Pause function (if available) allows you to keep the vacuum cleaner on stand-by and lock the cleaning head in the park position: just insert the brush into its horizontal housing (30).
Dual System (F)
The Trolley Dual Clean (if available) version of the Trolley Power makes your use of the appliance extremely versatile because it can be used with or without dust bag. Just assemble the conversion kit in the package: it comprises a Pure Clean dust bag (36), dust bag support (35), gasket (39), and motor filter grill (38) already fitted to the motor filter (37). The assembling takes place as follows:
- Make sure the appliance is disconnected from the electrical outlet.
- Press the dust-compartment opening button (14) to open the dust compartment lid (15) and remove the dust container (41).
- Fit the gasket into the special groove along the perimeter of the dust compartment (40).
- Fit the motor filter grill (already fitted to the motor filter) into the special dust-compartment guides.
- Slide the Pure Clean dust bag into the dust bag support all the way; then place it into the special dust compartment.
- Close the dust compartment lid until it clicks into place.
To use the vacuum cleaner with the dust container, remember to remove all the following parts: Pure Clean dust bag, dust bag support, gasket, motor filter and motor filter grill.
Air Fresh Hepa 13 (I)
The Air Fresh Hepa 13 filter (32) (if available), with active carbon treatment, ensures maximal dust retention (>99.95%) and filtration of odors.
CLEANING AND MAINTENANCE
Before cleaning or maintaining the vacuum cleaner, make sure it has been unplugged from the electrical outlet. Do not use aggressive substances or abrasive materials to clean the appliance, its internal parts, and attachments. Make sure it is thoroughly dry before using again. Make sure all its parts are thoroughly dry before replacing them. We advise you to clean the filter at least every 4 months to restore its filtering power. In any case, we recommend replacing the filter at least every year to ensure maximum performance.
Cleaning the appliance
Use a dry or slightly damp soft cloth to clean the plastic parts (body, dust compartment, flexible hose, etc.) and the metal extension pipe (9).
Cleaning the dust compartment (G)
For routine cleaning of the dust compartment (40):
- Press the dust-compartment opening button (14) to open the dust compartment lid (15).
- Based on the model, remove the Pure Clean dust bag (36) or the dust container (41).
- Clean the dust compartment by removing any residual dirt with a small brush. If needed, use a damp soft cloth, taking care to wipe all its parts entirely dry.
- Re-place the Pure Clean dust bag or dust container correctly and close the dust compartment lid until it clicks into place.
Replacing the Pure Clean dust bag (H)
We recommend always using Hotpoint original Pure Clean dust bags (on selected models only), because their special fabric allows optimum air filtration, maximum dust/powder retention, high performance, and a long motor life.
As the Pure Clean dust bags (36) are made of fabric, they are more resistant than conventional paper bags and can retain very fine dust/powder particles more effectively, thus ensuring maximum hygiene.
We recommend replacing the Pure Clean bag as soon as the full-bag indicator illuminates. Change it at least once a year to always be sure of the hygienic condition of your vacuum cleaner. The pores of a bag clogged with dust/powder particles reduce the motor's suction
power and can cause damage.
- Make sure the appliance is disconnected from the electrical outlet.
- Press the dust-compartment opening button (14) to open the dust compartment lid (15).
- Release the bag support (35) and remove the Pure Clean dust bag (36).

Dispose of the dust bag in compliance with all local regulations on waste disposal.
- Slide a new Pure Clean dust bag into the dust bag support completely; then place it back into the special compartment.
- Close the dust compartment lid until it clicks into place.

If you are finding it difficult to close the dust compartment lid, it is likely that the Pure
Clean dust bag and/or its dust bag support have not been assembled correctly. Do not force the dust bag lid to close, make sure both parts are in the correct position to allow lid closure.
Cleaning the filters (I) version with dust bag

The Pure Clean Hepa 13 filter ensures maximum protection against allergens and maintains high air quality, as the air given back by the appliance is entirely free from dust/ powder residues (filtering power >99.95% ). To clean the Pure Clean Hepa 13 filter (31):
- Disassemble the air grill (33) using the opening tab.
- Remove the Pure Clean Hepa 13 filter by releasing the opening tab.
- Wash the filter under running water, taking care that the jet of water is not too strong.
- Hold it so that the water flows parallel to its folds.
- Let it dry at room temperature until all its parts are thoroughly dry.
- Replace the Pure Clean Hepa 13 filter, paying attention to the position of the notches.
- Fit the air grill into its housing until it clicks into place.
To clean the dust compartment filters (40):
- Press the dust-compartment opening button (14) to open the dust compartment lid (15).
- Remove the Pure Clean dust bag (36), motor filter grill (38) and motor filter (37) from the motor filter grill.
- Clean the motor filter by washing it under running water, taking care that the jet of water is not too strong. Then gently shake water loose.
- When cleaning the motor filter grill, remove any dust/powder residues with a small brush. If needed, use a damp soft cloth.
- Fit the motor filter into the motor filter grill again, taking care to position it gently into the special notches.
- Slide the motor filter grill assembly into the special guides in the dust compartment.
- Fit the Pure Clean dust bag using the special dust bag support.
- Close the dust compartment lid until it clicks into place.
Cleaning the dust container (J)

For the routine cleaning of the dust container:
- Press the dust-compartment opening button (14) to open the dust compartment (15) and remove the dust container (41).
- Open the lid and empty the dust container.
- Remove any residual dirt by washing the dust container under running water.
- Let it dry at room temperature until all its parts are thoroughly dry.
- Close the dust container lid until it clicks into place and replace it into the dust compartment.
- Close the dust compartment lid until it clicks into place.
Cleaning the filters (K) version without dust bag

This model comprises two Pure Clean Hepa 13 filters. The Pure Clean Hepa 13 filter ensures maximum protection against allergens and high air quality, because the air given back by the appliance is entirely free from dust/powder residues (filtering power >99.95%).
To clean the Pure Clean Hepa 13 filter (31) in the back:
- Disassemble the air grill (33) using the opening tab.
- Remove the Pure Clean Hepa 13 filter by releasing the opening tab.
- Wash the filter under running water, taking care that the jet of water is not too strong.
- Hold it so that the water flows parallel to its folds.
- Let it dry at room temperature until all its parts are thoroughly dry.
- Re-place the Pure Clean Hepa 13 filter, paying attention to the positions of the notches.
- Fit the air grill into its housing until it clicks into place.
To clean the dust compartment filters (40):
- Press the dust-compartment opening button (14) to open the dust compartment (15).
- Remove the dust container (41).
- Release the opening tab and then remove the Pure Clean Hepa 13 filter, pre-filter (43) and filter protection grill (42).
- When cleaning the filter protection grill, remove any dust/powder residues with a small brush. If needed, use a damp soft cloth.
- Clean the pre-filter by washing it under running water, taking care that the jet of water is not too strong. Allow to dry.
- Wash the Pure Clean Hepa 13 filter under running water, taking care that the jet of water is not too strong.
- Hold it so that the water flows parallel to its folds.
- Let it dry at room temperature until all its parts are thoroughly dry.
- Fit the pre-filter into the special indentation of the Pure Clean Hepa 13 filter, locking both filters in place using the protection grill.
- Fit the pre-filter, Pure Clean Hepa 13 filter and protection grille assembly onto the dust container, paying attention to the positions of the notches, until it clicks into place.
- Re-place the dust container into the dust compartment.
- Close the dust compartment lid until it clicks into place.
ATTACHMENTS
The attachments can either be supplied as standard features (based on the model) or be purchased separately from Hotpoint authorised centres.
Multi brush/Multi Deluxe brush (M/L)
The Multi brush (3) is suitable for vacuuming hard floor and carpets on a daily basis.
The Multi Deluxe brush (1) is designed optimizing the air flow and is especially suitable for vacuuming hard and smooth floors as well as carpets.
Use the bristle-adjustment pedal (2) to clean:


Hard floors
Carpets
Parquet brush (N)
The Parquet brush (4) is suitable for vacuuming delicate areas such as wooden floors. The special
natural bristles enable you to use on very delicate surfaces without harm.
Turbo brush (O)
The Turbo brush (5), with rotating bristles, is especially suitable for the in-depth vacuuming of short-pile carpets and removing pet hair. The special antibacterial treatment prevents the proliferation of bacteria. An arrow under the brush indicates where it can be opened for dislodging trapped objects.
Deluxe Parquet brush (P)
The Deluxe Parquet brush (7) is suitable for vacuuming delicate and parquet floors. The brush is equipped with very delicate rotating bristles, which are operated by the vacuum cleaner's suction power, and soft wheels protecting delicate floors. To clean the plastic parts of the Deluxe Parquet brush, remove the brush from the metal extension pipe (9) and wipe with a dry or slightly damp soft cloth. To clean the rotating bristles, turn the safety lock into position and remove, then disassemble the rotating brush and start cleaning. Remove any hairs or threads that got entangled using scissors, taking care not to damage the bristles.
Upholstery brush (Q)
The upholstery brush (6) is suitable for vacuuming surfaces such as sofas, mattresses, blankets, cushions, etc. It is equipped with rotating bristles operated by the vacuum cleaner's suction power that enable you to clean in depth and remove any fur, hairs, or mites from fabrics. The protection grill prevents the bristles from touching the surfaces to be cleaned, thus ensuring maximum protection on fabrics.
Precision nozzle (R)
The precision nozzle in the attachment compartment (29) helps you vacuum corners, crevices, and other difficult-to-reach areas.
Nozzle for delicate surfaces (S)
The nozzle for delicate surfaces (28) in the attachment compartment (29) is suitable for vacuuming surfaces requiring special care such as radiators, furniture, etc. Its special natural bristles enable you to use it on very delicate surfaces without any harm.
Upholstery nozzle (T)
The upholstery nozzle is suitable for the precise vacuuming of particular surfaces such as sofas, mattresses, blankets, cushions, etc.
DISPOSAL OF OLD ELECTRICAL APPLIANCES

The European Directive 2002/96/EC on Waste Electrical and Electronic Equipment (WEEE) requires that old household electrical appliances must not be disposed
of in the normal unsorted municipal waste stream.
Old appliances must be collected separately in order to optimise the recovery and recycling of the materials they contain and reduce the impact on human health and the environment. The crossed out "wheeled bin" symbol on the product reminds you of your obligation that when you dispose of the appliance it must be separately collected. Consumers should contact their local authority or retailer for information concerning the correct disposal of their old appliance.
TROUBLESHOOTING
Problem
Possible causes / Solutions
The vacuum cleaner cannot be switched on.
The full dust bag/container indicator lights up although it is not full yet.
Low suction power.
Remote Power not working.
Small electrostatic discharges occur while sucking up.
The vacuum cleaner whistles or vibrates when in use.
The plug was not inserted or is not making contact. - Change the dust bag. If large quantities of very fine dust/powder are sucked up (e.g. flour, etc), the full dust bag indicator may light up although the bag is not full yet. The reason is that the Pure Clean dust bag is able to retain very fine dust/powder particles, thus ensuring maximum hygiene. Clean the dust container in models without dust bag. Clean the filters and, if needed, replace them. - Make sure the expansion pipe, flexible hose and brush are not blocked. Clean the filters and, if needed, replace them. - Make sure the expansion pipe, flexible hose and brush are not blocked. - Change the dust bag. If large quantities of very fine dust/powder are sucked up (e.g. flour, etc), the Pure Clean dust bag may become clogged. Clean the dust container and its filters. Battery not charged. - The batteries were positioned incorrectly inside the battery compartment. Position the two AAA batteries making sure of the positive and negative poles. - Remove batteries; then position them again, making sure of the positive and negative poles. - Electronic appliances or obstacles may be interfering or shielding with the infrared signal. If very fine dust or powders are sucked up such as flour, etc. small electrostatic discharges could occur. When sucking up materials previously mentioned, we advise not to use the metal extension pipe, but only the plastic flexible hose and to set a low suction power level. - One or more attachments were assembled incorrectly. Make sure the filters and brushes were assembled according to these instructions. In the model with dust bag make sure that the gasket is correctly in place too.
The brush moves with difficulty.
The dust compartment lid cannot be closed.
- The dust bag/container is full. Replace the dust bag or clean the dust container. Clean the filters and, if needed, replace them. The air regulator is open. Make sure it was closed correctly.
- Reduce suction power, especially on carpets and fabrics in general. Open the air regulator to reduce the "suction effect".
- The Pure Clean dust bag or dust container was assembled incorrectly. Make sure it is correctly in place so that the safety lever will let you close the dust compartment lid.
DESCRIPTION OF THE APPLIANCE
Remote Power Control (C)
Air Fresh Hepa 13 (I)
Possible causes/solutions
Air Fresh Hepa 13 (I)
Carpet nozzles
Parquet nozzle (N)
The parquet nozzle (4) is used for cleaning delicate hard surfaces, such as parquet. The special bristles made of natural material allow cleaning the most delicate floors without damaging them.
Turbo brush (O)
The turbo brush (5) with rotating bristles is especially suitable for thorough cleaning of carpets with short pile and for removing pet hair. The special antibacterial treatment prevents the spread of bacteria. The arrow on the housing indicates where it can be opened to remove trapped objects.
Deluxe parquet nozzle (P)
The nozzle for upholstery is suitable for thorough cleaning of upholstered surfaces - sofas, mattresses, clothing, pillows, etc.
SERVICE AND MAINTENANCE
Free hotline: 88003333887*
* (Free call for subscribers of all landline numbers throughout Russia) We care about our customers and strive to provide high quality service. We constantly improve our products to make your life with technology easier and more enjoyable.
Care for the appliance
The Professional line of care products, recommended by Hotpoint Ariston, extends the service life of your appliance and reduces the likelihood of breakdowns. The Professional line was created with the specifics of your appliance in mind. Products are manufactured in Italy in compliance with high European standards of quality, ecology, and safety of use. Learn more on the website www.hotpoint-ariston.ru in the «Service» section and ask in stores in your city.
Authorized service centers
To be closer to our customers, we have created a network of service centers, distinguished by high training, professionalism, and honesty of service technicians.
In case of malfunction
Before contacting the Service Center, check whether the malfunction can be fixed independently (see section «Malfunctions and methods for their elimination»).
You can contact the Service Center by toll-free phone or by the numbers specified in the warranty document.
! We recommend contacting only authorized service centers ! For repairs, insist on the use of original spare parts
Before contacting the Service Center, make sure you are ready to provide the operator with:
Description of the malfunction; Warranty document number (service book, service certificate, etc.); Model and serial number (S/N) of the product, indicated on the information plate located on the product and in the warranty document; - Date of sale of the product.
The dust container cover does not close.
Check that the dust container and the filter container have been installed correctly. Check the correctness of their placement so that the locking lever can close the dust container cover.
The brush moves with difficulty.
Reduce the suction power, especially when cleaning carpets and fabric upholstery. Open the air regulator for freer movement.
It is read with difficulty.
- Turn the device over so that the screen is not scratched. If the screen gets stuck, unwind it completely and rewind it.
| Pionpa Bojatno: | |
| Indesit Company Sp.A. | Bueane A. Mepjohn 47, 60044, |
| gopharato (AlH), Yvanin | Baopexho (AlH), Yvanin |
| Vinnoprep: | OOO, VHesamt PYC" |
| C. Bonpocam (6 Poccam) | Pocma, 127018, Mockea, yn. |
| Oqalalluats no audey | DibhHueb, Am 12, KOPn, 1 |
| Pocma, 127018, Mockea, yn. | |
| DibhHueb, Am 12, KOPn, 1 | |
| Materne: | Namecoc | Neunecoc | Namecoc |
| Topofoes mapka: | ARISTON | ARISTON | ARISTON |
| TopoBauh 3ahk kastorot berntt: | Moton: | SL D10 BDB | SL D07 BEB |
| Karatorencre: | Karas | Karas | Karas |
| Hommehahtso 3ahk hehe: | Hartopkehima anektoon mahan | 230V | 230V |
| Ammasenbok Hantipakse: | Ammasenbok Hantipakse: | 1000 W | 700 W |
| Tporpehsetra Moutohocte: | Yvordhoce of Okehaetehene Toda | 50HZ | 50HZ |
| Krasca zainutl od Todapekhenin | Krasca zainutl od Todapekhenin | Krasca zainutl od Todapekhenin | Krasca zainutl od Todapekhenin |
| BicycAte HoxOxOxOxOxOxOxOxOxOxOxOxOxOxOxOxOxOxOxOxOxOxOxOxOxOxOxOxOxOxOxOxOxOxOxOxOxOxOxOxOxOxOxOxOxOxOxOxOxOxOxOX | Incompaiau no cspyndkstam coxtctctbns MTN oyni-hernem konwa cspcyndkstabcoxtctctbns Konwa cspcyndkstabcoxtctctbns Konwa cspcyndkstabcoxtctctbns Konwa cspcyndkstabcoxtctctbns Konwa cspcyndkstabcoxtctctbns Konwa cspcyndkstabcoxtctctbns Konwa cspcyndkstabcoxtctctbns Konwa cspcyndkstabcoxlnt | 1-1-1-1-1-1-1-1-1-1-1-1-1-1-1-1-1-1-1-1-1-1-1-1-1-1-1-1-1-1-1-1-1-1-1-1-1-1-1-1-1-1-1-1-1-1-1-1-1-1-1 | -1-1-1-1-1-1-1-1-1-1-1-1-1-1-1-1-1-1-1-1-1-1-1-1-1-1-1-1-1-1-1-1-1-1-1-1-1-1-1-1-1-1-1-1-1-1-1-1-1- |
| Oat77 | AOT77 | AOT77 | AOT77 |
| Oat77 | AOT77 | AOT77 | AOT77 |
| Oat77 | AOT77 | AOT77 | AOT77 |
| Oat77 | AOT77 | AOT77 | AOT77 |
| Oat77 | AOT77 | AOT77 | AOT77 |
| Oat77 | AOT7 |
PART LIST
- Multi Deluxe brush*
- Brush adjustment lever
- Multi brush*
- Parket/hard floor brush*
- Turbo brush*
- Upholstery brush*
- Deluxe parquet nozzle*
- Telescopic tube sleeve
- Metal telescopic tube
- Handle
- Flexible hose
- Trolley system handle
- Trolley system on/off button
- Dust compartment opening button
- Dust compartment cover
- Vacuum suction opening
- Elastic hose release button
- Dust bag or container fullness indicator
- On/Off button
- Cable winding button
- +/- buttons for electronic suction power adjustment*
- Start & Pause button*
- Remote control battery compartment*
Technical Specifications:
Electrical values: 220-240V~50 Hz
Effective area radius: 10 meters
Dimensions: 450 × 310 × 230 mm .
Maximum power: 700 W - 1000 max.*
Air Fresh Hepa 13 (I)
Air Fresh Hepa 13 filter with activated carbon (32) (if present), (allows maximum dust collection (>99.95%) and odor removal.
CLEANING AND MAINTENANCE
Multi brush/Multi Deluxe brush (M/L)
Deluxe parquet brush (P)
Tel: (0.212) 355 53 00
DISPOSAL

Remote Power Control (C)
Air Fresh Hepa 13 (I)
- Speed regulator
- Signal receiver with speed control Remote Power Control*
- Electronic speed regulator*
- Nozzle for hard floors
- Accessories
- Installation in horizontal position
- Pure Clean Hepa 13*
- Air Fresh Hepa 13*
- Ventilation grille
- Air intake
- Maintain the flow
- Pure Clean flow
- Filter for the regulator
- Grille for the regulator filter
- Reinforcement
- Air outlet
41. Filter 42. Filter for cross cleaning 43. Protective grille for filters 44. Pure Clean Hepa 13
- In some models
Before using the appliance, carefully read the instructions and keep them for future reference.
GENERAL SAFETY INSTRUCTIONS
The safety of this appliance is based on strict adherence to technical specifications and compliance with current standards.
Do not use the appliance for purposes other than its intended use. Improper use may result in damage to the appliance and injury to persons.
The electrical mains voltage in your home must match the value indicated on the appliance's rating plate (220-240 V). Any incorrect connection may cause irreparable damage to the appliance and void the warranty.
If the plug, power cord, or appliance is damaged or malfunctions, do not use it. In such cases, to
prevent unsafe situations, the appliance must be checked by qualified personnel from Hotpoint-Ariston service centers.
Regularly check the condition of the power cord. Do not allow the appliance to be used by persons (including children) with reduced physical, sensory, or mental capabilities, or by persons lacking experience or knowledge of the appliance's operating instructions, unless they are supervised by responsible persons and have received prior instructions on using the appliance. Ensure that children do not play with the appliance. Never leave the appliance plugged into an electrical outlet unattended. Do not use the power cord for carrying or transporting the appliance. After each use, unplug the appliance from the electrical outlet and wind the power cord. Do not pull the power cord and do not run it over sharp edges, as it may be damaged. Do not leave the appliance near open flames, stoves, hot materials, or other heat sources. Do not vacuum liquids or animals. While the vacuum is operating, keep its ventilation openings clear of dust and debris. Before cleaning or maintenance, and in any case after each use, unplug the appliance from the electrical outlet. If you notice any malfunction, unplug the appliance immediately. Do not immerse the vacuum in water or any other liquid, and do not spray liquids on the appliance. Do not leave the appliance outdoors exposed to atmospheric agents. For safety reasons, keep the vacuum out of reach of children and pets.
Do not use the appliance to collect dust or wet substances, as this may adversely affect its operation.
Do not vacuum flammable or easily ignitable materials (e.g., ashes, cigarette butts, fuel); vacuum parts may ignite.
Sharp objects or objects with sharp edges can cause damage to the hose. Using abrasive materials (e.g., wire wool, scourers) may cause small electrostatic discharges. When cleaning such materials, we recommend not using the metal telescopic tube, but only the flexible plastic tube, setting the minimum power. For your safety, carry out any repair or maintenance operations only with the help of qualified personnel from Hotpoint-Ariston. The manufacturer declines any liability for damage resulting from improper use of the appliance.
BEFORE USING THE APPLIANCE
Remove all adhesive strips, plastic protective parts or cardboard boxes from the appliance. Check that all adhesive parts have been removed with the help of a suitable cloth.
Assembly
- Insert the flexible hose (11) into the suction inlet (16) until it clicks into place. To remove the hose, press the release button (17) and pull it out.
- Insert the metal telescopic tube (9) into the handle (10) until it locks. Adjust its height using the tube length adjuster (8).
- Insert the standard nozzle or any other accessory you need (see section "Accessories") into the metal telescopic tube until it locks.
If your appliance is equipped with the Remote Power Control device, you need to insert the batteries that are included in the supply (see section "Specifications", paragraph "Remote Power Control").
USING THE VACUUM CLEANER (A)
The appliance is equipped with a safety device that prevents the dust container lid from closing if the container is not correctly inserted. In this case, do not force the lid closed.
Check that all parts are in the correct position. The safety device will then allow the dust container lid to close.
Do not use the vacuum cleaner without the filter, without the Pure Clean filter, with a damaged filter or without the dust container, as this may cause damage to the appliance.
- Unwind the power cord (34) and insert the plug into the electrical socket (220/240V).
Before connecting the appliance to the mains, fully unwind the power cord (blue marker: 6.5 m; brown marker: 7 m) to prevent overheating and damage.
- Press the start/stop button (19) to switch the appliance on.
- Handle the trolley system (13) by holding the handle (12) and locking the system at the desired height, then take it by the handle, preventing the hose from getting caught during use.
- To adjust the suction power according to the model, use the +/- buttons for electronic power regulation (21) on the Remote Power Control device, or turn the electronic power regulator (26) manually. It is recommended to use low suction power for delicate surfaces to avoid damaging them (e.g., curtains, textiles, upholstery, leather) or to reduce the regulator to minimize the "suction effect".
- To pause the vacuum cleaner (pause mode), if it is equipped, you can use the pause button (22) on the Remote Power Control or the Start & Stop button, simply by inserting the plug into the socket (30).
- To turn off the device, press the Start/Stop button again.
- Unplug from the electrical outlet and press the cord rewind button (20) so that the cord winds completely.
Make sure the cord does not twist during rewinding.
- Store the device, locking the hose in the appropriate horizontal or vertical position. Do not turn on the vacuum cleaner if the plastic hose is blocked or kinked, as this may damage the device.
SPECIFICATIONS
Electronic power regulator (B)
The electronic power regulator (26) (if available) allows you to set the required suction power.
On some models, ideal power levels for different surfaces are indicated: carpets, hard floors.
The Eco function (if available) allows you to save up to 25% energy compared to consumption at maximum suction power, while ensuring effective cleaning.
Remote Power Control (C)
Remote power control (if available) allows you to adjust the suction power directly from the handle without bending down, which is necessary when using it. To use the vacuum cleaner, you can press the buttons on the handle and pause (22).
How to install or replace batteries in the Remote Power Control device:
- Open the battery compartment (23).
- Disconnect the batteries for the positive and negative poles.
- Close the battery compartment; it should click shut.
Trolley System (C)
The Trolley System allows you to easily move the appliance during cleaning or transport from one room to another, while keeping it compact.
- Press the open/close button of the Trolley System (13) to move the handle (12) to the desired position. 2. After finishing cleaning, press the open/close button of the Trolley System and fold the handle so that it locks.
Fold the handle so that it locks.

To store the appliance, you can use the Trolley handle directly, after checking that it is properly locked.
System, after checking that it is properly locked.
Start & Pause (E)
The Pause function (if available) allows you to switch the appliance to standby mode and lock the handle in the "parking position" by simply inserting the handle into the special horizontal slot (30).
Dual System (F)
Trolley Power in the Trolley Dual Clean version (if applicable) offers you the experience of versatile use. This appliance can be used with or without a bag, using the kit that includes the Pure Clean bag (36), the bag holder (35), the extension (39), and the motor filter grid (38), which is already assembled with the motor filter (37). These elements can be installed as follows:
- Make sure the plug is removed from the electrical outlet.
- Open the lid (14), press the opening button for the bag (13), and remove the bag holder (39).
- Insert the filter into the corresponding slots around the perimeter of the air outlet (38).
- Insert the Hepa filter frame (which comes with the Hepa filter in a pre-assembled form) into the corresponding guides of the air outlet.
- Insert the Pure Clean filter until it stops; then push it into the corresponding slot of the air outlet.
- Close the air outlet cover so that the latch engages.

To use your vacuum cleaner with the dust container, it is necessary
to install the following parts: Pure Clean filter, the filter itself, the Hepa filter, and the Hepa filter frame.
Air Fresh Hepa 13 (I)
If the air outlet cover does not close easily, this indicates that
the Pure Clean filter and/or the filter holder are not installed correctly. In this case, do not force the air outlet cover closed; check that it is in the correct position. This will ensure a proper seal of the air outlet.
Cleaning the filter (I) with a brush

The Pure Clean Hepa 13 filter guarantees maximum protection against allergens and ensures clean air returned to the room; such air is completely clean (filtering capacity > 99.95%).
CLICK & CLEAN COVER
Parquet brush (N)
The parquet brush (4) is intended for cleaning delicate types of flooring, such as parquet. Thanks to the special soft bristles, the brush can be safely used on the most delicate surfaces.
Upholstery nozzle (O)
HacaikdmpMe6nib (5) ndxOunb dny ToHoro nIIOOCOM CneiaJIbHNX IOBepxoHb, TaKHX Jk DIBaHH, MaTPaUN, KOBDPN, 7TOPN i T. n. CneiaJIbHa aHTnbakTePiaJIbHa 6o6ka nepeuKOJaKae
noiupenHHo 6aKtepi.CtpiKa nI neH3nem Bka3ye, de BIn MoKe 6yTN BiKpNTn IJn BnBnBaHHi 3axonJIeHXN 06'ekTIB.
Litka Deluxe napkety (P)
Litka Deluxe napkeTy (7) npn3haeHa dnyuueHn oOcbnBO deIiKaTHnx Tnib niIbnorn i napkeTy. LItka OchaueHa haindeIiKaTHiIiIMN oBepTOBmU uETINHKAMN, kI BBOJrbcB DIO BCMOKTuOyHM nOtIKOM nIIOCocy, a TaKoK M'AKIMN KOncamM, kI donomaraIoTb 36epeRtn deIiKaTHi niIOnr.
Дяо ушени пл actikobix actnи utkn Deluxe Дяп napketу 3himitb utky 3 TeleckoniuhoI MeTaneboi trpy6n (9) i npotpiB ii M'koU cyxoo abo 3Jerka 3BOJoxeHOn raHvipKO.Дяо ушени obepTOBIX utINOH BCTaHObit 3AMOK B NOJoxeHHA
i3HIMITb Ioro. 3HIMITb OeptOby UtiKy iOChTtB II, DOnOMaIauOu cObi HOxNcIMy y BnPaIky HAMotaHOro BOIOccs a60 HnTOK, CNIkkyUOu 3a Tm, Uo6 He NIOWKODNTU 5eTINHKN.
UItkaInM'kInxMe6NIB (Q)
LITka dIyM'kIX Me6nIB (6) peKOMeHdyTbc IyIuIeHH OOC6JIbNIX NOBepxOHB, TaKIN K DINBaHN, MaTPaUN, NOKPbBaN, NODUShKN, TOIO. LITka OCHaIeHa OeBPTOBIMN UeTNHKAMN, JIK BBOJrTcB CBIIO BCMOKTYIOHM NOTOKOM NINOCOCY i 3a6e3neHyOTB rINbHHe OUYeHH TEKCTNIIO BI DQNCCs, Wepcti DomauHix TBAPIN ABO KLIeEe. KpIM TORO, 3aBdAKn 3axNCHI peuITci, UeTNHK He KOHTaKTyIOTB 3 OHIyBaJIbHOIO NOBepxHEo, rapaHTyOuH MAKCImaJIbHy DeJIKaTY DIHO HA TEKCTINb.
HacaikaДлЯВаЖКоДОCTУNHnxMiCuR (R)
HacaikaДЯВаЖКоДОCTуннIXMiCúb,po3taшОваHA y BiДиIeHHiДЯakCEcyapIB(29),DOnOMOKe BamdoCЯrTn iNoHcTnN KyTn,ZiJIINHn iHsiBaxKoDOCTuHnMiCua.
Hacaikka dny deiikaTHnx NOBepxohb (S)
Hacaika dIra deNikatnix nobepxohb, po3taWobahay bIDJIeHHI dIra akcescyapib (29), peKomeHdyTbcra dIra nobepxohb, kIOTpebyObocBIOyBaRn, HanpIKnaI, paiaTophi 6aTapei, Me6ni, Toio. CneiaJbHi HATypanbi Hi 8eTNKn Do3BOJIAOTb cnokiHO BkOpncTaTn IIO UITky Ha haiDeNikatHiinX nobepxHax.
UItkaIJMa'M'kKnMe6nIB (T)
HacadkaДЯMe6nIB NiDxOuNTbДЯTOUHO rINIOOCOM CneuaJIbHnx NOBepXOHb, TAKNX JK DInBaHN, MaTPaCи, KOBdpi, StOpNi iT. n.
DONOMOFA
Then return for help:
- First, you can try to fix the problem yourself (see "Troubleshooting"). In the opposite case, contact the authorized technical support service by phone number indicated on the warranty certificate.
Contact qualified specialists.
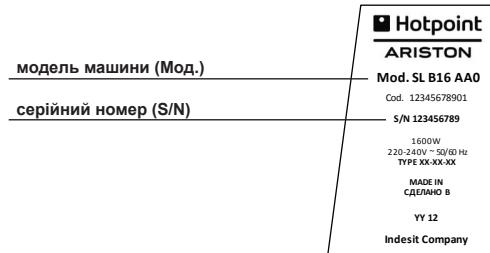
You need to report:
The malfunction; machine model (model); serial number (S/N).
DISPOSAL
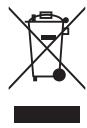
European Directive 2002/96/EC on waste electrical and electronic equipment (WEEE) requires the disposal of used appliances to be carried out in accordance with the general waste collection system.
Used appliances must be disposed of separately to optimize the recovery and recycling of materials inside the devices and prevent harm to the atmosphere and human health. All products are marked with a special symbol for separate collection, so that owners can dispose of them separately. For more information on the rules
for disposal of household appliances, owners should contact the local municipal service.
TROUBLESHOOTING
Problem
Possible cause / remedy
The plug is not inserted.
The indicator is lit or the plug is inserted, but the socket or plug is not yet inserted.
Low operating power.
He npaioe npicctpi Remote Power Control.
IiJ vac 36npuHn IINy BiDyBaIObCra Nebb NOMTIeEKeTPOCTaTNuHi po3pI.
PiJIOcOC CBnCTnTb a6o Bi6pye NiI qac ro6OtN.
BnIka He BcTaBJIeHa Bpo3eKy a6o BiDcyTHiKOHTaKT. 3amihitb miok. KoJn nnococom 36paeTcabeBnka kIbkiCTb Dyjke dpibhoro nny (Hanp. 60poJHo), iHnKatop 3anOBHeHOro Mioka moKe cnaJaxHytn ueBoHm CbitlOM, HabiTb, JaIO miok He do KInzra 3anOBHeHNI. Lje nob'zahO 3 TIm, 10Miok Pure Clean 3dathni ytpmByatn hainpi6hiwi qactinHKn nny, rapaHTyoHm MakcmaJIbHy ririEHy. Ouicrtb nIIO36ipHnK dIa Tnx MoJeNe, kI He MaOTb MiIka dIy nIy. Ouicitb pijbtpn i, B pa3i Heo6xidnocti, 3amHtibix. - IpekeonaiTeecy y BiDcyTHOCTi 3acMieHb B TeJeCKoIuHiN Tpy6i, rHyKki Tpy6i iuiTi.
Ouicitb pifbnpi i, B pa3i Heo6xidnocti, 3amHtibix. - IpekeonaiTecy y BiDcyTHOCTI 3acMieHb B TeJeCKoNiyiN Tpy6i, rHyKki Tpy6i iuiTi. 3amihitb miok. Koli nnilococom 3bnpaetbcra Belenka kibkictb dyke diipohoro nny (Hanp. bopooho), miok Pure Clean moke 3acmiTtncr. BnKoHaTe OuHSeHHa nnlo36ipHnka i noro fipIbtpiB.
BctabJIeHI 6bapeKn He MaIOT bOCTaTHbOro 3apAyD. - Batapeken He npabnIbHO BCTaBneHi BCEpeUinI batapeHoro BiDciKy. Po3TaUyTe Dbi batapeKn AAA, DoTPmMyOuNcB P03NTNBHOro i HeratNBHO rONIOcIB. BuMItb batapeKn, nOTIM po3TaUyTe 6batapeKn, DToTPmYUOuNCb PO3NTNBHO r HeratNBHO rONIOcIB. Moxnbo, enektpoHHi npuaDi i/60 nepewkoDi 3abaxaIOb i/ afo yhemoxknBnIOyB IHpauebpOHn CnHAn BiD npucptoO nuctaHIOHO KepyBaHHa YbIMKHeHHM/BUMKHeHHM.
BcMOKtYBaHnHa 3aHaTOn Dpi6Hnx NopoUkOBnx MaTepiAINiB (Hanp., 60pouHa, Too) MoKe CnpuHnHTn HeBeNuki eEnKTPOcTaTuHi po3PraJxehn. IiI qac y6bupanHra TaKnx MaTepiAINiB Mn paDmHO Be BnKOpNCToBvBaTn TeNeckOniHy Tpy6Ky 3 MeTany, a IInSe rHuKy PnactNKOBy Tpy6Ky, BCTaHOBvBUn MihImaJIbHy NotyKhIcTb.
- HenpaBnIbHo BCTaHOBJIeHi OINH a6o DeKilbKa akceCyapib. IpeBepTe, yOciΦIbTpN iUITKn npaBnIbHo BCTaHOBJIeHi 3riJHO HaBnIX IHcTpyKzIJ. B MoJEni 3 MiXkOM nepeKoHaIteCra TAKOX, yO uJIbHeHHa3nIO npaBnIbHe nOLOKeHHa. 3aIOBHeHm MIoK/NIJIO36ipHnK. 3aMInIb MiOk abo OuNCITb NIO36ipHnK. OuHCTIb pfIbtpn i, B pa3i Heo6xIDHOCTi, 3amHiTb ix. BikpnTn peryIaTOP nobITp. IpeBipTe, 0o BIn npabNbHO 3akpnTn.
He 3akpnaBcKpnka BidiinHnI py nny.
- HenpaBnIbHO BCTaHOBJIeHNI MiOcK Pure Clean a6o nIIO36ipHNI. IpekoHaIteCra, 00 BOH 3aHJN npBaBJIbe NOIOXeHNAk, 06 3aNo6IXHNI BaxJIb Do3BOINB 3akpITN KpiuKy BiDIIeHHN dIy nnIy.
Litka Baxko nepecyBaTbcra
3MeHtB nOTyKHiCTb BCMOKTyBaHHa, 3OKpema, npu uuueHHi KUNIMIB i TeKCTnIbHnx nobepxohb 3araIi. BiDkpiTe peryJrTop nobitpr, 0o6 3MeHunTn "epeKT npncockn".
UHyp KINBJIeHHHe HAMOTyEc7bc3 JERKICTIO.
CniikkyiTe,io6 nid yac haMoTyBaHnHa Hypy BIn He nepeKpyuBaBCa. Bpa3i 6bokyuBaHH 3HOBy po3MotaTe yBecb uHyp JxNBHeHH i nobTopiB onepauiO 3 HaMoTyBaHH.
UHcOPbIu CNATTAMAcbl
- Multi Deluxe*
- IIeTeKa KocbIMsa neaJI
- MybTn-KblIaK*
- Napket 电Kacbi*
- Typ6o 0eTka*
- KanTaftbIu 电Tkacbl*
- JIOKC napket 电KacbI*
- Tyrik y3bIHbIFbHbI peTteri
- Metanlanh xacanran y3apTy ttyiri
- Kon tyTkacbl 11.Пл actMaccaIbIK TITK
- AnbIn kyypy Tnykacbl
- Ap6a7a kynecin a7y/kabTymeci
- ⅢaH 6eNirih auy TyuMeci
- Wanh beneriHH kaknafbI
- Copy kipici
- Bocaty Tymecci 18.ToIbI ⅢaH DOp6acbIHbH/KoHTeHepiHi HndKATopbl
- Icke Kocy/TokTaTy Tymeci
- KaβeIbdi opay tyImeci
- Kyat 3neKtpOndbI Tpyde petTeyre apHaIraH +/- Tymenepi*
- Sart & Pause TyMeci 23.Баразаябeнirɪ
KIPICNE
Hotpoint-Ariston eEN KYTIMHe KOW KeNdiH3. Ap6a7a KyaTbI WaHcOpFbIbH CaTbIn anFaHbIb3ra anFBic 6iDipem3. Hotpoint-Ariston TybHybIbAp KbI3Meti KaMTamacbI3 etetIH MymKhiDKTePdi TOJbIFbIMeH naDanahy yuH 6yn eHimDi www.hotpointariston.com caTbIHda tipkereH xen.
Trolley Power TnIMdInik peH 3proHOMnHbI KnbICTbIPyfa apHaHaH.
Tinmjiniri Xofapbl XHa MOTopnap Kyat 3HeprnrcbH a3 TybHy apkbl OHTaJIbI eHIMdiJIikTi KaMTamacbI3 etedi.
IpaTeHt6ap 3ckKnIO3nBt Trolley Sysyem KyyneCi KyaTbI KaUbIKTaH 6ackapy fYHKcIcMbEm (erep 6ap 6oIca) 6ipre XHa3dbIn aHaJaCbIHda MaKcImaJbI 3proHOMKaHbXe HentiJIkTI KaMTaMaCbI eTeDi.
KpybIfbl Tek ynde naJaIaNHyra apHaIraH, COHdbIKTaH OHbl eHdipictik JkaFdaIa naJaIaNHyra 6oMaIbI.
KypbfblnaiDanaHa 6actamac 6pbih OCbl HcayblkTapbl MyKnT WbIFbl, KelewekeTe KOJaNy yuih caKTan KOnFaH MaHbl3bl.
- Aya petteri
- KyatbI KaabkTah backapy Tetiri CnHnblHbH KaobJdaBbIbI*
- Θηκτρούнόν ἀκής Μαγτέρτειώ
- Xihiuke yu
- Həsik 6eTepre apHaJfah yW
- Kocbimua 6eJIik
- KeIndeHeH opHaJaackaH caKtay opHbI
- Aca tasa Hepa 13 cy3rici*
- Air Fresh Hepa 13*
- Aya Topbi
- Kyaṭ kābēni
- ⅢaHdoP6acbHbH Tiperi
- Aca ta3a 1sAn DOp6acbl
- Motop cyarici
- MoTOp cy3ricHiH Topbl
- ApaBik Ka6aT
- IIIaH 6eNiri
41. Containers 42. Water inlet hose 43. Drain hose 44. Gas hose 13 items
- Safety rules
SAFETY INSTRUCTIONS
The appliance can be used only for its intended purpose, in accordance with the technical requirements and safety regulations.
Any other use is not allowed. Improper use may cause damage to property and/or serious injury.
Before connecting the appliance, check that the voltage (220-240 V) matches the rating plate. If the appliance is switched off, it can be turned on again.
If the power cord is damaged, or if it needs to be replaced, do not use the appliance. In such cases, to replace the damaged cord, contact the Hotpoint-Ariston service department. Do not attempt to replace the power cord yourself.
Do not allow children or persons who are not familiar with the instructions, or who are physically, sensory or mentally impaired (including children) to use the appliance. Children should be supervised to ensure they do not play with the appliance. Do not leave the appliance unattended while it is plugged in. Do not pull the power cord to move or unplug the appliance. After use, unplug it from the socket by holding the plug, not the cord. Do not twist or bend the power cord. Do not place the appliance on hot surfaces or near open flames. Do not use the appliance outdoors or in damp places. Do not immerse the appliance in water or other liquids. Do not use the appliance with wet hands. Do not touch the appliance with wet hands. Do not use the appliance if it has been dropped or damaged. Before cleaning or servicing, unplug the appliance. If the appliance is not working properly, unplug it. Do not immerse the appliance in water or other liquids. Do not spill liquids on the appliance. Do not leave the appliance unattended while it is in operation. To avoid a hazard, do not clean the appliance with a steam cleaner.
Do not pour liquids or flammable substances into the appliance, as they may affect its operation.
Do not pour hot liquids or liquids that are boiling or simmering into the appliance. Some parts of the appliance may become hot. Do not pour flammable or explosive substances, as the appliance may be damaged. If the appliance is used for a long time, it may cause electrostatic discharges
possible. When using the appliance, do not touch metal parts with wet hands, use only plastic or rubber parts and do not place it near heat sources.
If the appliance is not working properly, before contacting the Hotpoint-Ariston Technical Assistance Service, check whether the problem can be solved by following the instructions below. Do not take any action if there is a risk of danger.
REMOVED
All packaging materials, protective plastic films and cardboard inserts must be removed. Keep the packaging materials out of reach of children, as they are dangerous.
Installation
- Insert the plastic plug (11) into the water inlet (16) until you hear a click. To remove it, press the button (17) and pull it out.
- Insert the metal-reinforced hose (9) into the water connection (10) until it is firmly in place. To adjust the hose length, use the length adjuster (8).
- If the standard or angled connection (elbows) is not suitable for the water tap, install the metal-reinforced extension hose in its place.
If the appliance is controlled by a timer, the timer must be connected to the power supply and the battery must be installed (if applicable). See the paragraph "Control by timer".
REMOVED
The appliance must not be installed in a place where the water hose could be damaged. Check the hose regularly and replace it if necessary. Do not use the appliance with a damaged hose or if the hose is kinked or blocked.
hotpoint.eu
The appliance is now ready for use.
- Insert the power plug (34) into the socket (220/240 V).

To disconnect the appliance, pull the power plug (7 m) out of the socket and unplug it.
- To turn on the appliance, press the ON/OFF button (19).
- Press the start button (12) to open the vehicle door for entry/exit. Then, when the door is fully open, press the start button again to close it.
- To detect obstacles (depending on the model), press the close button briefly and hold it, or use the remote control key (21); alternatively, use the remote control key (26).

For safety, before closing, ensure that no people or objects are in the path of the door, and then press the close button; or use the remote control to close the door.
- If possible, press the close button (22) briefly to stop the door, or use the open/close switch (depending on the model). If the door is not fully closed, it will open again (30).
- To open the door, press the open/close button briefly.
- After disconnecting the power, press the cable release button (20) to release the cable.

During the release, do not pull the cable with force.
Remote control key (C)
If the remote control key (if available) is pressed while the door is moving, the door will stop. To resume operation, press the start/pause button (22) briefly.
To replace or remove the batteries of the remote control key:
- Remove the battery cover (23).
- Turn the battery over and insert two new batteries. 3. Replace the battery cover, ensuring it clicks into place.
Vehicle door (D)
When the vehicle door is fully open, it can be moved manually to the desired position and held in place.
- Press the start button (12) to open the vehicle door for entry/exit, then press the open/close button (13) to close it.
- Remove the fuel tank cap, then insert the fuel pump hose into the tank opening.

After inserting the fuel pump hose into the tank opening, secure it firmly to prevent it from coming loose.
Start & Pause (E)
Start & Pause function (if available): The switch allows you to start and stop the engine in any mode. The engine will stop when the switch is turned to the stop position (30).
Fuel pump (F)
The fuel pump allows you to pump fuel from the tank to the carburetor. The switch has two positions: on and off. To pump fuel, press the primer bulb several times until fuel flows into the carburetor.
Before starting the engine, check the following: the fuel tank cap (36), the fuel tank breather (34), the fuel line (39), and the fuel filter (37) and the fuel filter cap (38). To start the engine:
- After connecting the fuel pump to the power source, wait a few seconds.
- Press the primer bulb (14) several times, then open the fuel valve (15), and then pull the starter rope (41).
- Connect the fuel line (40) to the fuel tank connector.
- Connect the fuel filter (fuel filter cap) to the fuel tank connector.
- Fill the fuel tank with fuel and then replace the fuel tank cap.
- Make sure the fuel tank cap is securely tightened.

To disconnect the fuel pump from the fuel tank, follow the steps below:
Disconnect the following components: the fuel tank cap, the fuel tank breather, the fuel line, and the fuel filter and fuel filter cap.
Air Fresh Hepa 13 (I)
If equipped, the Air Fresh Hepa 13 filter (32) removes dust and particles from the air with maximum efficiency (>99.95%).
MAINTENANCE AND SERVICE

- MαHαCβFbIbI Ta3aIaMaH eHMece oFaH
- ΜκβI3MεKεPcETnεδγβbIαO pO3eTkaDαH
- ΜαTaBfAβHbIα ΜεKεTki3iH3. KγβbIβfBbIbI, bI bI iWiKi δειkTepi HxαHe KocβIMwλaNapDbI
- May yωiH αερi KγωTi Hemece aδpα3nBTi
- ΜρβbI KONdaHbAβH3. OHbI KaɪTaDAH
- ΜαHbAc δγβbI H xαKcbIαN βenKeHηE KεθI
- ΜβbIiH.
- ΜαβbIα

OpbIHapbHa caImac
6eJIkTeP TOJbIFbIMeH
6ypbH 6apnbK

To ensure effective cleaning, the water should be at a temperature of at least 60°C.
To ensure maximum efficiency, the water should be heated to at least 60°C.
Cleaning the filter
To clean the filter (9), use a brush or a damp cloth, avoiding the use of abrasive materials on plastic parts (body, front panel, etc.) and metal parts.
Cleaning the door seal
To clean the door seal (40), follow the procedure below:
- Press the door opening button (14) and open the door seal (15).
- Remove the detergent drawer (36) or the detergent container (41).
- Clean the door seal with a soft brush, then wipe it dry. If necessary, use a damp cloth to remove any residue, then dry all parts thoroughly.
- Place the detergent drawer or container back in its original position, and press the door seal until it clicks into place.
Cleaning the detergent drawer (H)
Only use original Hotpoint-Ariston detergent drawers. Using other products may damage the appliance and void the warranty, reducing the lifespan of the machine and its components.
Remove the oil filter (36) from the engine. After removing the filter, check the condition of the sealing surfaces. If the filter is damaged or the sealing surface is dirty, replace the filter with a new one. Install the new filter and tighten it to the specified torque.
The oil filter (36) is equipped with a red indicator that signals when the filter needs to be replaced. If the indicator is red, the filter must be replaced immediately. The filter should be replaced every time the engine oil is changed or according to the maintenance schedule.
Do not operate the engine without the oil filter installed.
- Disconnect the spark plug wire from the spark plug.
- Press the primer bulb (14) several times until fuel appears in the fuel line (15).
- Remove the fuel tank cap (35) and fill the fuel tank (36) with fresh fuel.

1. Check the fuel tank for leaks. 2. Check the fuel lines for cracks or damage. 3. Replace any damaged parts.
- After filling the fuel tank, securely tighten the fuel tank cap. Then, wipe up any spilled fuel.
- Check that the fuel tank cap is securely tightened by turning it until it clicks.

If the fuel tank cap is not tightened properly, fuel may leak out. To prevent fuel leakage, always ensure the cap is tightened securely. If the cap is damaged, replace it with a new one.
Fuel system (I) - fuel tank

The fuel tank is designed to provide maximum protection against fuel leakage and to meet high safety standards. It is made of high-quality plastic that is resistant to fuel and impact (fuel capacity > 99.95%).
To drain the fuel tank (31):
- Remove the fuel line (33) from the carburetor.
- Drain the fuel from the fuel tank (31) by tilting the engine.
- Check the oil level in the engine using the dipstick, and top up if necessary.
- Install the cable and its components correctly.
- Install the thermostat in the housing.
- Place the parts in the bath, then pour the new oil into the oil filter.
- Insert the dipstick into the engine block until it clicks.
Drain the oil (40):
- Open the drain plug (14) and remove the drain plug (15).
- Drain the new oil through the oil filter (36), remove the oil filter (38) and the oil filter (37) from the oil filter housing.
- Check the oil level using the dipstick, and if the oil is below the minimum, top it up. Then close the filler cap.
- When removing the oil filter housing, check the O-rings and gaskets for damage. If necessary, replace them with new ones.
- Install the oil filter housing with new O-rings.
- The oil filter housing is secured with bolts to the cylinder head.
- Tighten the bolts to the specified torque.
- Insert the dipstick into the dipstick tube until it clicks.
Drain the oil pan (J)

To install the container, follow the procedure:
- Open the lid (14), remove the cap (15), and take out the container (41).
- Close the cap and place the container.
- Insert the container into the water until the rim is flush.
- Set the temperature to the desired value.
- If the cap is not closed properly, it may cause leakage; close the lid securely.
- Make sure the cap is in the 'closed' position.
Water filtration (K) - filter element

This model has two water filters. The water filter is designed to protect against maximum contamination and to reduce the number of contaminants, including those that may be present in the water supply (filtration efficiency > 99.95%).
To replace the water filter (31):
- Remove the water tank cover (33).
- Remove the water filter by pulling it out.
- Be careful not to spill water, and place the filter in the water tank.
- Install the water tank cover correctly.
- Set the temperature to the desired value.
- Open the drain valve, drain the water from the system.
- Check the body of the pump for any damage.
Disconnect the electrical connections (40):
-
-
- Remove the cover of the container (41).
- To drain the water, open the drain valve, remove the filter (43) and the filter cover (42).
- After removing the filter cover, carefully remove any debris that may have accumulated. If necessary, clean the filter with a soft brush.
- Make sure the water is completely drained, then clean the filter with water. After that, dry it thoroughly.
- Close the hot water tap and open the cold water tap.
- Install the pressure reducer on the cold water supply line.
- Set the maximum temperature on the thermostat.
- Connect the cold water supply hose to the cold water tap, and secure the other end to the inlet valve.
- Secure the hose connections with a wrench, ensuring they are tight, and then connect the cold water supply hose and the inlet valve to the main water supply.
- Place the main water supply into the main water supply connection.
- Tighten the main water supply connection with a wrench to secure it.
Accessories
According to the standards of the manufacturer (model range), the first Hotpoint-Ariston company has developed a set of filters for cleaning.
Multi Deluxe (M/L)
Multi filter (3) is designed for cleaning carpets and upholstered furniture.
Multi Deluxe (1) is a special filter for thorough cleaning, it is more effective on carpets and textiles, and is also suitable for cleaning.
The filter is used (2) for cleaning hard surfaces:

Carpets

Upholstery and fabrics
Parket brush (N)
Parket (4) is used for cleaning hard floors. The bristles do not scratch hard floors.
Turbo brush (O)
The turbo brush (5) with rotating bristles is designed for thorough cleaning of carpets and removing pet hair. It is not suitable for use on delicate fabrics. Clean the brush with a soft brush or vacuum.
Lux parket brush (P)
Lux parket (7) is ideal for cleaning hard floors and parquet. It is equipped with soft bristles and a protective felt strip for gentle cleaning of hard floors. The cleaning performance of this brush is 30% higher than the standard Hotpoint-Ariston brush (according to IEC 60312 standard). For cleaning the Lux parket brush, remove it from the vacuum cleaner (9) and clean it with a brush or rinse under running water. For cleaning the bristles, use a soft brush. Do not use the brush without the protective felt strip. Replace the felt strip when worn.
We have removed the brush and cleaned the bristles.
Carpet brush (Q)
The belts (6) are designed for washing, mattresses, blankets, corsets, etc. The belts are intended for washing and are made of materials that can be washed. The belts are equipped with special fasteners for washing and are suitable for washing in the washing machine.
Chemical (R)
The accessory (28) is designed for washing chemical fibers, delicate fabrics, and items that require gentle washing.
For delicate fabrics (S)
The accessory (28) is designed for washing delicate fabrics, such as silk, etc. It is intended for washing items that require special care. The accessory is made of materials that allow washing without damaging the delicate fabrics.
For washing machine (Q)
The washing machine is designed for washing clothes, including shirts, mattresses, blankets, corsets, etc.
AFTER-SALES SERVICE
We are committed to providing high-quality service and support. We strive to offer you the best possible assistance, both online and in person, to ensure your satisfaction.
Warranty Service
For warranty service, please contact the Hotpoint Ariston Professional service centers. The warranty conditions are subject to the terms and conditions of the warranty certificate.
The Professional service centers have been established to ensure the highest quality of service. They are equipped with the latest technology and are staffed by trained professionals. For more information, please visit our website at www.hotpoint-ariston.ru and check the "Service" section.
Service Centers
To better serve you, we have a network of service centers that provide comprehensive support and assistance.
Current information
If you need to contact the service department, please adjust your settings (see "Contacts" section).
Contact the service department by phone using the phone number provided in the warranty card.
! We have strengthened the service centers' contact system! In case of emergency, please contact us directly.
If you contact the service department, please have the following information ready:
Service type fault; Warranty card number (service book, service certificate, etc.); Model and serial number of the appliance as indicated on the rating plate or warranty card; Purchase date of the appliance
You can also find the nearest service centers on the website www.hotpoint-ariston.ru in the "Service" section.
DISPOSAL
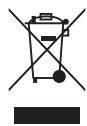
This appliance is marked in accordance with European Directive 2002/96/EC on Waste Electrical and Electronic Equipment (WEEE). By ensuring the correct disposal of this product, you will help prevent potentially negative consequences for the environment and human health.

The symbol on the product or its packaging indicates that this product cannot be treated as household waste. Instead, it should be handed over to the appropriate collection point for the recycling of electrical and electronic equipment.

Disposal must be carried out in accordance with local environmental regulations. For detailed information on the treatment, recovery, and recycling of this product, please contact your local city office, your household waste disposal service, or the shop where you purchased the product.
CONTENTS
Safety instructions. Warning
Before disposing of the appliance, cut off the power cord and contact the service department or their authorized representatives for proper disposal.

This appliance is marked according to the European directive on waste electrical and electronic equipment (WEEE).
CONTACTS
To avoid damage, do not use the container if the indicator is red.
Keep away from heat.
Do not use if the control is damaged.
Avoid contact with electrostatic discharges.
Do not use the container if it is damaged or leaking.
Check the label for instructions.
If the container is damaged or leaking, or if the contents are contaminated, do not use it and dispose of it properly. - Do not use the container if it is damaged or leaking. - If the contents are contaminated, do not use them. - Do not use the container if it is damaged or leaking. - If the contents are contaminated, do not use them. - Do not use the container if it is damaged or leaking. - If the contents are contaminated, do not use them.
If the contents are contaminated, do not use them. - Do not use the container if it is damaged or leaking. - If the contents are contaminated, do not use them. - Do not use the container if it is damaged or leaking. - If the contents are contaminated, do not use them. - Do not use the container if it is damaged or leaking. - If the contents are contaminated, do not use them.
Battery low. - Replace the batteries. Check the polarity and insert the batteries correctly. Remove the batteries if they are not in use. Do not use the device if the battery compartment is damaged or if there are signs of corrosion.
- If the contents are contaminated, do not use them. - Do not use the container if it is damaged or leaking. - If the contents are contaminated, do not use them. - Do not use the container if it is damaged or leaking. - If the contents are contaminated, do not use them. - Do not use the container if it is damaged or leaking. - If the contents are contaminated, do not use them.
- If the container is damaged or leaking, do not use it. - Do not use the container if it is damaged or leaking. - If the contents are contaminated, do not use them. - Do not use the container if it is damaged or leaking. - If the contents are contaminated, do not use them.
Do not use the container if it is damaged or leaking. - Do not use the container if it is damaged or leaking. - If the contents are contaminated, do not use them. - Do not use the container if it is damaged or leaking. - If the contents are contaminated, do not use them.
UeTka 3ep Kblnnbl.
Ka6eJIb 3e3ep opanaIbl.
Copy kyuih a3aHbI3, acipece kInemep MeH xaIIbMaTalaapbl Ta3aIarAH ke3de. Copy acepiH a3aHTy yuH ayapeTTeriHnA bIbI3. - Opay ke3iHne Ka6eJIb TynHdEIn KAnMaybIH KaMTaMaCbI3 etiH3. On TypbIN KaJCa, Kyat Ka6eJIH ToJIbIFbIMeH UblrApbIn, opaydbI KaYTaNaHaB13.
DESCRIPTION OF THE DUST EXTRACTION SYSTEM
- Mouthpiece for the dust extraction nozzle*
- Pedal for pressing the brush
- Mouthpiece for the dust extraction brush*
- Brush for parquet*
- Turbo brush*
- Brush for upholstery*
- Brush for parquet with adapter*
- Regulator for the suction power of the tube
- Metal telescopic tube 10. Handle for holding 11. Plastic cover 12. Handle for carrying
- Button for opening/closing the wheels System Trolley System
- Button for opening the dust compartment
- Dust container
- Start/Stop button
- Button for adjusting the power cord
- +/- button for electronic power adjustment*
- Start&Stop button* 23. Battery compartment*
- Air regulator
- Signal receiver for remote control Remote Power Control*
- Electronic power regulator*
- Guide for fine dust
- Guide for delicate surfaces 29. Accessory compartment
- Horizontal socket
- Filter Pure Clean Hepa 13*
- Air Fresh Hepa 13*
- Filter grille
- Cable retractor
- Dust bag holder
- Dust bag Pure Clean 37. Filter motor
- Filter grille on motor
- Seal 40. Dust compartment
- Dust container
- Lock release
- Pre-filter
- Philips Pure Clean Hepa 13
*cAmO pRi N HRAKO MOneJI N
INTRODUCTION
Thank you for purchasing the Trolley Power vacuum cleaner. This will provide you with an efficient and high-quality product. We recommend that you register this product at www.hotpoint.co.uk to ensure your entitlement to all benefits offered by Hotpoint Customer Service.
The Trolley Power is designed for efficiency and economy. Its new high-efficiency motors ensure optimal operation with low consumption.
The Trolley System, with its handle, combined with the Remote Power Control system (if fitted), provides maximum ergonomics and ease of use around furniture.
This appliance is designed for domestic use only and should not be used for industrial purposes.
Before using the appliance, it is important to read these instructions carefully and keep them for future reference.
GENERAL SAFETY RULES
The safety features of your vacuum cleaner comply with technical specifications and current consumer regulations.
Do not use the appliance for any purpose other than that for which it is intended. Incorrect use may cause damage and/or injury.
The voltage of your electrical system must match the voltage of the vacuum cleaner (220-240 V). Any incorrect connection may cause irreversible damage to the appliance and void its warranty.
If the plug, power cord, or appliance is damaged, or if any damage is visible, do not use the vacuum cleaner. In such cases, have the appliance checked by an authorized Hotpoint service center to avoid potential risks. Regularly check the condition of the power cord. This appliance is not intended for use by persons (including children) with reduced physical, sensory, or mental capabilities, or lack of experience and knowledge, unless they have been given supervision or instruction concerning use of the appliance by a person responsible for their safety. - Supervise children and do not allow them to play with the appliance. Never leave the appliance unattended while it is plugged into the electrical outlet. Never use the power cord for moving or carrying the appliance. After use, unplug the appliance from the electrical outlet and wind up the power cord. Do not pull the power cord over sharp edges to avoid potential damage. Never leave or use the appliance near stoves, heaters, radiators, or other heat sources. Do not use the vacuum cleaner on people or animals. Keep the suction openings away from the body while using the appliance. When changing accessories, when cleaning or maintaining the appliance, and in any case after use, unplug
it from the electrical outlet.
To avoid damage, always unplug the electrical contact. Never immerse the vacuum cleaner in water or spray it with liquid. Never spray liquid onto the device. Do not leave the device exposed to unfavorable weather conditions. For your safety, we recommend that you keep the vacuum cleaner at a lower position than your own body when cleaning stairs.
Never vacuum liquids or wet substances, as this may damage the device.
Never vacuum sharp parts or objects such as pins, watches, etc. The moving parts of the vacuum cleaner may become clogged. - Never vacuum sharp or pointed objects, as this may damage the device. If a lot of dust or dust-like substances such as flour are vacuumed, electrostatic discharges may occur. If such substances are vacuumed, we recommend that you do not use the metal telescopic tube, but only the plastic hose, and that you set the lowest power level for vacuuming. For your safety, any repair, maintenance, or servicing must be carried out on the device only by authorized Hotpoint personnel. We do not accept responsibility in case of damage caused by incorrect use of the device.
DELEGATED REGULATION (EU) No 665/2013
| Mapka | Hotpoint-Ariston | Hotpoint-Ariston | Hotpoint-Ariston |
| Mодел | SL D10 BDB | SL D10 BAW | SL D07 BEB |
| Клас[eнгий]а[eфektivbuct] | C | C | A |
| Гошиша[konsумаця]ha[eнгий в киловатчасa Гошина, сбс зakръляпес do[eин 3нak се徳 Decsettuнatable заразая (1) | 36 | 36 | 25 |
| Клас[eфektivbuct]prn рочистваце на{kишиим} | D | D | E |
| Клас[eфektivbuct]prn рочистваце на Тьрди падови настник | B | B | C |
| Клас падови[eмиси] | B | B | B |
| Ниво на звекова мошUCTВ db (A) | 80 | 80 | 78 |
| Номинална консуmpрана мошUCTВ W | 1000 | 1000 | 700 |
(1) Indicative annual energy consumption (kWh/year), based on 50 cleaning cycles. The actual annual energy consumption depends on how the device is used.
BEFORE FIRST USE
Remove all green parts, protective plastic material, and cardboard packaging. Make sure all green parts are removed with a damp cloth.
Assembly
- Attach the plastic hose (11) to the suction inlet (16) until it clicks into place. To remove it, press the release buttons (17) and pull it out.
- Insert the metal telescopic tube (9) into the handle (10) until it clicks into place. Use the height adjuster (8) to adjust the height of the tube.
- Place the standard brush/brush for carpets or the required accessory (see chapter "Accessories") at the end of the metal telescopic tube until it clicks into place.
If your device is equipped with remote power control, you must insert the provided batteries (see paragraph "Remote Power Control" in chapter "Functional Characteristics").
HOW TO USE THE VACUUM CLEANER (A)
The device is equipped with a safety device that prevents the dust bag compartment from closing if the dust bag is not correctly installed. Do not apply force when closing the dust bag compartment and make sure all parts are correctly positioned so that you can close the compartment.
Do not use the vacuum cleaner without the filter, the Pure Clean dust bag, the dust bag compartment, or the dust container, as this may cause damage to the device.
- Connect the power cord (34) to the electrical outlet (220/240V). We recommend that you unwind the cord completely (marked: 6.5m; marked: 7m) to avoid interruption and damage.
- Press the start/stop button (19) to start the device.
- Press the button for opening/closing the Trolley System (13) to extend the hose (12) to the desired length, while
holding it in place. Then guide the hose through the hose holder until you reach the desired position.
- To select the desired suction power (depending on the model), use the +/- button on the remote control or adjust the power (21) via the remote control; or turn the electronic power regulator (26).
We recommend using low suction power when cleaning delicate surfaces, such as curtains, fabrics, upholstery, etc., to avoid possible damage; you can also open the air regulator to reduce suction.
- To pause the vacuum cleaner, if this function is available, you can use the standby button (22) on the remote control or the Start & Pause function (depending on the model). Simply place the hose in the horizontal housing (30).
- To turn off the device, press the start/stop button again. 7. Remove the plug from the socket and press the cord rewind button (20) until it is fully retracted.

Make sure the cord is not twisted when rewinding it for storage.
- Attach the floor nozzle to the horizontal/vertical housing and store the device.

Do not turn on the vacuum cleaner if the plastic hose is damaged,
as this may damage the device.
Functional characteristics
Electronic power regulator (W)
The electronic power regulator (26) (if available) allows you to set the required suction power.
The appliance is designed for cleaning hard surfaces: curtains, carpets and hard floors.
The Eco function (if available) allows energy savings of up to 25% compared to the consumption at maximum suction power, while maintaining cleaning efficiency.
Multifunctional brush / Multifunctional brush DeLuxe (M/L)
The multifunctional brush (3) is suitable for everyday cleaning of hard floors and carpets.
The multifunctional brush (1) is designed to optimize the air flow and is particularly suitable for cleaning hard, smooth floors, as well as carpets.
Suction power.
The remote control does not work.
Static electricity discharges occur during vacuuming.
The dust container or filter is full or clogged.
- The appliance is not switched on or the plug is not connected. Replace the dust bag. If large amounts of fine dust or dust-like substances (e.g., plaster, etc.) have been vacuumed, the dust bag full indicator may light up even though the bag is not yet full. The reason is that the Pure Clean dust bag can hold dust/dust-like particles completely, which guarantees maximum hygiene.
- Clean the dust container when using the bagless mode. Clean the filters and, if necessary, replace them. Make sure that the suction tube, the telescopic tube and the brush are not blocked.
- Clean the filters and, if necessary, replace them. Make sure that the suction tube, the telescopic tube and the brush are not blocked. Replace the dust bag. If large amounts of fine dust or dust-like substances (e.g., plaster, etc.) have been vacuumed, the Pure Clean dust bag may become clogged. - Clean the dust container and its accessories.
The batteries are not inserted. - The batteries are inserted incorrectly in the battery compartment. Insert two AA batteries, making sure that the positive and negative poles are in the correct positions. - Remove the batteries; then insert them again, making sure that the positive and negative poles are in the correct positions. - Electronic devices may interfere with the radio signal.
If large amounts of fine dust or dust-like substances such as plaster have been vacuumed, static electricity discharges may occur. When vacuuming any of the above-mentioned parts, we recommend that you do not use the metal suction tube, but only the plastic tube with the brush, and that you use the device at low suction power.
- One or more attachments are assembled incorrectly. Make sure that the filters and brushes are assembled in accordance with these instructions. For models with a dust bag, make sure that the seal is correctly positioned. The dust bag/container is full or clogged. Replace the dust bag or clean the dust container. Clean the filters and, if necessary, replace them. The suction regulator is open. Make sure it is correctly closed.
The dust bag cannot be closed.
The cable unwinds smoothly.
Check the suction power, especially when vacuuming carpets and fabrics as they are. Open the air regulator to check the "suction effect". The Pure Clean dust bag and containers are designed specifically. Make sure they are correctly positioned so that you can close the lid of the dust compartment through the inspection window. - Make sure the cable does not retract while vacuuming. If the cable gets stuck, pull the cable stop and repeat the winding process.
VACUUM CLEANER DESCRIPTION
Air Fresh Hepa 13 (I)
Hotpoint Hotpoint ARISTON
- REMOTE POWER CONTROL (C)
- AIR FRESH HEPA 13 (I)
- INTRODUCTION
- GENERAL SAFETY RULES
- NEVER SUCK UP ANY LIQUID OR DAMP SUBSTANCES AS THIS COULD AFFECT THE OPERATION OF THE APPLIANCE
- BEFORE FIRST USE
- ASSEMBLING
- USING
- THE VACUUM CLEANER (A)
- FEATURES
- ELECTRONIC POWER REGULATOR (B)
- TROLLEY SYSTEM (D)
- START & PAUSE (E)
- DUAL SYSTEM (F)
- CLEANING AND MAINTENANCE
- CLEANING THE APPLIANCE
- CLEANING THE DUST COMPARTMENT (G)
- REPLACING THE PURE CLEAN DUST BAG (H)
- POWER AND CAN CAUSE DAMAGE
- DISPOSE OF THE DUST BAG IN COMPLIANCE WITH ALL LOCAL REGULATIONS ON WASTE DISPOSAL
- IF YOU ARE FINDING IT DIFFICULT TO CLOSE THE DUST COMPARTMENT LID, IT IS LIKELY THAT THE PURE
- CLEANING THE FILTERS (I) VERSION WITH DUST BAG
- CLEANING THE DUST CONTAINER (J)
- CLEANING THE FILTERS (K) VERSION WITHOUT DUST BAG
- ATTACHMENTS
- MULTI BRUSH/MULTI DELUXE BRUSH (M/L)
- PARQUET BRUSH (N)
- TURBO BRUSH (O)
- DELUXE PARQUET BRUSH (P)
- UPHOLSTERY BRUSH (Q)
- PRECISION NOZZLE (R)
- NOZZLE FOR DELICATE SURFACES (S)
- UPHOLSTERY NOZZLE (T)
- DISPOSAL OF OLD ELECTRICAL APPLIANCES
- TROUBLESHOOTING
- PROBLEM
- POSSIBLE CAUSES / SOLUTIONS
- DESCRIPTION OF THE APPLIANCE
- POSSIBLE CAUSES/SOLUTIONS
- PARQUET NOZZLE (N)
- DELUXE PARQUET NOZZLE (P)
- SERVICE AND MAINTENANCE
- CARE FOR THE APPLIANCE
- AUTHORIZED SERVICE CENTERS
- IN CASE OF MALFUNCTION
- BEFORE CONTACTING THE SERVICE CENTER, MAKE SURE YOU ARE READY TO PROVIDE THE OPERATOR WITH
- PART LIST
- TECHNICAL SPECIFICATIONS
- DISPOSAL
- GENERAL SAFETY INSTRUCTIONS
- BEFORE USING THE APPLIANCE
- ASSEMBLY
- USING THE VACUUM CLEANER (A)
- SPECIFICATIONS
- TROLLEY SYSTEM (C)
- CLEANING THE FILTER (I) WITH A BRUSH
- UPHOLSTERY NOZZLE (O)
- LITKA DELUXE NAPKETY (P)
- UITKAINM'KINXME6NIB (Q)
- HACAIKAДЛЯВАЖКОДОCTУNHNXMICUR (R)
- HACAIKKA DNY DEIIKATHNX NOBEPXOHB (S)
- UITKAIJMA'M'KKNME6NIB (T)
- DONOMOFA
- POSSIBLE CAUSE / REMEDY
- UHCOPBIU CNATTAMACBL
- KIPICNE
- SAFETY INSTRUCTIONS
- REMOVED
- INSTALLATION
- THE APPLIANCE IS NOW READY FOR USE
- REMOTE CONTROL KEY (C)
- VEHICLE DOOR (D)
- FUEL PUMP (F)
- MAINTENANCE AND SERVICE
- CLEANING THE FILTER
- CLEANING THE DOOR SEAL
- CLEANING THE DETERGENT DRAWER (H)
- DO NOT OPERATE THE ENGINE WITHOUT THE OIL FILTER INSTALLED
- CHECK THE FUEL TANK FOR LEAKS. 2. CHECK THE FUEL LINES FOR CRACKS OR DAMAGE. 3. REPLACE ANY DAMAGED PARTS
- IF THE FUEL TANK CAP IS NOT TIGHTENED PROPERLY, FUEL MAY LEAK OUT. TO PREVENT FUEL LEAKAGE, ALWAYS ENSURE THE CAP IS TIGHTENED SECURELY. IF THE CAP IS DAMAGED, REPLACE IT WITH A NEW ONE
- FUEL SYSTEM (I) - FUEL TANK
- DRAIN THE OIL PAN (J)
- WATER FILTRATION (K) - FILTER ELEMENT
- ACCESSORIES
- MULTI DELUXE (M/L)
- PARKET BRUSH (N)
- LUX PARKET BRUSH (P)
- CARPET BRUSH (Q)
- CHEMICAL (R)
- FOR DELICATE FABRICS (S)
- FOR WASHING MACHINE (Q)
- AFTER-SALES SERVICE
- WARRANTY SERVICE
- SERVICE CENTERS
- CURRENT INFORMATION
- IF YOU CONTACT THE SERVICE DEPARTMENT, PLEASE HAVE THE FOLLOWING INFORMATION READY
- CONTACTS
- DESCRIPTION OF THE DUST EXTRACTION SYSTEM
- NEVER VACUUM LIQUIDS OR WET SUBSTANCES, AS THIS MAY DAMAGE THE DEVICE
- DELEGATED REGULATION (EU) NO
- HOW TO USE THE VACUUM CLEANER (A)
- MAKE SURE THE CORD IS NOT TWISTED WHEN REWINDING IT FOR STORAGE
- FUNCTIONAL CHARACTERISTICS
- ELECTRONIC POWER REGULATOR (W)
- MULTIFUNCTIONAL BRUSH / MULTIFUNCTIONAL BRUSH DELUXE (M/L)
- VACUUM CLEANER DESCRIPTION
Brand : HOTPOINT
Model : SL D07 BEB
Category : Washing machine