
SL C20 AA0 - Vacuum Cleaner HOTPOINT - Free user manual and instructions
Find the device manual for free SL C20 AA0 HOTPOINT in PDF.
| Product type | Canister vacuum cleaner with Trolley System |
| Brand | HOTPOINT |
| Model | SL C20 AA0 |
| Power supply | 220-240 V ~ 50/60 Hz |
| Power cord length | 7 meters |
| Collection system | Dual System: with Pure Clean bag or bagless (dust container) |
| Filtration | Pure Clean Hepa 13 filter (filtering power > 99.95%) |
| Maneuverability technology | Trolley System: telescopic handle and swivel wheels |
| Remote control | Remote Power Control: power adjustment and standby on the handle (AAA batteries) |
| Standby function | Start & Stop: standby by inserting the brush into the horizontal slot |
| Power adjustment | Electronic via +/- buttons on the handle or manual on the body |
| Fill indicator | Red indicator for full bag / full container |
| Included accessories | Normal/carpet brush, Parquet brush, Turbo brush, Deluxe Parquet brush, Furniture brush, Crevice tool, Delicate surfaces nozzle |
| Tube type | Metal telescopic tube with length adjustment |
| Filter maintenance | Cleaning every 4 months (wash with water), annual replacement recommended |
| Bag maintenance | Pure Clean fabric bag: replace as soon as indicator lights up, at least once a year |
| Safety | Safety device preventing compartment closure if bag/container is incorrectly installed |
| Usage | Domestic use only |
Frequently Asked Questions - SL C20 AA0 HOTPOINT
User questions about SL C20 AA0 HOTPOINT
0 question about this device. Answer the ones you know or ask your own.
Ask a new question about this device
Download the instructions for your Vacuum Cleaner in PDF format for free! Find your manual SL C20 AA0 - HOTPOINT and take your electronic device back in hand. On this page are published all the documents necessary for the use of your device. SL C20 AA0 by HOTPOINT.
USER MANUAL SL C20 AA0 HOTPOINT
Remote Power Control (C)
- Standard/Carpet brush
- Bristle-adjustment pedal
- Parquet brush
- Turbo brush
- Upholstery brush
- Deluxe Parquet brush
- Pipe length regulator
- Metal extension pipe
- Hand grip
- Plastic hose
- Carrying handle
- Trolley System opening/closing button
- Dust compartment opening button
- Dust compartment lid
- Suction inlet
- Release
- Full dust bag/container indicator
- Start/Stop button
- Cord-rewind button
- Buttons +/- for electronic power adjustment
- Standby button
- Battery compartment
- Air regulator
- Remote Power Control signal receiver
INTRODUCTION
Thank you for purchasing our Trolley Power vacuum cleaner. In doing so you have opted for an effective, high performance appliance. We advise you to register this product on www.hotpoint.co.uk to make sure you are entitled to all the benefits made available by Hotpoint Customer Service.
The Trolley Power was designed to ensure optimum performance and consistent usability.
The exclusive Trolley System ensures maximum maneuverability and helps you move freely around the house without knocking against the furniture. The Remote Power Control (if available) enables you to adjust the suction power directly and effortlessly from the hand grip, with no need to bend.
This appliance was developed for household use only and should not be put to industrial use.
- Electronic power regulator
- Precision nozzle
- Nozzle for delicate surfaces
- Attachment compartment
- Horizontal housing
- Pure Clean Hepa 13 filter
- Air grill
- Power cord
Version with dust bag:
- Dust bag support
- Pure Clean dust bag
- Motor filter
- Motor filter grill
- Gasket
- Dust compartment
Version without dust bag:
- Dust compartment
- Dust container
- Filter protection grill
- Pre-filter
- Pure Clean Hepa 13 filter


Before you begin using the appliance, it is important that you carefully read these instructions and keep them for further reference.
GENERAL SAFETY RULES
The safety features of your vacuum cleaner comply with the technical specifications and regulations in force.
Do not use the appliance for any use other than its intended use. Any improper use could cause damage to persons and/or property.
The voltage of your system must match the voltage of the vacuum cleaner (220-240 V). Any connection error could cause irreversible damage to the appliance and void its warranty.
If the plug, power cord or appliance appear to be damaged or if any visible damage is found, do not operate the vacuum cleaner.
en
In such cases have it checked exclusively by Hotpoint authorised staff in order to avoid any hazardous situation.
- Regularly check the condition of the power cord.
This appliance was not designed to be used by persons (including children) with reduced physical, sensory or mental capabilities. Nor, in addition, persons lacking experience or familiarity with the product, unless they are supervised or instructed on the use of the appliance by a person responsible for their safety.
Supervise children to prevent them from playing with the appliance. - Never leave the appliance unattended when it is plugged into an electrical outlet.
- Never use the power cord to move or carry the appliance around.
After use, disconnect the plug from the electrical outlet and rewind the power cord. - Do not bend the power cord and keep it away from sharp edges to avoid any damage.
- Never leave or use the appliance over or close to flames, ovens, flammable materials or other sources of heat.
- Do not use the vacuum cleaner on persons or animals. Keep the suction ends away from your body while it is in operation.
- Before changing an attachment, when cleaning or maintaining the appliance, and in any case after every use, unplug it from the electrical outlet.
Should you suspect a failure, immediately unplug it from the electrical outlet. - Never immerse the vacuum cleaner in water or any other liquid. Never spray any liquid substances onto the appliance.
- Do not leave the appliance in the open air and exposed to inclement weather conditions.
- For safety, we advise you to keep the vacuum cleaner always lower than your own position when cleaning the stairs.
Never suck up any liquid or damp substances as this could affect the operation of the appliance.
-
Never suck up any flammable materials or incandescent objects such as ash, cigarette ends etc. Some parts of the vacuum cleaner could catch fire.
-
Never suck up any sharp or cutting objects as this could damage the appliance.
If very fine dust or powders are sucked up such as flour, etc. small electrostatic discharges could occur. When sucking up materials previously mentioned, we advise not to use the metal extension pipe, but only the plastic flexible hose and to set a low suction power level. - For your safety, every repair or maintenance action should be carried out on the appliance only by Hotpoint authorised staff.
- No responsibility shall be accepted in case of damage resulting from any improper use of the appliance.
BEFORE FIRST USE
Remove all adhesives, protective plastic materials and cardboard packaging. Make sure all adhesive parts are removed with a soft damp cloth.
Assembling
- Fasten the plastic flexible hose (10) to the suction inlet (15) until it clicks into place. To remove it, press the release (16) and pull it out.
- Fit the metal extension pipe (8) into the hand grip (9) until it locks into place. Use the length regulator (7) to adjust the length of the pipe.
- Fit the standard/carpet brush (1) or the attachment you need (see chapter "Attachments") into the end of the metal extension pipe until it locks into place.
If your appliance is equipped with a Remote Power Control, you will need to insert the batteries supplied (see paragraph "Remote Power Control" under chapter "Features").
USING
THE VACUUM CLEANER (A)
Do not use the vacuum cleaner without filters, Pure Clean dust bag, dust bag support or dust container, as the appliance could get damaged.
- Unwind the power cord (32) and plug the appliance into an electrical outlet (220/240V).
We advise you to unwind the entire power cord (app. 7m) to avoid any overheating and damage.
- Press the start/stop button (18) to start the appliance.
- Press the Trolley System opening/closing button (12) to extend the carrying handle (11) to the desired length until it locks into place. Then manoeuvre the vacuum cleaner using the carrying handle when cleaning the house.
- To select the desired suction intensity (based on the model) use the +/- button and electronically adjust the power (20) of the Remote Power Control; or manually rotate the electronic power regulator (25).
We advise you to use a low suction power on delicate surfaces such as curtains, fabrics, cushions etc to avoid any damage; or at least open the air regulator to reduce the suction effect.
- To pause the vacuum cleaner, if this feature is available, you can use the standby button (21) on the Remote Power Control or the Start & Stop function (based on the model). Just insert the brush into its horizontal housing (29).
- To switch off the appliance press the start/stop button again.
- Disconnect the plug from the electrical outlet and press the cord-rewind button (19) until rewinding is complete.

Make sure the cord does not get entangled during rewinding.
- Secure the floor head into its horizontal / vertical housing and store the appliance.
Do not start the vacuum cleaner if the plastic flexible hose is entangled, as this could damage the appliance.
FEATURES
Trolley System (B)
The Trolley System allows you to move your vacuum cleaner easily when cleaning and carry it from room to room effortlessly.
- Press the opening/closing button on the
Trolley System (12) to pull out the carry handle (11) until it locks into place at the desired length.
- Having completed your cleaning, press the opening/closing button on the Trolley System and close the carrying handle until it locks into place.
Use the Trolley System's carrying handle to store the appliance, making sure you have correctly locked it into place.
Remote Power Control (C)
The Remote Power Control (if available) enables you to adjust the suction power directly and effortlessly from the hand grip (9), with no need to bend. When using the vacuum cleaner, you can keep it on standby by pressing the standby button (21).
To insert or change the batteries of your Remote Power Control:
- Open the battery compartment (22).
- Insert two AAA batteries, making sure of the positive and negative poles.
- Close the battery compartment until it clicks into place.
Start & Stop (D)
The Start & Stop function (if available) lets you keep the vacuum cleaner on stand-by and lock the cleaning head in the park position: just insert the brush into its horizontal housing (29).
Dual System (E)
The Trolley Dual Clean version of the Trolley Power makes your use of the appliance extremely versatile because it can be used with or without dust bag. Just assemble the conversion kit in the package: it comprises a Pure Clean dust bag (34), dust bag support (33), gasket (37), and motor filter grill (36) already fitted to the motor filter (35). The assembling takes place as follows:
- Make sure the appliance is disconnected from the electrical outlet.
- Press the dust-compartment opening button (13) to open the dust compartment lid (14) and remove the dust container (39).
- Fit the gasket into the special groove along the perimeter of the dust compartment (38).
- Fit the motor filter grill (already fitted to
the motor filter) into the special dust-compartment guides.
- Slide the Pure Clean dust bag into the dust bag support all the way; then place it into the special dust compartment.
The appliance is equipped with a safety device that prevents the dust compartment lid from closing unless the dust bag / container has been correctly installed.
6. Close the dust compartment lid until it clicks into place.
To use the vacuum cleaner with the dust container, remember to remove all the following parts: Pure Clean dust bag, dust bag support, gasket, motor filter and motor filter grill.
CLEANING AND MAINTENANCE
Before cleaning or maintaining the vacuum cleaner, make sure it has been unplugged from the electrical outlet. Do not use aggressive substances or abrasive materials to clean the appliance, its internal parts and attachments. Make sure it is thoroughly dry before using again.
Cleaning the appliance
Use a dry or slightly damp soft cloth to clean the plastic parts (body, dust compartment, flexible hose etc) and the metal extension pipe (8).
Cleaning the attachments
Before cleaning the attachments refer to the chapter "Attachments".
Cleaning the dust compartment (F)
For the routine cleaning of the dust compartment (38):
- Press the dust-compartment opening button (13) to open the dust compartment lid (14).
- Based on the model, remove the Pure Clean dust bag (34) or the dust container (39).
- Clean the dust compartment by removing any residual dirt with a small brush. If needed, use a damp soft cloth, taking care to wipe all its parts entirely dry.
- Re-place the Pure Clean dust bag or dust
container correctly and close the dust compartment lid until it clicks into place.
The appliance is equipped with a safety device that prevents the dust compartment lid from closing unless the dust bag / container has been correctly installed.
Replacing the Pure Clean dust bag (G)
We recommend always using Hotpoint original Pure Clean dust bags, because their special fabric allows optimum air filtration, maximum dust/powder retention, high performances and a long motor life.
As the Pure Clean dust bags (34) are made of fabric, they are more resistant than conventional paper bags and can retain very fine dust/powder particles more effectively, thus ensuring maximum hygiene.
We recommend replacing the Pure Clean bag as soon as the full-bag indicator illuminates. Change at least once a year to be always sure of the hygienic condition of your vacuum cleaner. The pores of a bag clogged with dust/powder particles reduce the motor's suction power and can cause damage.
- Make sure the appliance is disconnected from the electrical outlet.
- Press the dust-compartment opening button (13) to open the dust compartment lid (14).
- Release the bag support (33) and remove the Pure Clean dust bag (34).
Dispose of the dust bag in compliance with all local regulations on waste disposal.
- Slide a new Pure Clean dust bag into the dust bag support completely; then place it back into the special compartment.
- Close the dust compartment lid until it clicks into place.
If you are finding it difficult to close the dust compartment lid, it is likely that the Pure Clean dust bag and/or its dust bag support have not been assembled correctly. Do not force the dust bag lid to close, make sure both parts are in the correct position to allow lid closure.
Cleaning the filters (H) model with dust bag

The Pure Clean Hepa 13 filter ensures maximum protection against allergens and maintains high air quality, as the air given back by the appliance is entirely free from dust/ powder residues (filtering power >99.95% ).
We advise you to clean the filter at least every 4 months to restore its filtering power. In any case we recommend replacing the filter at least every year to ensure maximum performance.
To clean the Pure Clean Hepa 13 filter (30):
- Disassemble the air grill (31) using the opening tab.
- Remove the Pure Clean Hepa 13 filter by releasing the opening tab.
- Wash the filter under running water, taking care that the jet of water is not too strong.
- Hold it so that the water flows parallel to its folds.
- Let it dry at room temperature until all its parts are thoroughly dry.
- Replace the Pure Clean Hepa 13 filter, paying attention to the position of the notches.
- Fit the air grill into its housing until it clicks into place.
To clean the dust compartment filters (38):
- Press the dust-compartment opening button (13) to open the dust compartment lid (14).
- Remove the Pure Clean dust bag (34), motor filter grill (36) and motor filter (35) from the motor filter grill.
- Clean the motor filter by washing it under running water, taking care that the jet of water is not too strong. Then gently shake water loose.
- When cleaning the motor filter grill, remove any dust/powder residues with a small brush. If needed, use a damp soft cloth.

Make sure all its parts are thoroughly dry before replacing them.
- Fit the motor filter into the motor filter grill again, taking care to position it gently into the special notches.
- Slide the motor filter grill assembly into the
special guides in the dust compartment.
14. Fit the Pure Clean dust bag using the special dust bag support.
The appliance is equipped with a safety device that prevents the dust-compartment lid from closing unless the dust bag has been correctly installed. Do not force the dust bag lid to close and make sure all the parts are in the correct position to allow you to close the lid.
15. Close the dust compartment lid until it clicks into place.
Cleaning the dust container (I) model without dust bag

For the routine cleaning of the dust container:
- Press the dust-compartment opening button (13) to open the dust compartment (14) and remove the dust container (39).
- Open the lid and empty the dust container.
- Remove any residual dirt by washing the dust container under running water.
- Let it dry at room temperature until all its parts are thoroughly dry.
- Close the dust container lid until it clicks into place and replace it into the dust compartment.
- Close the dust compartment lid until it clicks into place.
Cleaning the filters (J) model without dust bag

This model comprises two Pure Clean Hepa 13 filters. The Pure Clean Hepa 13 filter ensures maximum protection against allergens and high air quality, because the air given back by the appliance is entirely free from dust/powder residues (filtering power >99.95% ).
We advise you to clean the filter at least every 4 months to restore its filtering power. In any case we recommend replacing the filter at least every year to ensure maximum performance.
To clean the Pure Clean Hepa 13 filter (30) in the back:
- Disassemble the air grill (31) using the opening tab.
- Remove the Pure Clean Hepa 13 filter by
en
releasing the opening tab.
- Wash the filter under running water, taking care that the jet of water is not too strong.
- Hold it so that the water flows parallel to its folds.
- Let it dry at room temperature until all of it's parts are thoroughly dry.
- Re-place the Pure Clean Hepa 13 filter, paying attention to the positions of the notches.
- Fit the air grill into its housing until it clicks into place.
To clean the dust compartment filters (38):
- Press the dust-compartment opening button (13) to open the dust compartment (14).
- Remove the dust container (39).
- Release the opening tab and then remove the Pure Clean Hepa 13 filter, pre-filter (41) and filter protection grill (40).
- When cleaning the filter protection grill, remove any dust/powder residues with a small brush. If needed, use a damp soft cloth.
- Clean the pre-filter by washing it under running water, taking care that the jet of water is not too strong. Allow to dry.
- Wash the Pure Clean Hepa 13 filter under running water, taking care that the jet of water is not too strong.
- Hold it so that the water flows parallel to its folds.
- Let it dry at room temperature until all its parts are thoroughly dry.

Make sure all its parts are thoroughly dry before replacing them.
- Fit the pre-filter into the special indentation of the Pure Clean Hepa 13 filter, locking both filters in place using the protection grill.
- Fit the pre-filter, Pure Clean Hepa 13 filter and protection grille assembly onto the dust container, paying attention to the positions of the notches, until it clicks into place.
- Re-place the dust container into the dust compartment.

The appliance is equipped with a safetyservice that prevents the dust
compartment lid from closing unless the dust container has been correctly installed. Do not force the dust bag lid to close it and make sure
all the parts are in the correct position to allow lid closure.
19. Close the dust compartment lid until it clicks into place.
ATTACHMENTS
The attachments can either be supplied as standard features (based on the model) or be purchased separately from Hotpoint authorised centres.

Before changing an attachment, during a maintenance, disconnect the plug from the electrical socket. Do not use aggressive distances or abrasive materials to clean the appliance, its internal parts and attachments. To sure the appliance is thoroughly dry, use using it again.
Standard/Carpet brush (K)
The standard/carpet brush (1) is suitable for vacuuming hard and smooth floors as well as carpets on a daily basis. Use the bristle-adjustment pedal (2) to clean:

Hard floors

Carpets
To clean the plastic parts of the standard/carpet brush, remove the brush from the metal extension pipe (8) and wipe with a dry or slightly damp soft cloth. To clean the bristles, remove any dirt using, if needed, the precision nozzle (26).
Parquet brush (L)
The Parquet brush (3) is suitable for vacuuming delicate areas such as wooden floors. The special natural bristles enable you to use on very delicate surfaces without harm. To clean the plastic parts of the Parquet brush, remove the brush from the metal extension pipe (8) and wipe with a dry or slightly damp soft cloth. To clean the bristles, suck up any dirt using the precision nozzle (26).
Turbo brush (M)
The Turbo brush (4) is ideal for the in-depth vacuuming of short-pile carpets and removing pet hair. The rotation of the brush is operated by the vacuum cleaner's suction power. To clean the plastic parts of the Turbo brush, remove the brush from the metal extension pipe (8) and wipe with a dry or slightly damp soft cloth. Remove any
hairs or threads that got entangled in the rotating brush using scissors, taking care not to damage the bristles.
Deluxe Parquet brush (N)
The Deluxe Parquet brush (5) is suitable for vacuuming delicate and parquet floors. The brush is equipped with very delicate rotating bristles, which are operated by the vacuum cleaner's suction power, and soft wheels protecting delicate floors. To clean the plastic parts of the Deluxe Parquet brush, remove the brush from the metal extension pipe (8) and wipe with a dry or slightly damp soft cloth. To clean the rotating bristles, turn the safety lock into position and remove, then disassemble the rotating brush and start cleaning. Remove any hairs or threads that got entangled using scissors, taking care not to damage the bristles.
For your safety, never put your hands close to the suction nozzle or rotating brush while operating the appliance.
Upholstery brush (O)
The Upholstery brush (6) is suitable for vacuuming surfaces such as sofas, mattresses, blankets, cushions etc. It is equipped with rotating bristles operated by the vacuum cleaner's suction power that enable you to clean in depth and remove any fur, hairs or mites from fabrics. The protection grill prevents the bristles from touching the surfaces
to be cleaned, thus ensuring maximum on fabrics. To clean the plastic parts of the Upholstery brush, remove the brush from the metal extension pipe (8) and wipe with a dry or slightly damp soft cloth. To clean the rotating bristles, release the lid by releasing its fastening elements, then disassemble the rotating brush and start cleaning. Remove any hairs or threads that got entangled using scissors, taking care not to damage the bristles.
Precision nozzle (P)
The precision nozzle in the attachment compartment (28) helps you vacuum corners, crevices and other difficult-to-reach areas. To clean the precision nozzle, remove the nozzle from the metal extension pipe (8) and wipe with a dry or slightly damp soft cloth.
Nozzle for delicate surfaces (Q)
The nozzle for delicate surfaces in the attachment compartment (28) is suitable for vacuuming surfaces requiring special care such as radiators, furniture etc. Its special natural bristles enable you to use it on very delicate surfaces without any harm. To clean the plastic parts of the nozzle for delicate surfaces, remove the nozzle from the metal extension pipe (8) and wipe with a dry or slightly damp soft cloth. To clean the bristles, remove any dirt using, if needed, the precision nozzle (26).
TROUBLESHOOTING
Problem
The vacuum cleaner cannot be switched on.
The full dust bag/container indicator lights up although it is not full yet.
Low suction power.
Possible causes / Solutions
The plug was not inserted or is not making contact.
- Change the dust bag. If large quantities of very fine dust/ powder are sucked up (e.g. flour, etc), the full dust bag indicator may light up although the bag is not full yet. The reason is that the Pure Clean dust bag is able to retain very fine dust/powder particles, thus ensuring maximum hygiene.
Clean the dust container in models without dust bag.
Clean the filters and, if needed, replace them.
Make sure the expansion pipe, flexible hose and brush are not blocked.
Clean the filters and, if needed, replace them.
Make sure the expansion pipe, flexible hose and brush are
| not blocked. • Change the dust bag. If large quantities of very fine dust/ powder are sucked up (e.g. flour, etc), the Pure Clean dust bag may become clogged. • Clean the dust container and its filters. | |
| Remote Power not working. | • Battery not charged. • The batteries were positioned incorrectly inside the battery compartment. Position the two AAA batteries making sure of the positive and negative poles. • Remove batteries; then position them again, making sure of the positive and negative poles. • Electronic appliances or obstacles may be interfering or shielding with the infrared signal. |
| Small electrostatic discharges occur while sucking up. | • If very fine dust or powders are sucked up such as flour, etc. small electrostatic discharges could occur. When sucking up materials previously mentioned, we advise not to use the metal extension pipe, but only the plastic flexible hose and to set a low suction power level. |
| The vacuum cleaner whistles or vibrates when in use. | • One or more attachments were assembled incorrectly. Make sure the filters and brushes were assembled according to these instructions. In the model with dust bag make sure that the gasket is correctly in place too. • The dust bag/container is full. Replace the dust bag or clean the dust container. • Clean the filters and, if needed, replace them. • The air regulator is open. Make sure it was closed correctly. |
| The dust compartment lid cannot be closed. | • The Pure Clean dust bag or dust container was assembled incorrectly. Make sure it is correctly in place so that the safety lever will let you close the dust compartment lid. |
DISPOSAL OF OLD ELECTRICAL APPLIANCES

The European Directive 2002/96/EC on Waste Electrical and Electronic Equipment (WEEE), requires that old household electrical appliances must not be disposed of in the normal unsorbed municipal waste stream.
Old appliances must be collected separately in order to optimise the recovery
and recycling of the materials they contain and reduce the impact on human health and the environment.
The crossed out "wheeled bin" symbol on the product reminds you of your obligation, that when you dispose of the appliance it must be separately collected. Consumers should contact their local authority or retailer for information concerning the correct disposal of their old appliance.

DESCRIPTION DE L'APPAREIL
Remote Power Control (C)
Brosse Deluxe Parquet (N)
Causes/Solutions possibles
IpeH Naayanom NcnoB3ObaHnna 3denn BaxHo BHMaTeNbHO npoHTaTb HactoUIO IHCTpyKcuH IO COxpaHHTb ee dIy nocJeDyUxNx o6paueHn.
OBsIe INPABINLA B3OnACHOCTN
Bezonacnoctb Baawero nbIneocaca COOTBeTCTByet texHnueckm CpeunΦkaZmaM n DeiCTByUeMy HopMaTIny.
He nCnOlb3yIte n3dJIe B cIeJx,OTnIuHbIX OT tex,ДЯ KOTOpbIX OHO npEdHa3NaYeHO. HeaIpeKaaIee nCnOlb30BaHne n3dEInna MoKeT
HaheCTn yuερδ JIOJdAm n/IInn IMyuεctBy.

HanpxeHne
COOTBETCTBOBaTb
B
CETN
DOnJxHo
3HaueHnIO
HanpJxHeHn, yKa3aHHOMy B nacNopTe nbJIeCocaa (220-240 BaTT). IIO6oe
HenpaBnIbHoe 3neKtpuYecko NOpKnIouHeH MeKET npNBecTN K HeONpaBmblM NOBpeXdEHnAM np6opa n anHyIpObaHIO rapaHTnn.
- Ecπι Μτεπεζβhαγ Bνικα, cετοθ Μυμριπι πριδόρ Μημεότ Bνιπμbile Νονρεχδηνία, Θ Ḍκλύηαι ένλησεος. B ΚΤΟ Συγαe HγκΗΟ ποργυπήν ΠροΒερκγ Πριδόρα περcoHany, yνοληνόμουηνΗΟγ Hotpoint-Ariston.
- Perynpno npOBepnTe coCToHne cTeBoro shypa.
- Pnp6op He npedha3naeHdIaNCpOlb3OBAHnI liuamn (BkIIOUyAa DeTei) cOrpaHnueHHbIMn fN3NUyeCKHMn, CEHCOPHBIMn IIN yMCTBEHHbIMn CNOcObHOCTaMMn IIN LIuCaMn, He yMeIOUmm ObopaatbcraC np6bpom, 6e3 KOHTPOJIa CO CTOpOHbI nIu, OTBeuaIOUx 3a INX 6e3OnaCHOCTb, IIN 6e3 oBuYehnI npabUNAM NpIb3OBAHnI np6bpom.
He pa3pe7aIe Te IetTm Ipratb c np6opom.
Korda StTenCeNBHa BUNKa BCTaBJIeHa BCteByIO pO3ETKY, HNKoIgA He OCTaBJIyTe npi6Op 6e3 npICMOtpa.
He nepemeeaIte npnbop, depka ero 3a ceteboi shnp. Dnpepehockn pbilecoaca noIb3yItecb cncteMoT Trolley.
Iocne kaxdofo nCnojB3OBAHnO oTcoeDnHnTe 5TeNCeBHyO BnIKy OT CETn, B3aBUnCb 3a BnIKy pyKo, N 3aMaTbBaNTe CTeBOI Shyp.
C zelbI npedeOTBpaueHnnoBpeKdHnncTeBorO uHypa n36eraTe 3anomOB, XecTKnx Noctpbx KpaEB.
He octablaIe n He IcnoIb3yIte npIbop pIOM nn Hnd PnAmEhem, neaMn, BO3ropaEMbIMMaTePnaIaMn nn NHBIMNCTOCHNKAMn Tepna.
He nCnoB3yTe nbIeNoc Ha IIOJax IIN JxIBOTbIX. He npi6nixaTe BCacbIbAouJe OTBepCTra K TeY B IpOcece paBoTb nbIeNocca. - Pered cmeHoi kakOH-Ni6o HacaDN, pni BblIOJHEnH NcTKn I Tex. ObcIyKmbAHn I BJIb6om Cnyae nocne kajdOro IcNtOB30BaHn np6opa oTcoeHNHte WTeNCBHyO Bnky OT
CETeBOI pO3eTKn.
Пи пдоЗрени B HeNCnPabHOCTH He3aMeIINTeJIbHO OTCOeINHITe WTeNCEJbHyU BNIky OT cTeBoi pO3ETKII.
He norgykaIte nbIeNecoc B Body nnnB IIO6yIOpryIyO KINKOCtB, He 6pbI3raITe Ha Hero KINKne BeIeCTBa.
He octabJnTe npu6Op ha yInue n He noDBeprAte BO3DeiCTBnIO aTMocΦepHbIX OcaIkoB.
B ueJx 6e3oNaChocTn Iy8OpKn IecTHNtpeKOMeHdyem Bcerda yctaHaBbInBaTb NJIncocHnke BaWero co6cTBHeHHoro nOIOKeHnI.

He nCnoJb3yIte np6op dJa
BCacbIBaHnJXnKoCTeNJIINBlaRBO
n36exaHne ero nobpeXdEHH.
He BcabsBaIte NbIeNecOCOM Bo3ropaEmbIe BeIeCTBa IIN NCKpIe NepeIMtbl (HanprImep, peIe, OKypKn T.I.); DeTANI PbIeNecOCA MOrYT 3arOpetbcr.
He BCaCbIBaIe OcTpbIe npeXyUne npEIMTebl, KOToPbIe MOrY T NOBpeDnTb pni6Op.
BcascbIbAHne ocObo MeKoH (HaNPIMep, Mya n T.I.) MOKeT Bb3BaT JERKNE 3JIeKTHpOCTaTNUeCKHe pa3PdI. B IpoceCE BCascbIbAHnTaKx MATEpnaIOB peKOMeHdyE He NcNOb3OBA Tb pa3DbNkHyo MetaIIHHecKyU Tpy6y,a TOJbKO r6kni PIActNKOBbl UJNaHr, Bbl6paB MNHMmaNbHyO MoUHOCb BCascbIbAHnA.
Дя Baшей 6e3oNaChocTи JIOboI peMOHT nIIN pa6OtBI Ha npIbOpE DoJXHbI BbIIOJIHЯTbcr TOnbKO TexHnKaMn, yONlHOMOeHHbIMn Hotpoint-Ariston.
- ПюиЗБоДиТь He 6epeT ha c6eHnKaKoI OTBETCTBENHOCTN 3a yUeP6,пчИнHeHbI NO пчИнHe HeHaJIeJkaUero nCNoJIb3OBAHnЯ npi6opa.
ПОДГOTOBКИСПОЛБ3OBAHNIO
CnHmnte C np6opa BCE HakneKn, 3aunTHyHnIeKny nIn KOp6Ky. Y6eIntecb, YTO6bl BCE OCTaKn HAKneek bbln ydaJIeHbI MrgKoB BlaxKHO TpRknO.
C6opka
1.ПодсоeДинITE r6КИ ПлаctIKOBьшпанг (10)K BCaCSbIBAHOSeMy OTBepcTnIO (15) noka He pa3dAetcraцЛФО.K.ДЯ OTOeDINHeHЯнжмITE Ha KhoNky pa36IOKIpOBKn (16)И CHIMITE shnaHR.
2. BctaBbTe pa3dBnKHyIO MeTAPINUeCKyIO Tpy6y
(8) B pyky (9) Do ynpa. Дяизмени. Динны трубы Incnoьзуte peryларot (7).
- HadenbTe yHnBepcaIbHyu HacaIky (1) ININ dpyryu HacaKy (CMOTpIte pa3dEn «Akeccyapbl)Ha KOHeU pa3dBnKHO MeTannIueckO Tpy6bl Do yNopa.

EcnnBaue n3dJIne yKOMnJIeKTOBaHO cnCTemoi DnCTaHUNOHNO
ynpaBneHn, Heo6xoDnMo BCTaBnTb npJnaIauOuIeNc 6aTapeKn (CMOTpnte B pa3dene «XapaKTepncTkn》 npaparpaΦ "CnCTema dNCTaHOnOHnOro ynpaBneHn").
ИСПОЛьЗOBAHNE ПылесOCA (A)
He nCnoJb3yIte nbIeCoc 6e3 ΦnIbTPOB, MeIKOB nbIeNc6OpHnKa, KpeJIeHnMa MEska NII KOHTeHepa- nbIe6OpHnKa BO n36exKaHne NOBpeKdEHNr np6opa.
- Pa3MOTaIe CeTeBOI uHyp (32) n BCTaBBte uTEINCEbHyIO BuJIky B CeTeByIO pO3eTKy (220/240 B).

Ipeed nookJIOUOHeHem np6bopa K cTeN. pekOMeHnye NOnHOCTbIO pa3MOTaTb. loi shyp (7 M) BO n36ExKaHne ero. TpeBa n NOBpeKdEHHa.
- Haxmte KhoNky Bk./BbKn. (18) nBknIOeHn np6opa.
- HaxmTe KhoNkO tKpbIbAHn/3aKpbIbAHn CnCTembl Trolley (12) IJRA BbIDBxKeHnpyuKn (11),3aФнICnPuyTe ee B HuxHOM nIoXeHn, Bo3bMNTecb 3a pyKy IJr npEmeUeHn PbIneCocA B npOceCce y6opkn.
4.ДЯ BBIbOpa HUxHOn MOUHOCTN BCaCbIBaHHa, B 3aBnCIMOCn OT MoDEJI NblIEcOca, INcNoJIb3yTe KHNKn +/-ДЯ 3JIeKTPoHHo peYIpOBKN MOUHOCTN (20)Ha DnCTaHcUNOHm UnpaBJIeHn INn OtperyuPpyTe MOUHOCTb BpyHyIO (25).

PekomeHnyetcNcNoIb3ObaTb He6oIbIyIO MOUHOCTb BCaCbIBaHHa Ha
DeJIHKaTHbIX NOBepxHocTEx, TaKx KaK, 3aHaBeCKn, O6NBkA, N0dyuKn T.n. INN OTKpbIBaTb peRyJIaTOP nOToka BO3dYxa Dnra CHNXeHn MOUHOCTN BCacbIBaHn.
5.Дпя nepeknioyehn nJIeococa B
3heproc6eperaiozni pexim, ecn OH IMeETcA, MOXHO NcNOJb30BaTb, B 3aBNCIMOCTN OT MOeJI, KONKY peXIMA OxuaHnra (21) Ha pyUke DnCTaHNoHnro O npabIeHn IIN pIOCTO BCTaBnTB uTeTKy B CneuNaIbHoe KpeJIeHne IJRA napKOBKn B BEpTKaJIbHOM NOLOXHeHne (29).
- Дя Вьклоченя пибopa BHOБн haKMnTe KhoNky BkI./BbIKI.
- OToCoeHInHTe 1TEnCeJIbHyU BUNKy OT cTeBOI po3ETKN I HaxMMTE KHOJky CMOTKn cTeBOrO shHpa (19) BnIOMb Do noJIoHOn 3AMOTKn.

IpoBepbTe, YTO6bI B Ipocece CmOTKcTeBOrO shypa OH He 6blnpekpyuen.
- y6epnte np6op, 3a6nokpOBAB ueTky B BepTKaJIbHOM INIIN rOpN3OHTaJIbHOM IIOJKeHN.

He BkIIOUaHTe nbIeNcOC, ecn nJIaCTIKOBbI IJNaHr nepeKpyeH, BO
Hs6eKaHe NpBxpeHn np6opa.
XAPAKTEPNUCTUKN
Cuncrema Trolley(B)
CnctemaTrolleyno3BOJRAETIeKMOHaEBPnpoBaTB Bpocece yOboPK INpeMeuTaB NbIeNcOC MHNImaJIbHbIM UcNJINEM I3 KOMHaTbIB KOMHaTy.
- HaxMMTe KONky OTKpbIbAHy/3aKpbIbAHy CnCTeMbI Trolley (12)ДЯ BbIDBKeHry pyuK (11)иФИКСАЦи eeВ hyKHOM nOLOXKeHIN.
- По завершени уборки нажмITE Кногky otkpытney/зakpbttna Trolley System cCloxnte pyuKy BnIoTb Do oe БлokирOBKn.

y6eIntecb, yTO BO BpemxpaHEnn
pyka cnctembl Trolley haedxho nlaHa.
ДиctahunHoe ynpaBHeHne MOUHOCTbIO BCaCbIBaHnA (C)
Диctанцонhoe упавлени (ecln OH nmeetc) IO3BOJЯET peYUNIPOBaTb MOUHOCt b BCaCbIbAHnI nprmo Ha pyuKe (9) 6e3 DoONHITeJIbHbIX YcINiN I HeOxOAnMocTn HAKIOHrTbc K nbJIneCocy. ПрИ NCIOJIb3OBAHN nbJIeCocA moXHO TaKke nepeKJIQUHTb erO B pexIM OxNiDaHnI, Haxab COOTBeTCTByIoUy KoHnKy (21).
Iopraok yctahOBkn nnn 3ameHb6aTaapeek Ha
ru
pyuKe DnucTaHcIOHHO ynpaBJIeHnI:
- OTKpoTe OTEcДЯбatapeek (22).
- BcTaBbTe DBe 6aTapeKn (AAA), co6nIOdaI nOJIpaHOCtB.
- 3aKpoIe oTceK baTaapeek Do uenka.
AByTOMaTHueckoe OTKJIoueHne npn BeptnKaJIbHOJ napKOBKe Tpy6bl (D)
Функця abTOOTKJIIOUeHnE (ecnOHa nMeetc), IO3BOJЯET nepeKNIHOHTb NblIeCOC B peXIM OxNJaHnI 6IbOKnPoBaTb IeTky, BCTaBnB ee B CneuNaIbHoE napKOBOUHoe KpeJIeHne (29).
Bo3MOxHOCtB BbIbOpa CnCTeMbIC6opa nblnn (E)
LunHprueckn nbJncoc Trolley Dual Clean nMeet yHBepcaIbHyO cnCTemy c6opa nbJIn. 3TOT nbJncoc MOKeT 6bITb NCNoB3OBaH KAK C MeUKOM, TAK N 6e3 Hero, yCTaHOBNB COOTBETCTBYUoNIN KOHTeHep, BXODaNIN B KOMIIeK. CnCTema coCToNT I3 MeUka dJIa c6opa nbJIn (34), KpeJIeHnA MeUka (33), yNJIOHTHeTg (37), peWetKn PpeDMTOPHoro fNbTpa (36), NOCTABJIeMoB B CObpaHHom BnDE C ppeDMOTOpHbIM fNbTpOM (35), KOTOpbIE MOXHO yCTaHOBNt CJeDyUoNIM Oba3OM:
- y6eHntecb, yTO npnbop oTcoeHHeH OTeN.
- OtkpoIte KpbIshky OTecka nblIec6OpHnka (14) KhoIkoN OToKpbIbAHnO TceKa (13) n BbItaunTe KOHTeHep-NblIec6OpHnK (39).
- BCTaBbTe yNlOTHnTeNb B CneUHaJIbHoe OTBepCTne no neppImeTp y OTCeka nbIe6bOpHnka (38).
- BcTaBbTe peWetky npEIMOTOPHOro ΦnIbTp a (NocTAbIeTcB CObpaHHOM BnDe CΦnIbTpOM) B HApPaBJIouIe OTCeKa nblnc6bOpHnka.
- BcTaBbTe MeWOk B KpeIJIeHne I NOMecTITe ero B OTEcK PbIeSc6OpHnka.
Пьлесoc Oснашиз 3auntThbIM yctpoiCTBOM : Kpbilka OTceka Пьлесборнka He 3akpoeTc, ecn MewoK ИИ KONTeHep-Пьлесборнк yctahOBJIeHbI HENpaBnJbHO.
- 3akpoTe KpbIuKy OTCeKa nbIneScbOpHnKa do UeJIuKa.
ДяИСПОЛБ3OBAHINЯпьлесocaТольк c KOnTeHepOM - nbIeScBOpHNKOM CJIeDyET NOMHHTb,уTOи 3 nbIeCoca HxHo BblHyTb CJIeDyUOUINE DeTALN: MeWOK-NbIeSCBOpHNK, KpenJIeHne MeuKa, yNlOTHnTeJIb, npEIMOTOPHbI ΦnIbTp n peWeTKy npEIMOTOPHOfNbTpra.
CHCTKA N YXOD
Ipepe BbINOJIHeHEm YnCTKN y6eINTecb, yTO np6Op OTKnIOUeH ON CTNI. Ia NcTkn np6Opa, BHyTpEnHHX detaneN aKCECCyApOB He peKOMEHNyETcN cNOJb30BaTb arpeccNBhIe BeIeCTBa N abpa3INBhIE ry6Kn. Y6eNTecb, yTO np6Op a6COJIoTHo cyxO nepe nocJeDyUoMn NCNOJB3OBAHmE.
UncTka n3dJIIna
Дя чИстки пл actиковыдеталей (kopnyca, OТсека nbilencборнka, ngkoшпанг uTП.) u pa3dВиЖно Металческоуtpь (8) Heo6xOДМО ИСПОЛБЗOBaTb MЯrkTu TprnKy, CJerka CMOЧEHУ BODО.
UncTka akceccyapOB
ПдрбпeeВраздел«Акceccуары》.
UncTka OTeCeKa nbIeSc6OpHnka (F)
Perynpnag ounctka nbIe6bOpnka (38):
- OtkpoIte KpbIuKy OTeCeKa nbIeScOpHnka (14) KHOKNoI OTKpbIBaHnI OTeCeKa (13).
- B 3aBnCmOCTn OT MoJeN BbTaUHTe MeIooK-PlJnc6OpHnK (34) IJIN KOHTeHep -PbJInc6OpHnK (39).
- OuInCTHe OTe Cek NbIeScBOpHnKa UTeOtuKoI Pn HeoXoDImOcTm MoxHo NcNoJIb3OBA Tb Cnerka BnaxKyU MrgKyU TpRnKy. Iocne INcNoJIb3OBAHnI HeoXoDImO Hacyxo BblTepeTb BCE DeTaII.
- IpaBnIbHo yCTaHObIte Ha MeTo MeJIOK- nblIec6OpHnIK nII KONTHeHep-nblIec6OpHnIK n 3akpoIte KpbIshKy OTcKa Do UeJIYKOM.
NbIneoc Ocnae H 3aunTHbIM ycTpoiCTBOM: KpbIka OTceKa Nblnc6opHnKa He 3akpoetc, ecn MeoK ININ KOHTeHep-Nblnc6opHnK
yctaHOBneHbHe HnpeBaunbHo.
3aMeHa MeuKa-ntbIeSc6OpHnKa(G)
PekomeHdyem Bcerda NcNoIb30BaTbOpunHaJIbHbIe MeUKn-PlIeNec6OpHNKHotpoint-Ariston, TAK KAc CneuaJIbHnaTKaHb, IN3 KOtopoOn OHN IN3ROTOBJeHbI,ObecneuHbaET ONTMaJIbHyOfInbTpauHIO BO3duXa, MaKcMaJIbHOydepXnBaET PbIb, OblaJaet OTINuHbIMN3KcIIpyataUOnHHbIMNaueCTBaMNIydlnHaeT cPOK clyxblDBratela.
MeIok-NbJIeSc6OpHKn (34) n3rOToBJIeH n3 cneuaJIbHO TkaHn. TaKIM o6pa3OM, no cpaBHeHIO C oblyHbIM bMyaxHbIM NaKeTOM, OH yBIAETc BOJee npouHbIM N 60Jee 3ΦΦeKTuBHO yDepKINBaET CaMbIe MeIKNe YAcTnCbI PbIJN, o6ecneuBaMaKcMmAbHyU NCTOTy.

PekomeHdyem nbIeSc6OpHnK,
3aMeHHTb KaK
MSEWKTOJIbKO
HnDnKaTOp HanoJIHeHHa MeIka 3arOpNTcKpaChbIM UBeTom. O6raTeIbHa 3aMeHaMeIka-NbIneC6OpHnKa MmHmym1 pa3B roDdIy o6ecneHnna 3oΦeKTHBHO pa6OtblbIeCoca. Iopbl MeIka-NbIineC6OpHnKa,3a6BaIOCTc NbIbU, yTO npNBODNT K NOtepeMOuHOCTN BCacbIBAHn, a TaKxE MOXETnpNBECTN K NOBpeJDeHnIO DBIrataTeJI.
- YbeiTeCb, yTO npnbop OTcoeHHeH OT cETN.
- OTKpoTe KpbIuKy OTceKa nbIeScOpHnka (14) KhoNkoTOKpbIBaHnry OTceKa (13).
- OToeDInHnTe KpeIeHne MeuKa (33) n BbItaunTe MeuK - nbJInc6OpHNK(34).

YtJnI3npyIe
CTapbI MeWOK
B COOTBETCTBHN C MECTHBIMN HOPMaM
I0 yTIN3aun OTXoOB.
- BCTabBte HOBBI MEsOK- bIeScbOpHnK BCTabBte MeoK B KpeJIeHne I NOMeCTHTe erO BOTcEK bIeScbOpHnKa.
- 3akpoTe KpbIuKy OTCeKa nbIneScbOpHnKa do UeJIuKa.

Ecnn KpbIka OTecka nbIeSc6OpHnKa 3aKpbIbAeTcC TpydOm,3TO 3HaHT,4TO
MeoK- nIe6bOpHn K/nn COOTBcTcByOuie KpeJIeHne yCTaHOBHebl He npImeHrTe cnny,
3akpbibar KpbIshky OTecka Nblnc6bOpHnka.
Y6eintecb, YTO MeWOK IN KpeJIeHne 6bln
yCTaHOBNeHb I npAINbHo, YTO6bl 3aUNTHbI
pbIur Mor 3akpbITb OTcEK
Nblnc6bOpHnka.
Pnp6op ochaueh 3aunTHbIM yCTpOiCTBOM, He
N03BOJIAUOIM 3aKpbITb KpbIuKy OTceKa nbIeC6OpHnka,ecnn MeWOk yCTaHOBNeH He npImeHne Cnny, 3aKpbIBa KaPbIuKy OTceKa nbIeC6OpHnka. IpoBepbTe, YTO BCE DeTaN 6bln yCTaHOBHeI npabINbHo, TTO6bl 3aunTHbI pbIur Mor 3aKpbITb OTceK nbIeC6OpHnka.
15. 3aKpOte KpbIuKy OTeKa nbJIeScbOpHnKa do UeNcKa.
POpAdoK YnCTKn KOHTeHepa- nblnc6bOpHnka (I) MoJeB 6e3 MeuKa

Peynapna Ounchka KOHTeHepa- nblnc6opHkA:
- OtkpoiTe KpbIiKy OTCeKa nbJIeC6OpHnKa (14) KHOJIKo OTKpbIBaHnO OTCeKa (13) n 3BNeKInTe KOHTeHep-NbJIeC6OpHnK (39).
- OTKpoITe KpbIuKU n onyctOuHInTe KOHTeHep-PlJneC6OpHNK.
- YdaJInte BO3MOXHbIe HaneTbI, npOMbIB KOHTeHep-PIBJNEc6OpHNK NOJ KpaHOM.
- Octabte cyuHbCpI KOMHaTHOH TemnepaType DO NOnHO R BcBixAHN BCex DeTaeJe.
- 3aKpOJIe KpbIuKy KOHTeHepa-NbIeSc6OpHnKa do UcENuKa, yCTaHOBNTe KOHTeHepNbIeSc6OpHnK B OTCek NbIeSc6OpHnKa.
- 3akpoIe KpbIuKy OTCeka PbIeScbOpHnKa C IeNcKOM.
UncTkA qnJIbTPOB (J) MoJeIb 6e3 MeuKa

B 3TOI MoDEII IN IMEOTcA DbA FInIbTpA Hepa 13.
hotpoint-ariston.com
npn6nkaIte pykn K cacbBaIOSeMy OTBepCTNIO INK BpaauOJeC8 ueTke.
Matpacna Hacaika (O)
Matpachna Hacaika (6) npedha3hauhe na JnA NCTKNOCobix NOBepxHocTei, TAKnx KAKMraKaMebeIb, MatpaCbl, OeJNa, NdyuKIn nT.n. UTeKa OchaSeHa BpaAuaUmmncs QetINHKamn, KOTOpBle N03BOJIAOT TtateJIbHO NCTNTb N ydaIbTc TKAHeBOI OmbkN MBeJI N BOIOcbI, WepcTb DOMaunHX JNBOTHbIX N PbIeBBIX KLeuee. A 6bnarOapra 3aunTHoI peWetke UeTKa He Kacaetc ybupaemOI NOBepxHocTn, ObecneuBaMaKcImaJIbHbI yXoD 3a TkaHeBOI OmbkoI.
Для чИстКOBьIX DeTaine HaCадКн СИМЛТЕ ee CmetaJIHnueCKO pa3dВиЖнОТуБы (8) И пOTрпЕ ee cyхо МЯrkО ИИсERka ВlaЖнОТ ТРЯКОД. Для чИстКВврацAoUxNCSY ЧETINOK OTOeDInHtE KpbIuKу, Haxab Ha Спeциальные КЮк. 3aTeM ChИМЛТe BAVIK И ОчeNTte ΜeTINHKn.ЕсlnHa ΜeTky HAMOTaNtCb BOLOCsI IIN HNTKN,При HeoBxOДmOCTN ИСПОЛьЗУтЕ HOXHnCbI, CTapAraCB He NOBpeДntb ЧETINHy ΜeTkn.
UepeBaHa hacaKa (P)
LJIeIeBaH hacaIka, xpaHЯIaIcB B O TcKe IJnA kCeCCyApOB (28), npeHa3NaYeHa IJN y6OpKn y3Knx TpyHNOCTynHbIX MeCT.
Дя чсткп пл actиковых Deталеи Надкн CHIMMITE ueKу C MeTALNHyeCKO pa3DbNkHOI Tpy6bl (8) n npotpnte ee cyxO mRKO nII CNlerka BnajKHoT Tprnkoi.
Hacaika Дя Деликathьх NOBepxHocTei (Q)
HacaIkaДЯ DeIHKaTHbIX NOBepxHOCTe, xpaIyIaIcR BOTcKe DnA kCeCCcyApOB (28), npeIHa3NaUeHa DnYbOpKn NOBepxHOCTe, TpeSyIOuNXOCoBOrO BHNMaHry, TAKINK KAK DepeBraHHa IINIIpIactIKOBaMBeJIb N.T.I. CneuaJIbHbIe IeTINHkN 13 HATypaJIbHOro MaTePnAna He capanaHOT yBnpaEmyIO NOBepxHOCTb.
Для чсткп пл actиковых De差别и Надк ChmMnte ee C MeTALINUeCKO pa3DbuXHNO Tpy6bl (8) npoTpPte ee cyxO MrgKo uIn cnerka BnaxHOn TpIKNo. Для чстки УетнOK уdajNTe rpr3b, рр Иeo6xOIMOCTo INcNoIb3y y3kyU OJIeByu HacdKy (26).
YDAJIEHNE HENCINPABHOCTEI
HencnpaBHOCTb
Bo3MoXHbIe npuHbI / MeToDbI yCTpaHeHn
Ibilecoc He BkIIOyaeTc.
HnDnKaTOp nONHOro MeuKa HnNn HnDnKaTOp KOTheHepa nblnc6bOpnka 3aropaetc, daKe ecn MeoK nn KOnTeHep eue He noJIhIbe.
- Μτέπεζήνα ἀνλκα Θενβαῦηα Αςτεγύ ροσεΤκύ έῖνην έῦτην έῦτην έῦτην έῦτην έῦτην έῦτην έῦτην έῦτην έῦτην έῦτην έῦτην έῦτην έῦτην έῦτην έῦτην έῦτην έῦτην Εθεικόντα.
3aMeHnTb MeoK. B cIyae BCacbIbAHnB 60JIbIoTO KOJIuYeCTBa OeHb MeIKO NblN (MyKa I.T.I.) INDnKaTOP NOINHO MeJka MoKeT 3aRopeTbCpAChbIM CBETOM, DaJke ecn MeoK eue He nOLOH. 3To npOnCxOHT, TAK KAc MEoK-NbJIeNCbOpHN 3aDePjXnBAET daJe CaMbIe MeIKne YactnCbI NblIn, ObecneUBA mAkCMmaJIbHyIO rIgHeNy. 3Bo3MOxHna YnCTKa KOHTeHepa-NblncbOpHnKa Dnla MoJeEbe MeJka.
Bo3MOxHNO, Heo6OyIMa YNCTKa KOHTeHepa- nIe6OpHnka DJIa MOnJeB6e3 MeuKa. - Y6eHITecb, yTo6bl pa3dBnKna Tpy6a, rI6kn Ⅲ TaHaHr n ⅢeTka He 6bln 3acopehbl.
Hn3ka MoUHOCTb BCaCbIBaHn.
Bo3MOxHNO, Heo6OaMa YnCTKa 7nIbTPOB uX 3aMeHa.
- Y6eIITecb, yTo6bl pa3dBnKna Tpy6a, rN6kni Ⅲ TaHaH n ⅢeTka He 6bln 3acopehbl.
3aMeHnTb MeoK. B Cnyae BCacbHaHna 60JIbIoo KOIuYeCTBa Oeyh MeIKoN PbIIN (Myka N T.I.) MeoK- PbIeScOpHnik MoKeT 3acOpHTbcra.
Bo3MOxKHO, Heo6xOdmo npoucTnTB KOHTeHep- nblIec6OpHnK er0 qnlbtpbl.
He pa6oTaET nCTaHcNoHHOe ynpaBLeHne.
- YctaHOBJIeHHbIe 6aTapeiKn pa3pIuINcB.
He npabnIbHO yCTaHOBneHb 6aTapeiKn.
BCTaBbTe DBe 6aTapeKn (AAA),co6HIOJaI NOJKeJIbHbI IN OTPuTaTeNbHbI NIOHcA. - BbHbTe 6aTapeKIn, 3aTeM BHObB BCTaBbTe INx, o6paJaa BHNMaHHe Na NIOXKeTbHbI IN OTpNcaTeMbHbI NOHocA.
- Θηκτροῦнные приборы и/Nи Илье рпедмétы могут создаваьюмени и/Nи заханировать IK-cигнадистанционноу уравленья моцhoctу Remote Power Control.
B npocece BcacbBaHnBaO3NkaHOT JERKNE 3Jektpueckne pa3pndbl.
BcacsbAHne oco6o MeKo (Haepmep, Myka n T.n.) MoKeT Bb3BaT IeKne 3eKtpocTaTuYeCKne pa3pAdbI. B npOceCE BCaCSbAHn TakHX MaTePmaJIOpeKOmeHdyem He NcNoB3OBaT pa3DbNkHyO MeTaIINuCeKyU Tpy6y, a ToJIbKO r6KnnPiactNKOBbl JNaHr, BbIpaB MNHImaNbHyO MOUHOCTB BCaCSbAHn.
IbIeocOuNNITnIN Bn6pnpyETB npocece pa6oTbl.
OdHn HnHeckoNbKO akceccyapOB yctaHOBneHb HnnpabInbHo. PpOBepbTe, YTObbltpbI n etKb6bln Co6paHb I COOTBeCTBn C hAcToaUzIMn INHCTpykUmaMn.
MeIooK/koHTeHep-tnJIeNec6OpHnK nOJIhB.3aMeHnte MeIooK nII npOHCTte KOHTeHep-tnJIeNec6OpHnK.
Bo3MOxHO, Heo6xOaMa YnCTKa qInIbTPOB INx 3aMeHa.
- Otkpbit pepytTop BO3dyxa. Проверпte, чтбbl OH ьлпправильноЗakpbit.
KpbIka OTecka nbJIne6bOpHnKa He 3aKpbIBaetc.
MeIooK-tnJIeNec6OpHN KIOHTeHep-NbIeNec6OpHN 6blIN yCTaHOBJeHbNo. IpoBepbTe, npabUNbHoCTb nx paCnoJIOKeHn, YTO6bI 3aOpHbI pyHuar CMOr 3aKpbITb KpbIuKy OTEcKa NJIeNec6OpHNka.
UeTka nepemeeaetc Tpydom.
Cokpatnte MoUHocTb BCaCbBaHnry, B OOC6EHHOCTn npu YnCTke IIObix KOBpOB N TkaHEBOI OOBKn. OTKPOITe peryIaTOp BO3dyxa Dnla 60nee CBO6OHDoro nepemeueHnra.
CteBoI uHyp CmTaBbAeTcA TpyDom.
Поберът,чTo6bIВпpoUCECE CMOTkn CeTeBOrO shHypa on He 6bl NepeKpyuH. B clyuae 3actpeBaHnru shHypa, pa3MOTaTb ero NOJIHOCTbIO IN BHOBB CMOTaTb.
CEPBNUCHOE OBCJNYXINBAHNE
BecnlaTHaTROPaYJIHHa: 88003333887*
* (Ycnyra 6ecnnaTha IЯ a6oHeHToB Bcex ctauHOnapbIX IINH NHa Bcei TeppuTOpN Poccn)
Mbl3ab0TmCRO CBOUX NOKyNaTeJxN CTapaEMcR
OeHTb BlicOKoe KaeeCTBO cepBnCHOrO
OcbnykBaHn. Mbl NOctoHHo COepeHCTByEM
Haun npOdyKtbl, YTObI cdeNaTb Baue o6uHne
CTEXNKoINPOCTbIM INPnraTHbIM.
YXOD3aTexHnKoI
Линя npofoeeccnoHaJIbHbIX cpeCTB Professional no yxody 3a texhknO, pekomehdyemar Hotpoint Ariston, npodnT cpoK 3kCnIyatauBn Bawe texhkn n CHN3NT BepoAHTOcB ee noIOMKn. LInHry npofoeeccnoHaJIbHbIX cpeCTB Professional co3daHa C yyeTom oc6eHHocTe Bawe texhKn. PpOyoKtbl npOn3BOJaTcB IVtaJIIN C6OBJeHNEm BbICOKnx EBpOeNCKNX CTaNdApTOB B O6NaCTN kaueCTBa, 3KOJOrn N 6eONacHOctN mCNoIb3OBAHn. Y3haIte NoDpO6He Ha caIte www.hotpoint-ariston.ru B pa3dene «CepBnc» n cnpaunBaIte B mara3nHax Baawero ropoja.
ABTOPIN3OBaHHbIe cepBnCHbIe cHTpbI
Ytobb6bTb 6nJKe K Haunm NOTpeBntJAM, Mbl Co3dAUNI ShnpOKyU CepBnCHyU CeTb, Oc06eHHocTbU KOtopo JABJETC BbICOKa NoDroTOBka, npOceCCNOHaUNM N YeCTHOCTb CepBnCHbIX MaCTepOB.
PpN BO3HNKHOBeHn HEnCnpaBHOCTN
Ipeed Tem, kak o6paTntbC B Cnyk6y CepBnca npOBepbTe, HeNb3Jy yCTpaHNTb HeNCnpaBHOCTb camOcTOrTeBHo (cm. pa3dEe «HeNCnpaBHOCTn MeToDbI IN yCTpaHEHnA»).
ObpaTntbcB Cnyk6y CepBnca MoxHNo no Telefohy 6ecnlaTHOH ropyei nnHm nnno TelefoHAM, yka3aHHbIM B rapaHTnHOM DOKymente.
! Mbl pekomehnyem o6paaTaBcTOnbko KaBTOpN3OBaHHbIM CepBnCHbIM UeHTpam
!PnppeMOHTeTpe6yTeHcNoJIb3OBAHnOpunHaIbHbIX 3anaChbIX qacte
Ipeep o6paueHnem B Cnyx6y CepBnca Heo6xoJIMO y6eJntbCra, YTO Bbl roTobbl coo6uNTb onepaTopy:
Oncsahne HeucnpaBHOCTN;
Homep rapaHTnHoro DOKymeHTa (cepBnCHOI KHNKKN, cepBnCHOrcePTnΦnKaTnT.I.);
MoŋeNb n cepnHbI hOmep (S/N) n3dεnIy, yka3aHHbIe B INΦOpMaζIOHHO TabJIuYke, paCNoJoxEHHo H a N3dεNl mI rapaHTmHOM DOKymHeT;
-Дату п的对象и n3деля.
hotpoint-ariston.com
| Piongbaobuans: | |
| Indesit Company S.P.A. | Baire A. Meripov 47, 6004. |
| Qaopnesho (AH), Yransh | Qaopnesho (AH), Yransh |
| Unnoprep: | OO "Uleadent PYC" |
| C Bonpocam (6 Poccam) | Poccam, 12/19, Mocbga, Yr. |
| DBeHueb, Dom 12, Kopr, 1 | DBeHueb, Dom 12, Kopr, 1 |
| Poccam, 12/19, Mocbga, Yr. | Poccam, 12/19, Mocbga, Yr. |
| DBeHueb, Dom 12, Kopr, 1 | DBeHueb, Dom 12, Kopr, 1 |
| Qaopnesho (AH), Yransh | Qaopnesho (AH), Yransh |
| Ooo "Vlheesnt Pyc" | OO "Vlheesnt Pyc" |
| Poccam, 12/19, Mocbga, Yr. | Poccam, 12/19, Mocbga, Yr. |
| DBeHueb, Dom 12, Kopr, 1 | DBeHueb, Dom 12, Kopr, 1 |
| Kadenone: | Neunecoc | Neunecoc | Neunecoc |
| Topotheim Mepke: | Hotpoint | Hotpoint | Hotpoint |
| Topotheim Mepke: | ARISTON | ARISTON | ARISTON |
| Topotheim Mepke: | SL B16 AA | SL C22 AA | SL C18 AA |
| Mogene: | Horizent Hapakemirr: | Horizent Hapakemirr: | Horizent Hapakemirr: |
| Ctenaeus mokkawat: | Indesit Company | Indesit Company | Indesit Company |
| Ctenaeus mokkawat: | Kerai | Kerai | Kerai |
| HOMAHENHE 3AHEHNE | 240V | 230V | 230V |
| HOMAHENHE 3AHEHNE | 1600 W | 2200 W | 1800 W |
| YONOHOE OBOHAKHEPOPOA | 50HZ | 50HZ | 50HZ |
| YONOHOE OBOHAKHEPOPOA | 1600 W | 1600 W | 1600 W |
| Krasch pachinam TOKOM | Krasch pachinam TOKOM | Krasch pachinam TOKOM | Krasch pachinam TOKOM |
| BICYLAGE HOCKOQMOCTI NO. 97HYKATAM | no. 97HYKATAM | no. 97HYKATAM | no. 97HYKATAM |
| KOPIMA GOSCEKRAO, KOPIMA GOSCEKRAO | no. 97HYKATAM | no. 97HYKATAM | no. 97HYKATAM |
| KORNA GOSCEKRAO, KORNA GOSCEKRAO | no. 97HYKATAM | no. 97HYKATAM | no. 97HYKATAM |
| HAI DAHNYOHO ETCNHYX, BIL MONETI | OTMOBITE ANDPDC NO. 97HYKATOH | OTMOBITE ANDPDC NO. 97HYKATOH | OTMOBITE ANDPDC NO. 97HYKATOH |
| ADACYC cetus@inceis.com | ADTY | ADTY | ADTY |
| DARY NINOKEDETA DAEHNO TECHNAX | - 1-89 uNDPA B SIN CONTERTEBY | - 1-89 uNDPA B SIN CONTERTEBY | - 1-89 uNDPA B SIN CONTERTEBY |
| MONHO HOTUHTA, MONHO HOTUHTA | - 2-89 u 3-4 uNDPA B SIN | - 2-89 u 3-4 uNDPA B SIN | - 2-89 u 3-4 uNDPA B SIN |
| NODUCHYOW HONEY MECULA TONE | - 4-89 u 5-9 uNDPA B SIN | - 4-89 u 5-9 uNDPA B SIN | - 4-89 u 5-9 uNDPA B SIN |
| OPOASON. | - 4-89 u 5-9 uNDPA B SIN | - 4-89 u 5-9 uNDPA B SIN | - 4-89 u 5-9 uNDPA B SIN |
CIHAZIN TANIMI
- Normal/hali fircasi
- Firca ayarlama mandali
- Parke Firçasi
- Turbo Firçasi
- Doseme Fircasi
- Özel Delux Parke Ucu
- Teleskobik boru manşeti
- Metal teleskopik boru
- Tutma sapi
- Elastik hortum
- Trolley Sistem tutma kolu
- Trolley Sistem açma/kapama tusu
- Toz bolmesi aça ma tusu
- Toz bolmesi kapaqi
- Supürge emi ağazi
- Elastik hortum cikarma tusu
- Toz Torba veya hazne doluluk gõstergesi
- Açma/Kapama tusu
- Kablo sarma tuşu
- Elektronik emis gucui ayari icin +/- tu'slari
- Stand by butonu
- Uzaktan kumanda pil bolmesi
- Emis gucü regulatoru
- Saptan kumanda sinyal alcisi
Teknik Özellikler:
Elektrik degerler: 220-240V~50 Hz
Etkinlik alani yaricipei: 10 metre
Boyutlar: 450 × 310 × 230 ~mm .
Maximum Güç: 1600 W - 2400 max.*
Delux Parke fircasi (N)
Delux Parke fircasi (6), hassas zeminlerin ve
Remote Power Control (C)
- UtpmmyauiMiika
- Miok Pure Clean
- ΦínbtpdBnryHa
- Peiitka pfIbTpda DnryHa
- yujiJIbHeHHa
- BiDinHnIy nIy
Bercia 63 miuka:
- BiDinHnIy nIy
39.Пило3бірнк - Φπbtp nonepedhboro OCHUeHHRA
- 3axiHa pewiTka dIa fiNbTpB
- Pure Clean Hepa 13

JkNX TpydHouizB Ta Heo6xIDHOCTi HaxnIaTnca.
Ley npnlaed po3p06IeHn BKNJIOUHO
Для NOБуTOBOrO npu3HaueHnI He MaE BnKOpNCbYBaTnCry npOMncNoBnx CijIax.
Iepw Hix po3noaTN KOpNCyBaHH npnlaJOM, yBaXHO O3HaHOMTeC 3 cIMM IHcTpyKcIaMm i 36peEkeiB ix Ha MaIb6yTHc.
3AΓΑJIbHI IHCTPYKιI 3 ΕE3NEKIN
Be3neka Baaworo nnilococy 3achobaHa ha icTKO Bn3hauehenx TexhiuHnx Bmorax i BiNObiJaC YuHHHM cTaHdpTAM.
He BnKOpNCtOBuYTe npUaJd He 3a npu3HaueHnram. HehaJIeXHe BnKOpNCtAHnH MoKe npu3BecTu Do 36ntkIB MaHa i TpaBMam i3nHm OcO6am.
Hanpyra B eneKtpnHi MepeXi Baowoi 6ydiBNI MaC BiNObiDaTH 3NaueHnMa Ha ideHTnΦikauiHn TabnUci nHnocCy (220-
ua
240 B).Бyd-ЯкemonJIkoBE nID'EDHaHHMOKe npn3BeCTn Do HENOpBaHnx 36ntkIBnpNJady i do ckacyBaHnra rapaHTII.
- Ykso BnIka, Shyp JKNBLeHnA abo cam npnilad E HecnPpaBNMn a6o B pa3i nomiTnX yUkoJKeHb He BMKaIte NOrO. B TaKnx BnIadkax, 06b 3anobirtn He6e3neuHm CnTuayiaqim, npnilad Heo6XiDn O nepeBipnTn 3a DOnOMOrOy yNOBHOBeHeO npcoHaJa 3 nyHKTB Hotpoint-Ariston.
Peryarnpo nepebipTe cTah shHypy XMBJENHH.
He neped6auehe BnKOpncTaHnna npiJaNy 3 60ky oci6 (BpaxoByoun ditei) 3 6bMeJcHIMN f3iunHIMN, ceHCOPHNM a6o pO3ymOBIMn 3di6HOCTaMn, a TaKoX 3 60ky HeDOCBIuJeHnx Oci6 abo TaKHX, RKi He 3Naomi 3 npinCUnPamn DiI npiJaLy, RaIIO BOHI He nepe6yBaHtB niD HarglaOM BiIDNOiDaJIbHNX OCI i HE OTPMaII InonepedHix IHCTpyKciJ 3 BnKOpncTaHnna npiJaLy.
CTeKTe, 0o6 dItn He rpaIncs 3 npJaIaOM.
Hi B ykomy pa3i He 3aIIuAte 6e3 HargIy npnla3 yBIMKHeHO B eNeKTpNHy po3eTKy BNJKOIO.
He BnKOpNcTObyIe ShHyp KInBHeHnI DnpecyBaHHI TpaHcNoptyBaHHI npJlaNy. - Picn KOKHORO BHKOPNCaHHBIMMaTe BNIJKy 3 eNEKTPuHoi p03eTKn i 3MOTuTE HHPxKMBJeHH.
He 3nHaIte shHyp JxNbIeHHra I He npOBoIbTe Ioro nO roCTpIX KpaX, TOMy IIO BIn MOKe NOsKOdntsc.
He 3aIIIaIe i I He BIKOPINCTOByTe npIlaI aNoHaI abo nOpuy 3 BiIDKPIITM noJyM'am, neuAMn, roPIOUHM MaTePiAnAmn abo IHsIMn dKepeJamr TepJa.
He chitb ninoococom 0i3nHnx oci6 abo TBapn. Pid cac pobotn ninoococy Tpmaite Ioro BcmoKtuyohi OTBOPIN noaJI BiJ cactIn TIy. - Perup HIX 3aMInrTbD-bKm AkceCyap nid qac onepaui 3 ouHcENH i texHcHoro obcnyroBvBaHH i, B bD-bKOMy pa3i, nicra KoxHoro BnKOpNCTAHn npuJaY, BnMaTe BnIKy 3 eNEKTPnuHOI pOeTKn.
YKUO BUNHKAe NiO3pa Ha NOLOMky, HeraHOBNIMtB BVJky 3 eNEKtpnHuOi po3eKn.
He 3aHpyoTe pnilococ B BoOy a60B 6yDb-ky iHsy piDInHy, He 6pni3kaTe piki
peoobnHa npna.
He 3aIIuIaIte npIpaI Ha BiIKpIITOMy nobITpi iI dIeIO HeratINBnX atmocpepnx areHTIB.
3 npuHn 6e3neKn MnpaIMo NiJ cac OHIeHH CXOIN TPIMATN NIOOC 3aBXKnHa HnKhbomy BiCe6pipHi.
He BnKOpncTOByuTe npnlaD 36npaHn pIKnx a6o BONrNX peOBN, TOMy 10 ue MoKe HeRaTnBHO BnInHyTu Ha Ioro po60Ty.
He 36paIte pIIOOCOM roPoui a6o IerKo3aIMnCTi MaTePIaII (Hanp., noniJ, HeDOKyPkN, ToIo); qACTnHIN pIIOOCCy MOKyTb 3aiHraTncr.
He 3bnpaIte pnilococom 3aroctpeni pehi abo pei 3 pixyoo KpOMKOIO, TOMU IO BOHIMOxyTb npn3BcTeN do yuKoJKeHHN npNJaNy.
BcMOKTyBaHnHa 3aHaTTo Dpi6Hnx NopoUkOBuX MaTePiJIIB (HaP., BOpOuHa, ToIoo) MoKe CnpuHHHT HeBeIuNki eNeKtPoCTaTuHi pOzprJxKeHn. Pid YbupAnH TaNX MaTePiJIIB Mn paIMo He BnKOpNCTOByBaTu TeneckOniChy Tpy6Ky 3 MetaIy, a IInSe rHyky PnactIKOBy Tpy6Ky, BCTaHOBUBsM MinImaJIbHy NOTyXhICTb.
3aДЯ Baооi 6e3neKи BnKoHnyTe 6yIb-як O npaui 3 peMOHTy a60 3 o6cIyROvBaHnT TIIbKn 3a DonOMoroB BNOBHOaJxHoR O npcoHaIy 3 Hotpoint-Ariston.
Binpo6HnK BiDxNJIe 6yDb-ky BIDNOBIaIbHicTb 3a MoJKNBi yuKOJKeHHB HacIIOK HeHaJIeXHOro BkOpNCtAHnnpnnaNy.
ПЕЛШИХ PO3ПОЧАВИКОРИСТAHнЯ
3HIMITb BcI KJIeKi CTpiKu, PJIaCTNkoBi 3axnchi DeTani a6o KapTOHHI KOpO6Kn 3 npInaNy. IpepeBipTe, 10 BcI KJIeKi YacTHIN 3HrTi 3a DonOMOrIO M'JAKOI 3BOJNOKeHOI raHijpkN.
36ipka
- Ппсднайтгуну пл actikobyтубу (10)do BXiDHor BCMOKtyuOro OTbOpy (15) tak, lo npolyhano knacaHHa. loB iD'EDHATN Tpy6y, HATNCITb Ha npictpi
po36nokybaHHa (16)i3HIMt b II.
- BCTABTe TeLeckOniHy MeTaIeBy Tpy6y (8) B pyky (9) TaK, 106 BOHa 3a6nOkyBaIacr. BiDperyIIOHe II BnCOTy 3a DOnomorOIO peYJrTOpy DOBxHn Tpy6n (7).
- BCTaBte 3BnauHny Ⅲtky/Ⅲtky IJN KINIMIB (1), a60 iHsI HneobxIDHn Bam akcesCyap (3BepHITbcra do po3diny "Akcseyapu") B TeneckoIHy MeTaneBy Tpy6y TaK, 1Ob BOHa 3abNOkYBaIacra.
Kuio Bau npnlaO ochuen npncptoem Remote Power Control, Heo6xidno BCTaBHTN Hboro 6aTaepkN, kI BXoJrty KOMnJIeKT NoCTaHaHHa (3BepHITbcra do po3diJy "XapakTepcntkn",naparpa" "Remote Power Control").
BVKOPNCTAHHЯ ПИLOCOCA
He BnKOpNCToBnyTe nNIOcO 6e3 ΦIbTpIB, 6e3 MiKy Pure Clean, yTpMByaMa MiKy a6o NnNo36ipHnka, TOMy 10 o ce MoKe npu3BeCTn do yskOxDKeHH npuJa.
- P03MOTaIe TseHyp JxNBHeHHr (32) i BCTaBTe BnIKy npnIaHy B eNeKTpNHy po3eTKy (220/240B).
Nepw Hix NiD'EDHyBaTn npnaD o eNeKtpuHoi Mepexi, MnpaDmO p03MOTaTn shypr KnuBJIeHH (7 M), 0o6 3ano6irtn neperpiBy i ykwodxehn.
- HataichiHa KhoNky npck/cton (18), 0o6 3anyCTnI npnaD B pOboTy.
- HatncHtB Ha KhoNkBy BIDKpTTT/3aKpTTT Trolley System (12, 0o6 BnHnTpykY (11) i 3abNoKyBatn CnCTemy Ha baxaHb BnCOTi, nCn pyo YOro BiMItbCz 3a pykY, 0o6 nepemiuatn nnlococ nd qac uHneHH.
- 106 o6paTn 6aKaHy iHTeHCNBHcTB BCMOKTyBaHH, 3aJekHO BId MoIeI, BIKOpNCtOByTe KHOKN +/- dIe IeKtPOHnO perYIOBaHH noTyXhOCTi (20) npicrpoo Remote Power Control, a6o obepTaIte BpyHy eIeKtPOHn peYnTOp notyXhOCTi (25).

PekomeHdyEcBnKOpncTObyBaTu Hn3bky NOTyXhICTb BCMOKTyBaHHa Ha
JeIikaTHnx NOBepxHx, 106 He NoowkoDHTnix (HaNP., NopTbepn, TeKCTnbl, NoduShk, TooO) a6o Xo4a 6 BiKpntn peryJrTop nobitpr dna 3MeHsHeHn "epeKtY npncocKn".
- ьб зрбип посяпялосocа (pexim "nay3a"), tam De ue nepei6bauho, MoXHa BnKOpncTObyBaTu 3aIeXHo BiD moJeni KhoNky peximy ouikyBaHnry (21) Ha npicTpoi Remote Power Control afo KhoNky Start & Stop, npocTo BCTablnyoHu zitKy B cneiaIbHy ropnizHOtaJIbHy hiUy (29).
- ⅢoB BmKHyTn npuIaI, noBtOpho HaTnCHiTb Ha KhONKy Iyck/CTOn.
- BnIMiTb BNkky 3 eJekTpnuHoi po3eTKn i HaTNCiTb Ha KHONKn HAMOTyBaHHa SHhpy XNBHeHHA (19), TaK uOb HAMOTaN Ioro IOBHICTU

CniikyuTe, 0o6 nid qac HamotyBaHHa Hhpy BIn He nepekpyuBabcra.
- CknaiTiB npnla, 3a6noKyBaBun HacaKyu BiINOBiHni roPn3oHTaJIbHi a6o BepTnKaIbHi HiSi.
He BMnkaTe Nnloococ, kkuo rHycka nJaactNKOBa Tpy6a 3aHnShaetbcra nepekpyeHO, TOMy IIO ue MOKe NOsKOJNT npnilad.
XAPKTEPNUCTUKN
Trolley System (B)
Trolley System 03B0JNe 3pyNo NOBOUNTNC3 nIIOOCOM NiD Yac Opeaui 3 OOnuHnA bO tpaHcnpTyBaHHa 3 OOnHO npMiuEHHa B iHse, DOKlaDaUOn npu cMbMy MiHIMy 3ucNlb.
- HataichiHa KhoNky BiDkPnTTa3akPnTTT Trolley System (12), 06B BnHrTu pyKy (11) Do ii 6bokyBaHHy y 6baxahomy nonoKeHHi.
2.Писяязавершениопераць 3 очшиенни HeobxidiHo HATINCHyTN Ha KhoIGNky po3kpNTT/ 3akpTTcNCTeMn Trolley System i cknaCTny pUHKy TAK,IO6 BOHa 3a6bNOkyBaIacr.
Uo6 cKlaCTn Nlnooc Ha 36epirAHn, MoXHa cKOpNCTaTNCs4 6e3nocepHbO pyko Trolley System, nepeBipuBwn nonepeDhbo, 0o BOHa npabunbHo 3a6lokoBaHa.
ua
Remote Power Control (C)
Pnncpi Remote Power Control, De BIn HaraBHH, Do3BOJIpe peryHOBaTn nOTyKHCtB BCMOKTyBaHNH 6e3nocepeDHBo 3pyKn (9), 6e3 6yNb-RAkX 3ycNb i 6e3 HeoXiDHOCTi HaxnIaTNCr. KaIO nID vac BnKOpNCtAHN HNILOCocA HeoXiDHO nepeBecTn Ioro B PexIM OichiYBaHNH, DOnCTaTHbO IpocTo HAtnCHTuHa KNOpKy peXmU OichiYBaHNH (21).
I npntpoem, knn He 03BOJnE 3akpTTA. K BN BiDIneHn DnI Nnny B pa3i, KOIN Mioko MIO36ipHnK HnnpaBnBHO BCTaBneHn.
3aMiHa Miuka Pure Clean (G)
Mn padIMo 3aBXd n BnKOpNCToByBatn opriHaJIbHI MiXk Pure Clean Hotpoint-Ariston, TOMy IO BOH BnPo6NeHi 3i cneuiabHOI Tka Hya 3a6e3neUc ONTMaJIbHy fiNbTpaIO NOBITpRA, MaKcImaJIbHe yTpMaHnHnnny, BnCoki pOboQi noka3HnKn i TpNBaII N TePMH II DnBuYHa.
Miok Pure Clean (34) Bnpo6nHm 3 TkaHHi i Tomy, y npiBHNHi 3 TpaNuiHMMiKOM 3 panepy, biE 6IbW MiHm I MOxe epeKTHBiJe yTpIMyBatn dpiBHIiU cactnKn nny, rapaHTuOuMakcmaJIbHy ririCy.
Mn paDIMO 3amHrT MiOk Pure Clean, TIKiNbKn iHdkatop 3anOBHeHOro Mioka cnaJaxhe YepBOHM CBITNOM;B6yDbKryKomy pa3, IORO cnid 3amHrT OINH pa3 Ha pik, Uo6 rapaHTyBaTN HauKpaSy ririEHy BaWOMy npNJady.3acMIeHi NIIOM OTBOPN y MiUKy Pn3BOJaTb Do 3MeHseHHBcMOKtyBaJIbHOI NOTYXHOCTi DBNrHa i MOxTy HabITb yuKOdNTn Ioro.
- Перевирп, сю Вишик приладу витягуна з eльсторною розту.
- BiDkpiNe Te KpnuKy BiDiJIeHnHa nny (14), HATNCHyBn Ha KNOpKy BiDkPITBaIiJInEHn DaIy (13).
- Bi'εdha Te ytpmBya nЯ mioka (33)i 3Himitb Miok Pure Clean (34).

Ytni3yTe BnKOpNCTAHNI Miok
BIDNOIBINO DO YHHHORO 3aKOHODaBCTaBa yTnIi3aui BiXoDIB.
- BCTABTe HOBNI MiOOK Pure Clean B
UtpmmyBaM iMiKa Do ynpO; nOtIM po3aWyTe Ioro y BiNObiDhe BiDiJIeHnI.
- 3akpiTe KpUkU BiDinEnHnIy TaK, 06 npOnuHaNo KnaaHnR.
Kpknka BidiHnIy He 3akpnbatmtebcerNcKO,ue O3Haac,00 Miok Pure Clean i/abO i BiIDNOHn UTPMBya Mioka HnpabnlbHO BCTAHOBneHi. Y Takomy BnnaKy,He 3akpnbaiTe Kpnky BidiHnHn I nny i3doataKOBnM 3ucnnI m i nepeBipTe, 00 BOHN 3aHnPiabuBhe NIOXeHHa. TaKIM qHOM 3anobixHn BaxiNb 3a6e3neHTb 3akpntTkpnKn BidiHnHn I nny.
OuunenHnФiNbTpiv (H) MoJIb 3 MiKOM

ΦiNbTp Pure Clean HepaTpye MaKcImaJIbHn 3axNCT BiD anepreHIB i 3a6e3neUe JkICt b NOBepHeHOrO y npuIaN IOBITp; Take nobITpr E NobHCtIO OUnSeHm BiD nIy (ΦiNbTpByaJIbHa 3dATHiCtB > 99,95%).
Mn padmo ouhatau fiNbtp 0oHaImeHwe OINH pa3 koxhi 4 MicaTak, o6 BIDHOHTN Ioro fIbtpyBaIbHy 3daTHicTB. B 6yd-bKOMy pa3i, Mn padmo 3amHrtn fIbTp xOua 6 OINH pa3 Ha pik, o6 rapaHTyBaTN Ioro Bucoki ekcnJyaTauiHi xapakTepcntkn.
Пюценира 3 очишиеня Фпьтра Pure Clean Hepa 13 (30):
- 3HIMITb BeHTnIaIHy peWitKy (31) 3a DOnOMOrHO r3NcKa.
- BnMItb pfInbTp Pure Clean Hepa 13, po3bIokyBaBun y3nOk.
3.Помптefиьтбзноcecpeньo nidaKpaHOM,yHnKaHOnCnIbHOrO cTpyMeHIO BODI. - TpimaiTe Noro B TaKOMy nOIOXeHHI, IO6 BOda cTikajna napaJIenbHO CKJaIqkAM.
- 3aɪnɪtæ φɪnbtp Bɪncxətɪn pɪnp Kɪmhaɪtɪn TemnepaɪtɪpɒTɪn, nɒkɪn Bci NɔrO yɑctɪnHn He CTAhyTb NOBHiCtHo CyXmMn.
- 3HOby BcTaHOBiB pInbTp Pure Clean Hepa 13, yBaJxHo cPiIDkyOuH 3a noIoxKeHHaM KpinnHeHHa.
- BctaHObitb Ha Micce BeHTnJIaIHy pewiTky y BiINOBiDHy HiSy TaK, 06 npOyHaIo KlaUaHnR.
ua
IpoceDypa OunuHnHnΦilbTpiv BiDinHeHHn nnny (38):
- BiDkpiNte KpniuKy BiDiJiEnHnI nIy (14), HATNCHyBUn Ha KHONky BiDkpiTTB BiDiJiEnHHa IJI pI Ny (13).
- 3HimItb miok Pure Clean (34), peiitky pfIbTpra DnBryHa (36) i pIbTp pr DnBryHa (35) 3peiitkn pIbtpy DnBryHa.
- Binkohai Te Ounuenn Hpy DnBnyHa, npommbaOnu Noro 6e3nocepeHbO NiKpaHOM, yNkauOnu DyKe CnJbHnx CtpymehIB BOi, i akypatHO BnKpyTitb Noro.
- BvKoHaTe OunuHnpewiTkn fiNbtpy DBNrhya, BNdaIyOuN 3aNIuKn NINy ⅢiToHkoJ; 3a Heo6XiJHoCTi BvKOpNCaIte M'ky 3BOLOKeHy raHupKy.

I Nepw HIX 3HOBy 3bnpaTn npnla, nepekoHaTeCra, 0o Bci Ioro YactHnE Bucyuhei.
- 3HOBy BCTaHOBIb φiINbTp DnBryHa y peSiITky φiINbTa Pa DnBryHa, CTeKaUN 3a TmM, ΣO6 BiH npabuINbHo 3akpINBcRy.
- 3HOBy BCTaBTe KOHCTpyKUIO peWitKn φIbTp y DBInyHa. y BiNObiHi HAnpMaHi y BiDineHHi dny.
- Правильно BCTаВTe Miшок Pure Clean 3 BiДповдим утprimувачем мішka.

IpnlaOchauen 3ano6ixHHm npnctpoem, kH He Do3BOJAE 3akpTTKk BldiJeHHa DnA nnly B pa3i, konN K HnpabInbHO BCTaBHeH. Y TakomyDky He 3akpBaTe KpuHKy BldiJeHHa Nlny i3 DoatKOBHM 3cunllam i3ipraHTe, 0o Bci YactHH 3aHnHmMbHe noloxehn. TaKIM YHOM 5ixHH BaxJIb 3a6e3neuTb 3akpTTKk BldiJeHHa DnA nnly.
- 3akpiIte KpniKy BiDIneHnIy IJIy TaK, 06 npolyhano KnaaHnIy.
OuHHeHH NJIIO36ipHnka (I) MoJeIb 6e3 MiHa

KJIMiIKJIMOBI NOKPITT
Дя Oчиш�нг Пл actNKOBxЧаTN 3BvauHoi
TtKn a60 tTK nДЯ KINIMIB 3HIMITb tIky 3
TepeckoniuHOI metaJIeBOI Tpy6n (8) i npOTpiTB
II M'koHO cyXoHO a60 3JERka 3BONOKeHOI
raHupKOIO.Дя Oчиш�нг 5eTINOH KINaIITb
3a6pydHeHHa DOnOMOrOHaCaN Dnla
BaKKODCTyNHxMiCu (26).
Uitka nna napkeTy (L)
Uitka dny napkeTy (3) npn3naueHa dny uHHeHH oO6nbo deIiakTHnx Tniv niDnOrn, HapnPKnaI, DepeB'haro napkeTy. 3aBdKa nCneiaJbHmN
ua
HaTpyaIbHIM 5eTINHKAM 5iTKy MoKHa CnOKiHo BVKOpNCTOBByBAtn DJI HauDeNikaTHiUHX NOBepXoHb.
Дяочишня пл actikobnх чаши Дя napkeу 3himitb utky 3 teleckoniyhoI metaneboi Tpy6n (8) i npotpiB tM'koH cyxO a6o 3nerka 3bONOKeHO rHaHipKOIO.Дяочшня ueTINOK BuaNITb 3a6pUdHeHHra DonomorOHa HacaKn DЯвKKOIOCTynHnx Micu (26).
Uitka Tpy6o (M)
Litka typ60 (4) pekomehdyctbca, 3okpema, Dnra nninHHoro YuueHna KINIMIB 3 KOPOTKIM BOPCOM i KNIMOBNX NOKPNTIB BiD uepcTi Domauhix TBapNH. ObepTahna TIK BMKAeTBc BCMOKTyOCHM CTpyMeHem INIIOCOCY.
Дя Oчишипь пл actikobux qacTNH ⅢITK Typ60 3HIMtB ⅢITKY 3 TeleckoniuHOI MeTaNBoI Tpy6N (8) i npotpiB II M'AKOc cyxO aBO 3nerka 3BONJOeHO rANUPKO. BuaJraTe HAMoTaHe HABKOLO ⅢITKN BOLOCCa aBO HNTKN 3a DOnOMorOHO HOXuCb, cINiDKUOHy, UOb He NooKoDHTN UeTINKHn.
Litka Deluxe napkeTy (N)
Litka Deluxe napkeTy (6) np3nHaueHa nnyuennoocObIbNO deIikaTHnx TnIB niIIOrni napkeTy. LItka OcHaueHa NaIeIiKaTHiIiHMn oBeptOBIMN UetINHKaMn, RKi BBOJrbcB DIIHO BCMOKTyOuHm NOTIKOM NIIIOOCy, a TAKOK M'AKIMKoNEcAMn, kI dONOMaraIoTb 36epertn DeIiKAthi NiIIOrN.
Дя Oишенипл actikobux qactinu Deluxe napkeTy 3HimtBu t itky 3 TeleckoniuhoI metaneboI trpy6n (8) i npotpiB II M'koIO cyxioo a60 3nerka 3BOJoxeHOU raHicpKOIO.Дя OишениОБePTOBHX uTeHOK BCTaHOBIT b 3AMOK B NOJoxeHH I 3HimtBu noRo. 3HimtBu o6eToby UTKy i OHNCTiB II, DonomaraOCH co6i HOxNzAmy BUNaKy HAMOTaHORO BOLOCCs A6O HnTOK, CInkkyOnu 3a Tm, U6b He NOnKoDnTu eTINKn.
3aJaBaWoI 6e3neKn Hi B yKOMy pa3i He Na6nHexaTe pyKn Do BCMOKTyUOHoro OTbOpy a6o do o6epTOBOx uITKn iD vac po6OTn nnococcy.
LItka IaI MaJkNx Me6JIb (O)
Uitka dIy m'aknx Mebn (5) peKoMeHdyeTbcra
Дячишени OOCBINBIX NOBEXH,ТAKNXЯ ДИВани,Матраци,ПОКРИВАla,ПODУшК,TOSO. Шітka Oсашени OБерТOBIMN ШЕТИKHAMN, Яki BBOДЯТьСВ B ДIO BCMOKTYOчIM NOTOKOM ПИLOCOCYI 3a6e3neUyOT bTINbHHe Oчишени TEKCTNJIO BiD BOJOLCCS,ЧерSTI DomaшХIx TBAPINH abo KJIiSei.КрIMTORO,Завдаги зхИСHIpeWITci, ШЕТИНКИ He KOHTAKTYOTb 3 OчишВальHOIO NOBEXH, rapaHTYUOч MAKCIMaNbHy DeJIkaTHy ДIOHa TEKCTINJb.
Дя Oчишнгпл actNKOBxЧаTNИ MЯкnx Me6nIB 3HIMITb 3TeleckoIuHOI MetaneBoI Tpy6n (8) i npotpiTb II M'koO cyXOIO abo 3nerka 3BOLOKeHO raHicpKOIO.Дя Oчишнг obepTOBnx 5eTHNOK BiD'ednaHTe KpiuKy 3a DonomorOTo CneuiJIbHnx KpINJIbHnx elementiB. 3HIMITb obepTOBy 5tIKy i OChCTiB ii, DonomaraUOn c6bi HOKNUcMn y BInaKDy HAMOTaHO RONOCA a6O HHTOK, cnIDKYOOn 3a TmM, 506 He NOnKoDnTn 5eTnHKn.
HacaikaДЯВaЖКоДocTyuHnXMiCuP(P)
HacaKa DnB BaxKOIOCTyNHX MicCb, po3aObaHa y BiDIneHHI dnn akceCyapIB (28),doNOMoKe Bam DoCgTn i noChTn KyTn, uHNI HBI BaxKOIOCTyNHi Micra.
Дя Oушенипл actNKOBx qactH HacaKIN Дя BaxkkOIOCTyNHIX Micu 3HIMtB uItky 3 TeeneckoniiHOI MetaJIeBOI Tpy6N (8) i npotpiTB iM'koHO cyxoHO a60 3JERka 3BONoxHoHO raHhipKOIO.
Hacaikka nIy deNikaTHnx NOBepxohb (Q)
HacaKa DnA DeNikatnix nobepxoHb, po3taoobaHa y BiDinEnHi dIy Akcecyapib (28), peKOMeHNdyTbc dIy nobepxoHb, kI niTpe6yUoTb oc6bnBoi yBaH, HApnKJa, paiaTopHi 6baTapei, MeBNI, ToIO. CneuiabHi HATypaBHi IeTNHKI DO3BOJANOTb CNOKiHO BIKOPNCtAnu CIO uTKy Ha NaidenikaTHiNX nobepxHx.
Дя Oушенипл actNKOBx qactH HacaKn Дя DeIikaTHnx NOBepXOHB 3HimiTb 3iTy 3 ТеleckоиHOI METAJIeBOI Tpy6N (8) i npOTpiTb ii M'ЯкOTO cyxoTO a60 3Jerka 3BONOKeHOI raHчIPKOIO. Дя Oушенин сетINHOK BvIaIITb 3a6bpydHeHnH 3a DOnOMOrO HacaKn Дя ВадKKODCTynHx Micu (26).
UCYHEHHIPOBJIEM
Проблема
HINOCO H Bmkaetbcra.
CbITbca iHdkaTOp 3aONBHeHor mioka a6o NlIOcOcy Habi, KOJN Miok a6o NlIo36ipHnK ue He 3aONBHeHi.
Hn3bka notyXhictb BCMOKTyBaHH.
He npaioe npictri Remote Power Control.
Iiudac36npanHnJy BiDyBaIOBcra Nebb NOMITHi eNEKTPoCTaTNUHPi PO3pIu.
IIJIOOC CBnCTntb a6o Bi6pye niq cac po60tn.
Moxlinbi npuynn / 3acoby cyhennr
BnIka He BcTaBneHa B po3eKy a6o BiDcyTHiK KOHTaKT.
3amHbMiok. KOni nnococom 3bnpaetbcB eNka kIbKicTb dyke dpio6 Horo nny (HaNP. bopoWho), iHnKaTOp 3anOBHeHO r Mioka MoKe cnaJaxHyTu YepBOHm CbITLOM, Habt, KaIO Miok He Do KInzra 3anOBHeHn. Lc nob'3aHO 3 TmM, 10Miok Pure Clean 3daTHn yTpmyBatn HauDiPi6HiSi YaCTnHKn nny, rapaHTyOu n MaKcImaJIbHy ririEHy.
Ouictb nno36ipHnK dny Tnx MoJeNe, kHe MaIOtB mioka dny.
Ouicitb pijbtpn i, B pa3i Heo6xidnocti, 3amHtibix.
- IpekeKaHTeCs y BiDcyTHOcTi 3acMieHb TteEckOniHiN trpy6i, rHyKki Tpr6i i ciTci.
OuHCTiB φiIbTpni i, B pa3i Heo6xIDHOCTi, 3aMHiTb ix.
- IpekeKaHTeCs y BiDcyTHOcTi 3acMiuYe h B TeJeCKoIHyi Tpy6i, rhykki Tpy6i i ciTci.
3amihtb miok. KOni nnoococom 3bnpaetbcra Beinka kInbkictb dyke dpibHoro nny (Hanp. 60poHo), miok Pure Clean moke 3acmiTtncr.
BnKoHaTe OunuHn HnnO36ipHnKa i Ioro fIbTpIB.
Bctabnhi 6atapeKn He MaIOTb DoCTaTHbOro 3apny.
- BatapeiKn HnPaBnIbHo BCTaBHei BCEpaHni 6atapeHoro BiDcKy. Po3TaWyIe DBi BatapeiKn AAA, DoTpMHyOuNcB No3HTNBHO i HeraTbHBoro NOJIocIB.
BnMItb 6aTapeKn, noTIM po3TaUyTe 6aTapeKn, DToPmMyOuNcB n03tNBHOro i HeratNBHOro nIoIOcIB.
MokJInBo, eIeKtpOnHHi npnlaDi i/a6o nepeuKoDi 3aBaXaIoTb i/a6o yHEMOxKnBnHOt b IHpauepBOHn CnHaI BiD npncTpoU dNCTaHcIJHOrO KepyBaHHy yBIMKHeHHrM/BUMKHeHHrM.
BcMOKTyBaHnHa 3aHaTOn Dpi6HnX NopoUkOBnx MaTepiAinB (Ha np., 60poUHa, To1o) MoKe CnpuHnHTn HeBeNnuKi eNeKtpocTaTuHHi P03pJxKeHHa. IiD Yac ybupaHHa TAKNX MaTepiAinB Mn padIMo He BnKOpNCToBvBaTn TeNeckOniHy Tpy6ky 3 MetaIy, a IInSe rHuKy PnactuKOBy Tpy6ky, BCTAHOBuBUn MiHimaBHy NOTyKhICTb.
HenpaBnIbHo BCTaHOBJIeHi OINH a6o DeKiIbKa akceCyapIB. IpeBipTe, 00 yci pfIbTpri i itKu npBaNtbo BCTaHOBHei 3rIDHO HaeBnIX IHCTpyKcII. B MoJeI 3 MiXkOM nepeKoHaIteCra TakoJ, 00 yuiNbHeHHa3aHnIo npBaNtBe NoIOKeHHa.
| • 3anobvenn miok/niio36ipnik. 3amihitb miok a6o OuicntiB piio36ipnik. • OvnictiB φiIbtrpi i, B pa3i heo6xidnocti, 3amihitb ix. • Bidkpitni perylantop nobitpy. Nepebipte, ξo BIn npabnilho 3akpitni. | |
| He 3akpnuBaεtbcra kpiuka bivdilneHnla dlya niiу. | • HnpaBvIbNo BcTaHOBleni miok Pure Clean a6o niio36ipnik. PepekoahTecra, ξo BOHn 3aHnAin npabVIIbHe noIoXeHHra TAK, ξo6 3anobixhni Baxijb do3BOINB 3akpitni KPIUKU bivdiJeHHra dlya niiu. |
| LITka baxko nepecyBaεtbcra | • 3meHsItb NiOtJxHicTb BCMOKTyBaHnR, 3okpema, pri niuSeHHi knimmb i TekCTnIbHnx nobepxoHb B3arani. BiDkprIte peryIaTrop nobitpy, ξo6 3MeHsHTn "eΦeKT npiscockn". |
| Shyp xiuBleHnra He hamOTyεtbcra 3 leKicTIO. | • CπiDkyIte, ξo6 πiD quc haMOTyBaHnRa Shhupy BIn He pepeKpyuYBaBcRA. B pa3i 6bOkvBaHnR 3HOBy p03MotaTe yBece sbHypxKuBLeHnRa i NobTopiB onepaizu 3 haMOTyBaHnra. |
DONOMOFA
Iepu Hix 3bepHytnca no Donomory:
IpebeBipTe, Mu MoXHa cAmOCTiHOBuPiUHTn npo6nemy (INB. "Poiuyk i ycHyenHHeCnpabHocTe").
- Y npotunexkHOMy Bnaukdy, 3BepHtbc8do abTPON3OBAHOI cnyx6b TExHiuHOI DoONOMOrn 3a TeJefoHHM HOMePOM, BkazAHM Ha rapaHTiHOMy ceTpNΦkiAt.
!3BepTaIteCe BnKIIIOHNO Do yNOBHOBaXeHNx φaxiBzIB.
Tpe6a noBIDOMTN:
TIN HecnpaBHOCTI;
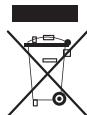
MOeJIb MaunHnM (MoI.);
cepiiHnH oHomep (S/N).
YTNJI3ALIJA

Бсрoneьka Диpeктпа 2002/96/ EC сцоб Вдховде Кгчногу ekeptponhhor болдання (WEEE) 3aboponяу utniliaцю пбутохп риладов черз 3агальни сстем Зшарна Мькхи Вдховд. 3ношени прилади моть 3братися Okрemos, сцob OTNIMi3ybatи витраши на NBOTPHE ВИКОРИСТАНHA npepeobky MATEPIAIB BCEpeMHI пистов i зanobigгпшкodi atmocфepi и Здорвю Лю dew. Bci npodуктNi MapkyTOCB pepekcepslenHIM Koшikom Дь СмITTЯ, сцob haradnix xblachnikam npo Обовэзк оцоу Okpemoi utiniaaiz. 3a пдальшюю inhфомацю no npabilam

ytni3aui NobyTOBnX npncTpoB ix BnaCHnMaIOb 3BepHTNCrdo MiCueBOI KOMyHaNbHOI cnyK6n.

UAHCOPfblcNATTAMACbI
- CtaHdapTTb/kiIeM ⅢeTkacbl
- ΜεΤαΚοςθήσα πηδαλι
- NapKeT 电Tkacbl
- Typ6o 电Tka
- KanTaBbI WcTeKacBi
- JIOKC napket 5eTkacbl
- Tytik y3bIhDbIfbHbIH peTteriWi
- MeTaNanXacanFah y3apTy tyti
- KonTtkacbl
- Пл actmacanbik Tytik
- AnbIn kyypy TytKacbl
- Apbaa Jxuecin auy/ka6y Tymeci
- ⅢaH bənirin auy tymeci
- Wanh genirihkaknafbbl
- Copy kipici
- Bocaty Tymecci
- TOnbl ⅢaH dOp6acblHbH/koHTeHepiHiH HNDnKaTopbl
- Icke Kocy/ToKtaTy TymMeci
- KaβeIbdi opay tyImeci
- Kyat 3neKtpOndbI Tpyde petteyre apHaHFaH +/- TyuMepei
- KyTu TyMeci
22.Батapestбелiri - Aya peTteriwi
KIPICNE
Hotpoint-Ariston eeden KytimiHe KOW KeinDiH3. Ap6a7a KyaTbI WaHCOPfBtBih CaTbIn aFHaBbIHb3ra anFBc 6iNdpem3. Hotpoint-Ariston TyTBHyBbInap KbImeti KaMTaMaCbI eTeIH MymKhiDikTepdi ToBbIMeH naDanaHy ySiH 6yn eHIMi www.hotpoint-ariston.com caTbIHda Tipkeren XeH.
Ap6a7a KyaTbI OHaJIbI eHIMdiNik neH TypaKtbl Kymblc ICTeyre apHaBIn JkacalFaH.
Aipbikua Apbaa Jyneci KOJaHdyblj KehinTeDi jHe yi iuiHde XnHa3fcofbImaiepkin XblJkyfa MymkiHdk 6peidi. KyattbkaBkTah backapy Tetiri (bap Bonca) TokTamaiak, copy KyuH tyKaadan Tikeen JHe Oha peTteRyMmKIndi6peedi.
KypbIJIbI TeK yIe naIdaIaHyf aApHaIraH, COHdbIKTaH OHbl EHdipicTik XaFdaIda
- KyattbI KaawbIgTah 6ackapy Tetiri ciHnblHbIH Ka6blJaBfblWbI
- ΘneKtpoHdbIK Kyat peTteriui
- XKiHjUke yu
- Həzik 6eTepre apHaJfAh yu
- KocbIMsa 6eJIk
- KeIeHeH opHaJaackaH caKtay opHbI
- Aca Ta3a Hepa 13 cy3rici
- Aya Topbi
- KyaT ka6eJI

山an do6acb6ap moenb:
33.卍安dop6acbHbIn tiperi
34. Aca ta3a sha n dop6acbl
35. Motop cyarici
36. MoTOp cy3riciHtOpbl
37. ApaBik Ka6aT
38. ⅢaH6eJIiri

IaH DOp6acbI JOK MoJeJIb:
- ⅢaH6eJIiri
39.卍AH KOHTeHepi - Cy3riH KOpFaTbIH Top
- AnfaKbI cy3ri
- Aca Ta3a Hepa 13 cy3rici
naiJaIaHya 60ImaiIbI.
KypbInfbHbI naDanaHa 6actamac 6ypbH OcbI HyckaynbIKTapdbI MyKnrT WbIFbIN, KeenekeTe KOJaHy ywiH caKTan KOnFaH MaHbI3DbI.
JXAJINbIKAYINC13IKe EPEXEJIPEI
JHcOpfbltbiH Kayinci3ik MymkiHdkTepi KONaHbIcTafti TexHkAblk TaanTap MeH 3aHapra cKekeKeneji.
KypblfblHb Ke3dIeRn MaKcaTbHaH 6acka ew6ip MaKcTa KaOndaHyFa 6oNMaJbI. Dypbic KOnDaH6ay HtNKeCiHne aamdapfa XaHE/ Hemece Mylikke 3aan KeNTiPyi MymKiH.
KeniDi er KepHey WaHcOpFbIHTbIH KepeHyiHe caikec Kenyi Tnic (220-240 B).
Kate kanaay KypbIbnHbI 6ipXoia 3aKbIMdan, OHbIKenijdiirih KywIH XOIObl MyMKIH.
Aibp, Kyat KaBeni Kypblfbl 3aKbImdaIHaB 60bnkepince Hemece Ke3 Kepepiik 3aKbIM Ta6bnca, WAnHcOpfblwTb1 KOJaHbAsb13. Myndai JkaFdaInapda, Ke3 KeIreH Kayinti XaFdaNdbH anDbH any yuH Hotpoint-Ariston KomnahnrcbHbH eKeJIeTTi MaMaHdApbHa KypblfblHbTEKcepTy KepeK.
KyaT Ka6eJIiH IN KafDaiBbH əpdaibIM TeKcepIN Otbpblb3.
Kayinci3ikTepiHe kayantbIaadam KypblfHbI KondaHy bohIHwa Kehec He HcyKay 6epMeren XaTaNla, DeHe, ce3Hy Hemece on Kaibeti TEmeH Hemece Taxipnbeci MeH eHim Typalbi biJimi KeTkiiKci3 aamdap (OhbH iuiHde balaIap) Byn KypblfHbI KondaHbayI Tnic.
KypbIJIbIMeOiHaMaYbI yuH 6aIaIapbl 6akblan OtbyKepek.
KypbIfblHb po3eTkafa Kocblbn TypfaH, OHbl 6akblaycbI KaIbipybl 60MaHbI3.
Kyat KaebiHeh TapbIn, KypblfHbI XblXbIpya Hemece aIbIn xpyre 60JMaIdbI.
KoJdaHfAHHAn KeiH aIbIpDAn YcTan, Ohbl po3EkaJaAn aXbIpaTbIHbI Da, KyaT Ka6eniH opan KOyblHbI3.
3aKbIM KeTIpMey yuH Kyat Ka6eIN MauBICtBpMaHbI3 XaHe YwKip WETepDe H ayNaK YCTaHbI3.
KypbIfblbl OT, neu, XaHfbll 3attap Hemece baca kblny Ke3edepiHHyCTIHpe Onapfa Xakbln Kepde KaIdbipIn Ketyre Hemece kondaHyra 60MaJbI.
- WHaHcOpfblIbI aamdapra Hemece KaHyapnapra KOndaH6aHbI3. KypblIbIg KyMbIc ICTen TpyFaH Ke3De copy XaKaTapbIH DeHeH3deh aynak yCTaHbI3.
KocbIMaHb aybICTbPmac 6pbH, KpyblfBhl Ta3aJlafH Hemece OFah KbI3Met KepcTeKeH Ke3e JeHe KOJaHaBn 6oJFaHHaH KeiH OHb pO3eTKaDaH aXbipaTbHb3.
Akaaybik bap ekeiHe KymHaHcHaB13, OHbI po3eTKaadH depey aKbIpaTbHb13.
- ⅢaHcOpfblIbI cyfa Hemece Ke3 KeIreH 6aCKa cyblIKTbIKKa canyuBb 60nMaHb13. KypblIFBa cyblk 3aTtap cebyui 60nMaHb13.
KypbIfblHbXafBIMcb3aya paibnda daana Kaandbpin Ketnehi3.
Kayinci3dkti KaMTamacbI3 ety ysiH, 6acnlaakTbI Ta3aIarAH Ke3de WaHCOPfbltB apdaibIM e3iH3deH TEmeH yCTaHbI3.
CytbIKtbK Hemece bInran 3aTapdbI copbn anMaHbI3, ce6e6i onap KypblfBihH XMybICbHa acep etyi MyMKH.
KaHbI 3aTapbl Hemece Kyn, TemekiyuTapbl CnAeTbKbI3bn TypFaH 3aTAPbl copbl anyuBb60MaHbI. JHaCOPbIbTIbIKeibip 6enikTepi TuTaHybMyMkiH.
YsKip Hemece eTkip 3aTtapdb copbIn aNyub6oMaHbI3, c6e6i Kypblfbl 3aKbIMdaNybl MyMKIH.
¥H CnIaKtbl eTe YCaK 1sHaH He YHTaK copblnca, a3daFaH 3JIeKTPoCTaTnKaIbIK pa3pIaTap 6aikai MyMkiH. Kofapblda aIbIaNfAH 3aTAP copfah Ke3de MeTaIaDH JxacanFah Y3apTy TYtiriH KOJaHaB6aI, TE NlaCTMaCCaJIbIK MaBicKaK TYtIKTI KOJaHaBihB3 XHe TEme H copy KyuH OPhaTbIHbI3.
Kayinc3dkTkAMTaMaCbIeTy yuH KpyBfNfBdaFbKe3 KeInReH XeHDey HemeCe KbImET Kepcety XMybICTapbH Hotpoint-Ariston KOMnHaHnrcbHbH eKinetTi MaMaHdapBopbHdaybTnic.
KpybIfblHbI dypbIC KOJaHa6ay caIapblHaH 6oIraH 3aIaIra Xyayan 6epiIMeNi.
AJFAI Pet IaIaJIaHEAc BYPbIH
Bapnbik Ka6b6tBipfbiWtapdbi, Kopfa6b1I
IIaactMaccabIK MaTePnaJa4DbI XeHe KapTOH
opambl Weuin aIbHb3. Ka6b6cKaKepnepdi
KymcaK dMbKbJI W6peKePN cypTIn, KetipiH3.
Kypactbipy
- Пл actmaccabik Maibickak Tyikti (10) copy Kipicine (15) «Tbik» etkeh dib6bc ecitirehe Kipri3in 6ekitih3. Ohbl uein any yiwin (16) Tymecin bacbn, wlrapbn anbHb3.
- MeTaanJH JkacalFan Y3apTkblu Tytikti (8) opbHa 6ekitireHwe KON TyTKacbiHa (9) KipriH3. TyIKtih Y3bHdbfHbH peTtey yuiH y3bHdbK peTteriuiH (7) konDaHbHbI3.
- CtaHndapTbI/kInem 电KacbH (1) HemeKaJkETTI KocbIMHaHbI («KocbIMaIap»
TapaybH KapaHbI3) OPhbHa OphaJaNackaHwa MeTanDaH XacanFaH y3apTy TytiriHin WeTiHe 6ekitii3.

Kypblfblb3 KyaTbI Kaawbiktah 6aackapy TetirimeH XabdktaJFaH
6oJca, aTeTKe KypbInfBIme 6ipre 6epinetIH 6ataperaIapblcany Kepek (MymkiHikTeP) TapaybHaFbI KyaTTb KaawIKtaH 6ackpy Tetiri naparpaΦbIH KapaHbI3.
KypbIINfbIInbTa3aJnay
Пл actmaccanbikболikteprdi(kopnyc,шанбелiri,maibickak Tytik,T.6.)Же HeMetaIaHJxacalfahy3apTy tytirih8Ta3aIay yuHIN KypFak HemeceCJIblIMkblJxMCAK WyBepeKTI KONdaHbIHbI3.
KocbIMwaanapdbI ta3aay
KocbIMwaIapDbI Ta3aIamac 6ypbH «KocbIMwaIap» TaaybH KapaHbI3.
Shan6enirin (F) Ta3aJay
Uan 6enirin (38) kyneni taanaan otbipy yuihkeneci npoueypaHbYCTaHbHb3:
- ⅢaH 6eNirih aUw tyMecin (13) 6acbin, 7aH 6eNirih KKaNfaBih (14) aUbIbI3.
- Moenbte 6aJnAhbICTbl, Aca Ta3a 7aH DOp6acbH (34) Hemece 7aH KOHTeHepiH (39) Wewin aIbHbI3.
- Kiukehe ⅢeKaMeH KaIbIn KoIraH Kipdi Keripin, WAn 6enirin Ta3anaHb3. KaKeT 6oIca, DbIMKbIn JyMCAk 7yBepeKti KOndaHyfa 6oNaDbI, Bipak 6apNbIK 6enikTepiH JakcbInan CypIn, KyprAty KepeK.
- Aca Ta3a WaH DOp6acbH HeMece WaH KOHTeHepiKaITadaH OPhbHa CaIbIn, «TbIK» etIN dIb6bc WbIKKaHwa WaH 6eJIirHi KaKNaFbH Jka6bHb3.
KypbIyB1 WAn DOp6acbl / KOHTHePiDyPbIC OPhaTbINFaHwa WAn 6enirinH KaKnarfbInh Xa6blNybiHa XoN 6epMeTIN Kayinc3dIK KypaIbImeXa6dbkTaNraH.
Aca Ta3a shaH dop6acbH (G) aybICTbIPy
Tek Hotpoint-Ariston KOMnHaHcBihbTynHcycka Aca Ta3a wah Dop6anapbHnaiDalaHraH XeH, ce6ebi OanapdbH apHaNbi MaTacbl ayahbl OHtaJIb TypeCy3edi, WauDbI/YHTaKTbIMAKCmAmJbI Type YCTan KaIaNbl, XOFapbl eHimdiIikneH xMBC icTeei JxHe MOTOpdbH Kb13MeT Mep3iMHH y3ak 6OlybH KaMTaMaCbI3 etedi.
Aca Ta3a WaH Dop6anapb (34) MaTaHaN KacalFaHDbIKTah, OJapdb IeCTypni KaFA3 Dop6anapra KapaFAnDa Te3imDipek 60bn, eTe Ycak WAn/HTak TynipikTepin TmIMDipek YcTaN Kaanbl, CenTIN rInneHaJIbIK XafdaIbIH XAKcbI BOnyBn KaMTamAcbI3 etedi.
Aca Ta3a Dop6acbH «Dop6a TOnbl Kbl3bl TycTI HdNkATOpbl KaHApKxah6ac aybIcTbIpydbI XeH caHaMbI3. KaITce De, WAnCOPFBWbTHrIneHaNbIK XaFdaBbHa aPkaWan ceHIMdi 6ony yuH IN OHb KEM dereHde XblbHa 6ip pet aybICTbIpy Kepek. WaH/YHTak TynipwikTepeMeH 6itein KaNFaH DOp6a TecikTepi MOTOpdbIH copy KyaTbIH TeMeHDeTeDi XHe TiNTi OHb 3aKbIMdaybl MymKiH.
- KypbIJIbI pO3eTKaHa aKbIpaTbIJFaHbHa Ke3 XETKi3iH3.
- ⅢaH 6eNirih auy Tymecin (13) 6acbIn, 7aH 6eNirih KKaNafbH (14) aWbIbI3.
3.Дорба tiperih (33) bocatbIn, Aca ta3a shaH dop6acbH (34) wIrfapbIn aIbIHbI3.
山ah dop6acbH KOkbic TacayfKaTbICTbl JepriNikTI 3aHapdbH6aplbifbHa cneKec Tpye KOkbicka TactaHbI3.
- KaHa Aca Ta3a WaH DOp6acbH WaH DOp6acbI TiperHe TObIfbIMeH CbIPbTbIHbI3; OaH KeiH, OHb apHaBb WAn 6eJIirHe KaTaDaH opHaTbIHbI3.
- ⅢaH 6eNirihin KaKnafbH opHbHa «TbIK» etin 6ekitirreHwe Xa6bHb3.
Wah 6eirih KaKnaBih Xa6y KnbH 6oJca, dEmek Aca Ta3a WAn Dop6acbl XaHE/Hemec Ohbiw HApDop6acbl Tiperi
DpybocpHaTbImMaFaH. WAn Dop6acbHbH KaKaNaBcH KyWTeKannahb3 XeHe Kayinci3ik NiHTiperi KaKaNTbI Ka6yFa MymKIndIK 6epyi ywiH, eki 6eNik Te Dpybc OpbIHda TyprAhbHa Ke3 KETKi3iH3.
Cy3rinepdiTa3anay(H) -shaDop6acbIbapMoJeIb

Aca Ta3a Hepa 13 cy3rici anlneprehndepre Kapcbi MaKcImMaIDbI KoprFay deHreinH XHe JxOFapbI aya canacbiH KaMTamacbI3 ete, ce6ebi KpyblfBdaH SwIFapbIFFaH aya ShaH/YHTaK KaNdbIKTapbIHAn ToNtBfBIMeh Ta3apTbIfHaH bOJaDbI (cy3y dApexekci >99,95%).
Cy3y eHimdiJirih KaJIbHa KeNtipy yiwI cy3riHi KEM dereHe4 aIda 6ip pet Ta3anan TyprAhKHe. KaNTce De, MaKcImaJIbI eHIMdiNikTi KamTaMaCbI3 ety yiwI cy3riHi KEM dereHe JkBn caBH aybICTbIPfAH KHe.
Aca taza Hepa 13 cy3ricin (30) ta3anay:
- Amy TiniH Kemerimeh aya TopbH (31) wewin anbHb3.
- Amy tiin 6ocaty apkblb Aca t3a Hepa 13 cy3ricih bifapbn anhbl3.
- CydbH KyuTbIM Xofapbl 60ImaybHa Hazap aydapa OtbipIn, cy3riHi cy afbHbHda KybHbI3.
- Cy ka6aTaTaNfah XepnepiHe npanneIb aFaTbIHdai YCTaHbI3.
- TOnIbIfBImeH KeNKeHHe 6eJIMe TeMnepaTpyacbHa Da yCTaHbI3.
- KetiktepiHIn opHbH 6aKaH, Aca Ta3a Hepa 13 cy3riciH opHbHa caIbHbI3.
- Aya TopbIH KOpnycbiHa «TbIK» eTKeH Dbl6bIc ectinreHne kipri3iH3.
Uan6eJIiriHcY3rinePi (38) Ta3aIay:
- ⅢaH 6eNirih auy TyuMecin (13) 6acbIn, 7aH 6eNirih KAKNaFbH (14) aushbHb3.
- Aca Ta3a 7aH dop6acbH (34), MOTOP cy3riciH, TOPbH (36) 7bIfapbH aJIbHbI3 XHe MOTOP cy3riciH (35) MOTOP cy3riciH, TOPbHaH 7bIfapbHbI3.
- CydbH Kyu TbIM Kofapbl 6oImaybHa Ha3ap aydapa OtbpIn, MOTOP cy3ricn Cy afbHbHnda Jybln, Ta3anaHbI3. OdaH KeiH
kz
aKbipbIHdAn CbIFbHb3.
- Motop cy3ricinH TopbIH Ta3anaFan Ke3de Ke3 KeIreH 7aH/HTak KaIbIKTapbIH KIIi IeTKamEH KetipH3. KaKet 6oNca, DbIMkbIn XyMCaK 7y6epeK KOJaHaHbHbI3.

OpbHapbHa caJMac 6ypbH 6apbIK 6eJIkTeP TOnbIFbIMeH KenKeHiHe Ke3 3BiH3.
- AphaBkTeKITKePRe a6aJIan opHaTy apKbIbMOTOp cy3ricH TopFa 6eKiTiH3.
- Motop cy3rici TopbI XINHaBfIH WaH 6eJIirHderi apHaNbi BaftTAtBaIITapFa cbPfBiTbHbI3.
- Aphanbi shaH do6ba tiperHH KEmerImeH Aca Ta3a shaH do6bacH beKtiH3.

KypbIFbI WaH DOp6acbl Dypbc opHaTbIFaHaW aH 6enirih
KaKnafbHbH Xa6bIybHa XoN 6epMeTih Kayinc3dik KypalbIme Hxa6dbkTaNFaH. WaH dop6acbHbH KaKnaFBH KywTe NannhaI3 XeHe Kayinc3dik NiHTiperi KaNaKbI Xa6yFa MyMKInDik 6epyi yuH, 6apnbK 6enIKTep Dpybc OpbHda TypFaHbHa Ke3 XeTKi3iHi3.
15. ⅢaH 6eIirinIH KaKnaFbIH opHbHa «TbIK» etIN 6ekitirrehwe Xa6bIb3.
ShaH KOHTeHepiN (I) Ta3aJay - ShaH DOp6acbI JOK MoJeNb

Jaan konTeHepin kyneni Ta3anan otbpy yuHKeNeci npoueDypaHbYcTaHbHbI3:
- ⅢaHbIinAuyTuYmecin(13)BaCbIn,saHbEJIirIH KAKnAfbH (14)aBbHb3 Da,saHkoHTeHepiH (39)MbIFapbl anbHb3.
- KaKNaKTbI aMbIn, ⅢaH KOHTeHepiH 6ocTaBbI3.
- ⅢaH KOHTeHepiH cy aftbIbIHda Kyy apKblbI KaIraH Kipdi KeTIpiH3.
- ToIbIFImeH KeIKeHHe 6eJIMe TeMnepaTypacbIHDa yCTaHbI3.
- ⅢaH KOHTeHepiHIN KaKNaFbIH «TbIK»ETKEH bIbIc ectInreHwe XaybIIN, KaNTaHaH WaH 6eJIirHe opHaTbHbI3.
- ⅢaH 6eirinIH KaKnaFbIH opHbHa «TbIK» etIN 6ekitireHwe JxabHbI3.
Cy3rilepdiTa3anay(J) -shaDop6acblJOKMOdeJIb

Bym moeIbIe eKc Aca ta3a Hepa 13 cyarici 6ap.
Aca Ta3a Hepa 13 cy3rici anleprehndepre Kapcbi MaKcImMaIDbI Kopray deHrein HKeHe JxorapbI aya canacbiH kAMTaMaCbI 3 ete, ce6eBi KpyblfBlaH hIbFapblfAHa aya IaH/YHTaK KaIdbIKTapbIHaT OIbIFbIMeH Ta3apTbIflFaH 60ana (cy3y dApexekci >99,95%).
Cy3y eHimdiinirn KaIbHa KeNtipy yiwH cy3rihi KEM dereHe4 aIda 6ip pet Ta3anan TyprAhKeH. KaNTce De, MaKcImaJIbI eHIMdiNikTi KamTaMaCbI3 ety ywH cy3riHI KEM dereHe Jkbl caiBn aybICTbIPfAH KHe.
ApTkbl JkaKtafl Aca Ta3a Hepa 13 cy3ricin (30) Ta3anay:
- Amy TiniH Kemerimeh aya TopbH (31) wewin anbHbI3.
- Amy tiin biocaty apkblb Aca ta3a Hepa 13 cy3ricih bifapbn anhbl3.
- CybH Kyu TbIM Xofapb60maybHa Hazap ayapa Otbipn, cy3riHi cy afbHbHda KybHbI3.
- Cy ka6aTtAnfah XepnepiHe npaIJIenb aTaBtHdA yCTaHb3.
- TOnbIfbImeH KeNKeHWe 6eIMe TempeatypacbHaDyCTaHbI3.
- KetiktepiinOpbHb6aikan, Aca Ta3a Hepa 13 cy3riciOpbHa caJIbHbI3.
- Aya TopbIH KoprnycbiHa «TbIK» eTKeH dbI6blc ectinreHwe kipri3ihi3.
Uan6eJIiriHcY3rinePi (38) Ta3aIay:
- ⅢaH 6eJIirH aUy TyuMecin (13) 6acbIn, 7aH 6eJIirHn KaKnaFbH (14) aUbHbI3.
- ⅢaH KOHTeHepiH (39) Wein aIbIbIbI3.
- Awy tiin 6ocatbIn, Aca ta3a Hepa 13 cy3ricin, anfawkbl cy3rihi (41) xhe cy3rihi KopraaiTbH TopdbI (40) wIrapbI aJIbHI3.
- Cy3rhi KOpraTbIH Topbl Ta3aIarAH Ke3de Ke3 KeIreH WaH/YHTak KaIbIKTapbIH KiLi IeTKaMeH KetipH3. KaKet 6oJcA, DbIMKbl JyMCaK WY6epeK KOJaHaHbIbI3.
- CydbH Kyu TbIM Xofapbl 60ImaybHa Ha3ap aydapa OTybPi, aIFaWKbl cy3rHi Cy afbIHbIHda Jybln, Ta3aHaBIs. Oan KeiH akbIPbIHdAn Cblfblb3.
- CydbH KyuTbIM KOFapbl 60mMayHa Ha3ap aydapa OtbIpyIn, Aca Ta3a Hepa 13 cy3riciH cy afbHbHda XyblHbI3.
- Cy ka6aTanFaH xepeIeIne npapannenb
aFaTbIHdai yCTaHbI3.
- TOnbIfBImeH KeIKeHJSe 6eJIMe TEMnepaTypacbIHda YCTaHbI3.

OpbHapbHa caJMac 6ypbH 6apbIK 6eJIkTeP TOnbIFbIMeH KenKeHiHe Ke3 3BiH3.
- AnfaaKbI cy3riH I Aca Ta3a Hepa 13 cy3riciDeri apHaNbI Ketikke KeTtipin, eki cy3riH KopraTbIH TopMeH opbIhapbHa 6ekiTih3.
- KeTikTeepiH opHbH 6aKan, «TbIK» etin opHbHa TYCKeHwe anFaUkbl cy3riHi, Aca Ta3a Hepa 13 cy3rici HKeHe KoprauTbIH Top XINHaftbH WAn KOHTeHepihe bektiH3.
- Μαн кontейнериΚаитадишанбетirihe caJIbIbI3.

KypbIfbl Wanh KOHTeHepi Dypbc opHaTbUFaHaWa Wanh 6enirih
KaKnafbHbH Xa6bIybHa XoN 6epMeTih Kayinc3dk KypalbIme Xa6dbkTaNFaH. WaH dop6acbHbH KaKnaFBH KywTe Xannahb3 XeHe Kayinc3dk NiHTiperi KaNaKTbXa6yFa MyMKHdik 6epyi ywiH, 6apnbK 6enIKTepe Dypbc OpBHda TypFaHbHa Ke3 XeTKi3Hi3.
19. ⅢaH 6eIirinH KaKnaFbIH opHbHa «TbIK» etIN 6ekitirrehse xa6bl3.
KOCbIMUJIAP
KocbIMsa cTahdapTTbI MymKiHdkTeP (MoJeBRe 6aJIaHaNbICTbI) peTIHe 6epiNy i Hemece Hotpoint-Ariston KOMpaHnAcBtBnE kJIeTTi opTaIbIKTapbIHAn 6eJIek catbIn aJIbHyblMymKiH.

KocbIMwaHblaybICTbIPmac 6ypbHxHE Kbl3Met KepeTy KeiHde aBbIpbl
po3eTKaadan afbITbHbI3. KypblfblbI, OHbIH iwiK 6enikTepi XeHe KocbIMuaanapdb Ta3anay yuH ecep KiWti Hemece a6pa3NBt 3aTTapdb KOJaHa6aHbI3. KypblfblbI KaTadaH KOJaHa6ac 6ypbH XaKaCbIaN KenKeHHe Ke3 KeTki3iH3.
CTaHdapTTbI/kiJIem 电Tkacbl(K)
CtanhapTTb/kiNETeTkacbl(1)KaTbIepi teric eHnepdi,coHdai-ak,Kinemdep MeH MOKetTI KHydenikti Ta3anayfKaonaiNbI.KeTkaKocbIMua
neanin (2) TEmeHderinepdi Ta3aay yuH KOnDaHbIHbI3:

KaTbIeHnep

KInemdepe MeH MOKeT
CTaHdapTb/kiIeM 1eKacbIHbINPiAcMaCaBk
6eJIikTepei Ta3aJalay yWIn 1eTKaHbI MetaJdAn
KacaIaFah y3apTy TytiriHeH (8) aKbIpaTbIn, KpyFaK
Hemece cA JdbIMkbIn Kymcak WSybepeKeH
cyptiH3. 1eTkaHbIn KbIJaapbIn Ta3aJalay yWIn,
KaKet 6oNca, XhiIiKe YtBn (26) KeMerimEn Ke3
KeIreH KipDi KeTIi3.
PapkeT uetKacbl (L)
Iapket 3aafw eehep cKtbl eTe H3ik eHdepTa3anayf KaJbIbApnaBt Ta6fn Kblnap OHbEte H3ik 6eTepdi 3akmbam Ta3anayf MymkiHik 6epeidi.
Napket 1eTkacbHbH nIactMaccabIK 6NIkTepiH Ta3anay yuH uTeKahb MeTaNdJ XacaIHaH y3apTy TytiriHeH (8) axbipatbIn, Kypfak Hemece Cn DblMKbl JyMCAK WSybepeKeH cyptiH3. UeTKaHbH KbIJaPbIH Ta3anay yuH, XhiIiKe YuTBH (26) Keemerim Ke3 KeIreH Kipdi copbIn aJIbHbI3.
Typ6o etska (M)
Typ6o 4) cicepe xinihke KInmdep MeH MOKETTI Ta3aIayra XHe XaHyapdbIH KyHiH copbI anyfa KonaiNb. UeTKaHbIH aHaNbyIH shAHCOPfBtBn H copy Kywi backapaDbI.
Typ6o 电KahbH nIacMaccblk 6NIkTepi H Ta3anay yWih 电TKaHbMeTaNdAn XacaIHaH Y3apTy TytiriHeN (8) axbipatbIn, Kypfak HemeC cI I bIMKbl JyMCaK Wy6epeKeHcypTiH3. AHaJIMaJIbI 电TKaFA 6aIIaHbIN KaIraH 7aIaTp MeH xinTerpi KaIbIme Kecin aIbIb3, bipak 电TKaHbIH KbIJaPbIH 3aKbIMDaI aJMaHbI3.
JIIOK napKeT uteKacbl (N)
JIIOKc napKeT 5eTkacbl (6) H3iK XHe napKeTneH KanTaIFaH eDeHepDi Ta3aIayfa aca KOnaJbIb. 5eTe 7aHcOpFbIuTbIH copy KyuImeBackapbIaNtBn H3iK aHaHaMaNb KblJaDapMeH XHe H3iK eDeHepDi KopFaIbTH KymCaK DeHreNekeTpEmH Ja6DbIKTaIFaH. ByI 5eTkaHbIH Ta3anay EhimdIniri Hotpoint-Ariston cTaNapTTb/
KINEM 1eTkacbIme CaIbICTbipfHa 30 %-fa apTbIK (cbIHak IEC 60312 cTaHdapTbHa CcNkec JkaCaIFaH).JIIOKc napKe TZeTKacBbHbI INlactMaccalbIK 6eNIkTePi TaaIay yWJH 1eTKaHbI MetaIaN H XacaIFaH y3apTy TYtiriHeH (8) axbipTaBn, KpyFak Hemece CAn DblIMKnBn Kymcak WSybepeKnE CyptiH3. AInHMaIbI KbIJaPdbTa3anay yuH KAYinciDik KynbHOpNbHa 6ybpIn, Weuin aIbHbI3. OdaH KeiH aHannMaIbI 5eTKaHbI 6eNKeKTeN, Ta3aIayFa KipiciH3. BaInaHbIN KaIFaH WaITap MeH XInTepeDi KaWbIme Kecin aIbHbI3, BIPA KZeTKaHbIH KbIJaPbIH 3aKbIMDaI anMaHbI3.
Kayinc3dkti KAMTamacbI3 ety ywiH Kypblfblb1 KOJaHaFah Ke3De KOnapbIb3Db1 copy yuBHaH Hemece aHaJMaJIbI ueTKaDaH ayNaK YCTaHbI3.
KanTaBbIu 1eTkacbl (O)
KanTaBbI WcETkAcbl (5) DnBaH, MaTpac, Kepne, JactbIK, T.6. 3aTtapDbI Ta3aJalayf KaJaiNbI. On WaHcOpBbIbTH copy Kywi BaskapaTbIH aHaHMaMbI KblldApMeH Ka6DbIKTaTaNFaH, Oanap BoJCa TepeH Ta3aJalayf KHe MaTalapDAn HcYH, ShaH HeMece KeHeNepDi Ketipyre MymKiHdk BepeDi. Ofan KocA, KopraTbIH Top KblldApDbIH Ta3aJanaHbIH 6eTke TnOiHe KOn BepMeH, MaTanapDbI H3ik TypDe EHNdeydi KaMTamacbl3 etedi.
KanTaBbIuTkacBHBn NnactMaCCaBbIK 6eNikTePi Ta3aJaiy uHIn TcKaHbMeTaIaH JkaCaNraH y3apTy tYirHeH (8) aKbipaTbIn, Kypfak
Hemece cJI DbIMkbIN JyMcaK Uy6epeKeNc HcyTl3. AInHaMaIbI KblIaPdbI Ta3anay yuH Bekity 3JemeHTepiH bocaty apkbl KaKnakTb I bocatbIbI3. OdaH KeiH aHaMaIbI uTeKaHbI BEnIeKTeI, Ta3aIayra KipiciH3. BaInaHbI KaIraH 1aWtap MeH XInTepDi KaIbImeH Kecin aJIbHbI3, BipaK UeTKaHbIH KbIaPabIH 3aKbIMdAn aImaHbI3.
Xihiwke yw (P)
KocbIMwa 6oIikTeri (28) xiHilke yuW bypbItapdb, KncbIK jepnepdi KeHe Ta3aHaHybl KnbH bacKa jepnepdi Ta3anayFa KEmekTeceidi. XiHlKe yuTbTa3anay uH uetKaHb MeTaNah JkacalFaH y3apTu TyTirIneH (8) axbipatbn, KpFAK Hemece cA JdbIMkbJxMcaK UyBepeKnne CyptiH3.
Həzik 6eTTepre apHaJfAh yw (Q)
KocbIMsa 6eNikTeri (28) H3iK 6etTepre apHaIfAH yu 6atapej, jnha3, T.6. cnA kbl apHaBbl Kytim kaxet etetih 6etTepdi ta3anayfa konaiNbI. OhIn apHaBbl TaBmKn bJnap OHbl eTe H3iK 6etTepdi 3akbIMdAmai Ta3anayfa MymkiHik bepeidi.
Hə3ik 6eTepre aphAflan yUbIH pIacMaccalbIK
6eJIkTepei Ta3aIay yUH yUbI MeTaIaH
JkacaIah y3apTy TytirHeH (8) aKbIpaTbIn, Kpyfak
Hemece cAn DbIMkbIn JyMcaK UyBepeKeNeh
cyptiH3. 1eTKaHbIn KbIJaPbIH Ta3aIay yUH,
KaKet 6oIcA, XhiIwke UyTbH (26) KeMerimEn Ke3
KeIreH KipDi KeTIi3.
AKAYIbIKTAPDbIXOHO
AkayIbIK
UHcOpfbIu eupinMei.
ToImaca da,shaH dOp6acbl/ KOHTeHepi TObl INHdNkATopnapbl JkaHaNbI.
blktmamcebenpei / ueimdepi
AиьлкocьлmafанHemeceTImeI Typ.
- Μαн Дорбасин ayысьпьиьз.Кэн Мелшерде оte YcaK
- shaн hemecе yHTak (YH T.6.) copbIncа, Дорба ani TOLMaFah
- bOJcA da, «Чан Дорбаси Толы» Kb3bI J TyCt i HДИКaTOpbl
- XaHyb I MyMkiH.МyHbI Ce6e6i - Aca Ta3a ωан Дорбаси оte
- YcaK ωан/YHTak TуйipuikTeprin Yctan TpyBn, MAKCIMaIbI
- TmIneHaHb KaMTamacbI 3 etY.
- ΜaH dOp6acbl JOK MOneJIbIepDe ⅢaH KOHTeHepiH Ta3aHaHbI3.
Cy3rIePdi Ta3aIahbI3 KHe KaKeT 6oJCa, onapdbI ayblCTbIPbIHbI3.
¥3apTy Tytiri, Maibickak Tytik JkHe 6itejin
| калмаганын ке3 кеткizhi3. | |
| Copy kуштtemen. | •Сузгел徳и тазаланыз ке He кожetбога, оларды ayblictbipbHiz3. •Узару Тутiri, майсak Тутik ке He сztka 6itelenin kалмаганын кe3 кеткizhi3. •Шан дорбасин ayblictbipbHiz3. Кeн мелшерde оte усak shan hemecу yHTaK (ун T.6.) copbIina, Aca ta3a shan dorpбаси biterin kaIybl MymkiH. •Шан контейнерхеони сузгелерin тazalanaHiz3. |
| Куattы кашьiktан baskapу куmbic ictemeidi. | •Батaperя зарды кеткilikci3. •Батaperялар běnlirine bātaperaynap duypic calbɪhəfah. Он ке He terpic nonioctepine hyazap aydabpɪn, eki AAA bātaperясын ophaactbipbHiz3. •Ожэne terpic nonioctepine hyazap aydabpɪn, bātaperaynapdu shbyrapbɪn aIbɪbɪs da, kaɪta opha'tbɪbɪs3. •Куattы кашьiktан baskapу tetririHin ИndpaKaBzibl cnHaJIbHa nəlektroHbɪk KþbyIbIparap hemec e backa 3aTAP Keedprɪx JACAN TUPYBI HEMEC XAYBIP TUPYBI MymKiH. |
| Сорган кеzeide kiwi Злесухостатикалык разрадтap baiKalaadbi. | •YN сижктуе усak shan He yHTak copbIina, azdaferan Злесухostatикалык pa3pradtap baiKaIbɪy MymKiH. Жорарыда aiByIbFah 3aTAP copraн кezeide metaIaDah Жасалган y3aprty Tylirih KonlaHbA,Tek пlaCTMaCCaBik Майыскak Тутikti KaIdaHbɪbɪs XIII XeHe TemeH copy KUShiH ophaTbɪbɪs3. |
| Колданган кеzeide шансорьш buckbiprafan дыбьс šыгарды hemec dipeiendeidi. | •Бир hemece bīphese kocbIMsa duypic ophaTbɪMafah. Сузгелр мен Μцтakapнуckaynapra сөн��с ophaTbɪFahbɪna Ha Ke3 xetKizhi3. Shan dopbcsb δap modeJIbe apalbIK kaBaTbɪn duypic ophaIaftbipbIbHn da TeKcepɪi3. •Шан dopbcsb/konteyneperi TOnI. Shan dopbcsb ayblictbipbHiz3 hemece shan konTeHepiN bocTaHbɪs3. •Сузгел徳и тazalanaHiz XIII XeHe kaxet bOnca, onapdBi ayblictbipbHiz3. •Aya petteriisi aIbɪk. On duypic kαkbIgfaHbɪha Ke3 xetKizhi3. |
| Шан БелirinIH kacnpaftы жа былмайды. | •Aca ta3a shan dopbacsb lmece shan konTeHepi duypic ophaTbɪMafah. Kayincizdiqik inhtiperi shan δeIirHin kaknacbH jábyra MymKɪdɪk bepyi yuɪn ol opbɪha duypic ophaIaftbipbIbɪaHa haHaHaHaHaHaHaHaHaHaHaHaHaHaHaHaHaHaHaHaHaHaHaHaHaHaHaHaHaHaHaHaHaHaHaHaHaHaHaHaHaHaHaHaHaHaHaHaHaHaHaHaHaHaHaHaHaHaHaHaHaHaHaHaHaHaHaHaHaHaHaHaHaHaHaHaHaHaHaHaHaHaHaHaHaHaHaHaHaHaHaHaHaHaHaHaHaHaHaHaHaHAHaHaHaHaHaHaHaHaHaHaHaHaHaHaHaHaHaHaHaHaHaHaHaHaHaHaHaHaHaHaHaHaHaHaHaHaHaHaHaHaHaHaHaHaHaHaHaHaHaHaHaHaHaHaHaHaHaHaHaHaHaHaHaHaHaHaHaHaHaHaHaHaHaHaHaHaHaHaHaHaHaHaHaHaHaHaHaHaHaHaHaHaHaHaHaHaHaHaHa Ha |
| Четka озер кулжды. | •Copy kuyiH a3aIbHbɪs, acipsece kilemderm Men JɑJIbH maTalapdBi TazalanaHem Ke3e. Copy acepiH a3aɪtu yuɪn aya petteriisiH aIbɪs3. |
| Кабель озер opaladы. | •Opay keziinde kabelb TuyniDeniP KanmaybH kamTamacbI3 etiH3. OI Tybɪn KaIcSa, Kuyat kabeliH tolbɪfBImeH shbɪrappbɪn, opaydBi kaiTaIaHaH. |
KbI3MET KOPCETY
Bi3 e3 TybHyBnIapbIMbI3Fa KbI3MeT KepceTeM3
KHe cepBnCTIK KbI3MeTTi Xorapbl DeHreJe YcblHyfa
TbIpcMbI3.C3re KpybIbnFImeH OaH JxHe KonaNbl
Kymbc KacayfMyMKiHdik 6epy yuiH 3e HImdepim3di
Y3dkci3 XetinDipin OTbipy TaIpcMbI3.
Kypbuftbifa Kytim Kepcety
KypbInfbira Kytim KepcTyre apHaHraH Hotpoint Ariston YcbIHATbIH KypblfBHLH Professional Kc6i6n 6yblmApdbIHbH XeJIci KypblfBHLH KonDaHbC Mep3iMH y3apTaBl XHe OHbH cbIHIN Kany KayinH aazIaTadbl.
Professional Kcic6yBIMApbHbH XeNici KpybnIbH3dBiEpeKwEniKTePi Ecepe Otbipn Jacanra. HImdep cana, 3kOnorna XHe KOJdHy Kayinc3Di 60BbHua EyponabIK KOFapbi CTAHdpTAPdb KaTaN CaTaN Otbipn ITaINJa Jaxacanra. TOnbIK AKnapaTbI www.hotpoint-ariston.ru BeCainbIH IN "KbI3MeT Kepcety" 6enimHe Kaapanb3 XHe KaNaHbI3daBf DyKeHepDe CpaHbI3.
Yekinetti Kbi3MeT Kepcety OpTaJIbIKTapBi
ΘτTybIHybIaIbIbMbI3faKaIbIbIpaKδonyγwIHweBep MaMaHapbIbHJXOFaIbI DeHReIderi KAcSiδn DaIbIHdbIFMeH έДЛdIrIMeH epeKueneHeTIN KbI3MeT KepeCy JeinilepiH KaIbITactbIpdbIK.
Aky naJa 6oJrH JaFdaJa
Kb3Met KepcTeY optanlfbHa xaabapnacap anDbHda, akaynbkTb1 e3iH3 Ty3etIn Kepyre TbipcbHb3 ("AkaynbkTap XeHe onapdbTy3ety KonJaPbT" TaaybH kapaH3).
KbI3MeT Kepcety OptaIbIbHa KeniNik KyKaTbHda Kepcetinrten TeneoH Hemipimeh Xabapnacyfa bonabl.
! Bi3 yakinenTi Kbi3Met Kepcety opTaNbIKTapbHa fana xaapnacyblY cybHAmbl3
!KeHney xymbictapbiH icke acbipraH Ke3de
fmpalbIK 6eIweKtepdi rHa KOnlaHybIH TaIan etiH3.
KbI3MeT Kepcsey optaIbIbHa x6abapnacap anbIhAeKeJeM eMaIMeITertpeDBepye daIbIH ekeHI3dTeKecpin anbIbH3:
AkayIbIK TpyIH CnataTay;
Kenijik KxKaTbHbH Hemipi (Kb3Met Kepcety Kitanlacbl, Kb3MET Kepcety ceTpunfKnTaB T.C.C.);
Kypblfblhih aknapat TaKaTnAcbHna HeMece Kenildk KpykaTbHda KepeTilre H KypblfbHbH MoDeni JkHe cepnIbIK Hemipi (S/N);
KypbJnfbHbH CaTbJFaH a-NyHi
Baca naДаы aknapat neн Канытарды www. hotpoint-ariston.ru Be6-caNTbHbH «КьзмТ Керсу» taraybHaH Kepe anacb3.
KOKbICKA TACTAY
3πeKtp JxHe 3πeKTPoHnKaIbIK KypaIaIapDbIH KaIbIKTapbHa (WEEE) KaTbICTbI 2002/96/EC Eypona 3aHHaMaCbHa Caikec yu Kpblfblnapbl KaIbITb1 TOblk KaIaNbIK KaIbIK aHaNbIMbIH naIdaNaHbIn

KoBbIMaybi Tnic. Kopuafan OpTa MeH xaIbIK DeHCayIbIbHa TneTlH 3NraHHbIH aIbIH ana OtblpIn, XapamCbI3 KpyIbIbJIaP KaI Ta IaIdaIahy MeH MaIIHnHa iUINderi MaTePiAndapBiE hDey KyHbIH OHtaIaHbIpy MaKcAtbIH da6eK XnHaNByI kepe. Bapblk
eHIMdepderi cbl3bnfah KObkic Xwiri eHIM necih6bekeTtenh KObkic XnHayra KaTbCTbl MInDeTIH ecKe canadJI. KapatmcbI3 yu KpylbNfblnapbH Dpybc XoIOFAkTaBcTbKocbIMwa aknapa any yuHIN eHIM nelepi Tnicti xaibkka Kb3met KepcTeOp TaBbIFHa Hemece OanapdbHKeprinikTi eKindepine Xabapnaca anaDbI.
Ew6ip opama Maaternabl Taqarma TImeyi Kepek.
Hotpoint
Hotpoint ARISTON