
CDC1300FD - Voice recorder SALORA - Free user manual and instructions
Find the device manual for free CDC1300FD SALORA in PDF.


| Product type | Digital voice recorder |
| Brand | Salora |
| Model | CDC1300FD |
| Dimensions (L x W x H) | Approx. 10 x 3 x 1.5 cm |
| Weight | Approx. 50 g (without batteries) |
| Power supply | 2 AAA batteries (not included) |
| Storage capacity | Internal memory, expandable via microSD card (not included) |
| Recording format | MP3 / WAV (depending on setting) |
| Main functions | Recording, playback, pause, stop, delete, key lock |
| Built-in microphone | Yes, omnidirectional |
| Built-in speaker | Yes |
| Connectivity | USB port (for file transfer) |
| Headphone jack | Yes (3.5 mm jack) |
| Battery life | Approx. 20 hours (continuous recording) |
| Care and cleaning | Clean with a soft, dry cloth. Do not use abrasive products. |
| Safety | Do not expose to moisture, shocks, or extreme temperatures. Remove batteries during prolonged non-use. |
| Spare parts and repairability | Batteries are replaceable. For any other repairs, contact customer service. |
Frequently Asked Questions - CDC1300FD SALORA
User questions about CDC1300FD SALORA
0 question about this device. Answer the ones you know or ask your own.
Ask a new question about this device
Download the instructions for your Voice recorder in PDF format for free! Find your manual CDC1300FD - SALORA and take your electronic device back in hand. On this page are published all the documents necessary for the use of your device. CDC1300FD by SALORA.
USER MANUAL CDC1300FD SALORA
AUTO DVR IN FULL HD CDC1300FD

natural_image
Two black Salora camera modules displayed against a blue gradient background, one with focal length and aperture settings, the other with control buttons (no readable text beyond branding)natural_image
Black electric vehicle charging plug with attached cable (no text or symbols visible)
natural_image
Close-up of a black USB cable with two connectors, no text or symbols visible
natural_image
Black plastic object with a rose-like protrusion mounted on a circular base (no text or symbols visible)
natural_image
Black electric car plug with attached cable (no visible text or symbols)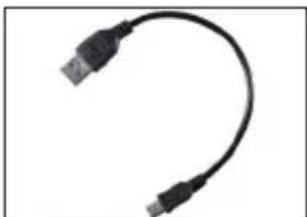
natural_image
Close-up of a black USB cable with two connectors, no text or symbols visible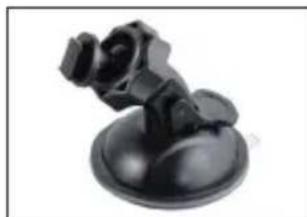
natural_image
Black plastic mechanical component mounted on a circular base (no visible text or symbols)
Thank you for purchasing one of our products, this product is especially developed as hard evidence. Meanwhile it meets the needs of other occasions, like meeting records, monitoring evidence, location shooting and video or other evidence. We hope to make you life in this way a bit easier.
This product combines the industry leading HDR high Dynamic camera, with, WDR wide camera, never missing a second, seamless looping video, ultra wide angle shooting, without distortion correction, ultra high definition, real time playback, motion detection, lane deviation shift an much more features in accordance with the latest technology. The device is unique and stylish and has a streamlined design. The product is very much appreciated by a vast majority of our customers.
This manual will inform you about the installation, operation, setting and precautions. Please read this manual thoroughly and keep it for further reference. We sincerely hope that this product will meet your needs and we are pleased to be at your disposal in the future. Specifications may vary due to upgrades or other reasons to improve our product. The manufacturer reserves the right to change the product without prior notice.
Infringement of copyright/privacy Notice
Please note that this device is for personal use only. The use must not violate the national or international copyright/privacy laws. The recorded images by this device are for personal use and cannot be published freely, this could violate someone else's copyright or legal rights.
Installation instructions
Installation of this device should be close to the rear-view mirror of the vehicle, to ensure the best view. Make sure that the device is placed within the reach of the windshield wipers, so that with rainy weather the view will still be good. Do not touch the lens with your fingers, it could leave oily residues on the lens, thus causing unclear pictures. Clean the lens of the camera regularly.
Precautions
Use the original standard charger supplied
Do not dismantle the device yourself, if you do you will lose the warranty.
If you would like to modify the power line, be sure this is done by a professional electrician.
Accessories Check
Here below you will find a list of accessories, standard and optional. Check if there are any items missing or damaged, if so please contact you dealer immediately.
Standard
natural_image
Black electric vehicle charging plug with attached cable (no text or symbols visible)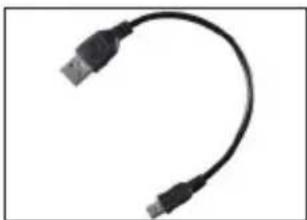
natural_image
Close-up of a black USB cable with two connectors (no text or symbols visible)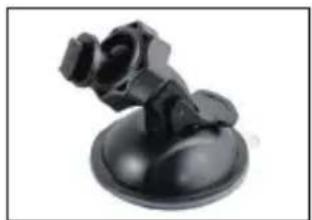
natural_image
Black mechanical component mounted on a circular base (no visible text or symbols)
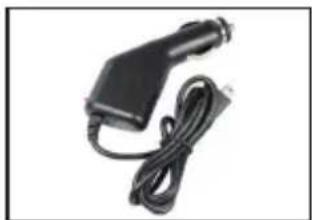
Car charger cable USB cable 3M pad Instructions
Keys and interface description
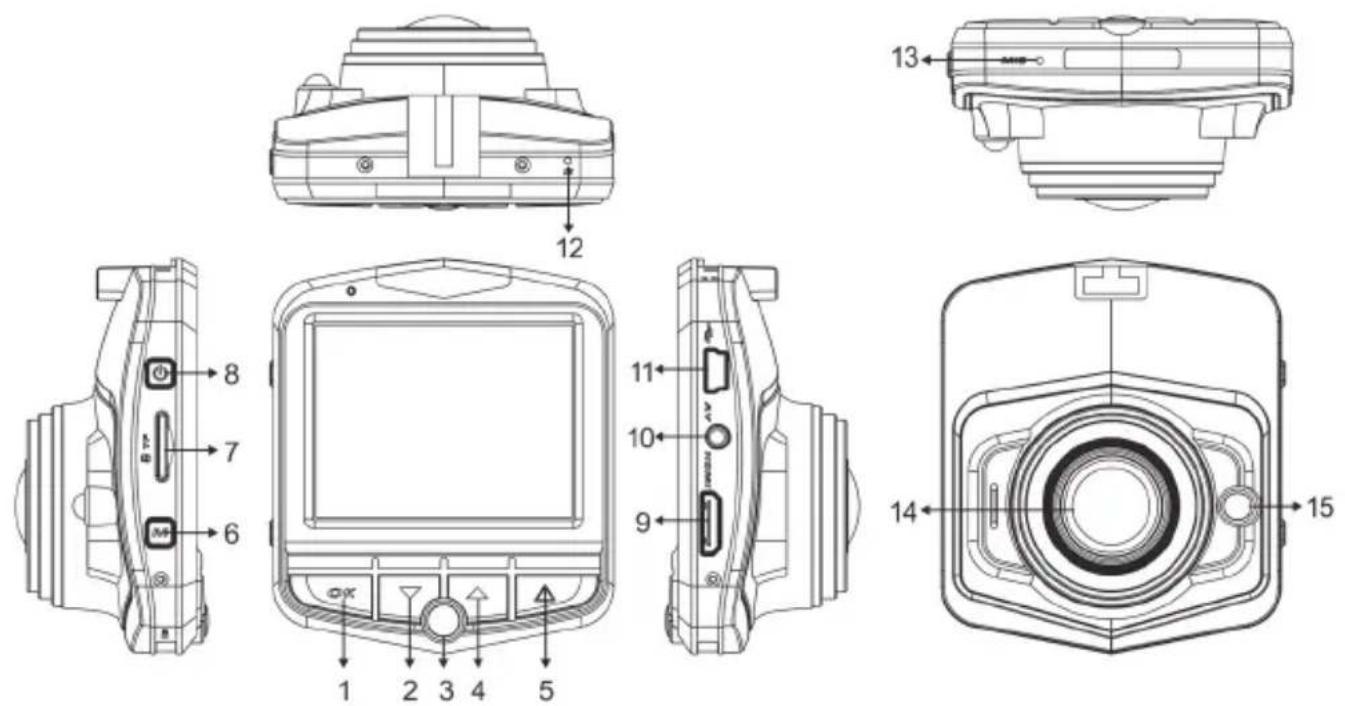
| Number Icon Name Operating Instructions | |||
| 1 OK | OK key | Camera/camera/confirm: a short press to start the camera, the will go in camera mode and start recording, press again to stop recording; | |
| 2 | Down key | Menu options, you can select: standby or video, night vision lights on or off. | |
| 3 P Parking Mode key You can active or deactivate the parking mode | |||
4 Up key  | Menu options, you can select: standby or recording status, open or closed recordings. | |
| 5 |  | Short press, the camera will record segments, which cannot be overwritten. |
| 6 M Mode/Menu key | Changing between several modes, Camera/Playback;In standby mode, press Menu and it will show on your screen. | |
| 7 | [1447] | TF card slot TF card slot, install following the directions |
| 8 | [X08C] | On/Off key Switching the device on or off |
| 9 HDMI HD Output Interface HD output for connecting High-Definition display devices | ||
| 10 | [2447] | AV input port AV cable is used to connect the video output to AV equipment |
| 11 | [1547] | Interface For connecting a PC to transfer data; power connector to supply power |
| 12 | F [2042] | Reset key Restarting the system |
| 13 | [1447] | Microphone Audio recording port |
| 14 | [2019] | Image Image reception |
| 15 | [SYXQ] | Fill light Use in low lights environment |
Installation
- Insert a memory card: insert the memory card, in accordance with the opening of the slot, press the card until it clicks.
Please note that the device operates with High speed storage, we advise you to use a high speed memory card, (Class 6 or higher)
Note: the first time you will be using a memory card be sure to format the card.
- Remove the memory card: press the card until it comes out of the slot automatically.
Note: If the device is in the boot state, do not remove the card, in order to avoid damaging the memory card.
- The screen is mounted on the front windshield inside the vehicle.
(1). The device is mounted on the suction cup bracket, tighten the base holder with the suction cup, make sure the camera is level with the ground, check if the device is firmly locked in place.
(2). Check if the suction cup is flat on the windshield.
(3). Firmly place the suction cup on the windscreen, pressure the clamps, the holder is mounted on the rear-view mirror in front of the windshield. Check if the device is firmly locked in place.
- Connect the power
Please use the original standard charger supplied, the boot device and the built-in battery. The end of the charger cable is connected to the device's USB port, the other end is plugged into the car port. Once the car engine is started, the device will automatically boot.
Note: you can extend the line of the device along the sides of the windshield and dashboard, so that the cable is not visible.
- Put the device On/Off
(1). Auto On/Off: once the car engine is started, the device will automatically boot. Once you put the device on, the camera will automatically start recording. If the car engine stops, the device will save the record and the power will be turned off, within 15 seconds.
(2). Manual on/off: if you want to put the device on manually, you press the ⏻ key, press again and the device will be turned off.
Initial settings
Set the date and time:
- Press the OK key to put the device into the standby state.
- Press the M key twice, and choose < time/date>, by pressing the ▲ and ▼ keys, then press OK to enter the setting
- By pressing the ▲ and ▼eys, you can adjust the values, after each field you press the OK key to confirm, until you have completed your setting. Press M to exit the menu.
Recording Operations
- When the car engine is started, the device will automatically be turned and start recording. When the engine is stalled, the camera will stop recording. You can also pres the OK key to stop recording manually.
Note: In some vehicles the, although the engine is stalled, the power supply will continue. If so, you can stop the camera manually or you can pull out the plug of the cigarette lighter.
- Other types of camera: press the OK key, the recording will start, press the OK key again to stop recording.
Note:
(1). The camera will record segments of 1, 2, 3, 5, 10 minutes, depending on the setting.
(2). These segments will be saved on the memory, in case of the memory card being filled, the oldest segment will be replaced by a new one.
- Emergency camera
Note: If you start your Gravity sensor and it detects a collision, the device will make a record which will be saved and locked automatically, the segment cannot be overwritten.
Camera operator
-
Short press the M key to enter Camera mode, the camera icon will be shown on the upper left corner of the screen.
-
Press the OK key to make pictures, the icon will flash once the camera is ready.
Video/Photo playback
-
In camera mode, pres the OK key to stop recording
-
Press the M key to switch to Playback mode, in the upper left corner of the screen the icon will be visible.
-
Press the ▲ and ▼ keys to select a file
-
Press the OK key to play the selected file, short press to pause the playback
Menu settings
-
If you are recording, press the OK key to stop recording
-
Long press the M key to show the setup menu, Long press twice to show the page menu
-
By short pressing the and keys you can cycle up and down the items
-
Select the setting you would like to modify, press OK to confirm
-
Short pres the M key to exit the menu
Special Features
1. Gravity sensor
If you start your Gravity sensor and it detects a collision, the device will make a record which will be saved and locked automatically, the segment cannot be overwritten, and this file cannot be deleted.
The options for the G sensor are: High/Medium/Low/Off. Factory default: Medium
2. Parking Mode
Turn on the Parking mode, the vehicle will now be stalled, the tachograph will now automatically turn of the camera, as soon as the tachograph detects a vibration force generated, the tachograph will activate the camera automatically for 10-15 seconds and then shut down again. When the vibration is detected again, the camera will turn on again.
Recording video Parking mode 1080P 15 frames/sec, the file will automatically be locked.
Note: the Parking mode only works in case of automatic shutdown, if you do this manually, the Parking mode does not work.
3. Motion detection
After pressing the OK key shortly, the camera will start the motion detection mode, the camera will automatically record 10 seconds, after detecting a motion. If the camera detects no motions, it will automatically turn off. When the camera detects a motion, it will turn on and the red recording light will start to blink. Default: detection off
4. USB mode
Connect the USB cable to the computer, the tachograph will automatically pop up the menu, with the following options:
(1). Memory
You can now access your video and photo files
(2). Camera
Now you have access to you USB device, this can be a real-time network camera, or your chat PC camera.
5. Battery instructions
Battery level indicator

Fully charged

Lower power consumption

Low power consumption

Lack of power
After switching on the car power, the red charging indicator lights up, indicating that the charging is in progress. The whole process will take approximately 180 minutes. The red indicator will turn of as soon as the charging is completed.
6. RESET
If during use, the device has a malfunction or crashes, it good be necessary to reset the device. You will be able to do so be putting a small needle into the hole.

| 1. Camer |  | ode | |
| 2. |  | Flashing, indicates the device is in progress | |
| 3. |  | To unlock the video fileIf the G sensor is activated will appear on the screen, indicating that the current video is a locked file. As short key, locking the video file. | |
| 4. | L | Activating Fill LightYou can activate or deactivate this function by entering the menu settings and the icon will be displayed on the screen, by pressing the s key you can activate the fill light quickly. | |
| 5. |   | Audio OnAudio Off.You can activate or deactivate this function by entering the menu settings and the icon will be displayed on the screen, by pressing the key you can activate the audio quickly. |
| 6. P. | Parking mode icon.You can activate or deactivate this function by entering the menu settings and the icon will be displayed on the screen. By pressing shortly on the P key you can quickly activate or deactivate this function. | |
| 7. 00:15:30 | White font – the memory cards remaining record time is displayed, red font – the current segment recording time is displayed. | |
| 8. 1080FHD | Indicates that the current resolution of the video is 1080FHD, You can choose between 1080FHD/720P/480P. In the menu you can modify the resolution of the video, on the screen your choice will be visible. | |
| 9. | [DSTD] | Icon of the memory card, this will be shown as soon as a memory card has been inserted. |
| 10 |  | Indicates the level of the battery |
| 11. |  | Icon indicating the length of a segment: 1 minute/2 minutes/3 minutes/5 minutes/10 minutes. |
| 12. |  | Indicates the current parameters of the exposure |
| 13. 00:00:01 Indicates the time, before initial setup | ||
| 14. 2014/01/01 Indicates the date, before initial setup | ||
| 15. Lane offset You can activate or deactivate the lane offset | ||
Settings menu
| Menu options Explanation | Available options | |
| Resolution Set the video | resolution 1080FHD,1080P,720P,WVGA,VGA | |
| Loop recording | Set the length of each segment | 1 minute, 2 minutes, 3 minutes, 5 minutes, 10 minutes; if you stop recording, the segment will not be completed automatically |
| Exposure Compensation | Underexposed, dim the light, you can use the fill light function | +0,0, -1/3, -2/3, -10, -4,3, -5/3, -2.0, +2.0, +5/3, +4/3, +10+2/3, +1/3 |
| Motion detection | In standby mode, when the motion detection is activated. | On, Off |
| Recording Audio Activate | or deactivate Audio recording. On, Off | |
| Date Stamp Camera video | watermark date On, Off | |
| G-sensor | Video recording generated by collision, cannot be deleted. | High, Medium, Low, Off |
| Lane Shift | The alarm will go off, as soon as the vehicle will shift lane. | Function switch, models, sensitivity, area selection, start speed. |
| Parking Mode | After parking the vehicle, as soon as the camera detects a vibration, the camera will be automatically be activated | On, Off |
| Date/Time Date and Time | You can set: the year, month, day, hour, minutes, seconds | |
| Automatic shutdown Auto | matic shutdown, no operation possible 1 minute, 30 | seconds |
| Screen saver | The device will automatically shut down the screen after a set time | 10 seconds, 30 seconds, 1 minute |
| Beep A sound is heard w | while using the keys On, Off | |
| Set language Language O | Operating Menu | Traditional Chinese, simplified Chinese, Russian, Japanese, French, Italian, German, Spanish, English, Korean, Dutch |
| TV mode TV System NTSC, PAL | ||
| Light Frequency Light frequency 50HZ, 60HZ | ||
| Fill Light To be used in a low light environment | On, Off | |
| Format | You can deleted all files from you memory card | SD card |
| Default setting | Restore to factory settings | Cancel, OK |
| Version | Software version | Versionumber |
Product specifications
| Product name HD tachograph | |
| Product features Extreme | wide angle of 170 degrees, 1080P Full HD |
| G-sensor Built-in (in case | of emergency, like a car accident, the file will not be deleted) |
| LCD screen size 2.3 inch | High definition LCD screen |
| Shot A + grade High Resolution, 170 degree, ultra wide angle lens | |
| Language Russian, English, Chinese, Japanese, dutch, etc. | |
| File Format MJPEG, AVI | |
| Video resolution 1920*10 | 80P, 1280*720P |
| Recording video format Audio: AAC | |
| Color effects Standard | |
| Continuous loop recording | Seamless loop recording, without missing seconds |
| Automatic switch On/Off Supported, automatic switching on/Off | |
| Motion detection function | Supported |
| Division Date Supported | |
| Vector Media Supported, built-in memory( Total 1024MB) | |
| Camera Mode 1200M | |
| Photo format | JPEG |
| Memory card TF (maximum support 32GB) | |
| Microphone | Supported |
| Built-in stereo | Supported |
| IR | Supported |
| Video Format | PAL/NTSC |
| Frequentie 50HZ/60HZ | |
| USB functions 1 : USB disk 2 : PC-Camera | |
| Power Interface 5V 1A | |
| Battery Built-in 200mAh | |
Troubleshooting
In case of any malfunctions or problems with the device, please refer to the possible solution mentioned here below:
Unable to boot
Check if the device is correctly connected to the car, check if the device has been manually been turned on, check if the battery has enough power or if it needs recharging. Sometimes it is necessary to reset the device and restore to the factory settings.
The camera stops automatically and the loops cannot be recorded.
Due to high definition recordings, it could be possible that the memory card does not function correctly, try a memory card of a higher class, such as class10.
If the segments cannot be recorded, it could be possible that you have activated the G sensor, so that the memory card is filled with locked files. You can format the card, so that the files will be deleted and deactivate the G sensor. The camera recordings and the segments are not the same.
Check if the motion detection function is activated, the length of time of those segments, depend on the detection of the motion of the vehicle and will be recorded only if a motion has been detected.
The recorded movie is not clear.
Check, whether the camera has no fingerprints on it. Please clean the lens before shooting and wipe the lens regularly.
The recorded video is of bad quality
The quality of the video can depend on numerous external circumstances, backlight, sunlight, intensity of the light, some can be adjusted by modifying the settings in the menu.
There is a streak interference on the images.
You could try to modify the settings of the light frequency, the normal rate is 50HZ.
When the device shuts down for no reason It could be necessary to reset the device, to restore to factory settings.


- AUTO DVR IN FULL HD CDC1300FD
- Precautions
- Accessories Check
- Installation
- Initial settings
- Recording Operations
- Note:
- Camera operator
- Menu settings
- Special Features
- Gravity sensor
- Parking Mode
- Note: the Parking mode only works in case of automatic shutdown, if you do this manually, the Parking mode does not work.
- Motion detection
- USB mode
- Battery instructions
- RESET
- Troubleshooting
Brand : SALORA
Model : CDC1300FD
Category : Voice recorder