
EK 3321 - Egg cooker CLATRONIC - Free user manual and instructions
Find the device manual for free EK 3321 CLATRONIC in PDF.


| Product type | Egg cooker |
| Brand | Clatronic |
| Model | EK 3321 |
| Capacity | 7 eggs |
| Power supply | 220-240 V, 50/60 Hz |
| Power | 450 W |
| Dimensions (W x D x H) | 20 x 15 x 15 cm |
| Weight | 0.6 kg |
| Housing material | Heat-resistant plastic |
| Heating plate material | Stainless steel |
| Color | White |
| Cooking functions | Hard-boiled, medium-boiled, soft-boiled eggs |
| Automatic shut-off | Yes |
| Operating indicator light | Yes |
| Built-in egg piercer | Yes |
| Graduated water level | Yes |
| Transparent lid | Yes |
| Cable length | 0.8 m |
| Care and cleaning | Non-stick plate, clean with a damp cloth |
| Safety | Overheat protection, automatic shut-off |
| Spare parts available | Water tank, lid, egg tray |
| Warranty | 2 years |
| Certifications | CE |
Frequently Asked Questions - EK 3321 CLATRONIC
User questions about EK 3321 CLATRONIC
0 question about this device. Answer the ones you know or ask your own.
Ask a new question about this device
Download the instructions for your Egg cooker in PDF format for free! Find your manual EK 3321 - CLATRONIC and take your electronic device back in hand. On this page are published all the documents necessary for the use of your device. EK 3321 by CLATRONIC.
USER MANUAL EK 3321 CLATRONIC
natural_image
Exterior view of a modern stainless steel kitchen appliance with a dome-shaped lid and control buttons (no visible text or symbols)CE
EIERKOCHER
General Safety Guidelines
Before using this device, carefully read this user manual and keep it together with the Warranty Certificate, cashier receipt and if possible, the original package inclusive its interior packing. If you hand on the device to any third person, include the user manual as well.
- Use the device for private and its intended purpose only. The device is not intended for commercial use.
- Do not use the device outdoors. Protect it from heat, direct sunlight, humidity (do not immerse into liquids under any circumstances) and sharp edges. Do not use the device with wet hands. If the device gets wet, unplug it immediately.
- Always switch off and unplug the device (pull the plug, not the cable) when you do not use the device, or when you attach accessories, during cleaning or malfunctioning.
- Do not leave the device unattended during operation. Always switch off the device when leaving the room. Unplug the device.
-
Regularly check the device and cable for signs of damage. Do not continue to operate the device in case of damage.
-
Do only use original parts.
- For the safety of your children, keep any packing parts (plastic bags, cartilage, Styrofoam etc.) out of their reach.
WARNING!
Don't let small children play with foils for danger of suffocation!
Symbols in this user manual
Important notes for your safety are marked distinctively. Pay absolute attention to them to avoid accidents and damage to the device:
WARNING:
Wams of dangers for your health and indicates potential risks of injury.
CAUTION:
Indicates potential dangers for the device or other objects.
i NOTE:
Highlights tips and information for you.
Special Safety Precautions for this Device
You will find the following warning and information symbol on the product:

WARNING: Hot surface! Risk of burns!
- During operation the temperature of accessible surfaces may become very hot.
- Do not move the appliance and do not touch during operation.
- Only remove the hood from the egg boiler after the acoustic signal has signalled that boiling is finished.
- Only take hold of hood and egg holder at their handles.
WARNING:
- Hot steam escapes from the steam opening and when opening the hood! Risk of scalding!
- Handle the measuring cup cautiously. It contains the egg piercer at the bottom. Risk of injury!

WARNING:
- CAUTION: Avoid injuries from the egg pricker.

CAUTION:
- Ensure the mains cord does not touch hot parts of the appliance.
-
Do not take the egg boiler without water into operation!
-
Only fill with cold water.
- Do not pour descaler onto the hot hotplate.
- This appliance can be used by children aged from 8 years and above if they have been given supervision or instruction concerning the safe use of the appliance understand the hazards involved.
- Cleaning and maintenance by the user shall not be made by children unless they are older 8 years and supervised.
- Keep the appliance and its cord out of reach of children less than 8 years.
• Children shall not play with the appliance.
- Appliances can be used by persons with reduced physical, sensory or mental capabilities or lack of experience and knowledge if they have been given supervision or instruction concerning use of the appliance in a safe way and if they understand the hazards involved.
- Do not repair the device by yourself. Please contact authorized personnel. In order to avoid hazards, a damaged mains cable must be replaced with an equivalent cable by the manufacturer, our customer service or any other qualified specialist.
- Only use the appliance in a dry, indoor area. It is intended for domestic use and similar areas of use such as e.g.
- In staff kitchens in shops, offices and other commercial areas. It is not intended for use in farm accommodation, hotels, motels or Bed & Breakfast establishments.

CAUTION:
The product must not be immersed into water for cleaning.
- Please follow the instructions as outlined in the chapter “Cleaning and Storage”.
Initial Operation
- Remove all parts carefully from the packaging.
- Clean the appliance before first use as described under "Cleaning and Storage".
Mains Cord
Unwind the mains cord from the base.
Electric Connection
- Ensure that your mains power corresponds to the appliance's specifications on the type label.
Operation

NOTE:
You can boil up to 7 eggs concurrently.
- Place the appliance on a flat, level and dry surface. The surface should be non-slip and heat resistant.
- Fill the supplied measuring cup fully with cold water and pour it into the egg boiler.
- Insert the egg holder.
- Pierce each egg at the bottom with the egg piercer at the bottom of the measuring cup to avoid cracking. Carefully press the egg on the piercer.
- Place the eggs with the pierced side up evenly spaced in the egg holder.
- Close the hood.
- Connect the power plug to a properly installed wall outlet.
- Set the hardness control to the desired position as described under "Hardness Setting".
- Turn the appliance on. The status indicator lights up.
- The acoustic signal sounds as soon as the eggs reach the desired hardness. Turn the appliance off and disconnect from mains power supply.
- Remove the hood only by taking hold of the handle.

WARNING: Risk of scalding!
When opening, tilt the hood in such way that the steam escapes from the side opposite the handle.
-
Remove the egg holder from the egg boiler and chill under cold water to avoid further cooking.
-
Let the appliance cool down completely before further use or storage!
Hardness Setting

NOTE:
The hardness control sets the boiling time and therewith the hardness of the eggs. The icons serve your orientation.
Icons for "boiling eggs with the same hardness"



Soft eggs medium hard eggs hard eggs
Icons for "concurrent boiling of soft, medium and hard eggs"
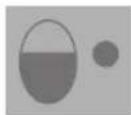

medium hard eggs hard eggs
Boiling Eggs with the Same Hardness:
Within the desired hardness the setting is determined by number and weight class of the eggs (S, M, L, XL).
Examples:

1 small egg (weight class S) is to be soft boiled:
- Set hardness control with the notch to the onset of the boiling range for soft eggs.

1 large egg (weight class XL) or 7 small eggs are to be soft boiled:
- Set hardness control to the centre of the boiling range.

7 large eggs are to be soft boiled:
- Set hardness control to the end of the boiling range.
Try the different settings. Thanks to the electronic boiling control you will be able to get excellent results after a short time.
Concurrent Boiling of Soft, Medium and Hard Eggs:
You can boil soft, medium and hard eggs in one fill in a single step. Preferably use same size eggs.
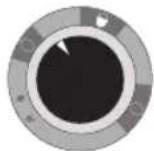
Fill the egg boiler as usual with water. Place all eggs on the egg holder. First set the hardness for soft eggs, as described above, according to size and number of the eggs. Turn the egg boiler on. Turn the appliance off as soon as the acoustic signal sounds and carefully remove the desired amount of soft-boiled eggs with a tablespoon. Chill the removed eggs to stop them from further cooking.

Subsequently resume with the icons for "concurrent boiling of soft, medium and hard eggs". Set the controls to 🙏 and turn the appliance on again. Turn the egg boiler of and remove the medium hard-boiled eggs after the acoustic signal sounds.

For the remaining eggs, to be hard boiled, turn the controls a bit further to ⚙ and turn the appliance on again. Wait for the acoustic signal to sound. Turn the appliance off and disconnect from mains power supply.
i NOTE:
If you do not want medium hard eggs, carry on boiling after removing the soft eggs until the remaining eggs are hard-boiled.
Rewind Mechanism for Power Cord
Wind the power cord inside the bottom of the appliance for space-saving storage.
Cleaning and Storage

WARNING
- Turn the appliance off and disconnect from mains power supply.
- Clean and store the appliance only after it completely cooled down. Risk of burns!
- Never submerge the appliance in water.

CAUTION:
- Do not use a wire brush or other abrasive utensils for cleaning.
-
Do not use aggressive or abrasive cleaning agents.
-
Remove the remaining water inside the egg boiler with a cloth. In this way you also remove scale residue.
- Clean the surface with a damp cloth without cleaning agents, if necessary.
- Clean hood and egg holder in dishwater.
Descaling
- Descaling intervals depend on water hardness and use frequency. We recommend regular descaling.
- Descaling is necessary if the appliance turns off before the water is boiling.
- Do not use vinegar for descaling, only use commercially available descaler based on citric acid. Observe the manufacturer's dosage recommendations.
Troubleshooting
| Problem Possible Cause Solutions | ||
| Appliance does not work | Wall outlet is defective | Try a different wall outlet. |
| Eggs are cracking | Eggs were not pierced | Pierce the eggs with the egg piercer on the measuring cup before boiling. |
| Eggs do not have the desired doneness | No or too little water filled in | Fill the supplied measuring cup brimful with cold water and pour it into the egg boiler. |
| Hardness control not properly set | Set the hardness control to the desired position as described under “Hardness Setting”. | |
| Hood not properly placed on appliance | Check the fit of the hood. | |
| Appliance turns off prematurely due to scale | Descale the egg boiler regularly. The scale is difficult to remove if too thick. | |
Technical Specifications
Model:....EK 3321
Power supply: 230 V\~, 50 Hz
Power consumption: 400 W
Protection class:....I
Net weight: .... approx. 0.800 kg
The right to make technical and design modifications in the course of continuous product development remains reserved.
This device complies with all current CE directives, such as electromagnetic compatibility and low voltage directive and is manufactured according to the latest safety regulations.

Meaning of the "Wheelie Bin" Symbol
Take care of our environment, do not dispose of electrical appliances via the household waste.
Dispose of obsolete or defective electrical appliances via municipal collection points.
Please help to avoid potential environmental and health impacts through improper waste disposal.
You contribute to recycling and other forms of utilization of old electric and electronic appliances.
Your municipality provides you with information about collecting points.
CTC Clatronic Sp. z o.o


- General Safety Guidelines
- WARNING!
- Symbols in this user manual
- WARNING:
- CAUTION:
- i NOTE:
- Special Safety Precautions for this Device
- WARNING: Hot surface! Risk of burns!
- Initial Operation
- Mains Cord
- Electric Connection
- Operation
- NOTE:
- WARNING: Risk of scalding!
- Hardness Setting
- Icons for "boiling eggs with the same hardness"
- Icons for "concurrent boiling of soft, medium and hard eggs"
- Boiling Eggs with the Same Hardness:
- Examples:
- Concurrent Boiling of Soft, Medium and Hard Eggs:
- Rewind Mechanism for Power Cord
- Cleaning and Storage
- WARNING
- Descaling
- Technical Specifications
- Meaning of the "Wheelie Bin" Symbol
Brand : CLATRONIC
Model : EK 3321
Category : Egg cooker