
VT-1374 BK - Razor Vitek - Free user manual and instructions
Find the device manual for free VT-1374 BK Vitek in PDF.


| Product type | Electric shaver |
| Brand | Vitek |
| Model | VT-1374 BK |
| Color | Black |
| Approximate dimensions | 15 x 5 x 5 cm |
| Weight | Approximately 200 g |
| Power supply | Rechargeable Li-ion battery |
| Battery life | Approximately 45 minutes |
| Charging time | 1 hour |
| Head type | Rotary |
| Number of blades | 3 |
| Main functions | Dry and wet shaving, self-sharpening blades |
| Waterproof rating | IPX7 (washable under water) |
| Charge indicator | LED |
| Safety | Automatic shut-off after 5 minutes of inactivity |
| Maintenance | Water cleaning, periodic lubrication |
| Spare parts available | Replacement blades and foils |
| Included accessories | USB charger, cleaning brush, travel case |
| Warranty | 2 years |
Frequently Asked Questions - VT-1374 BK Vitek
User questions about VT-1374 BK Vitek
0 question about this device. Answer the ones you know or ask your own.
Ask a new question about this device
Download the instructions for your Razor in PDF format for free! Find your manual VT-1374 BK - Vitek and take your electronic device back in hand. On this page are published all the documents necessary for the use of your device. VT-1374 BK by Vitek.
USER MANUAL VT-1374 BK Vitek
GB MANUAL INSTRUCTION 5
DE DIE BETRIEBSANWEISUNG 9
RUS ИНСТРУКЦИЯ ПО ЭКСПЛУАТАЦИИ 13
FR NOTICE D'UTILISATION 17
IT ISTRUZIONI D' USO 21
E INSTRUCCIONES DE USO 25
BG ИНСТРУКЦИЯ ЗА ЕКСПЛОАТАЦИЯ 29
HU HASZNÁLATI ÚTMUTATÓ 33
SCG UPUSTVO ZA UPOTREBU 37
PL INSTRUKCJA OBSŁUGI 41
CZ NÁVOD K POUŽITÍ 45
UA ІНСТРУКЦІЯ З ЕКСПЛУАТАЦІЇ 49
BEL ИНСТРУКЦЫЯ ПА ЭКСПЛУАТАЦЫИ 53
AR ت عل ي م ات ال اس ت خ د ام 57
Fast action
VT-1374 BK


ENGLISH
Washable rechargeable shaver with LCD display
Parts list
- Protective cap
- Shaving block
- Rotating blades
- Blade drive
- Shaving block locking button
- Shaver body
- Power switch with blocking button
- LCD display
- Charger
- Cleaning brush
- Travel bag
Charging (Pic.1)
Before first using the shaver or after long periods of disuse, the batteries must be charged for 6 hours.
- Connect the charger plug (9) to the jack on the bottom of the shaver body and connect the charger to AC power, the display (8) will show the necessary information.
- Consequent charging cycles should not exceed two hours.
Attention!
- Do not charge the batteries for more than 10 hours and in temperatures less than 0°C or more than 40°C as this can lead to a reduction in charge capacity.
- If you don't use the shaver for more than 20 days, charge it for four hours.
Using the shaver
The best shaving results are achieved if your skin is dry.
Your skin may need 2-3 weeks to adapt
to this shaving system.
- Remove the protective cap (1).
- Turn on the switch (7).
- Lightly touch the skin, moving around the shaving block using simultaneous up-down and rotating motions.
- Turn off the shaver with the power switch (7), cover the shaving block with the protective cap (1) and store the shaver.
Using the trimmer (Pic. 2, 3)
The trimmer is designed for evening whiskers and caring for mustaches.
- Move the trimmer switch to the upper position.
- Turn on the shaver with the switch (7).
- Position the shaver at the correct angle to the skin and move it gradually down, evening the whiskers.
- Turn off the shaver and move the trimmer switch to the lower position.
Cleaning the shaver
- Press the shaving block locking button (5) to open the shaving block and gain access for cleaning (Pic. 4).
- Using the brush (10), clean the shaving block inside and out, and also the blade drive (Pic. 4).
- The shaving block can be washed under a stream of warm water (Pic. 5). Dry the shaving block completely before closing. Do not allow water into the electric shaver's body. After completely dry, close the shaving block, reinstall the protective cap (1) and put away for storage.
ENGLISH
Information on the display
 | Charging | After connecting the charger to AC power, the display will light, the charging symbol will appear, and the shaver will beep 5 times to confirm the beginning of the charging cycle. When the charger is disconnected from AC power, the charging symbol will disappear in 10 seconds, and in 20 seconds, the display backlight will go out.The display will show the working time left and the charge level of the rechargeable batteries. |
| [CKWT] | Full charge | When the rechargeable batteries are fully charged, the display will show the working time left is 40 minutes and the battery charge level is 100. |
 | Shaver working time left | The numbers on the display show how much working time is left based on the charge in the batteries. The charge level indicator shows the status of the rechargeable batteries. |
 | Insufficient charging of rechargeable batteries | If the rechargeable batteries are not sufficiently charged, the indicator begins to blink after the number 3; the charger indicator will appear.The shaver automatically shuts off when the number 0 appears on the display. |
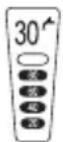 | Cleaning symbol | The blinking symbol on the display that looks like a water tap indicates that the shaver needs to be cleaned. The symbol will blink on the display for 30 seconds and beep 5 times to alert you to the need for cleaning the shaver.Clean the shaver no less frequently than once every 3 days. |
ENGLISH
It is recommended to clean the shaving heads once every two months (Pic. 6, 7, 8)
- Turn off the electric shaver.
- Press the locking button (5).
- Pull up on and remove the shaving block.
- Turn the ring counter-clockwise and remove the locking frame.
- Remove and clean the shaving heads (separately rotating and non-moving blades). Do not confuse the rotating and non-moving blades. This is important because the rotating and non-moving blades of each head adjust to one-another, which guarantees the optimal operating characteristics of each pair of blades.
If you accidentally confuse a blade block, it may take several weeks to restore optimal shaving characteristics. - Clean the rotating blade with the brush. Use the side of the brush with the short bristles.
- Clean the non-moving blades with the brush.
- Replace the shaving heads onto the shaving block, install the locking frame and turn the ring clockwise.
- Turn the non-moving blades clockwise/counter-clockwise to lock their plastic frame.
- Re-install the shaving block onto the shaver.
- Clean the trimmer after each use.
- Turn off the electric shaver.
- Clean the trimmer using the brush (10) included in the package.
- Apply drops of sewing machine or
Trimmer
hair clipper oil to the trimmer every six months.
Replacing the shaving heads (Pic. 6, 7, 8)
To achieve optimal results from your shaver, replace the shaving blocks every 2 years.
- Turn off the electric shaver.
- Press the locking button (5) and remove the shaving block.
- Turn the ring counter-clockwise and remove the locking frame.
- Replace the shaving heads, install the locking frame and turn the ring clockwise.
- Turn the non-moving blades clockwise/counter-clockwise to lock their plastic frame.
- Re-install the shaving block onto the shaver.
PROTECTING THE ENVIRONMENT
This shaver contains rechargeable batteries. Before disposing of the expired electric shaver, remove the batteries and dispose of them according to the laws of your country for disposal of harmful waste.
Do not throw the shaver away until you remove the built-in rechargeable batteries.
WARNINGS
- Do not charge the batteries in places where the temperature is lower than 0°C or higher than 40°C, or they are exposed to direct sunlight, near heat sources or places with high levels of humidity.
- Only use the charging device that came with the shaver.
- Keep the charger away from water
ENGLISH
and do not attempt to touch it with wet hands.
- Store the charger in a dry and safe place; protect it from damage.
- Do not use the charger in places where it can accidentally get bumped into the bathtub or sink.
- Do not press up on the non-moving shaving head screens in order to avoid damage.
- To avoid injury, do not use the shaver if the external shaving screen or internal cutting blades are damaged.
- Do not push on the LCD display in order to avoid damage.
- If the shaver isn't working properly, take it to an authorized service center.
- Only use the shaver for the purposes intended, as instructed in these instructions.
This device is designed for domestic use only.
TECHNICAL CHARACTERISTICS Charger
Power supply: AC 220 V \~ 50 Hz
Output voltage: DC 3.2 V
Shaver
Power usage: 3 Wt
The manufacturer reserves the right to change the device characteristics without prior notice.
Service life - no less than 3 years.
GUARANTEE
Details regarding guarantee conditions can be obtained from the dealer
from whom the appliance was purchased. The bill of sale or receipt must be produced when making any claim under the terms of this guarantee.

This product conforms to the EMC-Requirements as laid down by the Council Directive 89/336/EEC and to the Low Voltage Regulation (73/23 EEC)
DEUTSCH


- FAST ACTION
- VT-1374 BK
- ENGLISH
- WASHABLE RECHARGEABLE SHAVER WITH LCD DISPLAY
- PARTS LIST
- CHARGING (PIC.1)
- ATTENTION
- USING THE SHAVER
- USING THE TRIMMER (PIC. 2, 3)
- CLEANING THE SHAVER
- IT IS RECOMMENDED TO CLEAN THE SHAVING HEADS ONCE EVERY TWO MONTHS (PIC. 6, 7, 8)
- TRIMMER
- REPLACING THE SHAVING HEADS (PIC. 6, 7, 8)
- PROTECTING THE ENVIRONMENT
- WARNINGS
- TECHNICAL CHARACTERISTICS CHARGER
- SHAVER
- GUARANTEE
- DEUTSCH
Brand : Vitek
Model : VT-1374 BK
Category : Razor