USER MANUAL POLLY MAGIC CHICCO
IMPORTANT: KEEP FOR FUTURE REFERENCE.
WARNING
IMPORTANT: RETAIN FOR FUTURE REFERENCE - READ CAREFULLY - YOUR CHILD'S SAFETY MAY BE AFFECTED IF YOU DO NOT FOLLOW THESE INSTRUCTIONS CAREFULLY. READ THESE INSTRUCTIONS CAREFULLY TO GUARantee YOUR CHILD'S SAFETY AT ALL TIMES.
WARNING: TO AVOID DANGER OF SUFFOCATION REMOVE THE PLASTIC COVER BEFORE USING THIS ARTICLE. THIS COVER SHALL BE DESTROYED OR KEPT AWAY FROM BABIES AND CHILDREN.
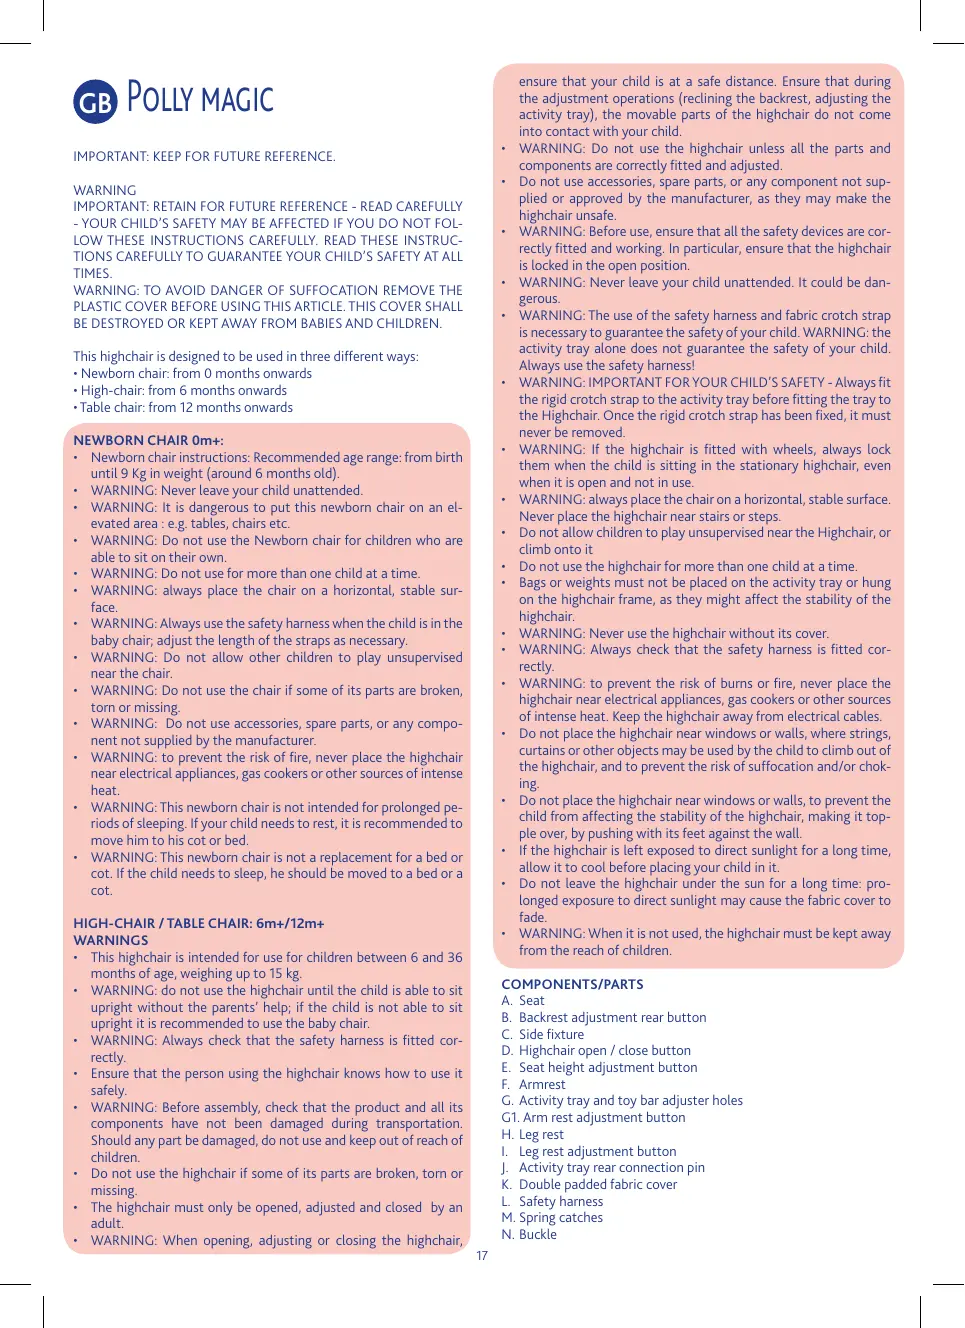
This highchair is designed to be used in three different ways:
- Newborn chair: from 0 months onwards
High-chair: from 6 months onwards
- Table chair: from 12 months onwards
NEWBORN CHAIR 0m+:
- Newborn chair instructions: Recommended age range: from birth until 9 Kg in weight (around 6 months old).
WARNING: Never leave your child unattended.
WARNING: It is dangerous to put this newborn chair on an elevated area : e.g. tables, chairs etc.
WARNING: Do not use the Newborn chair for children who are able to sit on their own.
WARNING: Do not use for more than one child at a time.
WARNING: always place the chair on a horizontal, stable surface.
WARNING: Always use the safety harness when the child is in the baby chair; adjust the length of the straps as necessary.
WARNING: Do not allow other children to play unsupervised near the chair.
WARNING: Do not use the chair if some of its parts are broken, torn or missing.
WARNING: Do not use accessories, spare parts, or any component not supplied by the manufacturer.
WARNING: to prevent the risk of fire, never place the highchair near electrical appliances, gas cookers or other sources of intense heat.
WARNING: This newborn chair is not intended for prolonged periods of sleeping. If your child needs to rest, it is recommended to move him to his cot or bed.
WARNING: This newborn chair is not a replacement for a bed or cot. If the child needs to sleep, he should be moved to a bed or a cot.
HIGH-CHAIR / TABLE CHAIR: 6m+/12m+ WARNINGS
This highchair is intended for use for children between 6 and 36 months of age, weighing up to 15kg
WARNING: do not use the highchair until the child is able to sit upright without the parents' help; if the child is not able to sit upright it is recommended to use the baby chair.
WARNING: Always check that the safety harness is fitted correctly.
- Ensure that the person using the highchair knows how to use it safely.
- WARNING: Before assembly, check that the product and all its components have not been damaged during transportation. Should any part be damaged, do not use and keep out of reach of children.
- Do not use the highchair if some of its parts are broken, torn or missing.
- The highchair must only be opened, adjusted and closed by an adult.
- WARNING: When opening, adjusting or closing the highchair,
ensure that your child is at a safe distance. Ensure that during the adjustment operations (reclining the backrest, adjusting the activity tray), the movable parts of the highchair do not come into contact with your child.
- WARNING: Do not use the highchair unless all the parts and components are correctly fitted and adjusted.
- Do not use accessories, spare parts, or any component not supplied or approved by the manufacturer, as they may make the highchair unsafe.
WARNING: Before use, ensure that all the safety devices are correctly fitted and working. In particular, ensure that the highchair is locked in the open position.
WARNING: Never leave your child unattended. It could be dangerous.
- WARNING: The use of the safety harness and fabric crotch strap is necessary to guarantee the safety of your child. WARNING: the activity tray alone does not guarantee the safety of your child. Always use the safety harness!
WARNING: IMPORTANT FOR YOUR CHILD'S SAFETY - Always fit the rigid crotch strap to the activity tray before fitting the tray to the Highchair. Once the rigid crotch strap has been fixed, it must never be removed.
WARNING: If the highchair is fitted with wheels, always lock them when the child is sitting in the stationary highchair, even when it is open and not in use.
WARNING: always place the chair on a horizontal, stable surface. Never place the highchair near stairs or steps.
- Do not allow children to play unsupervised near the Highchair, or climb onto it
- Do not use the highchair for more than one child at a time.
- Bags or weights must not be placed on the activity tray or hung on the highchair frame, as they might affect the stability of the highchair.
WARNING: Never use the highchair without its cover.
WARNING: Always check that the safety harness is fitted correctly.
WARNING: to prevent the risk of burns or fire, never place the highchair near electrical appliances, gas cookers or other sources of intense heat. Keep the highchair away from electrical cables.
- Do not place the highchair near windows or walls, where strings, curtains or other objects may be used by the child to climb out of the highchair, and to prevent the risk of suffocation and/or choking.
- Do not place the highchair near windows or walls, to prevent the child from affecting the stability of the highchair, making it topple over, by pushing with its feet against the wall.
- If the highchair is left exposed to direct sunlight for a long time, allow it to cool before placing your child in it.
- Do not leave the highchair under the sun for a long time: prolonged exposure to direct sunlight may cause the fabric cover to fade.
WARNING: When it is not used, the highchair must be kept away from the reach of children.
COMPONENTS/PARTS
A. Seat
B. Backrest adjustment rear button
C. Side fixture
D. Highchair open / close button
E. Seat height adjustment button
F. Armrest
G. Activity tray and toy bar adjuster holes
G1. Arm rest adjustment button
H. Leg rest
I. Leg rest adjustment button
J. Activity tray rear connection pin
K. Double padded fabric cover
L. Safety harness
M. Spring catches
N. Buckle
O. Safety harness clips
P. Fabric crotch strap
Q. D-Rings
R. Tray
S. Slots for fitting the tray
T. Tray locking button
U. Rigid crotch strap
V. Activity tray cover
W.Footrest
X. Rear legs
Y. Rear leg locking buttons
Z.Wheel
AA.Front legs
BB.Booster cushion
CC.Toy bar
DD.Basket
TIPS FOR CLEANING AND MAINTENANCE
The cleaning and maintenance of the highchair must only be carried out by an adult.
Cleaning
Clean the fabric cover with a soft damp cloth or a neutral detergent.
To remove the fabric cover from the highchair repeat, in the reverse order, the operations described to fix the fabric cover to the frame.
Only use water and a soft damp cloth to clean the plastic parts of the product
Do not use abrasive detergents or solvents.
If the highchair comes into contact with water, dry the metal parts to prevent the formation of rust.
Maintenance
Keep the highchair in a dry place.
To avoid friction that may prevent the correct operation of the Highchair, ensure that all the movable plastic parts located along the metal frame are free from dust, dirt or sand.
Lubricate only if necessary, with a light application of a silicone based lubricant between the components
Booster cushion:
The booster cushion is made from washable material; please follow the washing instructions carefully to protect the fabric:

Wash by hand in cold water

Do not bleach

Do not tumble dry

Do not iron

Do not dry clean
WARNING: Check that the fabric and stitching are in good condition each time you wash it.
WARNING: Prolonged exposure to direct sunlight can cause the fabric to fade.
Outer cover: 100% polyester
Padding: 100% polyester
HOW TO ASSEMBLE / OPEN THE HIGHCHAIR
WARNING: when opening the highchair, ensure that your child, or other children, are at a safe distance. Ensure that during these operations, the movable parts of the highchair do not come into contact
with your child.
- Fix the legs to the highchair frame as shown in diag. 1
WARNING: the ends of the front and rear legs have a different shape to avoid errors in the assembly phase.
Front legs: keep the two locking buttons, located at the base of the frame, pressed down and insert the legs into the structure. The parts are locked only when the two locking buttons come out from the holes on the legs, and an audible click is heard, signalling that the legs are securely fitted
Rear legs: keep the two locking buttons located at the base of the frame pressed down and insert the legs. The parts are locked only when the two locking buttons come out from the holes on the legs, and an audible click is heard, signalling that the legs are securely fitted (Diag. 1A)
-
Stand at the back of the highchair and hold the two side joints, then press the open / close buttons (diag. 2). At the same time, open the Highchair legs using your foot, until an audible click is heard, signalling that the legs are locked in the open position (diag. 2A).
-
Raise the seat: hold the upper part of the backrest and pull it upward, until the desired height is reached (diag. 3). The Highchair can be adjusted to 6 height positions.
-
Use the adjuster buttons on the sides (diag. 4) to open the leg rest (diag. 5).
-
Lower the armrests by pressing the two buttons located at the rear of the armrests (diag. 6)
WARNING: The armrests must always be maintained in a horizontal position. The armrests can be maintained in a vertical position only when closing the Highchair.
- Fix the fabric covers to the Highchair frame:
LININGS
A. Fit the fabric cover to the Highchair frame by sliding the safety harness and D-Rings into the appropriate loops (diag. 7A).
B. Fit the upper fabric cover to the Highchair frame by sliding the safety harness and D-Rings in the appropriate loops.
C. If the baby chair is to be used for smaller children, you can fit the soft booster cushion onto the seat by sliding the fastener straps through the appropriate loops (diag. 7B).
D. Slide the lap belt through the D-Rings, slide the crotch strap through the hole and insert the clips into the buckle (diag. 7C)
E. Fit the spring catches (diag. 7D).
The Highchair covers are padded, and can be removed and washed. To remove the fabric cover from the highchair repeat, in the reverse order, the operations described to fix the fabric cover to the frame. The same operations carried out for the upper padding must be carried out also for the lower padding.
WARNING: never use the highchair without the fabric cover.
WARNING: never use the Highchair only with the upper fabric cover or with the padding fitted to the frame in the reverse order.
-
Insert the footrest, turn it until the use position is reached, and lock it in place (diag. 8). The footrest can be adjusted to 3 positions. The child can now be seated in the Highchair:
-
Fit the rigid crotch strap to the activity tray (diag. 9).
-
WARNING: IMPORTANT FOR YOUR CHILD'S SAFETY - Always fit the rigid crotch strap to the activity tray before fitting the tray to the Highchair. Once the rigid crotch strap has been fixed, it must never be removed.
The activity tray can now be fitted to the Highchair.
SAFETY HARNESS
WARNING: The use of the safety harness and fabric crotch strap is necessary to guarantee the safety of your child.
WARNING: the activity tray alone does not guarantee the safety of your child. Always use the SAFETY HARNESS!
The highchair has a 5-point safety harness.
-
Release the safety harness (diag. 10)
-
Place the child in the highchair and fasten it with the safety harness (diag. 11)
The safety harness can be adjusted to two height positions.
FITTING / ADJUSTING THE ACTIVITY TRAY
- WARNING: IMPORTANT FOR YOUR CHILD'S SAFETY - Always fit the rigid crotch strap to the activity tray before fitting the tray to the Highchair. Once the rigid crotch strap has been fixed, it must never be removed.
The activity tray can be adjusted to 4 positions.
- Hold the activity tray in your hands (diag. 12).
- Insert the armrests in the guides located under the activity tray while simultaneously pressing the side locking button (diag. 13).
- Move the activity tray until the desired position is reached and release the button. If the activity tray is not automatically locked on the armrests, move the activity tray until a click is heard, signalling that the tray is locked. WARNING: Always ensure that the tray is locked correctly to the armrests before use. Attention: The activity tray can only be adjusted to the 4 indicated positions.
WARNING: never leave the tray fitted in a position in which the danger signs are visible on the armrests: IT IS NOT safe!
- To remove the tray, press the side buttons under the tray. When not in use, the tray can be stored away at the rear of the frame by using the two appropriate fixing points (diag. 14).
- The Highchair has an activity tray cover. This can be fixed / removed from the activity tray by a pressure device (diag. 15).
WARNING: Always ensure that the activity tray cover is correctly fitted to the tray during use.
- The activity tray cover can be used as a convenient "table cloth protection tray" if the child eats sitting directly at the table with his parents (diag. 16).
ADJUSTING THE HEIGHT OF THE HIGHCHAIR
The Highchair can be adjusted to 6 height positions.
- To raise the seat: hold the upper part of the backrest and pull it upward, until the desired height is reached. (Diag. 17)
- To lower the seat: press the two side buttons simultaneously and lower the seat, until the desired height is reached (diag. 18).
WARNING: do not carry out this operation with the child sitting in the Highchair.
ADJUSTING the highchair into a newborn seat
The Highchair seat can be reclined to 3 different positions and can be used as a Highchair/Table chair and baby chair; there are 6 different height to choose from.
HIGH-CHAIR / TABLE CHAIR POSITION: From 6 months onwards it can be used as a Highchair and from 12 months onwards it can be used as a table chair. (diag. 19; diag. 20).
NEWBORN CHAIR POSITION: The newborn chair can be used from birth until the child is 6 months old (diag. 21)
21. To adjust the inclination of the seat, press the button located at the top behind the backrest, move the seat until the desired position is reached and release the button; the seat will lock automatically and an audible click is heard, signalling that it is locked into position (diag. 21a).
The operation can be carried out also with the child sitting in the Highchair, although it can be more difficult.
LEG REST
The Highchair is fitted with a leg rest which can be adjusted to 2 different positions and used on the highchair/table chair and baby chair; Press the two side adjustment buttons and recline the leg rest, until the desired position is reached (diag. 22).
The footrest on the Highchair can be adjusted to 3 height positions.
- From the current position, turn the footrest until it unlocks (diag. 23).
- Remove the footrest and fit it at the desired height (diag. 24).
- Turn the footrest until the new desired use position is obtained, and lock it into position.
WHEELS
- Wheels are fitted onto the rear legs of the Polly Magic Highchair so it can be moved around easily (Diag. 25)
WARNING: always place the chair on a horizontal, stable surface. Never place the highchair near stairs or steps.
BASKET
The Polly Magic Highchair comes with a practical item basket.
To fasten it to the chair, proceed as follows:
- Insert the end metal parts of the basket into the slots on the highchair frame; (diag. 26)
- Wrap the Velcro straps around the metal bar under the seat. (diag. 27).
- Slot the side basket straps through the holes as seen in diagram 27 A.
- The basket can be used to hold all the items you need. (diag. 27B)
- To remove the basket, simply undo the Velcro straps from the metal tube, remove the side straps and then slide out the metal ends of the basket, by pressing the relative buttons.
CLOSING THE HIGHCHAIR
WARNING: when performing this operation, ensure that your child, or other children, are at a safe distance. Ensure that during these operations the movable parts of the highchair do not come into contact with your child.
WARNING: if it is fitted, remove the activity tray before starting any closing operations and stored it away at the rear of the frame, by using the two appropriate securing joints.
- Move the backrest and leg rest into a vertical position and raise the armrest in a vertical direction by pressing the buttons located on the lower part of the arm rests, until an audible click is heard (diag. 28).
- Lower the seat by pressing the two side buttons at the same time; if the basket is fitted, raise it upwards to that it fits under the bottom of the seat (diag. 29).
- Press the buttons at the centre of the side joints and, at the same time, close the legs of the Highchair using your foot (diag. 30), until an audible click signals that the Highchair is locked in the closed position.
WARNING: Always check that the highchair is perfectly closed (diag. 31).
USING THE TOY BAR WARNING
- WARNING: Never use the toy bar as a carrier handle.
- Do not attach any string to lengthen the toy fasteners on the bar and do not make any knots or loops: This could lead to running knots from accidentally forming which could lead to strangulation. This toy must only be used under adult supervision.
- Check the toy regularly for signs of wear and damage and to ensure that it is assembled correctly. Should any part be damaged, do not use the toy and keep it out of reach of children.
- WARNING: Before using the product remove and dispose of any plastic bags and any other packaging (e.g. fasteners and fixing ties etc) and keep them out of reach of children.

THIS PRODUCT COMPLIES WITH EC DIRECTIVE 2006/66/EC
The crossed bin symbol on the batteries or product pack indicates that, at the end of their life, they must not be disposed of as urban refuse. They must be disposed of separately from domestic waste, either by taking them to a separate waste disposal site for batteries or by returning them to your dealer when you buy similar rechargeable or non-rechargeable batteries.
The chemical symbols Hg , Cd, Pb, printed under the crossed bin symbol, indicate the type of substance contained in the batteries: Hg = Mercury, Cd = Cadmium, Pb = Led.
The user is responsible for taking the batteries to a special waste disposal site at the end of their life, so that they can be treated and recycled. If the spent batteries are collected correctly as separate waste, they can be recycled, treated and disposed of ecologically; this avoids a negative impact on both the environment and human
health, and contributes towards the recycling of the batteries' substances. Non-compliance with the norms on battery disposal damages the environment and human health. For further information regarding the waste disposal services available, contact your local waste disposal agency or the shop where you bought the batteries.
WASHING TIPS
Attention: Before washing the toy, always remove the pendant with the writing "PUSH ME" on it (according to the toy: The cow's tail or the pendant with the small whale) as it contains the button battery.
Outer cover: 100% polyester
Padding: 100% polyester

Wash by hand in cold water

Do not bleach

Do not tumble dry

Do not iron

Do not dry clean
Wash in warm water (maximum 30^ ); Do not bleach, do not tumble dry, do not iron, do not dry clean.
Fitting the toy bar:
- To fit the toy bar, slide the side hooks on the bar along the armrests until they click into the desired position.(diag. A, AA)
- Fasten the toy onto the bar using the strings on the panel, as seen in diagram B.
- The toy panel consists in a removable toy and pendants which are also removable as they are attached by Velcro fasteners. (diag. BB).
- The toy panel can be removed and placed on the tray to entertain the child; it has suction pads which fasten it firmly in place. (Diag. C).
- The toy panel has a variety of tactile and sound activities (according to the type of toy) to develop the child's hearing, sight and tactile skills (diag. D)
WARNING: Inside the pendant with the writing "PUSH ME" on it (according to the toy: The cow's tail or the pendant with the small whale) there are button batteries which can't be replaced.
Chicco U.K. Ltd.
Prospect Close
Lowmoor Road Industrial Estate
Kirby-in-Ashfield-Nottinghamshire -NG17 7LF
Great Britain
www.chicco.com
IBELANGRIJK: BEWAREN VOOR LATERE RAADPLEGING
BELANGRIJKE MEDEDELINGEN
BELANGRIJK: LEES DEZE INSTRUCTIES VOOR HET GEBRUK AANDACHTIG DOOR, OM GEVAREN BIJ HET GEBRUK TE VOORKOMEN. BEWAAR ZE VOOR LATERE RAADPLEGING. HOUD U ZORGVULDIG AAN DEZE INSTRUCTIES, OM DE VEILIGHEID VAN UW KIND NIEP HET SPEL TE ZETTEN.
LET OP: VERWIJDER VOOR HET GEBRUK EVENTUELE PLASTIC ZAKKEN EN ALLE ANDERE VERPAKKINGSONDERDELEN EN GOOI ZE WEG OF HOUD ZE IN IEDER GEVAL BUITEN HET BEREIK VAN BABY'S EN KINDEREN.
VOOR MEER INFORMATIE:
Post: Pharsana N.V.
Temselaan 5
1853 Strombeek-Bever - BELGIE
Telefoon: 0032-300-82-40
Site: www.chicco.be

POLLY MAGIC
SHODAS PREDPISEM EU 2006/66/EC
He cyuHTb B cHTprnfoye

He rnaaunr

Cyxay uictska 3aippeueHa
BHIMAHME: Pocne kaxdoi cTnRPKn npOBePraTe npOuHOCTb TKAHN uB0B.
BHIMAHINE:Длinteьhoeпpe6bIbaHne TkaHnHa coINHe MOKTe Bbl-3BaTb ee oecuBeuHbAIne.
Hapyxhaaactb: 100% noln3nphoe BOJOKHO
Ha6nBka: 100% nOIIaHOpHe BOJOKHO.
YCTAHOBKA/OTKpbIBAHNEDETCCKOCTUYBUNKAДЛКOPMJIENHIA
BHIMAHHE! PnBbIOnHHeHH 3TNX DeIcTBN CneIte 3a TEm, YTO-6bl BaW pe6EHOK nDpyNE tNe HaxADNOMbC bHaeONaCHOM PACCTOHN. Y6eINTECB TOM, YTO pNt yCaTHAOBe/OTKnPbBAHN CTyBnKA eroNoDbNHex He actn He 6ByT KacatcbTena pe6eHeka
1.Пикрени TE KОКпсу ДЕТСКОТ StIынka HOжки,ΚАК ПОКAZHO Hа рсунke 1.BHIMAHIE! CoeДинEHINЯ пердИХи 3аднIX HOжЕи IMeIoT pa3HyIO FOpyM BO IV36exaHIne Ix IIpepeYtBbAHHa Npri MOHTaKHe
IpeHnHe HOKKn: yedKxuBAA HaKaTbIMn DBA 6NOKupatOpA, haxoJuaueHa KOnCuX HoKek, BCTaBte Nx B KopNyC. Yactn pNkPpenNebl npabInbNo TOnbKO, KOrJa 6NOKnpOBOUHbE KHONi BbluN i3 COOTBeTcByUOux OTBepTn HA KopNyce, n 6bln CblweH uenQ npBblQNHLHn FikCaZm.
3aDnHe HoKKn: yIepKbBaa HaKaTbIMn Dba 6IbOKnpaTopa, HaxOJaHmE cBnH3y KOpNcya, BCTaBtBe HOKKn. qactn npKpenJIe bnpAunbHO ToTbKO, KOrDa 6IbOKnPOBOUChYe KHOJKN BiUShIn N3 COOTBcTcByIOuXh TOBpeTCH Na HOKkax, N6blCbIweH eJeNOK npn BbINoHNHeHH fKkaum.(Pnc.1A)
2. pacnojokntecb no3aDi detcKoro cTylbnuka N, B3Bwncb 3a Dba 60koBbIX shapnHa, haxMITE KHONKI OKpbBaHn/3AkpbBaHn (pnc.2).OHObpeMeHHo HOrO tOBOBraJIe HOKKI detcKoro cTylbnuka, noka He pa3dacty IueNOK. IueNOK Yka3bIaEBaET Ha To, TTO cTyn 3akpenJh E OTKpbTom nonoKeHHn (Pnc.2A)
3.ПиюдиммITE синда:уderжьая син��у 3а verxpHIOУ счы,notHTIne che BVBEXdo xужelaemoi BbICOTb (Pnc.3).П配电CMTopeho shtcB yypOBHepyIpynOBAHINa CTyBUnkaNo NO bICOTE.
4. ПовернITE с поюсыpo reуларовочьх 60кobых кногok (Pnc. 4) поставку对于我们HOTь поженио.TКрьваня (Pnc.5).
5. OnyctuTe NOJIOKOTHnKN, HaxaB Ha DBe KHOJKN B INx HIXHeN YaCTn (Pnc.6)
BHIMAHIE! PdIIOKOTNHKNI DNOJXHBI BCErDa HAXOHTCB S R OPGMOTAHBJHOM NIOJXeHNi. PdIOKOTNHKNI MOYr HAOJOITCB S BEPTNKAJBHOM NIOJXeHNi TOnBJKO pRn 3aKpBbAHNIuDJIENIA.
6.3akpenite yexon Ha Kopnyce detckoro cTynbnya:
YEXJIbI
A. Hadehbe tchoxn Ha kopnyc detckoro ctylbuKna, BCTaBvB pemHn 6e3oNaCHocTN n D-6pb3bke Koblua B COOTBeTcByUOuIne neTIN (Pnc.7A)
B. BCTABBeBexHNH qExON B KOpNc CStyBnHa, npOTaHyB peMHN 6eONaChOCTn I D-06pa3HbIe KOJIbIa chepe3 COOTBeTCTByIOUne ne TJI.
C. Ecnbl Bv6oepaTeBc NcIb3O8aTb CytbNk B NOJooHemn KpcEnuca-We3eJHOA Dnla MnaDux DeTe, MOKHy OCTaHOBVt Ha CSeHeneMaRkyO proHOOMUHNyIOPOduyUki, PpOTAHyB FHKcUpyOHe
peMHn uepe3 COOTBeTCTBHyOuIe OTBepCTna (Pnc.7B).
D. IpnotHInTe NORCHbIe PEMHNI Upe3 D-OpBaIa, npOTHNHTe 3aunTIy OT COCKaIb3bIbAHnB B COOTBeTCTByUo7Iy Ipope3b IN BCTabTE BnIKN B 3actEckn (PmC.7C)
E.3aФнксypи Te npyknHny 3aцeнky (Pnc.7D)
YechJIbI dTeCKOrO CTyIbUHka IJRA KOpMJIeHNIA - MArKHeNIA, CbeMHbIe IN MOHOUIMeCA.
UTo6bI CHaTb YexoN C0 CTyNbUHka, NOBTOPnTe B o6paTHOM nOpAKeDeCTBnO INcAHHbIe B p3dEne N OHaDEBaHnIO UeXna Ha CTyNbUHK.ДЯ NaHEBaHnI HnKHeR OeXna NOBTOpTe IpoUeDpy PnBePxHeRo UeXna
BHIMAHIE: 3aŋpeuaetcnaonb3oBaT bTeckn CTynbvnk 6e3 qexha
BHIMAHIME:3anpeaetcncnnonb30BaTb Detckm CTnyk TOnbKO C BepxHMMeXLOMN MeHMeCTAmB BepxHm HnHexHm YexON
7. BCTabTe NOCTABKU DnA HOR N NOBEPHNTE ee Do yDIO6HOro nONOJENHr IcNIOJIb3OBANIA, 3a6NoKOpOBaB ee (Pnc.8). DnA NOCTABKnI ppeyCMOTpeHb dBa NPOJOXHENHr.
Teneb Tcckn CtybnIa KpMJIeHr IOTOB K yCaKbAHIO pe-6eHa:
8. 3aKpeNITe JecTkyo 3auNTy OT COCKaJIb3bIbAHnK CTOnIKy (Pnc. 9).
9.BHIMAHINE!BAKHOIJI B63OJNACHOCTNIPE6EHKA!3aIpeuzaetcYCTAHAbINBaTbHa NdETCKN CTyNbUCh KTOTNK 6e3XKeCTKo3 3auNTbOTocKoJIb3bIbAHn. Pocne 3akpennHeNra Tako 3auNTbKT O cTOnIKy CHMMAE ee 3aIpeaTeCA
Tenepb CTOnIK TOBOT K UCTaHOBKe HApTeCKN CTyNbIK DnA KOpM- leHna
PEMHN B3ONACHOCTN
BHIMAHIME:MCNOLbOBAHHe pEmHe 6e0NaCHOctn C TKAHeBbM NaXOBbIM pEMHem BnIaTcE O63aTeJIbHO rapaHTne 6e0NaCHOctn pe6EHka.
BHIMAHINE: ctoJikc am no ce6 he rapaHTnpyet 6e3oNachoe yepKJBVAHne pe6eHa. Bcerda nCpOJIb3yIte pemHn 6e3oNaCHOCTn!
Дetectский Chabukн Stochen PANTTOUCHBIM PMHMA6 6e3oNaCHOCTN
10. OTCTeRHTe peMHn 6e3oNaCHOCTn (Pnc. 10)
11. YcaJnte pe6eHka Ha detckn cTylbvnK n npncTeHnTe ero peMHn (Pnc. 11)
Pemn 6e3oNaChOCTm MoXHo perynipoBaTb B DByx NIOJKeHnX IO BBICOTE.
YCTAHOBKA / PEGYUNPOBKA CTOJINKA
12: BAXKHO JIJI E3OJNACHOCTNI PEEHEKA! 3anpeaaetcra yctahnabBtHaTeTCKNI CTyIbYHK CTONIK 6e3 JeKCTKO 3aunltbOT OCOkAJIb3bIbAHIN. Iocne 3akpenIIeHnA TAKOI 3auNTbIK CTONIKY CHMaMbte e 3anpeaaetc
CTOJIHKMOKETPERyINPOBaTbC8B4NOJIOXeHnIX.
13.BozBMnTe cToJIk Bpykn(Pnc.12)
14. BCTaBtTe NOJLOKOTHNI BHTpb HApnpBAJIOUxN IOI CTOnIKOM, HaxIMMA OJHOHBpEmHoΦIKCpuyOJIne 6OKOBle KONIKI (Pnc. 13)
15. Nepemecnte cToJNK do Tpe6yEmoro noLOXeHnI N oTnyctnte KhoNkY. B cNoyae, eCInn He npOn3oWnO ABtOMaTHueckoe cCuenPHeHne CTOnJIka C noDIOKOTNHkAmi, nepEMeuaJIte erO, nOka He pa3dAcTcY ueLokOK 6bONKOBKN. BHIMAHNE! PObepaJIte Bcerda nepeD hauJALom NcNoB3oBaHN, YTO6bl CTOnIK 6bl npAbaINbHO 3aΦHKcPobAH Na noDIOKOTNHkax. BHImaHne! CToJNK MoKET pErynipOBaTBcNo 4 yKa3aHbIM NOLOXeHnIM.
BHIMAHIE! 3aIpeaaeTcOCTABTb CTOnIK B NonoJKeHn, npN KOTOP H NaDIOKOTNIKAX BUnHb 3HaKn OAnCHTO: 3TO - HE- BE3O1AChO!
16, 7To6bI CHr8b CTOnIKN, HAnKMITE HA 60KOBbIe KHOKNI NODHIM. ECIN CTOnIKOM HE NOJIb3yOTcR, EOr MOHO NpIKPereNTb C3aDN KOPNPcy CYtNBHKa C nOMOuBdo DByX COoBTcTBvOuMx WtblpeR (Pnc. 14)
17. Detckn cyIbNHK for KOPMNEHIN OCHaUeH NODHOCm dNr CTOnIKA. OH kPepnTcB/BydBnurAetC n3 CTOnIKA npu Bo3dEChTBnHa hakIMMOH mExAHm3 (PMc. 15)
BHIMAHINE! Bcerda npobepaite naedxHocb kpePlenna noDnoca Ha CTOniKe BO BVpeM erO nCOnIb3OBaHnA
- EcnI pe6eHok pInnHMAaT NIIu HEnoCpeCTBeHNO 3a CTONOM C poNDteJIAM, NOHOC MOKeT NcONb3OBAtBcKa KAc YdObHi noDHC; «PneDoXpAHauIOsi» cKaTeptb (pnc.16)
PErIINPOBKA CTyIbUHKA IO BbICOTE
DcKTHC NCTyBnHK MOXeTpeYeyNIPOBAtbCa NO BbICote Ha 6 yPOBbHx. 19. TTo6bl NoNDaTb CnEhBe: yeJepKbBa nCnHky 3a BepXHIOu cAcb, ToNHTHe ee BEPxO JOxehaEMo BbCtOb. (Prc. 17)
20. Tto6bI onyCTnTb cnDEHbe: HaxMMTE OJHOBpeMeHHO DBe 6OKOBbie KhoKN, ONyCTnTe cnDEHbe Do JxekaEMo BbKOTb (Pnc.18)
BHIMAHHE! PeRyIINPOBka BbICOTbI DoJIxHa IpiOBoDITbc8e3 pe6eHKa Ha CStyIbYnKe.
PERUINPOBKA noIooJenra- n3 detckoro cTynbUnka B Kpecnue-We3noHr.
IpeDyCMTopeHbI TpN NOLOKeHn HaKLOHa CnHKn CnDEHn, KOTOpBpe N03BOJNtE OcNtOB3ObAT B KaeeCTBe DTeCKO CTUbHnA IaKopMHeHn/DeTcKO TcUYHn (6e3 CTOniHa) n KpeCIna-ue3HOHa; IMeETCA BO3MOXHOCT BblOpTa 6pa3hBx BbICOT:
IPOLOXEHNE: DETCKN CTYbUHK DnI KOPMLEHNA/DETCKN CTYbUHK (6e3 cTOnIIKA) nCtONb3yeTc C 6-MecraHoro B03pAcTa DETCKN cTcybUHK dNk COPMLEHNA n C 12 MeCAEb KAK DETCKN cTcybUHK (6e3 cTOnIIKA). (pnc. 19; pnc. 20).
ПОЛОЖЕНUE: KPECJIJIUE-ULE3JOHГ: ИСПONьЗУЕТС рokedденяdo
ДостMuнения 6 МecRUHORO BO3pacrВа КЧeчспua-ULE3NoHrA
(pmc.21)
21. TtO6bI oTpErylnpOBaTb HauKHOH CnDEHnA, HauKMnTe HaBepXHOO KONHkY 3caDn cINHKn, HauKHOHc TnEHNo Do JxenaEMoR ONoXeHn HOnytCteero, CnDEHn aBTOMaTHueckn 3abLOKpyETc, Pa3dactc TaenQOK BInIOHNHnHO CuenHnEHn (Prc. 21a)
3Ta onepaunMOJET BbIPOJIHrTcB TaKJx, KOrDa pe6eHOK cnDHT HaTeTCKOM CTyNbUKe, HO emy HE COBCem yOo6HO.
IOCTABKA JIJA HOF
DeTCKM CTyNbYHK DnI KOPMNeHnO OCHaUeH NODCTaBKO DnI HOR, perYNiPyEMoN NO 2NOLOXEHnIM HAKNoHa, DnI NcNtOB3OBaHnIeDcTKOrO CTyNbYHKnA DnI KOPMNeHn/DEcTKOro CTyNbYHKa (6e3 CTOIINA) AND KpeCNIuza-We3NoHra; NaXmITE Ha Dbe 6OKOBBe KNOHKn peTyrNpOBKn HAKNOHte NODCTaBKY DnI HOR B XeNaEMO NONOKeHne (Pnc.22)
IODCTABKAДЯHOR(CTYNHÉ)
TeTCKM CTyIbYnK DnI KOPMneHnO CHaIeH NIOCTaBKOI DnI HOr (ctynHe) c 3 peryInpyeMbIM nNOJKeHnIM BvICOTbl
22.ИЗ ИСПОЛБУЕМО РОLOЖЕНИ NOВЕРНITE ee Do pa36ЮКИРOBKn (Pnc.23)
23. BbInbTe N BHObB BCTaBbTe ee Ha XeJenaemyu BbICOTy (Pnc. 24)
24.Повернite ee B HOBOE ponoJKeHne n 3a6bOKpyuTe.
KOJIeCA
- 3aДнe HoxKn DeTcKOrO CTyIbYnKa Дla KoprMneHnry Polly Magic Cha6xHeBk Kolecamn Dna O6nerYeHnra nepemeSeHnna (Pnc.25)
BHIMAHIE!YCTaHbAJIeIeNIDEne NcknOHTenBHO Ha rOp3HO-talbHyIO u cToTHyBI NOBEXpOHCTb. 3AnpeaTeCt yTaHbAMIBaT bTeCKNI CTbNIO6NJ3OCTNJeLcETNHU INI cTYneHEK.
KOP3mHA
DeTcKmCTyIbNHk dIJI KOpMNEHr Polly Magic oChaIeH yObo6HOI KOp3HNOI dIBEeI. YTObI pNcooEINHTbe e K KopnyC, DeI-CTByIe cNeDyUOIM 6Oba3OM:
- BCTaBbTe MeTaNJIHcEeCKne HAcKOHeuNkM KOp3NHiB BVHTpb COOTBcETBlyUOxix Na3OB Ha KOpTyCe DeTcKOrO CTyIbUmka (PmC. 26);
27.ПOTЯНITE COOTBETCTBYUŞIIe 3aCTeЖКи HaIлпУчкax BOKpyr Me- taIлИнecкои nepeKlaДины, haxOДашеясьнMuXe CUndHЯ.(pnc.27).
28.3aKpeNITe 60koBbIe NtIN KOp3HbI BHyTpN COOTBeTCTByOuixx OTBepCTM, KaK NpKa3AHO Ha pncyHke 27 A.
- Kop3nHa MoKET NcIOnIb3OBaTbCЯДЯХaHEnHb Beuéi (pMC. 27B).
- Yto6bI CHrTb ee co CTyla,doCTaTOHOp paCtErHyTB IINnyuKc MeTaJIInHECKO Tpy6Kn, BblTaUHTb DBe 60KObBle PeTnI IN 3OTBepCTnI, N HaxKaB No COBTBCTBByUOe KNHONKn, BblTaUHTb MeTAJIInueCeNKHe HAOJehNkN IN3 PAOB.
3AKPbIBAHNE
BHIMAHHE! PnBbIOnHHeHH 3TNX DeIcTBN CneIte 3a TeM, Tc0-6BbAaBpupeBEOHK nDpyNE tAnHOJINmBbHa6EzoNaChOM paccToHnn. Y6eJIntecB TOM, TcO npn yctAHOBKe/OTKpbBuHAnC TcyBnuKa eroNoBnxHHe bactNe He 6ydt KacatbCe TaTe pe6eHka.
BHIMAHIRE! Pered 3akpbvbanHem CTynbHnka CHMNTE CTONIK, pnpCTerHyB er0 3aTeM K Kopnyuc y NocpeDCTBOM DByX COOTBETCTBouxN xTbIpye.
- YctaHOBnTE CnHnKy I NOCTaBky DnI Hor B BEptNKaIbHoe NoIOKHe H NIOHNMIte NOIOKOtNHKn B BEPTKaNbHoe NOIOKeHne, HAKBa HA KHOKN, paCNOIOKeHHe B Ha INXnIXHe YaCTn, NOKa He paJAdTcA yIeNOK bOKNIOpOBKn (Pnc. 28).
- OnyCTHTE CUIDHeBé, HxKAB ODHOBPEMENHO DBE 6OKOBBE KHOPIK; eCNI NIMeTc TCOJIHa, NOIDHMITEe BvBepTx KA, YTObBi OHa npI-nerAcaN KHNKHeJ qaTcIcDhen (pMc.29)
- HaKMnte Ha KhoKNB 乙eHTpe 60KOBbIX WaHnPOB IN B 3TO Jx BePMA HORO npi6Nkxtb HOKKn DcTcKO StyNBnKa (Pnc.30), noka He pa3dactc ⅢeYOK. ⅢeYOK yKa3bBAet Ha To, YTO cTyNBn KaKpenHeB 3aKpBTOM NIOJoxEHNI.
BHHMAHHE! Bcerda y6eJdaiTeCb B pOJIHOM 3aKpbITn CTyIbUHaKa (pnc.31)
IICIOJIb3OBAHNE IITPOBOI IPEKJIADINHBI IPIEDUYIPEKDEHIE
BHIMAHINE! HNKoIa He NcNoJIb3yIe IrgPoByIO nepeKlaDInHy B KaueCTBe pyKoTKn DnIpeMeSeHnI.
He npivB3bIaIe TnHybI dIy yDInHeHn CnCTm KpeIeHn BWCJHX INrpyuweK HA INrpoOB npeKnAdHne H 3aB83bIaIe Y3bl/NeTIN:3TO MOKeT cNPOBOUcPOBaT bCnyaHoe O- paoBaOH NCKoJIb3xUx y3IOB, KOtOble OnaChb IyDuHnEHH. IVcnB3OBAHHe INrpyuK BCERda DOnkHO BbINOHNrTaCnOg PnncMOTPOM B3poclNorO.
- PergylnpO nIopBepeRte COsTOrHHe m3Hoca n3dEnn a HAIuHne BO3MOKbHbIX nI3NOMB. B cIyuee NOBpeJcEN He nCNoJIb3yTe nIpyuKx uXpAHIte ee B HE doCTynHOM fIraI deten MeCTe.
BHIMAHIE! Npeed hauajom Icnojbl3oBaHnaI CHMnITE u ydaI nIeTnKOBIIe MeeKIN udpTyne KOMIOHeHTbI, He BXOJIaIe H B COCTAB INpyuKIN (HaNPmEe, IhUnpKIN, KpeJeXHbIe 3JeMeHtBn np.) u xpaHnTE IN B HE DOCTYNHOM DIAJ DeTe MeCte.

COOTBETCTBNE DnPEKTHUBE EU 2006/66/EC
He cyuunb B ceHtpnphiye

He nlaunb

Cyxay uictska 3aippeueHa
Hapyxhna qactb: 100% noIIm3phiHoe BOLOKHO;Ha6uBka 100% noIIn3phiHoe BOLOKHO.
BbIPOINHJIe CTNPKY B TEENNOB BoJe (MAKcIMyM 30°); He OTe6EnbAaTHe, He CyuWite B MaSInne C 6apab6aHOM, He rTaJbTe yTOrOm, He OTdaBaHTe B XHMUcNTCKY.
UctaHOBka irpOBoN nepeKlaDInHbI
1.3aФИСКИРУЕ ИТROPOBYU PEKNEKIAIHNY; pIOTRAHITE NaI NOJLOKOTN.KAMIM DBA 6OkoBbIX KPIOKA PEKNEKIAIHNbI Do ee 6JIOKUPOBK B XekaENMO MONIOXeHEN (pMC, A, AA)
2. 3akpenite npruykHa nepeknadnne c nomoibno peTeb, pa-noloxehhix Ha naHEni, kak nokazao Hn pucnyke B.
3. IrgpoBaJnAnHeB coCTOHT n3cMeHNoI INpyuPkN uBcAaUINx INpyU-keK, KOtOpBe ToXe MOxHO MeHAtb, 6NaTo4ap3aCteKkAM HaIIny-kaK, IMEOUIMcK kA h An HaneH, taK nHa INpyuPkE (pnc.BB).
4. Irgpoban naheb mojet 6bIb n3Bleueha n paCIOJoxeHa h CTOniKe Ira pa3BHeuHn pe6BeHa; e MoKHO yD6HO 3aФmKCuPoBaT ha NOBEXHcN c NOMOsbIO pRNCCKs.(Pmc.C).
5. Irpobaa naheb noctabnaeTc B KOMPnKeTc pa3hblm nIpyuKaMa, peaHpyIOoHMa H Ka cAahne N oNDAOooMMBvKn (pa3NnuHbIeB B 3aBNCUMOCTN OT npUyueK), dnn OZ3aTeNbHorO, cnXOBOro n 3pntbHoro pBaNTMpe6eHka (PcM.D)
BHHMAHNE! BHytrpno ndBeChOnn ngpyuKc nHaDnncbIy "PUSH ME" (B 3BaBcUcMOCNTO tnyPruK: KOPOBN XBOCT NIN BNCsiAur pyuKsCA mMaHehKmK NTOM), pacNoLoKeHHO H NaRPOB NoHaEN, mMeOTcra MNHNAToPOrhBe 6aTaapeKKn, KOtOpBe HeNb3aAMeHntb.
ДЛЯ BOJIEI NOДРОБΗΝΗΦΟΡΑΙΝΙΝ:
Пουта: Artsana Spa
Servizio Clienti (cnyx6a noDpekkk kJneHToB)
(1) a_3 = 2
a1 = 2,a2 = - 4
JL 1 J5 i0eio gwh 1s jw 1 eao Joei w 1 aii .
jll Jlalb0oJgWgl g wgl sIywn 2eao Jlaeiwl pae :aai
ii. i. ii.
gill jai jia jia jia jia jia jia jia jia jia jia jia jia jia jia jia jia jia jia jia jia jia jia jia jia jia jia jia jia jia jia jia jia jia jia jia jia jia
Lai g Lai g iu w u w l b a d eulw gao
g Caiyall lall IaBai gao lao Looic lois Jolal dojai yagiy
aaii iaii jybu ic uisig ayla sic aoj>21 Jybl bnu ic Jaoell g:ajll
193 5k2jw81 200 200 200 200 200 200 200 200 200 200 200 200 200 200 200 200 200 200 200 200 200 200 200 200 200 20
gaijoeogssSo alljgeo! goo! ciis 1e joiin8n eo Jiaeiui por aaii . aiil
100 200 300 400 500 600 700 800 900 1000
Jaaa aagaae aagaae gagaaagaaagaaagaaagaaagaaagaaagaaagaaagaaagaaagaaagaaagaaagaaagaaagaaagaaagaaagaaagaaagaaagaaagaaagaaagaaagaaagaaagaaagaaagaaagaaagaaagaaagaaagaaagaaagaaagaaagaaagaaagaaagaaagaaagaaagaaagaaagaaagaaagaaagaaa
12+1y-1+6:wwS/2a0s alloe
中
a a a a a a a a a a a a a a a a a a a a a a a a a a a a a a a a a a a a a a a a a a
Lolalgl Lluyj poal aolwsl slzgl, liz golgolgolpaoe .
gaiySll gSLoicLsIg. aie wll Jalll gSLoic ySll jay
aIqaii pi ci all yjci liJig logiao
pucu g u 1g Lai gao hau klaa yuyySll gao gao: aai i
gaiyssll no aayao jle Jia bai joi yj pae
aLc glllglgllg
aaglln jyjg Jabno j58 gajlgl yjll Jlaeilpoc
wSll aI ic IaIe iI alebll aI aI aI sI g wSg psc
jglgl jda
Lggi yjki aillai j03 gai jll Jaeiw pcc
ggliln ggljglal jglgglgglgglgglgglgglg
glll 100000000000000000000000000000
gabal albs wicil dlig uulgl gagall g aill gao
Jalall logaw g jgill gaiySll aay aaoa aai yaa
L 是 AQ 中点 OQ = 2 OQ = 1
aLi lo M
[\therefore \cos \theta = \frac{b}{c}]
jLo8i jOjclLio.o
jolal no eginao Jusu wuluo loy.P
D L<1Lc.Ld.L.Q
Plebji aieoo. R
plehJIi iinu cuiu uigai S
plooljioo ooloo
山JU JU JU U
ploihil aioos hbi V
pl81 simo .W
a. 1,2,3 1,2,4 .
a131yJyJyJyJyJyJy
A = = 2AC
aolol 11
joejiueo.BB
aLlwlJol0. CC
aLw.DD
aillll g blll luee ie
a aal 1 1 1 1 1 1 1 1 1
· = | | · | |
g slll aolnoeclll jolal no ae bbl alwgl g
palll gaiy jaiy jay Slln yjaiy jaiy jaiy jaiy jaiy jaiy jaiy jaiy jaiy jaiy
gclg 10 gJ Jnnnll jgsill yssll aiee
wSLell
slll a,b,poactll jolal all no eobai ciwlall no agcnil lslj 1a bui pi
Lilgi a jio gj Jsi jll lc selwi jbi jgo Jloei w psc
Lgaiy iinil jao acgiail fjz81 aaiy gai slal aiwso all
i
aI
10
wJyJ no acgill slj81 ails JLoJg Lw81 JJJJ JpJ
SLSs21 Ssllg aic 5c! sddg dssdell 81 aes
g jll yll loc a lclc lcc
Sall 100000000000000000000000000000000000000
jimieill si
aill g i jlll allo go no neall aiin oclio
aIcIg cIbIgI gIiIg IiIg IiIg


aogao 0oLw y oStll ggy aai g Jusac Ls plall:
.
jglg jgl g jgl g a glg b a glg a glg a glg a glg a
.
100% :j:3
jwJg:100%:
:JJLaeiWJAIJIaJIb
gjll
Jablal 9, Jablal 10, alqol alqol alqol alqol alqol alqol alqol alqol alqol alqol alqol alqol alqol alqol alqol alqol alqol alqol alqol alqol alqol alqol alqol alqol alqol alqol alqol alqol alqol alqol alqol alqol alqol alqol
Jeee
1.1 Lsii jg cagog gLo5 gaijll gaiyLg plaal 1
i i 1g i g iie i ie iie iie iie iie iie iie iie iie iie iie iie iie
aalac Jlslbai gao aJlaol
1c0g2g11p531ch1111j1gc1b111a1oc a1oL81 gssllp
Jcuii 15g i0jxj 11 jaii Jg Lglj 1 g Jauio 15i a
gaa j 2019 aaii Ic oaggl wgl l 11111111111
C. 无论正整数, ( p - k) ( p^2 - kp^2) = p^2 - 4k .
100 100
J5i14 4g0001 jiej iplz81 g lgll21 g Jolgo J5i: aill o
eagplgglcoggglgglgglgglg
(1A J S i l l)
j j l 1000000000000000000000000000000000000000000000
JaeJIe JieJieLoa oocLue g.oagj jog .(2JS)
gaiyssll aaiyj yaiy jhui 6
an + 1 = 2( an + 1) 2 + 12( a_n + 1)
Lal1gJol8aOj-1JlloaLgoglaIeIeJIyIg
(7° JSLJ) aolilgjx
LolglojdojI Jldg jglal
aLg 1
Jsc Jg jw JIabu sljuiu aao aegn plsiui w aic.
llig aagaiilalil (slo ggeiailg sall iill
.78 J5
J 1
.17C J5J11) 1
(7D J5)JaiJIiJI bJIJIJIJIJIJIJIJIJIJIJIJIJIJI
1gUw gUw uS auiuuiuiuuiuuiuuiuui
1 1111111111111111
J 11
gell gll gll hiai iil jil jil jil
yj 1iLac jg Lglgi gai yjwSll Jlceiw psc aaiii
gge gge gge gge gge gge gge gge gge gge gge gge gge gge gge gge gge gge gge gge gge gge gge gge gge gge gge gge gge gge gge gge gge gge gge gge gge gge gge gge gge gge gge
slesus
aegg jn j 5j 5j 4s3 g piaai iinu uui jlc Jell.7
Aeog p 8 (JcJI) auiip Lg Jg JlaW
2
9.15.15.15.15.15.15.15.15.15.15.15.15.15.15.15.15.15.15.15.15.15.15.15.15.15.15.15.15.15.15.15.15.15.15 30
aill lgllll 12j2jLd lcl hiai i 10
Lg : S loj 1 20
y
Jlabe81 g JlalbIg 2g jll oolii 21 bgy 1y 1y 21 o42 o42 o42 lill sic
gaii j 1000
a 15 a5 15 15 15 15 15 15 15 15 15 15 15 15
jibbI
11Jg. jIe2I aLoc g e 11J pIeBll aIiJ allj wai alqweil sic:
i 1
Jg j gag a J 121 10000000000000000000000000000000000000
Jaa 1521 Jc 0g0g111111111111111111
(28 Jsii) 1051 cuiiui iiaaba eLoaw gio Ejai
Jc Jgdl 35 Jc cagj jia jie bieniJe aai gao jaoa .32
1 1 1 1 1 1 1 1 1 1 1 1 1 1 1 1 1 1 1 1 1 1 1 1 1 1 1 1
(29 L<JJ)
gagj jy g aaii1 Jalal 1jS y o g aogglj jzJc
ELoaw g.30J (S) 11
- b1c2 与 b2c1 的差为( )
(31J5J1) aaleo gssSll aai j o lai sLi :
ailll lalj Jol Jlae
m = 311
Lilgi Jaillglis wJol Jolo Jaooiip aaii
pucg wol Jolc aell lwl lll pblj jglbj jlae!pcc
a>g0 g 15g j u 25c o. 190 a d a e 19g si a lac 28:ogc/oac g iin
jai jia 1000000000000000000000000000000000000000000
aell
gaiyjie puc jog aelwJngiwl gao Jn Jalgiu Jsiig gaiw
Jc IaIg 1g aIgI JIqaiwI pAc ggiy Jgaiy aiJg
JLabj81 Jglio
aels g a s wll w581 j o yalil g allj! jaoi Jlaei w1 Jia :
Jollll. lgl 111111111111111111111111111
Jlabe81 Jglio 0e Iue:lgai g (yj) y j. Cunill alaeinll

EU 2006/66/EC L21
g jlll j. aelll lglc g g llllllllg gghlll alll
jLpJJI JLaIg Lgol JdJL JGIO Oo ooiog Lgogai oolg
JgLgai jyj 5g aiao ayai S gao yai jy 2 j j j jaiai
aIe aIg aIaI aIaI aIaI aIaI aIaI aIaI aIaI aIaI aIaI aIaI aIaI aIaI aIaI aIaI aIaI aIaI aIaI aIaI aIaI aIaI aIaI aIaI aIaI aIaI aIaI aIaII aIaII
duu duu uuuu uuuu uuuu uuuuuuuuuuuuuuuuuuuuuuuuuuuuuuuuuuuuuuuuuuuuuuuuuuuuuuuuuuuuuuuuuuuuuuuuuuuuuuuuuuuuuuuuuuuuuuuuuuuuuuuuuuuuuuuuuuuuuuuuuuuuuuuuuuuuuuuuuuuuuuuuuuuuuuuuuuuuuuuuuUU
aLggiJl aHbJll alll Hg.Cd.Pb JLaSll jorJ!
在 Rt ABD 中:
aill lglgeio sgljil sic clllal palsu jgmo llgmal
jall aloc aggi jgail laloc gwiagdiag:dlig Igeo3jc algill
g jll g lgl a1g a1g 11
a aaii iie 11111111
alai j! alalal Igio gSii gll alglggi dloc JgwiJgwni
Jd JwJg aIg jyI gjyI yI yI yI yI yI yI yI yI yI yI yI yI yI yI yI yI yI yI yI yI yI yI yI yI yI yI yI yI yI
gssll gssii lalaii gaaai oosai aokly aaleil g alal all clogell joo
g j g j j j j j j j j j j j j j j j j
aolwJ