
GBLS 7000 - Blower GUDE - Free user manual and instructions
Find the device manual for free GBLS 7000 GUDE in PDF.


| Product type | Electric blower |
| Brand | Güde |
| Model | GBLS 7000 |
| Power supply | Mains 230 V / 50 Hz |
| Rated power | 700 W |
| Max air flow | 800 m³/h |
| Max air speed | 250 km/h |
| Weight | 3.5 kg |
| Dimensions (L x W x H) | 95 x 25 x 35 cm |
| Sound level | 96 dB(A) |
| Vibration level | 2.5 m/s² |
| Protection class | Class II (double insulation) |
| Cable length | 10 m |
| Main functions | Blowing, variable speed control |
| Included accessories | Blow tube, concentration nozzle |
| Safety | Safety lock, overheat protection |
| Maintenance and cleaning | Clean air grilles regularly, use a damp cloth |
| Warranty | 2 years |
| Repairability | Spare parts available from the manufacturer |
| Usage | Outdoor, for leaves and light debris |
Frequently Asked Questions - GBLS 7000 GUDE
User questions about GBLS 7000 GUDE
0 question about this device. Answer the ones you know or ask your own.
Ask a new question about this device
Download the instructions for your Blower in PDF format for free! Find your manual GBLS 7000 - GUDE and take your electronic device back in hand. On this page are published all the documents necessary for the use of your device. GBLS 7000 by GUDE.
USER MANUAL GBLS 7000 GUDE
natural_image
Blue and black industrial air blower with a white cover (no visible text or symbols)GBLS 7000
94371


ENGLISH Please read the instructions carefully before starting the machine.
natural_image
Assorted cleaning products including black pipes, a blue handheld air purifier, and a white bottle (no text or symbols visible)| DE | Montage | SI | Montaža |
| GB | Assembly | HR | Montaža |
| FR | Montage | BG | Монтаж |
| IT | Montaggio | RO | Montaj |
| NL | Montage | BA | Montaža |
| CZ | Montáž | ||
| SK | Montáž | ||
| HU | Szerelés |
| DE | Betrieb | SI | Delovanje |
| GB | Operation | HR | Rad |
| FR | Fonctionnement | BG | Pábota |
| IT | Esercizio | RO | Funcționare |
| NL | Gebruik | BA | Rad |
| CZ | Provoz | ||
| SK | Prevádzka | ||
| HU | Üzemeltetés |
| DE | Betrieb | SI | Delovanje |
| GB | Operation | HR | Rad |
| FR | Fonctionnement | BG | Pábota |
| IT | Esercizio | RO | Functionare |
| NL | Gebruik | BA | Rad |
| CZ | Provoz | ||
| SK | Prevádzka | ||
| HU | Üzemeltetés |
| DE | Transport / Lagerung | SI | Transport / Shranjevanje |
| GB | Transport / storage | HR | Prijevoz / Uskladištenje |
| FR | Transport / Stockage | BG | Транспортиране / Съхранение |
| IT | Trasporto / Stoccaggio | RO | Transport / Depozitare |
| NL | Transport / Bewaring | BA | Prevoz / Uskladištenje |
| CZ | Přeprava / Uložení | ||
| SK | Transport / Uloženie | ||
| HU | Szállítás / Tárolás |




natural_image
Close-up of a blue industrial machine component with visible internal components and a numbered label '18' (no text or symbols on the device itself)DE Montage
GB Assembly
FR Montage
IT Montaggio
NL Montage
CZ Montáž
SK Montáž
HU Szerelés
SI Montaža
HR Montaža
BG Монтаж
RO Montaj
BA Montaža

GB - When suction of the collection bag and the angle must always be mounted!
natural_image
Three black cylindrical objects with curved ends, each showing a transformation or assembly process (no text or symbols visible)
natural_image
Close-up of a white electric blower with a black handle and green checkmark indicating inspection (no text or symbols)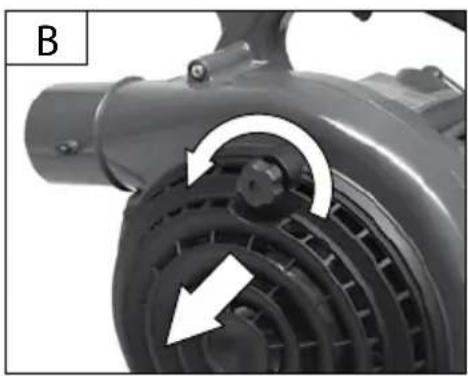
natural_image
Close-up of a mechanical component with a circular arrow indicating rotational motion (no text or symbols visible)
natural_image
Mechanical assembly diagram showing a pipe being inserted into a component, with an inset close-up of a device (no text or symbols visible)
DE Montage
GB Assembly
FR Montage
IT Montaggio
NL Montage
CZ Montáž
SK Montáž
HU Szerelés
SI Montaža
HR Montaža
BG Монтаж
RO Montaj
BA Montaža
natural_image
Illustration of a hairbrush with a green checkmark indicating a process, accompanied by decorative leaf patterns (no text or symbols)
natural_image
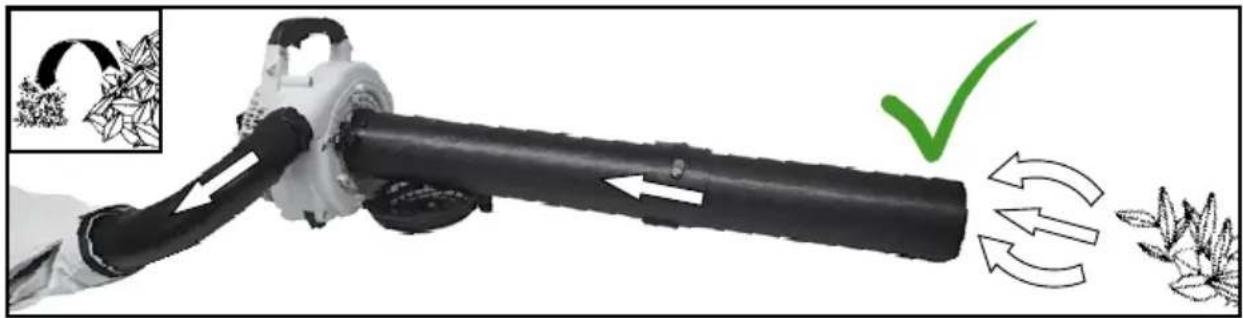
Illustration of a black manual blower with green checkmark indicating leaf litter and rotation arrows (no text or symbols)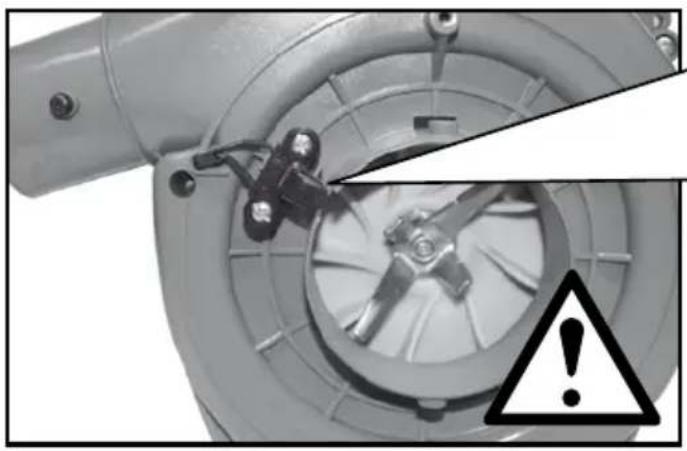
natural_image
Close-up of a mechanical component with warning symbol (no text or labels)GB - The micro-switch must be actuated by the cover either the suction pipe or in the operating mode „bubbles“.
GB Fuel tank filling
FR Ravitaillement
IT Rabbocco
NL Tanken
CZ Tankování
SK Tankovanie
HU Tankolás
SI Dolivanje goriva
HR Dopunjavanje goriva
BG Зареждане
RO Alimentarea cu combustibil
BA Dopunjavanje goriva
2



1



natural_image
Close-up of a mechanical component with a circular component and directional arrow overlay (no visible text or symbols)2

3

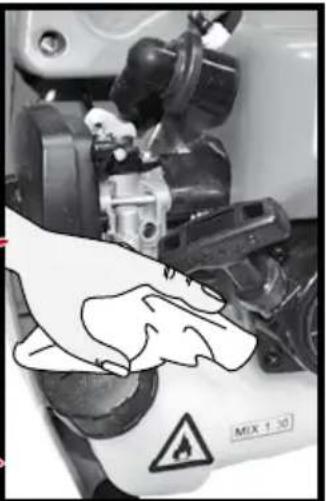
natural_image
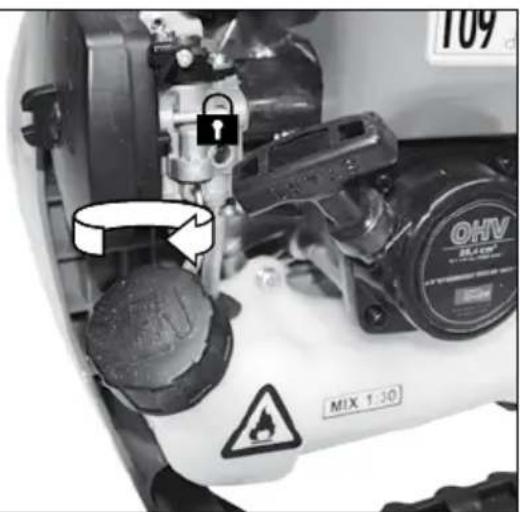
Close-up of a hand adjusting a mechanical component with warning symbol (no readable text or labels)

 | DE | Betrieb | SI | Delovanje |
| GB | Operation | HR | Rad | |
| FR | Fonctionnement | BG | Pábota | |
| IT | Esercizio | RO | Functionare | |
| NL | Gebruik | BA | Rad | |
| CZ | Provoz | |||
| SK | Prevádzka | |||
| HU | Üzemeltetés |


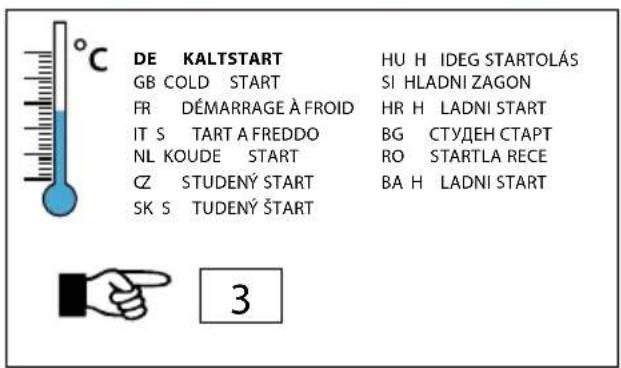
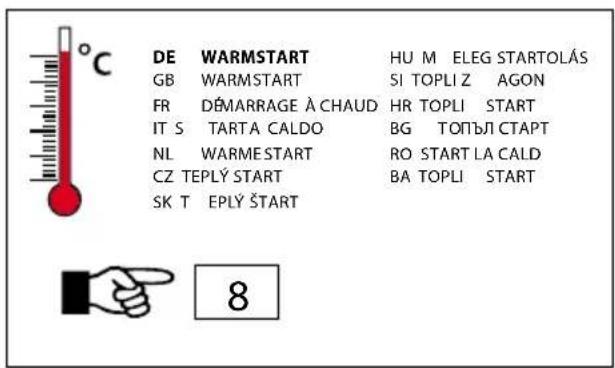

DE Betrieb
SI Delovanje
GB Operation
HR Rad
FR Fonctionnement
BG Работа
IT Esercizio
RO Functionare
NL Gebruik
BA Rad
CZ Provoz
SK Prevádzka
HU Üzemeltetés





4
- klack
2.

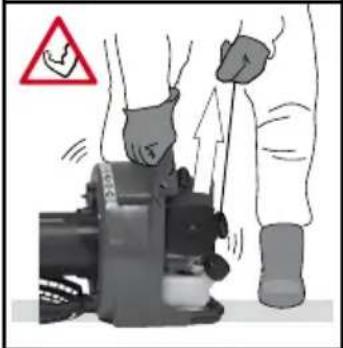
GB Pull firmly the starting rope approx. 3-5 times till the first noise of running is evident.
natural_image
Close-up of mechanical components with a downward arrow and a small symbol (no readable text or labels)6
START
7



GB Start-up of warm engine. Start-up of cool engine.
natural_image
Exterior view of a portable electronic device with a mesh basket and handle (no visible text or symbols)GB If the engine does not start after first 2-3 attempts, repeat completely the cold start-up procedure.


natural_image
Simple line drawing of a sun and wind turbine blade with blades, no text or symbols present| 4 | DE Reinigung / Wartung | SI Čiščenje / Vzdrževanje |
| GB Cleaning / Maintenance | HR Čiščenje / Održavanje | |
| FR Nettoyage / Entretien | BG Чистене / Поддръжка | |
| IT Pulizia / Manutenzione | RO Curățare / Întreținere | |
| NL Schoonmaken / Onderhoud | BA Čiščenje / Održavanje | |
| CZ Čištění / Údržba | ||
| SK Čistenie / Údrzba | ||
| HU Tisztítás / Karbantartás |




natural_image
Illustration of a spark plug and its wooden brush, showing the process from pinning to assembly (no text or symbols)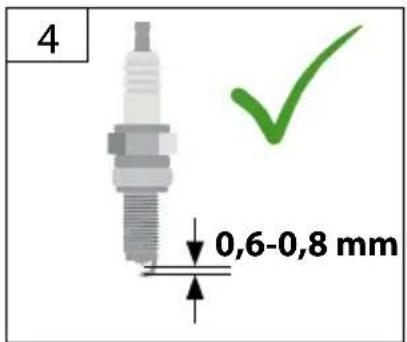
GB Cleaning / Maintenance
FR Nettoyage / Entretien
natural_image
Close-up of a mechanical component with a curved arrow indicating rotation (no visible text or symbols)8
natural_image
Close-up of a mechanical assembly with a white arrow indicating a component (no visible text or symbols)
natural_image
Close-up of a mechanical device with internal components and a close-up of a small electronic component (no visible text or symbols)

Technical Data Petrol Leaf Blower GBLS 7000
Art. No....94371
Engine....2-Takt OHV

Motor output....0,7 kW/1,1 PS ......bei max. 7500 min ^-1

Contents 25,4 ccm

Idle speed....2800 min ^-1

Air velocity......ca. 180 km/h
Leaf bag capacity.....ca. 50 l

tank capacity/Fuel....0,6 l/1:30

Weight netto (Blower/Suction fan)......4,6/5,6 kg
Sound power level....109 db


Read and understand the operating instructions before using the appliance. Abide by all the safety
measures stated in the service manual. Act responsibly toward third parties.
In case of any doubts about connection and operation refer please to our customer center
Specified Conditions Of Use
The leaf blower has been designed to blow or vacuum dry leaves.
Do not use this product in any other way as stated for normal use. Respecting technical data and safety precautions. Not observing general regulations in force and instructions from this manual does not make the manufacturer liable for damages.
Power tool description
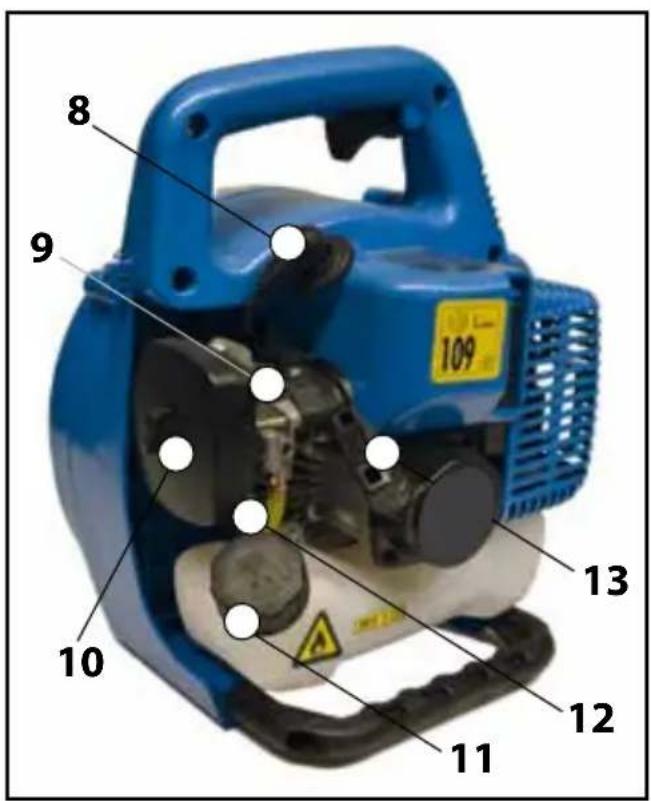
1 | Engine unit
2 | Exhaust tube, 2-tlg.
3 | Suction tube, 2-tlg.
4 | Connection angle Leaf collection bag
5 | Leaf collection bag
6 | Mixing bottle
7 | Spark plug wrench
8 | Spark plug
9 | Choke
10 | Air filter
11 | Fuel tank
12 | Primer pump
13 | Bowden starter
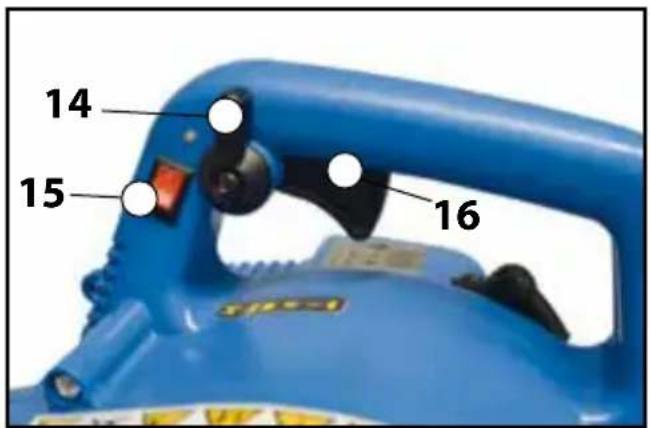
14 | Lever for detecting gas
15 | ON/OFF switch
16 | throttle-lever
17 | Screw Protective grille mounting
18 | Microswitch
Safety instructions
WARNING! WARNING! Electric shock! There is a risk of an injury caused by electric shock!
To operate the leaf vacuum in a safe way, all instructions and information on safety, installation and operation in the Operating Instructions must strictly be followed. All persons operating or servicing the appliance must be familiar with the Operating Instructions and know the potential dangers. It is necessary to prevent access to children, ill and infirm persons. Children must be carefully supervised if near machines. Comply with the applicable regional and local accident prevention regulations. The same applies to all occupational safety and health provisions.
The manufacturer cannot be held liable in case of an unauthorised change on the appliance resulting to damage.
WARNING! Basic preventive measures must always be taken when using tooling and forming machines. Please note all the advice and cautions in the additional safety instructions.
-
Pay attention to conditions of the environment you are working in. Once the engine starts running, toxic gases are produced. These gases may be odourless and invisible. Therefore, never work with the appliance in closed or poorly ventilated areas. Ensure adequate lighting when working. Provide a safe posture, especially in wet, snowy, icy conditions, on slopes, on an uneven terrain.
-
Do not let any unauthorised persons stay near the machine. Prevent unauthorised persons from contact with the tools.
Keep bystanders and animals in a safe distance from the garden appliance. Thrown-off stones may lead to injuries.
Never blow any dirt/leaves in the direction of persons or animals.
-
Ensure safe storage of the tools. Tools not being used must be stored in a dry place, elevated or otherwise inaccessible if possible.
-
Use the appropriate tools and appliances for your work at all times. Do not use e.g. any small tools or accessories for works that actually need to be performed with heavy tools/accessories. Use the tools and appliances for purposes for which they have been designed.
-
Ensure adequate clothing. Clothing must be purposeful and must not prevent from working. Do not wear any scarves, chains or other loosely hanging accessories. Long hair should be tied up.
-
Use hearing protection, respiratory protection, sight protection and sturdy shoes. Use personal protective equipment against noise, e.g. hearing protection, dust mask, safety glasses and shoes with a non-slip sole.
- Transport of leaves from the vacuum. Secure the appliance against turnover, damage and fuel leakage.
- Remove the socket wrench, etc. All wrenches, etc. must be removed before switching the leaf blower on.
- Stay concentrated all the time. Pay attention to what you are doing. Use common sense. Do not use any power tools when you are tired. You must not work with the leaf vacuum when you are under the influence of alcohol, drugs or pharmaceuticals that could reduce your ability to respond.
Caution! WARNING!
Petrol is highly flammable
- Store the fuel only in containers specifically approved for that purpose, in a safe place, away from heat and open fire.
- Do not smoke when handling fuel.
- Refuel outdoors only - use either the fuel bottle included or a funnel.
- Add fuel before starting the engine. The fuel tank cap must not be opened or engine fuel filled when the engine is running or is still hot.
-
Do not start the appliance in the place of refuelling as there could be petrol residues or vapours that could cause fire.
-
Engine fuel filling Always turn off the engine before refuelling. Open the fuel tank cap very carefully so that excessive pressure could slowly be eliminated and no fuel squirts out. High temperatures on the housing body are produced when working with the leaf vacuum. Therefore, let the vacuum cool down before refuelling. Otherwise, fuel could get ignited and cause severe burns. When refuelling, make sure you do not refuel too much. If the liquid has leaked outside the tank, it must be immediately removed and the appliance cleaned. After refuelling, make sure the screw cap is fitted correctly so that it is not released as a result of vibrations during your work.
- Time of use and breaks. A longer use of a motor unit can lead to poor circulation of blood in hands due to vibrations. However, you can extend the time of use with suitable gloves or regular breaks. Please keep in mind that personal susceptibility to poor circulation of blood, low outside temperatures or great clasp forces during work reduce the time of use.
- Pay attention to parts if not damaged. Check the appliance before using it. Are any parts damaged? As
for slight damage, ask yourself whether the appliance is going to work perfectly and safely. Ensure correct alignment and adjustment of the moving parts. Do
party fit correctly into each other? Are any parts damaged? Is everything installed properly? Are all preconditions for perfect working met?
Damaged protective equipment must professionally repaired or changed by authorised person, unless otherwise provided in the operating instructions. Defective switches must be changed by authorised personnel. Please contact your local servicing centre for any repair.
- Switch off the engine before any adjustment or servicing work. Do so especially when adjusting the suction and blowing function.
- Use only approved parts. Use only identical spare parts for servicing or repairs. Contact your authorised servicing centre for spare parts.
Warning! Use of accessories and add-ons other than those expressly recommended may result in injury of persons and objects.
The appliance may only be used for the intended purpose. Any misuse is regarded an improper use. The user, not the manufacturer in any case, is responsible for any material damage and injury of persons arising from such improper use.
The manufacturer cannot be held liable in any case should changes be made on its appliances or should its appliances be used incorrectly, resulting in damage.
⚠️ Operate the appliance with the attached nozzle only.
- Switch the engine off before any adjustment or servicing.
- Make the Operating Instructions available to all persons who are to work with the appliance.
- Use the machine only for vacuuming leaves. This machine is not suitable for larger pieces of wood or even larger stones. This can lead to appliance damage and may also be a source of danger for persons and users.
Caution: Do not suck any stones as the blower could get damaged.
- Ensure adequate lighting at all times.
- Do not use the leaf vacuum near flammable liquids or gases.
-
Do not blow and vacuum hot, flammable or explosive materials.
-
Do not let children and frail persons get near the appliance when in use.
- Check the appliance for damage. Do not use an appliance that is defective or damaged.
- Have the appliance repaired only in an authorised service centre.
- Do not try to execute any repair yourselves. Repairs and replacement of parts may only be performed by an authorised service centre.
- Be careful of the tripping hazard near the leaf vacuum.
• The person working with the appliance should not be distracted. - The protective equipment of the appliance must not be demounted or otherwise put out of operation in any case.
- Damaged or defective protective equipment must be immediately replaced.
- When working with the leaf vacuum, do not let yourself be disturbed, act wisely before paying attention to a new situation.
- At regular intervals, check whether all screws, nuts and other fasteners are tight firmly.
- Never place tools or materials above the appliance so that they cannot fall on the appliance.
- Do not overload the appliance, otherwise it will run more slowly and overheat.
- Do not try to take out the leaf bag when the appliance is running. This can only be performed when the appliance is off.
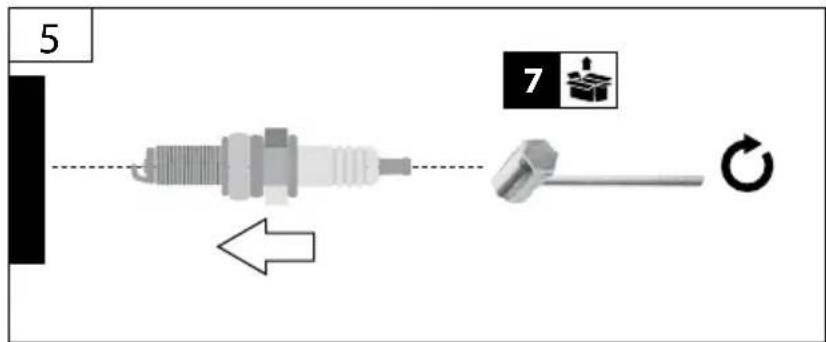
- The appliance must first be turned off and the spark plug removed before removing any defect.
- Adjusting, measurement, cleaning, etc. may only be performed when the machine is off and the spark plug removed.
- Do not leave the place of your work unattended if the engine is not turned off.
- If servicing or a repair of the safety and protective equipment is to be performed, such equipment must be refitted properly after servicing or a repair is finished.
- It is essential to know the accident prevention regulations applicable in the place of use of the appliance and all other, generally recognised safety regulations.
- Ensure solid footing and keep balance during your work.
-
Check the appliance for any sign of wear.
-
The safety equipment must necessarily be checked before using the appliance. Make sure the parts slightly affected at first sight are working properly.
- Check whether all movable parts are working perfectly. Pay particular attention to any damage and fixing parts. All parts must be installed properly and meet all conditions for perfect working.
- Unless otherwise provided in these Operating Instructions, damaged parts and safety equipment must be repaired or replaced by an authorised service centre.
- Have any defective switches replaced in an authorised service centre.
• The appliance complies with all relevant safety regulations. Repairs may only be executed by qualified electricians in an authorised service centre, using original spare parts. Failure to do so may result in injury.
AVOID EXPOSURE TO NOISE
- Applicable local regulations regarding the noise level of leaf vacuuming appliances must be complied with and followed.
- Do not operate the appliance in the day time when other people would be disturbed by unexpected noise (e.g. early in the morning or late at night). Times given in local regulations must be complied with.
• To keep the sound pressure level as low as possible, the number of simultaneously working appliances must be limited. - Do not add more gas than it is necessary for the respective work.
- Before use, check the appliance, especially the exhaust muffler, air suction and the air filter.
Emergency procedure
Conduct a first-aid procedure adequate to the injury and summon qualified medical attendance as quickly as possible. Protect the injured person from further harm and calm them down. For the sake of eventual accident, in accordance with DIN 13164, a workplace has to be fitted with a first-aid kit. It is essential to replace any used material in the first-aid kit immediately after it has been used. If you seek help, state the following pieces of information::
- Accident site
- Accident type
- Number of injured persons
- Injury type(s)
Requirements for operating staff
The operating staff must carefully read the Operating Instructions before using the appliance.
Qualification: : Apart from the detailed instructions by a professional, no special qualification is necessary for appliance using.
Minimum age: : Persons over 16 years of age can only work on the appliance. An exception includes youngsters trained in order to reach knowledge under supervision of the trainer during occupational education.
Training:: Using the appliance only requires corresponding training by a professional or the Operating Instructions. No special training is necessary.
Symbols

Warning/caution

Read the Operating Instructions

When working with the appliance, always keep Wear eye protective goggles! Wear ear protectors!

Wear protective gloves!

To be used outdoors only.

Protect against humidity Never expose tool to rain.

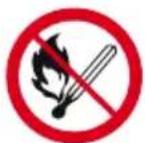
Prohibited smoking and open fire using. Never use the appliance in a flammable environment.

Protect against humidity

Protect against frost

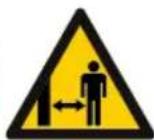
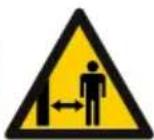
Keep children and other persons including animals in a safe distance when using the appliance.

Prohibited smoking and open fire using.
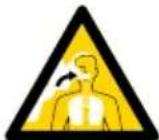
Inhaling exhaust gases may be fatal! Toxic exhaust fumes and oil vapors can cause poisoning.

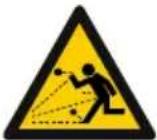
Warning against thrown-off items

distance from other persons! Make sure there is no person in the area of danger.

Warning! Inflammable materials!

Warning against dangerous electric voltage

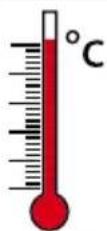
Caution - hot surface!

Strongly

Choke function
throttle-lever

Fuel mix ratio

Protect against humidity

This side up
Putting into operation for your safety
WARNING! Before putting the leaf vacuum into operation, you must check that the appliance is in a safe condition. Do not start the appliance if you have any doubts!
Comply with the following, in particular::
• Functionality of switches
• Proper installation of the suction or blow tube
- Smooth running of all switches.
- Safe fixing of the spark plug connector. A loose connector can cause sparking and ignition of the leaking fuel and air mixture.
- Ensure the handle is clean so that you can guide the leaf vacuum safely.
Before starting the appliance, all safety and protective equipment must be properly installed and in its place.
WARNING! If you have any doubt, ask for help regarding the appliance operation from a professional in an authorised service centre.
Assembly
Caution! before any installation and servicing ALWAYS Turn off the engine
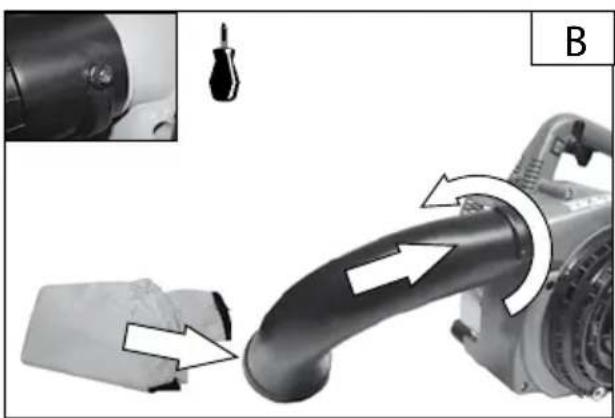
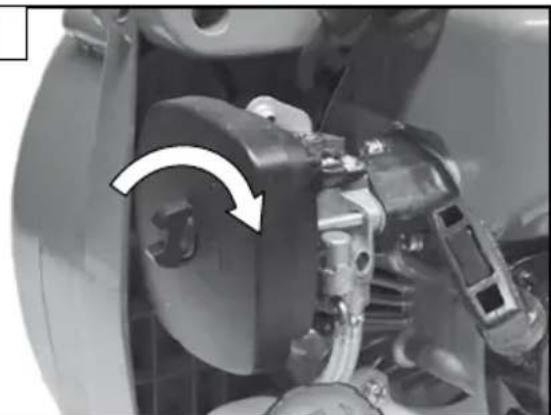
- The suction or blow tube and the leave collection bag are always installed according to an identical scheme. The tube is inserted in the respective clamping and secured by turning. Further securing using a screw is done for clamping of the blow tube or leaf collection bag.
- When installing the suction tube, make sure it is seated properly as the safety switch is controlled by the tube. Otherwise, the appliance will not start.
- Fix the leaf collection bag using the Velcro around the connection angle tube.
Starting the engine
- Fill a two-stroke fuel mixture (mix 1:30) to the respective fuel tank opening. Make sure no fluid leaks (risk of ignition).
- Stay at least 3 metres from the place of filling. Never switch the appliance on in closed or poorly ventilated areas.
- Move the On/Off to the „ON/I“ position and the throttle lever to the „slowly“ position (turtle). Control the choke for cold starting. Press the fuel injection pump (primary pump) 4-5 times so that the carburet-tor is flooded with fuel.
- Now put the leaf blower on the ground and grab the handle with one hand and pull the starting cable with the other hand until the engine starts.
- When the engine is running, turn the choke lever and press the throttle lever 2-3 times until operating speed is reached.
INFO:: If the appliance has not been used for a long time and fails to start as described above, press the fuel injection pump (primary pump) 2-3 times and repeat the process from step 2.
Operation
When working, always keep the leaf vacuum app. 3 cm above the ground.
The appliance noise level depends on the revolutions! Always use only revolutions that are necessary for the given work.
You have two options of using the appliance:
1. Suction function use
With this, you can suck leaves, grass or dirt to the leaf collection bag.
2. Blowing function use
With this, you can blow leaves, grass or dirt on a large area to a pile and then dispose them.
Caution! Always pay attention to the appliance blowing direction. Due to the big air pressure, particles may be thrown off high and injure other persons. Never direct the flow of air to persons or animals.
Switching the engine off
Before switching the engine off, let it run idle for 2-3 minutes so that the engine cools down. Then move the appliance to the „OFF/0“ position.
Caution! If the appliance does not stop after moving the switch to the „OFF“ position, move the choke all the way down. The machine will then switch off as too much fuel will be brought. Clean the appliance and check it for damage.
Read the troubleshooting section in this manual!
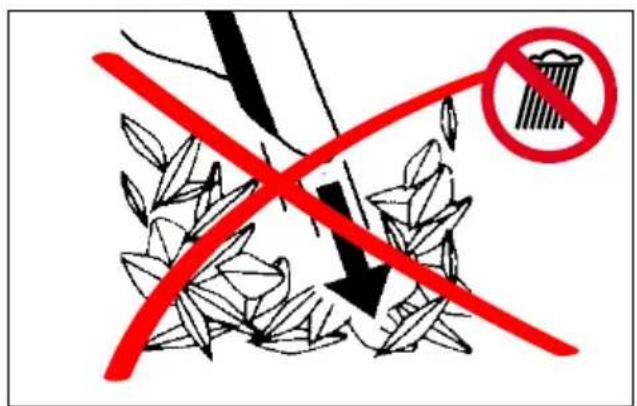
Caution! Absolutely dry leaves to be sucked or blown only. The collection bag must be protected against moisture.
Guarantee
Warranty period of 12 months applies to commercial use and 24 months applies to private use and commences on the day of purchase of the device.
The guarantee solely covers inadequacies caused by material defect or manufacturing defect. Original payment voucher with the sales date needs to be submitted for any claim in the guarantee period.
The guarantee does not cover any unauthorised use such as appliance overloading, use of violence, damage as a result of any unauthorised interference or caused by foreign items. Failing to follow the operating and assembly instructions and common wear are also not included in the guarantee.
Service
Do you have any technical questions? Any claim? Do you need any spare parts or operating instructions? We will quickly help you and without needles bureaucracy at our web pages at www.guede.com in the Servicing part. Please help us be able to help you. In order to identify your device in case of claim we need the serial No., product No. and year of production. All this data can be found on the type label. Please enter it here for future reference:
Serial No.:
Art. No:
Year of production:
Tel.: +49 (0) 79 04 / 700-360
Fax: +49 (0) 79 04 / 700-51999
E-Mail: support@ts.guede.com
Important information for the customer
Please be sure to know that returning the product in or after the warranty period must be made in the original packaging.
Maintenance/Storage
Caution! before any installation and servicing ALWAYS Turn off the engine
Keep the leaf blower clean so that it can work properly and safely. This applies to the ventilation slots, in particular. Never spray water on the leaf blower and do not plunge it into water.
Keep the garden appliance in a safe and dry place, inaccessible to children.
If the machine has any defect, the repair may only be executed by the customer service. Original accessories and original spare parts to be used only.
Only a regularly maintained and treated appliance can be a satisfactory aid. Insufficient maintenance and treatment may lead to unforeseen accidents and injuries
These instructions apply to normal conditions of use. In difficult conditions, such as severe dust and long daily working house, the intervals must be shortened accordingly.
Check the following before starting to work:
- throttle-lever
- Throttle lever
- ON/OFF switch
- Safety equipment
• Strength of all movable parts
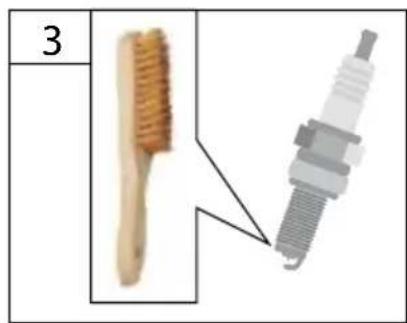
CAUTION! Make sure the spark plug thread and cylinder head are clean. No dirt may get into the cylinder head. Cleaning works must be performed very carefully when the spark plug is removed!
Repairs requiring special professional knowledge should be executed by authorised service centres. An unauthorised intervention may damage the appliance or put your safety at risk.
Instructions
The disposal instructions are based on the icons placed on the appliance or on the package. Description of the respective meanings can be found in the section „Marking“.
Transport package disposal
The package protects the appliance against damage during transport. Packing materials are usually chosen depending on their environmental friendliness and disposal method and can therefore be recycled. Returning the package to material circulation saves raw materials and reduces waste disposal costs. Parts of packages (e.g. foils, styropor®) can be dangerous to children. Risk of suffocation! Keep parts of packages away from children and dispose them as soon as possible.
Risk of suffocation! Keep parts of the packagings out of reach of children and dispose them as soon as possible.
Failures – causes - removal
| Failures Causes Removal | ||
| The motor does not start | Empty fuel tankOver floated motorSpark plug is dirty (carbon residues on electrodes), too big gap between electrodes.Dirty carburettor, nozzleFaulty connection of the spark plug, defective cable of the spark plugMissing spark | Top-up fully the fuel tankRelease the throttle, start a couple of times and remove the spark plug if necessary, clean it and dry itClean the spark plug, check the plug thermal value, possibly change the plug, set the electrodes distance to 0.6-0.7 mmClean, blow, the carburettor replaceCheck the short-circuiting button, cable, check or, as appropriate, replace the ignition module, adjust to 0.6-0.7 mm |
| Idle speed too high Cold engine Slowly heat the engine or, as appropriate, close the choke a little bit | ||
| Engine not running at maximum power | Spark plug is dirty (carbon residues on electrodes), too big gap between electrodes.Dirty carburettor, nozzleDirty air filterExhaust, inlet duct of the cylinderLeaking gasket in the crankcaseWrong fuel mixture (too much oil)Bad ignition | Clean the spark plug, check the plug thermal value, possibly change the plug, set the electrodes distance to 0.6-0.7 mmClean, blow, the carburettorClean or replace the air filterRemove and clean the exhaust and remove the carbon residues.replaceReplace the cylinder, piston or piston rings, grind off the cylinder overlap and install a bigger fraction of the pistonFill the fuel tank according to the manualContact gap size of ignition module (0,6-0,7 mm) let adjusted in authorized workshop |
| Motor can not be switched off | Light grey candle with signs of glowingCarbon residues in the combustion chamber | Install a spark plug with a higher thermal valueClean the cylinder head, piston bottom and cylinder channels |
Noise and vibration information
The measured noise values were learnt according to EN 60335. The noise level A is typically: sound pressure level of 95 dB (A); sound power level of 115 dB (A). Uncertainty K = 3 dB.
Total values of the ah vibrations (spatial vector sum of three directions) and uncertainty K learnt according to EN 60335: ah <7.4 m/s ^2 , K = 3 m/s ^2
Inspection and maintenance plan
| Regular servicing period Before any start-up | ||||||
| 10 Hours of operation | 10-15 Hours of operation | 50 Hours of operation | 100 Hours of operation | 250 Hours of operation | ||
| Air filter Inspection | √ | |||||
| Clean | √ | |||||
| Spark plug Inspection | ||||||
| Clean | √ | |||||
| Change | ||||||
Attention - surface chaude!

Fort

Fonction de starter

manette de gaz

EC-DECLARATION OF CONFORMITY
We, hereby declare the conception and construction of the below mentioned appliances correspond - at the type of construction being launched - to appropriate basic safety and hygienic requirements of EC Directives. In case of any change to the appliance not discussed with us the Declaration expires.
DECLARATION CE DE CONFORMITE
PROHLASENI O SHODE EU
| ( x - 2) | ||||||||||||||||||||
| x - 1 | y_1 | y_2 | y_3 | y_4 | y_5 | y_6 | y_7 | y_8 | y_9 | y_10 | y_11 | y_12 | y_13 | y_14 | y_15 | y_16 | y_17 | y_18 | y_19 | y_20 |
| x - 1 | y_1 | y_2 | y_3 | y_4 | y_5 | y_6 | y_7 | y_8 | y_9 | y_10 y_11 | y_12 | y_13 | y_14 | y_15 | y_16 | y_17 | y_18 | y_19 | y_20 | y_21 |
| x - 2 | y_1 | y_2 | y_3 | y_4 | y_5 | y_6 | y_7 | y_8 | y_9 | y_10 | y_12 | y_13 | y_14 | y_15 | y_16 | y_17 | y_18 | y_19 | y_20 | y_22 |
GÜDE GmbH & Co. KG
Birkichstrasse 6

- 4
- 6
- 7
- Technical Data Petrol Leaf Blower GBLS 7000
- Specified Conditions Of Use
- Power tool description
- Safety instructions
- Caution! WARNING!
- Petrol is highly flammable
- ⚠️ Operate the appliance with the attached nozzle only.
- Caution: Do not suck any stones as the blower could get damaged.
- AVOID EXPOSURE TO NOISE
- Emergency procedure
- Requirements for operating staff
- Symbols
- Putting into operation for your safety
- Assembly
- Caution! before any installation and servicing ALWAYS Turn off the engine
- Starting the engine
- Operation
- Suction function use
- Blowing function use
- Switching the engine off
- Guarantee
- Service
- Important information for the customer
- Maintenance/Storage
- Check the following before starting to work:
- CAUTION! Make sure the spark plug thread and cylinder head are clean. No dirt may get into the cylinder head. Cleaning works must be performed very carefully when the spark plug is removed!
- Instructions
- Transport package disposal
- Noise and vibration information
- EC-DECLARATION OF CONFORMITY
- DECLARATION CE DE CONFORMITE
- PROHLASENI O SHODE EU
Brand : GUDE
Model : GBLS 7000
Category : Blower