
Avance Collection HR2358 - Pasta machine PHILIPS - Free user manual and instructions
Find the device manual for free Avance Collection HR2358 PHILIPS in PDF.


| Product Type | Pasta Machine |
| Brand | Philips |
| Model | Avance Collection HR2358 |
| Dimensions (approx) | 30 x 20 x 15 cm (11.8 x 7.9 x 5.9 in) |
| Weight (approx) | 4 kg (8.8 lb) |
| Power Consumption | 150 W |
| Voltage | 220-240 V ~50/60 Hz |
| Functions | Automatic pasta extrusion, mixing, and kneading |
| Control Type | Electronic touch panel |
| Capacity | Up to 1 kg (2.2 lb) dough |
| Material | Plastic body, stainless steel mixing chamber and discs |
| Cleaning & Maintenance | Detachable parts dishwasher safe; wipe body with damp cloth |
| Safety Features | Automatic shut-off, overheat protection |
| Spare Parts & Repairability | Replacement discs and parts available; user-replaceable |
| Warranty | 2 years manufacturer warranty |
Frequently Asked Questions - Avance Collection HR2358 PHILIPS
User questions about Avance Collection HR2358 PHILIPS
0 question about this device. Answer the ones you know or ask your own.
Ask a new question about this device
Download the instructions for your Pasta machine in PDF format for free! Find your manual Avance Collection HR2358 - PHILIPS and take your electronic device back in hand. On this page are published all the documents necessary for the use of your device. Avance Collection HR2358 by PHILIPS.
USER MANUAL Avance Collection HR2358 PHILIPS
Always there to help you
Register your product and get support at www.philips.com/welcome

HR2358/06

EN User manual 2
ZHS 用户手册 34
PHILIPS
Congratulations on your purchase, and welcome to Philips!
To fully benefit from the support that Philips offers, register your product at www.philips.com/welcome.
Read this user manual carefully before you install and use the appliance.
Save it for future reference.
What's in the box

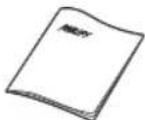
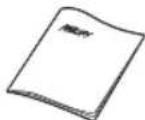
User manual Recipe bookMain unit
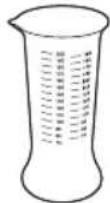
Water cup
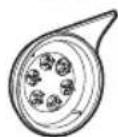
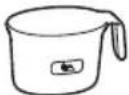
Flour cup


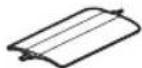
Flat cleaning tool
Metal cores*Penne
Pappardelle/ flat wide
Lasagna,
Ravioli &
Dumpling Skin
Shaping discs


Lasagna 1.2mm
Ravioli & Dumpling
Skin 0.8mm
Cleaning tools
Use the flat cleaning tool for the above shaping discs
Shaping discs
Angel Hair

Spaghetti**Fettuccine


Cleaning tools


* The Lasagna shaping disc and Ravioli & Dumpling Skin share the same plastic part but are provided with different metal cores (1.2mm for Lasagna, 0.8mm for Ravioli & Dumpling Skin).
** The spaghetti shaping disc is assembled on the appliance upon purchase.
2 English
Quick Start Guide
Disassembling and cleaning before first use
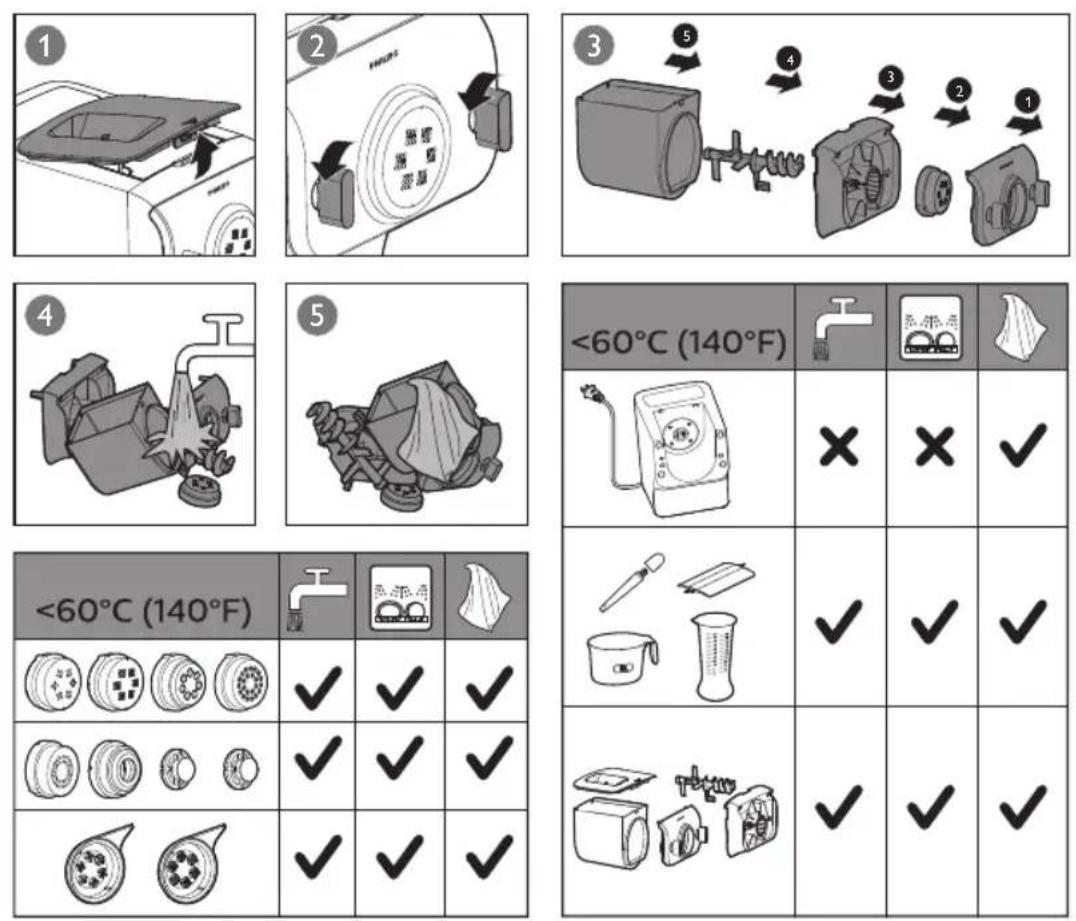
| <60°C (140°F) | |||
| × | × | √ | |
| √ | √ | √ | |
| √ | √ | √ |
| <60°C (140°F) | |||
| √ | √ | √ | |
| √ | √ | √ | |
| √ | √ | √ |
Assembling

Using the pasta and noodle maker

Contents
What's in the box 2
Quick Start Guide 3
Important 6
Overview 10
Disassembling and cleaning before first use 12
Assembling 14
Using the pasta and noodle maker .....16
Cleaning 24
Troubleshooting 27
Product information 30
Recycling 30
Warranty 31
Important
Safety
Read this user manual carefully before you use the appliance, and save it for future reference.
Warning
- Before you connect the appliance to the power, make sure that the voltage indicated on the bottom of the appliance corresponds to the local power voltage.
• Make sure that your hands are dry before you insert the plug into the power outlet. - Do not immerse the main unit in water.
• To prevent a short circuit or an electric shock, do not pour water or any liquid into the safety switch.
• Make sure that the plug is firmly inserted into the power outlet. - Never connect this appliance to a timer switch.
• Make sure that the appliance is assembled correctly before you insert the plug into the power outlet. - If the power cord, the plug, or other parts are damaged, do not use the appliance.
- If the power cord is damaged, you must have it replaced by Philips, a service center authorized by Philips or similarly qualified persons to avoid a hazard.
- Do not replace parts of the appliance by yourself.
- This appliance shall not be used by children. Keep the appliance and its power cord out of reach of children.
Warning
- This appliance is not intended for use by persons with reduced physical, sensory or mental capabilities, or lack of experience and knowledge, unless they have been given supervision or instruction concerning use of the appliance by a person responsible for their safety.
• Children should be supervised to ensure that they do not play with the appliance.
• To prevent any accidents, do not use the appliance if it is damaged for any reason.
Caution
- Before using the appliance for the first time, disassemble and wash the accessories thoroughly (refer to the chapter “Disassemble and cleaning before first use”).
- This appliance is intended for household use only.
- Never use any accessories or parts from other manufacturers or that Philips does not specifically recommend. If you use such accessories or parts, your guarantee becomes invalid.
Caution
- Do not use this appliance on an unstable or uneven surface.
- Do not disconnect the power cord before the processing is complete. If you have to stop processing, disconnect the power cord before you perform other operations.
• To better protect the lifetime of the appliance, we recommend the continuous working time to be less than 45 minutes. You can restart using the appliance after 15 minutes.
- If you intend to use the appliance continuously, clean the shaping disc with the supplied cleaning tool each time after use. For easy cleaning, do not soak the shaping disc into water directly.
- Do not bend, jerk, twist, or bundle the power cord forcibly, nor put it under heavy objects.
- Do not put metal or flammable objects in the mixing chamber.
- Unplug the appliance when not in use.
- Do not use the appliance near flammable objects such as table cloth or drapes.
- Pull out the power plug immediately after you detect smoke.
- When unplugging the power cord, do not pull the cable but grab the plug part.
Caution
- Keep the power plug clean.
- Do not put heavy objects on the appliance.
• This appliance is designed as consumer kitchen appliance. Do not use for any other purpose. - Do not move the appliance while it is operating.
- Disconnect the power cord if the appliance is left unattended and before assembling, disassembling or cleaning.
- Place the appliance in a dry and well ventilated place after use.
Electromagnetic fields (EMF)
This Philips appliance complies with all applicable standards and regulations regarding exposure to electromagnetic fields.
Overview
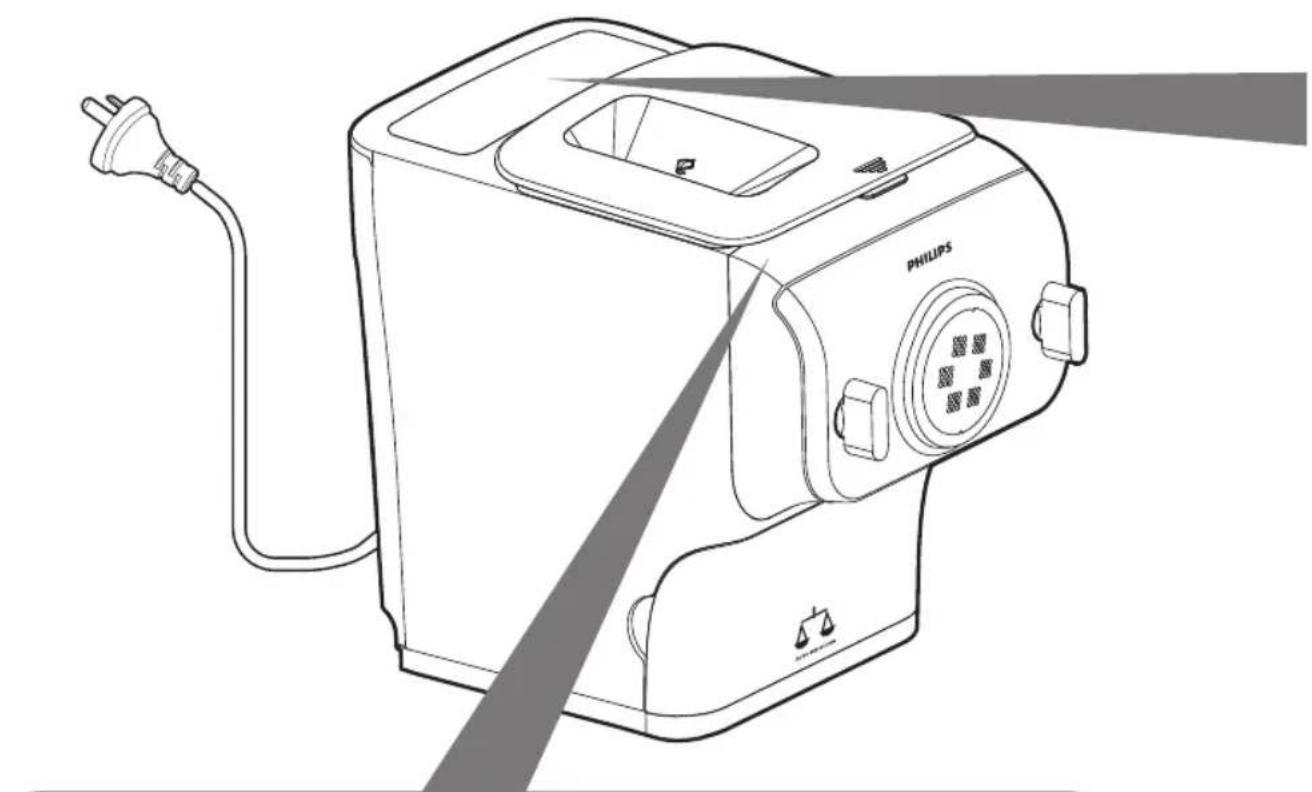

| Abbreviations |
| g = grams |
| ~ = approximately |
| ml = milliliters |
| mm = millimeters |
| kg = kilogram |
| in = inch |
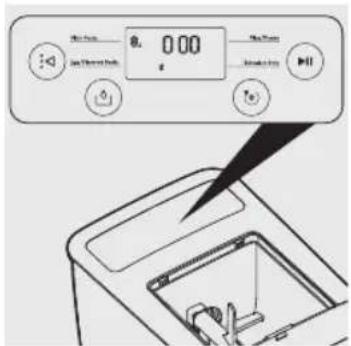
Program selection - press to select plain pasta/noodle or egg/flavored pasta/noodle.
Liquid calculation - press to show the required liquid quantity based on the amount of flour poured in.

Disassembling and cleaning before first use
Important
- Before using the appliance for the first time, remove and safely discard any packaging material and/or promotional labels.
• Take out all parts and accessories, wash and thoroughly dry all parts and accessories (refer to the chapter "Cleaning"). - Do not use water to rinse or soak the main unit.
- Do not use a scourer or similar cleaners as these will scratch the plastic surface and affect the lifetime of the pasta and noodle maker.
- The shaping discs and all detachable parts of the appliance are dishwasher proof. When you clean them in a dishwasher, make sure to set the temperature below 60° C ( 140° F).
• This appliance is intended for household use only.
1 Remove the mixing chamber lid from the appliance.

2 Loosen the front panel control knobs.
Note:
- The front panel is heavy. Take extra caution when removing it.

12 English
3 Disassemble the front panel, the shaping disc, the shaping disc holder, the mixing paddle, and the mixing chamber in order.

4 Clean all detachable parts, and wipe them dry.

Assembling
Follow below assembling steps to install the pasta and noodle maker.
Important
- Make sure to tighten the front panel knobs during assembly.
- Make sure the appliance is not plugged in during assembly.
1 Push the mixing chamber into the appliance.

2 Point the mixing paddle to the hole in the main unit. Insert the mixing paddle all the way into the main unit.

3 Attach the disc holder onto the appliance.
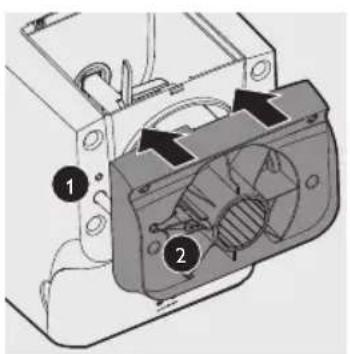
① Disc holder safety switch
② Disc holder safety switch lever
Note:
- Check that the safety switch ① and safety switch lever ② are set as shown in the illustration to the right.
14 English
4 Put the shaping disc onto the disc holder ①, and make sure it is firmly fixed on the disc holder ②.
Note:
• Make sure the inner cavity of the shaping disc and disc holder is properly fitted.

5 Attach the front panel to the main unit.
① Disc holder safety switch lever
Note:
- Make sure the front panel is completely fastened before using the appliance. - The front panel is heavy. Take extra caution when assembling it.

6 Fasten the front panel control knobs.
Note:
- If the front panel or the shaping disc is not properly assembled, the safety switch will prevent the appliance from working.

7 Close the mixing chamber lid properly.
Note:
- If the mixing chamber lid is not properly installed, the safety switch will prevent the appliance from working.

Using the pasta and noodle maker
Important
- Place the product on the flat surface and prevent table shaking or vibration.
- Make sure that all the parts are well assembled before plugging in.
- Do not shake or move the appliance when it is weighing the flour.
- Do not put your hands or any other object on top of the appliance when it is weighing the flour.
- Do not move or touch the power cord when the appliance is weighing the flour.
- Do not put less than 200g or more than 500g (2 cups) of flour in the chamber.
- Press the liquid calculation button after the flour weight is confirmed on the display.
- Pour in the liquid slowly through the water slot after the appliance start kneading.
- If you want to dispose of the weighed flour before processing with the next batch, empty the chamber and restart the appliance by unplugging and plugging in again.
- Do not put any ingredients that are 60° C / 140° F or above into the pasta and noodle maker, nor place the pasta and noodle maker in surroundings with high temperature ( 60° C / 140° F), for instance in a high temperature sterilization. This will deform the appliance.
- Never pour water into the mixing chamber before you place the chamber lid onto the chamber. Do not pour any liquids into the safety switch hole.
Preparing the ingredients
1 Connect the power plug to any 230V AC outlet. The pasta and noodle maker will sound once, and all indicators will flash once.
Note:
• Make sure that all the parts are well assembled before plugging in.

2 Wait until 0.00 displays on the screen.

3 Remove the chamber lid.
4 Wait until 000 displays on the screen..

5 Measure the flour with the flour cup. One full cup is equivalent to 1-2 servings..
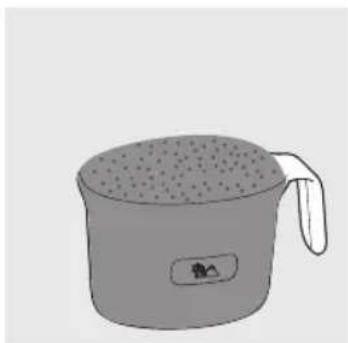
Note:
• One full cup of flour weighs around 250 gram (1-2 servings).
6 Pour the flour into the chamber. If you want to make 3-4 servings, add a second cup of flour as you will need 2 cups (\~500g) of flour in total.
Note:
- Do not put less than 200g or more than 500g of flour in the chamber. If you put too little or too much flour in the chamber, the appliance will not operate.
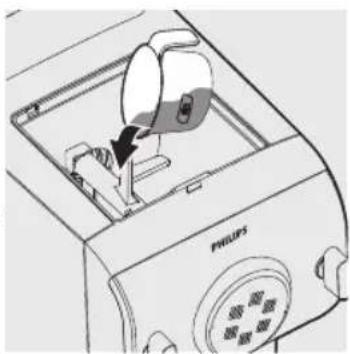
7 The appliance automatically weighs the flour, and shows the flour weight in grams.
Note:
- Do not shake or move the appliance when it is weighing the flour.
- Do not put any object on the appliance when it is weighing the flour.
- Do not move or touch the power cord when the appliance is weighing the flour.

- Some recipes (for example cookies, gluten free pasta) require you to skip the weighing part. In this case, press the start/pause button▶II for 3 seconds, and the appliance will start kneading and extruding directly.
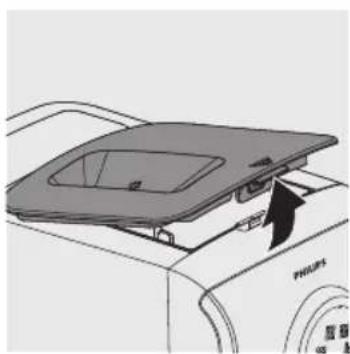
8 Close the chamber lid properly.
Note:
- Insert the two hooks into the appliance first ①, and then push the lid against the main unit ②.
- The appliance will not start working if the chamber lid is not properly closed. During the pasta/noodle making process, if the chamber lid becomes loose, the appliance will automatically stop working.

9 Press the program selection button: to choose the type of pasta/noodle you want to make.

| Program Tip | Corresponding recipe | |
| Plain Pasta/ noodle | When you are making pasta/ noodle with flour and water only, select the "Plain Pasta" program | Wheat pasta/noodleDurum pasta/noodleRamenUdonCurried pasta/noodle |
| Egg/ Flavored Pasta/ noodle | When you are making pasta/ noodle with flour and other ingredients (eggs or veggie juice), select the "Egg/ Flavored Pasta" programFor dumpling sheet or soba, select this program as well. | Wheat pasta/noodleDurum pasta/noodleDumpling sheetWhole wheat pasta/noodleSpelt pasta/noodleCarrot pasta/noodleTomato pasta/noodleSobaBeet pasta/noodleSpinach lasagna/dumpling/ wontonFennel pepper pasta/noodlePasta neroHerb pasta/noodle |
10 Wait until the flour weight is confirmed, and then press the liquid calculation button ⬆ and the required amount of water or water and egg mixture displays on the screen.
Note:
- Only press the liquid calculation button after the flour weight is confirmed on the display.
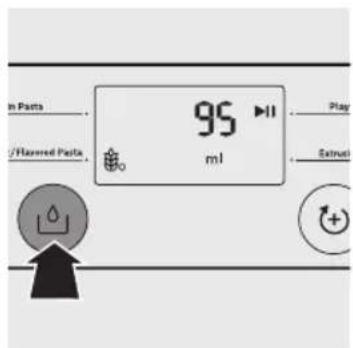
11 Measure the correct amount of water, egg mixture or vegetable mixture with the supplied water cup.
Note:
- Make sure to measure the liquid volume at eye level on a flat surface.

- When making the egg mixture, crack the egg into the water cup. Add water up to the required amount, and then whisk the water and egg to combine.
• If preferred, 2 eggs can be used instead of 1.
- When making the vegetable mixture, crack the egg into the water cup. Add vegetable juice up to the required amount, and then whisk the juice and egg to combine.

Starting the pasta/noodle making program
Important
- Do not select the extra extrusion program before the dough mixing is complete. Otherwise, this will damage the pasta and noodle maker and its lifetime.
- Do not disconnect the power cord before the processing is complete. If you have to stop processing, press the start/pause button▶II to stop the working process and then disconnect the power cord from outlet before performing other operations.
- To better protect the lifetime of the appliance, the continuous working time should be less than 45 minutes. You can restart using the appliance after a 15 minute rest.
- If you intend to use the appliance continuously, clean the shaping disc with the supplied cleaning tool each time after each pasta/noodle making session. For cleaning ease, do not soak the shaping disc directly in water.
1 Press the start/pause button ▶t to start processing, and the processing time starts to count down.
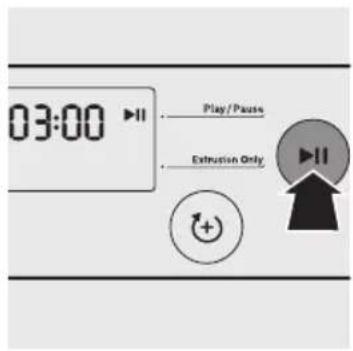
2 After the kneading starts, slowly pour in the water or water and egg mixture along the entire length of the slot in the lid.

Note:
- During dough mixing, do not add other ingredients after you have poured in the water. Otherwise, it will affect the results of the pasta/noodle texture.
3 After the pasta and noodle maker finishes kneading, it will beep a few times and the pasta/noodle extrusion will start after a few seconds. Place a container right under the outlet. Cut the pasta/noodle into the length you need with the flat cleaning tool.

Note:
- If the ratio of liquid and flour is not correct, the extrusion will not succeed. In this case, prepare the ingredients again.
- Move the cleaning tool downwards to cut the pasta/noodle.
- After the extrusion process is complete, the appliance will beep a few times. The whole working process (including kneading and extruding) takes 15 minutes for 500g of flour.
4 After the pasta/noodle making is complete, if you notice some leftover dough inside the chamber, you can press the extra extrusion button first, and then press the start/pause button for extra extrusion.
Note:
- The countdown timer of the extra extrusion program is 3 minutes. - You may find some fine pasta/noodle threads on the pasta/noodle surface. This is normal.
- The cooking time of the pasta/noodle varies depending on personal preferences, pasta/noodle shapes, and number of servings.
5 If you want to make another batch of pasta/noodle right after the first batch is finished, press the program selection button:◀ and wait until 000 displays on the screen. Then start from step 3 (remove the chamber lid) at Page 17, and all the rest steps are the same as the first batch.
Note:
- Make sure that all the parts (including the chamber lid) are well assembled before plugging in.
Pasta/noodle type reference table
This table is for your reference to select the right program to make various pasta/noodle. You can find the recipes in the recipe book.
| Program | Tip Corresponding recipe | |
| Plain Pasta/noodle | When you are making pasta/noodle with flour and water only, select the "Plain Pasta" program | Wheat pasta/noodleDurum pasta/noodleRamenUdonCurried pasta/noodle |
| Egg/Flavored Pasta/noodle | When you are making pasta/noodle with flour and other ingredients (eggs or veggie juice), select the "Egg/Flavored Pasta" programFor dumpling sheet or soba, select this program as well. | Wheat pasta/noodleDurum pasta/noodleDumpling sheetWhole wheat pasta/noodleSpelt pasta/noodleCarrot pasta/noodleTomato pasta/noodleSobaBeet pasta/noodleSpinach lasagna/dumpling/wontonFennel pepper pasta/noodlePasta neroHerb pasta/noodle |
Important
- The pasta/noodle recipes provided in the recipe book have been tested for success. If you experiment with or use other pasta/noodle recipes, the flour and water/egg ratios will need to be adjusted to the flour and water cup ratios included with the pasta and noodle maker. The pasta and noodle maker will not operate successfully without adjusting the new recipe accordingly.
Note:
- To help ensure the quality of the pasta/noodle, add the recommended liquid proportion.
- Using ingredients from different regions may affect the flour/water ratio.
- When making egg pasta/noodles or vegetable pasta/noodles follow these steps:
• Measure the egg and liquid to the recommended level. - Whisk the mixture evenly before pouring it into the chamber through the slot in the lid.
• See the recipe book provided for more delicious pasta/noodle ideas.
Cleaning
Important
- Disconnect the power and remove the power cord before cleaning or disassembling this appliance.
- Do not immerse the main unit in water.
- Do not use a scourer, caustic cleaners, or abrasive cleaners (for examples, gasoline, alcohol, and propanol) to clean the appliance.
- Clean the appliance each time after use, or the appliance might not operate properly.
• Take extra caution when cleaning the appliance to avoid getting cut by any sharp edges. - The shaping discs and all detachable parts of the appliance are dishwasher proof. When you clean them in a dishwasher, make sure to set the temperature below 60° C ( 140° F).
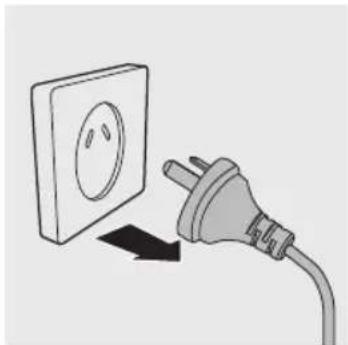
1 Disconnect the plug from the power outlet.
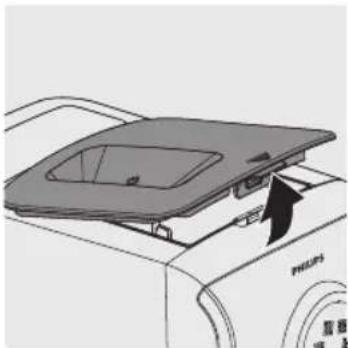
2 Remove the chamber lid from the appliance.
24 English
3 Loosen the front panel control knobs.
Note:
- The front panel is heavy. Take extra caution when removing it.

4 Disassemble the front panel, the shaping disc, the shaping disc holder, the mixing paddle, and the mixing chamber in order.

5 Use a dry cloth to clean flour residue in the hole ① where the mixing paddle is placed.
6 Clean the shaping disc with the supplied cleaning tool to remove the dough residues. After that, you can clean it with water.

Tip:
- For the spaghetti, angel hair and fettuccine shaping discs, put the shaping disc into the freezer for 2 hours. Then use the corresponding cleaning tool to poke out the dough in the holes.
![graph TD A["Refrigerator"] --> B["Cut into a circular component"] B --> C["Close-up of the lid"] C --> D["Close-up of the lid with four buttons"] D --> E["Final product with four buttons"]](/content/2026/06/1271399/images/0645f52485754462ee6ad00f1c384a92664e15bbf9a874517a3bcc767d65fa80.jpg)

7 Clean all detachable parts.

8 Use a dry cloth to clean the main unit, control panel, and the exterior of the pasta and noodle maker.

9 Store the pasta and noodle maker in a dry, well ventilated place after use.
Note:
- After cleaning, make sure all parts and the shaping disc air dry thoroughly before storing. Assemble the pasta and noodle maker back for next use.
Storing the shaping discs and cleaning tools
1 Insert the shaping disc ① and cleaning tool ② together. Put ① and ② into the storage drawer. Move the sliding bar ③ to secure the shaping discs and cleaning tools.
Make sure the cleaning tools and shaping discs are dry before putting them into the storage drawer.
![graph LR A["Step 1: Component 1"] --> B["Step 2: Component 2"] B --> C["Step 3: Final Assembly with Internal Component"]](/content/2026/06/1271399/images/804c628125467b84b08cc78c1638e8eb447c453e1ded6dd41ae33169c6eafa59.jpg)
26 English
Troubleshooting
This chapter summarizes the most common problems you could encounter with the appliance. If you are unable to solve the problem with the information below, visit www.philips.com/support or refer to page 31 for the consumer care number to call for assistance.
The indicators do not light up.
- The power plug is not connected correctly.
Check whether the power plug is connected correctly and the outlet is working properly.
After pressing the start/pause button the appliance sounds but does not work.
• The chamber is assembled incorrectly.
The shaping disc, or the front panel is assembled incorrectly.
Make sure you follow the user manual to assemble all parts correctly.
The safety switch is triggered and the appliance suddenly stops or restarts during the processing.
• The front panel knob is loose.
Make sure the front panel is securely assembled.
• Excessive ingredients in the pasta and noodle maker.
The maximum amount of flour used for each batch is 500g. If more than 500g is added, reduce the amount of flour before next batch.
During processing, the appliance stops. There is no alarm sound or flashes.
- The pasta and noodle maker has overheated due to long continuous working time.
Disconnect from the power outlet, and allow the pasta and noodle maker to cool down. To better protect the lifetime of the appliance, the continuous working time should be less than 45 minutes. You can restart using the appliance after a 15-minute rest.
When weighing the flour, the weight shown on the screen changes all the time.
- You are touching the appliance or the power cord.
When the appliance is weighing the flour, do not touch the appliance or the power cord.
The appliance stops during processing, EEEE displays on the screen, the indicators are flashing quickly, and the alarm sounds.
- The mixing paddle may be blocked by some foreign objects.
The dough may be too dry.
The wrong program is selected.
Disconnect from the power outlet, clean the pasta and noodle maker, and follow the user manual again to restart the pasta/noodle making.
Too much leftover dough inside the chamber.
- The flour is either exposed to moisture before use, or the dough is too wet.
Keep your flour dry during storage. Follow the user manual instructions to restart the pasta/noodle making. - The chamber, the mixing paddle, the shaping disc are not cleaned properly before use.
Make sure all parts are clean before use.
• The mixing paddle or the chamber is still wet.
Make sure all parts are completely dry before use.
• Water is not added in the right order.
The flour type is not correct.
Follow the user manual instructions to make pasta/noodle.
Small amount of water is leaking from the appliance.
• Water is added before the program starts.
Follow the user manual instructions to add water right after the program starts.
The mixing paddle is running idle, and there is no pasta/noodle coming out.
• The ratio of the flour and water is incorrect.
Disconnect the plug from the power outlet and discard dough. Clean the pasta and noodle maker, re-measure ingredients correctly and follow the user manual instructions again to restart the pasta/noodle making.
Unable to make pasta/noodle successfully with the liquid calculation function.
- The required liquid amount indicated on the display screen does not apply to some recipes (for example cookies, gluten free pasta/noodle).
These recipes require you to skip the liquid calculation part. In this case, press the start/pause button for 3 seconds, and the appliance will start kneading and extruding directly.
After the flour is poured in the mixing chamber, the weight shown on the display screen changes a bit after the lid is closed.
- After the appliance is plugged in, the chamber lid is removed when the weighing system is still calibrating.
Strictly follow steps 2, 3 and 4 on page 17
The kneading process does not start and E1 displays on the screen.
• There are more than 500g of flour in the mixing chamber.
Make sure that you do not put more than 500g of flour in the mixing chamber for one batch.
The kneading process does not start and E2 displays on the screen.
• There are less than 200g of flour in the mixing chamber.
Make sure that you do not put less than 200g of flour in the mixing chamber for one batch.
E3 displays on the screen.
• The weighing system has been reset.
When using the appliance, make sure to put it on a flat and stable surface. If the problem persists, refer to page 31 for the consumer care number to call for assistance.
E4 displays on the screen.
- Software in the appliance is not working.
Refer to page 31 for the consumer care number to call for assistance.
E5 displays on the screen.
- The total weight exceeds the upper limit of the weighing system (approximately 999 grams).
Unplug the appliance, remove any objects placed on the appliance, empty the mixing chamber, and start again from step 1 in chapter "Preparing the ingredients" (page 16).
EEEE displays on the screen.
• Excessive current is flowing through the circuit.
Pull power plug out of outlet first and then plug in again to reset the appliance.
Product information
| Model HR2358/06 | |
| Motor power 200W | |
| Rated voltage AC220-240V (50Hz) | |
| Dimensions (L x W x H) 343mm x 215mm x 315mm / 13.5 in x 8.5 in x 12.4 in | |
| Net weight 6.9kg | |
- For rated voltage and frequency information, refer to the typeplate on the product. Product information is subject to change without prior notice.
Recycling
Do not throw away the product with the normal household waste at the end of its life, but hand it in at an official collection point for recycling. By doing this, you help to preserve the environment.
Warranty
2-YEAR WARRANTY
IMPORTANT:
Please keep this warranty card together with your proof of purchase for use when claiming.
AUSTRALIA
Philips Consumer Care: 1300 363 391
Website: www.philips.com/support
NEW ZEALAND
Philips Consumer Care: 0800 658 224
Website: www.philips.com/support
PHILIPS
Philips Electronics Australia Limited and Philips New Zealand Commercial Limited Warranty against Defects
In this warranty:
We or us means Philips Electronics Australia Limited ACN 008 445 743 or Philips New Zealand Commercial Limited NZBN: 9429041782170, and our contact details are set out at the end of this warranty;
You means the purchaser or the original end-user of the Goods;
Supplier means the authorised distributor or retailer of the Goods that sold you the Goods in Australia or New Zealand; and
Goods means the product or equipment which was accompanied by this warranty and purchased in Australia or New Zealand.
If you require assistance with the operation of the product, its features or specifications please call the Philips Consumer Care Centre on 1300 363 391 in Australia or 0800 658 224 in New Zealand.
Australia: Our Goods come with guarantees that cannot be excluded under the Australian Consumer Law. You are entitled to a replacement or refund for a major failure and for compensation for any other reasonably foreseeable loss or damage.
You are also entitled to have the Goods repaired or replaced if the goods fail to be of acceptable quality and the failure does not amount to a major failure. This is not a complete statement of your legal rights as a consumer.
New Zealand: Our Goods come with guarantees that cannot be excluded under the Consumer Guarantees Act 1993. This guarantee applies in addition to the conditions and guarantees implied by that legislation.
Additional Warranty:
In addition to the rights and remedies that you have under the Australian Consumer Law, Consumer Guarantees Act of New Zealand or any other applicable law, we provide the following warranty against defects:
- If, during the first 2 years from their date of purchase from the Supplier
(Warranty Period), the Goods prove defective by reason of improper workmanship or materials and none of your statutory rights or remedies apply, we will repair or replace the Goods without charge.
PHILIPS
-
We do not have to repair or replace the Goods under this Additional Warranty if the Goods have been used for a commercial purpose; misused, improperly or inappropriately installed, operated or repaired; abused; damaged; or not maintained in accordance with the manufacturer's instructions.
-
Even when we do not have to repair or replace the Goods, we may decide to do so anyway. In some cases, we may decide to substitute the Goods with a similar alternative product of our choosing. All such decisions are at our absolute discretion.
-
All such repaired, replaced or substituted Goods continue to receive the benefit of this Additional Warranty for the time remaining on the original Warranty Period.
-
This Additional Warranty is limited to repair, replacement or substitution only. As far as the law permits, we will not be liable for any loss or damage caused to property or persons arising from any cause whatsoever.
-
In order to claim under this Additional Warranty you must telephone us on 1300 363 391 in Australia or 0800 658 224 in New Zealand within the Warranty Period. You will be asked for details of the Goods, a description of the defect and your personal details. Upon accepting your claim, we shall assist you with either returning the Goods to the Supplier for replacement or to the most convenient Philips Authorised Service Centre for your Goods to be repaired. In some case we may require that you return to the Goods to us (at the address below) for repair, replacement or substitution.
- All returned Goods must be accompanied by satisfactory proof of purchase which clearly indicates the name and address of the Supplier, the date and place of purchase and identifies product. It is best to provide a legible and unmodified receipt or sales invoice.
- You must bear any expense for return of the Goods or otherwise associated with making your claim under this Additional Warranty.
- This warranty is only valid and enforceable in Australia and New Zealand.
Contact us or the place of purchase for further details.
Philips Electronics Australia Limited
Philips New Zealand Commercial Limited
65 Epping Road North Ryde Level 3, 123 Carlton Gore Road
North Ryde SYDNEY NSW 2113 Newmarket AUCKLAND 1023
Consumer Care: 1300 363 391 Consumer Care: 0800 658 224
Website: www.philips.com/support
Website: www.philips.com/support
感谢您的惠顾,欢迎光临飞利浦!
为充分享受飞利浦提供的支持,请在
说明书 食谱

水杯

面粉杯
扁平清洁工具

意大利宽面 / 宽偏面
塑形模块

千层面 / 饺子皮 金属内芯


2 拧松前面板控制钮。
注意:
- 前面板很重。取下时要加倍小心。

42 简体中文
4 清洁所有可拆卸部件,然后擦干。

组装
按照以下组装步骤安装意面/面条机。
重要信息
3 将塑形模块支撑架安装到产品上。
44 简体中文
5 将前面板安装到主装置上。
①塑形模块支撑架安全开关连杆
注意:
使用意面 / 面条机
重要信息
2 等待屏幕显示000.

3 取下搅拌容器盖。

4 等待屏幕再次显示 000。
注意:
注意:
2 从产品上卸下搅拌容器盖。

3 拧松前面板控制钮。
注意:
- 前面板很重。取下时要加倍小心。

![graph TD A["Refrigerator"] --> B["Close lid"] B --> C["Close lid with heat sink"] C --> D["Close lid with heat sink"] D --> E["Close lid with heat sink"]](/content/2026/06/1271399/images/068e398c0a300263b2d7b73b440392acc4ee104dd498e5afdabb79bfaf5a20f5.jpg)

54 简体中文
7 清洁所有可拆卸部件。

故障排除
Specifications are subject to change without notice
All rights reserved.
4241 210 22574


- ALWAYS THERE TO HELP YOU
- WHAT'S IN THE BOX
- 2 ENGLISH
- QUICK START GUIDE
- CONTENTS
- IMPORTANT
- SAFETY
- WARNING
- CAUTION
- ELECTROMAGNETIC FIELDS (EMF)
- OVERVIEW
- DISASSEMBLING AND CLEANING BEFORE FIRST USE
- NOTE
- ASSEMBLING
- 14 ENGLISH
- USING THE PASTA AND NOODLE MAKER
- PREPARING THE INGREDIENTS
- STARTING THE PASTA/NOODLE MAKING PROGRAM
- PASTA/NOODLE TYPE REFERENCE TABLE
- CLEANING
- TIP
- STORING THE SHAPING DISCS AND CLEANING TOOLS
- 26 ENGLISH
- TROUBLESHOOTING
- TOO MUCH LEFTOVER DOUGH INSIDE THE CHAMBER
- SMALL AMOUNT OF WATER IS LEAKING FROM THE APPLIANCE
- THE MIXING PADDLE IS RUNNING IDLE, AND THERE IS NO PASTA/NOODLE COMING OUT
- UNABLE TO MAKE PASTA/NOODLE SUCCESSFULLY WITH THE LIQUID CALCULATION FUNCTION
- PRODUCT INFORMATION
- RECYCLING
- 2-YEAR WARRANTY
- AUSTRALIA
- NEW ZEALAND
- PHILIPS ELECTRONICS AUSTRALIA LIMITED AND PHILIPS NEW ZEALAND COMMERCIAL LIMITED WARRANTY AGAINST DEFECTS
- IN THIS WARRANTY
- ADDITIONAL WARRANTY
- 塑形模块
- 组装
- 重要信息
- 注意:
- 使用意面 / 面条机
- 54 简体中文
- 故障排除
Brand : PHILIPS
Model : Avance Collection HR2358
Category : Pasta machine