
VXE 7020 NAV - Car radio AUDIOVOX - Free user manual and instructions
Find the device manual for free VXE 7020 NAV AUDIOVOX in PDF.


| Product type | Car radio with GPS navigation |
| Brand | Audiovox |
| Model | VXE 7020 NAV |
| Dimensions | 178 x 100 x 160 mm (2 DIN) |
| Weight | Approximately 1.5 kg |
| Power supply | 12 V DC, 10 A fuse |
| Main functions | AM/FM radio, CD/DVD player, GPS navigation, Bluetooth, USB port, auxiliary input |
| Screen | Color touch screen, 6.2 inches |
| Supported audio formats | MP3, WMA, AAC, WAV |
| Bluetooth | Hands-free and audio streaming |
| Navigation | GPS with pre-installed maps, update possible |
| Maintenance and cleaning | Use a soft dry cloth, avoid solvents and abrasive products |
| Security | Customizable security code, detachable front panel |
| Spare parts and repairability | Available from Audiovox after-sales service |
| General information | User manual available in PDF on notice-facile.com |
Frequently Asked Questions - VXE 7020 NAV AUDIOVOX
User questions about VXE 7020 NAV AUDIOVOX
0 question about this device. Answer the ones you know or ask your own.
Ask a new question about this device
Download the instructions for your Car radio in PDF format for free! Find your manual VXE 7020 NAV - AUDIOVOX and take your electronic device back in hand. On this page are published all the documents necessary for the use of your device. VXE 7020 NAV by AUDIOVOX.
USER MANUAL VXE 7020 NAV AUDIOVOX
"Made for iPod," and "Made for iPhone" mean that an electronic accessory has been designed to connect specifically to iPod or iPhone, respectively, and has been certified by the developer to meet Apple performance standards. Apple is not responsible for the operation of this device or its compliance with safety and regulatory standards. Please note that the use of this accessory with iPod or iPhone may affect wireless performance.
Bluetooth® is a trademark of Bluetooth Special Interest Group (SIG) Inc.
iGo Primo is a trademark of NNG Kft.
At the end of the product's useful life, please dispose of it at appropriate collection points provided in your country.
- Rear Auxiliary Audio-/Video-Eingang (Composite)
Audiovox DAB+ 100 Receiver
natural_image
Pure electrical circuit lines without any symbols
Slide Out
natural_image
Pure electrical circuit lines without any symbolsEON (Enhanced Other Networks)
USB-Hauptmenü
bar
| Category | Value | |---|---| | Brightness | 12 | | Contrast | 7 | | Saturation | 9 | | Hue | 8 |bar
| Category | Value | |---|---| | Brightness | 12 | | Contrast | 7 | | Saturation | 9 | | Flux | 8 |natural_image
Close-up of a black plastic clamp with a connector and cable, no visible text or symbolsFreisprechmikrofon
Exiting the navigation mode
Press ON/OFF icon in the Main Menu of the navigation system to exit the navigation mode.
Thank you for choosing an Audiovox product. We hope you will find the instructions in this owner's manual clear and easy to follow. If you take a few minutes to look through it, you'll learn how to use all the features of your new Audiovox VXE 7020 NAV Mobile Multimedia Receiver for maximum enjoyment.
NORMAL USE
This unit is designed to be installed into a 2.0 DIN dashboard opening of a car with 12V battery voltage and negative ground.
Please read through the instruction manual carefully before starting to install the device.
For the installation of the VXE 7020 NAV receiver into the car we recommend to turn to a specialist.
Do not try to open this receiver and repair this receiver. Repairs must always be conducted by qualified specialists.
DECLARATION OF CONFORMITY C€
Hereby, Audiovox Audio Produkte GmbH declares that the VXE 7020 NAV is in compliance with the essential requirements and other relevant provisions of directive 1999/5/EC. The Declaration of Conformity can be found at http://www.audiovox.de in the download area of the VXE 7020 NAV.
CONTENTS
Safety Precautions 69
General information 69
Features / Technical Specifications 70
Optional equipment 72
Controls and Indicators 73
Remote Control 74
External Devices 78
Quick Start Guide 79
Equalizer Controls Menu 82
System Settings 84
Disc Operation 91
Radio Tuner Operation 101
USB Operation 106
iPod®/iPhone® controls 110
AV-In1/AV-In2 CONTROLS 114
Bluetooth® Operation 115
Navigation Quick Start 122
Rear Camera Operation 125
Steering Wheel Control (SWC) Operation 126
Troubleshooting 128
Care and Maintenance 131
SAFETY PRECAUTIONS
- Do not mount the unit in a place which would make it difficult to operate and use whilst driving, thereby impairing your safety.
- Road traffic safety is always of paramount importance. You should only ever use the car radio if you are able to control your vehicle safely and are aware of the current traffic situation.
- If you have any difficulty reading the display or you are unable to operate the car radio, park your car and then adjust the settings.
- As a driver, you must not use any applications during the journey that could distract you from the road ahead (e.g. entering a destination for navigation, viewing images or videos, etc.).
- The announcements made by the navigation system are to be followed while taking the corresponding traffic rules into account (e.g. road signs, give way signs, rights of way, etc.).
- Listening to music at high volume can damage your hearing.
- In order to hear warning sounds (e.g. police sirens, fire sirens, etc.) do not select an excessive volume.
- Do not increase the volume when the car radio has been muted (e.g. when selecting the BT function).
- To avoid accidents, never use the video function whilst driving (with the exception of the video function for the rear view camera). Use while driving is prohibited by law.
- Using an incorrect fuse may damage the unit or cause it to catch fire.
- The unit must not be disassembled or modified.
• To prevent personal injury from electric shock or fire, protect the unit from moisture and water.
GENERAL INFORMATION
- In the event of a malfunction, please read the instructions in the 'Troubleshooting' section. If the fault is not described, press the RESET button near the USB input to restore the factory settings.
- Only use data media in a standard format
FEATURES / TECHNICAL SPECIFICATIONS
Please read the instruction manual for this product before using. The documentation provided will allow the user to fully enjoy all the features of your new Audiovox VXE 7020 NAV Mobile Multimedia Receiver. Please read all of the instructions before beginning the installation and save this manual for future reference. We recommend having your Audiovox VXE 7020 NAV installed by a reputable installation shop.
DVD/CD Player
- Compatible disc media: DVD +/- R/ +/- RW (single and dual layer) and CD-R/-RW
- Compatible media formats: CD-DA, MP3, WMA, VCD, SVCD, Xvid, AVI, MPEG 1/2
• Signal to noise ratio: >95 dBA
• Dynamic range: >95 dB
• Frequency response: 20 Hz to 20 kHz, -3 dB
• Channel separation: > 60 dB at 1 kHz
• D/A converter: high performance 24-bit / 192 kHz sample rate, multi-bit Sigma-Delta modulator - Screen formats: cinema, normal and off (standby)
Video
- Format: PAL / NTSC (auto-detection)
• Output: 1 Vp-p (75 ohms)
• Input: 1 Vp-p (75 ohms)
CD / MP3 / WMA
- CD text compatible
• Display of album picture (ID3-tag compatible) - Directory search (MP3 / WMA only)
- Playback of self-made CDs/DVD+R/RWs with up to 2000 MP3 and WMA files
FM Tuner
- RDS (Radio Data System): AF (Alternative Frequencies), CT (Clock Time), EON (Enhanced Other Networks), PS (Programme Service), PTY (Programme Type), RT (Radio Text), TA (Traffic Announcements)
- Tuning range: 87,5 MHz – 107,9 MHz
• 18 station presets - Auto stereo/mono
- Local/distance
• Mono sensitivity (-30 dB): 9 dBf - Quieting sensitivity (-50 dB): 15 dBf
• Alternate channel sensitivity: 70 dB
• Signal to noise ratio at 1 kHz: 58 dB
• Frequency response: 30 Hz – 15 kHz, -3 dB
AM Tuner
- Tuning range: 522 kHz – 1620 kHz
- 12 station presets
Navigation System
• 3D NAV engine software iGo Primo 2.4
• Premium POI set with 7 million POIs
• TMC
• Text to speech function
- 8 GB micro SD card
- GPS antenna
• Maps available for 44 European countries
- Maps update on www.naviextras.com
• 15 TTS languages (Text to Speech, announcement of road names)
• 3D function displaying 3D buildings, 3D landmarks, and 3D terrain
- Navigation mix mode
Bluetooth®
- Hands-free operation with separate microphone
- Audio streaming
- Bluetooth module with AVRCP/A2DP profile
Monitor
- Screen size: 16 cm / (6.2") digital LCD TS (Touch Screen) with LED backlight
- Screen type: high definition TFT monitor with LCD (Liquid Crystal Display)
• Resolution: 1,152,000 sub pixels, 800x3 (W) x 480 (H)
Personal Color Adjustment (Color illustrations / background)
Extended graphical user interface adjustment with:
- 5 menu colors: green / red / orange / blue / purple (to set the background color on the LCD)
- 11 RGB light settings (keyboard / background illumination): blue / green / white / yellow / purple / red / aqua blue / sky blue / 3 x user-defined
Wallpaper Selection:
- Settings: motor start / blue fog / green cubes / red curls / tribal
General
- Front 3.5 mm A/V input
- Front USB 2.0 input with 1.0 A charge current
- Rear auxiliary audio/video input (Composite)
• Video input for rear view camera (normal and opposite hand)
- 5 line audio outputs: 2x front, 2x rear and subwoofer (6 V RMS / 500 ohms)
• Video output for TFT monitor
- SWC (Steering Wheel Control) connection via optionally available adapter (compatible with Dietz UNICO DUAL PLUS (art. no. 66040) with cable (art. no. 66405), PAC (Pacific Accessory Corporation) SWI-PS with Metra ASWC interface profile)
• 10-Band tone control with 6 preset and 1 user-defined EQ curves
- Sub X-over frequencies 80 / 120 / 160 Hz
- Programmable volume control for each audio source
- Calibration mode for touch screen
• Power supply: 11 to 16 VDC, negative ground
- Switch output for active antenna (blue): 500 mA max, overcurrent protection
- Operating temperature: -20^ to 65^
- Fuse 15A mini ATO
• DIN chassis dimensions: 178 x 178 x 100 mm (7" x 7" x 4")
• Weight: 2.6 kg net (incl. cable adapter and GPS antenna)
- Multi language OSD (German, English, French)
• Made for iPod / made for iPhone
• Automatic switch-on of rear view camera mode (normal and opposite hand)
- Windows 6.0 CE real time operating system
Power Ratings
• Total power output: 160 watts
• Power output: 4 x 40 watts
• Signal to noise ratio: 70 dBA below reference (reference: 1 watt, 4 ohms)
- Frequency response: 20 Hz – 20 kHz, -3 dB (AUX input used as reference input)
OPTIONAL EQUIPMENT
Rear Camera Audiovox RVC1
The VXE 7020 NAV is “camera ready.” Before accessing any camera features, you must purchase and install a rear video camera.
Audiovox DAB+ 100 Receiver
The VXE 7020 NAV is compatible with the DAB+ Receiver Audiovox DAB+ 100. The Audiovox DAB+ 100 allows radio reception in digital sound quality. For this, you must purchase and install the Audiovox DAB+ 100 module. The operation of the Audiovox DAB+ 100 is performed via the menu of the VXE 7020 NAV. Please refer to the instructions included with the DAB+ receiver for detailed installation and operation information.
CONTROLS AND INDICATORS

VXE 7020 NAV Controls and Indicators
-
Disc Slot: Accepts DVD/CD/MP3 discs. If the unit is turned on, playback begins when a disc is inserted.
-
LCD Screen and Touch Screen: Touch icons on this screen to access menus or control functions.
-
Remote Sensor: Used to receive command signals from the remote control.
-
3.5mm AV IN Jack: This connector accepts a 3.5 mm jack through which signals from various audio/video devices can be applied to the unit.
-
MicroSD Card Slot: Used to insert microSD cards containing navigation software updates.
-
USB Slot: Used to connect an iPod®, MP3 player or flash drive connection adapter for playback of music/video files.
-
Interface Cover: Covers the AV IN jack, microSD card slot, and USB slot.
-
Reset Button: Press this button to reset the system settings (except password settings) and to correct a system halt or other illegal operation. Use the tip of a pen to press the Reset button.
-
Power On/Off ( ⏻ ) Button / Rotary Volume ( Ⓞ Knob / Mute Button:
Press to turn the unit ON. Press and hold to turn the unit off.
Rotate the knob to adjust the volume from 0 to 50.
Press the knob momentarily to mute the audio. Press the knob again to restore the audio.
-
Menu Button: Press this button to access the Main touch screen menu. Press and hold the menu button for about 2 seconds to toggle between navigation and source.
-
Eject(▲) Button: Press this button to eject a DVD/CD/MP3 disc. Disc play is stopped, the disc is ejected and the unit will change to radio operation. If the disc is not removed from the unit and the button is pressed again, the disc will be re-loaded. If the disc is not removed from the disc slot within 10 seconds of being ejected, it will be automatically reloaded to prevent it from being accidentally damaged.
REMOTE CONTROL
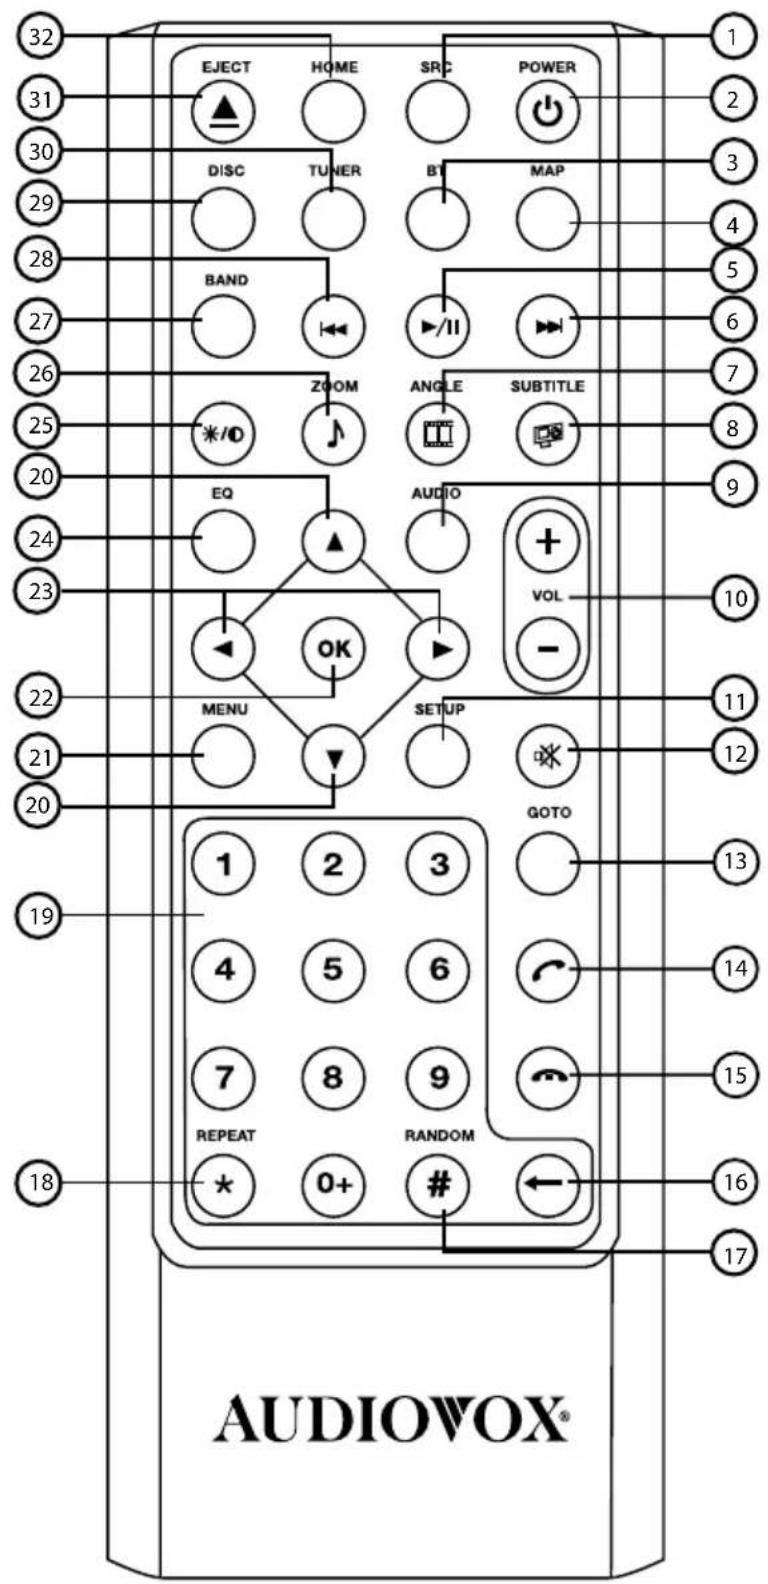
VXE 7020 NAV Remote Control
Remote Control Functional Description
- SOURCE (SRC) Button: Press this button to switch between and select available sources. (Disc, Radio, USB/iPod®, AV-IN1, AV-IN2, Settings, Bluetooth®, Camera)
- POWER Button (💡): Press this button to turn the unit ON and OFF.
- BLUETOOTH (BT) Button: Press this button to enter the Bluetooth feature.
- NAVIGATION Button: Press this button to enter the Navigation feature. Press again to return to previous source.
- PLAY / PAUSE (▶/II) Button: Press this button to pause the playback of a disc. Press this button again to resume normal playback.
- NEXT forward (▶▶) Button: Press this button to skip to the next chapter, track or song during playback of a disc. Press this button while in Radio mode to search available radio station by increasing tuning frequency. Press this button while in iPod mode to pause playback/starts playback of a music file.
- ANGLE Button (☐): Press to display and select different camera angles in DVD mode. Each time the button is pressed, the angle changes. Note: The numbers of angles vary from disc to disc. Not all discs contain this option.
- SUBTITLE Button (☐): Press to display and select the subtitle language in DVD mode. Each time the button is pressed, the subtitle language changes.
Note: The type and number of languages for subtitles vary from disc to disc. - AUDIO Button: Press to display and select the audio language in DVD mode. Each time the button is pressed, the language changes.
Note: The languages for audio vary from disc to disc. - VOLUME Button (VOL + and -): Press these buttons to increase or decrease the playback volume.
- SETUP Button: Press to this button to enter the system settings menu.
- MUTE Button (☐): Press this button to turn the audio output ON and OFF.
- GOTO Button: Press this button to open direct entry search screen during the playback of a disc.
- ANSWER INCOMING PHONE CALL Button ( ) : Press this button to answer an incoming Bluetooth phone call.
- Disconnect ACTIVE PHONE CALL Button(): Press this button to disconnect an active Bluetooth phone call.
- BACKSPACEButton(←): Press this button to correct invalid number entries when entering passwords, track/chapter selections or phone numbers using the remote control.
- RANDOM Button#): Press this button to play tracks or chapters in random order while playing a disc.
- REPEAT Button (★): Press this button to repeat the playback of a current track. Allows the user to repeat a selected Title, Chapter or Track of a DVD, CD or MP3.
- Number Buttons (0-9): Press these buttons to directly access chapters and tracks, dialing phone numbers, or entering passwords.
- Up (▲) / Down (▼) Buttons: Press these buttons to scroll upward and downward, respectively, in menu options.
- MENU Button: Press this button to access the root menu of a DVD or CD during playback. The disc will return to normal playback and the root menu will disappear if no selection is made within 10 seconds. This button is also used to select photo mode of an MP3 player.
- ENTER Button (OK): Press this button to implement a selected setting or accept an option.
23.Left (◀) / Right (▶) Buttons: Press these buttons to shift left and right, respectively, in the menu options
-
EQUALIZER Button (EQ): Press this button to accesses the equalizer menu in all audio playback modes.
-
Screen Backlight adjust Button (*/0): Press this button to adjust the screen backlighting level between low, medium and bright.
-
ZOOM Button(): (for viewing Image files)
DISC images
Press ZOOM button CD Player Performs
Once Enlarge the picture 125% of the original size
2 times Enlarge the picture 150% of the original size
3 times Enlarge the picture 200% of the original size
4 times Picture is returned to original size
-
BAND Button: Press this button to scroll though preset stations.
-
PREVIOUS (◀) Button: Press this button to go back to the previous chapter, track or song during playback of a disc. Press this button while in Radio mode to search available radio station by increasing tuning frequency. Press this button while in iPod mode to pause playback/starts playback of a music file.
-
DISC Button: Press this button to enter Disc mode.
-
TUNER: Press this button to enter Radio mode.
-
EJECT Button (▲): Press this button to eject a DVD/CD/MP3 disc. Disc play is stopped, the disc is ejected and the unit will change to radio operation. If the disc is not removed from the unit and the button is pressed again, the disc will be re-loaded. If the disc is not removed from the disc slot within 10 seconds of being ejected, it will be automatically reloaded to prevent it from being accidentally damaged.
-
HOME Button: Press this button to return to the source menu.
Notes on Remote Control Usage
Aim the remote control at the remote sensor on the unit.
- Replace the battery from the remote control or insert a battery insulator if the battery has not been used for a month or longer.
- DO NOT store the remote control in direct sunlight or in high temperature environment, or it may not function properly.
- The battery can work for 6 months under normal condition. If the remote control won't work, please change the battery.
- Use "button shaped" lithium battery "CR2025"(3V) only.
- DO NOT recharge, disassemble, heat or expose the battery in fire.
- Insert the battery in proper direction according to the (+) and (-) poles.
- Store the battery in a place where children cannot reach to avoid the risk of accident.
Remote Control Battery Replacement
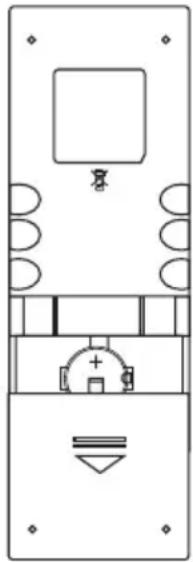
Install Battery
Use button-shaped lithium battery CR2025 (3V)" only. Insert the battery to the battery tray with proper direction according to the (+) and (-) poles.
NOTE: Be sure and insert the positive (+) side of the battery UNDER the metal tab in the battery compartment.
Uninstall Battery
Slide out the battery compartment tray at the bottom on the back of the remote control.


natural_image
Pure diagram of a slide layout with no text, numbers, or symbolsBattery Compartment Cover Removal/Installation
EXTERNAL DEVICES
Connecting External Devices
External devices, including a game console, camcorder, navigation unit, iPod®, Zune®, etc. can be connected to this unit using its front A/V input 3.5mm jack (AV-In1), the rear RCA inputs (AV-In2) or the USB port.
You cannot directly control external devices connected to the A/V INPUTs using the front panel controls or this unit's remote control.
AV-In1
AV-In1 is used for playback of audio/video from an external device connected to the unit through a 3.5mm jack. The unit can increase or decrease the volume of the connected device all other controls are done on the connected device. Select "AV-In 1" mode to access auxiliary devices.
AV-In2
AV-In2 is used for playback of audio/video from an external device connected through RCA connectors located on the back of the unit (see the VXE 7020 NAV Installation Guide). The unit can increase or decrease the volume of the connected device; all other controls are done on the connected device. Select “AV-In2” mode to access auxiliary devices.
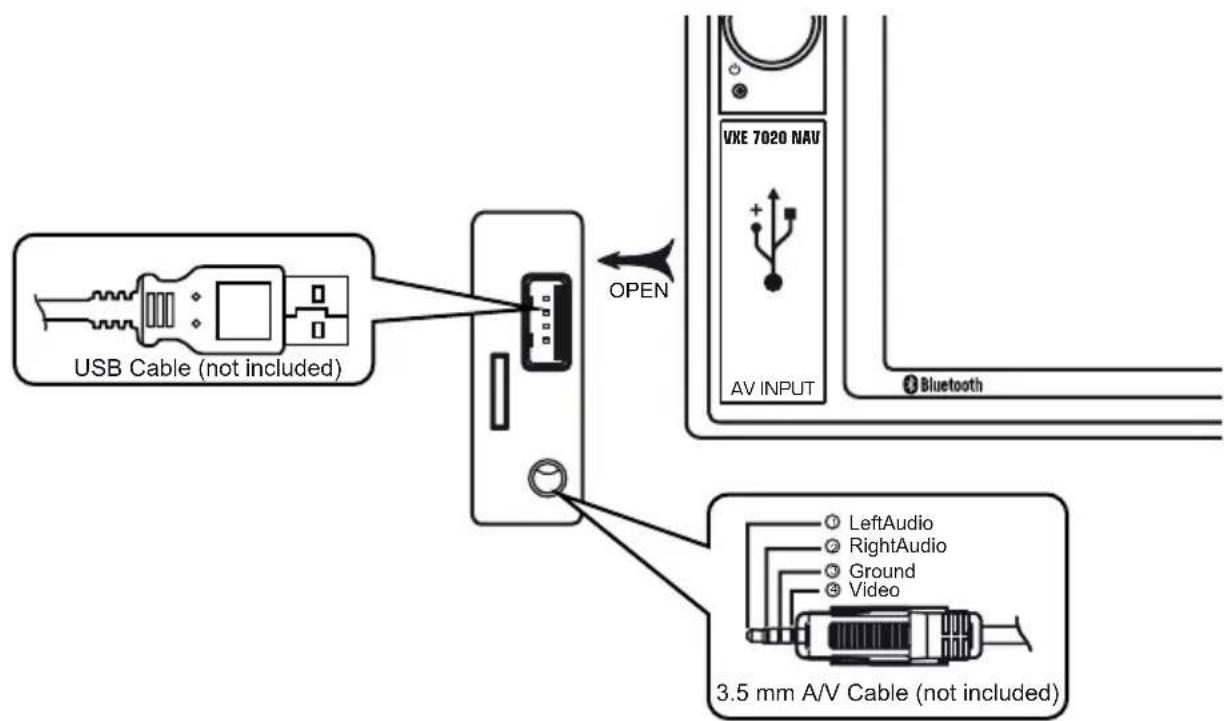
Connecting External Devices
QUICK START GUIDE
Turning the Unit ON or OFF
Press the front panel Power On/Off ( ) button / Rotary Volume ( ) knob / Mute button to turn the unit ON. To turn the unit OFF, press and hold the front panel Power On/Off ( ) button / Rotary Volume ( ) knob / Mute button for 2 seconds.
Selecting an Audio/Video Source, Bluetooth, Steering Wheel Controls or Backup Camera
To select an audio/video source:
- Press the front panel MENU button or touch the SRC icon to view the main menu screen.

VXE 7020 NAV Front Panel
- Touch the desired source icon on one of the two main menu screens.
Screen 1 of 2: Disc, Radio, USB, AV-IN1, AV-IN2, DAB, Bluetooth (BT).
Touch Next at the bottom of the screen to access Screen 2 of 2: Steering Wheel Controls (SWC), Camera, Settings.

Screen 1 Screen 2

VXE 7020 NAV Main Menu Screen
System Settings Adjustment
To access and adjust system settings:
Touch the Settings (💡) icon on the Main Menu screen to enter the SETTINGS MENU. Submenus where adjustments can be made will be highlighted.
Volume Adjustment
To increase or decrease the volume level, rotate the front panel Power
On/Off ( ⏻ ) button / Rotary Volume ( ⏻ ) knob / Mute button. The unit's front panel screen will display the volume level for 3 seconds. The volume level ranges from 0 to 50 (a beep sounds, indicating that the adjustment limit has been reached).
Audible Beep Confirmation
An audible beep tone confirms each function selection. The beep tone can be disabled through the Setup menu.
Muting the Audio
Press the front panel Power On/Off ( ) button / Rotary Volume ( ) knob / Mute button to mute the audio from the unit. Mute icon is displayed on the LCD screen. Press the Power On/Off ( ) button / Rotary Volume ( ) knob / Mute button again to restore the audio volume to its previous level. Adjusting the volume or using any of the audio setup features cancels the mute function.
Equalizer Controls
Equalizer (EQ): Adjustment can be made after entering one of the audio/video sources (Disc, Radio, USB, AV-IN1, AV-IN2 or DAB).
Touch the Equalizer (EQ) icon to view the Equalizer Control Screen to select a desired preset setting (Optimal, Classic, Rock, Jazz, Techno or Pop), Flat setting, custom User setting, make adjustments to the audio Balance and Fade levels or to turn the Loudness option ON or OFF. Touch the SRC icon to return to the current source.
Playing a Disc
To begin playback of an Audio/Video Disc:
- Press the front panel Power On/Off ( ⏻ ) button / Rotary Volume ( ⏻ ) knob / Mute button to turn the unit ON.
- Insert a disc with the label side facing up. Playback will begin automatically.
To eject a disc:
Press the front panel Eject (▲) button.
Resetting the System
To correct a system halt or other illegal operation, use the tip of a pen to press and release the reset button located just below the front panel interface cover.
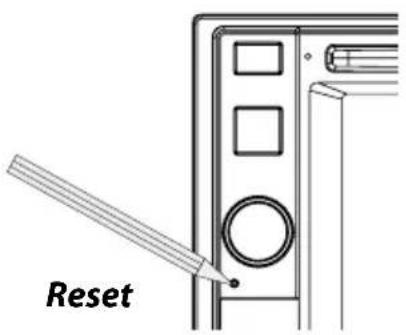
System Reset Button
After a system reset, the unit restores all factory default settings.
Note: If the unit is reset while a DVD is playing, the unit will return to Main Menu once the reset is complete.
Parking Brake Inhibit
When the pink "Parking" wire is connected to the vehicle Parking Brake circuit, the front TFT monitor will display video when the Parking Brake is engaged.
Adjusting Equalizer Controls
The Equalizer adjustment screen allows the user to easily adjust the audio system to meet the acoustical characteristics of the vehicle. The acoustical characteristics vary depending on the type of vehicle and measurements.
For example: proper setting of the audio controls can improve the speakers frequency response to compensate for cabin.
The Balance/Fade levels and Loudness ON/OFF option of a selected audio/video source (Disc, Radio, USB/iPod®, AV-IN1, AV-IN2 or DAB) is also adjusted through the Equalizer adjustment screen.
Equalizer (EQ) (10 Band)
- Touch the Equalizer (EQ) icon to view and select a desired preset setting (Optimal, Classic, Rock, Jazz, Techno or Pop) or Flat setting.
Note: The equalizer will automatically change to "USER" when individual audio functions are adjusted.

Equalizer Adjustment Screen
-
Select a desired frequency range slide bar to be adjusted (31.5, 62.5, 125, 250, 500, 1K, 2K, 4K, 8K or 16K).
-
Touch and move the slide bar Up or Down to adjust the frequency sound level settings from -10 to +10.
User Setting
Touch the User icon to customize each of equalizers 10 frequency bands.
Flat Setting
Touch the Flat icon to set the equalizers 10 band frequencies to the midpoint.
Loud Setting
Touch the Loudness icon to turn the loud option ON or OFF. The loud option automatically alters the frequency response curve of audio to make it sound more natural when played at a lower volume level.
Exiting the Equalizer
To exit the Equalizer menu touch the SRC icon to return to the current source.
Fader-Balance
Touch the FAD-BAL icon on the left side of the equalizer screen to display the balance/fader screen.
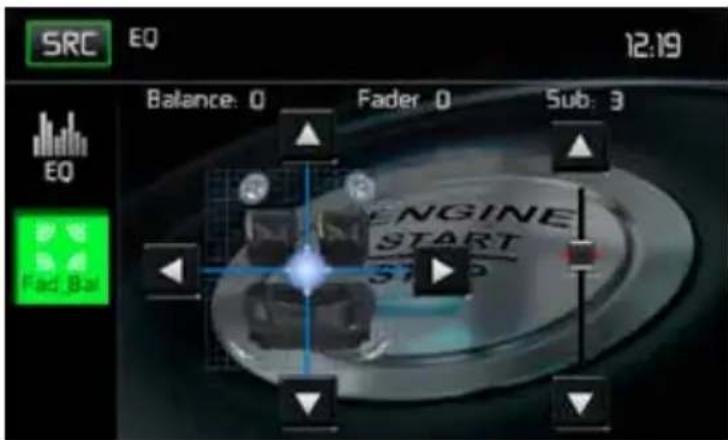
Fade-Balance Adjustment Screen
Balance
This feature is used to balance the audio output levels between the left and right side of the vehicle. Touch the ◀ or ▶ icons to change the balance control settings -20 (Left) to +20 (Right). The setting can also be changed by touching screen within the grid to move the sphere.
Fader
This feature is used to fade the audio output levels between the front and rear of the vehicle. Touch the ▲ or ▼ icons to change the fade control settings -20 (Rear) to +20 (Front). The setting can also be changed by touching screen within the grid to move the sphere.
Sub (Subwoofer)
This feature is used to reduce or increase the subwoofer sound level. Touch the slide bar ▲ or ▼ icons to adjust the settings.
Exiting the Balance-Fader
To exit the balance-fader touch the SRC icon on the top left corner of the screen.
SYSTEM SETTINGS
To access System Settings, touch the icon on the Main Menu screen. There are seven System Settings Sub-menus (General, Audio, Time, Language, Bluetooth, DVD or Volume) that are used to adjust the performance of each option of the VXE 7020 NAV. The Version Sub-menu is for information only. Touch a desired Sub-Menu and the Sub-menu will appear highlighted. The features available for adjustment will appear on the screen.


System Settings Screens
Adjusting a Sub-Menu Feature
- Touch the Sub-Menu feature to be adjusted.
- Touch the ▲ or ▼ icon to view the previous or next feature page, if applicable. An options list appears on the right.
- Touch the desired feature option once to make selection then touch again to confirm the selection.
General Sub-menu Features
Radio Region: USA, China, Japan, Europe, Europe (LW), and Orient (OIRT)
Europe frequencies:
• AM Frequency Spacing - 9 kHz
• AM Frequency Band - 522 kHz \~ 1620 kHz
• FM Frequency Spacing - 50 kHz
• FM Frequency Band - 87.5 MHz \~ 107.9 MHz
Radio Lo/Dx: Touch the Distance or Local to increase or decrease radio tuning sensitivity to receive local or distant stations.
TFT Standby: Touch OFF, 10s or 20s to set the unit's front panel TFT LCD screen to stay ON continuously or to blackout the screen after 10 or 20 seconds.
Display Adjust: Touch Night, Dark, Normal or Bright to set the unit's front panel TFT LCD screen to be adjusted for day and night conditions.
Beep: Touch ON or OFF to turn the selection confirmation beep ON or OFF.
Wallpaper: Touch Engine Start, Blue Haze, Green Cubes, Red Swirl or Tribal to select the TFT LCD wallpaper. Touch again to confirm and set the wallpaper.
Calibration
The Touch Screen Calibration adjustment is used to set the parameters of the touch screen to ensure that when the screen is touched, it corresponds to the feature desired.
Note: Never use a pen or sharp object to calibrate the touch screen as this will damage the panel.
- Touch the Calibrate icon and the first screen will appear with instructions.
- Follow the instructions on the screen touching and momentarily holding finger or a stylus to the center of the target for 2 seconds. Repeat as the target moves to each corner of the screen and finally to the center.

Calibration Screen
- The second screen will appear:
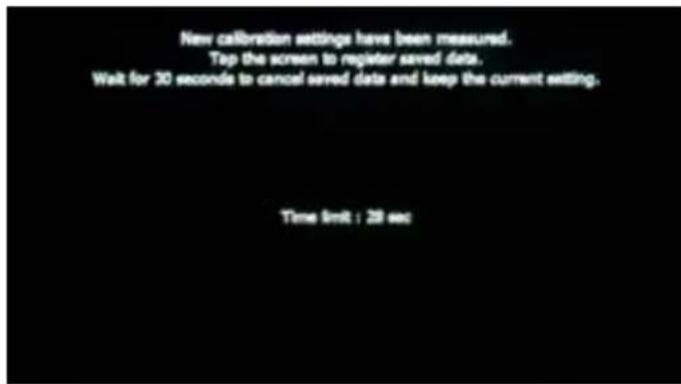
Calibration Screen Confirmation
- If the screen is touched, the new calibration parameters will be accepted. If the screen is not touched within thirty seconds, the new parameters will be disregarded.
Illumination: Touch to access the Illumination screen. Touch a color to set the front panel display to the selected color.
UI Color: Touch green, red, amber, blue or purple to select the user interface color. Touch again to confirm and set the color.
Demo: Touch ON or OFF to turn the demonstration mode ON or OFF. The factory default setting is OFF.
Audio Sub-menu Features
The Audio Sub-menu is used to turn the Subwoofer output ON or OFF and to select a Subwoofer crossover frequency.

Audio Sub-menu Screen
Subwoofer: Touch ON or OFF to turn the subwoofer output ON or OFF.
Subwoofer Crossover: Touch a crossover frequency (80Hz, 120Hz or 160Hz) to set a cut-off frequency for the subwoofer's low-pass filter (LPF).
Time Sub-menu Features
The clock appears in the top right corner of the screen during certain operations.
Note: The AM/PM indication will change as you continue to adjust the hour past 12.

Time Sub-menu Screen
Date: Touch the Date icon and use the ▲ or ▼ icons to set the day, month, and year. After setting the date, touch Save. The date will appear to the right of the DATE icon.
Clock Mode: Touch 12Hr to set the clock display to 12 hour time intervals using AM and PM. Touch 24Hr to set the clock display to a 24 hour time interval (or military time).
Time: Touch the Time icon and use the ▲ or ▼ icons to set the hour, minute, and either AM or PM. After setting the time, touch Save. The time will appear to the right of the TIME icon.
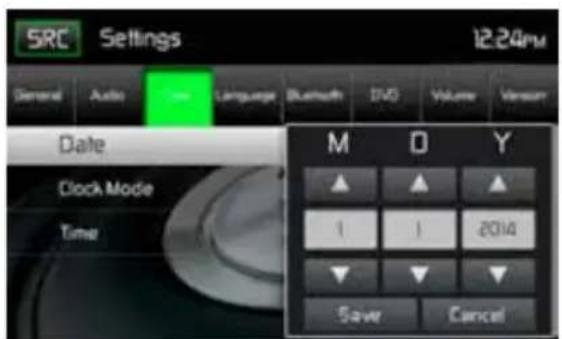
Date Settings Time Settings
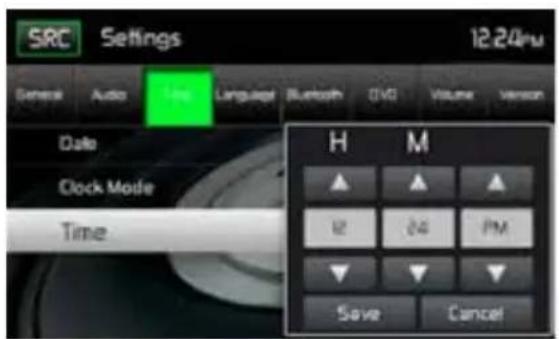
Date and Time Setting Screens
Language Sub-menu Features
If a DVD supports more than one Subtitle or Audio language, all the languages are available for selection during playback. If the selected language is not supported by the DVD, then the default language is used.

Language Sub-menu Screen
On Screen Display (OSD): Touch English, German or French to select the language for the OSD Display.
DVD Audio: If available, this feature allows the user to select one of the languages contained on the disc for the DVD audio.
DVD Subtitle: If available, this feature allows the user to select one of the languages contained on the disc for the DVD subtitles.
Disc Menu: Allows the user to select one of the languages contained on the disc menu.
Bluetooth Sub-menu Features
The Bluetooth audio capabilities can be used for wireless phones hands free applications. Before attempting to use the Bluetooth functions on this unit, please make sure the wireless phone to be connected supports Bluetooth functions.

Bluetooth Pairing Code Screen 2
Bluetooth: Touch ON or OFF to turn the Bluetooth function ON or OFF.
Auto-Connect: Touch ON or OFF to turn the Bluetooth Auto-Connect function ON or OFF.
Auto-Answer: Touch ON or OFF to turn the Bluetooth Auto-Answer function ON or OFF.
Pairing: This feature allows the user to create a unique 4 digit code for pairing Bluetooth devices to the unit. The factory default pairing code is "0000".
-
Touch the Paring Code icon and the Pairing Code entry screen will appear.
-
Use the keyboard to enter a unique 4-digit Pairing Code.
Note: If a wrong digit is entered touching the arrow will remove the number.
- Touch OK to confirm 4 digit pairing code.

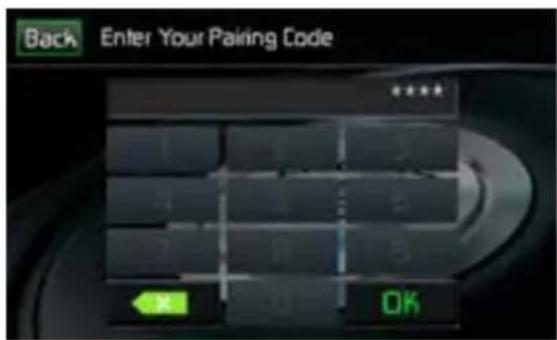
Pairing Code Entry Screen Pairing Code Confirmation Screen
Pairing Code Screens
DVD Sub-menu features
DRC: This feature allows the user to turn the Dynamic Range Control ON for better playback for low volumes or OFF.
Load Factory: This feature allows the user to "Reset" to restore the factory default settings.
Volume Sub-menu Features
The Volume Sub-menu allows the user to increase or decrease the relative volume of the audio output of each source individually.
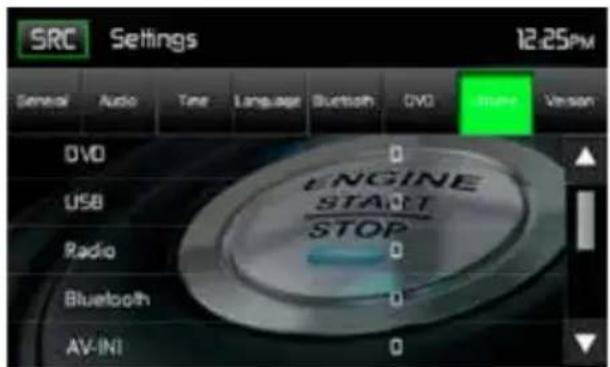
Volume Sub-menu Screen 1
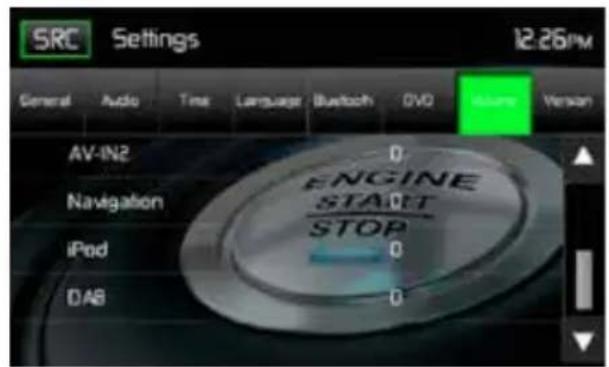
Volume Sub-menu Screen 2
Volume Sub-menu Screens
DVD: Touch the DVD icon to enter the setting, then use the ▲ or ▼ icons increase or decrease the relative volume level between -6 to +6.
USB: Touch the USB icon to enter the setting, then use the ▲ or ▼ icons increase or decrease the relative volume level between -6 to +6.
Radio: Touch the Radio icon to enter the setting, then use the ▲ or ▼ icons increase or decrease the relative volume level between -6 to +6.
Bluetooth: Touch the Bluetooth icon to enter the setting, then use the ▲ or ▼ icons to increase or decrease the relative volume level between -6 to +6.
AV-IN1: Touch the AV-IN1 icon to enter the setting, then use the ▲ or ▼ icons to increase or decrease the relative volume level between -6 to +6.
AV-IN2: Touch the AV-IN2 icon to enter the setting, then use the ▲ or ▼ icons to increase or decrease the relative volume level between -6 to +6.
Navigation: Touch the Navigation icon to enter the setting, then use the ▲ or ▼ icons increase or decrease the relative volume level between -6 to +6.
iPod: Touch the iPod icon to enter the setting, then use the ▲ or ▼ icons increase or decrease the relative volume level between -6 to +6.
DAB: Touch the DAB icon to enter the setting, then use the ▲ or ▼ icons to increase or decrease the relative volume level between -6 to +6.
The default relative volume level setting for all available sources is "0".
Version Sub-menu Features
The Version Sub-menu is used to identify the model and resident operating system as well as the hardware and software versions.
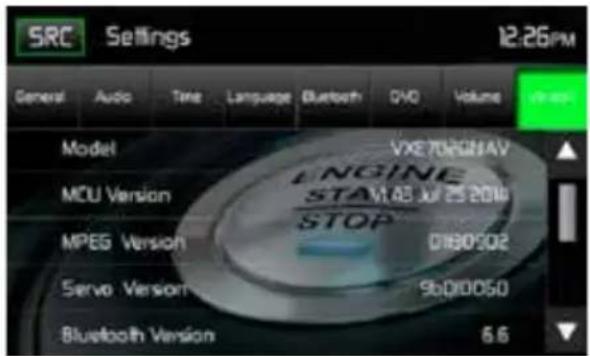
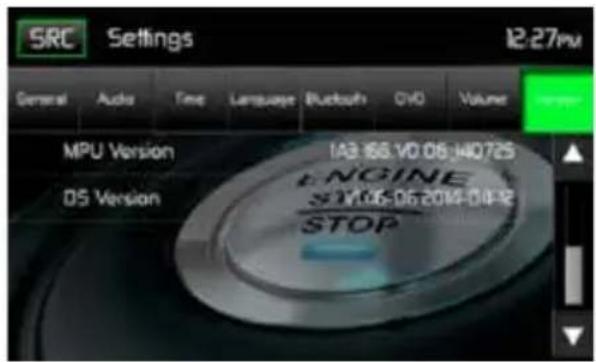
Version Sub-Menu Screen 1 Version Sub-Menu Screen 2
Version Sub-Menu Screens 1 and 2
Exiting the System Settings Menu
To exit the System Settings menu and resume normal playback, touch the SRC icon on the screen.
DISC OPERATION
Compatible Audio Discs Types
This system will play the following types of discs:
DVD - DVDs that contain audio and/or video.
Audio discs - Audio CDs that contain audio, video and image files.
MP3 discs - A disc that contains audio, video and image files (for example, a CD-R with downloaded MP3 files).
NOTE: This unit is designed to play pre-recorded (original) CD/DVDs. Some burned CD / DVDs may not play due to different recording formats.
DVD Operation
Note: When properly installed, DVD video cannot be displayed on the main TFT screen unless the parking brake is applied. If you attempt to play a DVD while the vehicle is moving, the TFT screen displays:
WARNING!!!
IT IS ILLEGAL TO VIEW VIDEO WHILE DRIVING OR OPERATING A MOTOR VEHICLE. SET PARKING BRAKE TO VIEW VIDEO.
From the Main Menu Screen touch the DISC Icon or insert a disc into the disc slot, label side up. Playback begins when a disc is inserted correctly.
DVD Main Menu
When a DVD is playing, touch the TFT LCD screen to view the DVD main menu. The on-screen icons and touch key areas are outlined below.
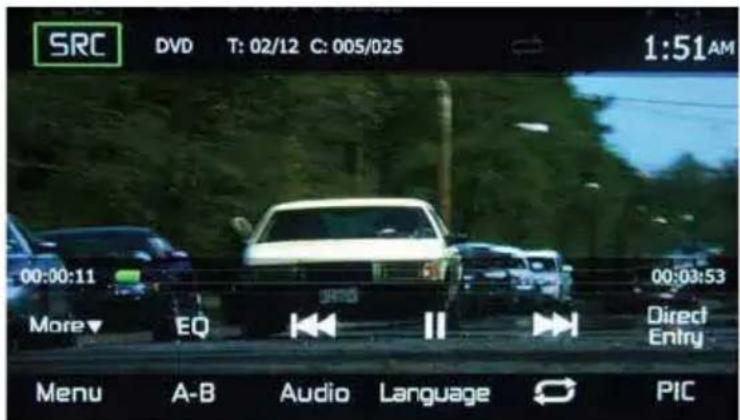
DVD Main Menu
SRC Icon: Touch this icon to return to the Main Menu Screen.
DVD: Displays the current source.
Title/Chapter Information: The title/chapter information displayed is the current number of the track playing, the total number of tracks on the disc, the current chapter playing and the total number of chapters on the disc.
Time Display: This indicator displays the time as entered by the user in the Settings Menu.
Chapter Elapsed Playback Time: The elapsed playback time of chapter is displayed on the screen.
Total Playback Time: The total playback time of disc is displayed on the screen.
More (▲/▼): Touch the ▲/▼ icons to display the next or previous page of the Disc menu.
( EQ ) Equalizer: Touch this icon to access the Equalizer Control Menu.
(◀◀) Previous: Touch this icon to play the previous track.
(▶/II) Play/Pause: Touch this icon to begin disc playback. Touch this icon again to pause disc playback.
(▶▶) Next: Touch this icon to play the next track.
Direct Entry: Touch this icon to the display the Direct Entry Screen.
Menu: Touch this icon to view the DVD root menu.
A-B: Touch to repeat a specific portion from point A to point B of the disc. During playback touch A-B to set the starting point A. Touch A-B a second time to set the ending point B. The player will repeatedly play the part between Point A and Point B. Touch A-B a third time to cancel A-B repeat and resume playback.
Audio: Touch this icon to select an audio language for DVD playback. The audio language selection depends on the languages contained on the disc.
Language: Touch this icon to select a subtitle language for DVD playback. The subtitle language selection depends on the languages contained on the disc.
( ) Repeat: Touch this icon during playback to repeat the current chapter. The icon on the screen will light and small letter C will appear below the icon and the chapter will repeat. Touch this icon a second time to repeat the current title. The icon on the TFT LCD screen will light and small letter T will appear below the icon and the title track will repeat. Touch the icon a third time to repeat the title and chapter. The icon on the main TFT LCD screen will light and small letter A will appear below the icon and the title and chapter will repeat. Touch the icon again the repeat function will be cancelled. The icon on the main TFT LCD screen will dim and playback of the remainder of the disc will resume.
PIC: When the PIC icon is touched the picture adjust screen appears. Touch this icon during playback to adjust the color brightness, contrast, saturation and hue. The levels can be adjusted to suit the users preferences. The adjustments are accomplished by touching the + or - icons to decrease or increase the desired setting. The settings have range of 1 to 20.
Note: The Picture Adjustment Screen will turn OFF automatically if no adjustment is made within five seconds or if any other part of the screen is touched.

bar
| Parameter | Value | |---|---| | Brightness | 12 | | Contrast | 7 | | Saturation | 9 | | Hue | 8 |DVD Picture Adjustment Screen
Direct Entry
When the Direct Entry icon is touched the Direct Entry Screen appears. The user can manually select a title or a chapter. By touching ▼ icon, the user can select a chapter or title. The title or chapter can be selected by touching the corresponding number for a title or chapter. After entering the numbers, touch the OK icon. If a wrong digit is entered, touching the arrow will remove the number. After touching OK, playback will begin.

DVD Chapter and Title Direct Entry Screen
Inserting a Disc
Upon inserting a DVD disc, DVD mode is entered and disc play begins. A disc cannot be inserted if there is already a disc in the unit or if the power is off.
Note: DVD-R and DVD-RW will not play unless the recording session is finalized and the DVD is closed.
Ejecting a Disc: Press the Eject (▲) button on the front of the unit to eject the disc. The unit automatically reverts to Tuner mode. You may eject a disc with the unit powered off. The unit will remain off after the disc is ejected.
Resetting the Loading Mechanism: If the disc loads abnormally or an abnormal core mechanism operation occurs, press and hold the Eject (▲) button on the front of the unit to reset the loading mechanism. Normal operation resumes.
Accessing DVD Mode: To switch to DVD mode when a disc is already inserted, touch SRC on the TFT LCD screen to access the source menu. Touch the disc icon.
Multi-Language Discs (DVD Only)
Changing Audio Language: If you are watching a disc recorded in multiple languages, touch the TFT LCD screen, then touch AUDIO to choose a language. Each time the icon is touched the language will change.
Changing Subtitle Language: If you are watching a disc recorded in multiple languages with subtitles, touch the TFT LCD, then touch Language screen to choose the language that you would like the subtitles to appear.
Playback Information
During DVD and VCD playback, touch the TFT LCD screen to display playback information on the screen, including the current playback time.
DVD Playback Information
- DVD Video – Format of current disc.
- Time 00:01:30/00:36:10 – Indicates the playback time of the current track.
- Title 5/08 – Indicates the fifth of 8 titles on the DVD is currently playing.
- Chapter 2/16 – Indicates that the second of 16 chapters on the DVD is currently playing.
VCD Playback Information
- VCD2.0 – Format of current disc.
- Time 00:01:30/00:36:10 – Indicates the playback time of the current track.
General Disc Information
Disc Properties
| Symbol 12cm Disc Properties Max Play Time | ||
 | Single side single layer (DVD-5) | (MPEG 2 Method) |
| Single side double layer (DVD-9) | 133 minutes | |
| Double side single layer (DVD-10) | 242 minutes | |
 | Double side double layer (DVD-18) | 266 minutes |
| 484 minutes | ||
 | Single side single layer (VCD) (MPEG 1 Method) | 74 minutes |
 | Single side single layer 74 minutes | |
Disc Symbols
| Symbol Meaning | |
 | Number of voice languages recorded. The number inside the icon indicates the number languages on the disc (maximum of 8). |
 | Number of subtitle languages available on the disc (maximum of 32). |
 | Number of angles provided (maximum of 9). |
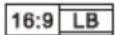 | Aspect ratios available. “LB” stands for Letter Box and “PS” stands for Pan/Scan.In the example on the left, the 16:9 video can be converted to Letter Box video. |
 | Indicates the region code where the disc can be played.• Region 1: USA, Canada, East Pacific Ocean Islands• Region 2: Japan, Western Europe, Northern Europe, Egypt, South Africa,Middle East• Region 3: Taiwan, Hong Kong, South Korea, Thailand, Indonesia, South-East Asia• Region 4: Australia, New Zealand, Middle and South America, South PacificOcean Islands/Oceania• Region 5: Russia, Mongolia, India, Middle Asia, Eastern Europe, North Korea,North Africa, North-West Asia• Region 6: Mainland China• ALL: All regions |
CD Operation
From the Main Menu Screen touch the DISC icon or insert a CD into the disc slot, label side up.
Playback begins in CD mode when a disc is inserted correctly.
CD Main Menu
The on-screen icons and touch key areas are outlined below.

CD Main Menu
SRC Icon: Touch this icon to return to the Main Menu Screen.
DISC: Displays the current source.
Track Number: Lists the current track playing and the total number of tracks contained on the disc.
Time Display: This indicator displays the time as entered by the user in the Settings Menu.
CD Disc Information Display: Displays the artist, the title of the track and the title of the album.
More (▼/▲): Touch the ▼/▲ icons to display the next or previous page of the Disc menu.
(◀◀) Previous: Touch this icon to play the previous track.
(▶/II) Play/Pause: Touch this icon to begin disc playback. Touch this icon again to pause disc playback.
(▶) Next: Touch this icon to play the next track.
List: Touch this icon to access the list of tracks contained on the disc. Touch a desired track icon twice and the track will begin playing.
(✗) Shuffle: Touch this icon to play tracks in the directory in a random order. The icon will light on the main CD screen.
( ) Repeat: Touch this icon to repeat playback of the current track. The icon on the TFT LCD screen will light and small number 1 will appear below the icon and the track will repeat. Touch this icon a second time and the album will repeat. The icon on the TFT LCD screen will light and small letter a will appear below the icon and the album will repeat. Touch the icon again the repeat function will be cancelled. The icon on the TFT LCD screen will dim and playback of the remainder of the disc will resume.
( EQ ) Equalizer: Touch this icon to access the Equalizer Control Menu.
Direct Entry: Touch this icon to the display the Direct Entry Screen.
Track Elapsed Playback Time: The elapsed playback time of track is displayed.
Track Total Playback Time: The total playback time of track is displayed.
CD List
Touching the List icon will display the CD List Screen. The CD List Screen illustrates the contents of a CD disc. The contents are divided into folders and various file types. The file types are audio tracks, Audio Video Interleave (AVI) files, and image files such as JPEGS. AVI files is a format designed to store both audio and video data for simultaneous playback. Touching the icon will display the files present on the disc.
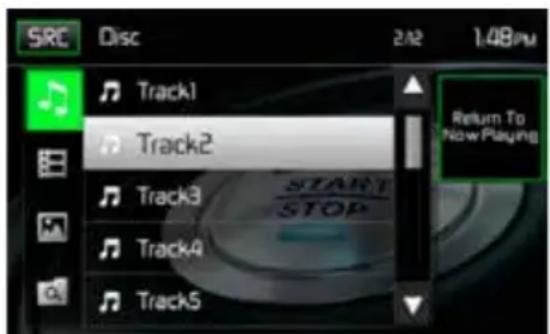
CD List Screen
(♪) Audio Files: Touch the audio file icon to display the audio files. Touch the audio file icon to select a track. Touch the audio file icon again to confirm and playback will begin.
( ) Video Files: Touch the video file icon to display the video files. Touch the video file icon to select a video file. Touch the video file icon again to confirm and playback will begin.
( ) Image Files (JPEG etc): Touch the image icon to display a folder or individual JPEG files. Touch the image icon to select a folder or an individual JPEG file. In the case of a JPEG folder touch the folder icon twice and the contents of the folder will be displayed. Touch the JPEG image icon to select and view an individual JPEG file.
( Ⓞ ) Folders: Touch the icon to display the folder/file hierarchy. Touch the folder icon twice and the contents of the folder will be displayed. Touch the file's icon to select a file. Touch the icon again to confirm and open the file.
Track Direct Entry
When the Direct Entry icon is touched the Direct Entry Screen appears. The user can manually select a track by touching the corresponding number. After entering the track numbers touch the OK icon. If a wrong digit is entered touching the arrow will remove the number. After touching OK playback will begin.

CD Track Direct Entry Screen
Controlling Playback
Inserting a Disc: Upon inserting a CD, disc play begins. You cannot insert a disc if there is already a disc in the unit or if the power is off.
Ejecting a Disc: Press the Eject (▲) button on the front of the unit to eject the disc. The unit automatically reverts to Tuner mode. You may eject a disc with the unit powered off. The unit will remain off after the disc is ejected.
Resetting the Loading Mechanism: If the disc loads abnormally or an abnormal core mechanism operation occurs, press and hold the Eject (▲) button on the front of the unit to reset the loading mechanism. Normal operation resumes.
Pausing Playback: Touch the Play/Pause (▶/II) icon to suspend or resume disc play.
Moving Through Tracks: Touch the Next (▶) icon to advance to the next track on the disc. Touch the Previous (◀) icon to move to the previous track.
Repeat Playback: Touch the 🔗 icon to alter repeat mode according to the following:
• CD-DA: Repeat Track > Repeat Album > Repeat Off
- CD-R/RW: Repeat Track > Repeat Album > Repeat Off
Random Play Select: Touch the Random (✗) icon to play the tracks on the disc in a random, shuffled order. Touch the Random (✗) icon again to cancel Random Play mode.
Note: CD-R and CD-RW will not play unless the recording session is finalized.
MP3/WMA Operation
MP3 is a format for storing digital audio. An audio CD-quality song can be compressed into the MP3 format with very little loss of quality, while taking up much less space. Insert a MP3 Disc into the disc slot, label side up. Playback begins in MP3 mode when a disc is inserted correctly. The unit plays the songs in the order they were burned on to the disc. The menu for playing audio MP3 music files is the same as previously described for CD discs.
Media and File Requirements
This player allows you to play back MP3 and WMA files recorded onto CD-R/RWs, DVD+R/RWs, and DVD-R/RWs. For CD-RW discs, please make sure it is formatted using the full method and not the quick method to prevent illegal disc operation.
For the greatest file capacity, Dual Layer DVD's can be used when burning music to a disc.
MP3 Format Compatibility
The file naming formats listed below are compatible with this unit:
- ISO 9660 – file name: 12 characters, file extension: 3 characters
- ISO 9660 – file name: 31 characters, file extension: 3 characters
- Joliet – 64 characters
If the file or folder name does not conform to ISO 9660 file system standards, it may not be displayed or played back correctly. Use the following settings when compressing audio data for your MP3 disc:
• Transfer Bit Rate: 128kbps
• Sampling Frequency: 48kHz
When recording MP3 up to the maximum disc capacity, disable additional writing. For recording on an empty disc up to maximum disc capacity, use the "Disc at once" setting.
MP3 Playing Order
When selected for play, files and folders are accessed in the order they were written by the CD writer. As a result, the order in which they are expected to be played may not match the order in which they are actually played. You may be able to set the order in which MP3/WMA files are to be played by writing them onto a medium such as a CD-R with their file names beginning with play sequence numbers such as "01" to "99".
Controlling Playback
Inserting a Disc: Upon inserting a MP3/WMA disc, disc play begins. You cannot insert a disc if there is already a disc in the unit or if the power is off.
Ejecting a Disc: Press the Eject (▲) button on the front of the unit to eject the disc. The unit automatically reverts to Tuner mode. You may eject a disc with the unit powered off. The unit will remain off after the disc is ejected.
Resetting the Loading Mechanism - If the disc loads abnormally or an abnormal core mechanism operation occurs, press and hold the Eject (▲) button on the front of the unit to reset the loading mechanism. Normal operation resumes.
Playing MP3/WMA Files: After inserting a MP3/WMA disc, files will play in the sequence of the "Root" directory.
Note: When burning MP3 / WMA files onto a DVD disc, use the 2X or 4X burning option, if available. This slower burning speed will help eliminate buffer errors and increase disc reading reliability. Also, use folders when burning large numbers of songs / files to a disc for easy music navigation. Select the “Disc at Once” option and close your disc.
Note: CD-R and CD-RW will not play unless the recording session is finalized.
Pausing Playback: Touch the Play/Pause (▶II) icon to suspend or resume playback.
Moving Through Tracks: Touch the Next (▶) icon to advance to the next track Touch the Previous (◀) icon to move to the previous track on the MP3 disc.
Repeat Playback: Touch the Repeat (→) icon to alter repeat mode as follows: Repeat Single > Repeat Folder > Repeat All > Repeat Off.
Random Play Select: Touch the Random (✗) icon to play the tracks on the MP3 disc device in a random, shuffled order. Touch the Random (✗) icon again to cancel Random Play mode.
From the main menu screen touch the radio icon. The radio tuner display screen appears.
Radio Tuner TFT Display
The on-screen icons and touch key areas are outlined below.

Radio Tuner TFT Display Screen
SRCIcon: Touch to view the SOURCE MENU and select a new playback source.
Radio: Displays the current source.
Time Display: This indicator displays the time as entered by the user in the Settings Menu.
Preset List: Provides a display of the preset frequencies. Touch to recall a preset station. The radio can store 6 FM1, 6 FM2, 6 FM3, 6 AM1, and 6 AM2 frequency presets.
Local/Distance: Displays the local distant setting.
Stereo: Displays stereo radio signal reception.
FM1: Displays the current preset frequency band.
P1 through P6: Displays the current preset frequency within the preset frequency band that currently playing.
DLF: Displays the radio station/frequency that is currently playing.
More (▲/▼): Touch the ▲/▼ icons to display the next or previous page of the Tuner menu.
(◀◀) Previous/Manual Seek: Touch this icon to momentarily seek the previous available radio station. Touch and hold this icon to manually tune the radio in 50kHz (for FM) or 9kHz (for AM) increments. Default mode is resumed after 10 seconds of inactivity.
(AS) Auto Store: Touch to automatically search and store all strong stations.
(▶▶) Next/Manual Seek: Touch this icon to momentarily seek the next available radio station or touch and hold to manually tune the radio in 50kHz (for FM) or 9kHz (for AM) increments. Default mode is resumed after 10 seconds of inactivity.
Band: Touch to change between AM/FM bands.
Option: Touch this icon to display the Options screen.
Save: Touch this icon to save a radio station frequency in one or all six preset stations on FM band 1, 2, 3 or AM band 1 and 2.
Local/Distance: Touch to select and activate local and distant station reception. When the Local function is on, only radio stations with a strong local radio signal are played.
Direct Entry: Touch this icon to the display the Direct Entry Screen.
( EQ ) Equalizer: Touch this icon to access the Equalizer Control Menu.
Option Screen
Touching the Options icon will display the following RDS, AF, EON, TA, TA Volume, CT and PTY functions on the Tuner TFT LCD display screen.

Radio Tuner Option Screen
RDS Basics
Radio Data System (RDS) enables traffic reports to be received and provides many facilities, including enabling the radio station name to be displayed on the radio display.
Touch on the selected option to change the setting.
- [RDS]: To turn on or off "RDS" function.
- [AF]: To turn on or off "AF" function.
- [CT]: To turn on or off "Clock Time" synchronization function.
- [EON]: To turn on or off "EON" function.
- [TA]: To turn on or off "TA" function.
• [PTY]: To show PTY list.
• [VOL]: Touch [ ◀] / [▶] to adjust TA volume.
AF
The receiver can automatically switch to an alternative frequency (AF) of the same station if the reception becomes poor. Press the OFF/ON touch-point to turn the automatic scanning for alternative frequencies of an RDS broad-cast station off and on.
EON (Enhanced Other Networks)
When EON data is received, the EON indicator lights and the TA and AF functions are enhanced. TA: Traffic information can be received from the current station or stations in other network.
AF: The frequency list of preset RDS stations is updated by EON data. EON enables the radio to make fuller use of RDS information. It constantly updates the AF list of preset stations, including the one that currently tuned into. If you preset a station around the area at your home, you will later be able to receive the same station at an alternative frequency, or any other station serving the same program, EON also keeps tracking of locally available TP (Traffic Program) stations.
TA
Press the TA ON/OFF button to switch the priority for traffic announcements on or off.
VOL (TA Volume)
In the OPTION menu, press the TA VOL button. Adjust the desired volume with the◀ or ▶button. Press the OPTION button. The radio menu is displayed again, the set volume is stored.
CT ON/OFF
(Clock Time, RDS feature) When enabled the radio system clock is synchronized with broadcasters time signal setting the clock automatically. In some regions where daylight savings time is not adhered to, the system clock will be off by 1 hour. In these cases, set CT to OFF and manually set the clock.
PTY
Program type (PTY) allows users to find similar programming by genre. Touch the PTY icon to access the program type search screen. If no matched PTY has been found, the unit will return to the original radio frequency.

PTY Screen
There are 27 categories in the PTY function.
| 1. None 8. Adult Hits | 15. Jazz 22. Personality | |
| 2. News 9. Soft Rock | 16. Classic 23. Public | |
| 3. Info 10. Top 40 | 7. RGB 24. College | |
| 4. Sports 11. Country | 18. Soft RGB 25. Weather | |
| 5. Talk 12. Oldies | 9. Language 26. Test | |
| 6. Rock 13. Soft | 20. Religious | us Music 27. Alert |
| 7. Classic Rock | 14. Nostalgia | 21. Religious Talk |
Direct Entry Tuning
When the Direct Entry icon is touched the Direct Entry Screen appears. The user can enter the desired radio station frequency using the on-screen number pad. After entering the radio station frequency touch the OK icon. If a wrong digit is entered touching the green arrow will remove the number. After touching OK the radio will tune to the entered station. Playback will begin.
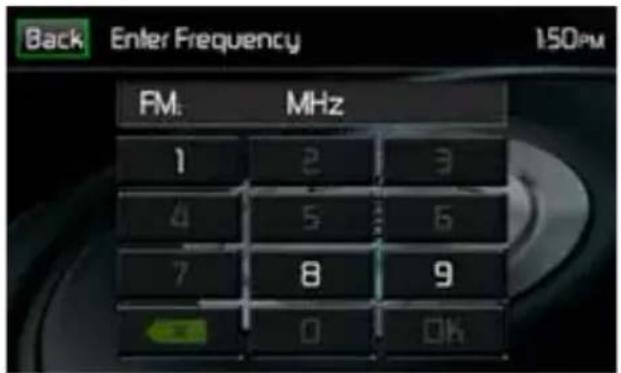
Radio Direct Entry Screen
Using Preset Stations
Six numbered preset icons store and recall stations for each band. All six stored stations (P1 through P6) for the current band appear on the screen.
Storing a Station
- Select a band (if needed), then tune to a desired radio station frequency.
- Touch the on-screen Save icon. The following screen will appear.

Preset Save Screen
- Touch the preset number in which you would like to store the current station. The station frequency is displayed at the top of the menu. The preset number will appear highlighted. The station frequency will be stored in the highlighted preset. The station will be displayed on the Tuner TFT LCD screen. A station can also be stored by touching and holding the preset icon to store the station currently tuned as a preset.
Recalling a Station
- Select a preset band (if needed).
- Touch an on-screen preset icons (P1 through P6) to select the corresponding stored station.
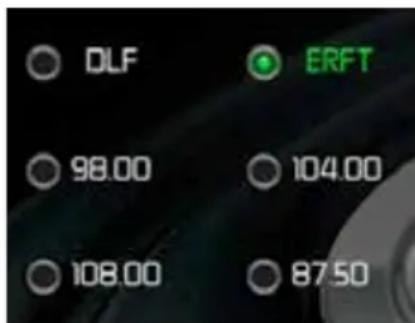
Preset Station Screen
Auto Store (AS)
To select six strong stations and store them in the current band. This feature is most useful when travelling in an area where you are not familiar with the local stations.
- Select a band (if needed).
- Touch the AS icon to activate the Auto Store function. FM Band 1 will be filled if enough stations are detected. The AM Bands function in a similar manner. As new stations are found they will replace stations already stored in that band.
Note: If stations have already been set as favorites, activating the Auto-Store feature will erase those stations and enter the new strong stations.
Local/Distance Radio Station Seeking
When the Local function is on, only radio stations with a strong local radio signal are played. To activate the Local function in the AM/FM tuner mode, touch the More on the Tuner TFT LCD screen. The Local/Distance icon is revealed. Touch Local or Distance to turn the local/distance function on or off. When the Local or Distance function is active, the Local or Distance indicator at the top of the screen is illuminated.
USB OPERATION
The unit will read the audio/video files on USB devices automatically.
NOTE: The USB ports will recognize most USB flash memory devices and portable hard drives. Hard drives must be formatted to FAT32 and NTFS is not supported.
Inserting/Removing a USB Device or microSD Card
Note: The microSD card is used to update navigation software only.
To insert a USB device or microSD card:
- Locate the Interface Cover on the front of the radio.
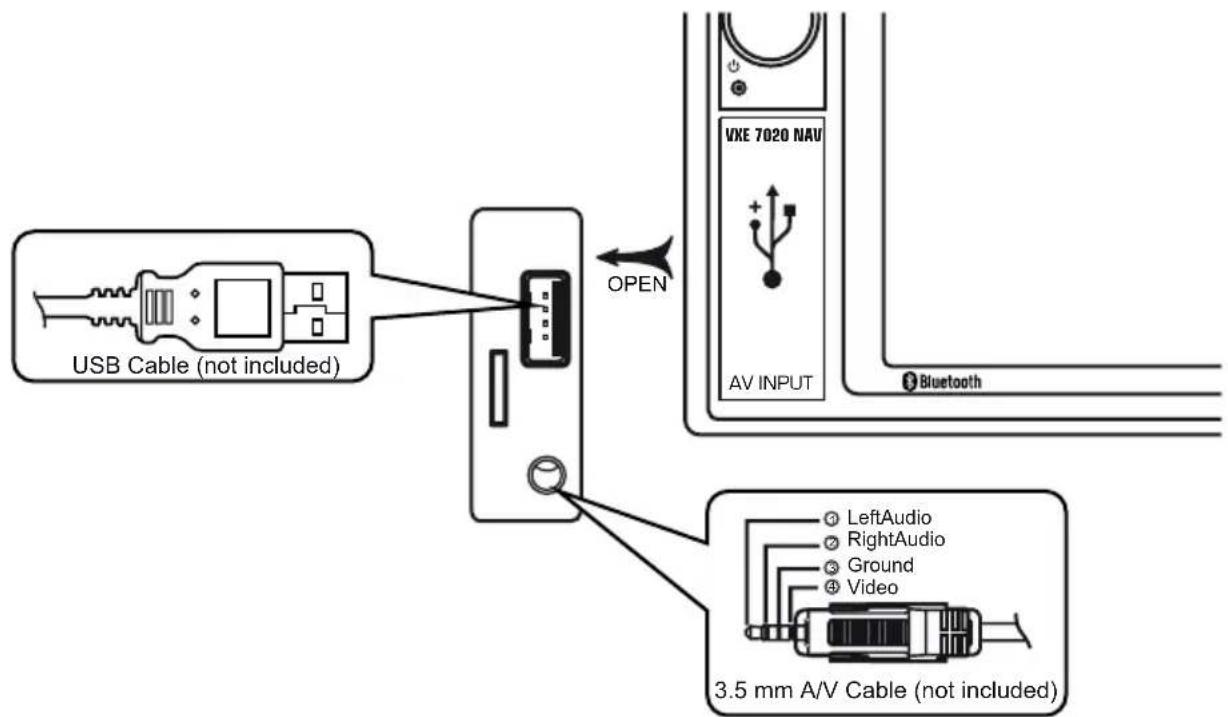
USB Slot and microSD Card Slot Location
- Lift the protective cover to reveal the USB slot and microSD card slots.
- Insert the USB device/microSD card into the USB/microSD card connectors.
Note: microSD cards are inserted into the microSD card slot until a click is heard. The click will ensure that the card is securely inserted to the unit.
To remove the USB device or microSD card:
- Touch the SRC icon on the main menu or press the SRC button on the front panel to switch to another mode.
- Remove the USB device or microSD card from the connector.
USB Operation
From the main menu screen touch the USB icon.
USB Main Menu
The on-screen icons and touch key areas are outlined below.

USB Main Menu
SRC Icon: Touch this icon to return to the Main Menu Screen.
Scrolling Display: Displays current track information.
Track Number: Lists the current audio track playing and the total number of audio tracks in audio mode. Lists the current video folder and the total number of video folders in video mode.
Time Display: This indicator displays the time as entered by the user in the Settings Menu.
More (▲/▼): Touch the ▲/▼ icons to display the next or previous page of the USB menu.
(◀◀) Previous: Touch this icon to play the previous track.
(▶/II) Play/Pause: Touch this icon to begin playback. Touch this icon again to pause playback.
(▶▶) Next: Touch this icon to play the next track.
List: Touch this icon to access the list of audio and video files contained on the USB device. Touch a folder icon and the contents of the folder will be displayed. Touch a desired track icon twice and the track will begin playing.
(✗) Shuffle: Touch this icon to play audio or video tracks in a random order. The icon will light on the main TFT LCD screen.
( Repeat: In audio mode touch this icon to repeat playback of the current audio track. The icon on the main TFT LCD screen will light and a small letter A will appear below the icon and all the audio tracks will repeat. Touch this icon again and single track will repeat. The icon on the TFT LCD screen will light and small number 1 will appear below the icon. Touch the icon again the repeat function will be cancelled. The icon on the main TFT LCD screen will dim and playback of the remainder of the tracks will resume.
In video mode touch this icon during playback to repeat the current track. The icon on the main TFT LCD screen will light and small number 1 will appear below the icon and the track will repeat. Touch the icon again to repeat all the tracks will repeat. The icon on the main TFT LCD screen will light and small letter A will appear below the icon and all the tracks will repeat. Touch the icon again the repeat function will be cancelled. The icon on the main TFT LCD screen will dim and playback of the remainder of the tracks will resume.
( EQ ) Equalizer: Touch this icon to access the Equalizer Control Menu.
Direct Entry: Touch this icon to the display the Direct Entry Screen.
USB List
Touching the List icon will display the USB List Screen. The USB List Screen illustrates the audio and video files present in the USB device. The contents are divided into folders and various file types. The file types consist of audio and video files. Touching the folder icon will display the files present in the folder.

USB List Screen
(♪) Audio Files: Touch the audio file icon to display the audio files. Touch the audio file icon to select a track. Touch the audio file icon again to confirm and playback will begin.
(日) Video Files: Touch the video file icon to display the video files. Touch the video file icon to select a video file. Touch the video file icon again to confirm and playback will begin.
( ) Image Files (JPEG etc): Touch the image icon to display a folder or individual JPEG files. Touch the image icon to select a folder or an individual JPEG file. In the case of a JPEG folder touch the folder icon twice and the contents of the folder will be displayed. Touch the JPEG image icon to select and view an individual JPEG file.
( ) Folders: Touch the icon to display the folder/file hierarchy. Touch the folder icon and the contents of the folder will be displayed. Touch the file's icon to select a file. Touch the icon again to confirm and open the file.
Direct Entry
When the Direct Entry icon is touched the Direct Entry Screen appears. The user can manually select a track by touching the corresponding number. After entering the track numbers touch the OK icon. If a wrong digit is entered touching the arrow will remove the number. After touching OK playback will begin.

USB Track Direct Entry Screen
Moving through Tracks
Touch the Next (▶)icon to advance to the next track on the USB device.
Touch the Previous (◀◀) icon to move to the previous track on the USB device.
Pausing Playback
Touch the Play/Pause (▶)icon to suspend or resume playback.
PIC: When the PIC icon is touched the picture adjust screen appears. Touch this icon during playback to adjust the color brightness, contrast, saturation and hue. The levels can be adjusted to suit the users preferences. The adjustments are accomplished by touching the + or - icons to decrease or increase the desired setting. The settings have range of 1 to 20.

bar
| Parameter | Value | |---|---| | Brightness | 12 | | Contrast | 7 | | Saturation | 9 | | Hue | 8 |USB Picture Adjust Screen
Note: The Picture Adjustment Screen will turn OFF automatically if no adjustment is made within five seconds or if any other part of the screen is touched.
The user can control an iPod®/iPhone® using the touch screen to access, albums, songs, videos, etc.
Note: For iPod®/iPhone® video playback, use an adapter cable equipped with a USB connector and a 3.5 mm AV jack. For basic connectivity, the iPod®/iPhone® must be connected to the unit using the iPod®/iPhone® adapter cable that came with the iPod/iPhone (also available separately) and a adapter cable to connect to the unit's mini USB connector. Be sure your iPod®/iPhone® has the latest Apple firmware installed to avoid connectivity issues.
The unit will automatically switch to iPod® mode when an iPod®, iPod® touch or iPhone® is plugged into the front panel USB connector. Also the iPod® can be accessed from the Main Menu Screen by touching the iPod® icon (only available when an iPod® or iPhone® is connected to the front panel USB connector).
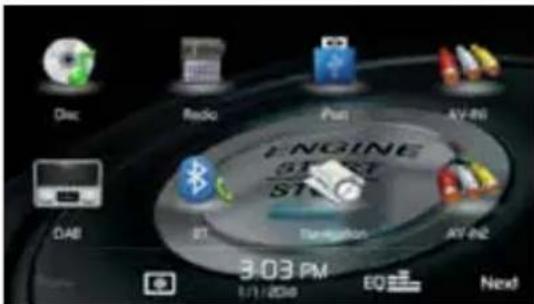
Main Menu Screen with iPod® Icon
iPod®/iPhone® Main Menu
The on-screen icons and touch key areas are outlined below.

iPod®/iPhone® Main Menu
SRC Icon: Touch this icon to return to the Main Menu Screen.
iPod: Displays the current source.
Track Number: Lists the current audio track playing and the total number of audio tracks in audio mode. Lists the current video folder and the total number of video folders in video mode.
Time Display: This indicator displays the time as entered by the user in the Settings Menu.
More ( ▲/▼ ): Touch the p/q icons to display the next or previous page of the iPod® menu.
(◀◀) Previous: Touch this icon to play the previous track.
(▶/II) Play/Pause: Touch this icon to begin playback. Touch this icon again to pause playback.
(▶▶) Next: Touch this icon to play the next track.
List: Touch this icon to access the list of audio and video files contained on the iPod®. Touch a folder icon and the contents of the folder will be displayed. Touch a desired track icon twice and the track will begin playing.
(✗) Shuffle: Touch this icon to play audio or video tracks in a random order. The icon will light on the main TFT LCD screen.
( ) Repeat: In audio mode touch this icon to repeat playback of the current audio track. The icon on the main TFT LCD screen will light and a small letter A will appear below the icon and all the audio tracks will repeat. Touch this icon again and single track will repeat. The icon on the TFT LCD screen will light and small number 1 will appear below the icon. Touch the icon again the repeat function will be cancelled. The icon on the main TFT LCD screen will dim and playback of the remainder of the tracks will resume.
( EQ ) Equalizer: Touch this icon to access the Equalizer Control Menu.
Direct Entry: Touch this icon to the display the Direct Entry Screen.
iPod® List
Touching the List icon will display the iPod® List Screen. The iPod® List Screen illustrates the audio and video files present in the iPod®. The contents are divided into folders and various file types. The file types consist of audio and video files. Touching the folder icon will display the files present in the folder.

iPod®/iPhone® List Screen
(♪) Audio Files: Touch the audio file icon to display the audio files. Touch the audio file icon to select a track. Touch the audio file icon again to confirm and playback will begin.
(日) Video Files: Touch the video file icon to display the video files. Touch the video file icon to select a video file. Touch the video file icon again to confirm and playback will begin.
( ) Image Files (JPEG etc): Image files are selected and controlled by the iPod®. Touch the image icon and the following message will appear:
Use the iPod® to control/select photos.
Touch screen to return to the menu.
( ⓐ ) Folders: Touch the icon to display the folder/file hierarchy. Touch the folder icon and the contents of the folder will be displayed. Touch the file's icon to select a file. Touch the icon again to confirm and open the file.
Controlling Playback
Direct Entry
When the Direct Entry icon is touched the Direct Entry Screen appears. The user can manually select a track by touching the corresponding number. After entering the track numbers touch the OK icon. If a wrong digit is entered touching the arrow will remove the number. After touching OK playback will begin.
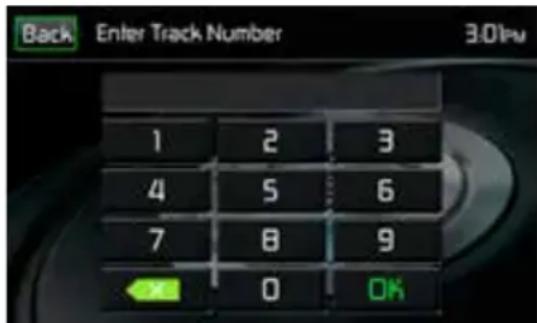
iPod®/iPhone® Track Direct Entry Screen
Moving through tracks
Touch the Next (▶▶) icon to advance to the next track on the iPod®.
Touch the Previous (◀◀) icon to move to the previous track on the iPod®.
Pausing Playback
Touch the Play/Pause (▶II) icon to suspend or resume playback.
PIC: When the PIC icon is touched the picture adjust screen appears. Touch this icon during playback to adjust the color brightness, contrast, saturation and hue. The levels can be adjusted to suit the users preferences. The adjustments are accomplished by touching the + or - icons to decrease or increase the desired setting. The settings have range of 1 to 20.
Note: The Picture Adjustment Screen will turn OFF automatically if no adjustment is made within five seconds or if any other part of the screen is touched.

iPod®/iPhone® Picture Adjust Screen
AV-IN1/AV-IN2 OPERATION
AV-In1
AV-In1 is used for playback of audio/video from an external device connected to the unit through a 3.5mm jack located on the font panel. The unit can increase or decrease the volume of the connected device. All other controls are done on the connected device.
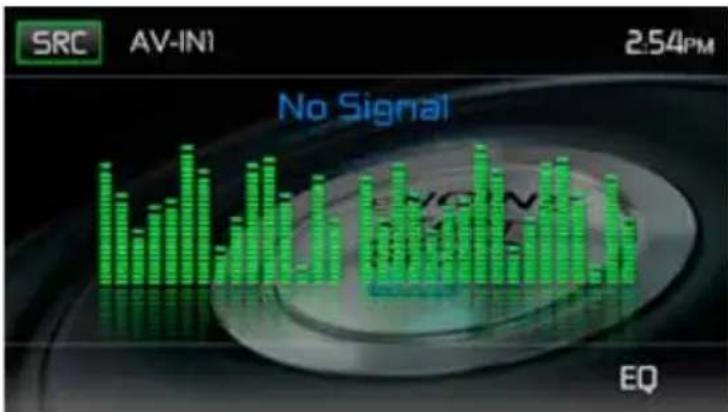
AV-In1 Screen (No Signal)
AV-In2
AV-In2 is used for playback of audio/video from an external device connected through RCA connectors located on the back of the unit. The unit can increase or decrease the volume of the connected device. All other controls are done on the connected device.

bar
| Time | Signal Value | |------|--------------| | 0 | 0 | | 1 | 1 | | 2 | 2 | | 3 | 3 | | 4 | 4 | | 5 | 5 | | 6 | 6 | | 7 | 7 | | 8 | 8 | | 9 | 9 | | 10 | 10 | | 11 | 11 | | 12 | 12 | | 13 | 13 | | 14 | 14 | | 15 | 15 | | 16 | 16 | | 17 | 17 | | 18 | 18 | | 19 | 19 | | 20 | 20 | | 21 | 21 | | 22 | 22 | | 23 | 23 | | 24 | 24 | | 25 | 25 | | 26 | 26 | | 27 | 27 | | 28 | 28 | | 29 | 29 | | 30 | 30 | | 31 | 31 | | 32 | 32 | | 33 | 33 | | 34 | 34 | | 35 | 35 | | 36 | 36 | | 37 | 37 | | 38 | 38 | | 39 | 39 | | 40 | 40 | | 41 | 41 | | 42 | 42 | | 43 | 43 | | 44 | 44 | | 45 | 45 | | 46 | 46 | | 47 | 47 | | 48 | 48 | | 49 | 49 | | 50 | 50 | | 51 | 51 | | 52 | 52 | | 53 | 53 | | 54 | 54 | | 55 | 55 | | 56 | 56 | | 57 | 57 | | 58 | 58 | | 59 | 59 | | 60 | 60 | | 61 | 61 | | 62 | 62 | | 63 | 63 | | 64 | 64 | | 65 | 65 | | 66 | 66 | | 67 | 67 | | 68 | 68 | | 69 | 69 | | 70 | 70 | | 71 | 71 | | 72 | 72 | | 73 | 73 | | 74 | 74 | | 75 | 75 | | 76 | 76 | | 77 | 77 | | 78 | 78 | | 79 | 79 | | 80 | 80 | | 81 | 81 | | 82 | 82 | | 83 | 83 | | 84 | 84 | | 85 | 85 | | 86 | 86 | | 87 | 87 | | 88 | 88 | | 89 | 89 | | 90 | 90 | | 91 | 91 | | 92 | 92 | | 93 | 93 | | 94 | 94 | | 95 | 95 | | 96 | 96 | | 97 | 97 | | 98 | 98 | | 99 | 99 | | EQ | - |AV-In2 Screen (No Signal)
Note: Audio/Video device must be connected to the unit using an audio/video adapter cable that is available separately.
Note: The unit can not directly control external devices connected to the Media Link. Please refer to the owner's manual that came with the external device for instructions.
Note: Video will only play when the vehicle parking brake is engaged. This is designed to meet European standards and laws. The brake must be connected for this feature to operate.
Bluetooth® technology has the capability to wirelessly synchronize and transfer data among devices. The Bluetooth audio capabilities can be used for wireless phones hands free applications. Before attempting to use the Bluetooth functions on the unit, please make sure your wireless phone supports Bluetooth functions.
We use the latest Bluetooth Technology in order to offer you the best connection, most features, and easiest pairing, but all phones operate differently. Please read your phone's owner's manual and familiarize yourself with its available Bluetooth features and functions. Not all features will work with all phones.
NOTE: The distance between this unit and your cellular phone must be 8 feet (2.4 meters) or less for sending and receiving voice and data via Bluetooth wireless technology.
Please make sure your mobile phone supports Bluetooth® functions (Headset or Handsfree profiles or both). Adhere to the following guidelines for successful operation.
- Before using Bluetooth® functions, you must pair your mobile phone to the VXE 7020 NAV head unit (see "Pairing the Bluetooth® System with Your Mobile Phone and Head Unit"). To ensure the best reception for pairing and re-connection, please make sure the mobile phone battery is fully charged before you begin.
- Try to perform pairing within a few minutes of the mobile phone being turned on.
- Once the unit has been paired with the mobile phone, the unit's model number, "VXE 7020 NAV", will be displayed on the mobile phone.
- To achieve the best performance, always keep the mobile phone within 3 meters of the head unit.
- Always keep a clear path between the mobile phone and the head unit. Never place a metal object or any other obstacle between the mobile phone and the head unit.
- Some mobile phones (like Sony Ericsson) may have a “Power Saving Mode” option. PLEASE DO NOT use the power saving mode with the VXE 7020 NAV.
- Before accepting or making a call, make sure your mobile phone's "Bluetooth® function" is turned on.
- To ensure the best conversation quality/performance, stay within one meter of the microphone when talking.
- To manually disconnect the mobile phone from the head unit, press the "Chain Link" icon on the Bluetooth® user interface (next to the mobile phone name) and the Bluetooth® will be "disconnected", but still paired.
Bluetooth User Interface
The on-screen icons and information for Bluetooth® functions are outlined below.

Bluetooth User Interface Screen
SRC Icon: Touch this icon to return to the Main Menu Screen.
Bluetooth: Displays the current source.
Audiovox 2525: Indicates the device that is paired with the unit.
(●): Indicates whether the unit is connected with a Bluetooth® device. Touch to connect to a Bluetooth® device.
(☐): Touch to disconnect from a Bluetooth® device.
VXE7020NAV Device Name: Provides the name that will appear on the Bluetooth® device.
Scan: Touch the icon to search for Bluetooth® devices.
Options: Touch to display the Bluetooth® options page.
Hands Free Profile (HFP)
To use a mobile phone with this unit, it is necessary to first establish a connection using Bluetooth® wireless technology. The connection is normally established using Hands Free Profile (HFP), which gives you full control of functions available on the mobile phone source. However, depending on your mobile phone, the connection may be made using Head Set Profile (HSP), making some functions unavailable. This is a limitation of your mobile phone, not the VXE 7020 NAV.
Since there are a number of Bluetooth® mobile phone implementations available on the market, operations with your Bluetooth® mobile phone using this unit vary greatly.
Please refer to the instruction manual that came with your Bluetooth® mobile phone along with this manual while operating your mobile phone with this unit.
Pairing your Mobile Phone with the Unit
Your mobile phone can initiate a search for new devices and pair to the unit. The following paragraphs describes the pairing process.
Note: The following procedures are generic. Procedures for pairing mobile phones may vary slightly from mobile phone manufacturer to mobile phone manufacturer.
- Touch the MENU button on the front panel to access the source menu.
- Touch the BT icon on the source menu and the Bluetooth® user interface screen will appear.
- Touch the Options icon and the following screen will appear:
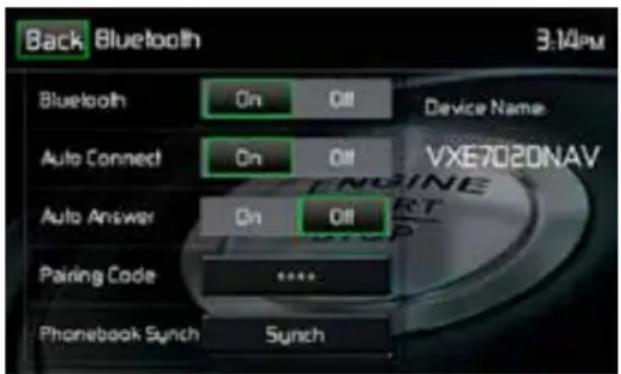
Bluetooth Option Menu
- On the Options submenu set the Bluetooth function to ON.
- On the Options submenu set the Auto Connect function to ON.
- Set the mobile phone Bluetooth® discover mode to ON.
Note: Some discovery modes have a time limit usually a minute before they are automatically turned OFF.
- Touch the "Scan" icon on the unit's Bluetooth® user interface screen. Available devices will appear with the "Pair" icon next to it.
- Touch the "Pair" icon on the unit's Bluetooth® user interface screen.
- A prompt to pair or bond should appear on your mobile phone. Accept the request and initiate the process.
NOTE: Some mobile phones require a “pass key” or pairing code to connect. If your phone requires a pass key or pairing code, you will need to enter this number. The default pairing code for many mobile phones is “0000”. The default code for the unit is “0000”.
- A prompt to enter a PIN number or passkey for the unit should appear. The default passkey for the unit is "0000".
- At this point a prompt stating pairing successful should appear. Another prompt should appear asking connect to the unit, Yes or NO. Touch Yes. The mobile phone and the unit should connect. The mobile phone should display a message similar to "Device Connected" and the mobile phone and the unit are now connected. VXE 7020 NAV will appear on the mobile phone list of devices.
Managing Incoming Calls
When connected to a Bluetooth® mobile phone, the unit will mute audio output, pause CD play, and change to the Bluetooth® screen below when a call is received. The incoming phone number or assigned name for that number will appear on the screen. An audible tone will sound from the unit and a graphic display will appear on the front panel.
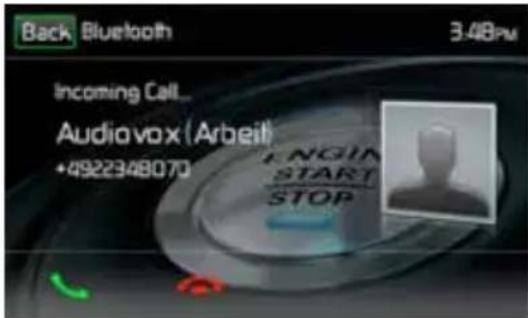
Bluetooth Incoming Call Screen
- icon: Touch to answer an incoming call.
- icon: Touch to end an incoming call.
Making an Outgoing Call
Outgoing calls can be performed in two manners. The outgoing call can be direct dialed using the front panel keypad or by touching either the Phonebook or Call History icons, selecting a name and touching the phone number.
Direct Dialing:
- Press the front panel MENU button and then touch the BLUETOOTH icon to access the Bluetooth® main menu. The following screen will appear:

Bluetooth Direct Dial Screen
- Use the 0-9, */+, and # icons to input the phone number. If necessary touch the green arrow icon to clear the last digit or the entire number and start over.
- After entering the phone number, touch the icon to dial the call. The number dialed will be displayed on the screen.
- To end the call, touch the 🔊 icon.
Answering an Incoming Call
To answer an incoming call touch the icon. For best reception, speak loudly and clearly into the units microphone. To end the conversation, touch the icon.
Rejecting an Incoming Call
Touch the To Phone icon to reject an incoming call. The call will revert to your mobile phone and be left for voice mail.
Volume Control
To increase or decrease the volume level of an incoming call, turn the rotary knob on the front panel or press the VOL+/VOL- icons on the remote control.
Audio Mute
To mute the phone call audio from the unit when a call is received, press the front panel rotary knob. Press the front panel rotary knob again and phone call audio will be restored to the unit.
Call Log
The call log consists of dialed numbers, received calls and missed calls.
Note: Not all wireless phones allow access to missed, received or dialed calls and some will not allow uploading of your wireless phone's address book.
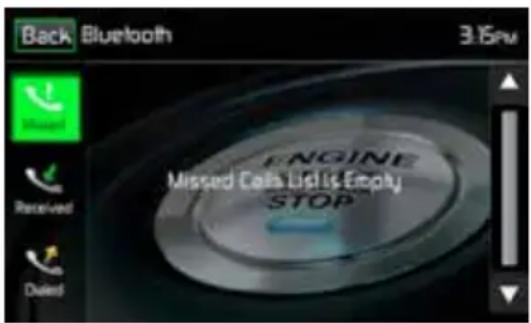
Bluetooth Call Log Screen
Missed Calls List: The Missed Calls List retrieves the list of missed numbers from your wireless phone if your wireless phone allows the function. The last missed number is the first number on the list. Touch the Missed Calls menu option to view the list. To make a call from the Missed Calls list, touch the call's name. Touch the phone number and it will be dialed.
Received Calls: The Received Calls list retrieves the received numbers stored on your wireless phone if your wireless phone allows the function. To access the Received list, touch the Received Calls menu option. The last received number is the first number on the list. To make a call from the Received Calls list, touch the name. A new screen will appear with the name on the top and the phone number below. Touch the phone number and it will be dialed.
Dialed Calls: The Dialed Calls list retrieves the list of dialed numbers from your wireless phone if your wireless phone allows the function. The last dialed number is the first number on the list. Touch the Dialed Calls menu option to view the list. To make a call from the Dialed Calls list, touch the name. A new screen will appear with the name on the top and the phone number below. Touch the phone number and it will be dialed.
Call Transfer
While talking, to transfer audio from the unit back to the mobile phone, touch the To Phone icon. You can only transfer a call after it has been answered. Touching the To Device icon will return the audio from the mobile phone to the unit.

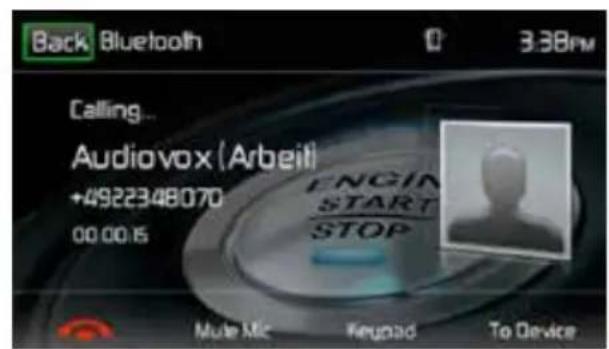
Transfer to Phone Screen Transfer to Radio Screen
Call Transfer Screens
Bluetooth Music Function
Bluetooth® provides an Advanced Audio Distribution Profile (A2DP) profile for streaming music from a mobile phone or a portable multimedia player (PMP), sometimes referred to as a MP3 player. The unit allows you to play back audio files from your mobile phone or a PMP using a Bluetooth® connection.
Note: Please quit A2DP mode before attempting to make a phone call, as unexpected results may occur depending on your mobile phone model.
The unit can control a Bluetooth® audio player via Advanced Audio Distribution Profile (A2DP) or Audio/Video Remote Control Profile (AVRCP). Bluetooth® audio players (or Bluetooth® adapters) compatible with these profiles can be connected to this unit. The following screen is used for streaming music.

Bluetooth Audio Control Screen
While listening to audio the following functions are available:
- Pause/Play (▶II) icon: Touch to pause playback. Touch again to resume playback.
- Previous (1) icon: Touch to play the previous track.
- Next (▶) Icon: Touch to play the next track.
Functionality varies depending on the profile used:
- A2DP: Stream audio from your Bluetooth® compatible audio player and listen to the music through the unit.
- AVRCP: Play back, pause, select songs, etc. while streaming audio from your Bluetooth® compatible audio player to the unit.
Note: Song information (e.g. elapsed playing time, song title, song index, etc.) cannot be displayed on this unit. Since there are a number of Bluetooth® audio players available on the market, operations with your Bluetooth® audio player while using this unit may vary greatly. Please refer to the instruction manual that came with your Bluetooth® audio player.
When there is an incoming call, the song will be paused. After the incoming call is finished, the screen will return to the music function screen and playback will continue.
Hands-Free Microphone
The hands-free microphone is installed in your vehicle in an accessible location that provides optimum voice reception. For best reception, speak loudly and clearly.

natural_image
Close-up of a black plastic clamp with a cable, no visible text or symbolsHands-Free Microphone
NAVIGATION QUICK START
The following procedure provides a quick overview of the Navigation mode. A complete Navigation Manual is available on our website www.audiovox.de.
NOTE: Before operating your iGO Primo 2 software, please carefully read and follow the instructions provided in the Navigation Owner's Manual. Make sure that you are familiar with the system's features and know how to operate the system.
Step 1 - Access the navigation function:
You can access the navigation function by pressing the MENU button and then the Navigation icon in the Main Menu.
Step 2 - Start Up/Access the Main Menu:
When using the navigation software for the first time, the initial setup process starts automatically. Do as follows:
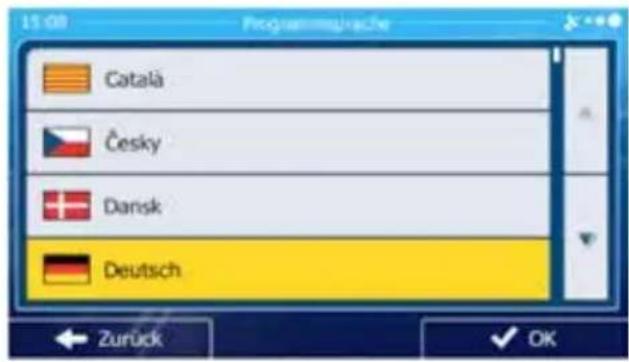
Select the written language of the application interface.

Read the End User Licence Agreement. Press to continue:
- You are now asked whether you allow the software to collect usage information and GPS logs that may be used for improving the application and the quality and coverage of maps. Press to allow the anonymous statistics or disable this function. Later you can turn

them on or off individually in Log collection settings
- The Configuration wizard starts. Press

to continue.

Select the language and speaker used for voice guidance messages.
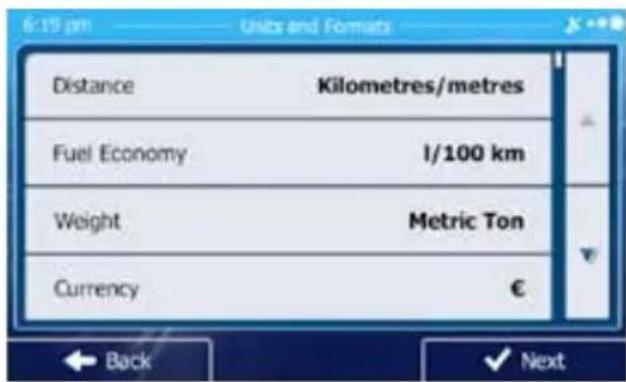
If needed, modify the time format and the unit settings. You can also change them later in REGIONAL SETTINGS.
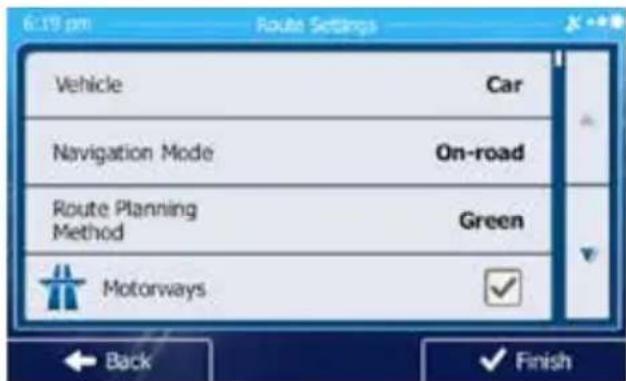
If needed, modify the default route planning options. You can also change them later in ROUTE SETTINGS.
The Initial Setup is now complete. The Configuration wizard can be restarted later from the Settings menu.

After the initial setup is completed, the Navigation menu appears:
Step 3 - Select a Destination:
You have many ways to select a destination. Select by touching screen:
Address: Tap FIND and then FIND ADDRESS. Travel to address entered using on-screen keypad.
Point of Interest: Press FIND and then FIND PLACES. Browse or search for point of interest.
History: Press FIND to see previous destinations.
Favourites: Press FIND and then FAVOURITES. Travel to favourite location.
Coordinates: Travel to a destination specified by coordinates. Press FIND, MORE, and then COORDINATE.
Place on Map: Press FIND and then FIND ON MAP. Browse the map to choose the destination and press the desired destination on the touchscreen. Press SELECT and the system will calculate a route to that destination.
Step 4 - Map/Guide Along Route
Proceed to the highlighted route and drive while the iGo primo 2 software provides guidance to your destination.
Step 5 - Arriving at Your Destination
When you are near your destination, the destination is indicated by a checkered flag symbol ✗.
Exiting the navigation mode
Press ON/OFF icon in the Main Menu of the navigation system to exit the navigation mode.
Latest Map Guarantee
To get the latest map data you have 30 days from the first GPS positioning to download the data free of charge from the website www.naviextras.com.
To get the updated map data, you need to download the Toolbox software from the website www.naviextras.com and a micro USB card reader.
Generate a backup of the navigation SD card before you update the map data.
This unit is "camera ready." Before accessing any camera features, you must install a rear video camera.
When the camera is not installed and the function is accessed by the gear selector being placed in reverse or by the unit's menu, the message "No Signal!" will be displayed and the following screen will appear.

Rear Camera Screen
When the camera is installed, the rear view image of what is behind the vehicle will appear when the vehicle is placed in reverse gear. When leaving reverse gear, the unit displays the previous screen.
STEERING WHEEL CONTROLS (SWC)
(if equipped)
The VXE 7020 NAV is compatible with following steering wheel control adapters: Dietz UNICO DUAL PLUS + cable, PAC (Pacific Accessory Corporation) SWI-PS and Metra ASWC. A 3.5 mm female connector (labeled "SWC Interface") on the back of the head unit allows connectivity to the adapters. Please refer to the instructions included with the adapters for detailed installation information.
Note: Not all OE steering wheel functions may be supported by the VXE 7020 NAV.
The following controls are available for most vehicles:
| 1. Volume Up (+) 4. Seek Up (Next) 7. Preset (+) 10. BT Send | |
| 2. Volume Down (-) 5. Seek Down (Prev) 8. Preset (-) 11. BT End | |
| 3. Mute 6. Source 9. Band 12. Undefined | |
To access the SWC Controls for programing, touch the SWC icon on the second page of the Main Source Menu.


SWC Programming Screen 1 SWC Programming Screen 2
SWC Programming Screens
SWC Programming
Up to 15 steering wheel control functions can be programmed via the built-in SWC interface. Not all functions may be supported for each vehicle.
- Popular OE steering wheel functions are already pre-programmed from the factory. If your vehicle does not support the exact same functions already pre-programmed, you will need to clear / reset the SWC interface and program in the exact functions of your vehicle. To clear / reset the SWC interface, press and hold "Reset" for 2 seconds.
- To begin programming the SWC interface after it has been cleared / reset, press a key 1 \~ 15, then press a function. The name of the selected function should appear next to the Key number programmed (Key 1 Volume +, etc.). Continue programming in this manner until all of the OE steering wheel control functions are completed.
Note: Functions 1 \~ 15 must be assigned to a function on the OE steering wheel. For example, if the OE steering wheel does not support Preset + and Preset -, then these functions must be cleared / reset in order for the other functions to work correctly.
- To "learn" the programming completed in step 2 above, press the "Learn" icon. You will then be prompted to push each button on the OE steering wheel (for 1 second), so the unit can learn the corresponding function.
- SWC learning / programming is now complete.
TROUBLESHOOTING
Troubleshooting
| Problem Cause Corrective Action | |||
| GENERAL | |||
| Unit will not power on Radio Fuse open Install new fuse with | correct rating | ||
| Car battery fuse open Install new fuse with correct rating | |||
| Illegal operation Press the RESET button located in the middle of the left side of the front panel | |||
| No/low audio output Improper audio output connection Check wiring and correct | |||
| Volume set too low Increase volume level | |||
| Improper “MUTE” connection Review wiring diagram and check “MUTE” connection | |||
| Speakers damaged Replace speakers | |||
| Heavily biased volume balance Adjust the channel balance to the center position | |||
| Speaker wiring is in contact with metal part of car | |||
| Poor sound quality or distortion | Pirated disc is in use Use original copy | ||
| Speaker power rating not compatible with unit | Connect proper speakers | ||
| Speaker is shorted Check speaker contact | |||
| Unit resets itself when engine is off | Incorrect connection between ACC and positive battery wire | Check wiring and correct | |
| TFT Monitor | |||
| No image Incorrect connection to parking brake wire | Check wiring and correct | ||
| Flashing image or interference appears on screen | DVD is not compatible with current TV system settings | Change setup to accommodate disc | |
| Improper video signal connections Check wiring and correct | |||
| Prolonged image or improper height/width ratio display | Improper aspect ratio setup Use correct aspect ratio setting | ||
| TUNER | |||
| Weak station searching | Auto antenna is not fully extended Extend | antenna fully or connect the auto antenna control cable properly | |
| Auto antenna not properly connected C | connect the auto antenna control cable properly | ||
| LOCAL function is activated Turn LOCAL function off | |||
| DISC | |||
| Cannot insert disc Disc already inside unit Eject current disc and insert new one | |||
| Image blurred, distorted or dark | Disc is illegally copied Use original disc | ||
| Disc does not play back | Disc is warped or scratched Use disc in good condition | ||
| Disc is dirty or wet | Clean disc with soft cloth | ||
| Laser pickup is dirty Clean laser pickup with cleaning disc | |||
| Incompatible disc is used Use compatible disc | |||
| Disc region code is not compatible with unit | Use disc with proper region code | ||
| Disc is inserted upside down Insert disc with label side up | |||
| MP3 | |||
| Interruption occurred during playback | Disc is dirty or scratched Clean disc or replace | ||
| File is damaged/bad recording Recreate disc with good files | |||
Disc Error Messages
| Message Displayed Cause Corrective Action | ||
| Loading Disc is being read | ||
| No Disc Disc is dirty Clean disc with soft cloth | ||
| Disc is upside down Insert disc with label side up | ||
| Disc not present in loading compartment Insert disc | ||
| Bad Disc Disc is dirty Clean disc with soft cloth | ||
| Disc is upside down Insert disc with label side up | ||
| Unknown disc | Disc format is not compatible with this unit | |
| Region Error | DVD is not compatible with region code of unit | |
| Error | Illegal mechanism operation | Press EJECT button for 5 seconds to reset loading mechanism |
CARE AND MAINTENANCE
- Use only a clean silicone cloth and neutral detergent to clean the front panel or monitor. A rough cloth and non-neutral detergent (such as alcohol) may result in scratching or discoloration.
- Do not get water or cleaning fluids on the unit.
- If the temperature inside the player gets too hot, a protective circuit automatically stops play of the disc. If this occurs, allow the unit to cool before operating the player again.
- Never insert anything other than a 12 cm (5") compact disc into the player as the mechanism can be damaged by foreign objects.
- Do not attempt to use a 8 cm (3") CD-Single disc in this unit, either with or without an adaptor, as damage to the player and/or disc may occur. Such damage is not covered by the Warranty on this product.
- The CD player may not operate properly in extreme hot or cold. If such conditions occur, allow the interior of the vehicle to reach a normal temperature before using player.
- When the vehicle warms up during cold weather or under damp conditions, condensation may appear on the LCD panel. Should this occur, the screen will not operate properly until the moisture has evaporated.
- We suggest you use a cleaning disc in this unit more frequently than in the unit in your home due to the environmental conditions of the vehicle.
DÉCLARATION DE CONFORMITÉ CE
Commandes AV-In1/AV-In2 180
natural_image
Pure technical diagram of a mechanical or electrical component with no text, numbers, or symbols
Slide Out

natural_image
Pure electrical circuit lines without any symbolsSlide In

Equalizer Adjustment Screen

Écran d'étalonnage
Pairing Code Entry Screen Pairing Code Confirmation Screen
Écrans du code de jumelage
Commander la reproduction
Insérer un disque
EON (Enhanced Other Networks)
Écran PTY
Commander la reproduction
Saisie directe
Écran AV-In1 (Aucun Signal)
AV-In2
Écran AV-In2 (Aucun Signal)
Écran de composition directe Bluetooth
natural_image
Close-up of a black mechanical clamp or connector with a cable, no visible text or symbolsMicrophone mains-libres
DÉMARRAGE RAPIDE DE LA NAVIGATION
Congratulations! You have made a wise selection in becoming the owner of a AUDIOVOX Mobile Video equipment. Due to
high quality AUDIOVOX Mobile Video products have earned an excellent reputation through the western world. And this high quality standard enables us to grant a 2-years warranty for AUDIOVOX Mobile Video products.
The equipments are checked and tested continuously during the entire production process. In case you have problems with your AUDIOVOX HiFi equipment, kindly observe the following:
- The guarantee period commences with the purchase of the component and is applicable only to the original owner.
- During the guarantee period we will rectify any defects due to faulty material or workmanship by replacing or repairing the defective part at our discretion. Further claims, and in particular those for price reduction, cancellation of sale, compensation for damages or subsequential damages, are excluded. The guarantee period is not altered by the fact that we have carried out guarantee work.
- Unauthorized tampering with the equipment will invalidate this guarantee.
- Consult your authorized dealer first, if guarantee service is needed. Should it prove necessary to return the component to the factory, please insure that • the component is packed in original factory packing in good condition • the quality control card has been filled out and enclosed with the component • your enclose your receipt as proof of purchase.
- Excluded from the guarantee are: • Illuminates • Wear parts • Shipping damages, either readily apparent or concealed (claims for such damages must be lodged immediately with forwarding agent, the railway express office or post office). • Scratches in cases, metal components, front panels, etc. (You must notify your dealer directly of such defects within three days of purchase.) • Defects caused by incorrect installation or connection, by operation errors (see operating instructions), by overloading or by external force.
- Equipments which have been repaired incorrectly or modified or where the case has been opened by persons other than us. • Consequential damages to other equipments. • Reimbursement of cools, without our prior consent, when repairing damages by third parties • Batteries and battery packs.


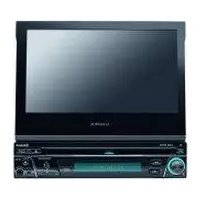
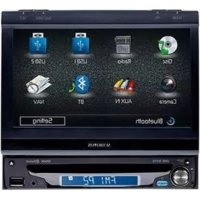
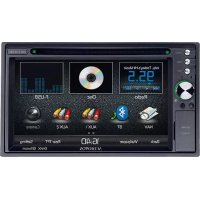
- Audiovox DAB+ 100 Receiver
- EON (Enhanced Other Networks)
- Exiting the navigation mode
- NORMAL USE
- DECLARATION OF CONFORMITY C€
- CONTENTS
- SAFETY PRECAUTIONS
- GENERAL INFORMATION
- FEATURES / TECHNICAL SPECIFICATIONS
- DVD/CD Player
- Video
- CD / MP3 / WMA
- FM Tuner
- AM Tuner
- Navigation System
- Bluetooth®
- Monitor
- Personal Color Adjustment (Color illustrations / background)
- Wallpaper Selection:
- General
- Power Ratings
- OPTIONAL EQUIPMENT
- Rear Camera Audiovox RVC1
- CONTROLS AND INDICATORS
- Remote Control Functional Description
- DISC images
- Notes on Remote Control Usage
- Remote Control Battery Replacement
- Install Battery
- Uninstall Battery
- EXTERNAL DEVICES
- Connecting External Devices
- AV-In1
- AV-In2
- QUICK START GUIDE
- Turning the Unit ON or OFF
- Selecting an Audio/Video Source, Bluetooth, Steering Wheel Controls or Backup Camera
- System Settings Adjustment
- Volume Adjustment
- Audible Beep Confirmation
- Muting the Audio
- Equalizer Controls
- Playing a Disc
- To eject a disc:
- Resetting the System
- Parking Brake Inhibit
- Adjusting Equalizer Controls
- Equalizer (EQ) (10 Band)
- User Setting
- Flat Setting
- Loud Setting
- Exiting the Equalizer
- Fader-Balance
- Balance
- Fader
- Sub (Subwoofer)
- Exiting the Balance-Fader
- SYSTEM SETTINGS
- Adjusting a Sub-Menu Feature
- General Sub-menu Features
- Calibration
- Note: Never use a pen or sharp object to calibrate the touch screen as this will damage the panel.
- Audio Sub-menu Features
- Time Sub-menu Features
- Language Sub-menu Features
- Bluetooth Sub-menu Features
- DVD Sub-menu features
- Volume Sub-menu Features
- Version Sub-menu Features
- Exiting the System Settings Menu
- DISC OPERATION
- Compatible Audio Discs Types
- DVD Operation
- WARNING!!!
- DVD Main Menu
- Direct Entry
- Inserting a Disc
- Multi-Language Discs (DVD Only)
- Playback Information
- DVD Playback Information
- VCD Playback Information
- General Disc Information
- CD Operation
- CD Main Menu
- CD List
- Track Direct Entry
- Controlling Playback
- MP3/WMA Operation
- Media and File Requirements
- MP3 Format Compatibility
- MP3 Playing Order
- Radio Tuner TFT Display
- Option Screen
- RDS Basics
- AF
- TA
- VOL (TA Volume)
- CT ON/OFF
- PTY
- Direct Entry Tuning
- Using Preset Stations
- Storing a Station
- Recalling a Station
- Auto Store (AS)
- Local/Distance Radio Station Seeking
- USB OPERATION
- Inserting/Removing a USB Device or microSD Card
- USB Main Menu
- USB List
- Moving through Tracks
- Pausing Playback
- iPod®/iPhone® Main Menu
- iPod® List
- AV-IN1/AV-IN2 OPERATION
- Bluetooth User Interface
- Hands Free Profile (HFP)
- Pairing your Mobile Phone with the Unit
- Note: The following procedures are generic. Procedures for pairing mobile phones may vary slightly from mobile phone manufacturer to mobile phone manufacturer.
- Managing Incoming Calls
- Making an Outgoing Call
- Direct Dialing:
- Answering an Incoming Call
- Rejecting an Incoming Call
- Volume Control
- Audio Mute
- Call Log
- Call Transfer
- Bluetooth Music Function
- Hands-Free Microphone
- NAVIGATION QUICK START
- Step 1 - Access the navigation function:
- Step 2 - Start Up/Access the Main Menu:
- Step 3 - Select a Destination:
- Step 4 - Map/Guide Along Route
- Step 5 - Arriving at Your Destination
- Latest Map Guarantee
- STEERING WHEEL CONTROLS (SWC)
- SWC Programming
- TROUBLESHOOTING
- CARE AND MAINTENANCE
- DÉCLARATION DE CONFORMITÉ CE
- Commander la reproduction
- Insérer un disque
- Saisie directe
- DÉMARRAGE RAPIDE DE LA NAVIGATION
Brand : AUDIOVOX
Model : VXE 7020 NAV
Category : Car radio