
Time Master 500 - Wristwatch TOPCOM - Free user manual and instructions
Find the device manual for free Time Master 500 TOPCOM in PDF.


| Product type | Digital watch |
| Brand | Topcom |
| Model | Time Master 500 |
| Case dimensions | Approx. 45 mm diameter, 12 mm thickness |
| Weight | Approx. 50 g (with strap) |
| Power source | CR2032 button cell battery (included) |
| Battery life | Approx. 2 to 3 years |
| Main functions | Time display, date, alarm, stopwatch, backlight |
| Water resistance | Splash resistant (do not immerse) |
| Case material | ABS plastic |
| Strap material | Silicone or resin |
| Strap attachment | Standard buckle |
| Operating temperature | 0°C to 50°C |
| Care and cleaning | Clean with a soft, dry cloth. Avoid solvents. |
| Safety | Do not expose to extreme temperatures. Keep out of reach of children under 3 years. |
| Spare parts and repairability | User-replaceable battery. Other parts: contact Topcom support. |
| Package contents | Watch, battery installed, user manual |
Frequently Asked Questions - Time Master 500 TOPCOM
User questions about Time Master 500 TOPCOM
0 question about this device. Answer the ones you know or ask your own.
Ask a new question about this device
Download the instructions for your Wristwatch in PDF format for free! Find your manual Time Master 500 - TOPCOM and take your electronic device back in hand. On this page are published all the documents necessary for the use of your device. Time Master 500 by TOPCOM.
USER MANUAL Time Master 500 TOPCOM
USER GUIDE / HANDLEIDING / MANUEL D'UTILISATEUR / GEBRAUCHSANWEISUNG / MANUAL DE USUARIO / BRUKSANVISNING / BRUGERVEJLEDNING /
ANVÄNDARHANDBOK / KÄYTTÖOHJE /
MANUALE D'USO / MANUAL DO UTILIZADOR
UŽIVATELSKÁ PØÍRUÈKA / HASZNÁLATI ÚTMUTATÓ
INSTRUKCJA OBSŁUGI / UŻÍVATEL'SKÝ MANUÁL
1.0
CE
UK The features described in this manual are published with reservation to modifications.
- Read the instructions before using the Chronometer.
- Keep this user's manual for future reference.
- Avoid exposing your Chronometer to extreme conditions for an unreasonable amount of time.
- Avoid rough usages or severe impacts to your Chronometer.
- Do not open the Chronometer's case unless by a certified service agency because it contains precise electronic sensors and components.
2 CARE AND MAINTENANCE
- Clean your Chronometer with a soft cloth.
- Keep your Chronometer away from magnets or appliances which contains magnetic objects such as mobile phones, speakers and motors.
- Store your Chronometer in a dry place when it is not in use.
3 DISPOSAL OF THE DEVICE (ENVIRONMENT)

At the end of the product lifecycle, you should not throw this product into the normal household garbage but bring the product to a collection point for the recycling of electrical and electronic equipments. The symbol on the product, user guide and/or box indicate this.
Some of the product materials can be re-used if you bring them to a recycling point. By re-using some parts or raw materials from used products you make an important contribution to the protection of the environment. Please contact your local authorities in case you need more information on the collection points in your area.
Batteries must be removed before disposing of the device. Dispose of the batteries in an environmental manner according to your country regulations.
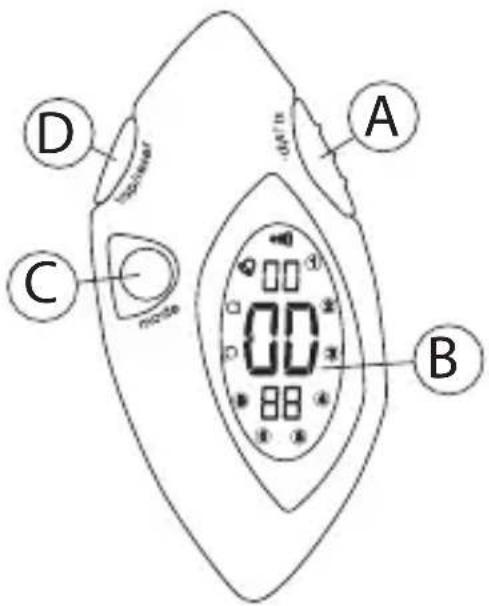
4 BUTTONS
A. START/STOP BUTTON [st./stp.]
• To 'start' or 'stop' the chronograph function during chronograph mode.
• To select date in time mode.
• To confirm in setting mode.
B. DISPLAY
C. MODE BUTTON [mode]
• To select among the Time mode and Chronograph mode.
D. LAP/RESET BUTTON [lap/reset]
• To see the lap time or to reset the chronograph during chronograph mode.
• To increase the digits under setting display.
• To toggle Yes/No.
5 T I M E M O D E
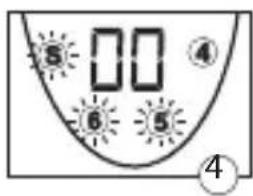
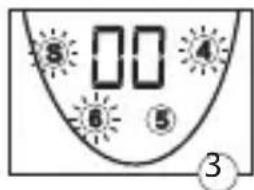
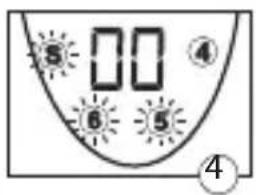
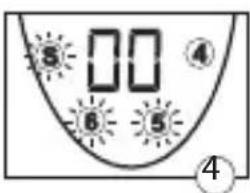
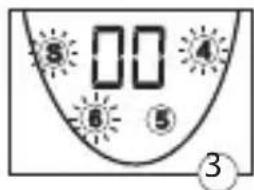
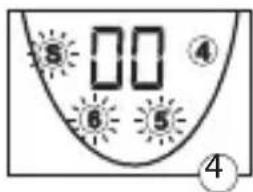
- Press the [st./stp.] button to select Month, Date and Day of the week. The day is expressed with numbers on the side of the display 1 to 6 and S (Sunday).
- Press the [lap/reset] button to see the alarm time.
5.1 12/24 HOUR SETTING
During normal time display:
- Press and hold the [lap/reset] button.
- Press the [mode] button once, 'P' or 'A' will appear when 12 hour system is set or disappear when 24 hour system is set.
- Release the [lap/reset] button.

5.2 TIME SETTING
In Time mode:
- Press and hold the [mode] button for more than 3 seconds.
- Release the button and press once the [mode] button again. The Tuesday flag (2) and the seconds will blink on the display.
- Press the [lap/reset] button to reset the seconds.
- Press the [st./stp.] button to confirm. The minutes are flashing.
- Press the [lap/reset] button to change the minutes.
- Press the [st./stp.] button to confirm.
- Follow previous steps to change hour, months and day.
- Press the [mode] button for final confirmation. The time will be displayed.
![graph TD A["12"] --> B["12"] B --> C["12"] C --> D["12"] D --> E["12"]](/content/2026/06/1267599/images/453c49d4a3f20c9ab600de5b2a02cd44355538b297f2f8357b223b6944b439a2.jpg)
5.3 MONTH/DATE POSITION INTERCHANGE
In Time mode:
- While pressing and holding the [st./stp.] button, press the [lap/reset] button to interchange date and month.
5.4 ALARM SETTING
In Time mode:
- Press and hold the [mode] button for more than 3 seconds. The Monday flag (1) and the alarm hour will blink on the display.
- Press the [lap/reset] to change the hour.
- Press the [st./stp.] button to confirm. The minutes are flashing.
- Press the [lap/reset] to change the minutes.
- Press the [mode] button to confirm.
5.4.1 TO ACTIVATE THE ALARM
- Press and hold the [lap/reset] button.
- While holding the [lap/reset] button, press the [st./stp.] button to switch the Hourly Chime on 'Each hour, a tone will be audible.
- While holding the [lap/reset] button, press the [st./stp.] button again to switch the Alarm on ‘●’
- While holding the [lap/reset] button, press the [st./stp.] button again to switch the alarm and once again to switch the Hourly Chime off.

5.4.2 TO TEST THE ALARM
- Press and hold the [lap/reset] button and the [st./stp.] button together. The alarm will sound.
5.4.3 ALARM SOUND OFF
- When the alarm sounds, press the [lap/reset] button to switch the alarm off.
6 CHRONOMETER
In Time mode:
- Press the [mode] button to switch to Chronometer mode.
- Press the [st./stp.] button to start.
- Press the [lap/reset] button while the chronometer is running.
The lap time is displayed and the chronometer runs in the background.

Press the [lap/reset] button again to return to chronometer mode.
-
Press the [st./stp.] button to stop the chronometer.
-
When stopped, press the [lap/reset] button to reset the chronometer.
7 BATTERY INSTALLATION
When the display shows weak or irregular symbols, the battery needs to be replaced.
If you are not confident with electronics, let change the battery by a professional. Do not open the Chronometer yourself.
Remove all screws on the back cover of the chronometer with a small screwdriver.
Remove and re-install a 3V (CR2032) battery with the positive (+) pole facing up and replace the cover.
Do not short-circuit batteries & dispose of in fire.
8 CE MARK
This product is in compliance with the essential requirements and other relevant provisions of the directive 89/336/EEC. This is confirmed by the CE-mark. The Declaration of conformity can be found on:
http://www.topcom.net/cedeclarations.php
9 TOPCOM WARRANTY
9.1 WARRANTY PERIOD
The Topcom units have a 24-month warranty period. The warranty period starts on the day the new unit is purchased. Consumables or defects causing a negligible effect on operation or value of the equipment are not covered.
The warranty has to be proven by presentation of the original purchase receipt, on which the date of purchase and the unit-model are indicated.
9.2 WARRANTY HANDLING
A faulty unit needs to be returned to a Topcom service centre including a valid purchase note.
If the unit develops a fault during the warranty period, Topcom or its officially appointed service centre will repair any defects caused by material or manufacturing faults free of charge.
Topcom will at its discretion fulfill its warranty obligations by either repairing or exchanging the faulty units or parts of the faulty units. In case of replacement, colour and model can be different from the original purchased unit.
The initial purchase date shall determine the start of the warranty period. The warranty period is not extended if the unit is exchanged or repaired by Topcom or its appointed service centres.
9.3 WARRANTY EXCLUSIONS
Damage or defects caused by incorrect treatment or operation and damage resulting from use of non-original parts or accessories not recommended by Topcom are not covered by the warranty.
The warranty does not cover damage caused by outside factors, such as lightning, water and fire, nor any damage caused during transportation.
No warranty can be claimed if the serial number on the units has been changed, removed or rendered illegible.
1 VEILIGHEIDSVOORSCHRIFTEN
C. MODE-TOETS [mode]
D. LAP/RESET-TOETS [lap/reset]

- Druk op de [st./stp.]-toets om te chronometer te stoppen.
- Als de chronometer stilstaat, drukt u op de [lap/reset]-toets om de chronometer te resetten.
7 BATTERIJ PLAATSEN
C. BOUTON MODE [mode]


9.3 EXCLUSIONS DE GARANTIE
5 M O D O T I E M P O
D. LAP/RESET-KNAPP [lap/reset]
D. LAP/RESET-KNAP [lap/reset]

Tryk på [lap/reset]-knappen igen for at vende tilbage til stopurtilstand.
- Tryk på [st./stp.]-knappen for at standse stopuret.
- Tryk på [lap/reset]-knappen for at nulstille stopuret, när stopuret er standset.
7 ISÄETNING AF BATTERI
2 STELL OG VEDLIKEHOLD
D. LAP/RESET-KNAPP [lap/reset]
5 KLOKKESLETTMODUS

D. LAP/RESET-NÄPPÄIN [lap/reset]


D. PRZYCISK LAP/RESET [lap/reset]
Kontakt: Topcom Europe Nv, departament R&D, Research Park, Grauwmeer 17, 3001
Heverlee, Belgia. Tel: +32 16 398920, Fax: +32 16 398939
SERVICE RETURN CARD - RÜCKSENDEKARTE - CARTE DE RETOUR SERVICE - RETOURFICHE
RETURN WITH YOUR DEFECT PRODUCT
Location/Ort./Lieu/Plaats: Post code/Postleitzahl/Code Postal/Postcode:

Country/Land/Pays/Land:
Tel./Tél.:

(Original Proof of Purchase has to be attached to this return card to be valid for warranty)
visit our website www.topcom.net


- 2 CARE AND MAINTENANCE
- 3 DISPOSAL OF THE DEVICE (ENVIRONMENT)
- 4 BUTTONS
- START/STOP BUTTON [ST./STP.]
- DISPLAY
- MODE BUTTON [MODE]
- LAP/RESET BUTTON [LAP/RESET]
- 5 T I M E M O D E
- 5.1 12/24 HOUR SETTING
- 5.2 TIME SETTING
- IN TIME MODE
- 5.3 MONTH/DATE POSITION INTERCHANGE
- 5.4 ALARM SETTING
- 5.4.1 TO ACTIVATE THE ALARM
- 5.4.2 TO TEST THE ALARM
- 5.4.3 ALARM SOUND OFF
- 6 CHRONOMETER
- 7 BATTERY INSTALLATION
- 8 CE MARK
- 9 TOPCOM WARRANTY
- 9.1 WARRANTY PERIOD
- 9.2 WARRANTY HANDLING
- 9.3 WARRANTY EXCLUSIONS
- 1 VEILIGHEIDSVOORSCHRIFTEN
- MODE-TOETS [MODE]
- LAP/RESET-TOETS [LAP/RESET]
- 7 BATTERIJ PLAATSEN
- BOUTON MODE [MODE]
- 9.3 EXCLUSIONS DE GARANTIE
- 5 M O D O T I E M P O
- LAP/RESET-KNAPP [LAP/RESET]
- LAP/RESET-KNAP [LAP/RESET]
- 7 ISÄETNING AF BATTERI
- 2 STELL OG VEDLIKEHOLD
- 5 KLOKKESLETTMODUS
- LAP/RESET-NÄPPÄIN [LAP/RESET]
- PRZYCISK LAP/RESET [LAP/RESET]
- SERVICE RETURN CARD - RÜCKSENDEKARTE - CARTE DE RETOUR SERVICE - RETOURFICHE
Brand : TOPCOM
Model : Time Master 500
Category : Wristwatch