
MC60BT - Hi-Fi System BLAUPUNKT - Free user manual and instructions
Find the device manual for free MC60BT BLAUPUNKT in PDF.


| Product Type | Hi-Fi System |
| Model | MC60BT |
| Brand | Blaupunkt |
| Dimensions (approx) | 30 x 20 x 15 cm |
| Weight (approx) | 2.5 kg |
| Power Output | 40 W RMS |
| Power Supply | AC 100-240 V, 50/60 Hz |
| Playback Formats | CD, USB, Bluetooth, FM Radio |
| Connectivity | Bluetooth 5.0, USB Port, AUX Input |
| Speakers | 2-way stereo speakers |
| Display | LED display |
| Remote Control | Included |
| Additional Features | EQ presets, alarm clock, sleep timer |
| Cleaning Instructions | Use dry soft cloth; avoid liquids |
| Safety Precautions | Do not expose to water; keep away from heat sources |
| Repairability | Contact authorized service center for repairs |
Frequently Asked Questions - MC60BT BLAUPUNKT
User questions about MC60BT BLAUPUNKT
0 question about this device. Answer the ones you know or ask your own.
Ask a new question about this device
Download the instructions for your Hi-Fi System in PDF format for free! Find your manual MC60BT - BLAUPUNKT and take your electronic device back in hand. On this page are published all the documents necessary for the use of your device. MC60BT by BLAUPUNKT.
USER MANUAL MC60BT BLAUPUNKT
USER MANUAL

Enjoy it.
Thanks for your purchase of our product. Please read through this manual before making connections and operating this product. Retain this manual for future reference.
IMPORTANT SAFETY INSTRUCTIONS

Caution:
To reduce the risk of electric shock, do not dismantle the product and do not expose the apparatus to rain or moisture. No user-serviceable parts inside. Refer servicing to qualified personnel only.
Explanation of Graphical Symbols:

The lightning flash within an equilateral triangle is intended to alert you to the presence of uninsulated dangerous voltage within the product's enclosure that may be of sufficient magnitude to constitute an electric shock to a person or persons.

The exclamation point within an equilateral triangle is intended to alert you to the presence of important operating and maintenance (servicing) instructions in the literature accompanying the product.

This mark indicates this unit belongs to class 1 laser product. The laser beam may produce radiation harm to the directly touching human body.
To achieve the utmost in enjoyment and performance, and in order to become familiar with its features, please read this manual carefully before attempting to operate this product. This will assure you years of trouble free performance and listening pleasure.
Important Notes
This safety and operating instruction should be retained for future reference.
a. The apparatus should not be exposed to dripping or splashing or placed in a humid atmosphere such as a bathroom.
b. Do not install the product in the following areas:
a). Places exposed to direct sunlight or close to radiators. b). On top of other stereo equipment that radiate too much heat. c). Blocking ventilation or in a dusty area. d). Areas where there is constant vibration. e). Humid or moist places.
c. Do not place near candles or other naked flames.
d. Operate the product only as instructed in this manual.
e. Before turning on the power for the first time, make sure the power adaptor is properly connected.
For safety reasons, do not remove any covers or attempt to gain access to the inside of the product. Refer any servicing to qualified personnel.
Do not attempt to remove any screws, or open the casing of the unit; there are no user serviceable parts inside. Refer all servicing to qualified service personnel.
SAFETY INSTRUCTIONS
- Read Instructions - All the safety and operating instructions must be read before the product is operated.
- Retain Instructions - The safety and operating instructions should be kept with the product for future reference.
- Heed warnings - All warnings on the product and in the operating instructions should be adhered to.
- Follow instructions - All operating and users' instructions should be followed.
- Installation - Install in accordance with the manufacturer's instructions.
- Power sources - This product should be operated only from the type of power source indicated by the marking adjacent to the power cord entry. If you are not sure of the type of power supply to your home, consult your product dealer or local power company.
- Grounding or polarization - the product is not required to be grounded. Ensure that the plug is fully inserted into the wall outlet or extension cord receptacle to prevent blade or pin exposure. Some versions of the product are equipped with a power cord fitted with a polarized alternating line plug (a plug having one blade wider than the other). This plug will fit onto the power outlet only one way. This is a safety feature. If you are unable to insert the plug fully into the outlet, try reversing the plug. If the plug should still fail to fit, contact your electrician to replace your obsolete outlet. Do not defeat the safety purpose of the polarized plug. When using an extension power-supply cord or a power-supply cord other than that supplied with the appliance, it should be fitted with the appropriate molded plugs and carry safety approval appropriate to the country of use.
- Power cord protection - Power-supply cords should be routed so that they are not likely to be walked on, kinked or pinched by items placed on or against them, paying particular attention to cords from plugs, receptacles and the point where they exit from the product.
- Overloading - Do not overload wall outlets, extension cords, or multiple sockets, as this can result in a risk of fire or electric shock.
- Ventilation - The product must be properly ventilated. Do not place the product on a bed, sofa, or other similar surface. Do not cover the product with any items such as tablecloths, newspapers, etc.
- Heat - The product should be situated away from heat sources such as radiators, heat registers, stoves, or other products, including amplifiers that produce heat. No naked flame sources, such as lighted candles, should be placed on the apparatus.
- Water and moisture - To reduce the risk of fire or electric shock, do not expose the product to train, dripping, splashing or excessive moisture such as in a sauna or bathroom. Do not use this product near water, for example, near a bathtub, washbowl, kitchen sink, laundry tub, in a wet basement or near a swimming pool (or similar).
- Object and Liquid Entry - Never push objects of any kind into this product through openings, as they may touch dangerous voltage points or short circuit parts that could result in a fire or electric shock. Never spill liquid of any kind on the product. Do not place any object containing liquid on top of the product.
- Cleaning - Unplug the product from the wall outlet before cleaning. Dust in the woofer may be cleaned with a dry cloth. If you wish to use an aerosol cleaning spray, do not spray directly on the cabinet; spray onto the cloth. Be careful not to damage the drive units.
- Attachments - Do not use attachments not recommended by the product manufacturer, as they may cause hazards.
- Accessories - Do not place this product on an unstable cart, stand, tripod, bracket or table. The product may fall, causing serious injury to a child or adult, and serious damage to the product. Use only with a cart, stand, tripod, bracket or table recommended by the manufacturer or sold with the product. Any mounting of the product should follow the manufacturer's instructions and should use a mounting accessory recommended by the manufacturer.
- Moving the product - A product and cart combination should be moved with care. Quick stops, excessive force and uneven surfaces may cause the product and cart combination to overturn.
- Unused periods - The power cord of the appliance should be unplugged from the outlet during lightning storms or when the apparatus is left unused for a long period of time.
- Servicing - Do not attempt to service this product yourself, as opening or removing covers may expose you to dangerous voltage or other hazards. Refer all servicing to qualified service personnel.
- Please remove the power plug from the main power source or wall power source when not in use. When plugged in to a power source, the system is in standby mode, so the power is not entirely cut off.
- Replacement parts - When replacement parts are required, ensure that the service technician has used replacement parts specified by the manufacturer or have the same characteristics as the original part. Unauthorized substitutions may result in fire, electric shock or other hazards.
- Mains fuses - For continued protection against fire hazard, use fuses only of the correct type and rating. The correct fuse specification for each voltage range is marked on the product.
- Do not turn up the volume while listening to a section with very low level inputs or no audio signals. If you do, the speaker may be damaged when a peak level section is suddenly played.
- The only means of completely disconnecting the product from the power supply is by removing the power cord from the wall outlet or the product. The wall outlet or the power cord entry to the product must remain freely accessible at all times while the product is in use.
- Try to install the product near a wall socket or extension cord and shall be easily accessible.
- The highest environmental temperature suitable for this product is 35°C.
- ESD hints - The normal function of the product may be disturbed by strong Electro-Magnetic Interference. If so, simply reset the product to resume normal operation by following the instruction manual. In case the function could not resume, please use the product in other location.
28. Battery
1). The batteries must not be exposed to excessive heat such as sunshine, fire or the like.
2). The batteries should be drawn to the environmental aspects of battery disposal.
3). Battery usage CAUTION - to prevent battery leakage which may result in body injuries, property damage, or damage to the apparatus:
- Install all batteries correctly, + and - as marked on the apparatus.
- Do not mix batteries (old and new or carbon and alkaline, etc.)
- Remove batteries when the unit is not used for a long time.

Bluetooth™
The Bluetooth® word mark and logos are registered trademarks owned by Bluetooth SIG, Inc. and any use of such marks by us is under license. Other trademarks and trade names are those of their respective owners.
Warning
This appliance is not intended for use by persons (including children) with reduced physical sensory or mental capabilities, or lack of experience and knowledge, unless they have been given supervision or instruction concerning use of the appliance by a person responsible for their safety. Children should be supervised to ensure that they do not play with the appliance.

- To prevent possible hearing damage, do not listen at high volume levels for long time periods respectively a sudden high volume level.
- Never use the device unsupervised! Switch off the device whenever you are not using it, even if this only for a short while.
- The appliance is not intended to be operated by means of an external timer or separate remote control system.
- If the supply cord is damaged, it must be replaced by the manufacturer, its service agent or similarly qualified persons in order to avoid a hazard.
- Before operating this system, check the voltage of this system to see if it is identical to the voltage of your local power supply.
- The unit should not be impeded by covering the ventilation opening with items such as newspaper, table-cloths, curtains etc. Make sure that there are at least 20 cm of space above and at least 5 cm of space on each side of the unit.
- The apparatus must not be exposed to dripping or splashing and that objects filled with liquids, such as vases, must not be placed on the apparatus.
- To prevent fire or shock hazard, do not expose this equipment to hot places, rain, moisture or dust.
- Do not locate this unit near any water sources e.g. taps, bathtubs, washing machines or swimming pools. Ensure that you place the unit on a dry, stable surface.
- Do not place this unit close to a strong magnetic field.
- Do not place the unit on a amplifier or receiver.
- Do not place this unit in a damp area as the moisture will affect the life of electric components.
- If the system is brought directly from a cold to a warm location, or is placed in a very damp room, moisture may condense on the lens inside the player. If this occurs, the system will not operate properly. Please leave the system turned on for about an hour until the moisture evaporates.
- Do not attempt to clean the unit with chemical solvents as this might damage the finish. Wipe with a clean, dry or slightly damp cloth.
- When removing the power plug from the wall outlet, always pull directly on the plug, never pull on the cord.
- The mains plug is used as the disconnect device, the disconnect device must remain readily operable.
COMPACT DISC MAINTENANCE
- Always use a compact disc bearing the mark as shown.
- Notes on handling discs
Store discs in their case when not in use.
Do not touch the reflective recorded surface.
Do not stick paper or write anything on the surface.
Do not bend the disc.

Store the disc in its case.
Do not expose discs to direct sunlight or high temperatures, high humidity or dusty places.

Should the disc become soiled, wipe off dust, dirt and fingerprints with a soft cloth.
The disc should be cleaned by wiping in a straight line from the center to the edge.

CORRECT INCORRECT
FROM THE CENTRE TO THE EDGE
Never use benzene, thinners, record cleaner fluid or anti-static spray. Be sure to keep the CD compartment door closed when not in use to keep it clean from dust and other contaminants. Do not touch the lens.
NOTICE
CE
This product complies with the radio interference requirements of the European community.

Your product is designed and manufactured with high quality materials and components, which can be recycled and reused.

When this crossed-out wheeled bin symbol is attached to a product it means that the product is covered by the European Directive 2002/96/EC. Please inform yourself about the local separate collection system for electrical and electronic products. Please act according to your local rules and do not dispose of your old products with your normal household waste. Correct disposal of your old product helps to prevent potential negative consequences for the environment and human health.
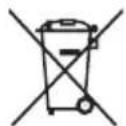
Your product contains batteries covered by the European Directive 2006/66/EC, which cannot be disposed of with normal household waste. Please inform yourself about the local rules on separate collection of batteries because correct disposal helps to prevent negative consequences for the environment and human health.
Environmental information
All unnecessary packaging has been omitted. We have tried to make the packaging easy to separate into three materials: cardboard (box), polystyrene foam (buffer) and poly ethylene (bags, protective foam sheet). Your system consists of material which can be recycled and reused if disassembled by a specialized company. Please observe the local regulations regarding the disposal of packaging materials, exhausted batteries and old equipment. Recording and playback of material might require consent. See Copyright Act 1956 and The Performer's Protection Acts 1958 to 1972.
LOCATION OF CONTROLS


NAMES OF CONTROLS
- Display
- PREVIOUS/REVERSE BUTTON
- Pause/Play Button
- NEXT/FORWARD Button
- POWER/STANDBY Button
- Disco Light Button
- Program/P-Mode Button
- Source Button
- VOLUME Dial
- NEXT/FORWARD+10 Button
- PREVIOUS/REVERSE-10 Button
- Power Button
- MIC Port
- USB Port
- Passive Speaker Guard
- Through the sound hole
- Speaker Guard
- Wooden Box
- Right Speaker
- Left Speaker
- FM ANT. Port
- AC Power Input
- Pair Button
- EQ/ID3 Button
- Tun+ Button
- Tun- Button 27. Right Disco Light 28. Left Disco Light
REMOTE HANDSET
LOADING THE BATTERIES INTO THE REMOTE HANDSET
- Open the battery compartment cover.
- Insert two "AAA" batteries (not included) as indicated inside the battery compartment.
- Close the cover.
KEY FUNCTIONS
- SOURCE BUTTON
- TUN.-
- STOP BUTTON
- SKIP BACKWARD BUTTON
- FOLD.+/+10/MEMORY+ BUTTON
- MUTE BUTTON
- PROG./MEMORY/P-MODE BUTTON
- VOL-BUTTON
- VOL+ BUTTON
- DISCO LIGHT BUTTON
- EQ/ID3
- FOLD.-/-10/MEMORY-BUTTON
- SKIP FORWARD BUTTON
- PLAY/PAUSE/PAIR BUTTON
- TUN.+
- POWER BUTTON
- BATTERY COMPARTMENT
To operate the unit with the remote control, point the remote handset at the remote sensor on the front panel and press the appropriate button on the remote handset. The remote works best within a range of 6 to 7 meters from the front panel and at an angle of 30 degrees. Bright sunlight or room lighting conditions can interfere with the remote control. If the remote operation is unsatisfactory or stops working entirely, first try replacing the remote batteries, then try reducing the room lighting conditions.
POWER SOURCE
This unit is designed to operate on AC electrical systems.
AC OPERATION
Plug one end of the power cord into the AC power input on the unit; plug the other end into a household AC outlet.
BASIC FUNCTION TURNING THE UNIT ON/OFF
Connect the Left and Right speaker cables to the L/R sockets and connect the FM wire to the FM ANT. socket on the rear cabinet. Press the POWER button on the unit or remote control to turn the unit on or off.
ESD hints – The product may reset or not reset to operation of control due to electrostatic discharge. Just switch off and reconnect again.
SETTING THE SOURCE MODE
To change the function mode, press the SOURCE button on the unit (RADIO / CD / USB / BT / AUX).
ADJUSTING THE VOLUME
Rotate the VOLUME dial on the unit or press the VOL.+/VOL.- keys on the remote control to increase or decrease the volume.
This unit has a built-in equalizer system. Press the EQ/ID3 button on the unit or remote control during playback to select a setting that best matches the music style: FLAT, CLASSIC, ROCK, POP, and JAZZ.
ID3 System
This unit has an ID3 system. If the MP3 file is in "ID3" format, it will automatically search for the information of "TITLE NAME", "ARTIST NAME", and "ALBUM NAME" to show on the display. To turn off the tag display system, press and hold the EQ/ID3 button and the unit will return to normal display.
TITLE NAME ARTIST NAME ALBUM NAME
DISCO LIGHT
To change the disco light effects, press the DISCO-LIGHT button on the unit or remote control. You can choose from five different modes.
To disable the disco light, press the DISCO-LIGHT button on the unit or remote control until the display reads "OFF".
- Press the SOURCE button on the unit or remote control to select the RADIO FUNCTION. This unit is designed for FM ONLY.
- Tune to the desired station by pressing the TUN.+/TUN.- button on the unit or remote control. The station frequency will show on the display. Example: FM87.80 MHz. If the radio receives a stereo signal, the "STEREO" indicator will show on the display.
- Rotate the VOLUME dial on the unit or press the VOL.+/VOL.- key on the remote control to adjust the volume to a comfortable level.
- Extend the FM ANTENNA to its full length and gently move the unit back and forth to get the best reception, or place the unit in an open location.
- To turn off the radio, press the SOURCE button on the unit or remote control to switch to other functions, or press the POWER button to turn off the unit.
AUTO PRESET MEMORY / SCAN
To search for and automatically save stations to preset memory, press the PLAY/PAUSE button on the unit or remote control. Any station with a strong enough signal will be saved to preset memory. After the unit finishes scanning, it will automatically tune to preset station number 1 (P01). To tune to the next preset station, press the FOLD.+/+10/M.+ button on the unit or remote control. To tune to the previous station, press the FOLD.-/-10/M.- button on the unit or remote control. Press TUN- or TUN+ for a second or more, then release the button; the tuner will automatically search for the first station with sufficient signal strength.
You may choose stations to save in preset memory so that you can tune directly to these stations quickly.
- Press the PROG./P-MODE/M. button on the unit or remote control. "P01" will flash on the display. Press the TUN.+ or TUN.- button on the unit or remote control to select the desired station.
- Press the PROG./P-MODE/M. button on the unit or remote control to choose the position you want to store, then press the PROG./P-MODE/M. button on the unit or remote control again to enter.
- To save another station, repeat steps (1) and (2). You may save up to 30 FM stations.
To tune to preset stations, press the FOLD.+/+10/M.+ or FOLD.-/-10/M.- button on the unit or remote control.
CD/MP3 OPERATION SUPPORTED DISC FORMATS
This unit can play all digital audio CD/MP3, finalized digital audio CD-Recordable (CD-R) discs, finalized digital audio CD-Rewritable (CD-RW) discs, and CD-DA formatted digital audio CD/CD-R/CD-RW discs.
LOADING A DISC
- Press the SOURCE button on the unit or remote control to select "CD" mode.
- Press PUSH TO OPEN on the CD door to open it; the display will read "OPEN".
- Place an audio CD or MP3 disc into the tray with the label side facing up.
- Close the CD door; the display will flash "CD READ", and then show the total number of playable tracks on the disc. Playback will start automatically.
- To remove the CD, press the ⬆POWER button on the unit or remote control to turn off the unit, then press PUSH TO OPEN on the CD door to open it. Hold the CD by its edges, and take it out carefully.
NOTE:
- Make sure the disc is completely stopped before opening the CD door.
- To ensure good system performance, wait until the unit reads the disc completely before doing anything else.
- If the disc is unreadable or if no disc is loaded in the tray, the display will show "NO DISC".
PLAYING A DISC
- The playback starts from Track 1 automatically after a compatible disc has been loaded and read by the unit.
- To pause playback, press the PLAY/PAUSE button on the unit or remote control. The current track time will flash on the display. To resume playback, press the PLAY/PAUSE button on the unit or remote control again.
- To stop playback, press the STOP button on the unit or remote control. The display will show the total number of tracks.
SKIPPING TO A TRACK/TIME POINT
To select a desired track
Press the SKIP UP or SKIP DOWN buttons on the unit or remote control to skip to the next or previous track respectively. Track numbers are shown on the display.
To scan quickly to a point in a track
Press and hold the SKIP UP or SKIP DOWN buttons on the unit or remote control to quickly scan forward or in reverse through a track.
The track time is shown on the display.
To select a song whose track number exceeds 10 (for MP3 disc only)
To select a song/track whose number exceeds 10, press the FOLD+/+10/M+ button each time to skip forward 10 tracks, then press the SKIP UP to select the desired track.
To select a desired folder (for MP3 disc only)
To select a desired folder, press and hold the FOLD+/+10/M+ button each time to skip forward a folder, then press the SKIP UP to select the desired track.
PROGRAMMING TRACKS
You can create a custom play list from your disc when playback is stopped. You can program up to 20 tracks for a CD disc and 99 tracks for an MP3 disc.
- While play is stopped, press the PROG./P-MODE/M. button on the unit or remote control. The display will flash PROG and show "P01 001".
- Use the SKIP UP or SKIP DOWN buttons on the unit or remote control to select the first track to be saved to the program list, then press PROG./P-MODE/M. on the unit or remote control to save. The display will now show the next program number (e.g., "P02 012").
- Repeat step 2 to save more tracks to the program list until all tracks have been programmed.
- Press the PLAY/PAUSE button on the unit or remote control to start playing the program list from the beginning. The display will show which track is currently playing.
- Press the STOP button on the unit or remote control to stop program playback. To clear the program, press the STOP button on the unit or remote control when the disc is stopped and open the CD compartment lid. The program is now erased.
MC60BT
REPEAT PLAY
You can play one track or all tracks on the disc repeatedly.
To repeat a single track, press the PROG./P-MODE/M. button on the unit or remote control during play until the REPEAT indicator flashes on the display. The current track will be played over and over again until you press the STOP button on the unit or remote control.
To repeat all tracks, press the PROG./P-MODE/M. button on the unit or remote control during play until the REPEAT indicator shows steadily on the display. All tracks on the disc will be played over and over again until you press the STOP button on the unit or remote control.
To repeat a folder, press the PROG./P-MODE/M. button on the unit or remote control during play until the REPEAT FOLD indicator shows on the display. All tracks in the current folder will be played over and over again until you press the STOP button on the unit or remote control. (This option is only available when playing an MP3 disc that contains more than one folder.)
To cancel repeat play, press the PROG./P-MODE/M. button on the unit or remote control until the display no longer shows any repeat indicators.
RANDOM PLAY
Press the PROG./P-MODE/M. button on the unit or remote control during play until the "RAN" indicator shows on the display. Tracks will play in random order. To resume normal playback, press the PROG./P-MODE/M. button on the unit or remote control until the "RAN" indicator disappears from the display.
INTRO PLAY
Press the PROG./P-MODE/M. button on the unit or remote control during play until the "INTRO" indicator is shown on the display. The first 10 seconds of each track will play, and then skip to the next track. To resume normal playback, press the PROG./P-MODE/M. button on the unit or remote control until the "INTRO" indicator disappears from the display.
LISTENING TO USB
USB OPERATION
- Press the SOURCE button on the unit or remote control to select "USB" mode.
- Connect the USB memory stick to the USB port on the front of the unit. The display will show the total number of playable tracks on the USB device. Playback will start automatically from Track 1.
- To pause playback, press the PLAY/PAUSE button on the unit or remote control. The current track time will flash on the display.
- To resume playback, press the PLAY/PAUSE button on the unit or remote control again.
- To stop playback, press the STOP button on the unit or remote control. The display will show the total number of tracks.
- To learn more about custom programs and repeat/random/intro playback, please refer to the CD/MP3 OPERATION section of this manual.
CAUTION:
To prevent harmful interference, always connect USB devices directly to the unit. Do not use a USB extension cable to connect USB devices to the unit.
This unit provides one 3.5mm Mic Jack for Karaoke function. The microphone is available in all modes.
- Connect a 3.5mm microphone to the mic jack. If your microphone has a 6.3mm connector, insert the 3.5mm to 6.3mm adaptor (included in the accessories) and connect your device to the adaptor.
- Adjust the volume level by turning the VOLUME dial on the unit or using the VOL.+/VOL.- keys on the remote control.
BLUETOOTH OPERATION
- Press the SOURCE button on the unit or remote control to switch to BLUETOOTH function. The LCD will display "BT" and the light will flash at high speed.
- Turn on the Bluetooth function on the device, scan for the unit "BLAUPUNKT MC60BT" and connect. Then input the password 0000 if required. The light will light up to indicate connection done, and the display will show "BT". Press Play to start playback. If the unit cannot connect to the relative Bluetooth within 2 minutes, the indicator light will flash every 2 seconds. Then press the PAIR button on the unit or remote control to reconnect.
- Press the VOLUME UP/DOWN on the unit, remote control, or the device to your desired level.
- Press the PAIR button on the unit or on the remote control to disconnect Bluetooth.
Note: The Bluetooth works best within 10 meters.
SPECIFICATIONS
GENERAL
Power Requirement: AC100-240V -50Hz
Power consumption: 60 Watts
Dimensions:
MAIN UNIT: 210(L) x 268(D) x 317(H) mm
SPEAKER: 220(L) x 270(D) x 317 (H) mm
Operation temperature: +5°C - +35°C
RECEIVER SECTION
Receiving Bands: FM ONLY
Frequency Range: FM 87.5 – 108 MHz
COMPACT DISC SECTION
Optical Pickup 3-Beam Laser
Frequency Response 100Hz - 16KHz
AUDIO SECTION
Power output 25W x 2
ACCESSORIES
Instruction Booklet .... 1
AC Cord 1
6.3mm Microphone ....1
Microphone Adaptor .... 1
Note: Specifications are subject to change for continuous improvement without prior notice.
CARRY DISCS ONLY IN THE SHOWN WAY
- Storage
DO NOT STORE NEAR HEAT SOURCES
- Cleaning the disc
CORRECT
INCORRECT
FROM CENTRE TO THE EDGE
CORRECT

FROM THE CENTRE TO THE EDGE
CORRECT
INCORRECT
FROM THE CENTRE TO THE EDGE
DISCO LIGHT
Competence Centre Audio
2N-Everpol Sp. z o.o.
ul. Puławska 403A
02-801 Warsaw, Poland
phone: +48 22 331 99 59
e-mail: info@everpol.pl
www.blaupunkt.com
In case of questions or problems
please contact our service.
Tel. 00 48 22 331 99 53
E-mail: info@blaupunkt-audio.pl
All rights reserved. All brand names are registered trademarks of their
respective owners. Specifications are subject to change without prior notice.
Enjoy it.

- USER MANUAL
- IMPORTANT SAFETY INSTRUCTIONS
- CAUTION
- EXPLANATION OF GRAPHICAL SYMBOLS
- IMPORTANT NOTES
- SAFETY INSTRUCTIONS
- BATTERY
- WARNING
- COMPACT DISC MAINTENANCE
- NOTICE
- ENVIRONMENTAL INFORMATION
- LOCATION OF CONTROLS
- NAMES OF CONTROLS
- REMOTE HANDSET
- LOADING THE BATTERIES INTO THE REMOTE HANDSET
- POWER SOURCE
- AC OPERATION
- BASIC FUNCTION TURNING THE UNIT ON/OFF
- SETTING THE SOURCE MODE
- ADJUSTING THE VOLUME
- ID3 SYSTEM
- DISCO LIGHT
- AUTO PRESET MEMORY / SCAN
- CD/MP3 OPERATION SUPPORTED DISC FORMATS
- LOADING A DISC
- NOTE
- PLAYING A DISC
- SKIPPING TO A TRACK/TIME POINT
- TO SELECT A DESIRED TRACK
- TO SCAN QUICKLY TO A POINT IN A TRACK
- TO SELECT A SONG WHOSE TRACK NUMBER EXCEEDS 10 (FOR MP3 DISC ONLY)
- TO SELECT A DESIRED FOLDER (FOR MP3 DISC ONLY)
- PROGRAMMING TRACKS
- MC60BT
- REPEAT PLAY
- RANDOM PLAY
- INTRO PLAY
- LISTENING TO USB
- USB OPERATION
- BLUETOOTH OPERATION
- SPECIFICATIONS
- GENERAL
- RECEIVER SECTION
- COMPACT DISC SECTION
- AUDIO SECTION
- ACCESSORIES
Brand : BLAUPUNKT
Model : MC60BT
Category : Hi-Fi System