Timer Dry - Tumble dryer Saivod - Free user manual and instructions
Find the device manual for free Timer Dry Saivod in PDF.


| Product Type | Tumble Dryer |
| Brand | Saivod |
| Model | Timer Dry |
| Drying Capacity | 8 kg |
| Dimensions (W x D x H) | 60 x 60 x 85 cm |
| Net Weight | 45 kg |
| Power Supply | 220-240 V ~ 50 Hz |
| Rated Power | 2200 W |
| Energy Class | C |
| Annual Consumption (kWh) | 450 kWh |
| Ventilation Type | Exhaust |
| Drying Programs | Ready to Iron, Extra Dry, Cotton, Synthetic, Timer |
| Timer Function | Yes, up to 120 minutes |
| Noise Level | 65 dB(A) |
| Care and Cleaning | Clean the filter after each cycle, drain the water tank if present |
| Safety Devices | Anti-shock protection, child lock, automatic shutdown in case of overheating |
| Spare Parts Available | Filter, belt, heating element, timer |
| Repairability | Repairability index 7.5/10 |
Frequently Asked Questions - Timer Dry Saivod
User questions about Timer Dry Saivod
0 question about this device. Answer the ones you know or ask your own.
Ask a new question about this device
Download the instructions for your Tumble dryer in PDF format for free! Find your manual Timer Dry - Saivod and take your electronic device back in hand. On this page are published all the documents necessary for the use of your device. Timer Dry by Saivod.
USER MANUAL Timer Dry Saivod
Instructions for installation
^□□□□KZ□□^□/sK□□d/D □Z□□Zz
GB ENGLISH 3-10
FR FRANÇAIS 11-18
ES ESPAÑOL 19-26
PT PORTUGUÊS 27-34
ENGLISH
Dear Customer,
Thank you for having chosen our product. Please read these instructions carefully before connecting and using the appliance.
A knowledge of the operating principles will help guarantee correct and safe use of the appliance.
If the appliance is sold or handed over for use by others, remember to give the new user the instruction booklet.
CONTENTS
NOTES AND ADVICE FOR THE USER 3-4
• Technical information 3
DESCRIPTION OF THE APPLIANCE 5
INSTALLING THE APPLIANCE 6-7
- Installation 6
• Levelling the appliance 6 - Connecting the air exhaust tube 6
- Connecting to the mains supply 7
USING THE APPLIANCE 7-9
• Description of the functions 7
- Door 8
• Drying the washing correctly 8
• Precautions for fabrics 8
- Program table 9
- Weights of washing 9
MAINTENANCE 10
- Cleaning the filter 10
- Fault finding 10
- Resolving problems 10
- Optional accessories 10
NOTES AND ADVICE FOR THE USER
| Dimensions: | Widht cm.: | 59.5 |
| Height cm.: | 85.0 | |
| Depth cm.: | 57.0 | |
| Max. capacity | see characteristics plate | |
| Power rating | see characteristics plate | |
| Voltage | see characteristics plate | |
MODEL: ____
SERIAL NUMBER: ____
DATE OF PURCHASE: ____
NOTES AND ADVICE FOR THE USER
This appliance has been designed for use as a domestic drier. Any other use is considered as improper and therefore dangerous.
- Keep this instruction book near to the appliance always, in order that it can be easily consulted when necessary.
Any modifications or attempts to interfere with the appliance can be dangerous for the user and may damage the product.
On delivery of the appliance, check that it has not been damaged during transport. If any damage is discovered, report the matter to the retailer immediately.
During the drying cycle, the air in the room is ducted through the back of the appliance. Do not cover the drier with washing or
any other items.
When positioning the appliance, ensure that the power supply cable is not kinked or squashed and is accessible.
Remember that the door glass and exhaust tube will heat up during a drying cycle and can reach temperatures of up to 60°. Do not touch these parts before the cooling cycle has been completed.
The appliance must not be used by children unless supervised.
Never dry washing that has been in contact with chemical agents such as dry-cleaning fluids
These products are volatile by nature and could cause an explosion.
Do not dry items with parts containing foam rubber or rubber
in general, in that the material could melt and damage other items or even the appliance itself.
If the appliance is sold or given away, remember to hand over this instruction book with it. This will help the new owner use the drier both correctly and safely.
Do not attempt to repair any appliance faults alone, in that repairs carried out by a non-professional may cause serious damage and will nullify any rights to repairs under guarantee.
Repairs to the appliance can only be carried out by personnel authorised by the customer service centres. All repairs must make use of original spare parts only.
Spin dry or wring the washing well before loading it into the drier.
natural_image
Cartoon illustration of a steaming hot pot with steam rising, connected to an electrical outlet (no text or symbols)Never insert or remove the plug from the mains socket with wet hands.

natural_image
Cartoon illustration of a smiling computer with electrical outlet symbols (no text or labels)The machine must be connected to a mains socket fitted with an efficient earth complying with current safety standards.

natural_image
Cartoon illustration of a distressed computer with steam rising, surrounded by electrical plugs and a TV (no text or symbols)Do not use extension leads or multiple plug adapters to connect the appliance to the mains supply.

natural_image
Cartoon illustration of a distressed computer monitor character under rain with falling snow (no text or symbols)Do not expose the appliance to atmospheric agents.

natural_image
Cartoon illustration of a smiling hard hat character holding a wrench and pliers, with an electrical outlet symbol nearby (no text or symbols present)When servicing or cleaning the appliance, remember to disconnect it from the mains supply.

natural_image
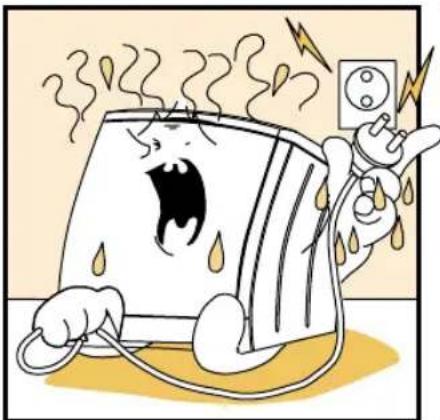
Cartoon illustration of a distressed document being pulled by a plug with lightning bolts (no text or symbols)Do not pull the power supply cable to unplug the appliance from the mains supply. Pull the plug only.
NOTES AND ADVICE FOR THE USER
Spun dry washing will dry quicker.
Clean the filter thoroughly each time the drier is used in order to guarantee perfect air circulation.
This appliance is marked according to the European directive 2002/96/EC on Waste Electrical and Electronic Equipment (WEEE). By ensuring this product is disposed of correctly, you will help prevent potential negative consequences for the environment and human health, which could otherwise be caused by inappropriate waste handling of this product. The
symbol ☒ on the product, or on the documents accompanying the product, indicates that this appliance may not be treated as household waste. Instead it shall be handed over to the applicable collection point for the recycling of electrical and electronic equipment. Disposal must be carried out in accordance with local environmental regulations for waste disposal. For more detailed information about treatment, recovery and recycling of this product, please contact your local city office, your
household waste disposal service or the shop where you purchased the product.
THE MANUFACTURER WILL NOT BE HELD RESPONSIBLE FOR ANY INCIDENTS RESULTING FROM NON-COMPLIANCE WITH SAFETY STANDARDS OR THE REQUIREMENTS OF THIS INSTRUCTION BOOK.
DESCRIPTION OF THE APPLIANCE
The drier is a domestic appliance capable of drying any type of fabric at any time.
The machine has been constructed in steel panels which have been treated and painted to guarantees that its aesthetic qualities remain unaltered over time.
The motor and all moving parts have been designed and manufactured to guarantee the minimum possible noise levels
The control panel has been
designed to enable the user to run the desired drying program without difficulty.
The wide door makes loading and unloading the washing much easier.

1 - START button
6 - Filter
2 - Delicate or energetic drying button
7 - Adjustable feet
3 - Drying time control knob
8 - Exhaust outlet
4 - Spin function active indicator light
9 - Outlet coupling
5 - Door
10- Exhaust tube
11- Tube support

INSTALLING THE APPLIANCE INSTALLATION
Installation must be carried out by qualified personnel in line with the instructions supplied by the manufacturer. Incorrect installation may result in damage and injury.
Install the drier near to a window to facilitate the evacuation of the damp air from the drier.
The exhaust tube must be used to prevent condensation, and must be inserted in hole A at the bottom of the back panel of the appliance (fig. 3).
Never cover the air intake at the back of the appliance.
Place the filter in its normal position as shown (fig. 4).

Clean the inside of the drying drum using a damp cloth to remove any dust deposits.

natural_image
Illustration of a door with a circular component and a grid-patterned cover, no text or symbols presentLEVELLING THE DRIER
Adjustable feet. Place the drier upright so that it rests firmly on all four feet. Level the drier by adjusting the feet as follows:
Lift the drier slightly.
Adjust the feet to the correctheight (fig. 5).
(Do not unscrew the feet to much and do not use a screwdriver).
Lower the drier.
A badly levelled machine may cause damage to the bearings and lead to their premature wear. This drier does not need to be anchored to the floor.

natural_image
Illustration of a hand holding a small object near a window, with motion arrows indicating movement (no text or symbols)CONNECTING THE AIR EXHAUST TUBE
Connect the exhaust tube to the outlet on the back of the drier (fig.6), as follows:
Connect one end of the tube to the connector piece supplied.
Rotate the connecting piece (together with the tube) anticlockwise in the drier outlet hole.
- Carry the tube away from the

natural_image
Illustration of a washing machine with a coiled hose and valve, no text or symbols presentback of the drier to the left or right by means of the recess at the bottom of the drier body.
Position the other end of the tube near to a window or a ventilation outlet on an external wall. If this is not possible, ensure that the room is well ventilated when the drier is being used. Use the support supplied to anchor the tube (fig. 7).

natural_image
Illustration of a washing machine with a coiled hose and attached hook (no text or symbols)Important: The air exhaust tube must be connected even if the air is not discharged outdoors, otherwise the drier will re-absorb the discharged damp air and thus prolong the drying time. Damp air can also damage the drier. Although the air discharged from the exhaust tube is only warm and damp and does not constitute a danger, it must never be directed towards people, animals or plants.
Important: The exhausted air must not be conveyed to a chimney discharging fumes generated by gas or other fuel burning appliances.
INSTALLING THE APPLIANCE ELECTRICAL CONNECTION
Make sure that the voltage indicated on the identification plate attached to the back of the appliance corresponds to that of the mains supply.
On completion of the installation, the appliance must be connected to the mains supply through a two-pole switch.
All cutouts, electric wiring and mains sockets must have a rating such that enables them to support the maximum load indicated on the identification plate.
The mains supply to which the appliance is connected must be fitted with an earthing system. If

natural_image
Illustration of a hand connecting an electrical outlet to a plug, with a ground symbol and number 8 (no text or labels)this is not the case, the manufacturer will not be held liable for any incidents that may occur (fig. 8).
If the power supply cable is damaged in any way, contact the appropriate specialised customer
technical service centre.
The drier must not be connected to the mains supply using indirect methods such as extension leads or multiple adapters.
Position the appliance so that the power supply cable is easily accessible for disconnection when the need arises.
Important: On completion of the drying cycle, disconnect the appliance from the mains supply to prevent young children from operating the drier.
USING THE APPLIANCE
DESCRIPTION OF THE FUNCTIONS

natural_image
Illustration of a hand pressing down on a circular component inside a cabinet (no text or symbols)

Drying time control knob: Rotate the knob to select the required drying times (fig._9). Refer to the program table to select the program according to the type of fabric.
At the end of each drying cycle, the appliance effects a 10 – 15 minute cooling cycle, during which time the appliance is still switched on.
N.B. The timer knob must always be rotated clockwise (fig. 9).
START button: Press this button to start the drying cycle (the indicator will light up) (fig. 10).
Delicate or energetic drying button: This button is used to select the type of drying cycle to run: Energetic or delicate (fig.11).
USING THE APPLIANCE DOOR
The drier is the front-loading type. Pull the handle outwards, without forcing it, and gently open the door. The appliance will stop if the door is opened during a drying cycle. The drum will continue to rotate for a while, slowing down gradually to a stop.
Important:
Obviously, during a drying cycle the washing in the drum will be hot. The washing is cooled during the cooling cycle (the last few minutes indicated on the programmer knob).
To avoid being scalded by steam
or burned by the hot washing, do not open the door during the drying phase.
If the need arises to interrupt the drying cycle, allow the drier to rotate for a few minutes in the cooling cycle.

natural_image
Illustration of a hand holding a small object inside a circular container with arrows indicating rotation (no text or symbols)DRYING THE WASHING CORRECTLY
Follow the procedure below:
A
▼ Spin the washing.
B
Separate the items into types or fabrics.
▼ Close any zips and fasten buttons and remember to empty the pockets of any clothing.
▼ Turn jumpers inside out.
C
▼ Open the door
▼ Load the washing in the drum and remember to load sheets from a corner first.
▼ It is advisable to load small and large items together.
D
▼ Close the door
▼ Dry your hands (never touch electric appliances with wet hands).
▼ Insert the plug in the mains socket.
E
▼ Select the drying cycle recommended for the load (see program table).
▼ Set the timer knob to the required drying time.
▼ Press the START button to start the cycle.
F
▼ To stop the machine during a drying cycle, simply open the door (the drum will slow down then stop).
▼ To continue the drying cycle, close the door and press the start button.
The drying time can be reduced or increased during the drying cycle by rotating the timer knob clockwise.
G
▼ After having removed the dry washing, clean the filter as follows:
- Lift the filter- Open it and clean it using a soft brush
- Close it and replace it in its seating
- The filter must be washed periodically using soapy water in order to remove very small particles.
▼ Unplug the appliance from the mains supply.
PRECAUTIONS FOR FABRIC TYPES
In the case of doubt as to the type of fabric, read the label on the item itself. Almost all items that can be machine dried have this information specified on the label. To avoid static electricity being generated in the items, add a conditioner to the rinse cycle of the washing machine.
Remove synthetic materials from the drum immediately to prevent them from creasing.
USING THE APPLIANCE
PROGRAM TABLE
| Fabric | Weight of dry washing | Type of drying to utilise | Times in minutes | ||
| Wardrobe dry | Idron dry Slightly damp | ||||
| TIMER CONTROLLED PROGRAM | |||||
| Cotton/ Linen | MAXIMUM LOAD | 80-120 min. | 60-100 min. | 50-80 min. | |
| Cotton/ Linen | HALF LOAD | 50-80 min. | 40-60 min. | 30-50 min. | |
| Synthetics | HALF LOAD | 60-100 min. | —— | —— | |
| Delicate synthetics | 1,5 kg | 50-80 min. | —— | —— | |
| Mixed fabrics | 2,0 kg | 40-60 min. | —— | —— | |

ENERGETIC DRYING DELICATE DRYING
Important: The drying time is dependent on a number of factors: weight, size of the items, type of fabric, degree of dampness. Well wrung/spun items dry quicker. To prevent items from creasing, do not overload the drier.
WASHING WEIGHTS
The indicated weights are approximate and may vary according to their manufacture, quality and finish.
Bedding
| Quilt | 700 |
| Bottom sheet 550 g | |
| Top sheet 600 g | |
| Pillowcase | 180 |
Household linen
| Tea towel (dishes) 90 g | |
| Tea towel (glasses) 70 g | |
| Flannel | 20 |
| Hand towel 200 g | |
Other linen items
| Bath robe | 1200 g |
| Bath towel | 800 g | |
| Lady's blouse | g | 300 g |
| Man's shirt | 600 g | |
| Blouse/shirt in synthetic material | g | 300 g |
Table linen
| Tablecloth | 250 g |
| Large tablecloth | 1000 g |
| Napkin | 80 g |
Men's clothing
| Wash ‘n wear shirt | 250 g |
| Vest (sleeveless) 120 g |
| Briefs | 80 g |
| Long johns | 250 g |
| Pyjamas | 480 g |
| Nightshirt | 400 g |
| Handkerchief | 25 g |
Ladies' clothing
| Blouse | 100 g |
| Jumper | 100 g |
| Briefs | 80 g |
| Slip | 150 g |
| Nightdress | 180 g |
| Pyjamas | 450 g |
| Handkerchief | 15 g |
MAINTENANCE
CLEANING THE FILTER
In order to guarantee optimum drying results under all circumstances, remember that the filter must be cleaned regularly. Remember to check and clean the filter after each drying cycle.
Important:
The filter must only be cleaned when the appliance is cold! Clean the filter following the procedure described below:
▼ Open the door.
▼ Grasp the filter in both hands and push it upwards to remove it.
▼ Carefully widen the top edge and open the filter.
▼ Remove the woollen particles.
▼ Close the filter, making sure that
the catch closes at the correct position.
▼ Clean the filter slide guides on the appliance, using a vacuum cleaner if necessary.
▼ Reposition the filter in the slide guides (fig. 13).

natural_image
Diagram of a washing machine with a door and fan, showing airflow direction (no text or symbols)FAULT FINDING
All electric appliance may breakdown at some time. Remember to call a qualified electrician in these cases. However, many problems can be resolved without the need for external intervention.
Important: If a fault occurs, disconnect the appliance from the mains supply immediately. Before calling the customer service centre, check the points listed below.
RESOLVING PROBLEMS
If the drier doesn't start
- Check that:
1) The appliance is plugged into the mains supply.
2) The mains socket is working correctly:
2a) The fuse has not blown. (Check by plugging in another appliance such as a table lamp).
2b) All the instructions in the manual have been followed.
If the drier doesn't start
- Check that:
1) The door is closed properly.
2) The "START" button has been pressed.
The washing does not dry
- Check that:
1) The air exhaust tube is not twisted or kinked.
2) The filter is not blocked. (Remember that when the door is opened, the internal parts of the drier and the washing may be very hot).
If, after all these checks have been carried out, the appliance still does not work, inform the nearest customer service centre.
When contacting the service centre, inform them of the appliance model, serial number and type of fault.
This information will help the service centre operator in procuring the necessary spare parts, thus guaranteeing a speedy and efficient repair.
OPTIONAL ACCESSORIES
The retailer can provide an accessory to enable the drier to be mounted on top of a front-loading washing machine, thus saving space. The installer will inform you of the appliance model for which this option is possible.
FRANÇOISE
Cher Client,
DATA D'ACHAT: \_\_\_\_
natural_image
Cartoon illustration of a steaming hot pot with steam rising, while a person is clamped by a plug and lightning bolts (no text or symbols)natural_image
Cartoon illustration of a smiling computer with electrical outlet symbols (no text or labels)natural_image
Cartoon illustration of a distressed computer with steam rising, surrounded by electrical plugs and a TV (no text or symbols)natural_image
Cartoon illustration of a distressed computer monitor character under rain with falling snow (no text or symbols)natural_image
Cartoon illustration of a smiling hardcover character holding a wrench and pointing at an electrical outlet (no text or symbols)natural_image
Cartoon illustration of a distressed computer with steam rising, connected to an electrical plug (no text or symbols)natural_image
Illustration of a door with a circular pipe and a grid-patterned object inside, no text or symbols presentNIVELLEMENT DU SÈCHE-LINGE
natural_image
Illustration of a hand holding a small object near a window, with motion arrows indicating movement (no text or symbols)CONNEXION DU TUYAU D'ÉVACUATION DE L'AIR
natural_image
Illustration of a washing machine with coiled tubing and a valve, no text or symbols presentnatural_image
Illustration of a washing machine with a coiled hose attached to a wall (no text or symbols)natural_image
Hand inserting a plug into an electrical socket (no text or symbols visible)natural_image
Illustration of a hand pressing down on a circular component inside a cabinet (no text or symbols)
natural_image
Illustration of a hand holding a small object inside a circular container with arrows indicating rotation (no text or symbols)POUR EFFECTUER CORRECTEMENT LE SÉCHAGE DU LINGE
natural_image
Diagram of a washing machine with a circular vent and fan, showing airflow direction (no text or symbols)natural_image
Cartoon illustration of a steaming hot pot with steam rising, while a person is clamped and lit by electrical outlets (no text or symbols)natural_image
Cartoon illustration of a smiling computer monitor character holding an electrical outlet (no text or symbols)natural_image
Cartoon illustration of a distressed computer with steam rising, surrounded by electrical plugs and a TV (no text or symbols)natural_image
Cartoon illustration of a distressed computer monitor character under rain with falling snow (no text or symbols)natural_image
Cartoon illustration of a smiling hard hat character holding a wrench and pliers, with an electrical outlet symbol above (no text or symbols present)natural_image
Cartoon illustration of a distressed computer with a lightning bolt and power plug, no text or symbols presentnatural_image
Illustration of a door with a circular component and a grid-patterned cover, no text or symbols presentnatural_image
Illustration of a hand holding a small object near a window, with motion arrows indicating movement (no text or symbols)natural_image
Illustration of a washing machine with coiled tubing and a valve, no text or symbols presentnatural_image
Illustration of a coiled cable or hose attached to a wall-mounted air conditioner unit (no text or symbols visible)natural_image
Hand inserting a plug into an electrical socket (no text or symbols visible)natural_image
Illustration of a hand pressing down on a circular component with an arrow indicating rotation (no text or symbols)

natural_image
Illustration of a hand holding a small object inside a circular container with arrows indicating rotation (no text or symbols)PARA SECAR CORRECTAMENTE LA ROPA
| Camisa wash and wear | 250 g |
| Camisola, sin mangas, | 120 g |
| Calzoncillos g | 80 g |
| Bragas | 250 g |
| Pijama | 480 g |
| Camisón | 400 g |
| Pañuelos | 25 g |
Vestuario mujer
| Camisa | 100 |
| Camiseta | 100 g |
| Braguitas | 80 g |
| Enaguas | 150 g |
| Camisón | 180 g |
| Pijama | 450 g |
| Pañuelos | 15 g |
MANTENIMIENTO
LIMPIEZA DEL FILTRO
natural_image
Diagram of a washing machine with a circular vent and fan, showing airflow direction (no text or symbols)natural_image
Cartoon illustration of a steaming hot pot with steam rising, while a person is clamped by lightning bolts and electrical socket (no text or symbols)natural_image
Cartoon illustration of a smiling computer monitor character holding an electrical outlet (no text or symbols)natural_image
Cartoon illustration of a distressed computer with steam rising, surrounded by electrical plugs and a TV (no text or symbols)É proibido ligar a máquina à tomada eléctrica utilizando extensões ou fichas múltiplas.

natural_image
Cartoon illustration of a distressed computer monitor character under rain with falling snow (no text or symbols)natural_image
Cartoon illustration of a smiling hardcover character holding a wrench and pointing at a power outlet (no text or symbols)natural_image
Cartoon illustration of a distressed computer with a lightning bolt and power plug, no text or symbols presentnatural_image
Illustration of a door with a circular component and a grid-patterned cover, no text or symbols presentnatural_image
Illustration of a hand holding a small object near a window, with motion arrows indicating movement (no text or symbols)natural_image
Illustration of a washing machine with coiled tubing and a valve, no text or symbols presentnatural_image
Illustration of a portable air conditioner unit with a coiled hose and ventilation grille (no text or symbols)natural_image
Illustration of a hand inserting a plug into an electrical socket (no text or symbols)natural_image
Illustration of a hand pressing down on a circular component inside a box, with no visible text or symbols.

natural_image
Illustration of a hand holding a small object through a circular component, with arrows indicating motion or movement (no text or symbols)COMO SECAR A ROUPA CORRECTAMENTE
natural_image
Diagram of a door with a circular vent and directional arrow indicating rotation or movement (no text or symbols)DETECÇÃO DE AVARIAS
natural_image
Illustration of layered geological strata with wavy topography and gray bottom layer (no text or symbols)- ENGLISH
- Dear Customer,
- CONTENTS
- NOTES AND ADVICE FOR THE USER 3-4
- DESCRIPTION OF THE APPLIANCE 5
- INSTALLING THE APPLIANCE 6-7
- USING THE APPLIANCE 7-9
- MAINTENANCE 10
- NOTES AND ADVICE FOR THE USER
- DESCRIPTION OF THE APPLIANCE
- INSTALLING THE APPLIANCE INSTALLATION
- LEVELLING THE DRIER
- CONNECTING THE AIR EXHAUST TUBE
- INSTALLING THE APPLIANCE ELECTRICAL CONNECTION
- USING THE APPLIANCE
- DESCRIPTION OF THE FUNCTIONS
- N.B. The timer knob must always be rotated clockwise (fig. 9).
- USING THE APPLIANCE DOOR
- Important:
- DRYING THE WASHING CORRECTLY
- Follow the procedure below:
- A
- B
- C
- D
- E
- F
- G
- PRECAUTIONS FOR FABRIC TYPES
- PROGRAM TABLE
- ENERGETIC DRYING DELICATE DRYING
- WASHING WEIGHTS
- MAINTENANCE
- CLEANING THE FILTER
- FAULT FINDING
- RESOLVING PROBLEMS
- If the drier doesn't start
- The washing does not dry
- OPTIONAL ACCESSORIES
- FRANÇOISE
- Cher Client,
- DATA D'ACHAT: \_\_\_\_
- NIVELLEMENT DU SÈCHE-LINGE
- CONNEXION DU TUYAU D'ÉVACUATION DE L'AIR
- POUR EFFECTUER CORRECTEMENT LE SÉCHAGE DU LINGE
- PARA SECAR CORRECTAMENTE LA ROPA
- Vestuario mujer
- MANTENIMIENTO
- LIMPIEZA DEL FILTRO
- COMO SECAR A ROUPA CORRECTAMENTE
- DETECÇÃO DE AVARIAS
Brand : Saivod
Model : Timer Dry
Category : Tumble dryer