
CSFILMSCAN200 - Scanner KONIG - Free user manual and instructions
Find the device manual for free CSFILMSCAN200 KONIG in PDF.


| Product Type | Film Scanner |
| Brand | Konig |
| Model | CSFILMSCAN200 |
| Supported Film Types | 35 mm Negative, 35 mm Slide |
| Maximum Resolution | 3200 dpi (interpolated) |
| Optical Resolution | 1800 dpi |
| Color Depth | 48 bits |
| Connectivity | USB 2.0 |
| Output Formats | JPEG, BMP, TIFF |
| Built-in Display | No |
| Power Supply | USB (5V, 500 mA) |
| Dimensions (L × W × H) | 25 × 10 × 10 cm |
| Weight | 0.5 kg |
| Included Software | ArcSoft Scan-n-Stitch Deluxe |
| System Compatibility | Windows XP/Vista/7/8/10, macOS 10.6 or later |
| Maintenance and Cleaning | Clean the glass with a soft, dry cloth. Avoid solvents. |
| Safety | Do not expose to moisture. Unplug before cleaning. |
| Spare Parts and Repairability | Contact Konig customer service for spare parts. Professional repair recommended. |
| General Information | Portable film scanner, ideal for digitizing your analog memories. |
Frequently Asked Questions - CSFILMSCAN200 KONIG
User questions about CSFILMSCAN200 KONIG
0 question about this device. Answer the ones you know or ask your own.
Ask a new question about this device
Download the instructions for your Scanner in PDF format for free! Find your manual CSFILMSCAN200 - KONIG and take your electronic device back in hand. On this page are published all the documents necessary for the use of your device. CSFILMSCAN200 by KONIG.
USER MANUAL CSFILMSCAN200 KONIG


B1

B2
1
②

③
B3
CSFILMSCAN200
Film scanner
Description (fig. A)
The film scanner is a device to scan negative film or positive film into a digital format.
| 1. Film scanner | |
| 2. Accessory slot | ·Move the accessory through the accessory slot.Accessories:- Negative film holder- Positive film holder- Positive film feeder |
| 3. Glass plate | |
| 4. Display | |
| 5. On/off buttonMenu button | On/off button·Press the button to switch on or off the device.Menu button·If the device is switched on, press the button to enter the menu. |
| 6. Up button | Scanning mode:·Press the button to increase the exposure.Menu mode:·Press the button to move up in the menu. |
| 7. Down button | Scanning mode:·Press the button to decrease the exposure.Menu mode:·Press the button to move down in the menu. |
| 8. Scan button | ·Press the button to scan negative film or positive film into a digital format. |
| 9. Playback mode button | ·Press the button to select the playback mode. |
| 10. Mirror image buttonImage rotation button | ·Press the button to mirror the image.·Press the button again to rotate the image. |
| 11. Power indicator | ·The indicator comes on when the device is switched on. |
| 12. Memory card indicator | ·The indicator comes on when a memory card is inserted in the memory card slot. |
| 13. PC connection indicator | ·The indicator comes on when the device is connected to the PC. |
| 14. Memory card slot (SD / MMC) | ·Insert a memory card into the memory card slot. |
| 15. USB port | ·Use the USB port to connect the device to the PC. |
| 16. TV connection | • Use the TV connection cable to connect the device to the TV. |
| 17. Negative film holder | • Use the negative film holder to scan negative film. |
| 18. Positive film holder | • Use the positive film holder to scan positive film. |
| 19. Positive film feeder | • Use the positive film feeder to quickly scan positive film. |
| 20. Cleaning brush | • Use the cleaning brush to clean the glass plate. |
| 21. Power adapter | • Use the USB cable to connect the power adapter to the device.• Insert the mains plug of the power adapter into the wall socket. |
| 22. USB cable | • Use the USB cable to connect the device to the PC. |
| 23. Composite video cable | • Use the composite video cable to connect the device to the TV. |
Use
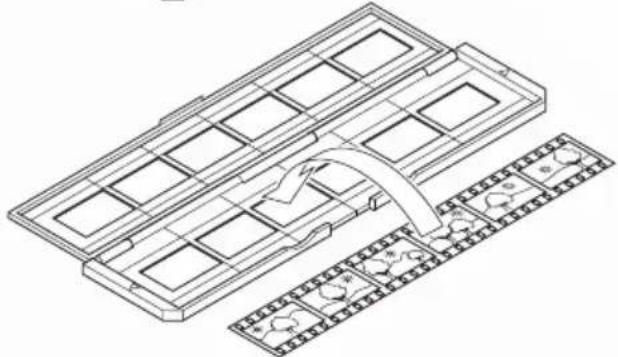
Negative film holder (fig. B1)
Refer to the illustration to scan negative film using the negative film holder.
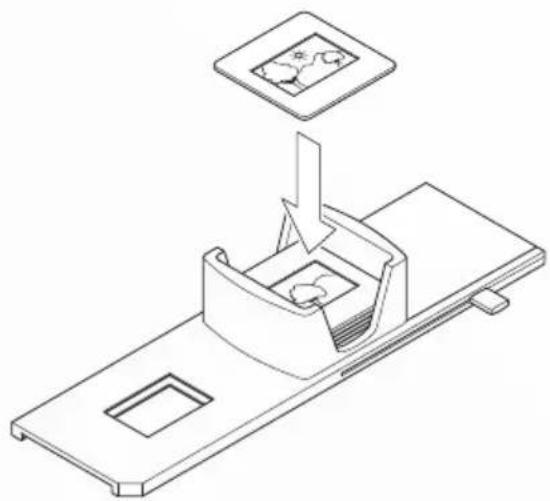
Positive film holder (fig. B2)
Refer to the illustration to scan positive film using the positive film holder.
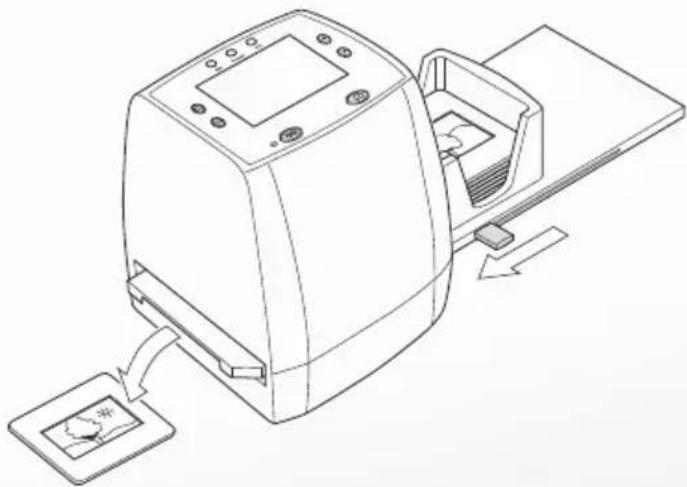
Positive film feeder (fig. B3)
Refer to the illustration to scan positive film using the positive film feeder.
Operation sequence
- Put the negative film or the positive film into the required accessory.
- Insert the accessory into the accessory slot.
- Insert a memory card into the memory card slot.
- If required, connect the USB cable to the scanner and the PC.
- Press the on/off button to switch on the device.
- Press the scan button to start scanning.
- Remove the memory card from the memory card slot.
- If required, disconnect the USB cable from the scanner and the PC.
- Press the on/off button to switch off the device.
- Remove the accessory from the accessory slot.
- Remove the negative film or the positive film from the accessory.
Menu
 | Main menu1. Capture mode2. Exposure compensation3. Resolution4. Language5. USB MSDC |
 | Capture mode1. Black & white2. Positive film3. Negative film |
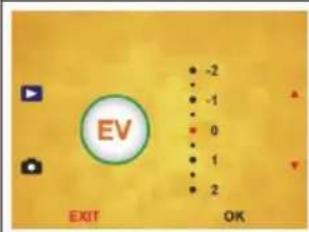 | Exposure compensationEV -2 ... EV +2 |
 | Resolution1. 5 megapixels2. 10 megapixels |
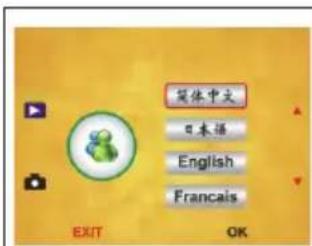
Language
- English
• German - Spanish
- French
- Italian
• Japanese - Simplified Chinese
- Traditional Chinese
USB MSDC
- Connect the USB cable to the scanner and the PC.
- Press the on/off button to switch on the device.
- Go to the main menu.
- Select "USB MSDC".
- Click "OK".
- Open the folder on the PC to view the pictures on the PC.
Cleaning and maintenance
- Do not use cleaning solvents or abrasives.
-
Do not attempt to repair the device. If the device does not operate correctly, replace it with a new device.
-
Clean the outside of the device using a soft, damp cloth.
- Clean the glass plate using the cleaning brush (brush side up).
Technical data
| Power input 5 V DC | |
| Lens F = 6.34 mm | |
| Focus range Fixed focus | |
| Sensor 1/3.2" CMOS | |
| Image resolution | 5 megapixels10 megapixels |
| Film sensitivity Automatic | |
| White balance Automatic | |
| Exposure compensation Automatic | |
| USB version USB 2.0 | |
| Memory card SD / MMC | |
| File format | JPEG |
| Operating system | Windows Vista / Windows 7 / Windows 8 / Windows 8.1 |
| Dimensions (LxWxH) | 88 x 86 x 111 mm |
| Weight | 300 g |
Safety
General safety
- Read the manual carefully before use. Keep the manual for future reference.
- Only use the device for its intended purposes. Do not use the device for other purposes than described in the manual.
- Do not use the device if any part is damaged or defective. If the device is damaged or defective, replace the device immediately.
- Do not expose the device to water or moisture.
- Keep the device away from sources of heat (e.g. radiators and stoves).
- Do not block the ventilation openings.
Electrical safety


• To reduce risk of electric shock, this product should only be opened by an authorized technician when service is required.
- Disconnect the product from the mains and other equipment if a problem should occur.
- Only use the supplied power adapter.
Warranty
Any changes and/or modifications to the product will void the warranty. We cannot accept any liability for damage caused by incorrect use of the product.
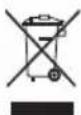
Disposal
- The product is designated for separate collection at an appropriate collection point. Do not dispose of the product with household waste.
- For more information, contact the retailer or the local authority responsible for waste management.
Documentation
The product has been manufactured and supplied in compliance with all relevant regulations and directives, valid for all member states of the European Union. The product complies with all applicable specifications and regulations in the country of sales.
Formal documentation is available upon request. The formal documentation includes, but is not limited to the Declaration of Conformity, the Material Safety Data Sheet and the product test report.
Disclaimer
Designs and specifications are subject to change without notice. All logos, brands and product names are trademarks or registered trademarks of their respective holders and are hereby recognized as such.
CSFILMSCAN200
Filmscanner
Auflösung
- 5 Megapixel
- 10 Megapixel

Sprache
Resolución
- 5 megapíxeles
- 10 megapíxeles

Idioma
- 5 megapixel
- 10 megapixel
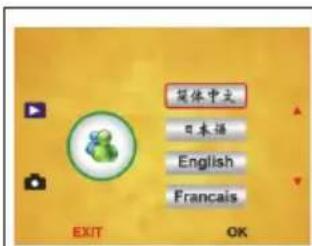
Lingua
Κύριο μενού
Ανάλυση
- 5 megapixel
- 10 megapixel

Γλώσσα
Vyváženie expozície
EV -2 ... EV +2
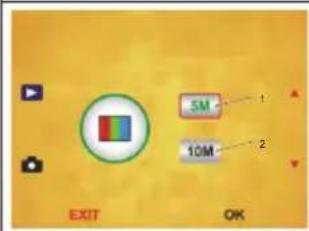
Rozlíšenie
- 5 megapixlov
- 10 megapixlov

Jazyk
Felbontás
- 5 megapixel
- 10 megapixel

Nyelv
Glavni izbornik
- Način za snimanje
- Kompenzacija ekspozicije
- Razlučivost
- Jezik
- USB MSDC

Način za snimanje
Razlučivost
- 5 megapiksela
- 10 megapiksela
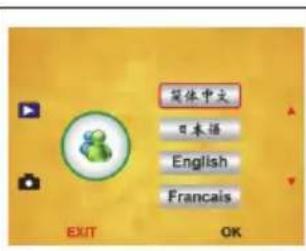
Jezik
Meniul principal
Compensarea expunerii
EV -2 ... EV +2

Rezoluție
- 5 megapixeli
- 10 megapixeli
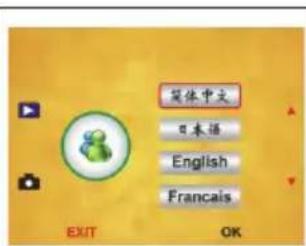
Limbă
Резолюция
- 5 megapixels
- 10 megapixels

Език
Разрешение

- CSFILMSCAN200
- FILM SCANNER
- DESCRIPTION (FIG. A)
- USE
- NEGATIVE FILM HOLDER (FIG. B1)
- POSITIVE FILM HOLDER (FIG. B2)
- POSITIVE FILM FEEDER (FIG. B3)
- OPERATION SEQUENCE
- MENU
- LANGUAGE
- USB MSDC
- CLEANING AND MAINTENANCE
- TECHNICAL DATA
- SAFETY
- GENERAL SAFETY
- ELECTRICAL SAFETY
- WARRANTY
- DISPOSAL
- DOCUMENTATION
- DISCLAIMER
- FILMSCANNER
- AUFLÖSUNG
- SPRACHE
- RESOLUCIÓN
- IDIOMA
- LINGUA
- ΚΎΡΙΟ ΜΕΝΟΎ
- ΑΝΆΛΥΣΗ
- ΓΛΏΣΣΑ
- VYVÁŽENIE EXPOZÍCIE
- ROZLÍŠENIE
- JAZYK
- FELBONTÁS
- NYELV
- GLAVNI IZBORNIK
- NAČIN ZA SNIMANJE
- RAZLUČIVOST
- JEZIK
- MENIUL PRINCIPAL
- COMPENSAREA EXPUNERII
- REZOLUȚIE
- LIMBĂ
- РЕЗОЛЮЦИЯ
- ЕЗИК
- РАЗРЕШЕНИЕ
Brand : KONIG
Model : CSFILMSCAN200
Category : Scanner