
Stereo VideoMic X - Microphone RODE - Free user manual and instructions
Find the device manual for free Stereo VideoMic X RODE in PDF.


| Product type | Broadcast stereo condenser microphone |
| Brand | Røde |
| Model | Stereo VideoMic X |
| Acoustic principle | Pressure gradient (cardioid) |
| Frequency response | 40 Hz - 20 kHz |
| Sensitivity | -32 dB re 1 V/Pa (25 mV at 94 dB SPL) ±2 dB @ 1 kHz |
| Dynamic range | 131 dB |
| Signal-to-noise ratio | 82 dBA SPL (IEC651) |
| Equivalent noise | 12 dBA SPL (IEC651) |
| Maximum sound pressure level | 143 dB SPL |
| Output impedance | 200 Ω |
| Power | 9V alkaline or lithium battery (over 30 h battery life) or P48 phantom power via mini-XLR |
| Outputs | 3.5 mm stereo mini-jack (L/R channels) and dual mini-XLR (P48 compatible) |
| High-pass filter | 3 positions: 0, 75 Hz, 150 Hz |
| Level selector | -10 dB, 0 dB, +20 dB |
| High-frequency boost | +6 dB from 3 kHz (shelving filter) |
| Dimensions (W x D x H) | 118 x 102 x 100 mm |
| Weight (without battery) | 300 g |
| Mounting | Shoe mount for camera + 3/8" thread for boom or tripod |
| Included accessories | Pop filter, windscreen, 3.5 mm stereo cable, desiccant pouch |
| Maintenance | Clean the windscreen with cold water and dry in the sun; regenerate the desiccant in an oven at 100-150°C |
| Warranty | 1 year (extendable to 10 years upon online registration) |
| Made in | Australia |
Frequently Asked Questions - Stereo VideoMic X RODE
User questions about Stereo VideoMic X RODE
0 question about this device. Answer the ones you know or ask your own.
Ask a new question about this device
Download the instructions for your Microphone in PDF format for free! Find your manual Stereo VideoMic X - RODE and take your electronic device back in hand. On this page are published all the documents necessary for the use of your device. Stereo VideoMic X by RODE.
USER MANUAL Stereo VideoMic X RODE
Broadcast On-Camera Stereo Microphone
www.rodemic.com/svmx

natural_image
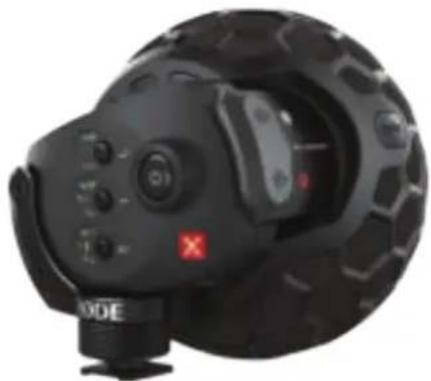
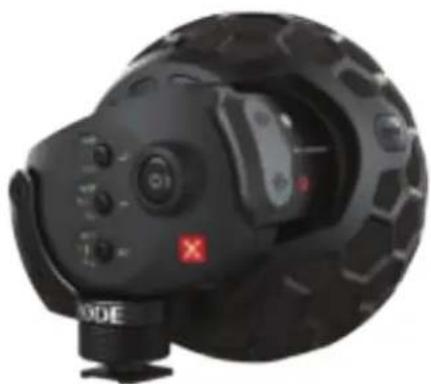
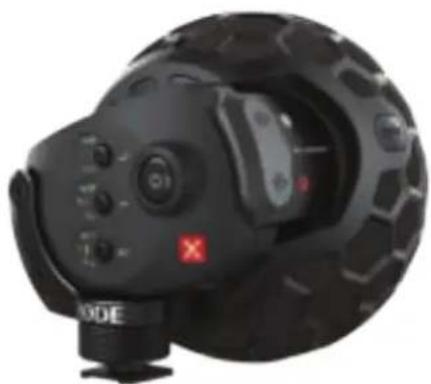
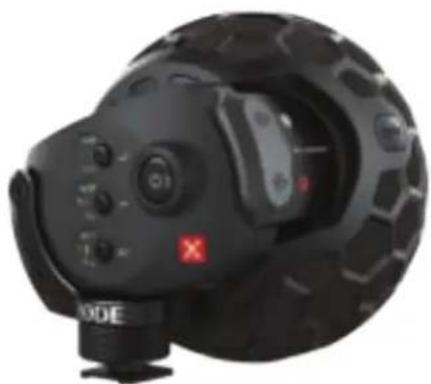
Close-up of a black spherical device with hexagonal pattern and control buttons (no visible text or symbols)2
Features
Compact true condenser stereo microphone
• Heavy duty, lightweight aluminium alloy body
- Broadcast recording quality
- 12 " externally biased true condenser capsules, acoustically matched.
- Integrated shock mount provides isolation from handling and mechanical noise
- Integrated professional Mini-XLR balanced stereo output for professional camera use
• 3.5mm stereo minijack output
Detailed control
• Three step high-pass filter (0, 75H Hz, 150Hz)
- Three position level control (-10dB, 0dB, +20dB)
• High frequency boost (+6dB)
• LED power on/low battery indicator
- Integrated billeted metal camera shoe mount with 3/8" thread for easy boompole mounting
- Integrated digital switching with power On/Off delay
Features cont.
Warranty
High quality performance
- 9V battery powered – over 30 hours use (alkaline)
• P48 phantom power via Mini XLR - Flexible and lightweight removable 3.5mm stereo cable (to minimise handling noise and ensure isolation)
- Premium pop shield and wind shield provided for protection in all situations.
• Australian designed and manufactured
• 10 Year Warranty*
*Online registration required

Register your SVMX now and validate your free 10 year warranty.
Scan the QR code with a smartphone, or visit warranty.rodemic.com/stereovideomicx
The Stereo VideoMic X is covered by a limited warranty for one (1) year from the date of purchase. This can be extended free of charge to a full ten (10) year warranty by registering your microphone online at warranty.rodemic.com/stereovideomicx
| 6 | Specifications | 7 | |||
| Acoustic Principle | Pressure Gradient | Sensitivity | -32 dB re 1V/Pa (25mV @ 94dB SPL) ± 2dB @ 1kHz | ||
| Polar Pattern | Cardioid | Dynamic Range | 131 dB SPL | ||
| Frequency Range | 40Hz - 20kHz | Power requirements | 9V alkaline battery | ||
| Frequency Range (High Pass Filter) | 0, 75, 150Hz | Output Connection | 3.5 Stereo mini jack plug (dual mono), Tip - left channel, Ring - right channel, Dual Mini XLR output (P48 compatible) | ||
| Variable Level | -10, 0, +20dB | ||||
| Output Impedence | 200Ω | Battery Life | 30 hours | ||
| Signal to Noise Ratio | 82 dBA SPL (as per IEC651) | Weight (No Battery) | 300g | ||
| Equivalent Noise | 12 dBA SPL (as per IEC651) | Dimension (W x L x H) | 102mm x 118mm x 100mm | ||
| Maximum SPL | 143dB SPL | ||||
8
Specifications
Control overview
9
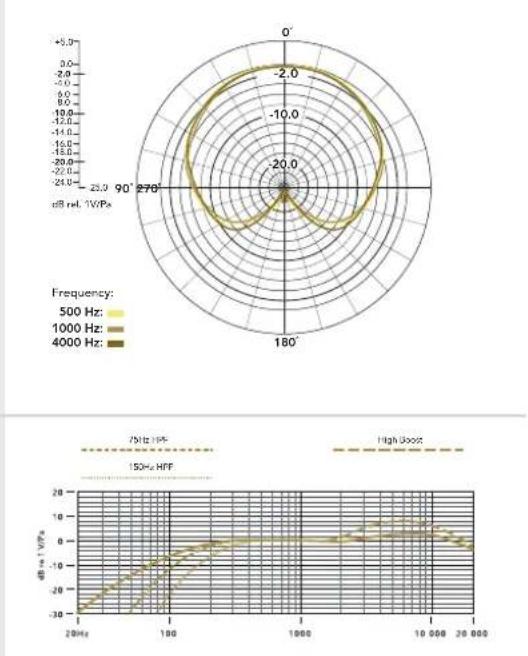
Polar Response

radar
| Frequency | Angle (°) | Value (dB rel. 10WPa) | | --------- | --------- | --------------------- | | 500 Hz | 90 | -2.0 | | 500 Hz | 25 | -1.5 | | 500 Hz | 270 | -2.5 | | 1000 Hz | 90 | -1.8 | | 1000 Hz | 25 | -1.2 | | 1000 Hz | 270 | -2.2 | | 4000 Hz | 90 | -1.6 | | 4000 Hz | 25 | -1.0 | | 4000 Hz | 270 | -2.3 |High frequency boost control button
On/off power button

Frequency Response

line
| Frequency (Hz) | 70Hz HF (dB vs. TWPa) | High Boost (dB vs. TWPa) | |---|---|---| | 200 | -30 | -30 | | 500 | -15 | -15 | | 1000 | -5 | -5 | | 1500 | 0 | 0 | | 20000 | 5 | 5 | | 25000 | 10 | 10 | | 30000 | 15 | 15 | | 35000 | 20 | 20 | | 40000 | 25 | 25 | | 45000 | 30 | 30 | | 50000 | 35 | 35 | | 55000 | 40 | 40 | | 60000 | 45 | 45 | | 65000 | 50 | 50 | | 70000 | 55 | 55 | | 75000 | 60 | 60 | | 80000 | 65 | 65 | | 85000 | 70 | 70 | | 90000 | 75 | 75 | | 95000 | 80 | 80 | | 100000 | 85 | 85 | | 110000 | 90 | 90 | | 120000 | 95 | 95 | | 130000 | 100 | 100 | | 140000 | 110 | 110 | | 150000 | 120 | 120 | | 160000 | 130 | 130 | | 170000 | 140 | 140 | | 180000 | 150 | 150 | | 190000 | 160 | 160 | | 200000 | 170 | 170 | | 220000 | -28 | -28 | | 240000 | -26 | -26 | | 260000 | -24 | -24 | | 280000 | -22 | -22 | | 32888888888888888888888888888888888888888888888888888888888888888888888888888888888888888888888888888810 11 Powering the SVMX
Installing the battery
Before you can record with your Stereo VideoMic X, you will need to install a standard 9V battery (ANS1:1604A or IEC:6LR61), or connect the microphone via the Mini XLR connections with individual 48v phantom power supplied for each channel.
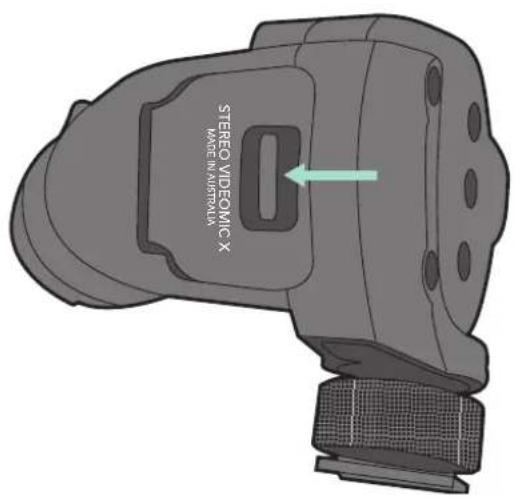
R∅DE recommends using a high quality lithium or alkaline battery to achieve the best possible battery life. To install the battery, open the battery cover that is located on the left hand side of the Stereo VideoMic X. To remove the cover, hold the microphone in one hand, and push the indentation across with your index finger to un-latch the battery door.

Diagram 1 - Push the indentation access to un-latch battery door
12 13 Powering the SVMX
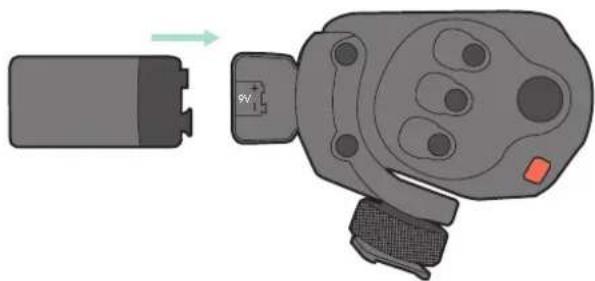
Insert the battery with the negative terminal (-) on the bottom as shown in Diagram 2. The correct battery orientation is also shown on the inside of the battery cover. If the battery orientation is not correct you will be unable to close the battery door.
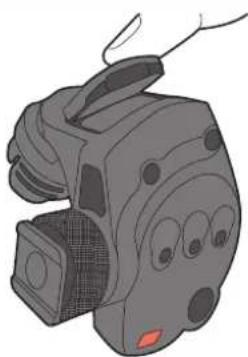
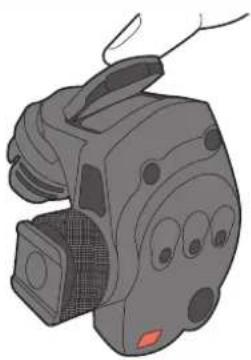
Replace the cover by simply pushing the door closed until it locks into place. The cover will push the battery against its spring terminal during installation.
natural_image
Diagram of a battery connected to a mechanical component with a switch, showing internal components and wiring (no text or symbols)Diagram 2 - Insert 9V battery
natural_image
Illustration of a gray toy camera with visible lens and control panel (no text or symbols)Diagram 3 - Push the cover until it locks into place
14 15 Powering the SVMX
Mounting the SVMX
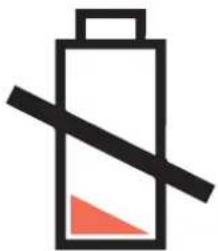
The Stereo VideoMic X will run continuously for over 30 hours with a high quality alkaline or lithium battery. Battery performance may vary depending on ambient temperature and battery shelf life, so it is wise to always carry a spare battery. We suggest always installing a fresh battery when the application is critical, with no opportunity to re-shoot. Always remember to switch off the Stereo VideoMic X when not in use, by holding the power button for approximately two seconds.
natural_image
Battery icon with a black diagonal line and red triangular base, symbolizing battery discharge (no text or symbols)
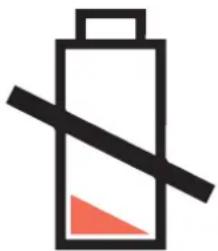
Diagram 4 - The power indicator LED will turn red to indicate a low battery level.
Mounting and connecting your Stereo VideoMic X
The Stereo VideoMic X incorporates a standard camera shoe mount on the underside of microphone body. The camera shoe mount has a 3/8" thread at the bottom to additionally allow mounting on tripods and boompoles.
Some older model and low-cost cameras may produce a higher level of mechanical noise, which can be picked up by the Stereo VideoMic X. The integrated high-pass filter should be switched on to reduce the resulting low frequency rumble.
16 17 Mounting the SVMX
Connecting the SVMX
Before sliding the camera shoe into place, loosen the fastening ring by turning anti-clockwise until it is loose enough to fit easily into your camera's shoe mount. Once the shoe is in place, gently tighten by turning the fastening ring clockwise until the Stereo VideoMic X is seated firmly in place.

natural_image
Illustration of a handheld device with circular ports and a red button, no text or symbols presentDiagram 5 - Twist the fastening ring anti-clockwise to loosen
The Stereo VideoMic X delivers a mic-level signal to the video camera via the stereo minijack audio port on the underside of the microphone body, or via the Mini XLR output connections on the right hand side of the Stereo VideoMic X body.
Connecting via Minijack: To connect to your camera via the 3.5mm minijack connection, first connect the red cable supplied with your microphone to the socket on the underside of the Stereo VideoMic X.
The minijack should be connected to the camera via the camera's "audio-in" socket – refer to your video camera user manual for the location of the socket on your camera model. Now that you have the Stereo VideoMic X securely fastened to your camera and the audio output lead connected, you can switch the microphone on and start recording.
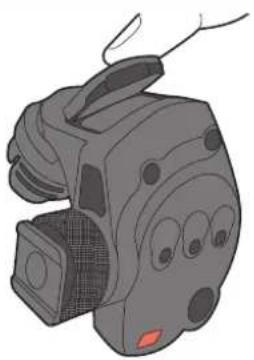
Connecting via Mini XLR: To connect the Stereo VideoMic X to a professional recording device via the mini XLR connectors, lift the protective cover on the side of the microphone to expose the mini XLR jacks. Ensuring that the levels on your recording device are set to zero, connect a mini XLR cable (available separately) to each of the two jacks on the microphone, followed by the corresponding ends on your recording device. Power on the microphone and then increase the recording levels of your recording device as required.
General operation
Powering the Stereo VideoMic X
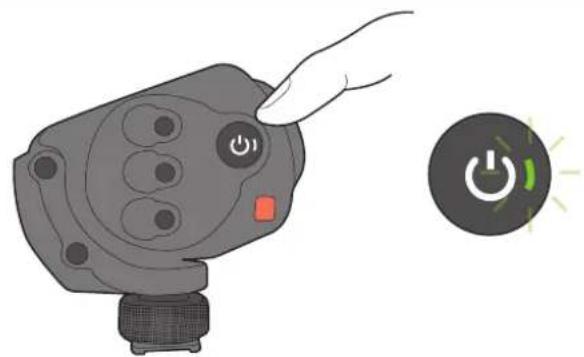
To turn the microphone on, first press and hold the power button until the power symbol lights up.
natural_image
Illustration of a hand pressing a button on a device with an icon showing a power switch (no text or symbols present)Diagram 6 - Press the power buttong until the power symbol lights
The power indicator LED is located within the power button. This LED will display a green light indicating a healthy battery level. When the battery runs low the LED will remain red and you should replace the battery. The microphone will work for over two hours once the red indicator is lit, however with reduced performance. R∅DE recommends changing the battery as soon as possible after the LED has turned red.
20 21 General operation
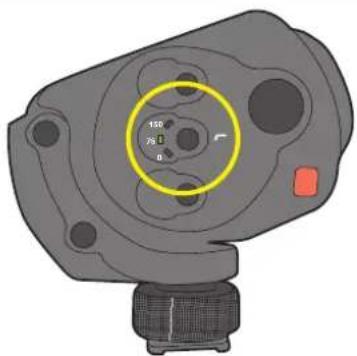
High-pass filter switch
The high-pass filter (HPF) is a low frequency cut-off setting, which you can use to reduce rumble and other low frequency noise picked up by the microphone while recording.
natural_image
3D mechanical component diagram with highlighted circular feature and measurement annotations (no readable text or symbols)Diagram 7 - High pass filter switch control button
For instance, it may be helpful to engage the high-pass filter to cut out the sound of air conditioning, handling noise while adjusting focus settings and distant traffic audible in the background.
To engage the high-pass filter, press the center button on the back of the microphone. The Stereo VideoMic X will cycle through each setting as the button is pressed, and the green LED will indicate the position that is currently selected.
22 23 General operation
Level control
The Stereo VideoMic X features three settings to control the signal output level to your recording device. These are set via the lowest selector button on the back of the microphone.

natural_image
3D mechanical component diagram with no visible text or symbolsDiagram 8 - Level control button
The lowest setting [-10] will reduce or attenuate the signal by 10dB, meaning that loud sound sources will be reduced and be less likely to overload or 'clip' the input of the recording device. The middle setting [0dB] is the nominal gain setting of the microphone for use in ideal recording conditions. The highest setting (+20) will increase the signal level by 20dB. This is useful for recording quiet sound sources, or when your camera requires a higher input level for better signal to noise ratio (as in many digital SLR cameras).
Please note that when setting the input level you should always be mindful of your camera's internal audio level setting. If you have the +20dB level selected on the Stereo VideoMic X you may need to reduce the input level on your camera.

For best results when recording to DSLR cameras, reduce the camera's input level as much as possible, selecting the +20dB input level on the Stereo VideoMic X and working
downward until the appropriate input level is achieved. This will result in a much lower noise floor and an overall clearer recording when plugging the Stereo VideoMic X into the typically low quality mic preamps found on most DSLR cameras.
24 25 General operation
The Stereo VideoMic X has been designed to work best with the camera's auto-gain control (AGC) switched off. [see your camera's user manual for instructions on setting the gain control to manual] As always, it is recommended to test your audio first before recording anything of importance.
The Stereo VideoMic X has been RF/EMI shielded for very high rejection of radio frequency interference, but we suggest you keep all transmitters, cell phones, pagers etc. at least two metres away to reduce the possibility of interference affecting your recordings.
High frequency boost control
The Stereo VideoMic X features a unique high frequency boost, which is designed to help pick out high frequency detail such as voices in a recording environment. The boost will also combat any high frequency loss experienced with the use of wind protection. The high frequency boost function is engaged via the top button on the back of the microphone body.
When engaged, the high frequency boost will apply a +6db shelf from 3kHz upwards, adding overall clarity to the recorded signal.

natural_image
3D mechanical component diagram with highlighted circular feature and red square marker (no text or symbols)Diagram 9 - High frequency boost control button
26 27 Selecting & Fitting Wind Shields
A premium pop shield and wind shield is provided with the Stereo VideoMic X for the ultimate in wind protection for all situations.
Pop shield:
The pop shield is designed to protect the Stereo VideoMic X capsules from very light air movement such as a gentle breeze, and has been designed to be acoustically transparent, whilst still providing wind protection. It is also useful for protecting the microphone from the noise caused by fast camera movements, like tracking or dolly shots.
To fit or remove the pop shield, simply squeeze it on the sides [labelled with the RODE logo] to allow it to fit over the microphone capsules.
Wind shield:
The wind shield is designed to protect the Stereo VideoMic X capsules from light breezes to heavy wind, and is recommended for use in all outdoor shooting situations, where wind gusts can often be unexpected and unpredictable. The wind shield is made
from a high quality synthetic fur mounted on a low-density foam, with a rubber lip that provides a tight seal around the microphone body. Although the wind shield is designed to be as acoustically transparent as possible, we recommend engaging the high frequency boost feature on the Stereo VideoMic X to combat the slight loss of high frequency detail experienced when covering any microphone capsule.

In very strong wind the combination of wind shield, high boost and high-pass filter can be used to best effect.


natural_image
Circular textured pattern with vertical striations, resembling a stylized tree or cloud (no text or symbols)Diagram 10 - Pop shield (left) and wind shield (right)
28 29 Additional tips and tricks
Safety & maintenance
For additional recording tips and tricks, please visit the R∅DE University – R∅DE's free online microphone training website (www.rodeuniversity.com). Check out the Broadcast recording semester for tutorials most relevant to the Stereo VideoMic X.
For more entertaining videos, you may also wish to visit R∅DE TV (www.rodemic.com/tv) – featuring a wide range of demos, reviews, interviews and behind-the-scenes clips for anyone interested in music, audio and recording.
When not in use, always keep your Stereo VideoMic X in a cool, dry place, preferably in a camera bag or equivalent to protect from dust or damage. When not in use for long periods of time, remove the battery before storage. Do not expose the Stereo VideoMic X to rain or moisture.
It is recommended that the pop shield be left on at all times possible to protect the microphone and sensitive capsules from damage, dust and moisture.
In instances where the microphone has become exposed to the elements and the foam has become moist or dirty, it may be necessary to remove the foam gently and dry it separately to the microphone body to prevent moisture from damaging the microphone. Take care in this operation so as not to damage or tear the foam during removal. The foam windshield can be hand washed in cold water, then dried thoroughly in the sun before refitting.
Inside the Stereo VideoMic X box, you will find a sachet of moisture absorbent crystals. Please retain these crystals and store with the Stereo VideoMic X to keep the microphone in ideal condition.
30 31 Safety & maintenance
Support
Eventually this pack of crystals will need to be dried. This is indicated by the crystals turning pink in colour. They can easily be re-used by placing them in an oven at 100-150 degrees Celsius for approximately ten minutes. The crystals will operate effectively again once they have turned blue.
The Stereo VideoMic X has no internal user serviceable parts. Should you encounter a problem, please refer all servicing to qualified service personnel.
If you experience any problem, or have any questions regarding your R∅DE microphone, first contact the dealer who sold it to you. If the microphone requires a factory authorised service, return will be organised by that dealer.
We have an extensive distributor/dealer network, but if you have difficulty getting the advice or assistance you require, please do not hesitate to contact us directly.
Alternatively please visit www.rodemic.com/support for contact details and a list of Frequently Asked Questions.
Importers & distributors
For a full list of international importers and distributors, visit our website at www.rodemic.com/distributors.
Stereo VideoMic X
www.rodemic.com/svmx

natural_image
Close-up of a black and white electronic device with a textured spherical body and control buttons (no visible text or symbols)34 35 Merkmale
natural_image
Diagram of a battery connected to a device with a switch, showing internal components and wiring (no text or symbols)natural_image
Illustration of a gray handheld device with multiple ports and buttons (no text or symbols)natural_image
Battery icon with a black diagonal line and red triangular base, symbolizing battery discharge (no text or symbols)
natural_image
Illustration of a handheld device with a red button and green rotation arrow (no text or symbols)natural_image
Illustration of a hand pressing a button on a device with a power switch symbol (no text or labels)natural_image
3D mechanical component diagram with highlighted circular feature and measurement annotations (no readable text or symbols)natural_image
3D mechanical component with a highlighted circular feature and measurement labels (no readable text or symbols)natural_image
3D mechanical component diagram with highlighted circular feature (no text or symbols)natural_image
Circular diagram with vertical lines and shaded segments, no text or symbols presentwww.rodemic.com/svmx
natural_image
Close-up of a black and white electronic device with a textured spherical body and control buttons (no visible text or symbols)natural_image
Diagram of a battery connected to a device with a switch, showing internal components and wiring (no text or symbols)Illustration 2 - Insérez la pile 9V.
natural_image
Illustration of a gray handheld device with multiple ports and buttons (no text or symbols)natural_image
Simple battery icon with a black diagonal line and red triangular discharge symbol (no text or numbers)
natural_image
Illustration of a handheld device with a red button and green rotation arrow (no text or symbols)natural_image
Illustration of a hand pressing a button on a device with a circular power button icon (no text or symbols)natural_image
3D mechanical component diagram with highlighted circular feature and measurement annotations (no readable text or symbols)natural_image
3D mechanical component diagram with highlighted circular feature (no text or symbols)natural_image
3D mechanical component diagram with highlighted circular feature (no text or symbols)In very strong wind the combination of wind shield, high boost and high-pass filter can be used to best effect.


natural_image
Circular diagram with vertical lines and shaded segments, no text or symbols presentDiagram 10 - Pop shield (left) and wind shield (right)
www.rodemic.com/svmx
natural_image
Close-up of a black and white electronic device with a textured spherical body and control buttons (no visible text or symbols)natural_image
Diagram of a battery connected to a device with a switch, showing internal components and wiring (no text or symbols)natural_image
Illustration of a gray handheld device with multiple ports and buttons (no text or symbols)natural_image
Simple battery icon with a black diagonal line and red triangular discharge symbol (no text or numbers)natural_image
Illustration of a handheld device with circular ports and a red button, no text or symbols presentnatural_image
Illustration of a hand pressing a button on a device with a power switch icon (no text or symbols)natural_image
3D mechanical component diagram with highlighted circular feature and measurement annotations (no readable text or symbols)natural_image
3D mechanical component diagram with highlighted circular feature (no text or symbols)natural_image
3D mechanical component diagram with highlighted circular feature and red square marker (no text or symbols)natural_image
Circular textured pattern with vertical streaks, resembling a stylized tree or cloud (no text or symbols)www.rodemic.com/svmx
natural_image
Close-up of a black and white electronic device with a textured spherical body and control buttons (no visible text or symbols)130 131 Caratteristiche
natural_image
Diagram of a battery connected to a device with a switch, showing internal components and wiring (no text or symbols)natural_image
Illustration of a gray handheld device with multiple ports and buttons (no text or symbols)natural_image
Simple battery icon with a black diagonal line and red triangular discharge symbol (no text or numbers)natural_image
Illustration of a handheld device with a red button and green rotation arrow (no text or symbols)natural_image
Illustration of a hand pressing a button on a device with a power switch icon (no text or symbols)Diagram 6 - Press the power buttong until the power symbol lights
natural_image
3D mechanical component diagram with highlighted circular feature and measurement annotations (no readable text or symbols)Figura 7 - Pulsante inserimento filtro passa alto
natural_image
3D mechanical component with a highlighted circular feature and measurement labels (no readable text or symbols)natural_image
3D mechanical component diagram with highlighted circular feature (no text or symbols)natural_image
Circular textured surface with vertical striations and jagged edges, resembling a geological or material sample (no text or symbols)www.rodemic.com/svmx
natural_image
Close-up of a black and white electronic device with a textured spherical body and control buttons (no visible text or symbols)162 163 特点
紧凑型真电容立体声话筒
natural_image
Diagram of a battery connected to a device with a switch, showing internal components and wiring (no text or symbols)示意图2-安装9V电池
natural_image
Illustration of a gray toy camera with visible lens and control panel (no text or symbols)示意图3-推入盖子直到其锁定到位
174 175 开启 SVMX 电源
安装SVMX
natural_image
Simple battery icon with a black diagonal line and red triangular discharge symbol (no text or numbers)natural_image
Illustration of a handheld device with a red button and green rotation arrow (no text or symbols)示意图5-逆时针拧紧固环使其松动
natural_image
Illustration of a hand pressing a button on a device with a power switch symbol (no text or labels)natural_image
3D mechanical component diagram with highlighted circular feature and measurement annotations (no readable text or symbols)示意图7-高通滤波器开关控制按钮
natural_image
3D mechanical component diagram with highlighted circular feature (no text or symbols)示意图8-电平控制按钮
natural_image
3D mechanical component diagram with highlighted circular feature (no text or symbols)示意图9-高频增益控制按钮
186 187 选择与安装防风罩
natural_image
Circular textured pattern with vertical striations and jagged edges (no text or symbols)www.rodemic.com/svmx

natural_image
Close-up of a black and white electronic device with a textured spherical body and control buttons (no visible text or symbols)natural_image
Diagram of a battery connector with a switch and indicator lights, showing internal components (no text or symbols)図 2 - 9V 電池を差し込む

natural_image
Illustration of a gray toy device with circular buttons and a handle (no text or symbols)natural_image
Battery icon with a black diagonal line and red triangular base, symbolizing battery discharge (no text or symbols)natural_image
Illustration of a handheld device with a red button and green rotation arrow (no text or symbols)natural_image
Illustration of a hand pressing a button on a device with a power switch icon (no text or symbols)natural_image
3D mechanical component diagram with highlighted circular feature and measurement annotations (no readable text or symbols)natural_image
3D mechanical component diagram with highlighted circular feature (no text or symbols)図8-レベルコントロール・ボタン
natural_image
3D mechanical component diagram with highlighted circular feature and red square marker (no text or symbols)natural_image
Circular diagram with vertical lines and shaded segments, no text or symbols presentwww.rodemic.com/svmx

natural_image
Close-up of a black and white electronic device with a textured spherical body and control buttons (no visible text or symbols)226 227
228 229

230 231

236 237

natural_image
Diagram of a battery connected to a mechanical component with a switch, showing internal components and wiring (no text or symbols)
natural_image
Illustration of a gray handheld device with control buttons and a red accent (no text or symbols)238 239
natural_image
Simple battery icon with a black diagonal line and red triangular discharge symbol (no text or numbers)
240 241

natural_image
Illustration of a handheld device with circular ports and a red button, no text or symbols present242 243

natural_image
Illustration of a hand pressing a button on a device with a power switch symbol (no text or labels)244 245

natural_image
3D mechanical component diagram with highlighted circular feature and measurement annotations (no readable text or symbols)246 247

natural_image
3D mechanical component with circular annotation highlighting a 20-10 dB range (no text or symbols beyond measurement indicators)

natural_image
3D mechanical component diagram with highlighted circular feature and red square marker (no text or symbols)


natural_image
Circular diagram with vertical lines and textured fill, no text or symbols present252 253
254 255

- 2
- Features
- Compact true condenser stereo microphone
- Detailed control
- Features cont.
- Warranty
- High quality performance
- Specifications
- Control overview
- 11 Powering the SVMX
- Installing the battery
- 13 Powering the SVMX
- 15 Powering the SVMX
- Mounting the SVMX
- Mounting and connecting your Stereo VideoMic X
- 17 Mounting the SVMX
- Connecting the SVMX
- General operation
- Powering the Stereo VideoMic X
- 21 General operation
- High-pass filter switch
- 23 General operation
- Level control
- 25 General operation
- High frequency boost control
- 27 Selecting & Fitting Wind Shields
- Pop shield:
- Wind shield:
- 29 Additional tips and tricks
- Safety & maintenance
- 31 Safety & maintenance
- Support
- Importers & distributors
- Stereo VideoMic X
- 35 Merkmale
- 131 Caratteristiche
- 163 特点
- 紧凑型真电容立体声话筒
- 175 开启 SVMX 电源
- 安装SVMX
- 187 选择与安装防风罩
Brand : RODE
Model : Stereo VideoMic X
Category : Microphone