
KD-G202 - Car radio JVC - Free user manual and instructions
Find the device manual for free KD-G202 JVC in PDF.
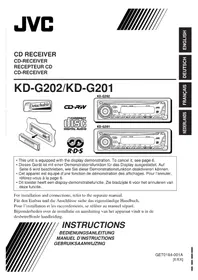


| Product type | Car radio |
| Brand | JVC |
| Model | KD-G202 |
| Dimensions (W x H x D) | 182 x 53 x 99 mm |
| Weight | 1.2 kg |
| Power supply | 12 V DC (vehicle battery) |
| Output power | 50 W x 4 channels |
| Radio frequency ranges | FM: 87.5 – 108.0 MHz; AM: 531 – 1,602 kHz |
| CD player | Yes, compatible with CD-R/RW |
| Auxiliary input | 3.5 mm jack on front panel |
| Main functions | RDS radio, CD player, auxiliary input, preset equalizer |
| Display | Backlit LCD display |
| Clock adjustment | Manual via menu |
| Maintenance and cleaning | Use a soft, dry cloth. Do not use solvents. |
| Safety | Protection fuse in the power harness |
| Spare parts and repairability | Available via JVC after-sales service |
Frequently Asked Questions - KD-G202 JVC
User questions about KD-G202 JVC
0 question about this device. Answer the ones you know or ask your own.
Ask a new question about this device
Download the instructions for your Car radio in PDF format for free! Find your manual KD-G202 - JVC and take your electronic device back in hand. On this page are published all the documents necessary for the use of your device. KD-G202 by JVC.
USER MANUAL KD-G202 JVC


KD-G202
KD-G201
For installation and connections, refer to the separate manual.
INSTRUCTION MANUAL
INSTRUCTION MANUAL
IMPORTANT FOR LASER PRODUCTS
- CLASS 1 LASER PRODUCT
- CAUTION: Do not open the top cover. There are no user serviceable parts inside the unit; leave all servicing to qualified service personnel.
- CAUTION: Visible and invisible laser radiation when open and interlock failed or defeated. Avoid direct exposure to beam.
- REPRODUCTION OF LABEL: CAUTION LABEL, PLACED OUTSIDE THE UNIT.
| CAUTION : Visible and invisible laser radiation when open and interlock failed or defeated. AVOID DIRECT EXPOSURE TO BEAM. (e) | ADVARSEL : Synlig og usynlig laserstråling når maskinen er åben eller interlocken lejler. Undgå direkte eksponering til stråling. (d) | VARNING : Synlig och osynlig laserstråmlning når den öppnas och spärren är urkopplad. Betrakta ej strålen. (s) | VARO : Avattaessa ja suojalikhus chitetune tai vällisena olek altina näkyvälle ja näkymättömälle lasersäkiylle. Välta säleen kohdistumista sucraan itsesi. (t) |
How to reset your unit
While holding SEL (select), press status by on attenuator) for more than 2 seconds. This will reset the built-in microcomputer.

Notes:
- Your preset adjustments—such as preset channels or sound adjustments—will also be erased.
- If a CD is in the unit, it will eject when you reset the unit. Be careful not to drop the CD.
How to use the MODE button
If you press MODE, the unit goes into functions mode, then the number buttons work as different function buttons.
Ex.: When number button 2 works as MO (monaural) button.
![graph TD A["MODE"] --> B["7 EQ"] A --> C["8 MO"] A --> D["9 SSM"] A --> E["10"] A --> F["11 RPT"] A --> G["12 RND"] B --> H["1"] C --> I["2"] D --> J["3"] E --> K["4"] F --> L["5"] G --> M["6"]](/content/2026/06/1251995/images/3e13641a9fa64cbb854f230ce9e4c346beaf45b9909e033748401f2a90fb27dc.jpg)

Time countdown indicator
To use these buttons for original functions again after pressing MODE, wait for 5 seconds without pressing any of these buttons until the functions mode is cleared.
- Pressing MODE again also clears the functions mode.
Thank you for purchasing a JVC product. Please read all instructions carefully before operation, to ensure your complete understanding and to obtain the best possible performance from the unit.
CONTENTS
How to reset your unit 2
How to use the MODE button 2
LOCATION OF THE BUTTONS ...... 4
Control panel 4
BASIC OPERATIONS .... 5
Turning on the power 5
Canceling the display demonstration ..... 6
Setting the clock 7
RADIO OPERATIONS 8
Listening to the radio 8
Storing stations in memory 10
Tuning in to a preset station 11
RDS OPERATIONS ...... 12
What you can do with RDS 12
Other convenient RDS functions and adjustments 17
CD OPERATIONS ...... 19
Playing a CD 19
Locating a track or a particular portion on a CD 20
Selecting CD playback modes 20
Prohibiting CD ejection 21
SOUND ADJUSTMENTS 22
Selecting preset sound modes (C-EQ: custom equalizer) 22
Adjusting the sound 23
OTHER MAIN FUNCTIONS .... 24
Changing the general settings (PSM) ..... 24
Detaching the control panel 26
TROUBLESHOOTING 27
MAINTENANCE 28
Handling discs 28
SPECIFICATIONS 29
KD-G202 and KD-G201 are equipped with the steering wheel remote control function. If your car is equipped with the steering wheel remote controller, you can operate the unit using the controller.
• See the Installation/Connection Manual (separate volume) for connection to utilize this function.
Note:
For security reasons, a numbered ID card is provided with this unit, and the same ID number is imprinted on the unit's chassis. Keep the card in a safe place, as it will help the authorities to identify your unit if stolen.
BEFORE USE
For safety....
- Do not raise the volume level too much, as this will block outside sounds, making driving dangerous.
- Stop the car before performing any complicated operations.
Temperature inside the car....
If you have parked the car for a long time in hot or cold weather, wait until the temperature in the car becomes normal before operating the unit.
Control panel

1 (stand-by/attenuator) button
2 SEL (select) button
3 FM/AM button
4 CD button
5 Loading slot
6 Display window
7 ▲ (eject) button
8 TP PTY (traffic programme/programme type) button
9 ▲ (up) button
▶▶ (fast-forward) button
10 Control dial
11 Number buttons
12 EQ (equalizer) button
13 MO (monaural) button
14 SSM (Strong-station Sequential Memory) button
15 RPT (repeat) button
16 RND (random) button
17 MODE button
18 DISP (display) button
19 🖼️/▶▶ buttons
20 (control panel release) button
21 ▼ (down) button
◀◀ (reverse) button
Display window
22 Tuner reception indicators: MO (monaural), ST (stereo)
23 RDS indicators: TP, PTY, AF, REG
24 CD indicator
25 RND (random disc) indicator
26 RPT (repeat) indicator
27 LOUD (loudness) indicator
28 EQ (equalizer) indicator
29 Sound mode (C-EQ: custom equalizer) indicators: ROCK, CLASSIC, POPS, HIP HOP, JAZZ, USER
30 Main display
31 Source display, Volume level indicator

Turning on the power
1 Turn on the power.

Note on One-Touch Operation:
When you select a source in step 2 below, the power automatically comes on. You do not have to press this button to turn on the power.
2 Select the source.

To operate the tuner (FM or AM), see pages 8 – 18.
To play a CD, see pages 19 – 21.
3 Adjust the volume.

To increase the volume
To decrease the volume
Volume level appears.

Volume level indicator
4 Adjust the sound as you want. (See pages 22 and 23.)
To drop the volume in a moment
Press ⬇ately while listening to any source. "ATT" starts flashing on the display, and the volume level will drop in a moment.
To resume the previous volume level, press the button briefly again.
- If you turn the control dial, you can also restore the sound.
To turn off the power
Press and hold for more than one second.
"SEE YOU" appears, then the unit turns off.
- If you turn off the power while listening to a CD, CD play will start from where playback has been stopped previously, next time you turn on the power.
CAUTION on Volume Setting:
CDs produce very little noise compared with other sources. If the volume level is adjusted for the tuner, for example, the speakers may be damaged by the sudden increase in the output level.
Therefore, lower the volume before playing a CD and adjust it as required during playback.

Canceling the display demonstration
When shipped from the factory, display demonstration has been activated, and starts automatically when no operations are done for about 20 seconds.
- It is recommended to cancel the display demonstration before you use the unit for the first time.
To cancel the display demonstration, follow the procedure below:
1 Press and hold SEL (select) for more than 2 seconds so that one of the PSM items appears on the display. (PSM: see pages 24 and 25.)

2 Select "DEMO" if not shown on the display.


3 Select "DEMO OFF."

4 Finish the setting.

To activate the display demonstration, repeat the same procedure and select "DEMO ON" in step 3.

Setting the clock
You can also set the clock system to either 24 hours or 12 hours.
1 Press and hold SEL (select) for more than 2 seconds so that one of the PSM items appears on the display. (PSM: see pages 24 and 25.)

2 Set the hour.
1 Select "CLOCK H" (hour) if not shown on the display. 2 Adjust the hour.
1
2
3 Set the minute.
1 Select "CLOCK M" (minute). 2 Adjust the minute.
1
2
4 Set the clock system.
1 Select "24H/12H." 2 Select "24H" or "12H."
1
2
5 Finish the setting.

To check the current clock time or change the display mode

Press DISP (display) repeatedly. Each time you press the button, the display changes as follows:
- During AM and FM non-RDS station operation:
Frequency ←→ Clock
• During FM RDS Station operation:
![graph LR A["Station name"] --> B["Station frequency"] B --> C["Programme typeClock"] C --> A](/content/2026/06/1251995/images/fb0811ce5e2edebff4cbfdf1c34e73e5c9e22c21c3be7e15fe89bbeafdab112b.jpg)
- During CD operation:
Clock / Elapsed playing time
- During power off:
The power turns on and the clock time is shown for 5 seconds, then the power turns off.

Listening to the radio
You can use either automatic searching or manual searching to tune in to a particular station.
Searching for a station automatically: Auto search
1 Select the band (FM1 - 3, AM).

Each time you press the button, the band changes as follows:

Lights up when receiving an FM stereo broadcast with sufficient signal strength.

Selected band appears.
Note:
This receiver has three FM bands (FM1, FM2, FM3). You can use any one of them to listen to an FM broadcast.
2 Start searching for a station.

To search for stations of higher frequencies
To search for stations of lower frequencies When a station is received, searching stops.
To stop searching before a station is received, press the same button you have pressed for searching.
Searching for a station manually: Manual search
1 Select the band (FM1 - 3, AM).

Each time you press the button, the band changes as follows:

Note:
This receiver has three FM bands (FM1, FM2, FM3). You can use any one of them to listen to an FM broadcast.
2 Press and hold ▶▶| ▶or ◀◀ until “M” (manual) starts flashing on the display.


3 Tune in to a station you want while "M" (manual) is still flashing.

To tune in to stations of higher frequencies
To tune in to stations of lower frequencies
- If you release your finger from the button, the manual mode will automatically turn off after 5 seconds.
- If you hold down the button, the frequency keeps changing (in 50 kHz intervals for FM and 9 kHz for AM—MW/LW) until you release the button.
When an FM stereo broadcast is hard to receive

1 Press MODE to enter the functions mode while listening to an FM stereo broadcast.
2 Press MO (monaural), while "MODE" is still flashing on the display, so that "MONO" appears on the display. Each time you press the button, monaural mode turns on and off alternately.
MO (monaural) indicator
When the MO indicator is lit on the display, the sound you hear becomes monaural but the reception will be improved.
Storing stations in memory
You can use one of the following two methods to store broadcasting stations in memory.
• Automatic preset of FM stations: SSM (Strong-station Sequential Memory) - Manual preset of both FM and AM stations
FM station automatic preset: SSM
You can preset 6 local FM stations in each FM band (FM1, FM2, and FM3).
1 Select the FM band (FM1 – 3) you want to store FM stations into.

Each time you press the button, the band changes as follows:

2 Press MODE to enter the functions mode.

3 Press and hold SSM for about 2 seconds.


“SSM” flashes, then disappears when automatic preset is over.
Local FM stations with the strongest signals are searched and stored automatically in the band number you have selected (FM1, FM2, or FM3). These stations are preset in the number buttons—No.1 (lowest frequency) to No.6 (highest frequency).
When automatic preset is over, the station stored in number button 1 will be automatically tuned in.
Manual preset
You can preset up to 6 stations in each band (FM1, FM2, FM3, and AM) manually.
Ex.: Storing FM station of 92.5 MHz into the preset number 1 of the FM1 band.
1 Select the band (FM1 – 3, AM) you want to store stations into (in this example, FM1).

Each time you press the button, the band changes as follows:

2 Tune in to a station (in this example, of 92.5 MHz).

To tune in to stations of higher frequencies
To tune in to stations of lower frequencies

3 Press and hold the number button (in this example, 1) for more than 2 seconds.

Preset number flashes for a while.
4 Repeat the above procedure to store other stations into other preset numbers.
Notes:
- A previously preset station is erased when a new station is stored in the same preset number.
- Preset stations are erased when the power supply to the memory circuit is interrupted (for example, during battery replacement). If this occurs, preset the stations again.
Tuning in to a preset station
You can easily tune in to a preset station. Remember that you must store stations first. If you have not stored them yet, see "Storing stations in memory" on pages 10 and 11.
1 Select the band (FM1 - 3, AM).

2 Select the number (1 - 6) for the preset station you want.

Note:
You can also use the ▲ (up) or ▼ (down) button on the unit to select the next or previous preset stations. Each time you press the ▲ (up) or ▼ (down) button, the next or previous preset station is tuned in.
What you can do with RDS
RDS (Radio Data System) allows FM stations to send an additional signal along with their regular programme signals. For example, the stations send their station names, as well as information about what type of programme they broadcast, such as sports or music, etc.
Another advantage of RDS function is called "Enhanced Other Networks." By using the Enhanced Other Networks data sent from a station, you can tune in to a different station of a different network broadcasting your favorite programme or traffic announcement while listening to another programme or to another source such as CD.
By receiving the RDS data, this unit can do the following:
- Tracing the same programme automatically (Network-Tracking Reception)
- Standby Reception of TA (Traffic Announcement) or your favorite programme • PTY (Programme Type) search
- Programme search • And some other functions
Tracing the same programme automatically (Network-Tracking Reception)
When driving in an area where FM reception is not good, the tuner built in this unit automatically tunes in to another RDS station, broadcasting the same programme with stronger signals. So, you can continue to listen to the same programme in its finest reception, no matter where you drive. (See the illustration on page 18.)
Two types of the RDS data are used to make Network-Tracking Reception work correctly — PI (Programme Identification) and AF (Alternative Frequency).
Without receiving these data correctly from the RDS station you are listening to, Network-Tracking Reception will not operate.
To use Network-Tracking Reception
You can select the different modes of network-tracking reception to continue listening to the same programme in its finest reception.
When shipped from the factory, "AF" is selected.
- AF: Network-Tracking Reception is activated with Regionalization set to "off." With this setting, the unit switches to another station within the same network when the received signals from the current station become weak. (In this mode, the programme may differ from the one currently received.) The AF indicator lights up but the REG indicator does not.
- AF REG: Network-Tracking Reception is activated with Regionalization set to "on."
With this setting, the unit switches to another station, within the same network, broadcasting the same programme when the received signals from the current station become weak.
Both the AF indicator and the REG indicator light up.
- OFF: Network-Tracking Reception is deactivated. Neither the AF indicator nor the REG indicator lights up.

1 Press and hold SEL (select) for more than 2 seconds so that one of the PSM items appears on the display. (PSM: see pages 24 and 25.)

2 Select "AF-REG" (alternative frequency/regionalization reception) if not shown on the display.

3 Select the desired mode—"AF," "AF REG," or "OFF."

4 Finish the setting.

Using TA Standby Reception
TA Standby Reception allows the unit to switch temporarily to Traffic Announcement (TA) from the current source (another FM station or CD).
• TA Standby Reception will not work if you are listening to an AM station.
Press TP PTY to activate TA Standby Reception.

■When the current source is FM, the TP indicator either lights up or flashes.
- If the TP indicator lights up, TA Standby Reception is activated. If a station starts broadcasting a traffic announcement, "TRAFFIC" appears on the display, and this unit automatically tunes in to the station. The volume changes to the preset TA volume level (see page 17) and the traffic announcement can be heard. - If the TP indicator flashes, TA Standby Reception is not yet activated since the station being received does not provide the signals used for TA Standby Reception. To activate TA Standby Reception, you need to tune in to another station providing these signals. Press ▶▶| ∧ or √ |◀◀ to search for such a station. When a station providing these signals is tuned in, the TP indicator stops flashing and remains lit. Now TA Standby Reception is activated.
■When the current source is other than FM, the TP indicator lights up.
If a station starts broadcasting a traffic announcement, "TRAFFIC" appears on the display, and this unit automatically changes the source and tunes in to the station.
To deactivate the TA Standby Reception, press TP PTY again. The TP indicator disappears.
Using PTY Standby Reception
PTY Standby Reception allows the unit to switch temporarily to your favorite programme (PTY: Programme Type) from the current source (another FM station or CD).
- PTY Standby Reception will not work if you are listening to an AM station.
You can select your favorite programme type for PTY Standby Reception. When shipped from the factory, PTY Standby Reception is turned off. ("OFF" is selected for PTY Standby Reception.)
1 Press and hold SEL (select) for more than 2 seconds so that one of the PSM items appears on the display. (PSM: see pages 24 and 25.)

2 Select "PTY STBY" (standby) if not shown on the display.

3 Select one of the twenty-nine PTY codes. (See page 18.)

Selected code name appears on the display and is stored into memory.
4 Finish the setting.

■When the current source is FM, the PTY indicator either lights up or flashes.
- If the PTY indicator lights up, PTY Standby Reception is activated. If a station starts broadcasting the selected PTY programme, this unit automatically tunes in to the station. - If the PTY indicator flashes, PTY Standby Reception is not yet activated since the station being received does not provide the signals used for PTY Standby Reception. To activate PTY Standby Reception, you need to tune in to another station providing these signals. Press ▶▶▶ ▲ or ▼▶▶◀◀ to search for such a station. When a station providing these signals is tuned in, the PTY indicator stops flashing and remains lit. Now PTY Standby Reception is activated.
■When the current source is other than FM, the PTY indicator lights up.
If a station starts broadcasting the selected PTY programme, this unit automatically changes the source and tunes in to the station.
To deactivate the PTY Standby Reception, select "OFF" in step 3 on the left column. The PTY indicator disappears.
Searching your favorite programme
You can search any one of the PTY codes. In addition, you can store your 6 favorite programme types in the number buttons. When shipped from the factory, the following 6 programme types have been stored in the number buttons (1 to 6).
To store your favorite programme types, see below.
To search your favorite programme type, see page 16.
| 1 | 2 | 3 |
| POP M | ROCK M EASY M | |
| 4 | 5 | 6 |
| CLASSICS | AFFAIRS | VARIED |
To store your favorite programme types
1 Press and hold TP PTY for more than 2 seconds while listening to an FM station.

The last selected PTY code appears.
2 Select one of the twenty-nine PTY codes. (See page 18.)

Selected code name appears on the display.
3 Press and hold the number button for more than 2 seconds to store the PTY code selected into the preset number you want.


Selected PTY code and "MEMORY" appear alternately for a while.

4 Press and hold TP PTY for more than 2 seconds to exit from this mode.

To search your favorite programme type
1 Press and hold TP PTY for more than 2 seconds while listening to an FM station.


The last selected PTY code appears.
2 To select one of your favorite programme type

or
To select any one of the twenty-nine PTY codes.


Ex.: When "ROCK M" is selected
3 Press ▶▶| ∧ or ∨ |◀◀ to start PTY search for your favorite programme.


- If there is a station broadcasting a programme of the same PTY code as you selected, that station is tuned in.
- If there is no station broadcasting a programme of the same PTY code as you selected, the station will not change.
Note:
In some areas, the PTY search will not work correctly.
Other convenient RDS functions and adjustments
Automatic selection of the station when using the number buttons
Usually when you press the number button, the preset station is tuned in.
However, when the preset station is an RDS station, something different will happen. If the signals from that preset station are not sufficient for good reception, this unit, using the AF data, tunes in to another frequency broadcasting the same programme as the original preset station is broadcasting. (Programme search)
- The unit takes some time to tune in to another station using programme search.
To activate programme search, follow the procedure below.
- See also “Changing the general settings (PSM)” on page 24.
1 Press and hold SEL (select) for more than 2 seconds so that one of the PSM items appears on the display.
2 Press ▶▶| ∧ or √ |◀◀ to select "P(Programme)-SEARCH."
3 Turn the control dial clockwise to select "ON." Now programme search is activated.
4 Press SEL (select) to finish the setting.
To cancel programme search, repeat the same procedure and select "OFF" in step 3 by turning the control dial counterclockwise.
Setting the TA volume level
You can preset the volume level for TA Standby Reception. When a traffic programme is received, the volume level automatically changes to the preset level.
- See also "Changing the general settings (PSM)" on page 24.
1 Press and hold SEL (select) for more than 2 seconds so that one of the PSM items appears on the display.
2 Press ▶▶▶I ∧ or √ I◀◀ to select "TA VOL" (volume).
3 Turn the control dial to set to the desired volume.
You can set it from "VOL 00" to "VOL 30" or "VOL 50" (depending on the amplifier gain control setting: see page 25).
4 Press SEL (select) to finish the setting.
Automatic clock adjustment
When shipped from the factory, the clock built in this unit is set to be readjusted automatically using the CT (Clock Time) data in the RDS signal.
If you do not want to use automatic clock adjustment, follow the procedure below.
- See also "Changing the general settings (PSM)" on page 24.
1 Press and hold SEL (select) for more than 2 seconds so that one of the PSM items appears on the display.
2 Press ▶▶▶ I ∧ or √ ◀◀◀ to select "AUTO ADJ" (adjustment).
3 Turn the control dial counterclockwise to select "OFF."
Now automatic clock adjustment is canceled.
4 Press SEL (select) to finish the setting.
To reactivate clock adjustment, repeat the same procedure and select "ON" in step 3 by turning the control dial clockwise.
Note:
You must stay tuned to the same station for more than 2 minutes after setting "AUTO ADJ" to "ON."
Otherwise, the clock time will not be adjusted. (This is because the unit takes up to 2 minutes to capture the CT data in the RDS signal.)
PTY codes
NEWS: News
AFFAIRS: Topical programmes expanding on current news or affairs
INFO: Programmes which impart advice on a wide variety of topics
SPORT: Sport events
EDUCATE: Educational programmes
DRAMA: Radio plays
CULTURE: Programmes on national or regional culture
SCIENCE: Programmes on natural science and technology
VARIED: Other programmes like comedies or ceremonies
POP M: Pop music
ROCK M: Rock music
EASY M: Easy-listening music
LIGHT M: Light music
CLASSICS: Classical music
OTHER M: Other music
WEATHER: Weather information
FINANCE: Reports on commerce, trading, the Stock Market, etc.
CHILDREN: Entertainment programmes for children
SOCIAL: Programmes on social activities
RELIGION: Programs dealing with any aspect of belief or faith, or the nature of existence or ethics
PHONE IN: Programs where people can express their views either by phone or in a public forum
TRAVEL: Programs about travel destinations, package tours, and travel ideas and opportunities
LEISURE: Programs concerned with recreational activities such as gardening, cooking, fishing, etc.
JAZZ: Jazz music
COUNTRY: Country music
NATION M: Current popular music from another nation or region, in that country's language
OLDIES: Classic pop music
FOLK M: Folk music
DOCUMENT: Programs dealing with factual matters, presented in an investigative style
The same program can be received on different frequencies.
![graph TD A["Programme 1 broadcasting on frequency A"] --> B["Wave propagation path"] B --> C["Programme 1 broadcasting on frequency C"] C --> D["Wave propagation path"] D --> E["Programme 1 broadcasting on frequency E"] E --> F["Wave propagation path"] F --> G["Programme 1 broadcasting on frequency…](/content/2026/06/1251995/images/f918c796f98ddcee8ee4c20ee7652ec499cebe5eed5530f59faf0b75f0909d02.jpg)

Playing a CD
Insert a CD into the loading slot.

The unit turns on, draws the CD, and starts playback automatically.
Note on One-Touch Operation:
When a CD is already in the loading slot, pressing CD turns on the unit and starts playback automatically.


All tracks will be played repeatedly until you stop playback.
Notes:
- When a CD is inserted upside down, "EJECT" appears on the display and the CD automatically ejects.
- If there is no CD in the loading slot, you cannot select CD as the source. "NO DISC" appears on the display.
To stop play and eject the CD
Press ▲.
CD play stops and the CD automatically ejects from the loading slot. The source changes to the tuner (you will hear the last received station).
- If you change the source, CD play also stops (without ejecting the CD). Next time you select "CD" as the source, CD play starts from where playback has been stopped previously.
Notes:
- If the ejected CD is not removed for about 15 seconds, the CD is automatically inserted again into the loading slot to protect it from dust. (CD play will not start this time.)
- You can eject the CD even when the unit is turned off.
About mistracking:
Mistracking may result from driving on extremely rough roads. This does not damage the unit and the CD, but will be annoying.
We recommend that you stop CD play while driving on such rough roads.
Locating a track or a particular portion on a CD
To fast-forward or reverse the track

Press and hold ▶▶ while playing a CD to fast-forward the track.
Press and hold ◀◀ while playing a CD to reverse the track.
To go to the next or previous tracks

Press ▶▶▶ briefly while playing a CD to go ahead to the beginning of the next track.
Each time you press the button consecutively, the beginning of the next tracks is located and played back.
Press ▼◀ briefly while playing a CD to go back to the beginning of the current track.
Each time you press the button consecutively, the beginning of the previous tracks is located and played back.
To go to a particular track directly
Press the number button corresponding to the track number to start its playback.

• To select a track number from 1 – 6: Press 1 (7) – 6 (12) briefly. - To select a track number from 7 – 12: Press and hold 1 (7) – 6 (12) for more than one second.
Selecting CD playback modes
To play back tracks at random (Disc Random Play)
You can play back all tracks on the CD at random.

1 Press MODE to enter the functions mode while playing a CD. 2 Press RND (random), while "MODE" is still flashing on the display, so that "DISC RND" appears on the display. Each time you press the button, disc random play mode turns on and off alternately.

When disc random play is turned on, the RND indicator lights up on the display. A track randomly selected starts playing.
To play back tracks repeatedly (Track Repeat Play)
You can play back the current track repeatedly.

1 Press MODE to enter the functions mode while playing a CD. 2 Press RPT (repeat), while "MODE" is still flashing on the display, so that "TRK RPT" appears on the display. Each time you press the button, track repeat play mode turns on and off alternately.

When track repeat play is turned on, the RPT indicator lights up on the display. The current track starts playing repeatedly.
Prohibiting CD ejection
You can prohibit CD ejection and can lock a CD in the loading slot.
While pressing CD, press and hold ▲ for more than 2 seconds.

"EJECT" flashes on the display for about 5 seconds, and the CD is locked and cannot be ejected.

To cancel the prohibition and unlock the CD
While pressing CD, press and hold ▲ again for more than 2 seconds.
"EJECT" appears on the display, and the CD ejects from the loading slot.

Selecting preset sound modes (C-EQ: custom equalizer)
You can select a preset sound mode (C-EQ: custom equalizer) suitable to the music genre.
- There is a time limit in doing the following procedure. If the setting is canceled before you finish, start from step 1 again.
1 Press MODE to enter the functions mode.

2 Select the sound mode you want.

Each time you press the button, the sound modes change as follows:
![graph LR A["USER"] --> B["ROCK"] --> C["CLASSIC"] D["JAZZ"] <--_E["HIP HOP"] <--_F["POPS"]](/content/2026/06/1251995/images/f06d794c8aa55674d7ad762a563dbe8be0ddf0d3f89838b9a8c48070fd575ce2.jpg)
| USER | ROCK | CLASSIC |
| JAZZ | HIP HOP | POPS |

Ex.: When you select "ROCK"
| Indication | For: Preset values | |||
| USER (Flat sound) 00 00 OFF | ||||
| ROCK Rock or +03 +01 ON disco music | ||||
| CLASSIC Classical +01 -02 OFF music | ||||
| POPS Light music +04 +01 OFF | ||||
| HIP HOP Funk or rap +02 music | ON | |||
| JAZZ | Jazz music | +02 +03 OFF | ||
Note:
You can adjust each sound mode to your preference. Once you make an adjustment, it is automatically stored for the currently selected sound mode. See "Adjusting the sound" on page 23.
Adjusting the sound
You can adjust the sound characteristics to your preference.
1 Select the item you want to adjust.

Each time you press the button, the adjustable items change as follows:
![graph LR A["BAS (bass)"] --> B["TRE (treble)"] B --> C["FAD (fader)"] C --> D["BAL (balance)"] D --> E["LOUD (loudness)"] E --> F["VOL (volume)"] F --> A](/content/2026/06/1251995/images/eced8c3bfa2a45eb6728c403b241143d56617480fcd4fb24ad2f9af04cbcd357.jpg)
| Indication | To do: Range | |
| BAS*1 | Adjust the bass. -06 (min.)|+06 (max.) | |
| TRE*1 | Adjust the treble. -06 (min.)|+06 (max.) | |
| FAD*2 | Adjust the front R06 (Rear only)and rear speaker |balance. F06 (Front only) | |
| BAL Adjust | the left L06 (Left only)and right speaker |balance. R06 (Right only) | |
| LOUD*1 | Boost low and high frequencies to LOUD ONproduce a well- |balanced sound at low volume level. | LOUD OFF |
| VOL*3 | Adjust the volume. | 00 (min.)|30 or 50 ( max.4 ) |
*1 When you adjust the bass, treble, or loudness, the adjustment you have made is stored for the currently selected sound mode (C-EQ) including "USER." *2 If you are using a two-speaker system, set the fader level to "00." *3 Normally the control dial works as the volume control. So you do not have to select "VOL" to adjust the volume level. *4 Depending on the amplifier gain control setting. (See page 25 for details.)
2 Adjust the setting.

To increase the level or turn on the loudness
To decrease the level or turn off the loudness
Indication pattern changes as you adjust the bass or treble.

Ex. 1: When you adjust "TRE" (treble)

Ex. 2: When you turn on the loudness
3 Repeat steps 1 and 2 to adjust the other items.
To reset each sound mode to the factory settings, repeat the same procedure and reassign the preset values listed in the table on page 22.
Changing the general settings (PSM)
You can change the items listed in the table below and page 25 by using the PSM (Preferred Setting Mode) control.
Basic Procedure
1 Press and hold SEL (select) for more than 2 seconds so that one of the PSM items appears on the display. (See below and page 25.)

2 Select the PSM item you want to adjust.

3 Adjust the PSM item selected.

4 Repeat steps 2 and 3 to adjust the other PSM items if necessary.
5 Finish the setting.

Preferred Setting Mode (PSM) items
- For detailed operations of each PSM items, refer to the pages listed in the table.
| Indications Selectable values | /items | Factory-preset See settings page | ||
| DEMO Display demonstration | DEMO ONDE | EMO OFF DEMO | ON 6 | |
| CLOCK H Hour adjustment | 0 — 23 (1 — 12) | 0 (0:00) | 7 | |
| CLOCK M Minute adjustment | 00 — 59 | 00 (0:00) | ||
| 24H/12H 24/12-hour time display | 12H | 24H | 24H | |
| AUTO ADJ Automatic clock setting | OFF | ON | ON | 17 |
| AF-REG Alternative frequency/Regionalization reception | AF ↔ AF REG↑↓ OFF ←↑ | AF | 12, 13 | |
| Indications | Selectable values/items | Factory-preset settings | See page | |
| PTY STBY PTY standby | OFF → 29 programme types (see page 18) | OFF | 14 | |
| TA VOL Traffic announcement volume | VOL 00 — VOL 30 or 50* | VOL 20 | 17 | |
| P-SEARCH Programme search | OFF | ON | OFF | 17 |
| DIMMER Dimmer mode | OFF | ON | OFF | 25 |
| TEL Telephone muting | OFF ↔ MUTING 1↑→ MUTING 2 | OFF | 25 | |
| AMP GAIN Amplifier gain control | LOW PWR | HIGH PWR HIGH PWR 25 | ||
* Depending on the amplifier gain control setting. (See below for details.)
To select the dimmer mode—DIMMER
You can dim the display at night (according to your preference).
When shipped from the factory, dimmer is deactivated.
• OFF: Cancels the dimmer. • ON: Activates the dimmer.
To select the telephone muting—TEL
This mode is used when a cellular phone system is connected. Depending on the phone system used, select either "MUTING 1" or "MUTING 2" whichever mutes the sounds from this unit. When shipped from the factory, this mode is deactivated.
- MUTING 1: Select if this setting can mute the sounds.
- MUTING 2: Select if this setting can mute the sounds. • OFF: Cancels the telephone muting.
To select the amplifier gain control —AMP GAIN
You can change the maximum volume level of this unit. When the maximum power of the speakers is less than 50 W, select "LOW PWR" to prevent them from being damaged.
When shipped from the factory, "HIGH PWR" is selected.
- LOW PWR: You can adjust the volume level from "VOL 00" to "VOL 30."
Note:
If you change the setting from "HIGH PWR" to "LOW PWR" while listening at a volume level more than 30, the unit automatically changes the volume level to "VOL 30."
- HIGH PWR: You can adjust the volume level from "VOL 00" to "VOL 50."
Detaching the control panel
You can detach the control panel when leaving the car.
When detaching or attaching the control panel, be careful not to damage the connectors on the back of the control panel and on the panel holder.
Detaching the control panel
Before detaching the control panel, be sure to turn off the power.
1 Unlock the control panel.

2 Lift and pull the control panel out of the unit.

3 Put the detached control panel into the provided case.

Attaching the control panel
1 Insert the left side of the control panel into the groove on the panel holder.

2 Press the right side of the control panel to fix it to the panel holder.

Note on cleaning the connectors:
If you frequently detach the control panel, the connectors will deteriorate.
To minimize this possibility, periodically wipe the connectors with a cotton swab or cloth moistened with alcohol, being careful not to damage the connectors.

Connectors
What appears to be trouble is not always serious. Check the following points before calling a service center.
| Symptoms | Causes | Remedies | |
| General | Sound cannot be heard from the speakers. | The volume level is set to the minimum level. | Adjust it to the optimum level. |
| Connections are incorrect. | Check the cords and connections. | ||
| This unit does not work at all. | The built-in microcomputer may have functioned incorrectly due to noise, etc. | While holding SEL (select), press data/AD by/on attenuator) for more than 2 seconds to reset the unit. (The clock setting and preset stations stored in memory are erased.) (See page 2.) | |
| FM/AM | SSM (Strong-station Sequential Memory) automatic preset does not work. | Signals are too weak. | Store stations manually. |
| Static noise while listening to the radio. | The aerial is not connected firmly. | Connect the aerial firmly. | |
| CD Playback | CD automatically ejects. | CD is inserted upside down. | Insert the CD correctly. |
| CD-R/CD-RW cannot be played back.Tracks on the CD-R/CD-RW cannot be skipped. | CD-R/CD-RW is not finalized. | Insert a finalized CD-R/CD-RW.Finalize the CD-R/CD-RW with the component which you used for recording. | |
| CD can be neither played back nor ejected. | CD is locked. | Unlock the CD.(See page 21.) | |
| The CD player may have functioned incorrectly. | While holding 0/1 ATT(standby/on attenuator), press ▲ (eject) for more than 2 seconds. Be careful not to drop the CD when it is ejected. | ||
| CD sound is sometimes interrupted. | You are driving on rough roads. | Stop playback while driving on rough roads. | |
| CD is scratched. | Change the CD. | ||
| Connections are incorrect. | Check the cords and connections. | ||
| “NO DISC” appears on the display. | No CD in the loading slot. | Insert a CD into the loading slot. | |
| CD is inserted incorrectly. | Insert the CD correctly. | ||
Handling discs
This unit has been designed to reproduce CDs, CD-Rs (Recordable), and CD-RWs (Rewritable).
- This unit is not compatible with MP3 discs.
How to handle discs
When removing a disc
Center holder
from its case, press down the center holder of the case and lift the disc out, holding it by the edges.

- Always hold the disc by the edges. Do not touch its recording surface.
When storing a disc into its case, gently insert the disc around the center holder (with the printed surface facing up).
- Make sure to store discs into the cases after use.
To keep discs clean
A dirty disc may not be played correctly. If a disc does become dirty, wipe it with a soft cloth in a straight line from center to edge.

To play new discs
New discs may have some rough spots around the inner and outer edges. If such a disc is used, this unit may reject the disc.

To remove these rough spots, rub the edges with a pencil or ball-point pen, etc.
Moisture condensation
Moisture may condense on the lens inside the CD player in the following cases:
• After starting the heater in the car. - If it becomes very humid inside the car.
Should this occur, the CD player may malfunction. In this case, eject the disc and leave the unit turned on for a few hours until the moisture evaporates.
When playing a CD-R or CD-RW
Before playing back CD-Rs or CD-RWs, read their instructions or cautions carefully.
- Use only "finalized" CD-Rs or CD-RWs.
- Some CD-Rs or CD-RWs may not be played back on this unit because of their disc characteristics, and for the following reasons:
– Discs are dirty or scratched. - Moisture condensation on the lens inside the unit. - The pickup lens inside the unit is dirty.
- CD-RWs may require a longer readout time since the reflectance of CD-RWs is lower than that of regular CDs.
- CD-Rs or CD-RWs are susceptible to high temperatures or high humidity, so do not leave them inside your car.
- Do not use following CD-Rs or CD-RWs:
- Discs with stickers, labels, or protective seal stuck to the surface. – Discs on which labels can be directly printed by an ink jet printer.
Using these discs under high temperatures or high humidity may cause malfunctions or damage to discs. For example,
- Stickers or labels may shrink and warp a disc.
- Stickers or labels may be peeled off so discs cannot be ejected. – Print on discs may get sticky.
Read instructions or cautions about labels and printable discs carefully.
CAUTIONS:
- Do not insert 8 cm discs (single CDs) into the loading slot. (Such discs cannot be ejected.)
- Do not insert any disc of unusual shape—like a heart or flower; otherwise, it will cause a malfunction.
- Do not expose discs to direct sunlight or any heat source or place them in a place subject to high temperature and humidity. Do not leave them in a car.
- Do not use any solvent (for example, conventional record cleaner, spray, thinner, benzine, etc.) to clean discs.
Warped disc

Sticker

Sticker residue
Disc

Stick-on label
AUDIO AMPLIFIER SECTION
Maximum Power Output:
Front: 50 W per channel
Rear: 50 W per channel
Continuous Power Output (RMS):
Front: 19 W per channel into 4 Ω, 40 Hz to 20 000 Hz at no more than 0.8% total harmonic distortion.
Rear: 19 W per channel into 4 Ω, 40 Hz to 20 000 Hz at no more than 0.8% total harmonic distortion.
Load Impedance: 4 Ω (4 Ω to 8 Ω allowance)
Tone Control Range:
Bass: ±10 dB at 100 Hz
Treble: ±10 dB at 10 kHz
Frequency Response: 40 Hz to 20 000 Hz
Signal-to-Noise Ratio: 70 dB
Line-Out Level/Impedance:
2.0 V/20 kΩ load (full scale)
Output Impedance: 1 kΩ
TUNER SECTION
Frequency Range:
FM: 87.5 MHz to 108.0 MHz
AM: (MW) 522 kHz to 1 620 kHz
(LW) 144 kHz to 279 kHz
[FM Tuner]
Usable Sensitivity:
11.3 dBf (1.0 μV/75 Ω)
50 dB Quieting Sensitivity:
16.3 dBf (1.8 μV/75 Ω)
Alternate Channel Selectivity (400 kHz): 65 dB
Frequency Response: 40 Hz to 15 000 Hz
Stereo Separation: 30 dB
Capture Ratio: 1.5 dB
[MW Tuner]
Sensitivity: 20 μV
Selectivity: 35 dB
[LW Tuner]
Sensitivity: 50 μV
CD PLAYER SECTION
Type: Compact disc player
Signal Detection System: Non-contact optical pickup (semiconductor laser)
Number of channels: 2 channels (stereo)
Frequency Response: 5 Hz to 20 000 Hz
Dynamic Range: 96 dB
Signal-to-Noise Ratio: 98 dB
Wow and Flutter: Less than measurable limit
GENERAL
Power Requirement:
Operating Voltage:
DC 14.4 V (11 V to 16 V allowance)
Grounding System: Negative ground
Allowable Operating Temperature:
0°C to +40°C
Dimensions (W × H × D):
Installation Size (approx.):
182 mm × 52 mm × 150 mm
Panel Size (approx.):
188 mm × 58 mm × 11 mm
Mass (approx.):
1.3 kg (excluding accessories)
Design and specifications are subject to change without notice.
Connections
11.3 dBf (1.0 μV/75 Ω)
Dimensions (W × H × D):
Mounting size (approx.):
182 mm × 52 mm × 150 mm

Connectors
11.3 dBf (1.0 μV/75 Ω)
Dimensions (L × H × P):
27 LOUD indicator (loudness)
28 EQ indicator (equalizer)
EDUCATE: Educational programs
Connectors
11.3 dBf (1.0 μV/75 Ω)
Stereo separation: 30 dB
Capture range: 1.5 dB
[MG-zenders]
Sensitivity: 20 μV
Having TROUBLE with operation?
Please reset your unit
Refer to page of How to reset your unit
- IMPORTANT FOR LASER PRODUCTS
- HOW TO RESET YOUR UNIT
- NOTES
- HOW TO USE THE MODE BUTTON
- CONTENTS
- LOCATION OF THE BUTTONS
- BASIC OPERATIONS
- RADIO OPERATIONS
- RDS OPERATIONS
- CD OPERATIONS
- SOUND ADJUSTMENTS
- OTHER MAIN FUNCTIONS
- TROUBLESHOOTING
- MAINTENANCE
- SPECIFICATIONS
- NOTE
- BEFORE USE
- FOR SAFETY
- TEMPERATURE INSIDE THE CAR
- CONTROL PANEL
- DISPLAY WINDOW
- TURNING ON THE POWER
- TURN ON THE POWER
- NOTE ON ONE-TOUCH OPERATION
- SELECT THE SOURCE
- ADJUST THE VOLUME
- ADJUST THE SOUND AS YOU WANT. (SEE PAGES 22 AND 23.)
- TO DROP THE VOLUME IN A MOMENT
- TO TURN OFF THE POWER
- CAUTION ON VOLUME SETTING
- CANCELING THE DISPLAY DEMONSTRATION
- SETTING THE CLOCK
- LISTENING TO THE RADIO
- SEARCHING FOR A STATION AUTOMATICALLY: AUTO SEARCH
- SELECT THE BAND (FM1 - 3, AM)
- START SEARCHING FOR A STATION
- SEARCHING FOR A STATION MANUALLY: MANUAL SEARCH
- PRESS AND HOLD ▶▶| ▶OR ◀◀ UNTIL “M” (MANUAL) STARTS FLASHING ON THE DISPLAY
- TUNE IN TO A STATION YOU WANT WHILE "M" (MANUAL) IS STILL FLASHING
- WHEN AN FM STEREO BROADCAST IS HARD TO RECEIVE
- STORING STATIONS IN MEMORY
- FM STATION AUTOMATIC PRESET: SSM
- SELECT THE FM BAND (FM1 – 3) YOU WANT TO STORE FM STATIONS INTO
- PRESS MODE TO ENTER THE FUNCTIONS MODE
- PRESS AND HOLD SSM FOR ABOUT 2 SECONDS
- MANUAL PRESET
- SELECT THE BAND (FM1 – 3, AM) YOU WANT TO STORE STATIONS INTO (IN THIS EXAMPLE, FM1)
- TUNE IN TO A STATION (IN THIS EXAMPLE, OF 92.5 MHZ)
- PRESS AND HOLD THE NUMBER BUTTON (IN THIS EXAMPLE, 1) FOR MORE THAN 2 SECONDS
- REPEAT THE ABOVE PROCEDURE TO STORE OTHER STATIONS INTO OTHER PRESET NUMBERS
- TUNING IN TO A PRESET STATION
- SELECT THE NUMBER (1 - 6) FOR THE PRESET STATION YOU WANT
- WHAT YOU CAN DO WITH RDS
- TRACING THE SAME PROGRAMME AUTOMATICALLY (NETWORK-TRACKING RECEPTION)
- TO USE NETWORK-TRACKING RECEPTION
- USING TA STANDBY RECEPTION
- USING PTY STANDBY RECEPTION
- SEARCHING YOUR FAVORITE PROGRAMME
- TO STORE YOUR FAVORITE PROGRAMME TYPES
- TO SEARCH YOUR FAVORITE PROGRAMME TYPE
- PRESS AND HOLD TP PTY FOR MORE THAN 2 SECONDS WHILE LISTENING TO AN FM STATION
- TO SELECT ONE OF YOUR FAVORITE PROGRAMME TYPE
- PRESS ▶▶| ∧ OR ∨ |◀◀ TO START PTY SEARCH FOR YOUR FAVORITE PROGRAMME
- OTHER CONVENIENT RDS FUNCTIONS AND ADJUSTMENTS
- AUTOMATIC SELECTION OF THE STATION WHEN USING THE NUMBER BUTTONS
- SETTING THE TA VOLUME LEVEL
- AUTOMATIC CLOCK ADJUSTMENT
- PTY CODES
- THE SAME PROGRAM CAN BE RECEIVED ON DIFFERENT FREQUENCIES
- PLAYING A CD
- INSERT A CD INTO THE LOADING SLOT
- TO STOP PLAY AND EJECT THE CD
- PRESS ▲
- ABOUT MISTRACKING
- LOCATING A TRACK OR A PARTICULAR PORTION ON A CD
- TO FAST-FORWARD OR REVERSE THE TRACK
- TO GO TO THE NEXT OR PREVIOUS TRACKS
- TO GO TO A PARTICULAR TRACK DIRECTLY
- SELECTING CD PLAYBACK MODES
- TO PLAY BACK TRACKS AT RANDOM (DISC RANDOM PLAY)
- TO PLAY BACK TRACKS REPEATEDLY (TRACK REPEAT PLAY)
- PROHIBITING CD EJECTION
- SELECTING PRESET SOUND MODES (C-EQ: CUSTOM EQUALIZER)
- SELECT THE SOUND MODE YOU WANT
- ADJUSTING THE SOUND
- SELECT THE ITEM YOU WANT TO ADJUST
- ADJUST THE SETTING
- REPEAT STEPS 1 AND 2 TO ADJUST THE OTHER ITEMS
- CHANGING THE GENERAL SETTINGS (PSM)
- BASIC PROCEDURE
- PREFERRED SETTING MODE (PSM) ITEMS
- TO SELECT THE DIMMER MODE—DIMMER
- TO SELECT THE TELEPHONE MUTING—TEL
- TO SELECT THE AMPLIFIER GAIN CONTROL —AMP GAIN
- DETACHING THE CONTROL PANEL
- ATTACHING THE CONTROL PANEL
- NOTE ON CLEANING THE CONNECTORS
- HANDLING DISCS
- HOW TO HANDLE DISCS
- WHEN REMOVING A DISC
- TO KEEP DISCS CLEAN
- TO PLAY NEW DISCS
- MOISTURE CONDENSATION
- WHEN PLAYING A CD-R OR CD-RW
- CAUTIONS
- AUDIO AMPLIFIER SECTION
- TUNER SECTION
- CD PLAYER SECTION
- GENERAL
- [MG-ZENDERS]
- HAVING TROUBLE WITH OPERATION
- PLEASE RESET YOUR UNIT
Brand : JVC
Model : KD-G202
Category : Car radio