Cubi 2 - Radio PerfectPro - Free user manual and instructions
Find the device manual for free Cubi 2 PerfectPro in PDF.

User questions about Cubi 2 PerfectPro
0 question about this device. Answer the ones you know or ask your own.
Ask a new question about this device
Download the instructions for your Radio in PDF format for free! Find your manual Cubi 2 - PerfectPro and take your electronic device back in hand. On this page are published all the documents necessary for the use of your device. Cubi 2 by PerfectPro.
USER MANUAL Cubi 2 PerfectPro
Operating instruction GB
natural_image
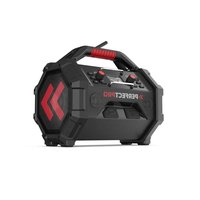
Front view of a Cuba 1600 microcontroller with display and control panel (no text or symbols on main body)iPod is a trademark of Apple Inc., registered in the U.S. and other countries.
"Made for iPod" means that an electrical accessory has been designed to connect specifically to iPod and has been certified by the developer to meet Apple performance standards.
Apple is not responsible for the operation of the device or its compliance with safety and regulatory standards.
Important Safety Instructions
- Read these instructions.
- Keep these instructions.
- Heed all warnings.
- Follow all instructions.
- Do not use this apparatus near water.
-
Clean only with dry cloth.
-
Do not block any ventilation openings. Install in accordance with the instructions.
-
Do not install near any heat sources such as radiators, heat registers, stoves or other apparatus (including amplifiers) that produce heat.
-
Protect the power cord from being walked on or pinched particularly at plug, convenience receptacles, and the point where they exit from the apparatus.
-
Only use attachments/accessories specified by the manufacturer.
-
Use only with the cart, stand, tripod, bracket, or table specified by the manufacturer, or sold with the apparatus. When a cart is used, use caution when moving the cart/apparatus combination to avoid injury from tip-over.
GB
- Unplug this apparatus during lightning storms or when unused for long periods of time.
- Refer all servicing to qualified service personnel. Servicing is required when the apparatus has been damaged in any way, such as power-supply cord or plug is damaged, liquid has been spilled or objects have fallen into the apparatus, the apparatus has been exposed to rain or moisture, does not operate normally, or has been dropped.
- To reduce the risk of fire or electric shock, do not expose this appliance to Rain or Moisture.
- The Shock Hazard Marking and Associated Graphical Symbol is provided on the back of unit.
- Apparatus shall not be exposed to dripping or splashing and no objects filled with liquids, shall be placed on the apparatus.
- For outdoors use, to avoid electric shock, use battery only during a raining day or the weather is wet.
- The power plug should be close to the radio, and easy to be approached that during the emergency, to disconnect the power from the radio, just unplug the power plug from the AC power slot.
- Notice: The changes or modifications not expressly approved by the party responsible for compliance could void the user's authority to operate the equipment.

GB
Controls and connections
① Volume control knob / Mute
② Tuning control knob / Seek / Select
③ Charge LED
④ Source button
⑤ Loudness button
⑥ LCD display
⑦ EQ button (Equalizer)
⑧ FM Stereo / Mono button
⑨ Remote control sensor
⑩ FM Antenna
⑪ iPod Compartment
⑫ Backlight button
⑬ Fast Forward / Preset 6
⑭ Play or Pause / Preset 5
⑮ Rewind / Preset 4
⑯ Speakers
⑰ Preset 3
⑱ Select / Preset 2
⑲ Menu / Preset 1
⑳ Power Standby (On/Off)
②1 Battery compartment
⑳ AC Power cord
②3 Aux In 1 socket
⑳ 10-14V DC In socket
⑲ USB / DC charging socket
⑳ Aux In 2 socket
⑳ Batteries switch
⑳ Back-up batteries compartment
⑲ Main battery compartment
③0 Passive bass speaker
③1 Storage compartment
③2 iPod compartment door locking clip
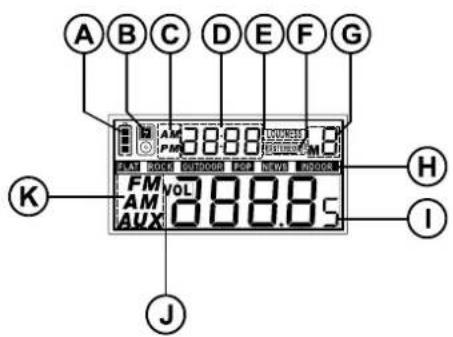
Display icons
Ⓐ Battery power
⑧ iPod indicator
© Radio band
(D) Clock
E Loudness indicator
⑤ Stereo indicator
© Preset indicator
⑧ EQ setting
① Frequency display
① Volume indicator
© Source indicator
text_image
A B C D E F G AM 38.88 PM 38.88 FM VOL AM 38.88 AUX K H I JGB
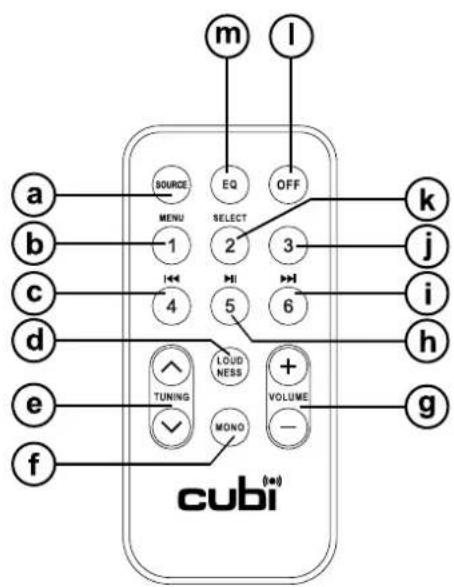
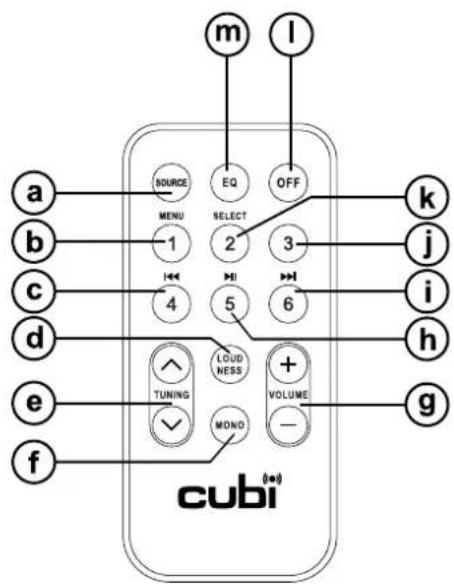
Remote control
a Source
b Menu / Preset 1
© Rewind / Preset 4
d Loudness
e Tune Up / Down
f FM Stereo / Mono
⑨ Volume Up / Down
① Play/Pause / Preset 5
① Fast Forward / Preset 6
j Preset 3
④ Select / Preset 2
① Power off
m EQ
text_image
m l a b c d e f SOURCE EQ OFF k 1 2 3 4 5 6 7 8 9 10 11 12 13 14 15 16 17 18 19 20 21 22 23 24 25 26 27 28 29 30 31 32 33 34 35 36 37 38 39 40 Tuning LOUD NESS VOLUME MONO - cubiRemote control functions
Many functions of the Cubi worksite radio can be operated using the remote control. Some operations require a longer press of the button. In this case simply keep your finger held on the remote control button for 2-3 seconds until the display on the radio shows that the command has been accepted.
Before the first operation: please remove the small transparent foil from the battery holder to activate the battery.
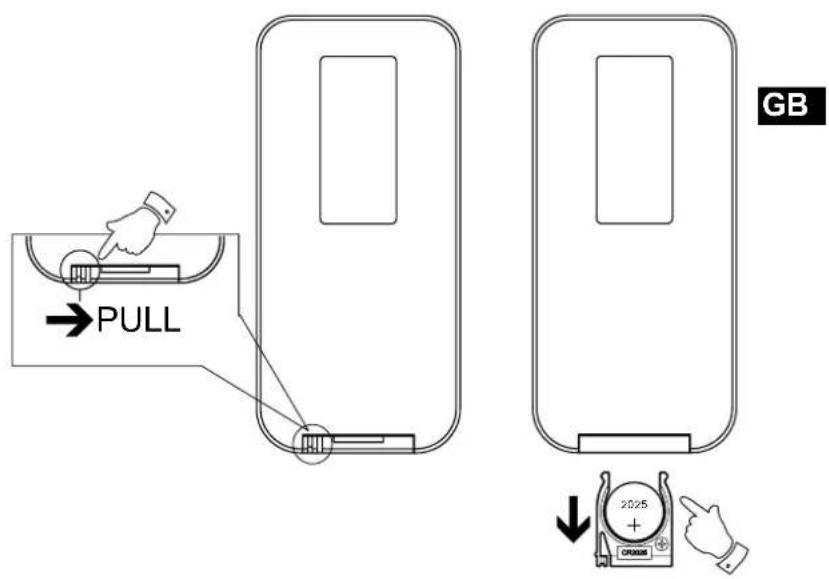
Remote control battery replacement
-
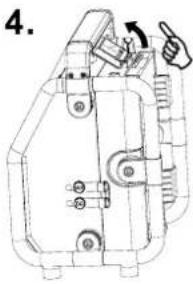
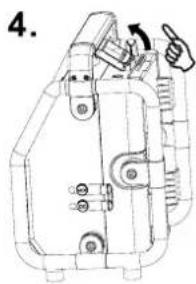
Open the battery holder by pulling the holder out in direction shown.
-
Remove battery from holder.
-
Replace battery (CR2025 or equivalent) ensuring that the positive side of the battery faces you with holder positioned as shown.
-
Replace the battery holder.
text_image
PULL GB 2025 +IMPORTANT:
The batteries should not be exposed to excessive heat such as sunshine, fire or the like. After use, disposable batteries should if possible be taken to a suitable recycling center. On no account should batteries be disposed of by incineration.
Power the Radio
A. Battery Operation
- Installing the batteries, first pull out the battery compartment locker to release battery compartment following the diagram shown on the right. There are the main battery pack compartment and the back up battery compartment.
Note:
Before you insert the batteries, if you use non-rechargeable batteries, make sure the NiMH/NiCad/Alkaline switch which located inside the battery compartment is switched to Alkaline position. If you use rechargeable batteries, make sure to switch NiMH/NiCad/Alkaline switch to NiMH/NiCad position.
-
Insert 6 x D size (UM-1) battery into the compartment. Ensure the battery is inserted in accordance with the diagram shown on page 10.
-
Insert 2 x AA size (UM-3) battery into the back up battery compartment.
Note:
The back up battery is for time and memory station back up during power failure. It is suggested to replace the back up battery every six months to avoid battery leakage.
Run time of the radio on batteries varies strongly depending on quality and capacity (mAh) of the batteries, temperature, volume level etc.
- Close the battery cover and lock the compartment locker back into place.
If the radio is not to be used for any extended period of time, it is recommended that the batteries are removed from the radio. Reduced power, distortion and a “stuttering sound” or low battery sign ☐ flashing on the display are all signs that the batteries need replacing or recharging.
IMPORTANT:
The batteries should not be exposed to excessive heat such as sunshine, fire or the like. After use, disposable batteries should if possible be taken to a suitable recycling center. On no account should batteries be disposed of by incineration.
GB
natural_image
Technical line drawing of a mechanical component with no visible text or symbols
natural_image
Technical line drawing of a mechanical device with no visible text or symbols
text_image
3.
text_image
4.B. AC Operation
Before plug the AC power cord into the AC socket, be sure the voltage is correct. If you have batteries in the radio and connect the AC power cord into the AC socket, the batteries will automatically be disconnected.
text_image
5.Charging the batteries
Reduced power, distortion and a “stuttering sound” or low battery sign “☐” flashing on the display are all the signs that the batteries need to be recharged if you use rechargeable batteries to power the radio.
Note:
The batteries can be charged only when the radio is off.
Connect the AC power cord into the AC socket to charge the batteries. Be sure the battery type switch is set to MiMH / NiCad position.
Battery charging function of this radio only applies to the 6 D-size (UM-1) batteries and not to the AA-size (UM-3) back up batteries.
GB
When the batteries are being charged, the LED charging indicator above the STANDBY button will turn red. It will turn green when the batteries are fully charged.
Charging time can take up to approx. 10 hours depending on the capacity of the rechargeable batteries. Only charge batteries in room temperature between 5 degrees C and 35 degrees C. In lower or higher temperature full charge cannot be achieved and there may be damage to the batteries or the receiver.
Charge new batteries fully the first time before first use. This can take longer depending on the capacity of the rechargeable batteries.
Do not use a mix of old and new rechargeable batteries. Do not use a mix of full and empty rechargeable batteries. Do not use batteries that have a different mAh capacity. Do not use damaged or leaking batteries.
Charging the batteries in Car
The batteries can also be charged in the radio using a 12V car (cigarette lighter) adaptor, voltage range 10-14V, maximum current of 2A, DC dimension 2.0 mm inner diameter with positive pole and 6.3 mm outer diameter with negative pole. To charge, connect the adaptor to the car (cigarette lighter) socket and DC In socket located on the side of the receiver.
Setting the clock time
- Press and hold the Tuning knob, and the clock type 12H / 24H will begin flashing. Rotate the Tuning knob rightward / leftward to choose the desired clock format.
- Press down Tuning knob again and the hour digits will begin flashing. Rotate the Tuning knob to change the hour digits as needed.
- Press and release the Tuning knob to confirm the hour setting, and the minute digits on the display will flash. Rotate the Tuning knob to change the minute digits as needed.
- Press and release the Tuning knob to confirm the minutes setting and to complete the clock setting. The radio will save your settings. The display will show saved time after clock time setting is completed.
Note:
The clock time setting function can not be operated by remote control.
LCD illumination
When you use AC outlet to power the radio, the LCD display will be always illuminated by pressing any buttons unless you press the BACKLIGHT button to turn off the illumination, or press the STANDBY button to turn the radio off. If you press the BACKLIGHT button when the power is off, the LCD display illumination will turn itself off automatically after 12 seconds.
When using batteries to power the radio, pressing any button will turn on the LCD illumination for 12 seconds when the power is on. Pressing the BACKLIGHT button when the power is on and the LCD display will always be illuminated. You may press the BACKLIGHT button to turn off the LCD illumination. Pressing any button when the power is off, the LCD illumination will only last for 12 seconds.
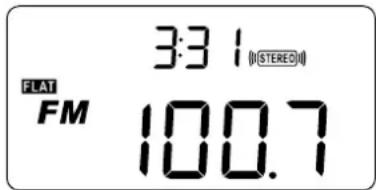
Operating your radio – Manual tuning
- Press the STANDBY button to switch on your radio.
- Press the SOURCE button to select FM band and stand up the rubber antenna properly to get best FM reception.
- Rotate the Tuning control knob to tune required frequency in the increment of 50 kHz.
- Select required EQ and stereo / mono mode.
- A stereo symbol will appear on the LCD display if a stereo broadcasting station is found.
text_image
3:31 (STEREO) FLAT FM 100.7- Rotate the Volume control knob to get required sound level.
- To turn off the radio, press the STANDBY button. Display will show local time only.
3:32
Search tuning FM
- Press the STANDBY button to turn radio on and select FM band by pressing the SOURCE button as described.
- Stand up the FM rubber antenna properly to get best reception.
- Press the Tuning control knob, and the radio will seek forward and stop automatically when it finds a radio station with good signal. The radio will seek forward for the next available station if pressing down the Tuning control knob again.
GB
FM stereo / mono
- If the FM station is received with a weak or not optimal signal some hiss may be audible. To reduce the hiss press and release the STEREO button so that the Stereo indicator on the display is cancelled. Your radio will switch to mono mode.
- To return to stereo mode press and release the STEREO button so that Stereo indicator on the display is visible. The radio will switch to stereo mode.
This Stereo / mono switching function is only available in the FM mode.
Presetting stations
You may store your preferred FM radio stations to the preset station memories (1 to 6). The procedure for setting presets and using them to tune stations is described below.
- Press the STANDBY button to turn on the radio.
- Press the SOURCE button and tune to the required station as previously described.
- Press and hold the required Preset button (1\~6) until radio beeps and the display shows corresponding "MX" on the upper right corner.

text_image
3:37 (STEREO) M3 FLAT FM 99.7- Repeat this procedure for the remaining presets as you wish.
- Stations stored in preset memories may be overwritten by following above procedures if required.
Recalling a preset station
- Press the STANDBY button to turn on the radio.
- Press the SOURCE button to select FM band.
- Momentarily press the required Preset button (1\~6) to cause your radio to tune to the station stored in preset memory.
iPod docking
To open the iPod compartment, softly push the top of the transparent compartment door a little inside with your thumb while simultaneously lifting the door locking clip upwards with your other thumb.
Your radio has an iPod docking facility which allows you to play digital audio files and soundtracks held on your iPod directly.
Your radio uses the iPod Universal Dock connector developed for use with iPods. Recent models of iPod are supplied with Universal Dock Adapter inserts which ensure correct alignment of the iPod with the electrical connector.
GB
Important:
The radio does not support iPod 3rd generation (build 2003-2004). To avoid possible damage to your iPod, do not use your iPod with the product without the correct adapter fitted to the radio.
Always keep the iPod compartment door shut and lock the compartment door locking clip after docking your iPod.
Charging your iPod
- Place the iPod onto the Universal Dock Adapter into the iPod docking compartment.
- Press the STANDBY button to switch on your radio. Press SOURCE button until “iPod” shows on the display. Your radio is able to recharge your iPod’s internal battery. The iPod indicator will appear charging icon on the LCD display when the source is under Aux In 1 / 2 and iPod mode. Your iPod won’t be charged under FM and Standby mode.

text_image
FLAT 3:39 iPodNavigating your iPod
To navigate your iPod menus to make selections or to change settings, you should use your iPod controls. The radio controls can be used for Menu / Select, Previous / Next, Fast Rewind / Fast Forward and Play / Pause functions.
- Use the Menu button to navigate to higher level menus on your iPod.
- Use the Tuning control knob as required to move up or down a menu screen on your iPod.
- Press the SELECT button to choose the highlighted on screen menu item. If this item is a lower level menu item, you may then navigate further using the Tuning control knob and SELECT buttons.
GB
Playing an audio file on your iPod
- When you have found the required item, use the SELECT button on the radio to start the iPod playing.
- Adjust the volume to the required setting using the Volume control knob on your radio.
- To pause playback press the Play / Pause button. To resume playback press the Play / Pause button again.
- iPods do not have a Stop button (they use the Pause function). To play an alternative selection, use the iPod menus to make the selection using the Play/Pause button to stop playing the current item if needed.
- If it was previously playing, your iPod will switch on and continue playing from where it was previously stopped.
Search function
- Press and release either the Fast-Forward or Rewind buttons to start playing the next or previous track.
- While the iPod is playing, press and hold the Fast-Forward or Rewind buttons to move through the current file or track, and then release the button when the desired point in the file or track is reached.
Mute function
- Press the Volume knob to mute the speaker output, the LCD will show "VOL 0" flickeringly.

text_image
VOL 0- Press the Volume knob again to turn off the mute function, it will gradually release the mute function and return to the previous volume level.
- The mute function can also be disabled by rotating the Tuning control knob or pressing the SOURCE button.
GB
The sound on your radio can be adjusted to suit your personal taste for the songs you are listening to. It has six preset equalizer modes.
Press the EQ button to cycle through the various modes:
a. Flat – no tone modification is applied.
b. Rock
c. Outdoor
d. Pop
e. News
f. Indoor
Note:
The influence of the EQ settings on your iPod will also be audible during playback of iPod from docking station (iPod mode).
Loudness On/Off
Press the Loudness button to get compensation on lower and higher frequency. The effect will be most audible when the radio is in lower volume level. Display will appear LOUDNESS when Loudness function is applied.

text_image
329 LOUDNESS (STERED) FLAT FM 94.3Aux In Socket
There are 2 Aux In sockets in this radio to connect other audio sources like MP3 player or computer to listen to the audio program via the speakers of this radio.
Aux In-1 is located on the side while Aux In-2 is located inside the storage compartment.
Remove the rubber cover (Aux In-1) and connect the audio source with a 3.5 mm audio connector wire.
GB
Release the battery compartment locker and pull down the cover to find Aux In-2 socket, connect the audio source with a 3.5 mm audio connector wire.
When radio is on, repeatedly press and release SOURCE button to select AU 1 (Aux In-1) or AU 2 (Aux In-2), rotate the volume control to play the audio program.
Make sure the Aux In-1 rubber cover on the side is closed well after use to prevent moist and dirt from entering the radio.
Power-out only USB Socket (not for playback of audio files on USB stick)
There is a power-out USB socket of 5V / 0.5A located inside the storage compartment for charging purpose only. Charging from this socket only takes place while your radio is in Aux In 1 or Aux In 2 mode.
Important:
Ensure the specification of your external device such as mobile phone, mp3 player or iPod is compatible with the radio. Please read instruction manual of your external device before charging.
Specifications
Frequency range: FM 87.50 – 108 MHz
AC Power: AC 100 - 240V/ 50/60Hz /40W
Batteries:
ALKALINE battery
6 X D size (UM-1) for main battery
2 X AA size (UM-3) for backup battery
Rechargeable battery
Ni-MH or Ni-Cad 6 X D size
GB
Output Power:
4.5W 10% T.H.D. x 2 channels @ 1 kHz @ battery 9V (Alkaline)
6W 10% T.H.D. x 2 channels @ 1 kHz @ DC 12V
8W 10% T.H.D. x 2 channels @ 1 kHz @ AC 100 – 240V

If at any time in the future you should need to dispose of this product please note that: Waste electrical products should not be disposed of with household waste. Please recycle where facilities exist. Check with your Local Authority or retailer for recycling advice. (Waste Electrical and Electronic Equipment Directive)


NL
text_image
A B C D E F G AM 38.88 L0000 PM 38.88 M0 FM VOL 38.88 S AM AUX K H I JNL
Afstandsbediening
a Source
b Menu / Preset 1
© Achteruitspoelen / Preset 4
(d) Loudness
© Afstemmen Omhoog / Omlaag
f FM Stereo / Mono
⑧ Volume Omhoog / Omlaag
① Play/Pause / Preset 5
① Vooruitspoelen / Preset 6
j Preset 3
k Select / Preset 2
① Power uit
m EQ
flowchart
graph TD
    m --> SOURCE
    l --> EQ
    SOURCE --> MENU
    MENU --> SELECT
    SELECT --> 2
    2 --> 3
    3 --> 5
    5 --> LOUDNESS
    LOUDNESS --> TUNING
    LOUDNESS --> VOLUME
    VOLUME --> MONO
    MONO --> +
    +
    +
    + --> -
    -
    -
    -
    -
    -
    -
    -
    -
    -
    -
    -
    -
    -
    -
    -
    -
    -
    -
    -
    -
    -
    -
    -
    -
    -
    -
    -
    -
    -
    -
    -
    -
    -
    -
    -
    -
    -
    -
    -
    -
    -
    -
    -
    -
    -
    -
    -
    -
    -
    -
natural_image
Technical line drawing of a mechanical component with no visible text or symbols
natural_image
Technical line drawing of a mechanical device with no visible text or symbols
text_image
3.
text_image
4.text_image
3:31(STEREO) FLAT FM 100.7text_image
3:37 (STEREO) M 3 FLAT FM 99.72 X maat AA (UM-3) back-up batterijen
Oplaadbare batterijen
Ni-MH of Ni-Cad 6 X maat D
NL
Vermogen:
4.5W 10% T.H.D. x 2 kanalen @ 1 kHz @ batterij 9V (Alkaline)
6W 10% T.H.D. x 2 kanalen @ 1 kHz @ DC 12V
8W 10% T.H.D. x 2 kanalen @ 1 kHz @ AC 100 – 240V

text_image
A B C D E F G AM 38.88 L0000 PM 20000 PM 10000 PM 5000 FM VOL 888.8 S AM AUX K H I JD
Fernbedienung
natural_image
Technical line drawing of a mechanical component with no visible text or symbols
natural_image
Technical line drawing of a mechanical device with no visible text or symbols
text_image
3.
text_image
4.
B. Netzbetrieb
text_image
3:31 (STEREO) FLAT FM 100.7text_image
A B C D E F G AM PM FM VOL AM AUX 888.85 K H I JFjärrkontroll
natural_image
Technical line drawing of a mechanical component with no visible text or symbols
natural_image
Technical line drawing of a mechanical device with no visible text or symbols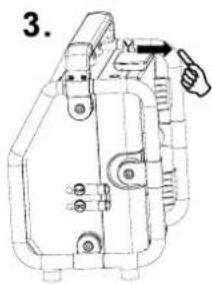
text_image
3.
text_image
4.s
B. AC drift
text_image
3:3 I (STEREO) FLAT FM 100.7natural_image
Technical line drawing of a mechanical device with no visible text or symbols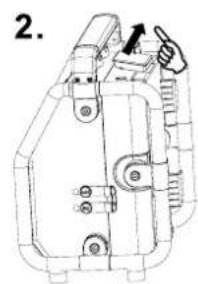
natural_image
Technical line drawing of a mechanical device with no visible text or symbols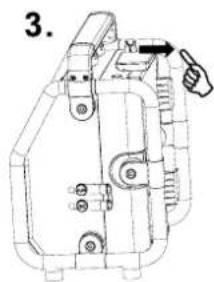
text_image
3.
text_image
4.