
Ixus 127 HS - Camera CANON - Free user manual and instructions
Find the device manual for free Ixus 127 HS CANON in PDF.


| Product type | Compact digital camera |
| Brand | Canon |
| Model | Ixus 127 HS |
| Dimensions (L x H x P) | Approx. 95.2 x 56.8 x 22.3 mm |
| Weight | Approx. 130 g (with battery and memory card) |
| Power supply | Rechargeable battery NB-11L, charger CB-2LDE |
| Compatible memory cards | SD, SDHC, SDXC (not supplied) |
| Main features | Auto mode, optical zoom, video recording, face detection, image stabilizer |
| Optical zoom | 8x (28-224 mm equivalent) |
| Sensor resolution | 16 megapixels |
| Screen | 2.7-inch LCD screen |
| Connectivity | USB 2.0, video output |
| Maintenance and cleaning | Use a soft, dry cloth for the lens and screen. Avoid solvents. |
| Safety | Do not expose to water or excessive heat. Use only Canon batteries and chargers. |
| Spare parts and repairability | Battery, charger, USB cable available. Repair by authorized Canon center. |
| General information | Manufactured by Canon Inc. Manual available in multiple languages. Compliant with WEEE directive. |
Frequently Asked Questions - Ixus 127 HS CANON
User questions about Ixus 127 HS CANON
0 question about this device. Answer the ones you know or ask your own.
Ask a new question about this device
Download the instructions for your Camera in PDF format for free! Find your manual Ixus 127 HS - CANON and take your electronic device back in hand. On this page are published all the documents necessary for the use of your device. Ixus 127 HS by CANON.
USER MANUAL Ixus 127 HS CANON
Before use, make sure the following items are included in the package. If anything is missing, contact your camera dealer.
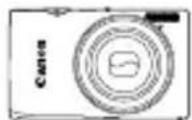
Camera Battery Pack NB-11L (with terminal cover)
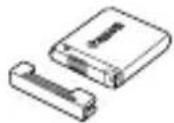

Battery
Charger
CB-2LDE

Interface Cable
IFC-400PCU
Wrist Strap
WS-800 ^*1

Getting Started (This Guide)

DIGITAL CAMERA Manuals Disk ^2
DIGITAL CAMERA
Solution Disk ^*3

Warranty System Booklet
*1 For attachment instructions, refer to the Camera User Guide in the DIGITAL CAMERA Manuals Disk.
*2 Contains the Camera User Guide and ImageBrowser EX User Guide.
*3 Contains software used with the camera. For installation instructions, refer to the Camera User Guide, and for instructions on use, refer to the ImageBrowser EX User Guide.
Compatible Memory Cards
A memory card is not included.
The following memory cards (sold separately) can be used, regardless of capacity. For details on the number of shots and recording time per memory card, refer to “Specifications” in the Camera User Guide.
- SD memory cards *
- SDHC memory cards *
- SDXC memory cards
- Eye-Fi cards
* Conforms to SD specifications. However, not all memory cards have been verified to work with the camera.
About Eye-Fi Cards
This product is not guaranteed to support Eye-Fi card functions (including wireless transfer). In case of an issue with an Eye-Fi card, please check with the card manufacturer.
Also note that an approval is required to use Eye-Fi cards in many countries or regions. Without approval, use of the card is not permitted. If it is unclear whether the card has been approved for use in the area, please check with the card manufacturer.
Initial Preparations
Charging the Battery

1 Remove the cover and insert the battery.
After aligning the ▲ marks on the battery and charger, insert the battery by pushing it in ( )and down ( ). ②
natural_image
Diagram of a device with a plug inserted into a socket, showing an arrow pointing to the socket (no text or symbols present)2 Charge the battery.
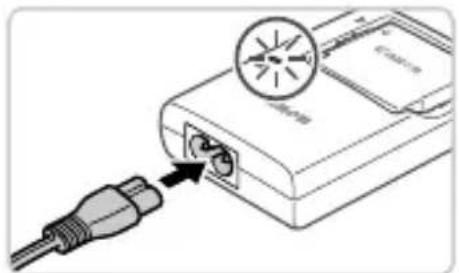
Once you connect the power cord to the charger and plug the cord into a power outlet, the lamp will light up orange.
- When charging is finished, the lamp turns green. Remove the battery.
For details on charging time and the number of shots or recording time available with a fully charged battery, refer to "Specifications" in the Camera User Guide.
Inserting the Battery and Memory Card
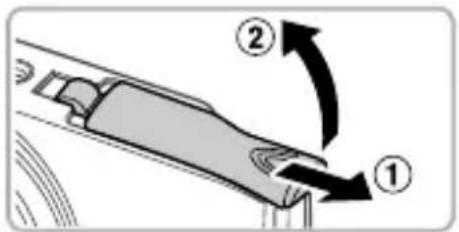
1 Open the cover.
Slide the cover(1) and open it ( )②

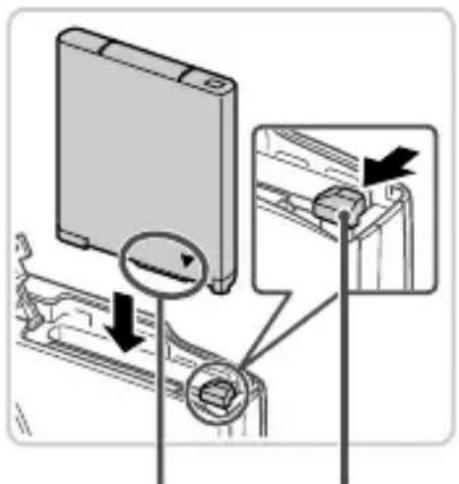
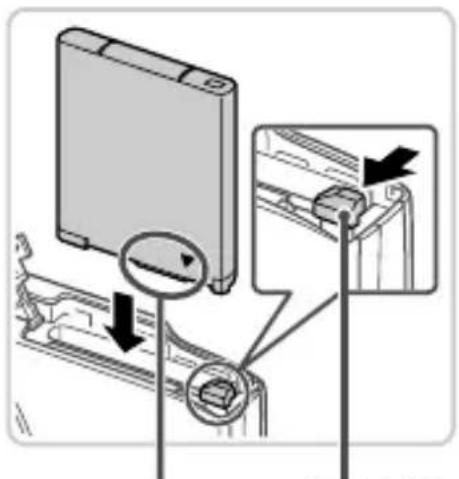
2 Insert the battery.
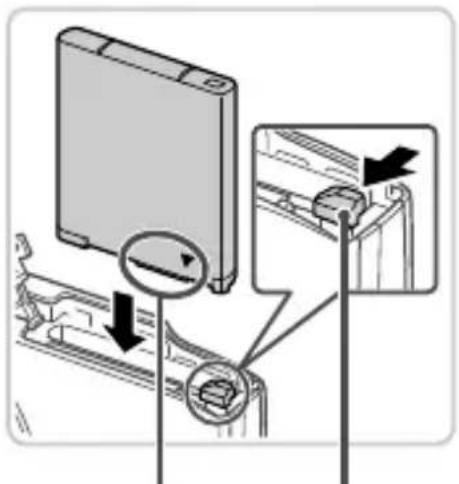
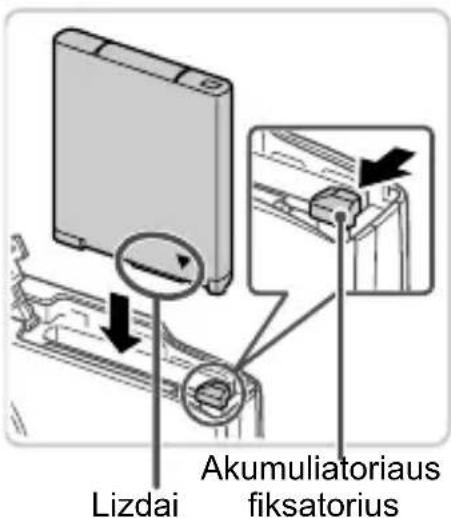
While pressing the battery lock in the direction of the arrow, insert the battery as shown and push it in until it clicks into the locked position.
To remove the battery, press the battery lock in the direction of the arrow.
Battery LockT
Initial Preparations
Terminals
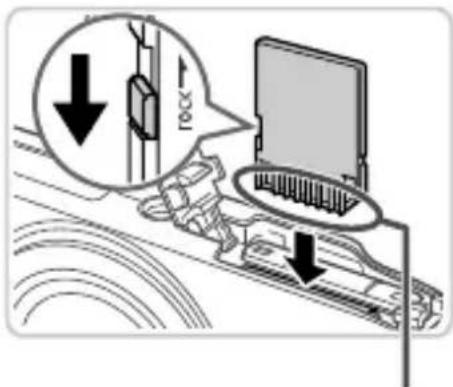
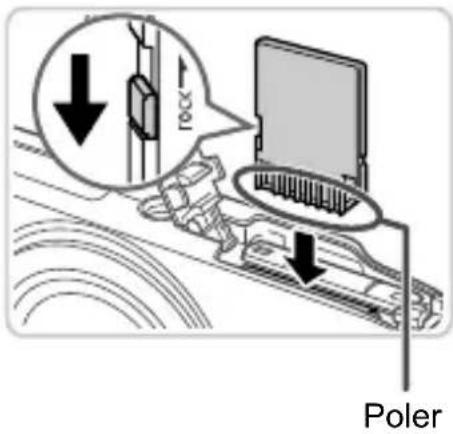
Check the card's write-protect tab and insert the memory card.
Recording is not possible on memory cards with a write-protect tab when the tab is in the locked (downward) position. Slide the tab up until it clicks into the unlocked position.
- Insert the memory card facing as shown until it clicks into the locked position.
To remove the memory card, push it in until you feel a click, and then slowly release it.
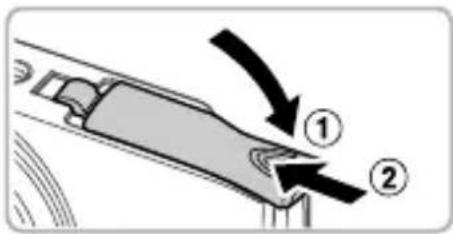
Close the cover.
- Lower the cover(1) and hold it down as you slide it, until it clicks into the closed position (2).
Setting the Date and Time
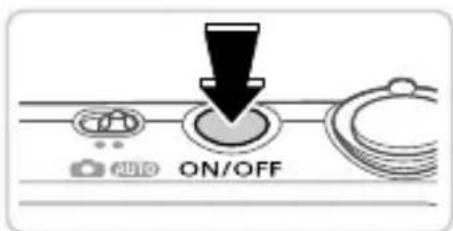
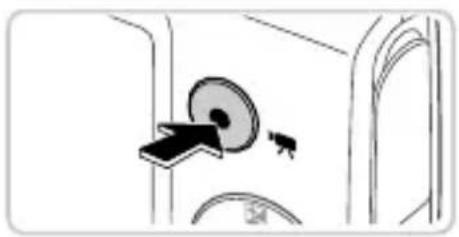
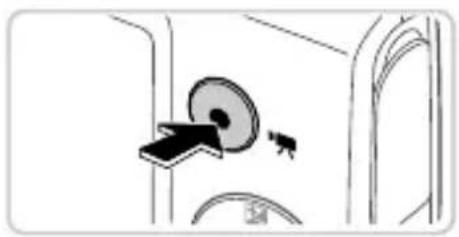
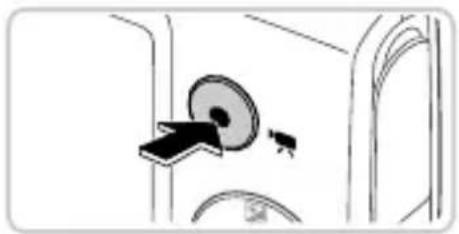
Turn the camera on.
- Press the ON/OFF button.
The Date/Time screen is displayed.
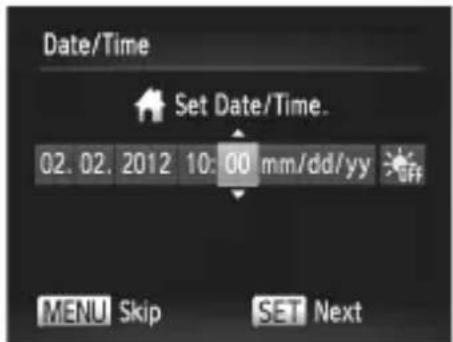
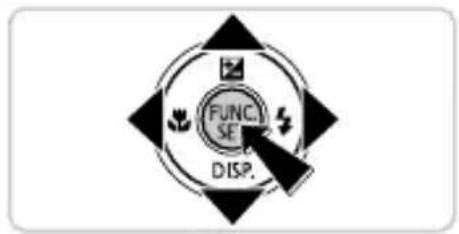
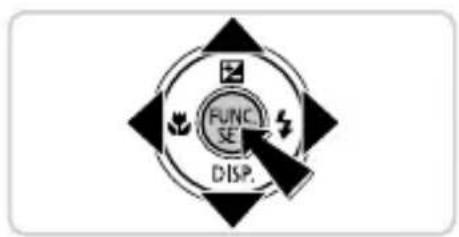
Set the date and time.
- Press the ◀▶ buttons to choose an option.
- Press the ▲▼ buttons to specify the date and time.
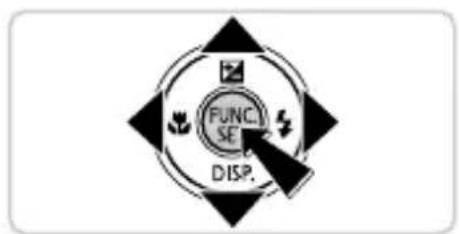
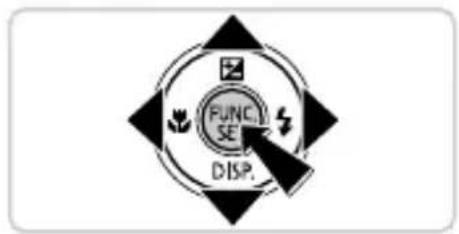
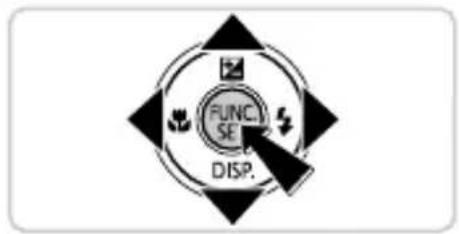
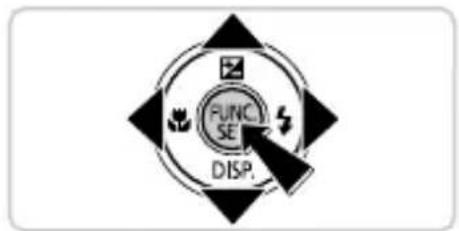
- When finished, press the FUNC SET button.

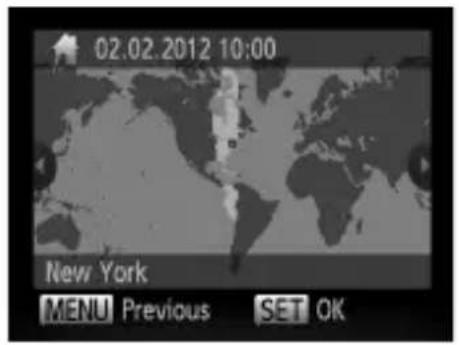
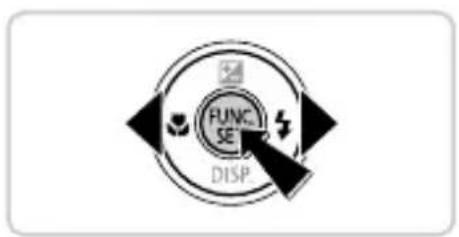
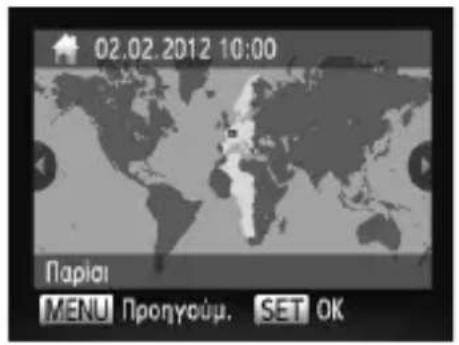
3 Set the local time zone.
- Press the ◀▶ buttons to choose your local time zone.
- Press the Ⓗ button when finished. After a confirmation message, the setting screen is no longer displayed.
To turn off the camera, press the ON/OFF button.
Changing the Date and Time
To adjust the date and time once you have set it, do the following.
1 Press the MENU button.
2 Move the zoom lever to choose the ƒ tab.
3 Press the ▲▼ buttons to choose [Date/Time], and then press the Ⓗ FUNC. SET button.
4 Follow step 2 again to complete the setting.
5 Press the MENU button.
Display Language
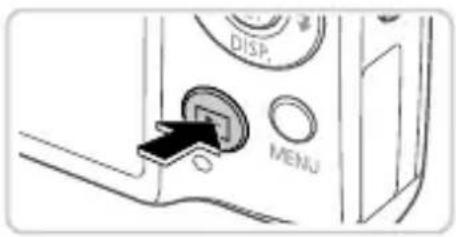
Enter Playback mode.
- Press the ▶ button.
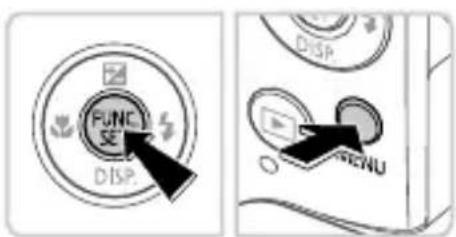
Access the setting screen and choose a language.
- Press and hold the FUNC SET button, and then immediately press the MENU button.
- Press the ▲▼◀▶ buttons to choose a language, and then press the Ⓗ️ button.
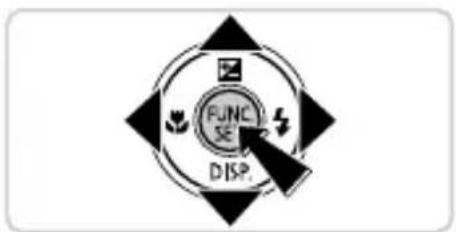
Trying the Camera Out
Shooting

Turn the camera on and enter AUTO mode.
- Press the ON/OFF button.
Set the mode switch to AUTO.
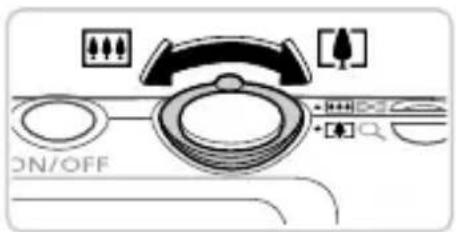
Compose the shot.
To zoom in and enlarge the subject, move the zoom lever toward [▲] (telephoto) as you watch the screen, and to zoom away from the subject, move it toward [▲▲] (wide angle).

natural_image
Diagram showing a device with a circular component and an arrow pointing to it, no text or symbols presentShoot still images.
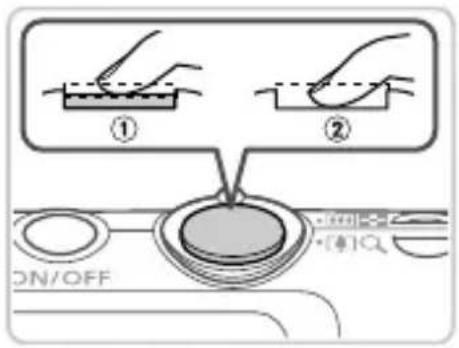
- Press the shutter button lightly (1).
The camera beeps twice after focusing, and AF frames are displayed to indicate image areas in focus. Press the shutter button all the way down ( )
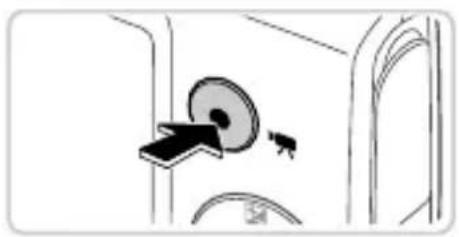
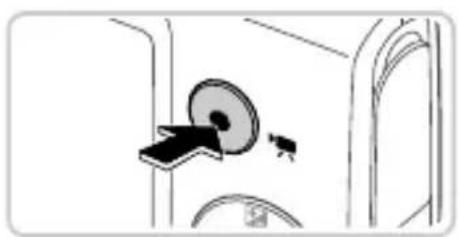
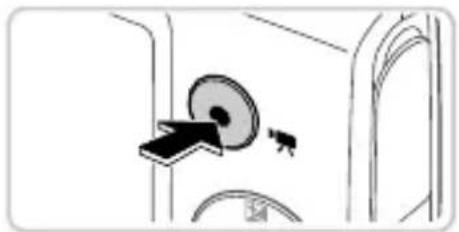
Shoot movies.
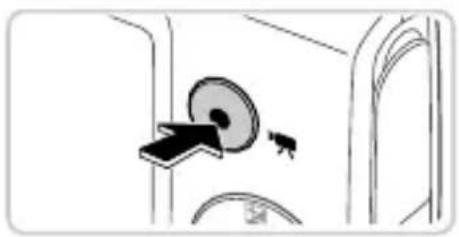
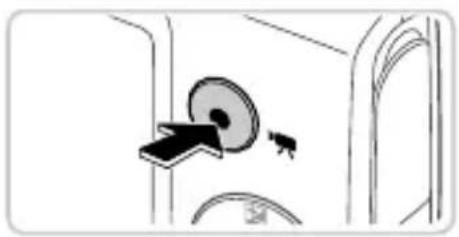
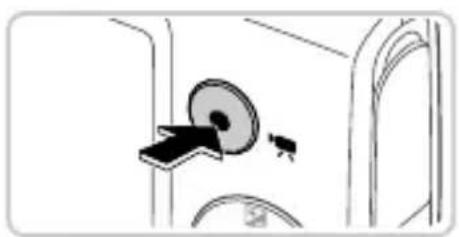
- Press the movie button to start shooting, and press it again to stop.
Viewing
Enter Playback mode.
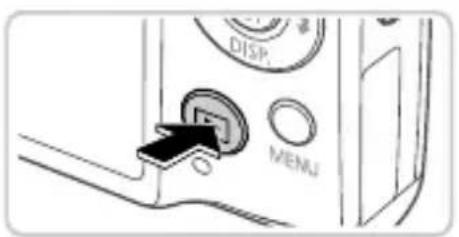
- Press the ▶ button.
Browse through your images.
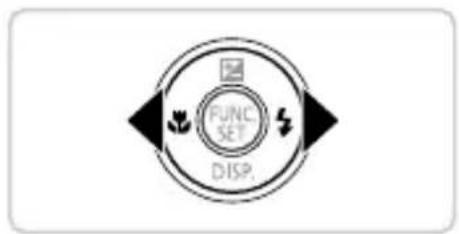
To view the previous or next image, press the ◀▶ buttons.
Movies are identified by a icon. To play movies, go to step 3.
Play movies.
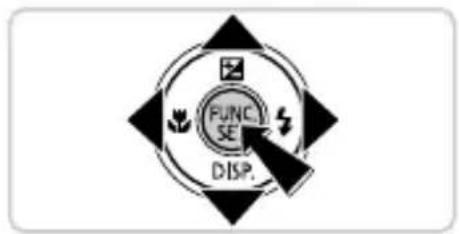
- Press the ⬤️ button, press the ▲▼ buttons to choose , and then press the ⬤️ button again.
To adjust the volume, press the ▲▼ buttons. - Playback now begins, and after the movie is finished, SET is displayed.
Erasing the Images
To erase the image you chose in step 2, do the following. Note that erased images cannot be recovered.
1 Press the Ⓗ️ button, press the ▲▼ buttons to choose ☑, and then press the Ⓗ️ button again.
2 After [Erase?] is displayed, press the ◀▶ buttons to choose [Erase], and then press the ⬤️ button.
Viewing the Manuals
Refer to the manuals on the included DIGITAL CAMERA Manuals Disk for a more in-depth understanding of the camera, or when using software on the DIGITAL CAMERA Solution Disk. Adobe Reader is required to view the PDF manuals. Microsoft Word/Word Viewer can be installed to view the Word manuals (required only for manuals for the Middle East).

natural_image
Illustration of a laptop with an arrow pointing to a CD icon (no text or symbols present)Insert the DIGITAL CAMERA Manuals Disk in the computer's CD-ROM drive.
- Follow the instructions displayed to view the manual.
| Camera User Guide | Explains how to use all functions of this camera, lists product specifications, and explains procedures for installing the included software. |
| ImageBrowser EX User Guide | Instructions for the included software |
European Union (and EEA) only.

natural_image
Two identical hand-drawn trash bin symbols crossed with diagonal lines, no text or labels present.These symbols indicate that this product is not to be disposed of with your household waste, according to the WEEE Directive (2002/96/EC), the Battery Directive (2006/66/EC) and/or your national laws implementing those Directives. If a chemical symbol is printed beneath the symbol shown above, in accordance with the Battery Directive, this indicates that a heavy metal (Hg = Mercury, Cd = Cadmium, Pb = Lead)
is present in this battery or accumulator at a concentration above an applicable threshold specified in the Battery Directive.
This product should be handed over to a designated collection point, e.g., on an authorized one-for-one basis when you buy a new similar product or to an authorized collection site for recycling waste electrical and electronic equipment (EEE) and batteries and accumulators. Improper handling of this type of waste could have a possible impact on the environment and human health due to potentially hazardous substances that are generally associated with EEE.
Your cooperation in the correct disposal of this product will contribute to the effective usage of natural resources.
For more information about the recycling of this product, please contact your local city office, waste authority, approved scheme or your household waste disposal service or visit www.canon-europe.com/environment.
(EEA: Norway, Iceland and Liechtenstein)
CAUTION
RISK OF EXPLOSION IF BATTERY IS REPLACED BY AN INCORRECT TYPE.
DISPOSE OF USED BATTERIES ACCORDING TO LOCAL REGULATION.
CANON INC.
30-2, Shimomaruko 3-chome, Ohta-ku, Tokyo 146-8501, Japan CANON EUROPA N.V.
Bovenkerkerweg 59-61, 1185 XB Amstelveen, The Netherlands
© CANON INC. 2012 PRINTED IN THE EU
Lieferumfang
natural_image
Diagram of a plug inserted into a device with a circular component above it, showing an arrow pointing to the plug (no text or symbols present)Anschlüsse
natural_image
Diagram of a door with a circular component and an arrow pointing to it, no text or symbols present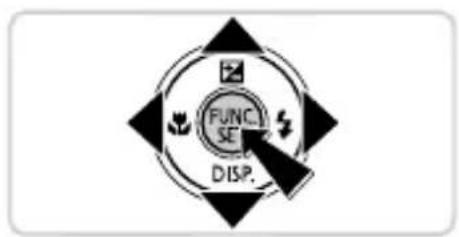
natural_image
Illustration of a laptop with an arrow pointing to a CD icon (no text or symbols present)natural_image
Two identical hand-drawn trash bin symbols crossed with diagonal lines, no text or labels present.30-2, Shimomaruko 3-chome, Ohta-ku, Tokyo 146-8501, Japan
CANON EUROPA N.V.
Bovenkerkerweg 59-61, 1185 XB Amstelveen, The Netherlands
Contenu du coffret
natural_image
Diagram of a device with a plug inserted into a socket, showing wiring and a circular component (no text or symbols)Chargez la batterie.
Bornes

natural_image
Diagram showing a device with a circular component and an arrow pointing to it, no text or symbols present.Prenez des photos.

Activez le mode de lecture.
natural_image
Illustration of a laptop with a CD icon showing an arrow pointing to it (no text or symbols present)natural_image
Two identical hand-drawn trash bin symbols crossed with diagonal lines, no text or labels presentnatural_image
Diagram of a device with a plug inserted into a socket, showing an arrow pointing to the socket (no text or symbols present)Cargue la batería.
Abra la tapa.
Deslice la tapa① y ábrala ( )②

Terminales
Cierre la tapa.
natural_image
Diagram showing a device with a circular component and an arrow pointing to it, no text or symbols present
natural_image
Illustration of a laptop connected to an CD/DVD icon (no text or symbols)natural_image
Two identical hand-drawn trash bin symbols crossed with diagonal lines, no text or labels present.30-2, Shimomaruko 3-chome, Ohta-ku, Tokyo 146-8501, Japan
CANON EUROPA N.V.
Bovenkerkerweg 59-61, 1185 XB Amstelveen, The Netherlands
natural_image
Diagram of a device with a plug inserted into a socket, showing an arrow pointing to the socket (no text or symbols present)Terminali
3 Scattare le foto.
natural_image
Diagram of a door with a circular component and a black arrow pointing to it, no text or symbols presentnatural_image
Illustration of a laptop connected to an CD/DVD icon (no text or symbols)natural_image
Two identical hand-drawn trash bin symbols crossed with diagonal lines, no text or labels present.© CANON INC. 2012 STAMPATO NELL'UE
natural_image
Diagram of a device with a plug inserted into a socket, showing wiring and a circular component (no text or symbols)Laad de batterij op.
Open het klepje.
Plaats de batterij.
Aansluitpunten
Sluit het klepje.
Schakel de camera in.

natural_image
Diagram of a door with a circular component and a black arrow pointing to it, no text or symbols presentMaak foto's.

natural_image
Illustration of a laptop with an arrow pointing to a CD icon (no text or symbols present)natural_image
Two identical hand-drawn trash bin symbols crossed with diagonal lines, no text or labels present.natural_image
Diagram of a device with a plug inserted into a socket, showing an arrow pointing to the socket (no text or symbols present)1 Abra a tampa.
Deslize a tampa ① ) e abra-a ( )2
2 Insira a bateria.
Terminais
Fecha a tampa.

natural_image
Diagram of a door mechanism with a circular component and directional arrows (no text or symbols)Tire fotografias.
natural_image
Illustration of a laptop with an arrow pointing to a CD icon (no text or symbols present)natural_image
Two identical hand-drawn trash bin symbols crossed with diagonal lines, no text or labels present.© CANON INC. 2012 IMPRESSO NA UE
Kassens indhold
natural_image
Diagram of a device with a plug inserted into a socket, showing an arrow pointing to the socket (no text or symbols present)Oplad batteriet.
Åbn dækslet.
Isæt batteriet.
- Skub batterilåsen i pilens retning, isæt batteriet som vist, og tryk på det, indtil det klikker på plads i låst position. - Tryk batterilåsen i pilens retning for at fjerne batteriet.
BatterilåsPc
Første klargøring


Luk dækslet.
natural_image
Diagram of a door with a circular component and a black arrow pointing to it, no text or symbols presentTag stillbilleder.
Skift til afspilningstilstand.
Tryk på knappen ▶.
Gennemse billederne.
natural_image
Illustration of a laptop connected to an CD/DVD icon (no text or symbols)natural_image
Two identical hand-drawn trash bin symbols crossed with diagonal lines, no text or labels present.© CANON INC. 2012 TRYKT | EU
natural_image
Diagram of a device with a plug inserted into a socket, showing an arrow pointing to the socket (no text or symbols present)Ladda batteriet.
Öppna luckan.
Sätt i batteriet.
Kontakter
Stäng luckan.
3 Ställ in den lokala tidszonen.

natural_image
Diagram showing a device with a circular component and an arrow pointing to it, no text or symbols presentTa stillbilder.

natural_image
Illustration of a laptop connected to an CD/DVD icon (no text or symbols)natural_image
Two identical hand-drawn trash bin symbols crossed with diagonal lines, no text or labels present.© CANON INC. 2012 TRYCKT I EU
Pakkauksen sisältö
natural_image
Diagram of a device with a plug inserted into a socket, showing an arrow pointing to the socket (no text or symbols present)2 Lataa akku.
Avaa kansi.
2 Aseta akku.
Liitännät
Sulje kansi.

natural_image
Diagram showing a device with a circular component and an arrow pointing to it, no text or symbols present
natural_image
Illustration of a laptop connected to an CD and an arrow indicating data transfer (no text or symbols present)natural_image
Two identical hand-drawn trash bin symbols crossed with diagonal lines, no text or labels present.© CANON INC. 2012 PAINETTU EU:SSA
Obsah balení
natural_image
Diagram of a device with a plug inserted into a socket, showing an arrow pointing to the socket (no text or symbols present)2 Nabijte baterii.
1 Otevřete krytku.
2 Vložte baterii.
Zavřete krytku.

natural_image
Diagram showing a device with a circular component and an arrow pointing to it, inside a vehicle (no text or symbols)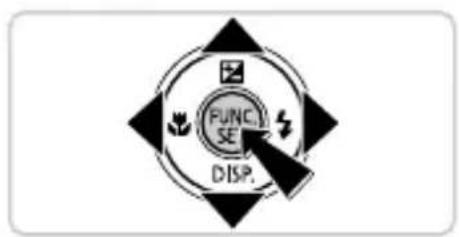
natural_image
Illustration of a laptop connected to an CD/DVD icon (no text or symbols)natural_image
Two identical trash bin symbols crossed with diagonal lines, no text or labels presentnatural_image
Diagram of a device with a plug inserted into a socket, showing an arrow pointing to the socket (no text or symbols present)Nyissa ki a fedelet.
Csatlakozók
Csukja be a fedelet.
natural_image
Diagram showing a device with a circular component and an arrow pointing to it, enclosed in a door frame (no text or symbols)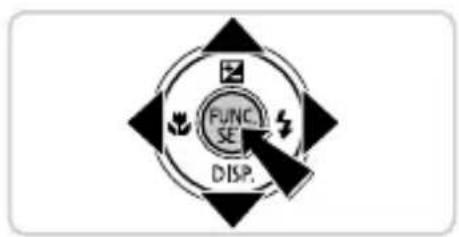
natural_image
Illustration of a laptop with a CD icon showing an arrow pointing to it (no text or symbols present)natural_image
Two identical hand-drawn trash bin symbols crossed with diagonal lines, no text or labels present.© CANON INC. 2012 AZ EU-BAN NYOMTATVA
Zawartość zestawu
natural_image
Diagram of a device with a plug inserted into a socket, showing wiring and a circular component (no text or symbols)2 Naładuj baterię.
1 Otwórz pokrywę.

Zamknij pokrywę.
natural_image
Diagram of a door mechanism with a circular component and a tool, no text or symbols present3 Zrób zdjęcia.
natural_image
Illustration of a laptop connected to an CD and an arrow indicating data transfer (no text or symbols present)natural_image
Two identical hand-drawn trash bins with cross-bracing, no text or symbols presentnatural_image
Diagram of a device with a plug inserted into a socket, showing wiring and a circular component (no text or symbols)2 Nabite batériu.
- Po pripojení napájacieho kábla k nabíjačke a zasunutí do elektrickej zásuvky sa indikátor rozsvieti na oranžovo. - Po dokončení nabíjania sa indikátor rozsvieti na zeleno. Vyberte batériu. - Podrobné informácie o čase nabíjania a počte záberov alebo čase záznamu s plne nabitou batériou nájdete v časti „Technické parametre“ v Užívatel'skej príručke k fotoaparátu.
1 Otvorte kryt.
- Posuňte (①) a otvorte (②) kryt.
natural_image
Diagram showing a device with a scroll wheel and directional arrows indicating movement or operation (no text or symbols present)2 Vložte batériu.
Zatvorte kryt.
3 Nastavte miestne časové pásmo.
natural_image
Diagram of a door with a circular dial and arrow pointing to a button (no text or symbols)3 Zhotovte fotografie.
1 Prejdite do režimu prehrávania.
Stlačte tlačidlo ▶.
natural_image
Illustration of a laptop with a CD icon showing an arrow pointing to it (no text or symbols present)natural_image
Two identical trash bin icons crossed with diagonal lines, no text or symbols presentnatural_image
Diagram of a device with a plug inserted into a socket, showing an arrow pointing to the socket (no text or symbols present)2 Laadige aku täis.
1 Avage kaas.
Nihutage kaant( ) ja avage see ( ) ^2
2 Sisestage aku.
Kontaktid
Sulgege kaas.
natural_image
Simple line drawing of a door with a circular component and a small object, no text or symbols presentPildistage.
natural_image
Illustration of a laptop with a CD icon showing an arrow pointing to it (no text or symbols present)natural_image
Two identical trash bin symbols crossed with diagonal lines, no text or labels present© CANON INC. 2012 TRÜKITUD EUROOPA LIIDUS
Iepakojuma saturs
natural_image
Diagram of a device with a plug inserted into a socket, showing wiring and a circular component (no text or symbols)1 Atveriet vāciņu.
2 levietojiet akumulatoru.
Kontakti
Aizveriet vāciņu.
natural_image
Diagram showing a device with a circular component and a mouse, no text or symbols present3 Fotografējiet.
natural_image
Illustration of a laptop with a CD icon showing an arrow pointing to it (no text or symbols present)natural_image
Two identical hand-drawn trash bins with cross-bracing, no text or symbols presentnatural_image
Diagram of a device with a plug inserted into a socket, showing wiring and a circular component (no text or symbols)Atidarykite dangtelj.
Pastumkite dangtelj (①) ir atidarykite jj (②).
natural_image
Diagram showing a device with a circular component and an arrow pointing to it, no text or symbols present3 Fotografuokite.

natural_image
Illustration of a laptop with an arrow pointing to a CD icon (no text or symbols present)natural_image
Two identical trash bin symbols crossed with diagonal lines, no text or labels presentnatural_image
Diagram of a device with a plug inserted into a socket, showing wiring and a circular component (no text or symbols)Ανοίξτε το κάλυμμα.
Υποδοχές
Κλείστε το κάλυμμα.
natural_image
Diagram of a door with a circular component and a mouse pointer, no text or symbols present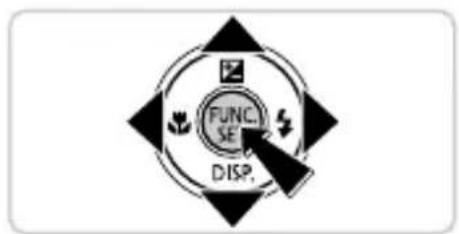
natural_image
Illustration of a laptop connected to a CD and an arrow indicating data transfer (no text or symbols present)natural_image
Two identical hand-drawn trash bin symbols crossed with diagonal lines, no text or labels present.- Compatible Memory Cards
- About Eye-Fi Cards
- Initial Preparations
- Charging the Battery
- Remove the cover and insert the battery.
- Charge the battery.
- Inserting the Battery and Memory Card
- Open the cover.
- Insert the battery.
- Check the card's write-protect tab and insert the memory card.
- Close the cover.
- Setting the Date and Time
- Turn the camera on.
- Set the date and time.
- Set the local time zone.
- Changing the Date and Time
- Display Language
- Enter Playback mode.
- Access the setting screen and choose a language.
- Trying the Camera Out
- Shooting
- Turn the camera on and enter AUTO mode.
- Compose the shot.
- Shoot still images.
- Shoot movies.
- Viewing
- Browse through your images.
- Play movies.
- Erasing the Images
- Viewing the Manuals
- CAUTION
- CANON INC.
- Lieferumfang
- CANON EUROPA N.V.
- Contenu du coffret
- Chargez la batterie.
- Prenez des photos.
- Activez le mode de lecture.
- Cargue la batería.
- Abra la tapa.
- Cierre la tapa.
- Scattare le foto.
- Laad de batterij op.
- Open het klepje.
- Plaats de batterij.
- Sluit het klepje.
- Schakel de camera in.
- Maak foto's.
- Abra a tampa.
- Insira a bateria.
- Fecha a tampa.
- Tire fotografias.
- Kassens indhold
- Oplad batteriet.
- Åbn dækslet.
- Isæt batteriet.
- Første klargøring
- Luk dækslet.
- Tag stillbilleder.
- Skift til afspilningstilstand.
- Gennemse billederne.
- Ladda batteriet.
- Öppna luckan.
- Sätt i batteriet.
- Stäng luckan.
- Ställ in den lokala tidszonen.
- Ta stillbilder.
- Pakkauksen sisältö
- Lataa akku.
- Avaa kansi.
- Aseta akku.
- Sulje kansi.
- Obsah balení
- Nabijte baterii.
- Otevřete krytku.
- Vložte baterii.
- Zavřete krytku.
- Nyissa ki a fedelet.
- Csukja be a fedelet.
- Zawartość zestawu
- Naładuj baterię.
- Otwórz pokrywę.
- Zamknij pokrywę.
- Zrób zdjęcia.
- Nabite batériu.
- Otvorte kryt.
- Vložte batériu.
- Zatvorte kryt.
- Nastavte miestne časové pásmo.
- Zhotovte fotografie.
- Prejdite do režimu prehrávania.
- Laadige aku täis.
- Avage kaas.
- Sisestage aku.
- Sulgege kaas.
- Pildistage.
- Iepakojuma saturs
- Atveriet vāciņu.
- levietojiet akumulatoru.
- Aizveriet vāciņu.
- Fotografējiet.
- Atidarykite dangtelj.
- Fotografuokite.
- Ανοίξτε το κάλυμμα.
- Κλείστε το κάλυμμα.
Brand : CANON
Model : Ixus 127 HS
Category : Camera