ST-8235 - Iron TRISTAR - Free user manual and instructions
Find the device manual for free ST-8235 TRISTAR in PDF.

User questions about ST-8235 TRISTAR
0 question about this device. Answer the ones you know or ask your own.
Ask a new question about this device
Download the instructions for your Iron in PDF format for free! Find your manual ST-8235 - TRISTAR and take your electronic device back in hand. On this page are published all the documents necessary for the use of your device. ST-8235 by TRISTAR.
USER MANUAL ST-8235 TRISTAR
natural_image
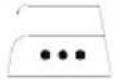
Close-up of a purple and gray iron iron with steam iron (no visible text or symbols)Spraying nozzle Flexible power cord Spray button
Steam button Auto turn off light
Anti calk button Water tank
natural_image
Illustration of a hand holding a tool over a cylindrical object, enclosed in a circle (no text or symbols)Operation and maintenance
Remove all packaging of the device. Remove the plastic layer of the soleplate (no. 12).
Check if the voltage of the appliance corresponds to the main voltage of your home.
Rated voltage : AC220-240V 50Hz
Filling your iron with water
Before filling water, please pull out the plug from the wall outlet and turn the thermostat (No.1) to the MIN position. Fill the watertank with cold tap water to the maximum level, please be aware not to overfill.
Never add other liquids to the water!
The radius of the exhaust steam is very powerful, so make sure you do not aim on people, pets or delicate points.
The use of your iron without steam
Turn the steam switch (No. 3) to the O position.
Set the thermostat switch (No. 1) on the iron to the desired position from MIN to MAX.
On the label in your garment you can find the correct position which is
appropriate for the garment. See the schedule on the next page for the meaning of the standings.
The power control light (No.11) turns off when the desired temperature is reached.
To remove stubborn wrinkles, you can press the spray button (No. 6) to bring your ironing to moisten.
The use of your iron with steam
Turn the steam switch (No. 3) to position 0 or to position • • for more steam.
Set the thermostat switch (No. 1) on the iron to the desired position of MIN to MAX.
On the label in your garment, you can find the correct position which is appropriate for the garment. See the schedule on the next page for the meaning of the standings.
The control light (No. 11) turns off when the desired temperature is reached.
To remove stubborn wrinkles, you can press the spray button (No. 6) to bring your ironing to moisten. For an extra boost of steam press again the steam button (No. 7).
Anti drip system
This device is equipped with a anti drip system. If, after ironing with steam, ironing with a lower temperature is chosen without the use of steam hot water can still drop out of the soleplate, these drops can cause stains on the garment. To prevent this, the device automatically switches to the anti drip system. And you should not press the steam button more than 3 times in a row. It is possible that the steam function and the anti drip system cannot manage this.
And a result is that the steam iron will leak.
Automatically turn off system
If the device, in the horizontal position, is not used for longer than 30 seconds, the device switches itself off automatically, the automatic turn off light (No.8) lights. If the device in the vertical position is not used for longer than eight minutes, the device switches itself off automatically, the automatic turn off light (No.8) lights. If the device is moved, it will turn back on automatically. The automatic turn off light (No. 8) will go out.
| GARMENTLABEL | FABRICTYPE | THERMOSTATREGULATION |
 | Synthetic | ·Lowtemperature |
 | Silk - Wool | ··Medtemperature |
 | Cotton -linen | ··MAXtemperature |
 | Fabric not to be ironed | |
To clean your iron
The following procedure is intended for daily use of the device, every 14 days to be conducted.
• Fill the reservoir with cold tap water.
- Plug in the power and adjust the thermostat (No. 1) on the MAX setting. Wait until the power indicator light (No. 11) goes out.
- Hold the iron horizontally above the sink.
- Turn the steam switch to position 0 and press repeatedly on the anti calc button (No. 9).
• The steam holes in the soleplate (No. 12) are now cleaned.
- Clean the iron dry with a soft cloth. Note the soleplate is hot!
• You need the iron to get rid of all water before storing
Attention! The iron is very hot do not touch

natural_image
Illustration of a hand holding a tool, enclosed in a circular frame (no text or symbols)IMPORTANT SAFEGUARDS
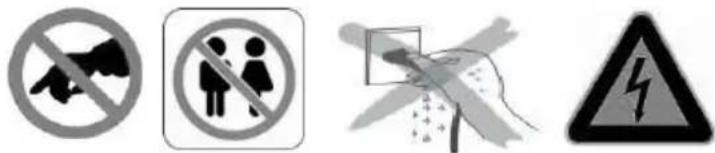
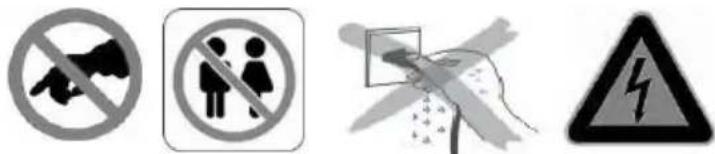
- Read all instructions before use.
- Do not touch hot surfaces. Use handles or knobs.
- To protect against electric shock, do not immerse cord, plug or appliance in water or any other liquid.
- Unplug from outlet when not in use and before cleaning. Allow the device to cool before putting on or taking off parts. Do not operate any appliance with a damaged cord or plug or after the appliance malfunctions, or has been damaged in any manner.
- The use of accessory attachments not recommended by the appliance manufacturer may cause injuries and invalidate any warranty you may have.
- Do not use outdoors, or on or near direct heat sources
- Do not let cord hang over edge of table or counter, or touch hot surfaces or come into contact with the hot parts or allow the product to be situated underneath or close to curtains, window coverings etc.
• This appliance is for household use only and only for the purpose it is made for.
- The appliance must be placed on a stable, level surface.
- This appliance is an attended appliance, and as such should never be left ON or whilst hot without adult supervision.
- This appliance is not intended for use by persons (including children) with reduced physical, sensory or mental capabilities, or lack of experience and knowledge, unless they have been given supervision or instruction concerning use of the appliance by a person responsible for their safety.
• Children should be supervised to ensure that they do not play with the appliance.
• This device is not intended for use with an external timer or a remote control system.
- Note: To avoid danger by the accidental resetting thermal protection, the device may not be powered through an external switching device, such as a timer, or connected to a circuit and is turned regularly by the subject.
- A damaged cord or plug must be replaced by an authorized technician to avoid a hazard. Do not repair the device yourself.
• Using an extension cord or something similar is not allowed.
SAVE THESE INSTRUCTIONS FOR FUTURE REFERENCE
Guarantee
- The device supplied by our Company is covered by 24 month guarantee starting on the date of purchase (receipt).
- During the life of the guarantee any fault of the device or its accessories to material or manufacturing defects will be eliminated free of charge by repairing or, at our discretion, by replacing it. The guarantee services do not entail an extension of the life of the guarantee nor do they give rise to any right to a new guarantee!
- Proof of the guarantee is provided by the proof of purchase. Without proof of purchase no free replacement or repair will be carried out.
- If you wish to make a claim under the guarantee please return the entire machine in the original packaging to your dealer together with the receipt.
- Damage to accessories does not mean automatic free replacement of the whole machine. In such cases please contact our hotline. Broken glass or breakage of plastic parts are always subject to a charge.
- Defects to consumables or parts subject to wearing, as well as cleaning, maintenance or the replacement of said parts are not covered by the guarantee and hence are to be paid!
- The guarantee lapses in case of unauthorized tampering.
- After the expiry of the guarantee repairs can be carried by the competent dealer or repair service against the payment of the ensuing costs.
Guidelines for protection of the environment
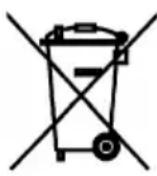

This appliance should not be put into the domestic garbage at the end of its useful life, but must be disposed of at a central point for recycling of electric and electronic domestic appliances. This symbol on appliance, instruction manual and packaging puts your attention to this important issue. The materials used in this appliance can be recycled. By recycling used domestic appliances you contribute an important push to the protection of our environment. Ask your local authorities for information regarding the point of recollection
Packaging
The packaging is 100% recyclable, return the packaging separated.
Product
This device is equipped with a mark according to European Directive 2002/96/EC on Waste Electrical and Electronic Equipment (WEEE). By ensuring that the product correctly as waste is processed, it helps you may have adverse consequences for the environment and human health.
EC declaration of conformity
This device is designed, manufactured and marketed in accordance with the safety objectives of the Low Voltage Directive "No 2006/95/EC, the protection requirements of the EMC Directive 2004/108/EC "Electromagnetic Compatibility" and the requirement of Directive 93/68/EEC.
natural_image
Illustration of a hand holding a tool, enclosed in a circular frame (no text or symbols)MISES EN GARDES IMPORTANTES

natural_image
Illustration of a hand holding a knife cutting through a cylindrical container (no text or symbols)natural_image
Illustration of a hand holding a tool over a cylindrical object, enclosed in a circle (no text or symbols)natural_image
Illustration of a hand holding a pen or stylus, enclosed in a circle (no text or symbols)PRECAUZIONI IMPORTANTI

text_image
Four safety symbols: no megaphone, no person silhouette, open box with warning sign, and hazard symbol.natural_image
Illustration of a hand holding a pen or stylus, enclosed in a circle (no text or symbols)INSTRUÇÕES DE SEGURANÇA IMPORTANTES
natural_image
Illustration of a hand holding a pointed object with a cross mark, enclosed in a circle (no text or symbols)VIKTIGA SÄKERHETSRUTINER

natural_image
Illustration of a hand holding a pen or stylus over a cylindrical object, enclosed in a circle (no text or symbols)WAŻNE WSKAZÓWKI DOTYCZĄCE BEZPIECZEŃSTWA
