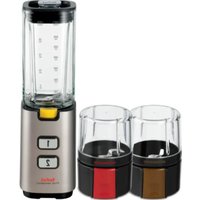
Mini Multi Deluxe BL125 - Blender TEFAL - Free user manual and instructions
Find the device manual for free Mini Multi Deluxe BL125 TEFAL in PDF.

User questions about Mini Multi Deluxe BL125 TEFAL
0 question about this device. Answer the ones you know or ask your own.
Ask a new question about this device
Download the instructions for your Blender in PDF format for free! Find your manual Mini Multi Deluxe BL125 - TEFAL and take your electronic device back in hand. On this page are published all the documents necessary for the use of your device. Mini Multi Deluxe BL125 by TEFAL.
USER MANUAL Mini Multi Deluxe BL125 TEFAL
natural_image
Exterior view of a modern kitchen blender with black and silver casing (no text or symbols visible)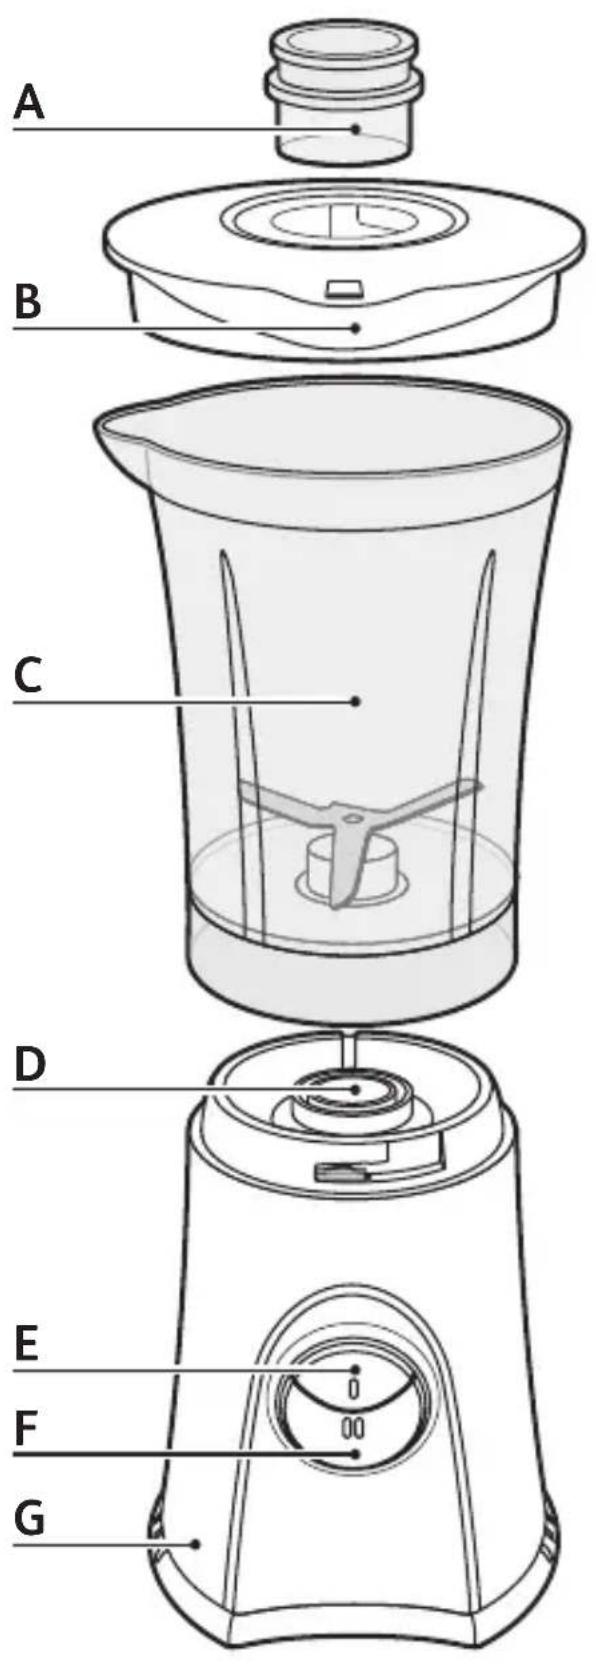
text_image
A B C D E F G
text_image
H H1 H2 J I I1 I2 J
natural_image
Diagram of a waste bin with a downward arrow indicating compression or disassembly (no text or symbols present)fig.1fig.2
natural_image
Diagram of a mechanical component with directional arrows indicating motion or force (no text or symbols)
natural_image
Diagram of a blender with directional arrows indicating rotation and change (no text or symbols)fig.3fig.4

natural_image
Diagram of a plastic container with internal components and directional arrows indicating flow or movement (no text or symbols)
natural_image
Illustration of a blender with a downward arrow indicating compression or cooling process (no text or symbols)fig.5
IMPORTANT SAFEGUARDS
When using electrical appliances, basic safety precautions should always be followed to reduce the risk of fire, electric shock, and/or injury to persons, including the following:
- Read all instructions carefully before using the blender.
- To protect against fire, electric shock and injury to persons, do not immerse cord, plug or appliance in water or other liquids.
- Close supervision is necessary when any appliance is used near children. This appliance is not intended for use by children.
- Unplug the appliance from outlet when not in use, before putting on or taking off parts, and before cleaning.
- Avoid contact with moving parts.
- Keep hands and utensils out of the jar while blending in order to reduce the risk of severe injury to persons or damage to the blender. A scraper or wooden spoon may be used but only when the blender is not running and is unplugged.
- Do not operate any appliance with a damaged cord or plug or after the appliance malfunctions, or is dropped or damaged in any manner. Return the appliance to an authorized Service Center for examination, repair or electrical/mechanical adjustments.
- The use of attachments, including canning jars, not recommended by the manufacturer may cause a risk of injury to persons.
- Do not use outdoors.
- To reduce the risk of injury do not drape cord over the counter top or table top where it can be pulled on by children or trippe over unintentionally.
- Blades are sharp. Handle carefully.
• Always operate the blender with the lid in place.
- When blending hot liquids, remove the measuring cup to allow steam to escape.
- Do not use the appliance for other than intended use.
- Do not place the blender jar in a microwave oven.
- This appliance is for household use only. Any servicing other than cleaning and user maintenance should be performed by the nearest authorized Service Center.
- Do not immerse base in water or any other liquid.
- Make sure the voltage of the appliance is in accordance with your domestic supply.
- To reduce the risk of fire or electric shock, do not dismantle the appliance. Repair should be done by an authorized Service Center only.
- Keep your hands and the cord away from hot parts during operation.
- Never clean with scouring powders or hard implements.
- Do not place or use the appliance on hot surfaces such as stoves, hotplates, or near open gas flames.
- Do not let the cord come in contact with hot surfaces such as the stove or hang over the edge of a table/counter.
- Do not expose the appliance to temperatures above 105^ F / 40^ C .
- To disconnect blender, remove plug from wall outlet. Do not yank cord, instead grasp plug and pull to disconnect.
- Make sure that the lid is securely locked in place before operating the appliance.
- Do not open the lid until the blades have completely stopped.
- Never place the jar (C) on the motor unit (G) when motor is running.
- Do not attempt to defeat the cover interlock mechanism.
- To reduce the risk of injury, never place cutting blade on base without first putting bowl properly in place.
- Be certain cover is securely locked in place before operating appliance
- Keep hands and utensils away from the cutting blade while chopping food to reduce the risk of severe injury to persons or damage to the food chopper. A scraper may be used but only when the food chopper is not running.
SPECIAL CORD INSTRUCTIONS
Regarding your cord:
This appliance has a polarized plug (one blade is wider than the other). To reduce the risk of electric shock, this plug is intended to fit into a polarized outlet only one way. If the plug does not fully fit into the outlet, reverse the plug. If it still does not fit, contact a qualified electrician. Do not attempt to modify the plug in any way.
A short power-supply cord is provided to reduce the risks resulting from becoming entangled in or tripping over a longer cord. If a long extension is used, the marked electrical rating of the extension cord should be at least as great as the electrical rating of the appliance. Cords rated for less amperage may overheat.
SAVE THESE INSTRUCTIONS CAUTION
Care should be taken to arrange the cord so that it cannot be pulled or tripped over.
- This appliance is for household use only. Any servicing other than cleaning and user maintenance should be performed by the nearest authorized Service Center.
- To reduce the risk of fire or electric shock, do not remove the base.
No user serviceable parts inside. Repair should be done by an authorized T-fal Service Center only.
Description
A Measuring cup
B Lid
C Blender jug
D Safety locking system
E Low-speed button
F High-speed button
G Motor unit
H Grinder accessory
(depending on model Not applicable to BL 125D42 & BL125D76)
H1. Lid
H2. Blade unit
I Chopper accessory (depending on model))
I1. Lid
I2. Blade unit
J Chopper / grinder preserving lids
Safety locking system (D
The appliance cannot be started if the blender jar (C) or the accessories (H or I) have not been placed or fitted correctly onto the motor unit (G).
Before using your blender for the first time
- Before using the blender for the first time, clean all the accessories (A, B, C, H & I) warm soapy water (except for the motor unit (G). See “Cleaning”). Rinse and dry them carefully.
- CAUTION: the blades are very sharp, handle them with care when clear using your appliance.
- Ensure that all packaging has been removed before using the blender.
Using the blender
The blender can only be used for preparations such as smoothies, milk-shakes and sauces or mixing ingredients (cooked vegetable soups, waffle and pancake batter). Do not use for processing coffee beans, hard spices or grinding sugar.
- Place the ingredients in the blender jug (C). Never pour or process liquids or ingredients whose temperature is higher than 176^ F/ 80^ C. Instead cool them slightly first. Refer to the table below for the maximum quantities to be used. Do not exceed the maximum quantities stated in the table below.
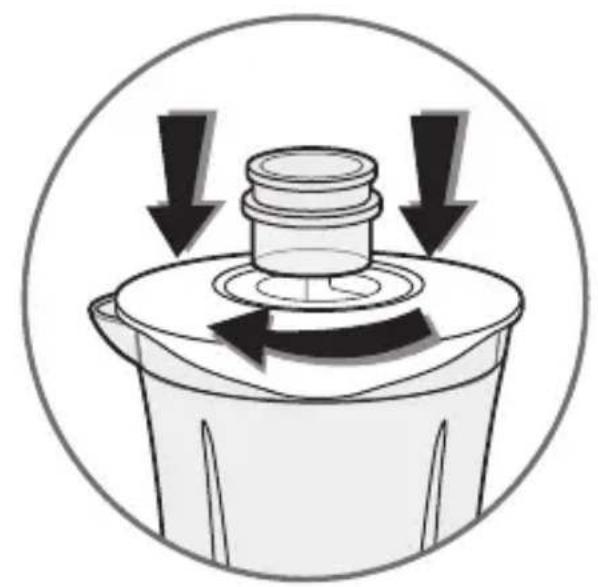
- Lock the lid (B) onto the blender jug (C) (Fig. 1).
-
Fit the measuring cap (A) into the opening in the lid and turn it to lock it into place. (Fig. 2).
-
Place the blender jug (C) onto the motor unit (G). Lock the blender jug (C) correctly (Fig. 1).
| Ingredients Quantities | (Max) |
| Fruits (kiwis, bananas, strawberries, pineapple...) | 7oz / 200g |
| Vegetables (tomatoes, avocado...) | 7oz / 200g |
| Vegetable soups | 7oz / 200g cooked vegetables + water (optional) |
| Milk-shakes | 4oz fruit + 10oz milk / 100g fruit + 300ml milk |
- Plug in the appliance and switch it on by pressing the low-speed or high-speed but ton (E or F). The blender will not operate if the blender jug is not correctly fitted.
- Hold the appliance firmly with both hands during operation. Do not operate the appliance for more than one minute at a time. After blending for one minute, switch off the appliance and wait for 15 minutes before blending again. If the appliance becomes hot, let it cool down before you continue using it.
Recommendations:
- Do not operate the appliance more than one minute continuously.
-
Allow the appliance to cool down for 1 hour after 5 consecutive uses.
-
To add ingredients while the blender is in use, insert them through the feeder hole in the lid (B).
- Cut the ingredients into small pieces (approx. 0.6 inches * 0.6 inches / 15mm x 15mm) before putting them in the blender jug (C). Do not process a large quantity of ingredients at the same time.
CAUTION: If ingredients remain stuck to the blades, unplug the appliance remove them with a spatula.
Using the chopper and grinder accessories (H or I) (depending on model)
(Grinder (H) is not applicable to BL 125D42 & BL125D76)
The chopper accessory (I) allows you to chop ingredients such as meat (up to 3oz / 80g cut into pieces), onions, garlic, ginger...
The grinder accessory (H) allows you:
- to grind coffee beans (up to 3oz / 80g)
- to grind or chop various spices (chilies), rice, dried fruits and nuts such as hazelnuts, almonds.
CAUTION: Do not handle the accessory blade (H2 or I2) as they are ver and may cause injury.
- Cut the ingredients into small pieces (approx. 0.6 inches * 0.6 inches / 15mm x 15mm). Place them into the chopper or grinder lid (H1 or I1). Refer to the table below for the maximum quantities to be used.
| Ingredients Quantities (Max) Accessory | ||
| Meat (cut into pieces) 2.5oz / 80g I | ||
| Spices (chilies, pepper...) 1.5oz / 50g H | ||
| Coffee beans, rice 0.7oz–2.5oz / 20-80g H | ||
| Onions 0.7oz–4oz / 20-100g | I | |
| Garlic | 0.7oz–4oz / 20-100g | I |
- Fit the chopper or grinder blade unit (H2 or I2) onto the chopper or grinder lid (H or I1). Lock the blade unit by turning it clockwise (Fig. 4).
- Turn the assembled chopper or grinder accessory upward. Place the chopper or grinder accessory onto the motor unit (G) and lock it (Fig. 5).
- Plug in the appliance and switch it on by pressing the low-speed or high-speed button (E or F). The chopper or grinder will not operate unless the blade unit has been correctly fitted.
- Hold the accessory firmly with both hands during operation. Do not operate the accessory for more than 30 seconds at a time.
- You can store the preparation in the fridge by removing the chopper or grinder blade unit, and covering the lid with the seal (J).
Cleaning
- Unplug the blender and remove all the accessories.
- Handle the blades (H2 or I2) with care as they are very sharp.
- Wipe the motor unit (G) down with a damp cloth. Dry carefully.
- Never plunge the motor unit (G) into running water.
- To make cleaning easier, always wash the removable parts in warm water and dis soap immediately after use.
- The blender jug (C), the lid (B), measuring cap (A) and the accessories (H1, I1 & J) may be cleaned in the dishwasher in the upper tray.
What to do if your appliance does not work?
| PROBLEMS | CAUSE | SOLUTION |
| The appliance is not working. | The plug is not inserted correctly. | Connect the appliance to a socket with the correct voltage. |
| The jug or accessory is not properly fitted onto the motor unit. | Check that the jug or the accessory has been fitted properly onto the motor unit. | |
| Excessive vibrations. | The product is not placed on a flat, stable heat-resistant work-surface. | Place the product on a flat, stable heat-resistant work-surface. |
| The jug or accessory is not properly fitted onto the motor unit. | Check that the jug or the accessory has been fitted properly onto the motor unit. | |
| The lid is leaking. | The quantity of food being processed is too great. | Reduce the quantity of ingredients. Never exceed the maximum level (14oz / 400 ml) of the blender jug. |
| The lid is not fitted properly. | Lock the lid properly onto the blender jug. | |
| The blades do not turn easily. | Pieces of food too big or too hard. | Reduce the size or quantity of ingredients. Add liquid. |
| The jug is leaking from the bottom. | The seal is not properly fitted and the blade holder is not positioned correctly. The liquid or ingredients used have been too hot and the seal has begun to perish. | Reposition the seal and lock the blade holder correctly. Never pour or blend liquids or ingredients where the temperature is higher than 176°F / 80°C. |
Your blender still does not work ?
- Please contact an approved service centre (see the list in the service booklet).
CANADA :
T-fal
345 Passmore Avenue
Scarborough, Ontario M1V 3N8
Monday to thursday: 8.30 am to 4.30 pm
Friday: 8:30 am to 1:30 pm
Fax number:1 416 297 0231
USA :
Online - www.t-falusa.com
Phone - 1-800-395-8325
Hours* Monday – Thursday from 8:30 a.m. – 5:00 p.m.
(EST), Friday 8:30 a.m. - 4:00 p.m. (EST)
Please note hours are subject to change.
Letters should be addressed to :
Groupe SEB – Consumer Service
2121 Eden Road
Millville NJ, 08332
Only letters can be accepted. Packages without a return authorization number will be refused.
PRÉCAUTIONS IMPORTANTES
Goldsmith 38 - 401, Col. Polanco Chapultepec
Delegacion Miguel Hidalgo
11560 MEXICO D.F
Tel: 52839353-55
01-800-505-45-00 y
01-800-112-83-25
E p. 1 - 11
F p. 12 - 19
S p. 20 - 29