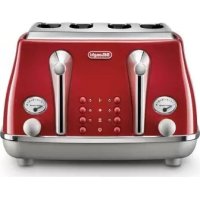
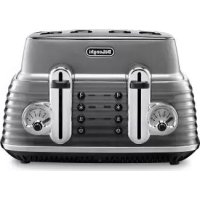
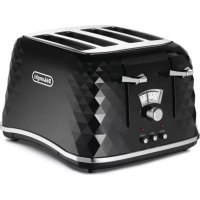
CTO 4003 - Toaster DELONGHI - Free user manual and instructions
Find the device manual for free CTO 4003 DELONGHI in PDF.
| Product type | Toaster |
| Brand | De'Longhi |
| Model | CTO 4003 |
| Power supply | 220-240 V ~ 50/60 Hz |
| Power | 900 W |
| Dimensions (approx.) | 30 x 20 x 25 cm |
| Weight (approx.) | 2 kg |
| Capacity | 2 slices of bread |
| Browning control | Control knob with window |
| Functions | Toast, Defrost, Reheat, Bagel, Stop/Cancel |
| Defrost function | Yes, with indicator light |
| Reheat function | Yes, with indicator light |
| Bagel function | Toasts one side only, with indicator light |
| Emergency stop | Stop/Cancel button |
| Cord storage | Clip under the appliance |
| Crumb tray | Removable, regular cleaning recommended |
| Maintenance | Clean with a soft cloth, do not immerse |
| Safety | Automatic shutdown at end of cycle, do not insert metal utensils |
| Cord length | Approximately 0.8 m |
| Exterior material | Plastic and stainless steel |
| Warranty | 2 years (according to applicable legislation) |
Frequently Asked Questions - CTO 4003 DELONGHI
User questions about CTO 4003 DELONGHI
0 question about this device. Answer the ones you know or ask your own.
Ask a new question about this device
Download the instructions for your Toaster in PDF format for free! Find your manual CTO 4003 - DELONGHI and take your electronic device back in hand. On this page are published all the documents necessary for the use of your device. CTO 4003 by DELONGHI.
USER MANUAL CTO 4003 DELONGHI
Please retain these instructions for future reference
DēLonghi
Living innovation
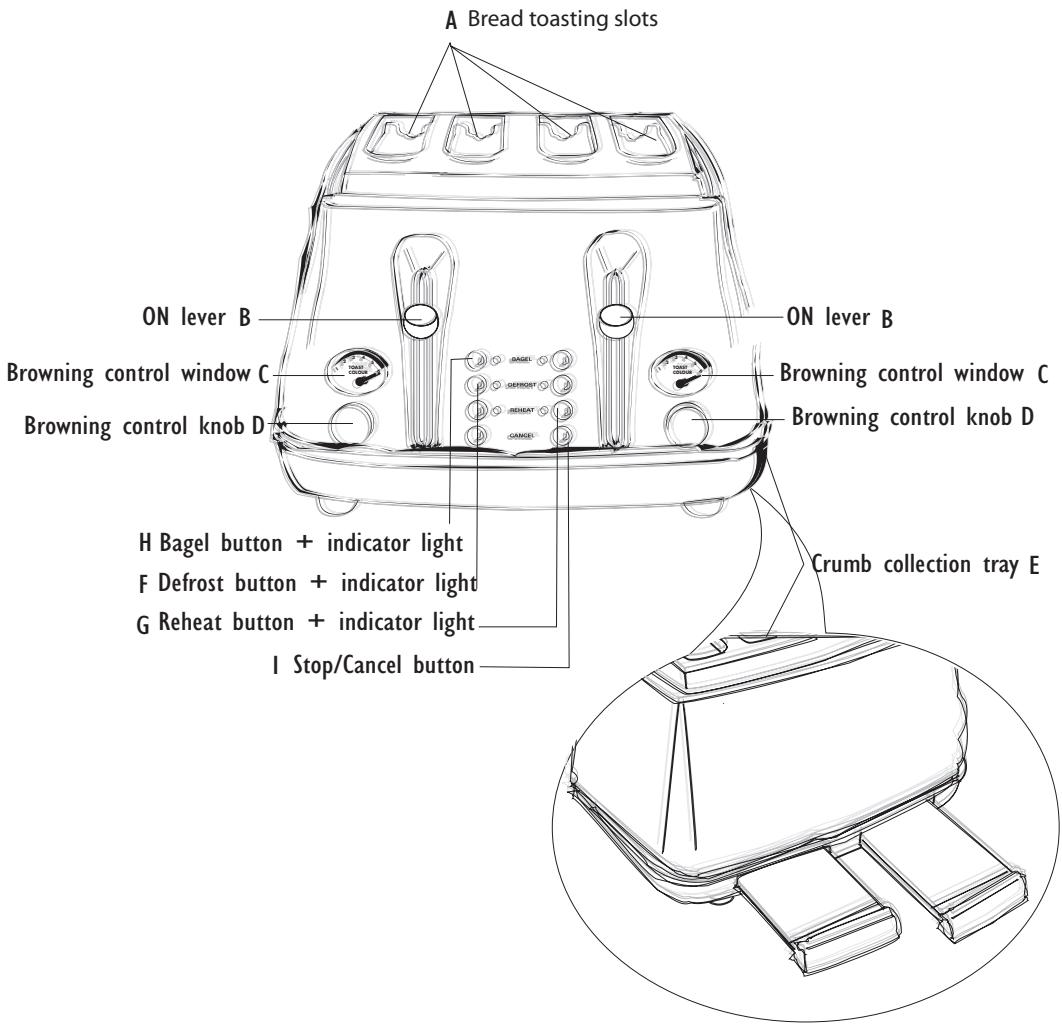
Description of Appliance
The following terms are used throughout the instruction manual
Thank you for choosing this De'Longhi Toaster. To get the best results from your new appliance please read these instructions carefully before using the appliance. This is the only way to ensure optimum results and maximum safety.
Safety Warnings
- The appliance is exclusively for the use for which it has been manufactured. Any other use is to be considered inappropriate and therefore dangerous. The manufacturer cannot be held responsible for eventual damage caused by inappropriate, improper or irresponsible use and/or for repairs made to the product by unauthorised personnel.
- After removing the appliance from the packaging, make sure that the product is complete and in perfect condition. Ensure all labels and packaging have been removed from the toaster.
- The plastic bag in which the appliance was packaged should be kept out of reach of children as it poses a suffocation hazard.
- Remove any dust that may have accumulated on the appliance during transit by dusting it off with a soft dry cloth.
- Before inserting the plug into the electrical socket, make certain: - The voltage of the socket corresponds to the value indicated on the information label, attached to the appliance.
- The electrical socket is earthed, the manufacturer declines any responsibility for the lack of observation of this norm.
- In the case of incompatibility between the socket and the plug of the appliance, have it replaced by a qualified technician. The use of adapters, multiple socket units and/or extension cables is not recommended. Whenever it may be necessary to use such equipment, it is advisable to use only single or multiple adapters or extension cables which comply with the current safety standards, and make sure not to exceed the wattage limit of the adapter or extension cable.
- If the supply cord is damaged, it must be replaced by the manufacturer, its service agent or similarly qualified persons in order to avoid a hazard.
- The appliance is not intended for use by persons (including children) with reduced physical, sensory or mental capabilities, or lack of experience and knowledge, unless they have been given supervision or instruction concerning use of the appliance by a person responsible for their safety. Children should be supervised to ensure that they do not play with the appliance.
- To avoid electric shocks, never let the toaster, cord or plug get wet, and NEVER put your hand or anything metal, e.g. a knife or foil, into the toaster.
- Do not touch the appliance with wet or damp hands.
- The areas surrounding the bread slots become very hot during use: operating the toaster should be carried out touching only the plastic controls.
- Bread is a foodstuff which may catch fire.
Do not use this appliance under or next to curtains or other
combustible material.
- Do not cover the appliance while it is in use, it could overheat and catch fire.
• We recommend that you do not use your toaster directly under wall cupboards
- Burnt food can catch fire, so never leave your toaster on unattended, and set the browning control lower for thin or dry bread which can burn more easily.
- Never warm food with a topping or filling (e.g. pizza): if it drips into the toaster it could catch fire.
- Clean the crumb tray regularly: crumbs can smoke or burn.
- Always unplug the toaster when not in use, before cleaning or attempting to clear jammed bread.
- Do not unplug the appliance from the outlet by pulling on the cord.
- Do not leave the appliance exposed to the elements, (rain, direct sunlight, frost, etc.).
- Do not immerse the appliance, the plug, or the electrical cable in water.
- For necessary repairs or replacement of the electrical cable, consult the technical service centre authorised by the manufacturer. Please refer to enclosed guarantee leaflet for details.
- As with any electrical appliance, whilst the instructions aim to cover as many eventualities as possible, caution and common sense should be applied when operating your appliance, particularly in the vicinity of young children.
This appliance conforms to the Directive 89/336/CEE relative to electromagnetic compatibility.
Materials and accessories coming into contact with food conform to EC regulation 1935/2004.
IMPORTANT INFORMATION FOR CORRECT DISPOSAL OF THE PRODUCT IN ACCORDANCE WITH EC DIRECTIVE 2002/96/EC.

At the end of its working life, the product must not be disposed of as urban waste. It must be taken to a special local authority differentiated waste collection centre or to a dealer providing this service. Disposing of a household appliance separately avoids possible negative consequences for the environment and health deriving from inappropriate disposal and enables the constituent materials to be recovered to obtain significant savings in energy and resources. As a reminder of the need to dispose of household appliances separately, the product is marked with a crossed-out wheeled dustbin.
Electrical Requirements
Before using this appliance ensure that the voltage indicated on the product corresponds with the main voltage in your home, if you are in any doubt about your supply contact your local electricity company.
The flexible mains lead is supplied connected to a B.S. 1363 fused plug having a fuse of 13 amp capacity. Should this plug not fit the socket outlets in your home, it should be cut off and replaced with a suitable plug, following the procedure outlined below.
Note: Such a plug cannot be used for any other appliance and should therefore be properly disposed of, (having removed the fuse) and not left where children might find it and plug it into a supply socket - with the obvious consequent danger.
N.B. We recommend the use of good quality plugs and wall sockets that can be switched off when the machine is not in use.
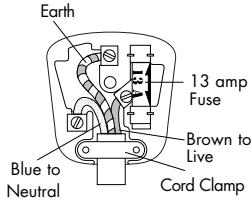
Important: the wires in the mains lead fitted to this appliance are coloured in accordance with the following code:
GREEN AND YELLOW
BLUE
BROWN
EARTH
NEUTRAL
LIVE
As the colours of the wires in the mains lead of this appliance may not correspond with the coloured markings identifying the terminals in your plug, proceed as follows:
The wire which is coloured green and yellow must be connected to the terminal in the plug which is marked with the letter E or by the earth symbol ± or coloured green or green and yellow.
The wire which is coloured blue must be connected to the terminal which is marked with the letter N or coloured black.
The wire which is coloured brown must be connected to the terminal which is marked with the letter L or coloured red.
When wiring the plug, ensure that all strands of wire are securely retained in each terminal. Do not forget to tighten the mains lead clamp on the plug. If your electricity supply point has only two pin socket outlets, or if you are in doubt, consult a qualified electrician.
Should the mains lead ever require replacement, it is essential that this operation be carried out by a qualified electrician and should only be replaced with a flexible cord of the same size.
If the plug is a moulded-on type the fuse cover must be refitted. If the fuse cover is lost, the plug must not be used until a replacement cover is obtained. The colour of the correct replacement fuse cover is that of the coloured insert in the base of the fuse recess or elsewhere on the plug. Always state this colour when ordering a replacement fuse cover. Only 13amp replacement fuses which are asta approved to B.S. 1362 should be fitted.
This appliance conforms to the Norms EN 55014 regarding the suppression of radio interference.
Warning
this appliance must be earthed
Green and Yellow to
BEFORE USING FOR THE FIRST TIME
- Clip excess cord into the cord storage clips underneath the toaster.
- As with all new heating elements, your toaster may emit a slight burning or ‘new’ smell when it is first switched on. This is normal and not a cause for concern.
- To eliminate the 'new' smell at the first use, operate the toaster on a medium setting without any without any bread inside. Ensure the room is well ventilated during this operation.
TO USE YOUR TOASTER
- Make sure than the ON levers (B) are at the rest position. Move the browning control dial (D) to the desired setting.
- Connect the appliance to the electrical outlet.
- Insert the slices of bread into the bread toasting slots (A) and lower the lever (B) until it is all the way down.
Note: If the appliance is not connected to the electrical outlet, the lever (B) will not stay down. - When the toasting is finished, the lever returns to the rest position, raising the toasted bread slices at the same time.
- If the bread is not sufficiently toasted, select a darker degree of toasting by turning the browning control dial (D).
- The toasting can be interrupted at any time by pressing the Stop/Cancel button (I). Never lift the lever (B) to cancel toasting.
Caution: the bread toasting slots become very hot during operation. Do not touch.
Defrost function
Frozen slices of bread may be toasted by pressing the Defrost button (F) immediately after lowering the lever (B); the toasting cycle will be lengthened in order to achieve the desired browning. The defrost indicator light will remain lit while the defrost function is in use.
Reheat function
To warm toast that has popped up but gone cold, lower the lever (B) again and then press the 'Reheat' button (G). Please note that this is fixed reheat time which cannot be adjusted by the browning control. The reheat function can be cancelled at any time by pressing the Stop/Cancel button (I). The reheat indicator light will remain lit while the reheat function is in use
Bagel function
The ‘Bagel’ function allows for the toasting of bread, bagels and muffins etc on one side only (internal side), while the other (external side) remains warm. Bagels and muffins must be sliced in half before toasting. Press down on the lever (B) and then press the ‘Bagel’ button (H). The bagel indicator light will remain lit while the bagel function is in use.
SUGGESTIONS FOR USE
- Select a lower setting for light browning, for toasting one slice only or for dry bread
- When toasting a single slice of bread, you may notice a variation in toast colour from one side to the other – this is normal.
- Dry/stale bread toasts more quickly than fresh bread, and thinly sliced bread toasts more quickly than thickly sliced bread. Therefore the browning control should be set at a lower setting than usual.
- For best results ensure that the bread slices are of an even thickness, freshness and size.
- In order to achieve uniform browning we recommend that you wait a minimum of 30 seconds between each toasting so that the heating control can reset. Alternatively select a lower setting when additional toasting is carried out.
PRECAUTIONS
- Never use the appliance when it is empty (when there is no bread inside) except on first use.
- Do not use very thin or broken slices of bread.
- Do not insert other foods that may drip during the cooking process. In addition to making the cleaning procedure more difficult, these may cause fires.
- Clean the crumb tray regularly: crumbs can smoke or burn.
- Do not insert (by force) foods that are too big for the slots.
- Do not insert forks or other utensils into the toaster in order to remove bread. As well as damaging the toaster, there is a high risk of electric shock.
- Should some toast remain blocked in the toaster, remove the plug from the mains, wait for the toaster to cool down until it is safe to touch, then turn the toaster over and shake it gently.
CARE AND CLEANING
• Before cleaning, unplug your toaster and let it cool down.
- The external part of the appliance must be cleaned with a soft cloth. Do not use abrasive detergents that can ruin the surface.
• DO NOT IMMERSE IN WATER.
• After each use, remove the plug from the electrical outlet and empty the crumb collection tray that is under the appliance.
DO NOT TOUCH ANY PART OF THE TOASTER WITH SHARP OR METAL UTENSILS, ESPECIALLY INSIDE THE BREAD TOASTING SLOTS. RISK OF ELECTRIC SHOCK.
SERVICE AND CUSTOMER CARE
- If the cord is damaged it must, for safety reasons, be repaired by De'Longhi or an authorised De'Longhi repairer.
- Please refer to the enclosed guarantee leaflet for service and assistance details.
DēLonghi
De' Longhi Appliances
via L. Seitz, 47
31100 - Treviso - Italia