
W 91LUX - Heating appliance DELONGHI - Free user manual and instructions
Find the device manual for free W 91LUX DELONGHI in PDF.
| Product type | Electric tabletop oven |
| Brand | De'Longhi |
| Model | W 91LUX |
| External dimensions (HxWxD) | 225 x 425 x 330 mm |
| Internal dimensions (HxWxD) | 170 x 295 x 265 mm |
| Cavity volume | 12.5 L |
| Weight | Approximately 5 kg |
| Power supply | 220-240 V ~ 50/60 Hz, 1800 W (estimated) |
| Temperature range | 60°C to 270°C |
| Timer | Up to 120 minutes with audible automatic shut-off |
| Main functions | Conventional cooking, grill, keep warm, pizza cooking with stone (depending on model) |
| Included accessories | Rack, baking tray, diet rack, drip tray, pizza stone (depending on model) |
| Care and cleaning | Clean the exterior with a damp sponge; do not immerse; accessories dishwasher safe |
| Safety | Automatic shut-off by timer; hot surfaces; do not move during operation |
| Spare parts | Replaceable oven lamp (heat-resistant type) |
| Repairability | Contact an authorized dealer for repairs |
| General information | Heating appliance compliant with CE standards |
Frequently Asked Questions - W 91LUX DELONGHI
User questions about W 91LUX DELONGHI
0 question about this device. Answer the ones you know or ask your own.
Ask a new question about this device
Download the instructions for your Heating appliance in PDF format for free! Find your manual W 91LUX - DELONGHI and take your electronic device back in hand. On this page are published all the documents necessary for the use of your device. W 91LUX by DELONGHI.
USER MANUAL W 91LUX DELONGHI
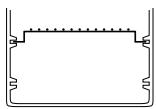
A Top Heating element
B Oven light (*)
C Temperature dial
D On/off and timer dial (*)
E Function selection dial
F Control light
G Bottom heating element
H crumb-tray (*)
I Baking tray (*)
L Diet grill (*)
M Dripping tray (*)
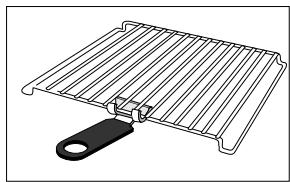
N Wire rack
- Wire rack handle (*)
P Pizza Stone (*)
(*) Not on all models
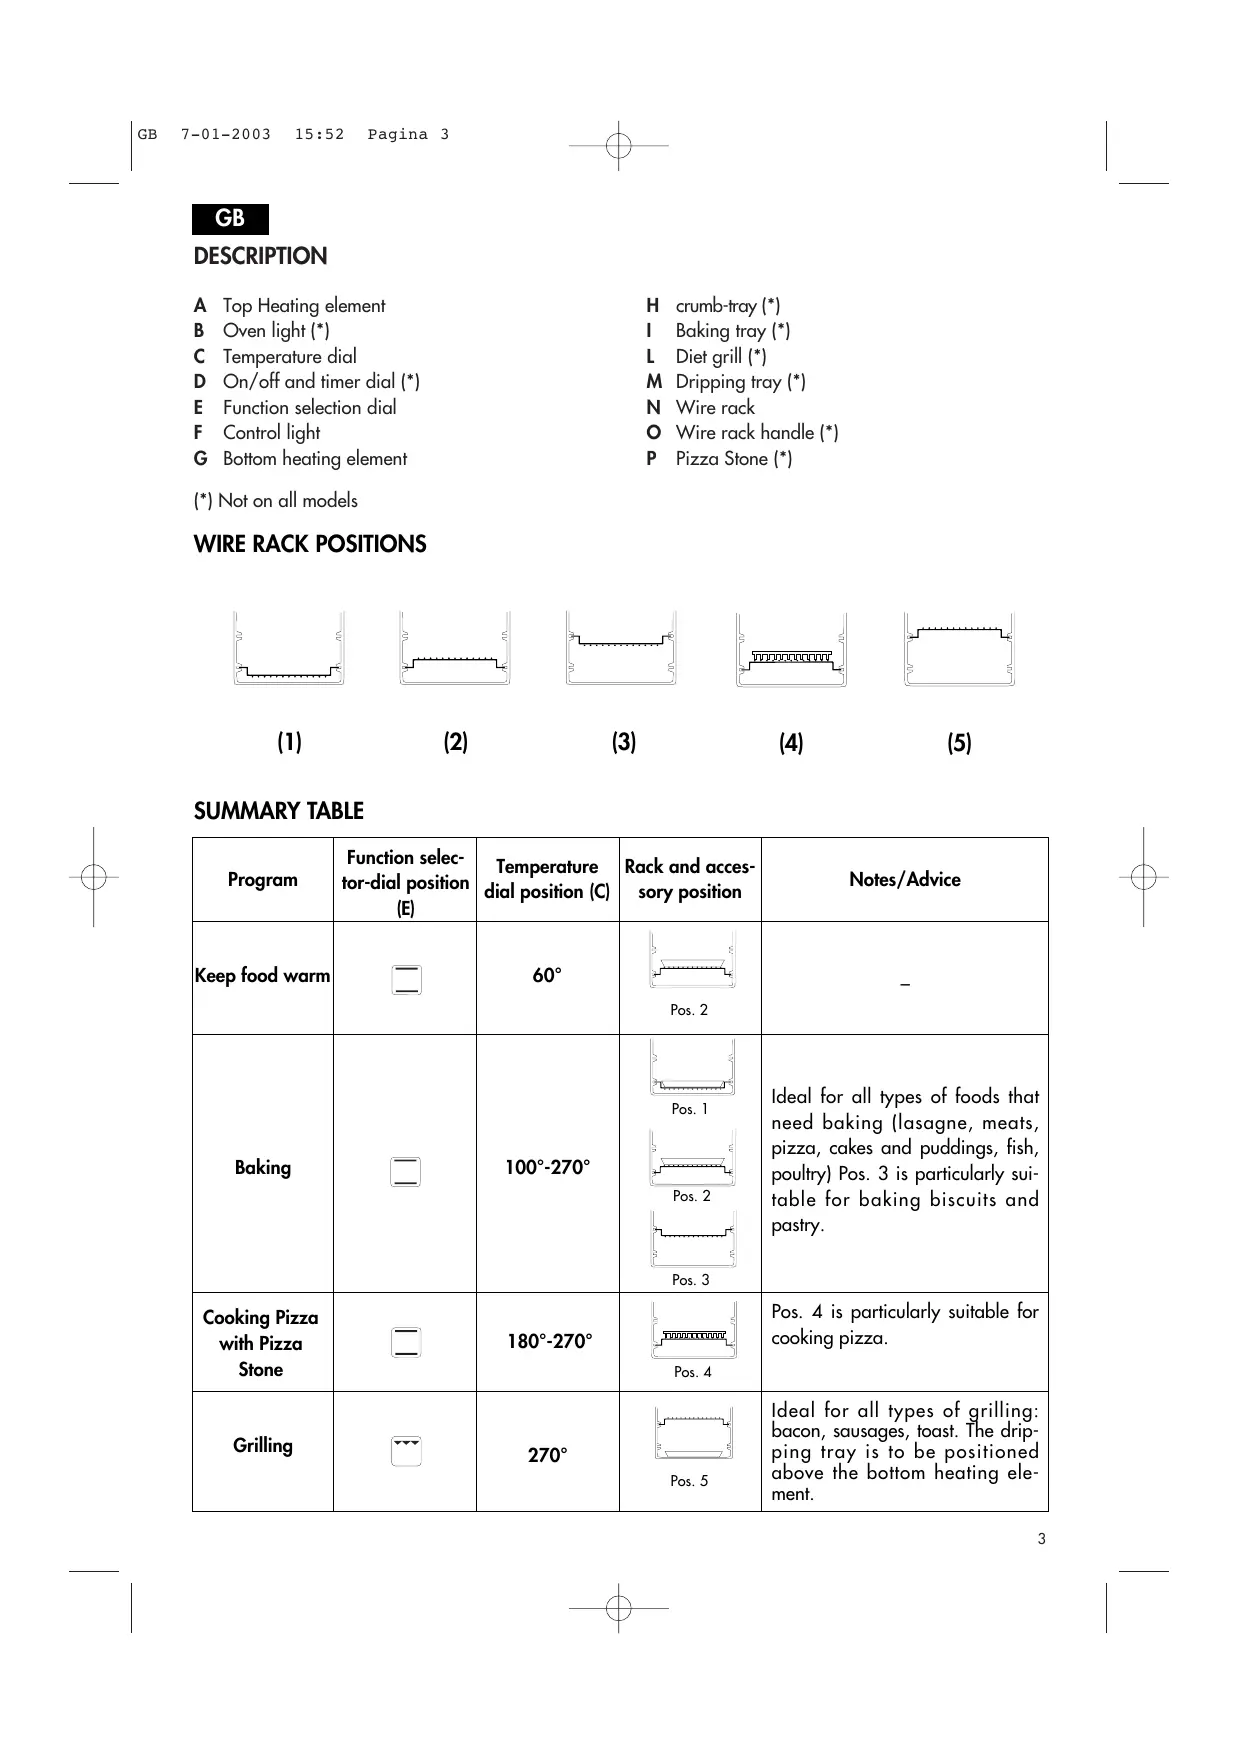
WIRE RACK POSITIONS

(1)
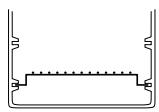
(2)
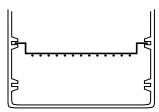
(3)
(4)
(5)
SUMMARY TABLE
| Program | Function selec-tor-dial position (E) | Temperature dial position (C) | Rack and acces-sory position | Notes/Advice |
| Keep food warm |  | 60° | 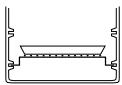 Pos. 2 Pos. 2 | - |
| Baking |  | 100°-270° | 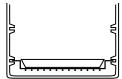 Pos. 1 Pos. 1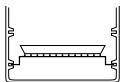 Pos. 2 Pos. 2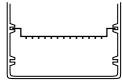 Pos. 3 Pos. 3 | Ideal for all types of foods that need baking (lasagne, meats, pizza, cakes and puddings, fish, poultry) Pos. 3 is particularly suitable for baking biscuits and pastry. |
| Cooking Pizza with Pizza Stone |  | 180°-270° |  Pos. 4 Pos. 4 | Pos. 4 is particularly suitable for cooking pizza. |
| Grilling |  | 270° |  Pos. 5 Pos. 5 | Ideal for all types of grilling: bacon, sausages, toast. The dripping tray is to be positioned above the bottom heating element. |
TECHNICAL DATA
Power rating ....see rating plate
Max. power load ...... see rating plate
Outside dimensions (HxWxD) ......mm 225x425x330
Inside dimensions (HxWxD) ......mm 170x295x265
Cavity volume 12,5
ENERGY CONSUMPTION (CENELEC HD 376 NORM)
To heat to 200^ C....kW 0,1
To maintain 200^ C for one hour ....kW 0,5
Total kW 0,6
This appliance complies with Directive EEC 89/336 regarding the electromagnetic compatibility. All materials and objects destined to come into contact with foodstuffs are in compliance with what is set forth by EEC directive 89/109 and the enforcement Law Decree of January 25, 1992, n. 108.
WARNINGS:
- This oven has been designed to cook foods. It must not be used for other purposes and should not be modified or tampered with in any way.
- Prior to use, make sure that the appliance has not sustained damages during transport.
- Place the appliance on a flat surface at least 85 cm high, out of reach of children.
- While in use, the metal parts and the glass become very hot, operate the appliance by touching the plastic dials and handles only.
-
Before plugging in your appliance, check that:
-
the power supply corresponds to that shown on the rating plate, found on the bottom of the appliance;
- the power socket has a minimum of 10A and is properly earthed:
-
the manufacturer declines any responsibility in case this safety norm is not followed.
-
Carefully wash all accessories prior to use.
-
Before using, run the appliance without any foodstuffs, setting the temperature dial to max. level for at least 15 minutes to eliminate the "new" smell and some of the smoke caused by protective substances which are applied to the heating element for protection during transport. Air the room during this procedure.
- Do not move the appliance while in use.
- In case of replacement, use only power cables that are in compliance with the law, made of HO5 RRF rubber identical to that supplied with the appliance.
WARNING: Once having removed the appliance from the packaging, check that the door is intact. As the door is made from glass, it is fragile, and should be replaced if visibly chipped, scored or scratched. Furthermore, when using, cleaning or moving the appliance, do not slam or bang the door or pour cold liquids on the glass when the appliance is hot.
OPTIONAL ACCESSORIES
- DRIPPING TRAY (M):
must be positioned below the diet grill. May be also used to cook liquid food. During the grill function it is to be positioned above the bottom heating element (G) so as to collect dripping fat.
- BAKING TRAY (I):
must be positioned directly on to the diet grill. Ideal for cooking pastries and biscuits.
• DIET GRILL (L):
may be inserted inside of the dripping tray (M) in two different positions:
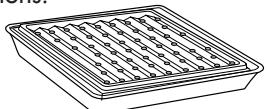
higher position

lower position
- WIRE RACK HANDLE (O):
for removing the wire rack during use.
natural_image
Line drawing of a grater with a handle and metal frame (no text or symbols)- OVEN LIGHT (B):

text_image
1when the grill is in operation, the oven-light is always on.
If the light were to go out, you may continue to use the oven without any problems. See an authorized dealer for the light's replacement.
Some models are equipped with a twist-off light casing (1). To replace the light do the following: unplug the appliance from the wall., untwist the glass light-casing turning it anti-clockwise and replace the light with one of the same type (heat resistant) then twist back the glass light casing (1) into place.
USING THE COMMANDS
- Temperature dial (C)
Select the desired temperature, as follows:
- To keep food warm:
- Traditional oven baking:
- Grilling in general:
- On/off timer dial (D)
- To turn oven on:
- To switch oven off:
- To program cooking times :
Temperature dial on position 60. Temperature dial position between 100°C and 270°C. Temperature dial on position 270°C.
(not on all models)
Turn dial to 🔊 position.
Turn dial to "0" position.
Turn dial clockwise until desired time is set (max. 120 minutes) once set time has elapsed the appliance will give off a sound (*) and the oven will switch off automatically. (*) only on some models.
For cooking times of less than 10 minutes, turn the dial all the way and then set it on to the desired time.
• Function selector dial (E)

natural_image
Simple diagram showing five downward arrows above a blank oval shape, no text or symbols present.
GRILL
(upper element only, at maximum power)
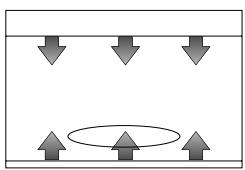
natural_image
Simple diagram showing downward arrows and an oval shape with upward arrows, no text or symbols present.
TRADITIONAL OVEN
(upper and lower elements)
When turned this dial selects the functions available for your different types of cooking, meaning:
- Control light (F)
When the control light is on this means the oven is heating up, when the light switches off this means that the oven has reached the pre-set temperature.
USING THE OVEN
- General advice
- When baking or grilling, it is advisable to always pre-heat the oven to the desired temperature, to get the best possible cooking results.
- Cooking times depend on the product quality, the food temperature and on individual taste. The times shown in the table are only indicative an thus susceptible to variations and do not take into account the time needed to pre-heat the oven.
- When cooking freeze-dried foods, check the times suggested in the products' packaging.
IMPORTANT
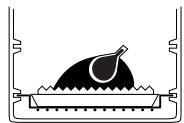
If your oven comes with a diet grill:
we suggest cooking chicken and roasts directly on the diet grill which rests directly on the dripping tray (see fig. on side) to avoid fat dripping to the bottom of the oven and on to the walls. Refer to the following paragraphs for further details.
- Keeping food hot
- Set the function control dial on ☐
- Set the On-Off/Timer dial on 📋 (not on all models)
- Set the temperature to 60, the control light (F) will come on.
- Insert the wire rack as shown in the table on page 3, and place the food on top of it.
Do not leave the food in the oven for a long time as it may become too dry.
- Baking
- Insert the wire rack as show in the table on page 3.
- Set the function control dial to □.
- Select the required temperature by turning the temperature dial (C).
- Set the On-Off/Timer dial (if fitted) on 🎨, or to the required cooking time.
- Wait for the oven to reach the set temperature (control light goes out), then put the food in.
| Recipe/quantity | Temperature | Time | Wire rack position | Comments and advice |
| Pizza (500gr) | 270° | 15'-18' | 2 | Use a well greased dripping tray |
| Bread (500gr) | 270° | 22'-26' | 2 | Use anoiled dripping tray |
| Lasagne (1kg) | 200° | 18'-22' | 2 | Use a Pyrex dish, turn after 10'. |
| Macaroni au gratin (1 kg) | 200° | 18'-22' | 2 | Use a Pyrex dish, turn after 10'. |
| Chicken (1 kg) | 200° | 70'-80' | 1 | Turn over when half cooked |
| Roast pork (1 kg) | 200° | 70'-80' | 1 | Turn over when half cooked |
| Meat loaf (650gr) | 200° | 45'-50' | 2 | Turn over when half cooked |
| Rabbit (800gr) | 200° | 50'-60' | 2 | Turn over when half cooked |
| Trout (500gr) | 180° | 30'-35' | 2 | Use a dripping tray, turn when half cooked |
| Fish au gratin (4 fillets) | 180° | 18'-22' | 2 | Use a dripping tray, turn when half cooked |
| Baked hake (4 slices) | 180° | 25'-30' | 2 | Use a dripping tray, turn when half cooked |
| Tomatoes au gratin (4, medium) | 180° | 40'-45' | 2 | Use an oiled dripping tray |
| Stuffed courgettes (2, halved) | 180° | 45'-50' | 2 | Use a dripping tray, turn when half cooked |
| Cauliflower cheese (800gr) | 200° | 18'-20' | 2 | Use a dripping tray |
| Roast potatoes (500gr) | 200° | 35'-40' | 2 | Turn 2-3 times during cooking |
| Plum cake | 160° | 85'-90' | 1 | Use rectangular cake-tin, turn when half baked |
| Biscuits (shortbreads) | 170° | 15'-18' | 3 | Use a dripping-pan or baking tray, turn after 9 minutes |
| Jam tart | 160° | 40'-45' | 2 | Use a dripping tray, turn when half baked |
| Strudel | 160° | 35'-40' | 2 | Use a dripping tray, turn when half baked |
| Sponge cake | 160° | 25'-30' | 2 | Use a cake-tin, turn when half baked |
Note: If supplied, the use of the appropriate accessories (baking tray, diet grill and dripping tray) is recommended.
• Cooking pizza with Pizza Stone
- Place the wire rack to position 4 (see "Summary Table") and place the special pizza stone on the rack.
- Set the temperature to 270 °C and pre-heat the oven for 5-7 min.
- Set the function control dial to ☐.
- Place the pizza on the pizza stone and cook for about 8 minutes at a temperature of 270^
N.B. Do not use oil or fat when cooking pizza.
- Grilling
- Insert the wire rack to position 5 and the dripping tray on to the bottom heating element. We suggest pouring two glasses of water into the dripping tray so as t avoid smoke and bad odors resulting from burning fat, and for ease in cleaning.
- Turn the function selector dial to position 📋.
- Preheat the oven for about 8 to 10 minutes.
- Place food inside.
- Shut the door panel only until the first click, as shown in the diagram on the side.
- The ON/OFF timer dial (if included) may be either on the ⏻ setting or on the desired time setting (see: "use of commands" paragraph).

| Recipe/quantity | Temperature dial | Times | Wire rack Position | Suggestions |
| Pork chop (2) | 270^ | 19 min. | 4 | Turn over after 11 min. |
| Fresh hamburgers (2) | 270^ | 13 min. | 4 | Turn over after 7 min. |
| Sausages (4) | 270^ | 20 min. | 4 | Turn over after 11 min. |
| Toast (4 slices) | 270^ | 2 min. | 4 | Turn over after 1 min. (*) |
(\*): Dripping tray is not required when toasting bread.
CLEANING
CLEANING THE PIZZA STONE
- Remove cooking residue from the pizza stone with a spatula or a broad-blade knife. For more thorough cleaning, heat the pizza stone in the oven and clean with an abrasive pad. Rinse well in hot water. Do not use detergents.
• After a time, the pizza stone will tend to become darker. This does not affect its characteristics in any way.
CLEANING THE APPLIANCE
- Frequent cleaning avoids smoke and bad odors during cooking.
- Before any type of cleaning unplug the appliance from the wall.
- Never immerse the appliance in water.
- The grill, drip tray and diet grill may be washed as other kitchen ware, either by hand or in the dishwasher.
- To clean the outside surface always use a moist sponge. Avoid using abrasive products that could damage the finish. Ensure water or soap does not penetrate the inside of the oven through the vents positioned on top of the oven.
- To clean the inside aluminum walls never use aluminum-corrosive products (spray detergents) and never scrape the walls with sharp or pointed objects.
Some models come with a bottom opening-panel for easier access as well as cleaning, open the (H) panel by pressing on the spring-latch (fig.A), position the oven on its back (vertically) (fig.B). In this manner, your cleaning will be easier. Once cleaning is finished, close the panel and make sure that the latch is well closed.

natural_image
Illustration of hands using a handheld device to cut or fold a sheet of paper (no text or symbols visible)fig. A

fig. B
GUARANTEE
If the guarantee is printed onto the packaging, it should be cut out, filled out completely and kept aside along with proof of purchase and showed to the technician prior to repairs being made.