NS-1A10S - Mp3 player INSIGNIA - Free user manual and instructions
Find the device manual for free NS-1A10S INSIGNIA in PDF.

User questions about NS-1A10S INSIGNIA
0 question about this device. Answer the ones you know or ask your own.
Ask a new question about this device
Download the instructions for your Mp3 player in PDF format for free! Find your manual NS-1A10S - INSIGNIA and take your electronic device back in hand. On this page are published all the documents necessary for the use of your device. NS-1A10S by INSIGNIA.
USER MANUAL NS-1A10S INSIGNIA
Insignia NS-1A10f/NS-1A10s Digital Music Player
Contents
Introduction ....3
Safety information ....3
Features. 3
Package contents. 4
System requirements 4
Controls and connections....4
Setting up your digital music player .....5
Charging the battery....5
Connecting headphones 6
Installing the Best Buy Digital Music Store software 6
Using your digital music player .....6
Turning your player on and off 6
Changing the volume 6
Locking the buttons 6
Navigating the on-screen menus 7
Playing music files 7
Repeating tracks....8
Repeating segments of a track....9
Using the Enhanced Audio Effect. 10
Using the surround. 11
Using the equalizer....12
Rating songs 14
Adding Rhapsody songs to your library ..... 14
Purchasing music....15
Using Chapter Mode for Audible tracks ..... 15
Repeating Audible tracks 16
Viewing artist information for music tracks ..... 16
Getting more music 17
Getting more music on your computer ..... 17
Copying music files to your player ..... 17
Deleting all music files 19
Disconnecting the player 21
Listening to FM radio 21
Maintaining your digital music player .....28
Care and cleaning 28
Updating the firmware 29
Ordering a replacement battery 29
FAQ 29
Contacting technical support 29
Learn more....29
Specifications. 30
1 Year Limited Warranty....31
Español 20
Introduction
Congratulations on your purchase of a high-quality Insignia product. Your NS-1A10f or NS-1A10s represents the state of the art in digital media players and is designed for reliable and trouble-free performance. You can use your music player to play digital music files and listen to FM radio. And the best part is that you can carry it with you anywhere.

text_image
BEST BUY DIGITALMUSICSTORE RhapsodyFor The Perfect Sync!
Safety information
- Read, keep, and follow all instructions. Heed all warnings.
- Only use attachments and accessories made for Insignia or universal MP3 accessories.
- Turn down the volume before turning on your MP3 player and avoid using it at a high volume. Permanent hearing loss may occur if earphones or headphones are used at high volume. Reduced volume also extends battery life.
- Do not use headphones or earphones while driving, cycling, or operating any motorized vehicle. This may create a traffic hazard and may be illegal in your area.
- To reduce the chance of electrical shock, do not use or operate this player near moist environments.
- Unplug the player during lightning storms or when unused for long periods of time.
- Risk of explosion, damage, or battery leakage if the battery is replaced incorrectly or replaced by an incorrect type. Dispose of used batteries according to local regulations.
- Clean only with a dry cloth.
- Do not disassemble the player to access internal components (except for the battery) under any circumstances.
- It is recommended that you handle the player with one hand and open the USB cap with the other to prevent dropping the player.
Features
- Plays MP3, WMA, secure WMA, and Audible file (format-4) formats.
- OLED display supports several languages and displays song information.
- Digital FM radio tuner allows you to access local radio stations. The radio also memorizes up to 20 of your favorite radio stations.
- Six preset equalizer settings to optimize playback for normal, rock, jazz, classical, pop, and bass music. You can also set a custom equalizer setting for personal taste.
- In addition your player supports surrounds modes for a richer music experience.
- Sophisticated music library sorting lets you browse the music in your player by artist, album, song title, genre, and playlist.
- A-B Repeat lets you select any starting and end points during playback, so you can repeatedly play that segment. This feature is especially helpful while learning languages and words to songs.
• High-speed mini USB 2.0 port for fast and easy file transfers.
• Supports Microsoft WMDRM 10 technology.
- Fully compatible with Best Buy Digital Music service (including channels) and other subscription/ download services.
- Easy-to-use menus.
- Upgradeable firmware to keep your music player up to date.
- Rechargeable battery.
- Comes with two extra hinges so you can customize your player depending on your mood.
Package contents
• Insignia Digital music player
- Earphones
- Mini USB 2.0 extension cable
- Quick Start Guide
• CD (contains Best Buy Digital Music Store software and this online user guide)
• Audible offer card
• Best Buy Digital Music card
- Warranty card
System requirements
To transfer music from your computer to your music player, your computer must have the following minimum system requirements:
• One of the following operating systems:
• Windows Me, Windows XP Home, Windows XP Professional, Windows Vista, or later
• Mac OS 9, Mac OS 10
• One available USB port
- CD-ROM Drive
Controls and connections
Front
text_image
A Main Menu Now Playing > Music Library > Rhapsody... INSIGNIA menu G F B C D E| Item Icon Function | |
| A The OLED displays the information. | |
| B Rewind/ Skip BackPress to restart the current track.Press repeatedly to skip to previous tracks.Press and hold to rewind.In FM radio mode, press to change frequencies.In Main Menu or an options menu, press to go back to the previous menu. | |
| C Up—Press to scroll up through lists, change radio frequency presets. | |
| D Play/ Pause/ SelectPress to play or pause playback.In Playback and FM mode, press and hold to enter an options menu.In menus, press to select an option. |
| Item Icon Function | |
| E Fast Forward/ Skip/ NextPress to skip to the next track.Press and hold to fast forward.In menus, press to open the next submenu or setting.In FM radio mode, press to change frequencies.In Main Menu or an options menu, press to go to next menu. | |
| F Down—Press to scroll down through lists or change radio frequency presets. | |
| G Power—Press and hold for two seconds to turn on the player. Press and hold for two seconds again to turn the player off. If the player freezes, press and hold for seven seconds to force the player to reset.Menu—Press once when the power is on to go to the Main Menu. | |
| The USB cap is used to protect the USB connector while you are listening to music. To connect the player to your computer, rotate the cap towards the headphone jack and plug the player directly into your USB port. To replace the hinge simply take one of the cap arms and pull it gently off the player. It will snap off easily. Push the new one onto the player. | |
Left side
natural_image
Diagram of a mechanical component with labeled point A, showing internal structure and no readable text or symbols.Item Function
A Hold switch—Slide to disable all buttons.
Right side
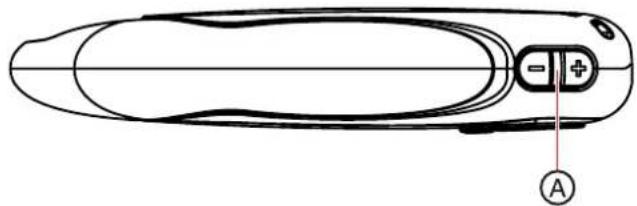
natural_image
Top-down schematic of a car body with labeled components (no text or symbols beyond basic diagram)| Item | Function |
| A | Volume—Press + to increase volume; press — to decrease volume. |
Bottom

text_image
VOL hold AItem Function
A Connect the earphones to the jack.
Back

natural_image
Top-down schematic of a vehicle or device component with labeled point A (no text or symbols beyond label)Item Function
A Connect the USB connector to a computer USB port for transferring music and data.
OLED Display
text_image
A B C D E 000/000 A-B Artist Name/Alb Track Name F G H 00:00:00 00:00:00 I JItem Function
| A | Playback Status—Displays the music or audible track playback status. |
| B | Track Number—The first number is the current track number, and the second is the total number of sound tracks. While playing an audible track, the first number represents the current chapter, and the second is total number of chapters. |
Item Function
| C | Subscription Status—Shows the Best Buy Digital Music service subscription status. |
| D | A to B Repeat—Indicates when the A to B section repeat function is enabled. |
| E | Battery Status—Indicates the battery charge status. |
| F | Artist Name/ Album Name—Displays the artist name and album name of current file name that is being played. |
| G | Track Name—Displays the current file name that is being played. |
| H Progress Bar—Shows the playback progress. | |
| I | Play Time—Displays the on-going timer of the current playback file. |
| J Total Time—Displays the total time of all the files. | |

text_image
000/000 Artist Name/Alb Track Name 24 L| Item | Function |
| K | Repeat Mode—Indicates the repeat mode which includes Normal, Repeat One, Repeat All, Shuffle, and Shuffle & Repeat. |
| L Volume—Displays the volume status. | |
Setting up your digital music player
Charging the battery
Charge the battery whenever you are not using the player to make sure it is always fully charged. The battery charges in about two hours. A fully charged battery provides up to 30 hours of continuous music playback, depending on the brightness and display time of the backlight, and the volume levels. You do not need to fully charge the battery before beginning to use your player.
Note
If the following icon appears on the display, you must charge your player.

text_image
Low BatteryTo charge the battery:
1 Turn on your computer.
2 Connect the supplied mini USB 2.0 cable to the mini USB jack on the player and a standard USB jack on your computer. When the cable is connected correctly, the player begins recharging its battery using the USB connection, and the message USB Connected appears on the player.

text_image
USB ConnectedAs the battery charges, the LED backlights behind the buttons blink every five seconds. Once the battery is fully charged, the LED stops blinking.
Note
You can also use a USB charger to charge your player. The charger must supply 0.5 Amps at 5 Volts to charge the player.
Connecting headphones
You can use any headphones with a standard 3.5 mm stereo audio plug.
To connect headphones:
- Plug headphones or the provided earphones into the earphone/ headphone jack on the music player.
Note
To use the FM radio, you must connect the provided earphones because they act as the FM antenna. To substitute for the earphones, you can use any headphones with unshielded wires.
Installing the Best Buy Digital Music Store software
To install the software:
1 Insert the Insignia software CD into your computer's CD or DVD drive. The software installation program starts.
-OR-
If the installation program doesn't start automatically, double-click My Computer on your desktop, double-click the CD drive that contains the Insignia CD, then double-click the file setup.exe. The software installation program starts.
2 Follow the on-screen instructions to finish the installation.
Tip
For iTunes Drag and Drop support, use File & Folder (MSC) USB mode. Your Insignia MP3 player will only play iTunes MP3 files that you drag and drop from iTunes. For information on changing USB modes, see "Select the USB mode" on page 27.
Using your digital music player
Turning your player on and off
To turn your player on or off:
- Press and hold (Power/ Menu) for two seconds.
Resetting the player
If the player stops responding to button presses, you should reset the player.
To reset your player:
- Press and hold (Power/ Menu) for seven seconds to force a reset. This will fully reset the player.
Changing the volume
To change the volume:
- Press (Volume Up) or (Volume Down).
Locking the buttons
You can prevent accidental button operation by locking the buttons.
To lock the buttons:
- Slide the HOLD switch in the direction of the arrow. An image of the hold button in the HOLD position appears on the screen.
text_image
000/000 HOLDTo unlock the buttons:
- Slide the HOLD switch away from the arrow.
Navigating the on-screen menus
Use the on-screen menu to play music and change settings.
To navigate the on-screen menu:
1 Press (Power/Menu). The Main Menu opens.

text_image
Main Menu Now Playing > Music Library > Rhapsody... >2 Press (Up) or (Down) to highlight one of the following menu items:
- Now Playing g
- Music Library
• Rhapsody Channels
• FM Radio - Settings
3 Press (Next). The submenu of the item you selected opens. To navigate backwards from a submenu, press (Previous).
Playing music files
To play music:
1 Press (Power/Menu). The Main Menu opens.

text_image
Main Menu Now Playing > Music Library > Rhapsody... >2 Press (Up) or (Down) to highlight Music Library, then press Next). The music library opens.

text_image
Music Library Play All Artist Album3 Highlight one of the following options, then press ▶Next) to open that category:
- Play All—Plays all tracks on the player.
• Artist—Lists all tracks arranged alphabetically by artist. - Album—Lists all tracks arranged alphabetically by album. Even if you copied only one track from an album to your player, that album name appears in this list.
- Genre—Lists all tracks arranged alphabetically by genre.
- Track—Lists all tracks arranged alphabetically by track title.
- Playlist—Lists all tracks arranged alphabetically by playlist.
• Rhapsody Channels—Lists the subscribed Rhapsody songs.
• Audible—Lists all Audible tracks.
4 To play all tracks starting with a specific track, select that track within the category. The player switches to the Now Playing view, which displays information on the track currently playing.
5 If your selection does not begin to play, press ▷ (Play/Pause).
The track begins playing and the play status icon appears in the upper-left corner of the display.

text_image
000/000 Artist Name/Alb Track Name 00:00:00 00:00:00• To pause playback, press ▶ (Play/Pause). The pause status icon 📄 appears in the upper-left corner of the screen.
- To skip to the next track, press ▶▶▶ (Skip/Fast Forward).
- To skip to a previous track, press (Skip Back/Rewind) repeatedly.
- To fast forward the current track, press and hold (Skip/Fast Forward).
• To rewind the current track, press and hold ◀◀ (Skip Back/Rewind).
• To restart the current track, press (Skip Back/Rewind) once.
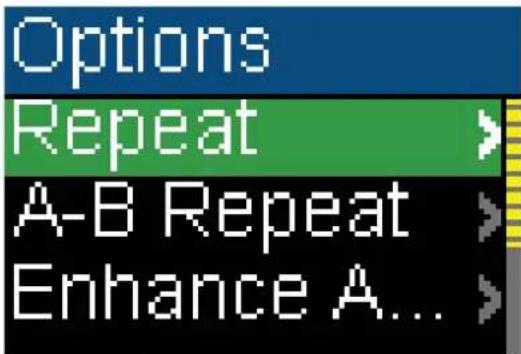
Repeating tracks
To repeat tracks:
1 In the Playback menu, press ▷ (Play/Pause) button for two seconds. The player enters the Playback sub-menu.
text_image
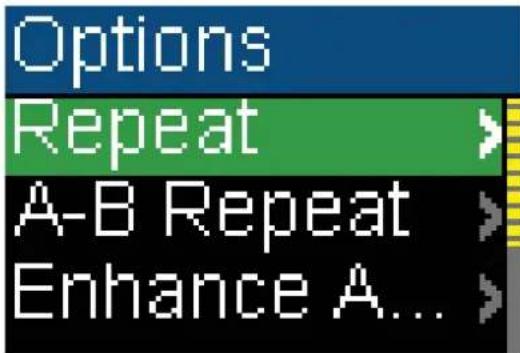
Options Repeat A-B Repeat Enhance A...2 Select Repeat, then press ▶▶ (Next) or ▶▶▶ (Play/Pause).

text_image
Options Repeat A-B Repeat Enhance A...3 Press (Up) or (Down) to select one of the following options:
• Normal—default setting
- Repeat One—repeat a single track
- Repeat All—repeat all tracks
- Shuffle—play all tracks randomly
- Shuffle & REP—play all tracks randomly and repeat

text_image
Repeat Normal Repeat One Repeat All| Icon Repeat Mode | |
| Normal | |
| Repeat One | |
| Repeat All | |
| Shuffle | |
| Shuffle & Repeat | |
4 Press (Next) or (PlayPause) to save your setting. The repeat icon appears on the Now Playing screen next to the battery icon.

text_image
000/000 Artist Name/Alb Track Name 00:00:00 00:00:00-OR-
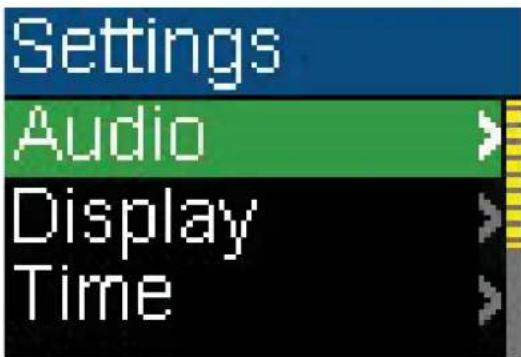
1 In the Settings menu, select Audio, then press ▶▶ (Next) ▶or (Play/Pause).

text_image
Settings Audio Display Time2 In the Audio sub-menu, select Repeat, then press ▶▶ (Next) ▶▶r (Play/Pause).

text_image
Settings Repeat A-B Repeat Enhance A...3 Press (Up) or (Down) to select one of the following options:
• Normal—default setting
- Repeat One—repeat a single track
- Repeat All—repeat all tracks
- Shuffle—play all tracks randomly
- Shuffle & REP—play all tracks randomly and repeat

text_image
Repeat Normal Repeat One Repeat All4 Press (Next) or (PlayPause) to save your setting.
Repeating segments of a track
You can use A-B repeat to repeatedly play a segment of a track. You must first enable A-B repeat.
To enable A-B repeat:
1 In the Playback menu, press ▷ (Play/Pause) button for two seconds. The player enters the Playback sub-menu.

text_image
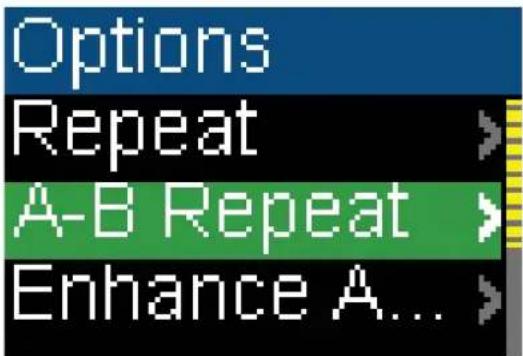
Options Repeat A-B Repeat Enhance A...2 Select A-B Repeat, then press ▶▶ (Next) or ▶▶▶ (Play/Pause).
text_image
Options Repeat A-B Repeat Enhance A...3 Press (Up) or (Down) to select one of the following options:
- Off—disable the A-B repeat function
- On—enable the A-B repeat function

text_image
A-B Repeat Off On4 Press (Next) or (PlayPause) to save your setting. -OR-
1 In the Settings menu, select Audio, then press ▶▶ (Next) ▶□r (Play/Pause).

text_image
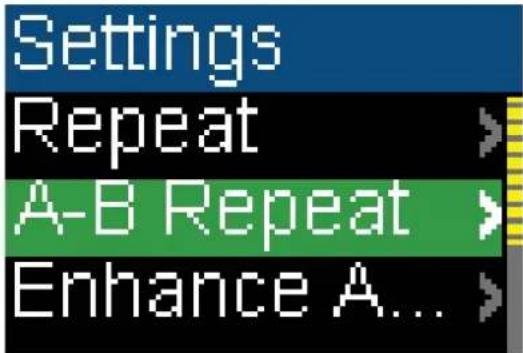
Settings Audio Display Time2 Press ▲ (Up) or ▼ (Down) to highlight A-B repeat, then press ▶ next) or ▷ ▶ (Play/Pause).
text_image
Settings Repeat A-B Repeat Enhance A...3 Press ▲ (Up) or ▼ (Down) to highlight On or Off, then press ▶ Next) or ▷ (Play/Pause) to save setting. The Audio Setting menu opens.

text_image
A-B Repeat Off OnTo repeat an audio segment:
1 During playback, press (Down) to mark the start of the playback loop. The repeat icon on the display shows an A.

text_image
000/000 A- Artist Name/Alb Track Name 00:00:00 00:00:002 Press (Down) again to mark the end of the playback loop. The repeat icon on the display shows as A-B and the player repeats that audio segment indefinitely.

text_image
000/000 A-B Artist Name/Alt Track Name 00:00:00 00:00:003 Press (Down) again to cancel the repeating loop.
Using the Enhanced Audio Effect
This player supports an enhanced audio effect.
To activate the enhanced audio effect:
1 In the Playback menu, press ▷ (Play/Pause) button for two seconds. The player enters the Playback sub-menu.
text_image
Options Repeat > A-B Repeat > Enhance A... >2 Select Enhance Audio, then press ▶▶▶ (Next) or ▶Play/Pause).

text_image
Options Repeat A-B Repeat Enhance A...3 Press ▲ (Up) or ▼ (Down) to highlight On or Off.

text_image
Enhance Au... Off On4 Press (Next) or (PlayPause) to save your setting. -OR-
1 In the Settings menu, select Audio, then press ▶▶ (Next) ▶□r (Play/Pause).
text_image
Settings Audio Display Time2 In the Audio menu, select Enhance Audio, then press Next) or (Play/Pause).
text_image
Settings Repeat A-B Repeat Enhance A... >3 Press (Up) or (Down) to select the Enhance Audio setting you want.

text_image
Enhance Au... Off On4 Press (Next) or (PlayPause) to save your new settings.
Using the surround
This player supports a surround audio effect.
To activate the surround audio effect:
1 In the Playback menu, press ▷ (Play/Pause) button for two seconds. The player enters the Playback sub-menu.

text_image
Options Repeat > A-B Repeat > Enhance A... >2 Select Surround, then press ▶▶ (Next) or ▶▶▶ (Play/Pause).

text_image
Options Surround > Equalizer > Rate this so...>3 Press (Up) or (Down) to highlight an option on the list.
text_image
Surround Off Level 1 Level 24 Press (Next) or (PlayPause) to save your setting. -OR-
1 In the Settings menu, select Audio, then press ▶▶ (Next) ▶▶r (Play/Pause).

text_image
Settings Audio Display Time2 In the Audio menu, select Surround, then press ▶▶ (Next) ▶▶r (Play/Pause).

text_image
Settings Surround > Equalizer >3 Press (Up) or (Down) to select the Surround setting you want.

text_image
Surround Off Level 1 Level 24 Press (Up) or (PlayPause) to save your new settings.
Using the equalizer
Six equalizer settings are available for you to select from. Five are preprogrammed into the player: Normal, Rock, Jazz, Classic, and Pops. The User setting lets you customize the equalizer to your preference.
To select a pre-programmed equalizer setting:
1 In the Playback menu, press ▷ (Play/Pause) button for two seconds. The player enters the Playback sub-menu.
text_image
Options Repeat A-B Repeat Enhance A...2 Select Equalizer, then press ▶▶ (Next) or ▶▶ (Play/Pause).

text_image
Options Surround Equalizer Rate this so...3 Press (Up) or (Down) to select the equalizer setting you want.

text_image
Equalizer Normal Rock Jazz4 Press (Next) or (PlayPause) to save your setting. -OR-
1 In the Settings menu, select Audio, then press ▶▶ (Next) ▶▶r (Play/Pause).
text_image
Settings Audio Display Time2 In the Audio menu, select Equalizer, then press ▶▶ (Next) ▶□r (Play/Pause).
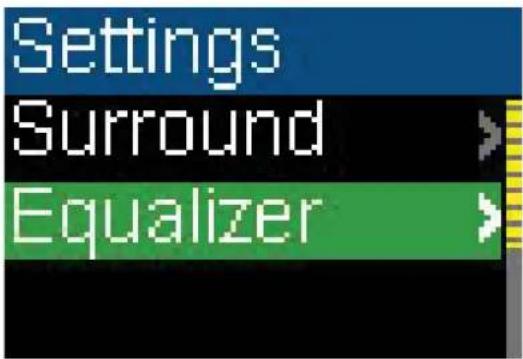
text_image
Settings Surround Equalizer3 Press (Up) or (Down) to select the equalizer setting you want.

text_image
Equalizer Normal Rock Jazz4 Press (Up) or (PlayPause) to save your new settings.
To change the equalizer's custom setting:
1 In the Settings menu, select Audio, then press ▶▶ (Next) ▶▶r (Play/Pause).

text_image
Settings Audio Display Time2 In the Audio menu, select Equalizer, then press ▶▶ (Next) ▶or (Play/Pause).

text_image
Settings Surround Equalizer3 Press (Up) or (Down) to select the Custom setting.

text_image
Equalizer Pop Bass Custom4 Press (Next) to move the cursor to the first equalizer setting dial.

text_image
Custom +12db -12db 0 -8 -12 +10 200 1K 3K 10K5 Press (Up) or (Down) to adjust the setting. Repeat this step to adjust each remaining dial.
6 Press (Play/Pause) to save your new settings.
Rating songs
You can rate the songs in the player while you are listening to them.
To rate a song:
1 While playing a song, press (Play/Pause) button for two seconds. The Playback sub-menu opens.

text_image
Options Repeat > A-B Repeat > Enhance A... >2 Select Rate this song, then press ▶▶ (Next) or ▶▶ (Play/Pause).

text_image
Options Surround > Equalizer > Rate this so...>3 Press (Up) or (Down) to select neutral, 1-star, 2-star, 3-star, 4-star, 5-star, and negative.

text_image
Rate this song ☆☆☆☆☆ ★☆☆☆☆ ★★☆☆☆4 Press (Next) or (PlayPause) to save your setting.
Adding Rhapsody songs to your library
When you subscribe to a Rhapsody channel, the songs will not appear in your music library, they are only part of the Rhapsody channel. While listening, you can add the song to the music library on the player.
To add a Rhapsody Channel song to the music library:
1 In the Playback menu, press ▷ (Play/Pause) button for two seconds. The player enters the Playback sub-menu.

text_image
Options Repeat A-B Repeat Enhance A...2 Select Add to library, then press ▶▶ (Next) or ▶▶ (Play/Pause). The song has been added message appears.

text_image
Options Add to library> Purchase Artist Inform...>
text_image
Options Song has been added3 Once a song has been added to the library, it can not be added again. You can not select the Add to library item for a song that is already in the library.
Note
The added song is a subscription-based addition to your library. The song falls under all the regular Best Buy Digital Music store DRM restrictions if you wish you can purchase it to own the song permanently.
Purchasing music
With a valid subscription to Best Buy Digital Music Store, any song that is playing can be marked for purchase later. You can purchase it later through the Best Buy Digital Music Store software using your computer.
To purchase the Rhapsody Channel song in the player:
1 In the Playback menu, press ▷ (Play/Pause) button for two seconds. The player enters the Playback sub-menu.
text_image
Options Repeat A-B Repeat Enhance A...2 Select Purchase, then press ▶▶ (Next) or ▶▶ (Play/Pause).

text_image
Options Add to library > Purchase > Artist Inform...>3 Press ▲ (Up) or ▼ (Down) to select No or Yes.

text_image
Purchase No YesThe next time you connect your player to your computer and use the Best Buy Digital Music Store software, your purchase order will be uploaded. You will have the option to purchase this song at that time. You will also have the opportunity to cancel this purchase.
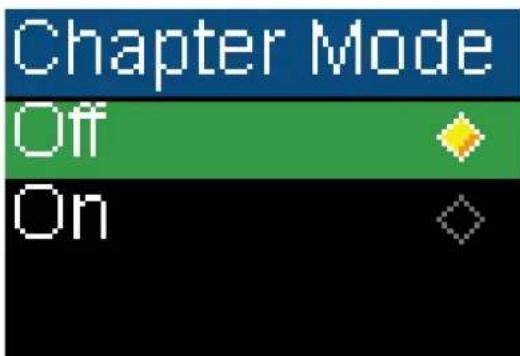
Using Chapter Mode for Audible tracks
For Audible tracks, the player supports chapter mode.
To enable chapter mode:
1 While playing an audible track, press ▷ (Play/Pause) button for two seconds, you will enter the Audible Playback sub-menu.

text_image
Options Chapter Mo...> Repeat2 Select Chapter Mode and press ▶▶ (Next) or ▶Play/Pause). You will see the next display as below.
text_image
Chapter Mode Off On3 Select Off to disable the chapter mode function or select On to enable the function. When chapter mode is enabled:
- If the 000/000 appears in white, it means that the current track number and total track number are being displayed.
- If the 000/000 appears in yellow, it means that the current chapter number and total chapter number are being displayed.

text_image
000/000 A-B Artist Name/Alb Track Name 00:00:00 00:00:004 Press (Skip/Fast Forward) skip the chapter. or press (Skip Back/Rewind) to skip forward.
Repeating Audible tracks
For Audible tracks, this player supports Repeat One and Repeat All.
To set the repeat setting for Audible track:
1 In Audible Playback menu, press ▷ (Play/Pause) button for two seconds, you will enter the Audible Playback sub-menu.

text_image
Options Chapter Mo... Repeat2 Select Repeat, then press ▶▶ (Next) or ▶▶▶ (Play/Pause).

text_image
Options Chapter Mo... Repeat >3 Press (Up) or (Down) to select one of the following options:
• Normal—default setting
- Repeat One—repeat a single track
- Repeat All—repeat all tracks

text_image
Repeat Normal Repeat One Repeat All| Icon Repeat Mode | |
| Normal | |
| Repeat One | |
| Repeat All | |
4 Press (Next) or (PlayPause) to save your setting. The repeat icon appears on the Now Playing screen next to the battery icon.

text_image
000/000 Artist Name/Alb Track Name 00:00:00 00:00:00Viewing artist information for music tracks
Songs downloaded through Best Buy Music Store's subscription service often contain artist information. You can view the artist information while listening to the song.
To view the artist information
1 In the Playback menu, press ▷ (Play/Pause) button for two seconds. The player enters the Playback sub-menu.

text_image
Options Repeat A-B Repeat Enhance A...2 Select Artist Information, then press ▶▶ (Next) or ▶Play/Pause).

text_image
Options Add to library Purchase Artist Inform...>You can read the artist information of the currently playing song on the display.
3 Press (Up) or (Down) to read more artist information if available. Press (Skip Back/Rewind) to go back to the Options Menu.
Getting more music
Your music player already contains some music files, but you can get more music from your own music CDs and from the Internet.
Getting music from CDs and the Internet to your music player involves two steps:
1 Rip a CD (create files of the music on the CD) or download music files from the Internet.
2 Select the files to copy and copy them to your player.
Getting more music on your computer
Getting music from CDs
To rip a CD:
1 Click Start, All Programs, Best Buy Digital Music Store, Best Buy Digital Music Store. Best Buy Digital Music Store opens.
text_image
Music Guide Curtini Lucinda Willielle Lucinda Willielle Lucinda Willielle Lucinda Willielle Lucinda Willielle Lucinda Willielle Lucinda Willielle Lucinda Willielle Lucinda Willielle Lucinda Willielle Lucinda Willielle Lucinda Willielle Lucinda Willielle Lucinda Willielle Lucinda Willielle Lucinda Willielle Lucinda Willielle LucindaWillielle LucindaWillielle LucindaWillielle LucindaWillielle LucindaWillielle LucindaWillielle LucindaWillielle LucindaWillielle LucindaWillielle LucindaWillielle LucindaWillielle LucindaWillielle LucindaWillielle LucindaWillielle LucindaWillielle LucindaWillielle LucindaWillielle Loca Loca Loca Loca Loca Loca Loca Loca Loca Loca Loca Loca Loca Loca Loca Loca Loca Loca Loca Loca Loca Loca Loca Loca Loca Loca Loca Loca Loca Loca Loca Loca Loca Loca2 Put a music CD in the CD drive. Best Buy Digital Music Store lists the tracks on the right side of the screen. If you are connected to the Internet, the list shows the track names.
3 Click the check boxes in front of the songs you want to copy.
4 Click Import CD. Best Buy Digital Music Store creates MP3 files from the music tracks on the CD and lists them under the My Library folder.

For information on transferring your music files to your music player, see "Copying music files to your player" on page 17.
Getting music from Digital Music Store
To buy and download music files from the Internet:
1 Click Start, All Programs, Best Buy Digital Music Store, Best Buy Digital Music Store. Best Buy Digital Music Store opens.

text_image
Music Guide Lima Williems Lucinda Williems Dr. Sweet Ludhills On You Roll2 In the Search box, type the name of the artist or album you want to download music for, then click Go. Any matches that Digital Music Store finds are displayed on the screen.
3 Decide which tracks or albums you want to buy, then click BUY next to the music you want.
4 Follow the on-screen directions to finish the purchase. The music files are added to your Digital Music Store music library.
Tips
You can also use other digital music management programs to get music files from the Internet. See the program's online help for more information. For iTunes Drag and Drop support, use File & Folder (MSC) USB mode. Your Insignia MP3 player will only play iTunes MP3 files that you drag and drop from iTunes. For information on changing USB modes, see "Select the USB mode" on page 27.
Copying music files to your player
Copying files using Best Buy Digital Music Store
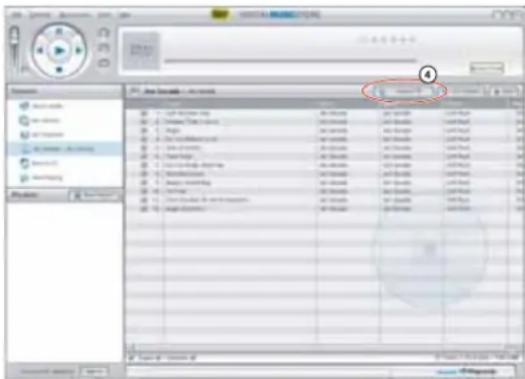
To copy files from your computer to the music player using Best Buy Digital Music Store:
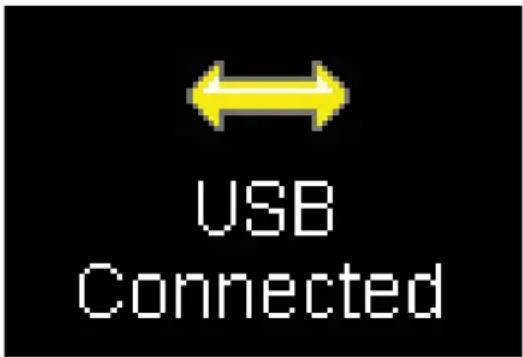
1 Connect the USB cable to a USB port on your computer and the mini USB port on your player. The message USB Connected appears on the player.

text_image
USB ConnectedYour computer detects the player, and adds the player as a new device called Insignia Kix Player in the My Computer list of drives in Windows.
2 Click Start, All Programs, Best Buy Digital Music Store, Best Buy Digital Music Store. Best Buy Digital Music Store opens.
3 Close any popup windows that open.
4 Click My Library in the list of content types. Your entire library of digital music appears in the right side of the screen.
text_image
Audio Audio files Audio name Audio type Audio format Audio mode: 0x100% Audio mode: 0x100% Audio mode: 0x100% Audio mode: 0x100% Audio mode: 0x100% Audio mode: 0x100% Audio mode: 0x100% Audio mode: 0x100% Audio mode: 0x100% Audio mode: 0x100% Audio mode: 0x100%5 Click and drag the music files from your library list to the Insignia Kix Player item in the Sources list.

text_image
OK OK OK6 When you have finished transferring all of the files you want to copy to your Insignia Kix Player, you can click Insignia Kix Player in the list of sources to view the updated list of tracks on your player.
When the transferring is complete, the message OK to disconnect appears on the player.
7 Unplug the USB cable from your computer and your player.
Copying files using Windows Explorer
To copy music files from your computer to your player using Windows Explorer:
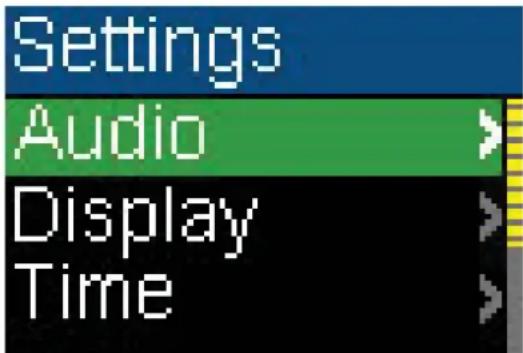
1 On your player, press (Power/ Menu), select Settings, then press (Next).

text_image
Main Menu Now Playing > Music Library > Rhapsody... >
text_image
Settings Audio Display Time2 Select USB Mode, then press ▶▶ (Next).

text_image
Settings System Account USB Mode3 Highlight Media Manager (MTP) or File & Folder (MSC), then press ▶Next) or ▶(Play/Pause) to save the setting.

text_image
USB Mode Media Man... File & Fold...- Use Media Manager (MTP) mode to copy WMA and MP3 files to the Media folder, and any other file formats to the Data folder (you cannot see the Data folder using the player's display). Depending on which media manager software (such as BBDMS, Windows Media Player, and many others) you use, the name of the subfolders may be different than Media and Data. - Use File & Folder (MSC) mode to copy folders and any format of files to the player's root folder. The player will still only play MP3 and WMA files.
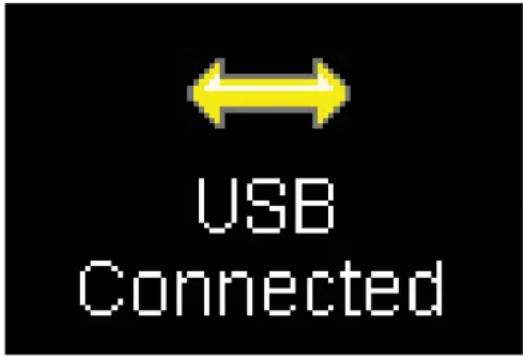
4 Connect your player to the computer using the provided USB cable. The message USB Connected appears on the player.
text_image
USB Connected5 On your computer, click Start, My Computer, then open the folder where your music files are.
6 Open My Computer again to open another window, then open the Insignia Kix Player drive. (When your computer detected the player, it added the player as a new device called Insignia Kix Player in the My Computer list of drives in Windows.)
7 Click and drag the music files from your computer to the player:
- If your player is in Media Manager (MTP) mode, copy them to the Media folder on the player.
- If your player is in File & Folder (MSC) mode, copy them to the root folder on the player.
While transferring data, you will see the following screen.

text_image
WritingTip
To select multiple files, press and hold Ctrl on your keyboard while clicking the files with your mouse. To select an entire range of files, click the file at the top of the range, press and hold Shift on your keyboard, then click the file at the bottom of the range.
8 Unplug the USB cable from your computer and your player.
Deleting all music files
To delete all music files from your player using the on-screen menu:
1 Press ⏻(Power/ Menu). MtheMenu opens.

text_image
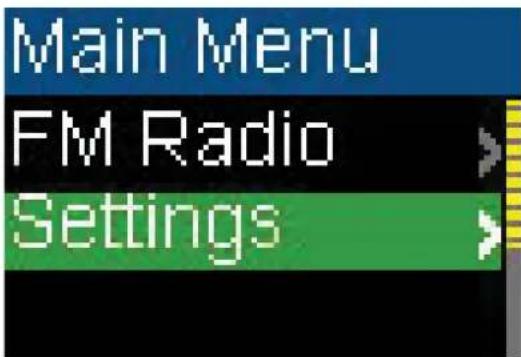
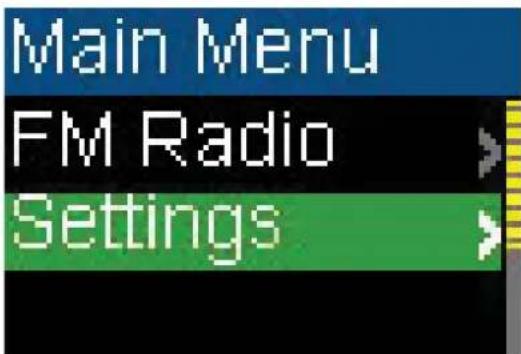
Main Menu Now Playing > Music Library > Rhapsody... >2 Select Settings, then press ▶▶▶ (Next) or ▶▶▶ (Play/Pause).
text_image
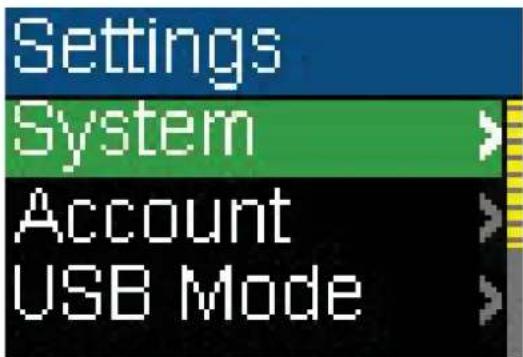
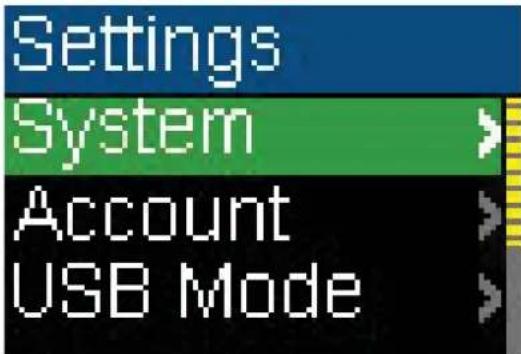
Settings Audio Display Time3 Select System, then press ▶▶ (Next) or ▶▶▶ (Play/Pause).

text_image
Settings System Account USB Mode4 Select Erase All, then press ▶▶ (Next).

text_image
System Language Erase All System init5 Select Yes, then press ▶▶ (Next) or ▶▶▶ (Play/Pause).

text_image
Erase All No YesWhile the player deletes all the music files, you will see the following display. The duration depends on the number of files being deleted.

text_image
Erase All Please wait erasingAfter deleting all the files, the player takes some time to rebuild the library. After the following message disappears, all the music files have been deleted.

text_image
Erase All Rebuilding the library Please waitTo delete music files from your player using your computer:
1 Connect the USB cable to a USB port on your computer and the mini USB port on your player. The message USB Connected appears on the player.
text_image
USB ConnectedYour computer detects the player, and adds the player as a new device called Insignia Kix Player in the My Computer list of drives in Windows.
2 Click Start, then click My Computer.
3 Double-click the Insignia Kix Player device, then open the Media folder.
4 Find the files you want to delete, click to select them, then press Delete on your keyboard. The files are deleted.
Tip
To select multiple files, press and hold Ctrl on your keyboard while clicking the files with your mouse. To select an entire range of files, click the file at the top of the range, press and hold Shift on your keyboard, then click the file at the bottom of the range.
Disconnecting the player
After you have connected the player to a computer for recharging or for transferring music, you need to safely disconnect the player.
To safely disconnect the player from your computer:
1 Double-click the icon on the task bar to open the Safely Remove Hardware dialog box. You can find all devices connected on the display. To remove the player, close all the programs, and click on the USB Mass Storage Device and click the Stop button.
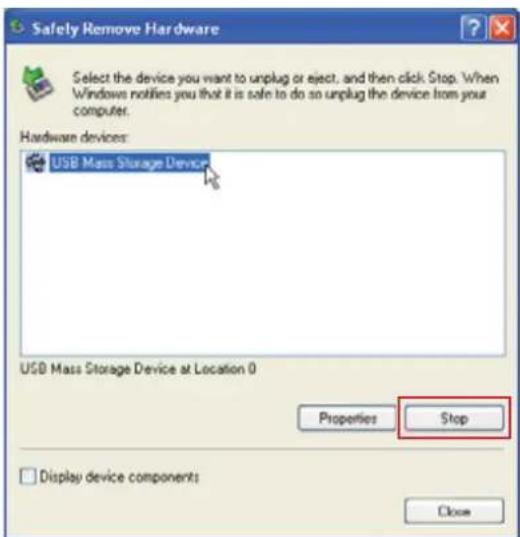
text_image
Safety Remove Hardware Select the device you want to unplug or eject, and then click Stop. When Windows notifies you that it is safe to do an unplug the device from your computer. Hardware devices: USB Mass Storage Device Properties Stop Display device components Close2 When you see a window as below, select USB Mass Storage Device and click OK.

text_image
Stop a Hardware device Confirm devices to be stopped. Choose OK to continue. Windows will attempt to stop the following devices. After the devices are stopped they may be removed safely. USB Mass Storage Device Generic volume - (F) USB Device OK Cancel3 The following message appears, and you can remove the player.

text_image
Safe To Remove Hardware The 'USB Mass Storage Device' device can now be safely removed from the system.Listening to FM radio
You can listen to FM radio broadcasts on your player.
Note
To use the FM radio, you must have the provided earphones connected because they act as the FM antenna. To substitute for the earphones, you can use any headphones with unshielded wires.
Tuning the radio
To tune to an FM radio station:
1 Plug your earphones into the earphone jack.
2 Press ⏻(Power/Menu). M FineMenu opens.

text_image
Main Menu Now Playing > Music Library > Rhapsody... >3 Select FM Radio, then press ▶▶ (Next) or ▶▶▶ (Play/Pause).

text_image
Main Menu FM Radio Settings4 Press (Previous) (Next) to the frequency in increments of 100 KHz. Press and hold (Previous) or (Next) for one second, the player searches for the previous or next strong channel.

text_image
FM Radio Preset 01 99.7 MHz 87.5 1085 Press (Up) or (PlayPause) to switch among the preset channels.
change
Setting station presets
Station presets let you quickly access your favorite frequencies.
To add station presets:
1 In FM mode, tune to an FM radio station frequency.
2 Press and hold (Play/Pause) for two seconds to open the FM Options menu.
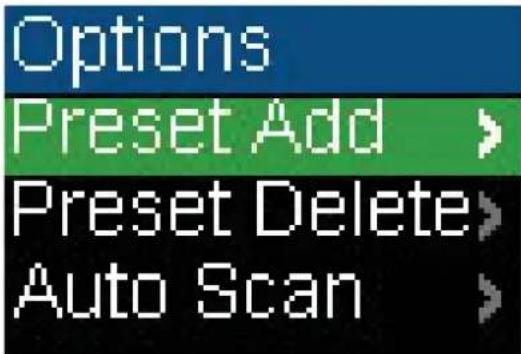
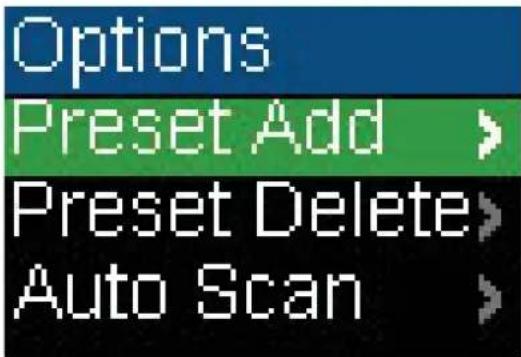
text_image
Options Preset Add > Preset Delete > Auto Scan >3 Select Preset Add, then press ▶▶ (Next) or ▶▶▶ (Play/Pause).
4 Press (Up) or (Down) to select a channel to add, then press Next) or ▶(Play/Pause). The channel is added. If a channel existed at the same number, it is replaced.
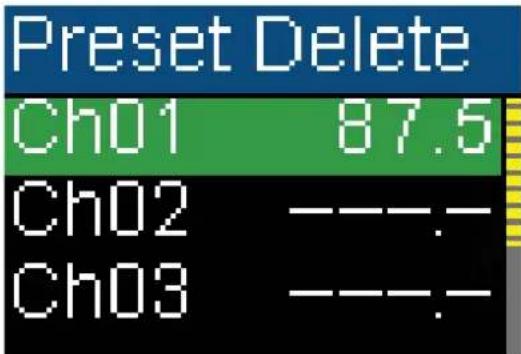
text_image
Preset Delete Ch01 87.5 Ch02 ---. Ch03 ---.To delete station presets:
1 In FM mode, press (Play/Pause) to enter the FM Options sub-menu.
text_image
Options Preset Add > Preset Delete > Auto Scan >2 Select Preset Delete, then press ▶▶ (Next) or ▶▶ (Play/Pause).
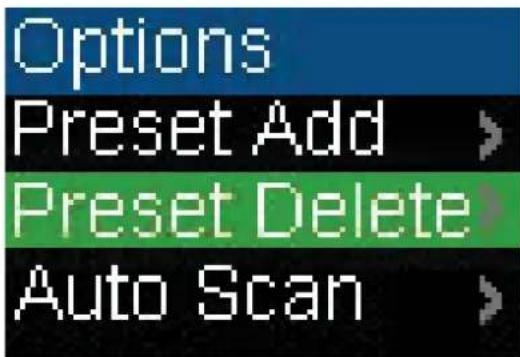
text_image
Options Preset Add > Preset Delete > Auto Scan >3 Press (Up) or (Down) to select a preset station to delete, then press Next) or ▷(Play/Pause). The preset is deleted.

text_image
Preset Delete Ch01 87.5 Ch02 ---. Ch03 ---.To set station presets automatically:
1 In FM mode, press (Play/Pause) to enter the FM Options sub-menu.

text_image
Options Preset Add > Preset Delete > Auto Scan >2 Select Auto Scan, then press ▶▶ (Next) or ▶▶▶ (Play/Pause).
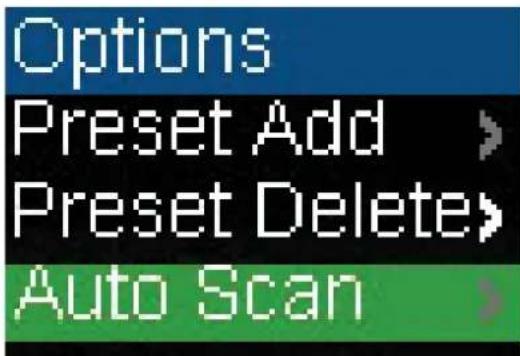
text_image
Options Preset Add > Preset Delete> Auto ScanThe player scans the radio range and flashes the message Auto Scanning.
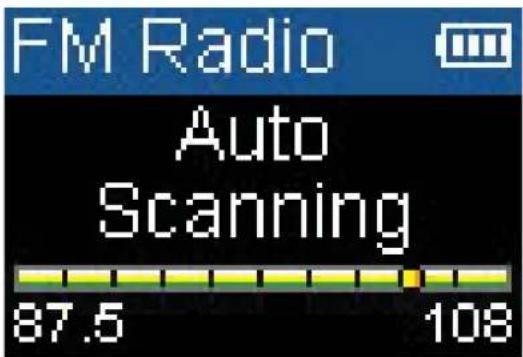
text_image
FM Radio Auto Scanning 87.5 108While scanning, the player automatically adds a preset for any local strong stations until all 20 preset channels have been set or all frequencies have been scanned.
Changing settings
You can change the brightness, rotation, and backlight settings.
To change the brightness, rotation, and backlight settings:
1 Press (Power/ Menu). The Main Menu opens.

text_image
Main Menu Now Playing > Music Library > Rhapsody... >2 Select Settings, then press ▶▶ (Next) or ▶▶ (Play/Pause).

text_image
Main Menu FM Radio Settings3 Select Display, then press ▶▶ (Next) or ▶▶ (Play/Pause). The Display menu opens.
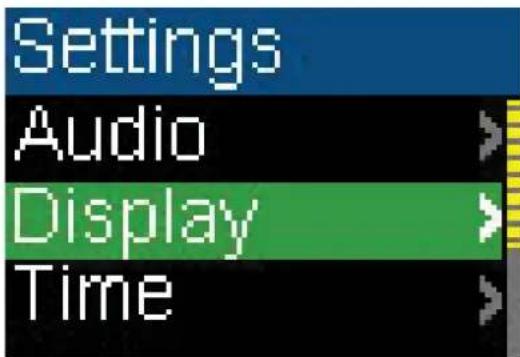
text_image
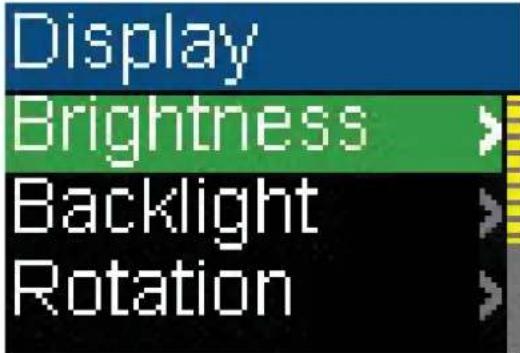
Settings Audio Display Time4 Change any of the following settings:
- Brightness—Changes the brightness of the backlit screen.
text_image
Display Brightness > Backlight > Rotation >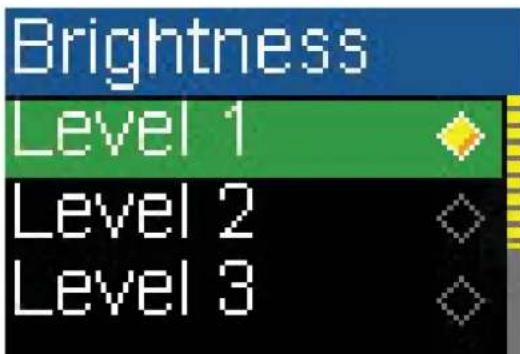
text_image
Brightness Level 1 Level 2 Level 3- Backlight—Changes the length of time that the backlight stays on after you press a button. The backlight may noticeably decrease battery life if it is left on for long periods of time.
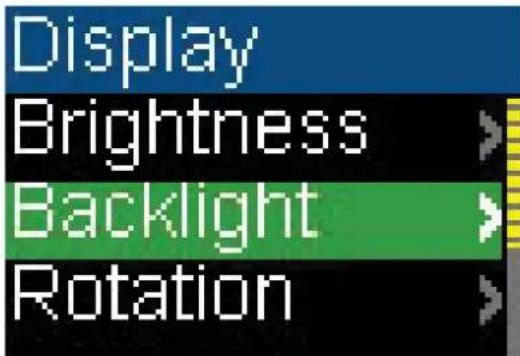
text_image
Display Brightness Backlight Rotation
text_image
Backlight 2 Sec 5 Sec 10 Sec- Rotation—Rotates the screen and flips the button functions to make left-handed use of the player easier. Default is Right-Handed.

text_image
Display Brightness Backlight Rotation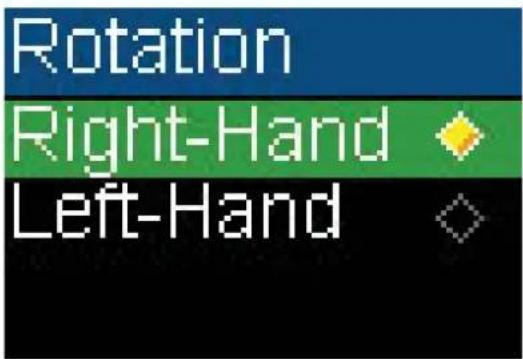
text_image
Rotation Right-Hand Left-HandTo change the power off and sleep settings:
1 Press (Power/ Menu). The Main Menu opens.

text_image
Main Menu Now Playing > Music Library > Rhapsody... >2 Select Settings, then press ▶▶ (Next) or ▶▶▶ (Play/Pause).

text_image
Main Menu FM Radio Settings3 Select Time, then press ▶▶ (Next) or ▶▶ (Play/Pause). The Time menu opens.

text_image
Settings Audio Display Time4 Change any of the following settings:
- Auto Power Off—Adjusts the length of time without any button presses that the player waits before automatically turning off. You can select Off or a time up to ten minutes.

text_image
Time Auto Power... Sleep
text_image
Auto Power off 5 Min 10 Min- Sleep—Changes the length of time the player waits before automatically turning off, regardless of button presses or other activity. You can select 30-minute time increments up to 120 minutes.

text_image
Time Auto Power... Sleep
text_image
Sleep Off 30 Min 60 MinTo change the player's language:
1 Press (Power/Menu). The Main Menu opens.

text_image
Main Menu Now Playing > Music Library > Rhapsody... >2 Select Settings, then press ▶▶ (Next) or ▶▶ (Play/Pause).

text_image
Main Menu FM Radio Settings3 Select System, then press ▶▶ (Next) or ▶▶▶ (Play/Pause). The System menu opens.
text_image
Settings System Account USB Mode4 Select Language.

text_image
System Language Erase All System init5 Select English, French, or Spanish.

text_image
Language English Français EspañolTo erase all files and change all settings to factory defaults:
1 Press Ⓑ(Power/ Menu). MeneMenu opens.

text_image
Main Menu Now Playing > Music Library > Rhapsody... >2 Select Settings, then press ▶▶ (Next) or ▶▶ (Play/Pause).
text_image
Main Menu FM Radio Settings3 Select System, then press ▶▶ (Next) or ▶▶▶ (Play/Pause). The System menu opens.
text_image
Settings System Account USB Mode4 Change any of the following settings: - Erase All—Erases all music files from the player.

text_image
System Language Erase All System init
text_image
Erase All No Yes
text_image
Erase All Please wait erasing
text_image
Erase All Rebuilding the library Please wait- System Init—Resets all player settings to the factory defaults.

text_image
System Language Erase All System init
text_image
System init No YesSelect the USB mode
The music player can use two USB modes, Media Manager (MTP, the default) mode and File & Folder (MSC) mode.
To manually change the USB mode:
1 Press (Power/Menu). The Main Menu opens.

text_image
Main Menu Now Playing > Music Library > Rhapsody... >2 Select Settings, then press ▶▶ (Next) or ▶▶ (Play/Pause).
text_image
Main Menu FM Radio Settings3 Select USB Mode, then press ▶▶ (Next) or ▶▶ (Play/Pause). The USB Mode menu opens.

text_image
Settings System Account USB Mode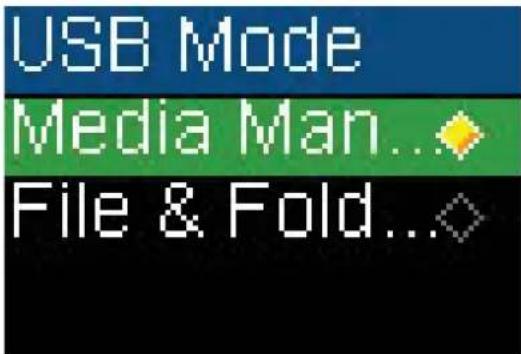
text_image
USB Mode Media Man... File & Fold...4 Select any of the following settings:
• Media Manager (MTP)—Optimum setting for using the player as a music player with Windows XP.
- File & Folder (MSC)—Optimum setting for using the player as a file storage device, and required for using iTunes Drag and Drop Support.
Viewing Account Information
Your player stores your account status information for the Best Buy Digital Music Store, including User ID, Renewed date, and Expiration date.
To view the account information:
1 Press ⏻(Power/ Menu). MFileMenu opens.

text_image
Main Menu Now Playing > Music Library > Rhapsody... >2 Select Settings, then press ▶▶ (Next) or ▶▶▶ (Play/Pause).

text_image
Main Menu FM Radio Settings3 Select Account Information, then press ▶▶ (Next) or ▶Play/Pause). You see the account information.

text_image
Settings System Account Inf... USB Mode
text_image
Account Infor... User ID: A02CCFFE... Renewed: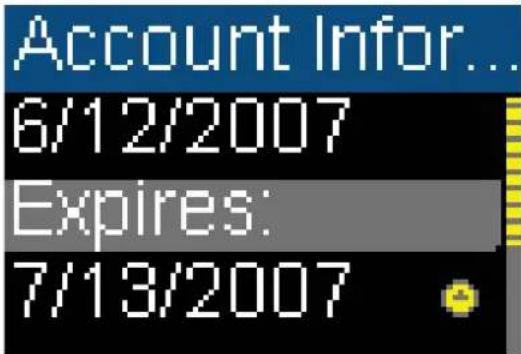
text_image
Account Infor... 6/12/2007 Expires: 7/13/2007Viewing system information
Your player can tell you its total memory, used memory, available memory, and other system information.
To view system information:
1 Press (Power/Menu). The Main Menu opens.

text_image
Main Menu Now Playing > Music Library > Rhapsody... >2 Select Settings, then press ▶▶ (Next) or ▶▶▶ (Play/Pause).

text_image
Main Menu FM Radio Settings3 Select Information, then press ▶▶ (Next) or ▶▶ (Play/Pause). The Information screen opens, displaying memory use, firmware version, and date.

text_image
Settings Information >
text_image
Information Firmware Ver:0.00.00 7/13/2007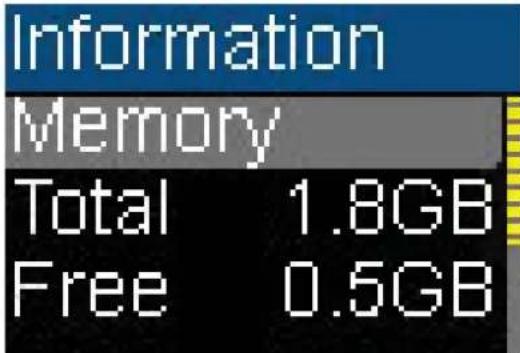
text_image
Information Memory Total 1.8GB Free 0.5GBMaintaining your digital music player
Care and cleaning
• Periodically clean your player by using a washcloth dampened only with water, or lens-cleaning papers dampened with water or isopropyl (rubbing) alcohol.
• Make sure that you do not get the player wet.
- Keep your player away from hot environments, such as on top of a vehicle dashboard, a window sill, or a heat register.
- Avoid carrying your player in a pocket that contains metallic items, which can scratch and damage the player.
- Avoid carrying your player in a pocket or compartment that is dirty. Dirt, dust, and lint can damage the player.
- As much as possible, keep your player in its protective carrying case.
- Update the firmware occasionally to make sure that you have the latest version and product features.
Updating the firmware
To update the firmware:
1 On the Internet, connect your Web browser to www.insignia-products.com, then search for the music player firmware update.
2 Follow the online instructions to download the updated firmware files. Make sure that you take note of where the file is saved to.
3 Double-click the file you saved in step 2, then follow the on-screen instructions to complete the upgrade.
4 When the file finishes copying, unplug the USB cable. The player automatically detects and installs the new firmware.
Warning Installing new firmware will automatically delete all content from the player.
Ordering a replacement battery
You can purchase a replacement battery from the following web address: http://bestbuy.partsearch.com/
FAQ
How do I copy files to the player?
In File & Folder (MSC) mode, you can copy files to the player the same way you copy files to a hard drive or flash memory drive. In Media Manager (MTP) mode, you can use BBDMS, Windows Media Player, or other digital music managers to transfer files to your player. For more information, see "Copying music files to your player" on page 17 and "Select the USB mode" on page 27.
Which file formats does the player support?
This player supports MP3, WMA, secure WMA, and Audible audio formats. Any other formats must be converted to a supported format before being copied to your player.
What is MTP?
Media Transfer Protocol (MTP, or Media Manager mode) is a protocol for connecting portable devices to a Windows XP computer and synchronizing digital media content between those devices.
When I copy files to the player using Windows Explorer, what folder should I copy them to?
In Media Manager (MTP) mode, copy them to the Media folder on the player. In File & Folder (MSC) mode, you can copy them to the root directory.
Some of my music files are on my player, but cannot be played. When I select them, a different song begins to play. What is wrong?
You may not have purchased the rights to play the song on an additional device. To test this, try to play a song that you have copied from an older CD and converted to MP3 format. If you can play that song but not the song that doesn't play, then you need to purchase the rights to play the song.
Why should I update the firmware?
You should always update the player to the latest firmware to make sure that it works correctly and has the latest features. For more information, see “Updating the firmware” on page 29.
How do I copy a CD to my player?
First you must rip the CD using a digital music manager like Best Buy Digital Music Store or Windows Media Player. After the songs are on your computer, copy the songs to the player using Windows Explorer or a digital music manager. For more information, see “Copying music files to your player” on page 17.
Why does my player display a message that says "Unknown artist/album"?
This message usually appears when the music file does not contain artist or album information (incomplete ID3 tags). See the documentation or online help of your digital music manager for instructions on adding that information to your music files.
Getting help
Contacting technical support
Before you contact technical support, review the FAQ section to see if your question is already answered there.
If you have questions about the use or features of your player, call Technical Support at 1-800-699-9218 or (877) 467-4289, or fill out an online support request at:
www.bestbuy.com/support.asp
Get additional online help at: www.insignia-products.comwww.bestbuy.com/mp3www.geeksquad.com
Learn more
On the Internet, you can use a Web search site to find information on the following topics*:
- "Ripping CDs"
- "Downloading music"
- "Downloading MP3s"
- "MP3 music"
- "MP3 copyright law"
*Best Buy Enterprise Services, Inc. does not maintain and is not responsible for the content of Web pages you find using these search terms.
Specifications
Specifications and features are subject to change without notice or obligation.
| Ports and connections | Mini USB 2.0, Earphones/Headphones |
| Display OLED, 16 colors, 96 x 64 pixels | |
| Battery Rechargeable lithium-ion | |
| Supported formats Audio: MP3, WMA (DRM10), and Audible | |
| Dimensions 83 (L) x 36.8(W) x 16.7 mm | |
| Weight 1.06 oz. (30 g) | |
Legal notices
FCC Part 15
This device complies with Part 15 of the FCC Rules. Operation of this product is subject to the following two conditions: (1) this device may not cause harmful interference, and (2) this device must accept any interference received, including interference that may cause undesired operation.
This equipment has been tested and found to comply within the limits for a class B digital device, pursuant to Part 15 of the FCC Rules. These limits are designed to provide reasonable protection against harmful interference in a residential installation. This equipment generates, uses, and can radiate radio frequency energy and, if not installed and used in accordance with the instructions, may cause harmful interference to radio communications. However, there is no guarantee that interference will not occur in a particular installation. If this equipment does cause harmful interference to radio or television reception, which can be determined by turning the equipment off and on, the user is encouraged to try to correct the interference by one or more of the following measures:
- Reorient or relocate the receiving antenna.
- Increase the separation between the equipment and receiver.
- Connect the equipment into an outlet on a circuit different from that to which the receiver is connected.
- Consult the dealer or an experienced technician for help.
FCC warning
Changes or modifications not expressly approved by the party responsible for compliance with the FCC Rules could void the user's authority to operate this equipment.
DHHS and FDA safety certification
This product is made and tested to meet safety standards of the FCC, requirements and compliance with safety performance of the U.S. Department of Health and Human Services, and also with FDA Radiation Performance Standards 21 CFR Subchapter J.
Canada ICES-003 statement
This Class B digital apparatus complies with Canadian ICES-003.
RSS 310 statement
To reduce potential radio interference to other users, the antenna type and its gain should be so chosen that the equivalent isotropically radiated power (e.i.r.p.) is not more than that permitted for successful communication.
Copyright
© 2006 Insignia. Insignia and the Insignia logo are trademarks of Best Buy Enterprise Services, Inc. Other brands and product names are trademarks or registered trademarks of their respective holders. Specifications and features are subject to change without notice or obligation. For service and support call (877) 467-4289.
1 Year Limited Warranty
Insignia Products ("Insignia") warrants to you, the original purchaser of this new NS-1A10f/NS-1A10s ("Product"), that the Product shall be free of defects in the original manufacture of the material or workmanship for a period of one (1) year from the date of your purchase of the Product ("Warranty Period"). This Product must be purchased from an authorized dealer of Insignia brand products and packaged with this warranty statement. This warranty does not cover refurbished Product. If you notify Insignia during the Warranty Period of a defect covered by this warranty that requires service, terms of this warranty apply.
How long does the coverage last?
The Warranty Period lasts for 1 year (365 days) from the date you purchased the Product. The purchase date is printed on the receipt you received with the Product.
What does this warranty cover?
During the Warranty Period, if the original manufacture of the material or workmanship of the Product is determined to be defective by an authorized Insignia repair center or store personnel, Insignia will (at its sole option): (1) repair the Product with new or rebuilt parts; or (2) replace the Product at no charge with new or rebuilt comparable products or parts. Products and parts replaced under this warranty become the property of Insignia and are not returned to you. If service of Products or parts are required after the Warranty Period expires, you must pay all labor and parts charges. This warranty lasts as long as you own your Insignia Product during the Warranty Period. Warranty coverage terminates if you sell or otherwise transfer the Product.
How to obtain warranty service?
If you purchased the Product at a retail store location, take your original receipt and the Product to the store you purchased it from. Make sure that you place the Product in its original packaging or packaging that provides the same amount of protection as the original packaging. If you purchased the Product from an online web site, mail your original receipt and the Product to the address listed on the web site. Make sure that you put the Product in its original packaging or packaging that provides the same amount of protection as the original packaging.
To obtain in-home warranty service for a television with a screen 25 inches or larger, call 1-888-BESTBUY. Call agents will diagnose and correct the issue over the phone or will have an Insignia-approved repair person dispatched to your home.
Where is the warranty valid?
This warranty is valid only to the original purchaser of the product in the United States and Canada.
What does the warranty not cover?
This warranty does not cover:
- Customer instruction
- Installation
- Set up adjustments
• Cosmetic damage
• Damage due to acts of God, such as lightning strikes - Accident
- Misuse
• Abuse
• Negligence - Commercial use
- Modification of any part of the Product, including the antenna
- Plasma display panel damaged by static (non-moving) images applied for lengthy periods (burn-in).
This warranty also does not cover:
- Damage due to incorrect operation or maintenance
- Connection to an incorrect voltage supply
- Attempted repair by anyone other than a facility authorized by Insignia to service the Product
- Products sold as is or with all faults
- Consumables, such as fuses or batteries
- Products where the factory applied serial number has been altered or removed
REPAIR REPLACEMENT AS PROVIDED UNDER THIS WARRANTY IS YOUR EXCLUSIVE REMEDY. INSIGNIA SHALL NOT BE LIABLE FOR ANY INCIDENTAL OR CONSEQUENTIAL DAMAGES FOR THE BREACH OF ANY EXPRESS OR IMPLIED WARRANTY ON THIS PRODUCT, INCLUDING, BUT NOT LIMITED TO, LOST DATA, LOSS OF USE OF YOUR PRODUCT, LOST BUSINESS OR LOST PROFITS. INSIGNIA PRODUCTS MAKES NO OTHER EXPRESS WARRANTIES WITH RESPECT TO THE PRODUCT, ALL EXPRESS AND IMPLIED WARRANTIES FOR THE PRODUCT, INCLUDING, BUT NOT LIMITED TO, ANY IMPLIED WARRANTIES OF AND CONDITIONS OF MERCHANTABILITY AND FITNESS FOR A PARTICULAR PURPOSE, ARE LIMITED IN DURATION TO THE WARRANTY PERIOD SET FORTH ABOVE AND NO WARRANTIES, WHETHER EXPRESS OR IMPLIED, WILL APPLY AFTER THE WARRANTY PERIOD. SOME STATES, PROVINCES AND JURISDICTIONS DO NOT ALLOW LIMITATIONS ON HOW LONG AN IMPLIED WARRANTY LASTS, SO THE ABOVE LIMITATION MAY NOT APPLY TO YOU. THIS WARRANTY GIVES YOU SPECIFIC LEGAL RIGHTS, AND YOU MAY ALSO HAVE OTHER RIGHTS, WHICH VARY FROM STATE TO STATE OR PROVINCE TO PROVINCE.
Contact Insignia:
For customer service please call 1-877-467-4289
www.insignia-products.com
INSIGNIA™ is a trademark of Best Buy Enterprise Services, Inc.
Distributed by Best Buy Purchasing, LLC.
Insignia, 7601 Penn Avenue South, Richfield, Minnesota, U.S.A.
natural_image
Diagram of a mechanical component with labeled point A, showing internal structure and no readable text or symbols.Elemento Función
natural_image
Top-down schematic of a vehicle showing key components (no text or labels)Elemento Función
natural_image
Top-down schematic of a vehicle or device component with labeled point A (no text or symbols beyond label)Elemento Función
text_image
Low Batterytext_image
USB Connectedtext_image
Main Menu Now Playing > Music Library > Rhapsody... >text_image
Main Menu Now Playing > Music Library > Rhapsody... >text_image
Repeat Normal Repeat One Repeat Alltext_image
Repeat Normal Repeat One Repeat Alltext_image
A-B Repeat Off Ontext_image
A-B Repeat Off Ontext_image
Options Surround > Equalizer > Rate this so...>text_image
Surround Off Level 1 Level 2text_image
Settings Surround Equalizertext_image
Surround Off Level 1 Level 2text_image
Options Surround Equalizer Rate this so...>text_image
Equalizer Normal Rock Jazztext_image
Settings Surround Equalizertext_image
Equalizer Normal Rock Jazztext_image
Settings Surround Equalizertext_image
Equalizer Pop Bass Customtext_image
Options Surround > Equalizer > Rate this so...>text_image
Options Add to library> Purchase Artist Inform...>
text_image
Options Song has been addedtext_image
Options Add to library > Purchase > Artist Inform...>text_image
Purchase No Yestext_image
Options Chapter Mo...> Repeattext_image
Chapter Mode Off Ontext_image
Options Chapter Mo... Repeattext_image
Options Chapter Mo... Repeat >text_image
Repeat Normal Repeat One Repeat Alltext_image
Options Add to library > Purchase > Artist Inform... >text_image
Music Table Guru Williems on a Avonet Road Lucydia Williems CHL Williems See You Mailtext_image
USB Connectedtext_image
Export Volume Export Value Project - Projects Export Volume Project Export Volume Project Export Volume Project Export Volume Project Export Volume Project Export Volume Project Export Volume Project Export Volume Project Export Volume Project Export Volume Project Export Volume Project Export Volume Project Export Volume Project Export Volume Project Export Volume Project Export Volume Project Export Volume Project Export Volume Project Export Volume Project Export Volume Project Export Volume Project Export Volume Project Export Volume Project Export Volume Project Export Volume Project Export VolumeProjecttext_image
Main Menu Now Playing > Music Library > Rhapsody... >
text_image
Settings Audio Display Timetext_image
Settings System Account USB Modetext_image
USB Connectedtext_image
Main Menu Now Playing > Music Library > Rhapsody... >text_image
Settings System Account USB Modetext_image
Erase All Please wait erasingtext_image
Erase All Rebuilding the library Please waittext_image
USB Connectedtext_image
Safely Remove Hardware Select the device you want to unplug or eject, and then click Stop. When Windows notifies you that it is safe to do so unplug the device from your computer. Hardware devices: USB Mass Storage Device USB Mass Storage Device at Location 0 Properties Stop Display device components Closetext_image
Stop a Hardware device Confirm devices to be stopped. Choose OK to continue. Windows will attempt to stop the following devices. After the devices are stopped they may be removed solely. USB Mass Storage Device Genetic volume - (F) USB Device OK Canceltext_image
Safe To Remove Hardware The 'USB Mass Storage Device' device can now be safely removed from the system.text_image
Main Menu Now Playing > Music Library > Rhapsody... >text_image
Main Menu FM Radio Settingstext_image
Options Preset Add > Preset Delete > Auto Scan >text_image
Options Preset Add > Preset Delete > Auto Scan >text_image
Options Preset Add > Preset Delete > Auto Scan >text_image
Options Preset Add > Preset Delete > Auto Scan >text_image
FM Radio Auto Scanning 87.5 108text_image
Main Menu Now Playing > Music Library > Rhapsody... >text_image
Main Menu FM Radio Settingstext_image
Display Brightness > Backlight > Rotation >
text_image
Brightness Level 1 Level 2 Level 3text_image
Display Brightness Backlight Rotation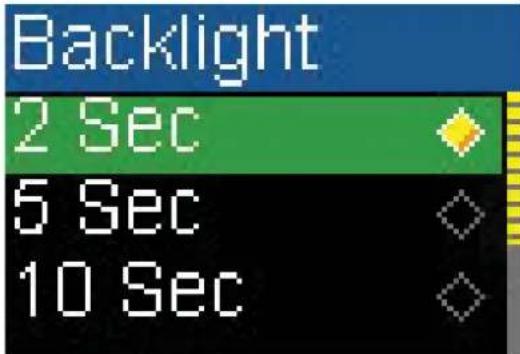
text_image
Backlight 2 Sec 5 Sec 10 Sectext_image
Display Brightness Backlight Rotation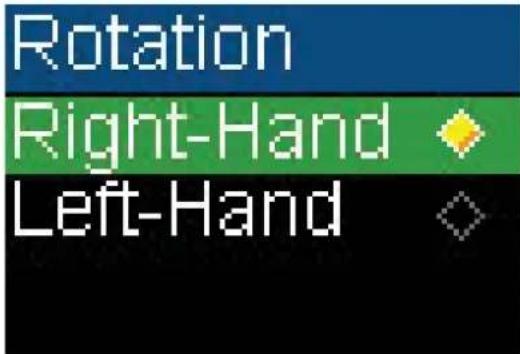
text_image
Rotation Right-Hand Left-Handtext_image
Main Menu Now Playing > Music Library > Rhapsody... >text_image
Main Menu FM Radio Settingstext_image
Main Menu Now Playing > Music Library > Rhapsody... >text_image
Main Menu FM Radio Settingstext_image
Settings System Account USB Modetext_image
Main Menu Now Playing > Music Library > Rhapsody... >text_image
Main Menu FM Radio Settingstext_image
Settings System Account USB Modetext_image
Erase All Please wait erasing
text_image
Erase All Rebuilding the library Please waittext_image
Main Menu Now Playing > Music Library > Rhapsody... >text_image
Main Menu FM Radio Settingstext_image
Settings System Account USB Mode
text_image
USB Mode Media Man... File & Fold...text_image
Main Menu Now Playing > Music Library > Rhapsody... >text_image
Main Menu FM Radio Settingstext_image
Settings System Account Inf... USB Mode
text_image
Account Infor... User ID: A02CCFFE... Renewed: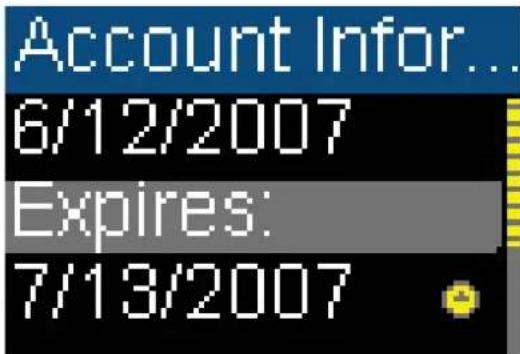
text_image
Account Infor... 6/12/2007 Expires: 7/13/2007text_image
Main Menu Now Playing > Music Library > Rhapsody... >text_image
Main Menu FM Radio SettingsDistributed by Best Buy Purchasing, LLC
7601 Penn Avenue South, Richfield, MN USA 55423-3645
© 2007 Best Buy Enterprise Services, Inc.
All rights reserved. INSIGNIA is a registered trademark of Best Buy Enterprise Services, Inc.
All other products and brand names are trademarks of their respective owners.
7601 Penn Avenue South, Richfield, MN USA 55423-3645
© 2007 Best Buy Enterprise Services, Inc.
7601 Penn Avenue South, Richfield, MN USA 55423-3645
© 2007 Best Buy Enterprise Services, Inc.