
Minno K 279 - Vacuum Cleaner KING - Free user manual and instructions
Find the device manual for free Minno K 279 KING in PDF.

| Product Type | Bagless Vacuum Cleaner |
| Model | Minno K 279 |
| Brand | King |
| Power Consumption | 1200 W |
| Suction Power | 300 Air Watts |
| Dust Capacity | 2.5 L |
| Filtration System | HEPA 13 Filter |
| Noise Level | 78 dB |
| Weight | 5.5 kg |
| Dimensions (L x W x H) | 35 x 25 x 30 cm |
| Cord Length | 6 m |
| Operating Radius | 9 m |
| Attachments Included | Crevice tool, Dusting brush, Upholstery nozzle |
| Dust Container Type | Transparent Cyclone |
| Washable Filter | Yes |
| Voltage | 220-240 V, 50/60 Hz |
| Maintenance | Empty dust container after each use; clean filters monthly |
| Safety Features | Thermal overload protection |
| Repairability | Spare parts available (filter, hose, brush) |
| Warranty | 2 years |
Frequently Asked Questions - Minno K 279 KING
User questions about Minno K 279 KING
0 question about this device. Answer the ones you know or ask your own.
Ask a new question about this device
Download the instructions for your Vacuum Cleaner in PDF format for free! Find your manual Minno K 279 - KING and take your electronic device back in hand. On this page are published all the documents necessary for the use of your device. Minno K 279 by KING.
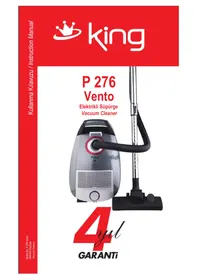
USER MANUAL Minno K 279 KING
natural_image
White crown icon on red background, no text or symbols presentking
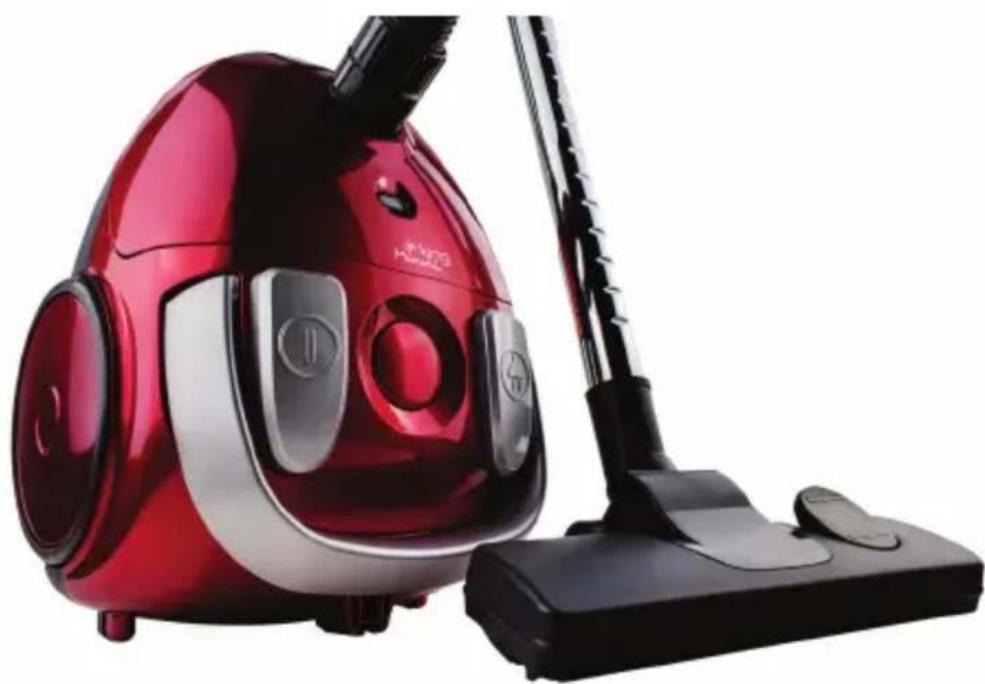
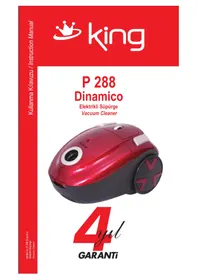
K 279 Minni
Elektrikli Süpürge
Vacuum Cleaner
natural_image
Red and silver vacuum cleaner with black handle, no visible text or symbols
GARANTI

natural_image
Red background with a white crown and ring design (no text or symbols)king
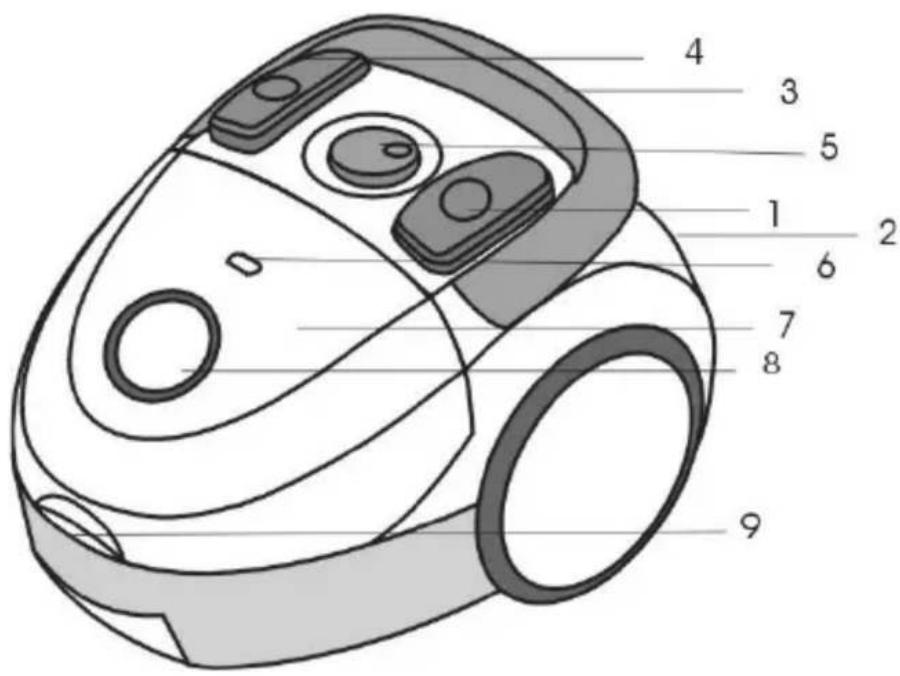
Overview the components
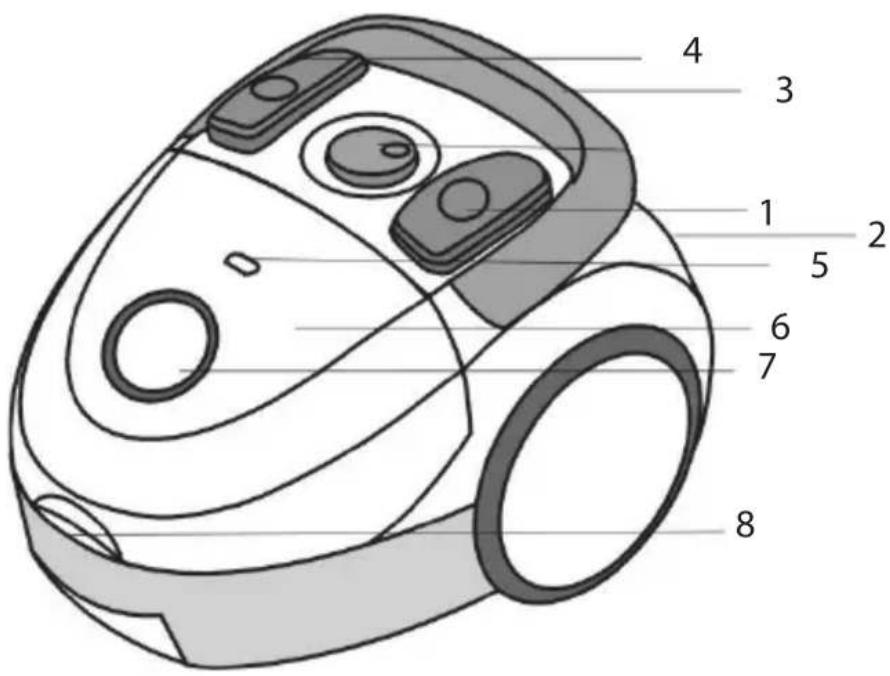
- On/off switch
- Cable & Plug
- Carrying handle
- Cable-winding key
- Dust bag filling display
- Dust bag compartment (front cover)
- Hose connection
- Handle for opening the dust bag compartment

natural_image
Red background with a white crown and ring design (no text or symbols)king
Instruction Manual
General Safety Instructions
- Read the operating instructions carefully before putting the appliance into operation and keep the instructions including the warranty, the receipt and, if possible, the box with the internal packing.
The appliance is designed exclusively for private use and for the envisaged purpose. This appliance is not fit for commercial use. Do not use it outdoors (except if it is designed to be used outdoors). Keep it away from sources of heat, direct sunlight, humidity (never dip it into any liquid) and sharp edges. Do not use the appliance with wet hands. If the appliance is humid or wet, unplug it immediately. Do not put it in water. - When cleaning or putting it away, switch off the appliance and always pull out the plug from the socket (pull on the plug, not the cable) if the appliance is not being used and remove the attached accessories.
- Do not operate the machine without supervision. If you should leave the workplace, always switch the machine off or remove the plug from the socket (pull the plug itself, not the lead).
■ To protect children from the dangers posed by electrical appliances, make sure that the cable is hanging low and that children do not have access to the appliance.
This appliance is not intended for use by persons (including children) with reduced physical, sensory or mental capabilities, or lack of experience and knowledge, unless they have been given supervision or instruction concerning use of the appliance by a person responsible for their safety.
■ Children should be supervised to ensure that they do not play with the appliance. - Check the appliance and the cable for damage on a regular basis. Do not use the appliance if it is damaged.
- Do not try to repair the appliance on your own. Always contact an authorized technician. To avoid the exposure to danger, always have a faulty cable be replaced only by the manufacturer, by our customer service or by a qualified person and with a cable of the same type.
■ Use only original spare parts. - Pay careful attention to the following “Special Safety Instructions”.

natural_image
Red background with a white crown and ring design (no text or symbols)king
Special Safety Instructions
■ Do not suck up liquids!
■ Do not suck up hot ashes or pointed or sharp objects!
■ Do not use the appliance in humid rooms!
■ Never use without the filter. Check that the filter is inserted correctly!
■ Hair, clothing and body parts away from the vacuum nozzle during use!
- Keep the vacuum cleaner away from sources of heat like radiators, ovens, etc.!
Start-up
- Insert the connection head of the suction hose into the hose connector (8) until it locks in place. To do so, please press the buttons simultaneously. In order to release the hose again, please press the buttons once more on the connection head.
- Keep the buttons pressed down and then pull out the hose.
- Please attach the telescopic suction tube to the grip end (see section ‘Suction Tube’).
■ Then assemble the floor nozzle and/or the accessories.
Using the Appliance
- Unwind the length of cable (2) you require.
- Insert the mains plug into a correctly installed 220-240V, 50-60 Hz power socket. Turn on the device with the on/off switch (1) by pushing the regulator downwards.
- Vacuum at a steady speed. There is no need to exert pressure.
- Attention: pay attention to the range that can be covered with the cable length.
Telescopic Suction Tube:
- This makes it possible to adapt the height to your individual body size. Unlock the coupling by turning the wide section of the suction tube to the left.
- Move the suction tube as required. To lock the coupling, turn the wide suction tube to the right.
Cable winding device:
Pull out the cable (2) up to the maximum length indicated with the yellow mark. Never pull the cable out up to the red mark as the cable winding can be damaged. Said damages are not covered by the warranty. Winding Press the cable (4) winding button and guide the cable. Hold the cable to avoid wrapping.
king
Nozzle Attachment:
Crevice nozzle/Brush nozzle: For vacuuming upholstery, curtains and in corners and crevices etc.
'2-in-1' nozzle: When this is folded together it can be used as a groove nozzle. If you would like to use the brush nozzle, pull the brush section in the direction of the arrow until it locks in place.
Floor nozzle: To clean carpets or smooth surfaces.
Smooth floors: Press down the lever with the brush symbol with your foot. The brush is now visible.
Carpets: Press down the opposite lever.
Releasing the nozzles: Pull these off while turning slightly.
Air Slide:
Open the air slide on the hose handle in order to regulate the airflow or to clear any particles sticking to the nozzle.
Dust bag replacement display (6):
Hold the hose up into air. If the dust bag change display lights up, the bag is full. Please change it.
Changing the dust bag:
■ Pull the plug out of the socket.
■ Open the lid of the dust bag compartment by the handle (9) (until its locks in place).
■ Remove the bag by pulling the fixing device carefully towards the rear in order to make the bag more easily accessible. Then remove the dust bag by pulling it upwards.
- Insert a new bag. Please ensure that the bag is located correctly in the guide mechanism. Close the cover so that it snaps into place.
Filter:
Your appliance has two filters.
Motor protection filter (inlet filter):
The inlet filter is located in the dust bag compartment. The filter is located vertically in the rear section of the dust housing. Remove the filter by pulling upwards. Clean the engine protection filter after dust bag changes. If necessary, the filter can also be washed in warm water without any additives. Place it back into place only once it is completely dry!
king
Outlet filter:
The appliance is also equipped with an outlet filter. This filter is to be found on the side of your device behind the ventilation grille. Open the ventilation grille by turning the filter cover (7) in the direction of "OPEN". Then pull the grille out towards the front. Remove the filter and clean as described above. Please reinsert the filter correctly and then close the ventilation grille. Please turn the filter cover in the direction of "LOCK".
Cleaning and storage
Cleaning
■ Pull the plug out of the socket before cleaning!
■ Clean the casing with a dry cloth.
■ Let the iron cool down completely.
■ Wind the cable completely.
■ Position the device either horizontally or vertically in order to suspend the hook on the floor nozzle in the parking assistance on the rear or the bottom of the device.
Storage
Guarantee
The device supplied by our Company is covered by month guarantee starting on the date of purchase (receipt). During the life of the guarantee any fault of the device or its accessories to material or manufacturing defects will be eliminated free of charge by repairing or, at our discretion, by replacing it. The guarantee services do not entail an extension of the life of the guarantee nor do they give rise to any right to a new guarantee! Proof of the guarantee is provided by the proof of purchase. Without proof of purchase no free replacement or repair will be carried out. If you wish to make a claim under the guarantee please return the entire machine in the original packaging to your dealer together with the receipt. Damage to accessories does not mean automatic free replacement of the whole machine. In such cases please contact our hotline. Broken glass or breakage of plastic parts are always subject to a charge. Defects to consumables or parts subject to wearing, as well as cleaning, maintenance or the replacement of said parts are not covered by the guarantee and hence are to be paid! The guarantee lapses in case of unauthorized tampering.
After the expiry of the guarantee
After the expiry of the guarantee repairs can be carried by the competent dealer or repair service against the payment of the ensuing costs.

natural_image
White crown icon on red background, no text or symbols presentking
PARÇALARI

natural_image
Red background with a white crown and ring design (no text or symbols)king
natural_image
Red background with a white crown and ring design (no text or symbols)king
natural_image
Red background with a white crown and ring design (no text or symbols)king
natural_image
Red background with a white crown and ring design (no text or symbols)king
استخدام الأجنبية
natural_image
Red background with a white crown and ring design (no text or symbols)king
SATIŞ SONRASI SERVİS
natural_image
Symbol of a trash bin with crossed lines indicating no waste or discharge (no text or labels)
- king
- K 279 Minni
- Overview the components
- Instruction Manual
- General Safety Instructions
- Special Safety Instructions
- Start-up
- Using the Appliance
- Telescopic Suction Tube:
- Cable winding device:
- Nozzle Attachment:
- Air Slide:
- Dust bag replacement display (6):
- Changing the dust bag:
- Filter:
- Motor protection filter (inlet filter):
- Outlet filter:
- Cleaning and storage
- Cleaning
- Storage
- Guarantee
- After the expiry of the guarantee
- PARÇALARI
- SATIŞ SONRASI SERVİS
Brand : KING
Model : Minno K 279
Category : Vacuum Cleaner