
SCAN 3.1.2 - Image scanning software NIKON - Free user manual and instructions
Find the device manual for free SCAN 3.1.2 NIKON in PDF.

User questions about SCAN 3.1.2 NIKON
0 question about this device. Answer the ones you know or ask your own.
Ask a new question about this device
Download the instructions for your Image scanning software in PDF format for free! Find your manual SCAN 3.1.2 - NIKON and take your electronic device back in hand. On this page are published all the documents necessary for the use of your device. SCAN 3.1.2 by NIKON.
USER MANUAL SCAN 3.1.2 NIKON
WindowsXP Home Edition/WindowsXP Professional
Nikon Scan(Ver.3.1.2)
This manual is for those users who are running Nikon Scan (Ver. 3.1.2) under Windows XP Home Edition / Professional.
Registering a Scanner with Windows XP
(SUPER COOLSCAN 8000 ED / SUPER COOLSCAN 4000 ED /COOLSCAN IV ED / LS-2000 / COOLSCAN III)
The screenshots in this manual show the registration procedure for the SUPERCOOLSCAN 4000ED. The scanner must be registered as a hardware device when it is connected to the computer for the first time.
You will need to log on as the "Computer Administrator" when registering a scanner. Note that you should also log on as the "Computer Administrator" when using, installing or uninstalling Nikon Scan.
Step I
The first time the scanner is connected to the computer, the "Found New Hardware Wizard" will be displayed. Select Install from a list or specific location and click Next.

Caution (LS-2000 / COOLSCAN III Users)
You will need the Windows XP compatible ASPI layer for your SCSI board or SCSI card in order to use the LS-2000 and the COOLSCAN III with Windows XP.
Step2
The dialog shown below will be displayed. Select Search for the best driver in these locations, then check Include this location in the search.
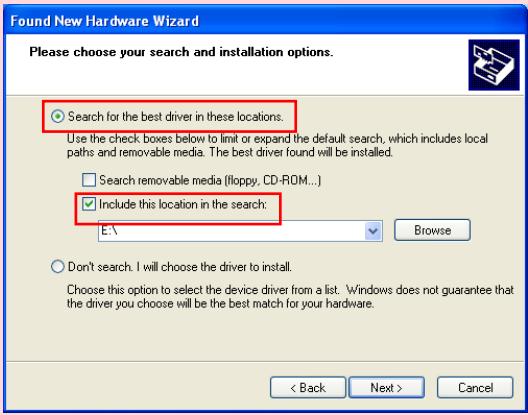
If, for example, the Inf Folder created when you ran the downloaded nsinfxp.exe file is inside "New Folder", click the Browse button, and select "C:\New Folder\Inf".

Click OK; the dialog shown below will be displayed.
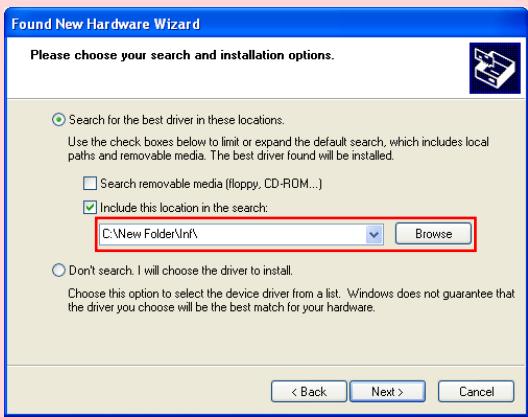
As an example, the above screenshot shows the driver location as "C:\New Folder\Inf".
Step 3
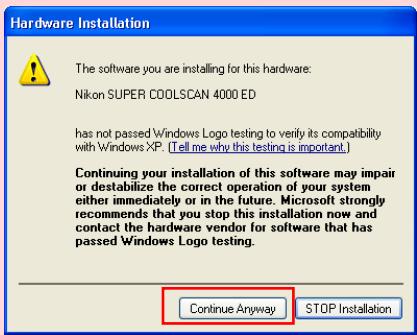
During the driver installation, the dialog shown at right will appear; click Continue Anyway, and carry on with the installation.
Step4
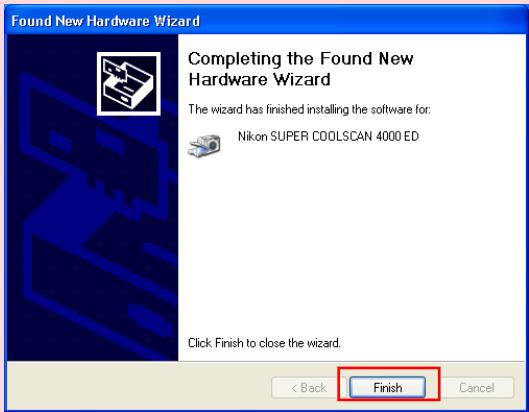
When the driver installation has been completed, the dialog shown below will be displayed; click Finish to close the wizard.
Step5
Once registration is complete, follow the steps below to check that the scanner has been correctly registered with the system.
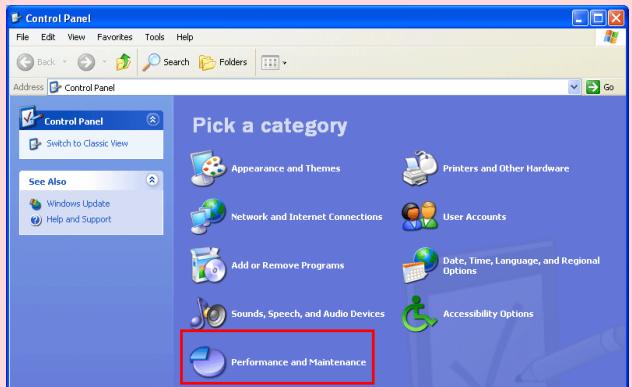
Select Control Panel from the Start menu to display the window shown below. Click Performance and Maintenance.
Step6
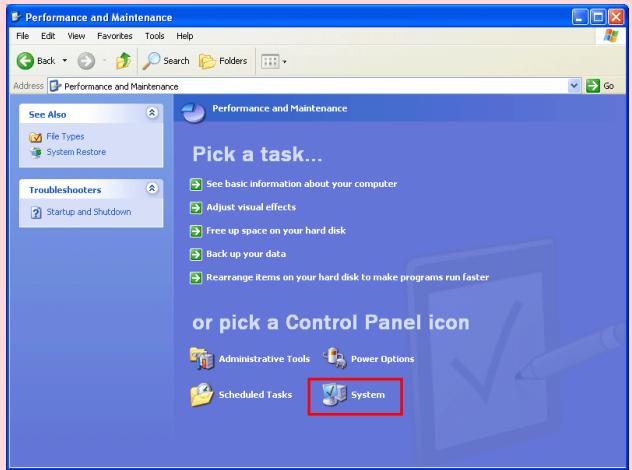
The Performance and Maintenance window will be displayed. Click System.
Step7
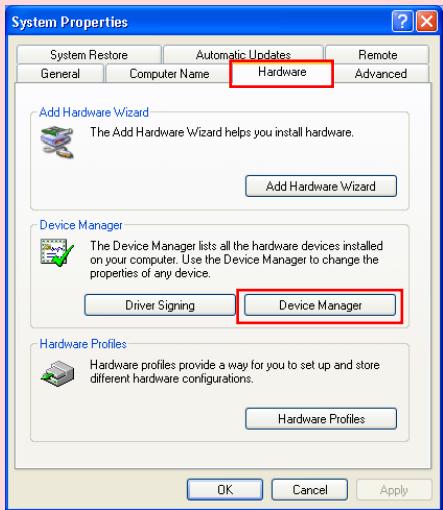
The System Properties window will be displayed. Select the Hardware tab and click the Device Manager button in the Device Manager section.
Step8
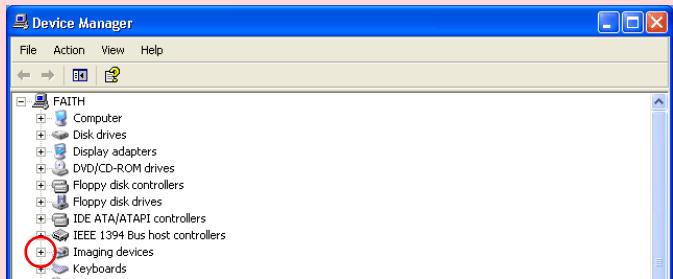
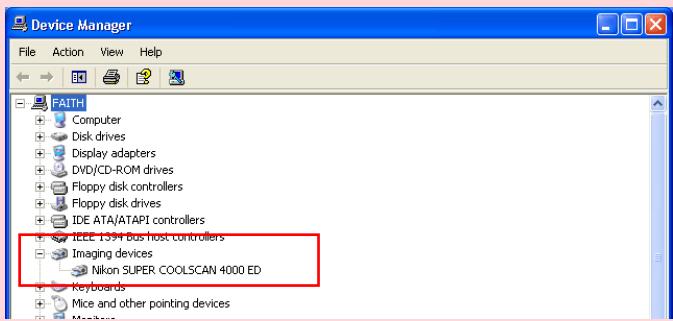
The Device Manager window will appear. Confirming that "Imaging Device" is listed in the Device Manager window, and click the "+" next to the listing.
Step9
After confirming that "(the name of your scanner)" is listed under "Imaging Device," double-click the listing to open the Properties window.
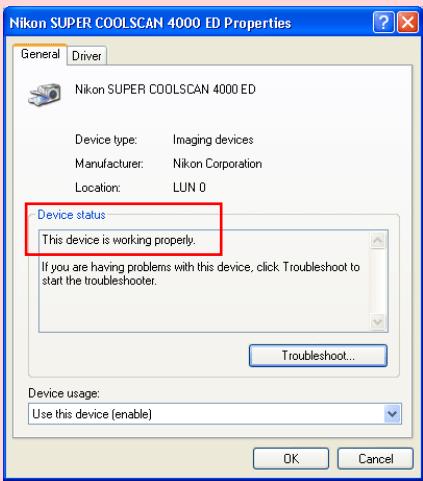
Step 10
The Properties dialog for your scanner will be displayed. Click the General tab and confirm that "This device is working properly" appears under "Device status". Click OK.
Close the Device Manager, then click OK to close the System Properties window. Device registration is now complete