
EM - SLR camera NIKON - Free user manual and instructions
Find the device manual for free EM NIKON in PDF.

| Product type | 35 mm SLR camera with aperture priority |
| Image format | 24 mm x 36 mm (35 mm film) |
| Lens mount | Nikon bayonet mount |
| Compatible lenses | Nikon Series E, Nikkor AI type and others (see manual) |
| Shutter | Electronically controlled vertical travel metal focal plane shutter |
| Shutter speeds | 1 s to 1/1000 s (AUTO), 1/90 s (M90), bulb (B) |
| Film advance | Cocking lever, 144° stroke, advances, cocks, and counts frames |
| Viewfinder | Fixed eye-level pentaprism, approx. 92% field of view |
| Viewfinder (magnification) | 0.86x with 50 mm lens set to infinity |
| Focusing screen | Fixed Nikon "K" type with split-image rangefinder, microprisms, and matte field |
| Exposure metering | Center-weighted TTL, full aperture, silicon photodiode (SPD) |
| Metering range | EV 2 to 18 (ISO 100, f/1.8 lens) |
| Exposure signal | Audible beep if shutter speed ≤1/30 s or ≥1/1000 s |
| Exposure compensation | Approx. +2 EV (button pressed) |
| Power supply | Two 1.5 V silver-oxide batteries (type S-76) |
| Battery check | LED lights when check button is pressed |
| Film speed (ASA) | ASA 25 to 1600 |
| Frame counter | Automatic reset when back is opened, "S" mark |
| Flash synchronization | 1/90 s, ISO hot shoe, compatible SB-E/SB-10, other flashes on M90 |
| Self-timer | Approx. 10 s, can be cancelled before release |
| Dimensions (W x H x D) | 135 mm x 86 mm x 54 mm |
| Weight (body only) | 460 g |
| Finish | Black |
| Supplied accessories | Body cap, strap eyelets, two batteries |
| Care and cleaning | Clean lenses with a blower brush or special lens liquid. Avoid touching the shutter curtains and film pressure plate. Store in a cool, dry place. Remove batteries if not used for an extended period. |
| Safety | Do not dispose of used batteries in fire. Handle lenses with care. Do not force controls. If dropped, take to an authorized repair center. |
| Spare parts and repairability | Check compatible lenses (manual section VIII). For repairs, contact a dealer or authorized Nikon service center. |
| General information | 35 mm aperture priority SLR, compact design, compatible with Nikon EM accessories (viewfinder, MD-E motor drive, SB-E flash). |
Frequently Asked Questions - EM NIKON
User questions about EM NIKON
0 question about this device. Answer the ones you know or ask your own.
Ask a new question about this device
Download the instructions for your SLR camera in PDF format for free! Find your manual EM - NIKON and take your electronic device back in hand. On this page are published all the documents necessary for the use of your device. EM by NIKON.
USER MANUAL EM NIKON
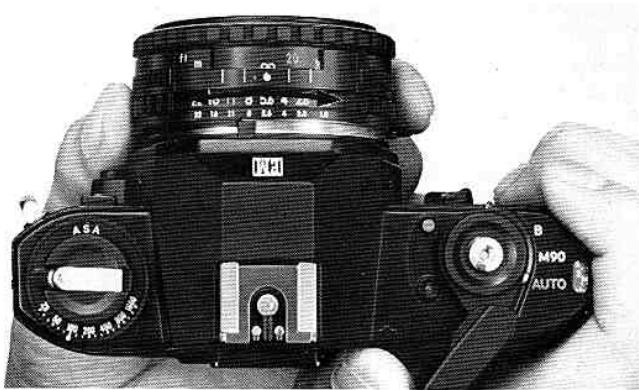
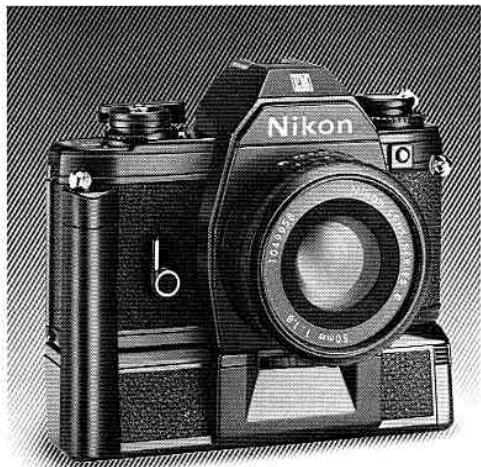
NOMENCLATURE
Frame counter
shutter operation mode selector (p. 23)
shutter release button (p. 21)
shutter release fingerguard (p. 19)
Film winding lever (p. 21)
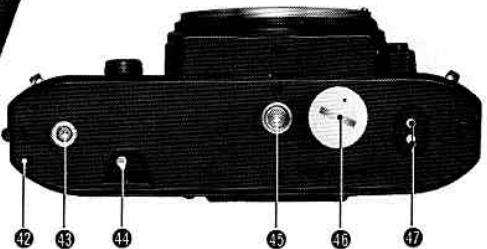
Battery power check button (p. 12)
Battery power LED lamp
veckstrap eyelet
Exposure compensation button (p. 10)
Self-timer (p. 21)
ens mounting flange (p. 13)
.ens mounting index
.ens release button
Reflex mirror
Aperture direct readout (ADR) scale**
ens aperture scale
.ens aperture ring (p. 19)
.ens mounting ring (p. 13)
Aperture/distance scale index
nfrared photography focusing index (p. 24)
Depth-of-field indicators (p. 25)
Focusing distance scale (p. 18)
.ens focusing ring (p. 17)
m plane indicator (p. 24) positioned below
lot used with the EM; for Nikon cameras
ith ADR facility
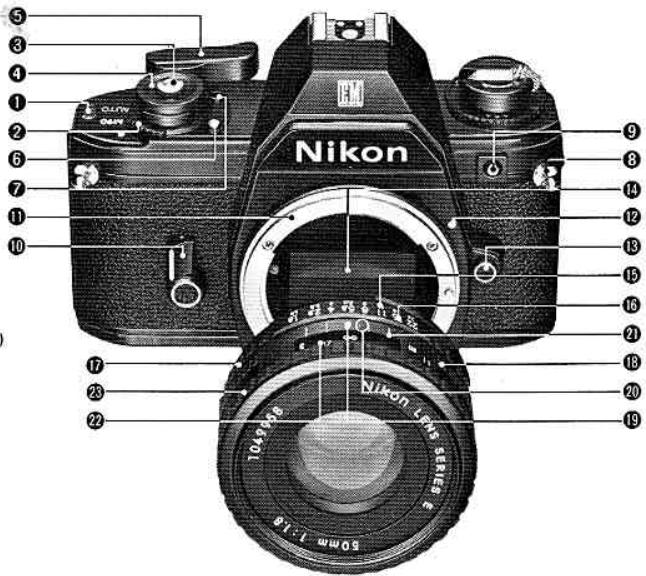
TABLE OF CONTENTS
Page No.
I. NOMENCLATURE....3,34
II. BASIC OPERATION 4-9
III. HOW TO HOLD THE CAMERA....10
IV. SETTING UP THE CAMERA BODY AND THE LENS
A. Install the Batteries 11-12
B. Mount the Lens....13
V. PREPARING TO SHOOT AND ACTUAL SHOOTING
A. Load the Film 14-15
B. Set ASA....16
C. Focus 17-18
D. Determine Exposure.... 19-20
E. Shoot 21
E. Unload the Film 22
VI. TECHNICAL DETAILS AND OTHER INFORMATION
A. Exposure Measurement....23
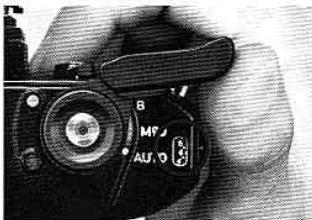
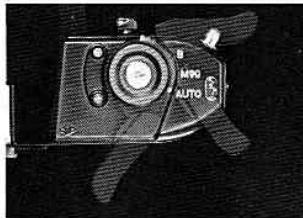
B. Shutter Operation Mode Selection.... 23
C. Film Plane Indicator 24
D. Infrared Photography 24
E. Depth of Field 25
VII. SPECIAL ACCESSORIES FOR THE NIKON EM
A. Motorized Shooting with the Nikon MD-E Motor Drive....26-27
B. Flash Photography with the Nikon SB-E Speedlight Unit 28
VIII. OTHER EM ACCESSORIES AND USABLE LENSES
A. Other Accessories....29
B. Nikon and Nikkor Lenses for the Nikon EM.....30
This section provides a concise summary of all the other sections of the manual. After you have thorough read the rest of the manual, use the section as a quick reference source
natural_image
Close-up of mechanical components including a cylindrical housing and multiple circular features (no visible text or symbols)- Insert two batteries into battery c

natural_image
Collage of black-and-white photos showing a church, a parade scene with a bride in costume, a hot air balloon, and people blowing bubbles (no text or symbols)
Spread out the manual for ready reference to the numbered nomenclature terms. Details are explained on pages indicated by the numbers in parentheses.
natural_image
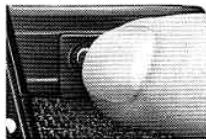
Close-up of a hand inserting a coin into a small electronic device (no visible text or symbols)- Unlock battery chamber (11-12).
natural_image
Close-up of a vintage camera lens with visible caliper and adjustment knobs (no text or symbols)- Mount lens after closing battery chamber (13).

natural_image
Close-up of hands operating a mechanical device with a cylindrical component (no visible text or symbols)- Pull out film rewind knob to open camera back (14)
natural_image
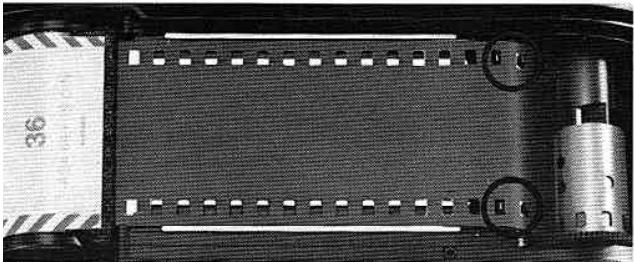
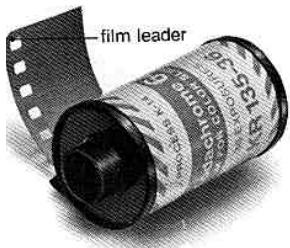
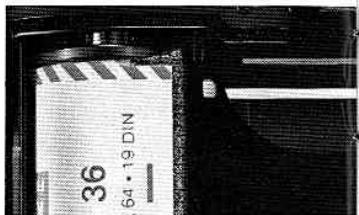
Close-up of a film strip with visible slots and a metallic cylindrical component (no text or symbols)Load film (14-15). To ensure proper film winding, make sure that both edges of the film engage the film sprockets 37.
natural_image
Close-up of a hand using a tool to press or adjust a mechanical component, no visible text or symbols- Rotate film rewind crank 24 to take up film slack (14-15). Be careful that you do not wind film back into the cassette.
natural_image
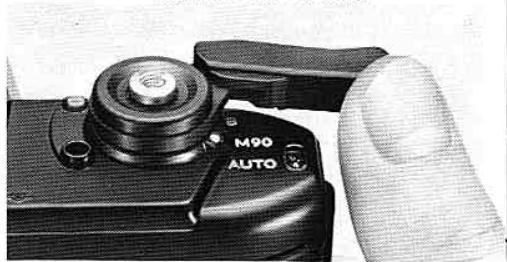
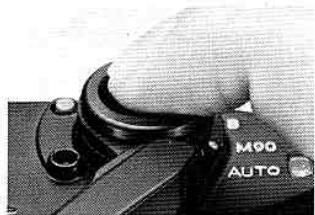
Close-up of a mechanical component with a hand adjusting a cylindrical part, labeled 'M90 AUTO' (no other text or symbols visible)Press shutter release button ③ all the way (21).
Note: Do not attempt to take pictures prior to frame 1, the start of AUTO operation.
natural_image
Close-up of a black M90 AUTO digital camera with a hand adjusting its grip (no visible text or symbols on the device body)- Stroke film winding lever ⑤ to advance film (21).
natural_image
Close-up of a hand operating a rotary dial with dual switches (no visible text or symbols)- Snap camera back closed, then set ASA with ASA film speed selector ring 26 (16).
natural_image
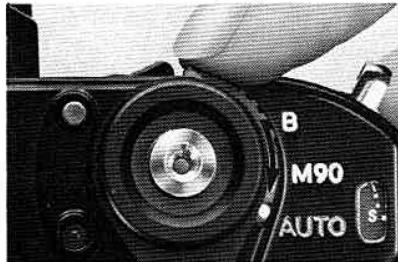
Close-up of a camera's head and neck showing the lens, no visible text or symbols on the device itself.- Set shutter operation mode selecto ② to AUTO.
natural_image
Close-up of hands holding a black MRI camera with visible dials and control knobs (no readable text or symbols)- Confirm film advance: film rewind knob 25 turns opposite engraved arrow as winding lever is stroked (14-15).
- Repeat Steps 9 and 1 until frame counter ① ind cates 1. Camera is then ready t take first picture.
natural_image
Black-and-white photo of a person holding a camera lens, smiling (no visible text or symbols)- Look through viewfinder eyepiece ③2, and focus on subject (17-18).

natural_image
Black-and-white photo of a person holding a Nikon camera, no visible text or symbols- Switch meter on, lightly pressing shutter release button ③. Turn lens aperture ring ⑰ until "beep-beep" sound, if any, stops (20).
- Advance film to the next frame. (p. 21).
natural_image
Close-up of a hand pressing down on a mechanical component labeled 'M90 AUTO' (no other text or symbols visible)- You are now ready to shoot: depress shutter release button until you hear the click of the shutter (21).
natural_image
Close-up of a finger pressing a button on a textured surface (no text or symbols visible)- After completing the roll, rewind and unload film (22).
natural_image
Close-up of a hand turning a mechanical component with an arrow indicating rotation (no text or symbols visible)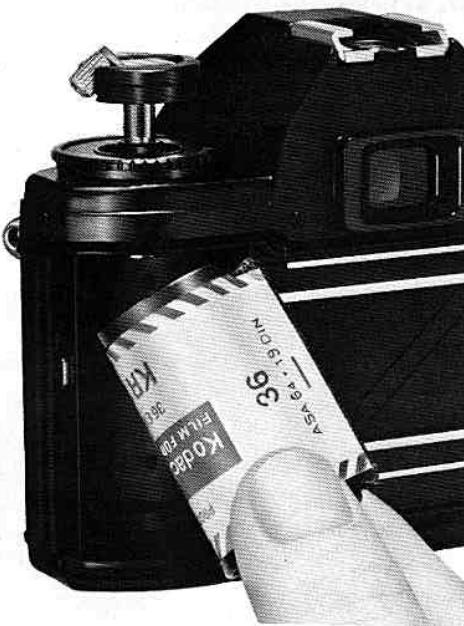
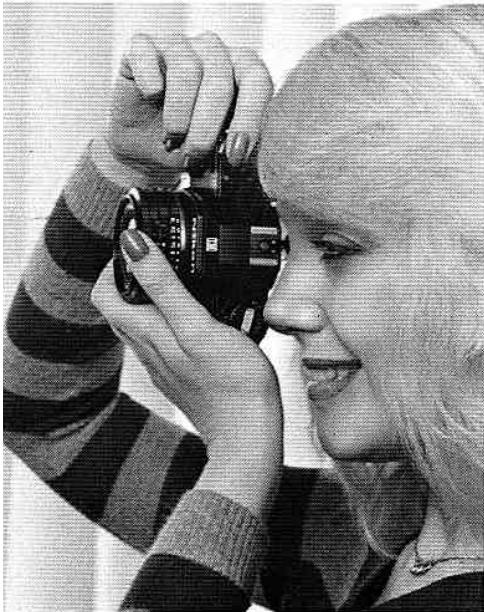
III. HOW TO HOLD THE CAMERA
To take good pictures, you should first learn how to handle your camera properly. Hold the camera with both hands, as shown in the pictures, cushioning it in the palm of your left hand. For added support, prop your left-hand elbow against your body. Before loading the camera with film, practice in front of a mirror until you have mastered all the controls.

natural_image
Black-and-white photo of a person looking out of a mirror reflection, no visible text or symbols
natural_image
Person wearing a striped sweater and holding a camera, captured in black and white (no visible text or symbols)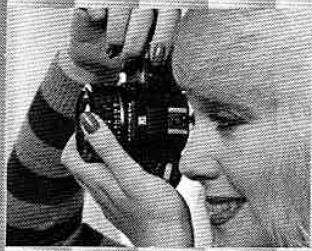
natural_image
Black-and-white photo of a person holding a camera lens, smiling (no visible text or symbols)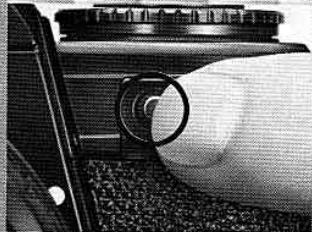
natural_image
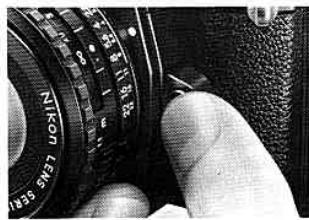
Close-up of a hand holding a camera lens and grip, with no visible text or symbolsExposure compensation button ⑨: Depressed with the left-hand index finger (p.21)
IV. SETTING UP THE CAMERA BODY AND THE LENS
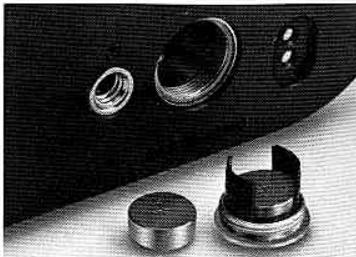
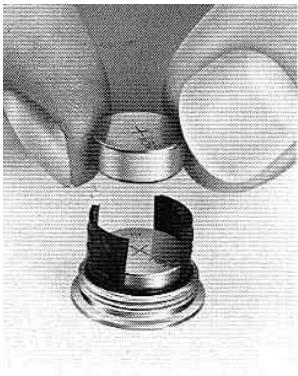
A. Install the Batteries
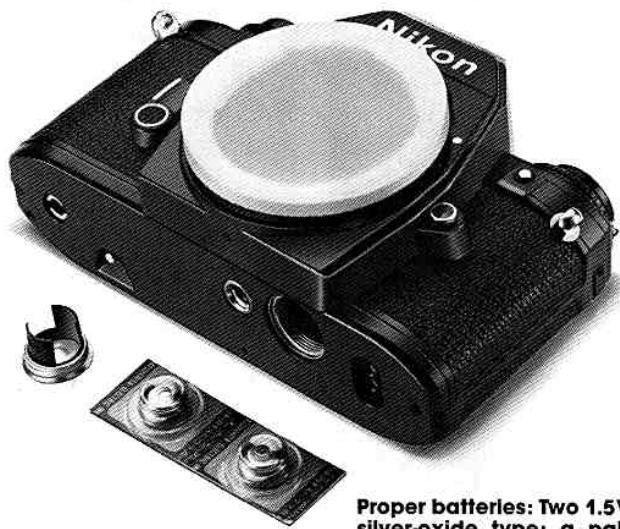
Proper batteries: Two 1.5V silver-oxide type; a pair comes with your camera.
natural_image
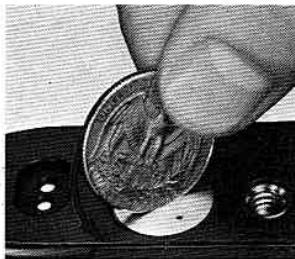
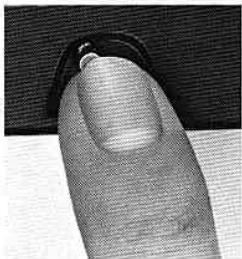
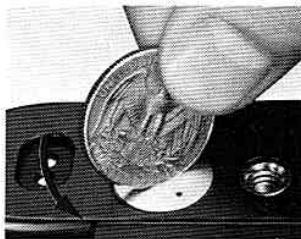
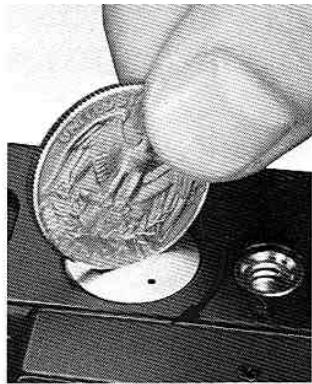
Close-up of a hand inserting a coin into a small container (no visible text or symbols)- Unlock the battery chambe lid 46 with a coin.
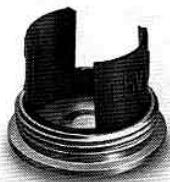
2. Remove the battery clip which is integral with the lid.
natural_image
Close-up of a hand holding a metallic cylindrical component with a small inset showing internal cutouts (no text or symbols visible)- Insert the batteries, handling them at the edges, one on op of the other, with the + narks facing up, into battery clip.
natural_image
Close-up of a hand inserting a coin into a small pot (no visible text or symbols)- Replace the battery chamber clip/lid, and close the chamber securely.
natural_image
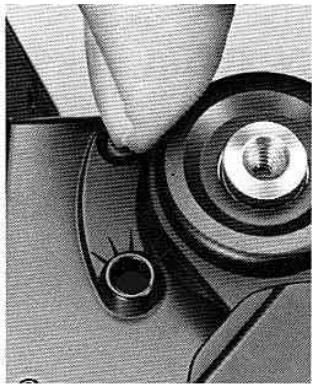
Close-up of a hand turning a mechanical component with a threaded shaft and circular base (no visible text or symbols)- Push the battery power check button ⑥. If the adjacent lamp does not light up (or is too dim), check battery orientation or put in a new set of batteries.

natural_image
Simple line drawing of a cartoon character with wings and a circular head (no text or symbols)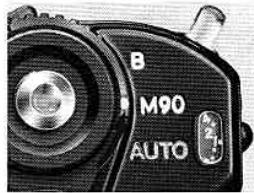
natural_image
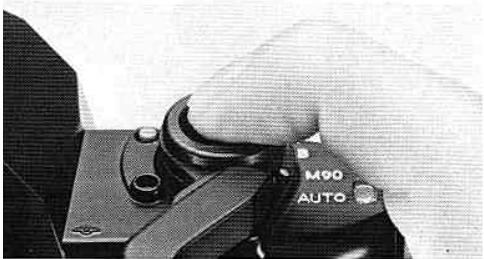
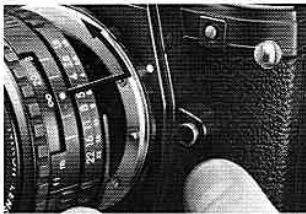
Close-up of a black camera lens with 'B' and 'M90 AUTO' labels, no additional text or symbols visible.QA
Q. Can I still use the camera even when the batteries are dead?
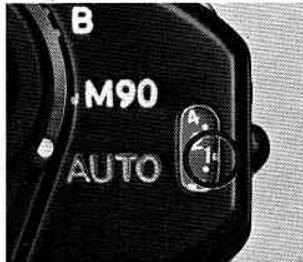
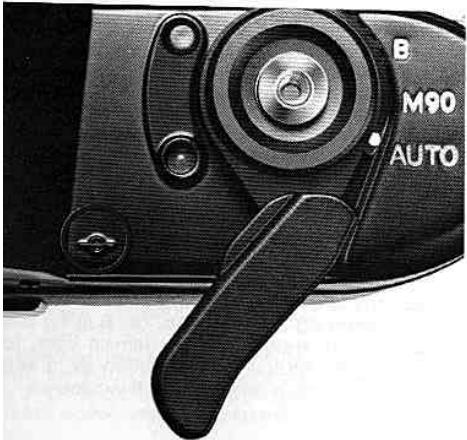
A. Yes. In this case, reset the shutter operation mode selector ② from AUTO to M90 which will provide a shutter speed of 1/90sec.
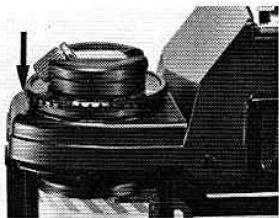
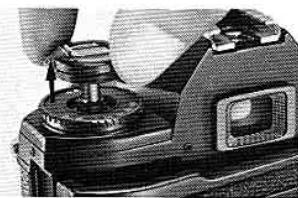
B. Mount the Lens
natural_image
Close-up of a hand holding a circular object over a mechanical component (no visible text or symbols)- Remove the camera body cap.
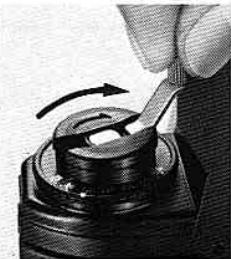
To remove the lens: Press the camera's lens release button 18, and twist the lens by its mounting ring until it becomes loose.
natural_image
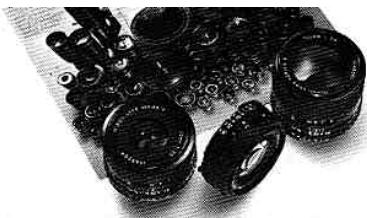
Black-and-white photo of multiple camera lenses and mechanical parts (no visible text or symbols)
natural_image
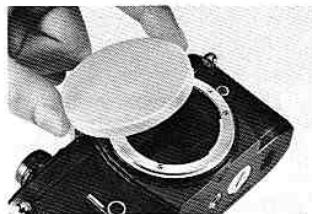
Close-up of a hand holding a black circular object with a textured surface, partially covered by a white dome (no visible text or symbols)- Remove the rear lens cap.
natural_image
Close-up of a hand adjusting a Nikon Lesius Sensor lens (no visible text or symbols on the lens body)Proper lenses: Nikon Serles E lenses, AI-type Nikkor lenses and others (p. 30).
natural_image
Close-up of a camera lens with visible measurement dial and adjustment knobs (no text or symbols)- Seat the lens on top of the camera body's lens mounting flange ⑪, making sure the lens mounting index ⑫ is aligned with the aperture/distance scale index ⑬. Then twist the lens by its mounting ring ⑭ until it clicks into place.
V. PREPARING TO SHOOT AND ACTUAL SHOOTING
A. Load the Film
Proper film: Any commercially available, color or black-and-white, 35mm film negative (prints) or transparency slides) in cassettes of 12, 20, 4 or 36 exposures.
natural_image
Close-up of a mechanical device with a cylindrical component and a metallic knob (no visible text or symbols)- Open the camera back by pulling up the film rewind knob 25.
- Place the cassette in the film cassette chamber 33.
natural_image
Close-up of a hand adjusting a camera lens (no visible text or symbols)- After closing the camera back, press the shutter release button ③.
natural_image
Close-up of a hand using a tool to adjust a mechanical component (no visible text or symbols)- To take up film slack, turn the film rewind crank in the direction of the engraved arrow, until you feel a slight resistance. Be careful not to wind the film back into the cassette.
natural_image
Close-up of a mechanical device with a cylindrical component mounted on a base (no visible text or symbols)- Secure the cassette with the film rewind fork by pressing the knob back.
natural_image
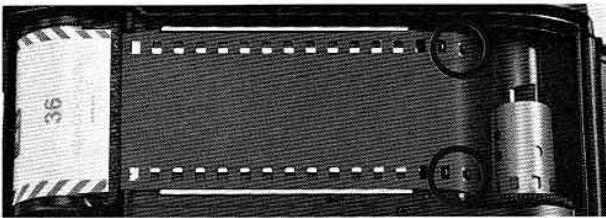
Close-up of a film strip with a metallic cylindrical component and a textured black sheet, no visible text or symbols.- Insert the film leader into any of the film takeup spool's 18 si slots. Be sure the film's perforations engage the film sprockets 27 . Press the shutter release button and stroke the film winding lever to advance the film.
natural_image
Close-up of a DSLR camera showing mode dial and settings (no readable text or symbols beyond labels)- Advance the film, press the shutter release button, and advance the film again until the frame counter ① indicates 1 to start AUTO operation.
QA
Q. How can I be sure the film has been properly loaded and i being advanced?
A. If, as you advance the filr
winding lever, the film rewind knob rotates in the opposite site direction of the arrow engraved on it, you can be sure the film is being properly advanced.
Note: If you release the shutter during "AUTO" operation with the cap mounted on the lens or in an extra dark place, the reflex mirror 14 will remain in the "up position. To return the mirror to its original position, see the shutter operation mode selector 2 to M90 or B.
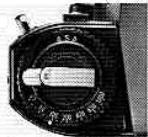
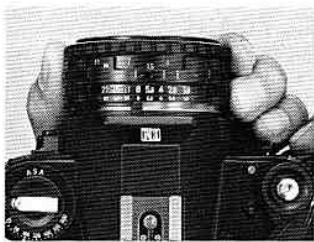
B. Set ASA
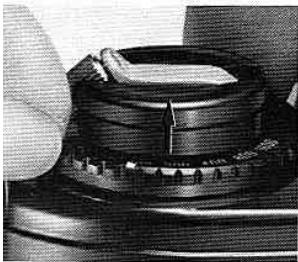
natural_image
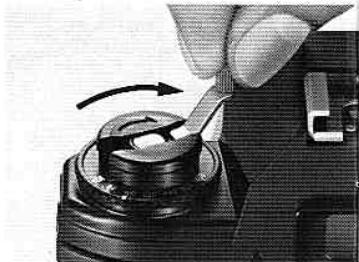
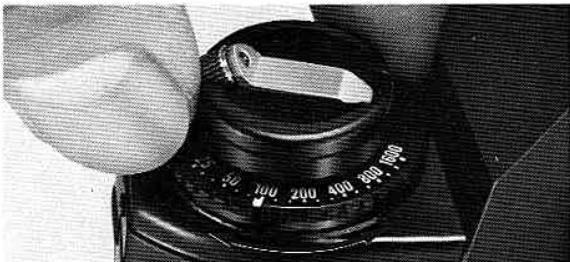
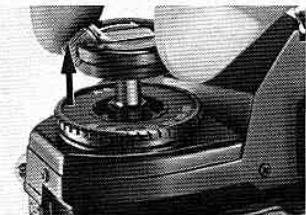
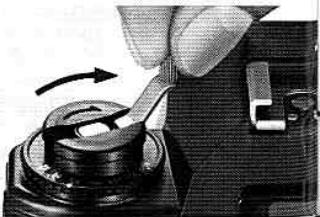
Close-up of a mechanical component with layered structure and textured surface (no visible text or symbols)Pull-up the ASA film speed selector ring 26.
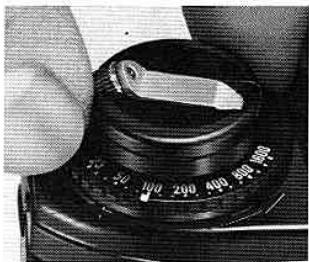
natural_image
Close-up of a hand holding a camera dial with measurement markings (no readable text or symbols)- Turn it - until the ASA film speed setting index 27 is aligned with your film's ASA rating.
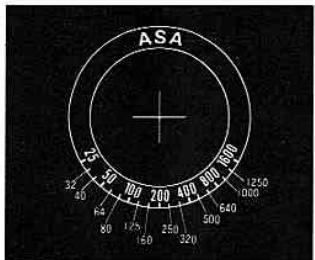
Note: Don't forget to reset ASA when you use film with different ASA ratings; otherwise, the film will not be correctly exposed.
QA
. What is ASA?
. ASA is a number assigned to your film by the Ameri- in Standards Association. This number indicates the re- live sensitivity of your film to light. Your camera must ive this information to be able to give your film the oper exposure.
QA
Q. What should I do to remember the ASA rating of the film loaded in the camera?
A. As a reminder, insert the film carton tab which indicates the ASA rating, into the camera back's memo holder ④.
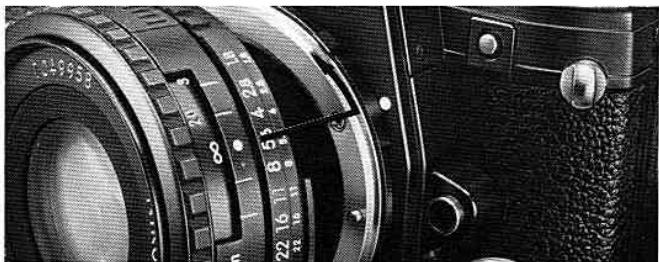
C. Focus
natural_image
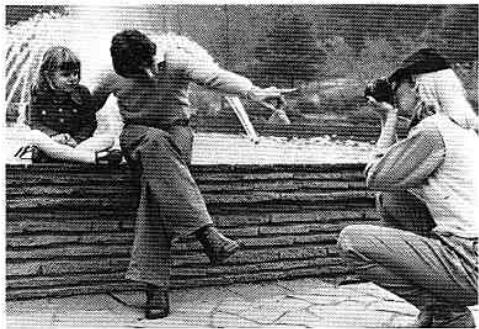
Black-and-white photo of three people sitting on stone steps, one holding a camera, with no visible text or symbols.- Aim your camera at your subject, then compose the picture through the viewfinder.
natural_image
Close-up of a Nikon DSLR camera with visible lens and control knobs (no text or symbols on body)- Rotate the lens 23 until your subject appears sharp. There are three focusing aids you can use.
- Shutter speed scale
- Flash ready-light (p. 28)
- Flash photography bracket (p. 28)
4.Shutter speed needle - Split-image rangefinder spot
- Microprism ring
- Fine matte outer field
natural_image
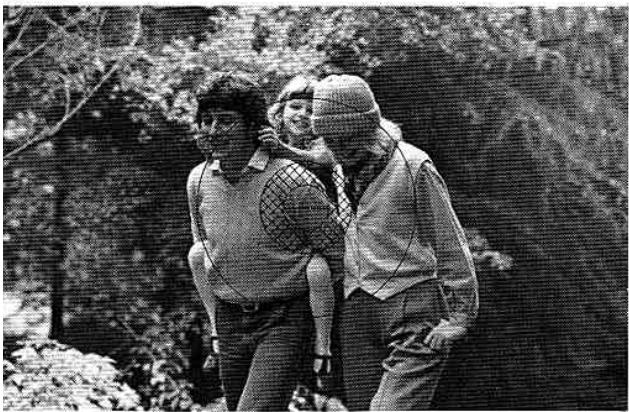
Black-and-white photo of three people walking outdoors in a wooded area (no visible text or symbols)plit-image rangefinder spot: Suitable for subjects with well-defined itlines. Turn the focusing ring Ⓜ until the two halves of the spot incide, forming a single image.
icroprism ring: For subjects without definite contours, or for rapid cusing. Turn the focusing ring until the image in the ring appears isp.
ne matte outer field: Ideal for close-ups or when shooting with tele- ioto lenses. Turn the focusing ring until the image in the field pears sharp.
natural_image
Close-up of a black DSLR camera with dual-touch lens and control knobs, held by fingers (no visible text or symbols)To “prefocus” the lens (i.e., when time does not permit focusing through the viewfinder), turn the focusing ring until the estimated distance is aligned with the lens aperture/distance scale index 19. With this technique, however, the focus may not be as sharp as you expect.
Note: When you're using lenses with small maximum apertures (e.g., f/5.6, f/8) or taking close-ups, you may find it difficult to focus with the split-image spot or microprism ring (i.e., they become "dark"); in this case, focus with the fine matte outer field.
1
D. Determine Exposure
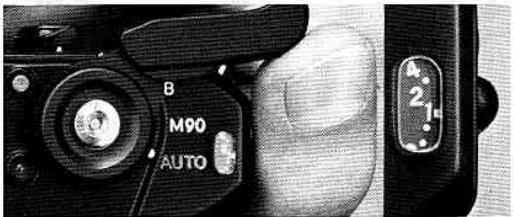
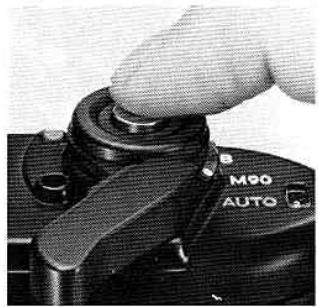
- Set the shutter operation mode selector ② to AUTO.
natural_image
Close-up of a black DSLR camera with visible lens, control knobs, and hand gestures (no readable text or symbols)- Select an aperture by turning the lens aperture ring ⑰.
natural_image
Close-up of a hand adjusting a camera lens component (no visible text or symbols)- Press the shutter release button ③ halfway (i.e., cushion your finger with the shutter release fingerguard ④) to switch the camera's meter on. The shutter speed indicated by the needle in the viewfinder will depend on both the selected aperture and scene brightness.
Note: The meter remains switched on for a brief period even after your finger is lifted off the shutter release button.
Exposure warning signal: Should a "beep-beep" sound be emitted, note the position of the needle in the shutter speed scale. If it swings past 1/1000 sec. and stays within the red zone, overexposure will result. In this case, reset lens aperture until the sound stops or the needle "drops" from the red zone; despite the sound, correct exposure is possible. If the needle is around 1/30 sec. or below, the sound merely warns you that camera shake may affect image sharpness because of the slow shutter speed. You either readjust aperture until the sound stops, or, if the needles is below 1/30 sec., use a tripod to prevent picture blur. The meter remains switched on for a brief period even after your finger is lifted off the shutter release button.
Notes: 1. At approximately 1/1000sec. or 1/30sec., a shrill sound may be emitted; it becomes regular when the needle goes beyond these points. 2. It is possible you won't hear the warning sound in noisy shooting situations.
natural_image
Black-and-white photo of a man in a suit holding an object, standing outdoors with foliage in the background (no visible text or symbols)Overexposed (Above 1/1000 sec.)

natural_image
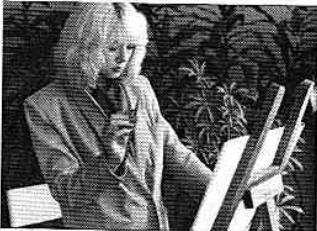
Black-and-white photo of a person seated in a garden with plants and foliage (no visible text or symbols)Tripod recommended to prevent camera shake (Below 1/30 sec.)
natural_image
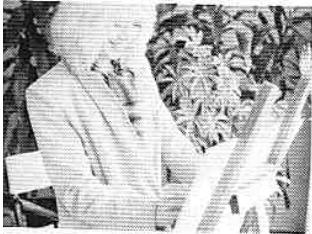
Black-and-white photo of a person reading books outdoors (no visible text or symbols)Correctly exposed
QA
Q. What shutter speed is best to use?
A. The shutter speed should be fast enough to prevent camera shake, especially in hand-held shooting. In dim light, you may not be able to get a high speed. As a rule of thumb, use a tripod if the shutter speed is slower than a number equal to the focal length of the lens. For example, with a 50mm lens,
don't take hand-held pictures at shutter speeds slower than 1/50sec., and with a 135mm, try to use a minimum speed of 1/135sec. Remember, this presumes your subject is not moving. If it does, you'll need faster speeds—in which case you just open the lens aperture.
E. Shoot

natural_image
Close-up of a hand pressing down on a mechanical component (no visible text or symbols)- Depress the shutter release button ③ with steady, even pressure.
natural_image
Close-up of a DSLR camera with visible lens and control buttons (no readable text or symbols beyond basic markings)- Advance the film to the next frame by stroking the film winding lever ⑤.
natural_image
Close-up of a vintage camera with visible branding and propeller (no readable text or symbols)You can move the grooved film winding lever with your right hand thumb in one sweep or a series of short strokes.
QA
Q. When is the exposure compensation button ⑨ used?
A. To obtain a correct exposure when the main subject is side-
lit or backlit. In this case, keep the button depressed as you depress the shutter release button ③, the shutter speed needle "drops" by about 2 steps (i.e., from 1/250 sec. to approx. 1/60 sec.).
Self-timer: This provides an ap prox. 10-sec. exposure dela Slide the lever away from th lens as far as it will go, cover th finder eyepiece 32 with the pair of your hand to prevent stra light from entering, then depres the shutter release button. Not
that the timer is designed not to cock accidentally an requires slight pressure when you start to stroke i After use, gently nudge the lever back into place sinc it always stops just before the starting position.
F. Unload the Film
natural_image
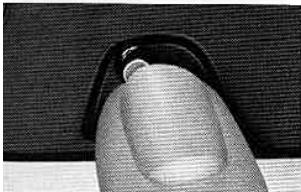
Close-up of a finger pressing a button on a textured surface (no visible text or symbols)When you can no longer stroke the film winding lever and the frame counter indicates that the last exposure has been made, press the film rewind button. Don't force the lever, or you may tear the film out of the cassette.
natural_image
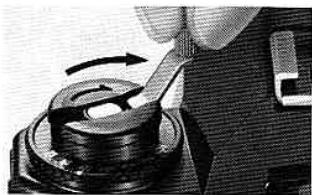
Close-up of a hand using a tool to press or adjust a mechanical component, no visible text or symbols- Turn the film rewind crank ② in the direction of the engraved arrow with even pressure until rewind "tension" gets lighter.
natural_image
Close-up of a camera lens assembly with no visible text or symbols- Pull up the film rewind knob 25 to open the camera back, and remove the cassette.
Notes: 1. Do not push the film re-wind button before all the frames are exposed; otherwise, there will be a slight frame overlap. If the button is inadvertently depressed, make a blank exposure in a dark place.
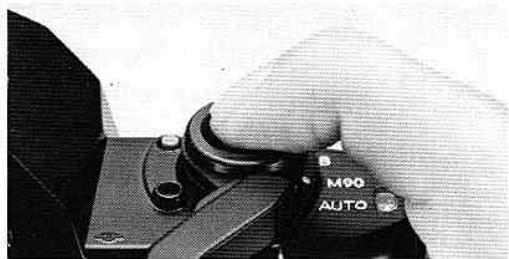
When carrying the camera, it is recommended that you set the shutter operation mode selector ② from AUTO to B to prevent battery power drainage caused by the shutter release button being inadvertently depressed.

QA
Q. What should I do if I make the mistake of opening the camera back before the film is fully rewound?
closed. You may be able to save a few frames, but this is not guaranteed, especially if the back is opened in bright light.
D. Film Plane Indicator
This is mainly used in close-up photography to determine the exact subject-to-film plane distance. This is visible when the film winding lever ⑤ is pulled out, and positioned precisely on the film plane—6.5mm from the front surface of the lens mounting flange ⑪.
D. Infrared Photography
Both Nikon Series E and Nikkor lenses have an infrared photography focusing index 20 for shooting with black-and-white infrared film. The image is first focused through the viewfinder; then the lens focusing ring 23 is turned until the point focused is aligned with the infrared index.
natural_image
Close-up of a black camera's dial and lever mechanism (no text or symbols visible)
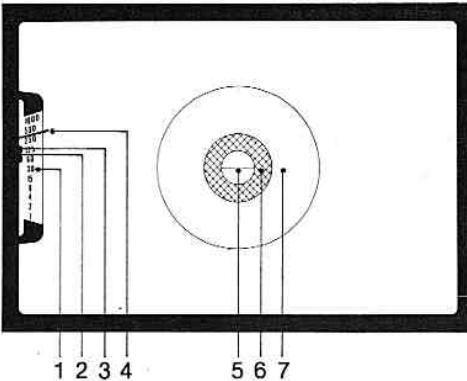
A. Exposure Measurement
The Nikon EM's built-in exposure meter use Nikon's through-the-lens (TTL) center-weighted exposure metering system. The meter "reads" th light over the entire focusing screen, but favors th central 12mm-diameter area outlined on th screen. This is where the main subject is likely t be positioned, and allows the photographer t make precise exposure readings of the selecte subject area, as well as provides for overa balanced exposures.
natural_image
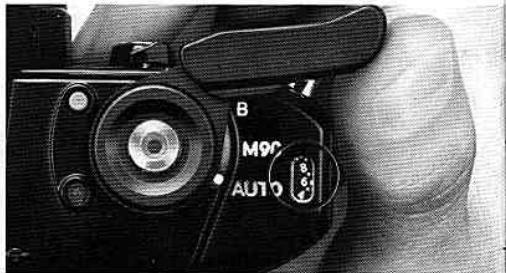
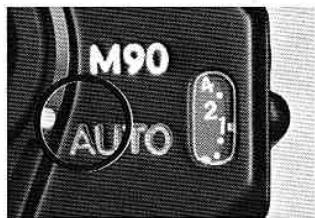
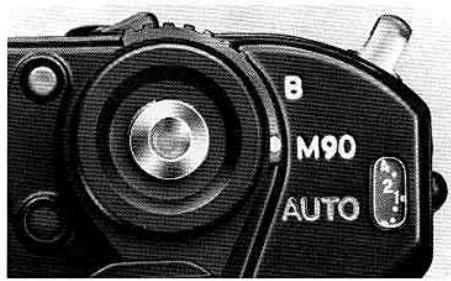
Close-up of a black DMM90 camera with no visible text or symbols on the body (pure technical labels)B. Shutter Operation Mode Selection
The shutter operation mode selector has two mechanical override settings. M90 provides shutter speed of 1/90 sec.; it is also used for flas photography with an electronic flash unit other than the Nikon SB-E or SB-10 (p. 28). B is for long exposures—the shutter curtains remain open for as long as the shutter release button ③ is kept depressed. A tripod is essential for B exposures.
E. Depth of Field
When you focus on your subject, you will find that objects both in front of and behind it also appear to be in focus. This "zone" of focus is called depth of field. In general, to control depth of field, use the lens aperture ring ⑰ selectively, remembering that the lower the number of the aperture set (i.e., the wider the lens aperture), the "shallower" the depth of field, and vice versa. You can also use the color-coded depth-of-field indicators ⑱ of Nikon Series E and Nikkor lenses. The wider the gap between two identical colors (which match the color of the lens aperture number in use), the deeper the depth of field, and vice versa. Remember, when selecting an aperture based on depth of field, the shutter speed will change accordingly. Be careful that you don't use a shutter speed which is too slow for hand-held shooting or for moving subjects.

natural_image
Black-and-white photo of a person sitting on pavement, wearing a cap and jacket (no visible text or symbols)Lens set at f/1.8

natural_image
Black-and-white photo of a person sitting on cobblestone pavement, wearing a beret and boots (no visible text or symbols)Lens set at f/8

natural_image
Black-and-white photo of an elderly man kneeling on a cobblestone path, holding a small object (no visible text or symbols)Lens set at f/16
'II. SPECIAL ACCESSORIES FOR THE NIKON EM
. Motorized Shooting with the Nikon MD-E Motor Drive
you don't have to be a pro to discover the excitement of motor-drive photography. The EM's special, equally compact and handsome accessories, the MD-E, makes motorized shooting easy for everyone. You have a choice of single-frame shooting or continuous shooting of up to about two frames per second. A red LED (light emitting diode) mp at the back of the MD-E flashes to indicate that motorized shooting is in progress. And the motor automatically stops when all the frames have been exposed. It's that simple! Once you put on the motor you probably won't want to take it if! It's a natural accessory for all-around use.
natural_image
Black Nikon 3.50 camera with visible lens and body (no text or symbols beyond branding)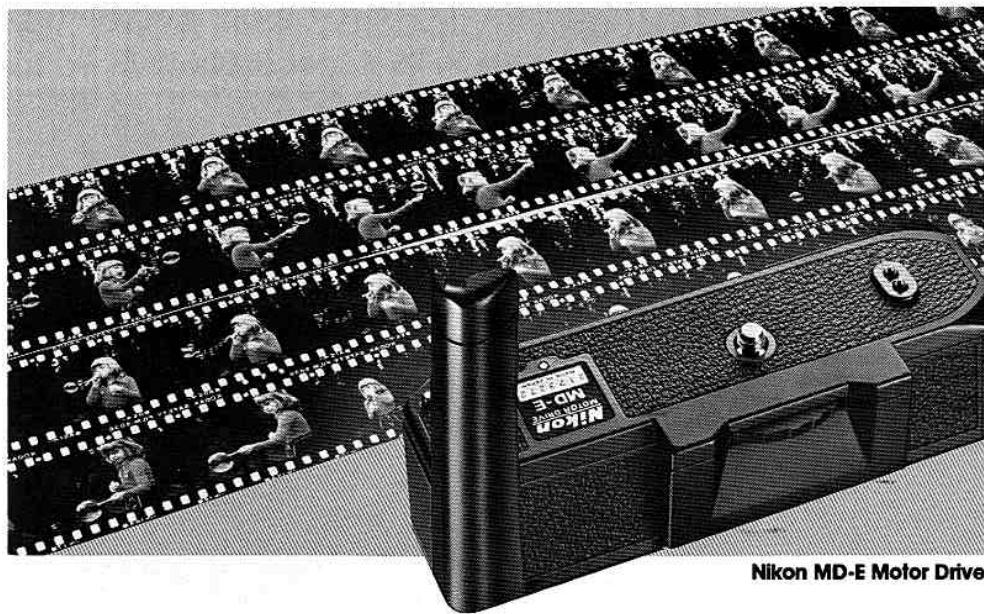
natural_image
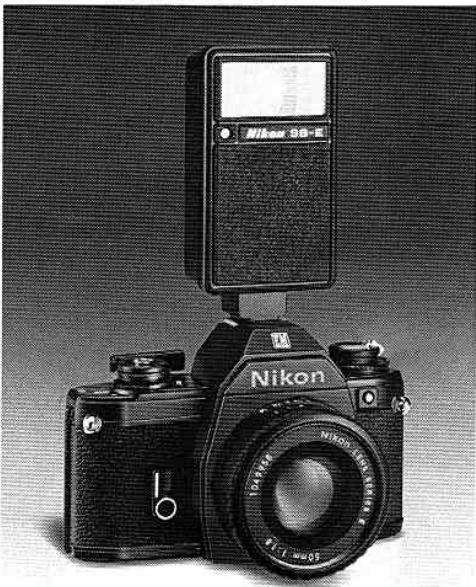
Black-and-white photo of a Nikon 3-MD Motor Drive film strip with multiple camera crew members, no visible text or symbols on the main image.3. Flash Photography with the Nikon SB-E Speedlight Unit
Slip the compact Nikon SB-E into your camera's ecessed ISO-type flash unit hot-shoe ②, and take great flash pictures automatically—at a predetermined shutter speed of 1/90 sec., with the shutter operation mode selector ② on AUTO. It's so easy anyone can do it. A "ready-light" inside the camera's viewfinder lets you know when you're ready to shoot. Note that the flash photography bracket inside the viewfinder indicates a flash synchronization speed of 1/90 sec., no matter where the shutter speed needle is positioned. The SB-E provides features that no other flash can. It's the natural choice. It's compact enough to fit in a shirt pocket and really efficient. See it at your Nikon dealer. For flash photography with other electronic flash units, the shutter operation mode selector ② is set to M90.
natural_image
Black Nikon 58-E camera with digital display and lens (no visible text or symbols on body)VIII. OTHER EM ACCESSORIES AND USABLE LENSES
Other Accessories
natural_image
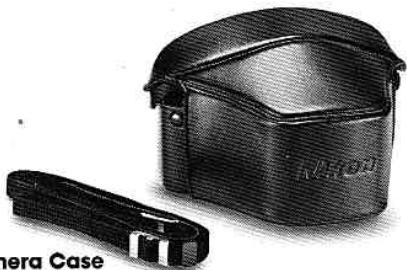
Black and white photo of a camera case with a strap, no visible text or symbols on the device itself.Camera Case
The CF-11 Camera Case is recommended for storing the Nikon EM with a Nikon Series E 50mm f/1.8 mounted. It has an attractive, durable finish.
Eyepiece Adapter
Simply slide this adapter onto the EM's rectangular viewfinder eyepiece Ⓜ, and you can use various Nikon viewfinder accessories.
such as eyepiece correction lenses, rubber eyecup, etc., to meet the requirements of various shooting situations.
natural_image
Two black-framed cameras with lenses and filter bands, no visible text or symbolsLens Hoods
The HR-4 and HR-Lens Hoods perfectly complement the Nikon Series E lenses. They prevent extraneous light from striking the lens surface and causing flare and ghost in the picture. Also useful for protecting the lens.
Compartment Case
The FB-E Compartment Case has been specially designed to accommodate the Nikon EM with a Nikon Series E 50mm f/1.8 lens attached and other EM accessories such as Nikon Speedlight SB-E, Nikon Motor Drive MD-E, Nikon Series E 35mm f/2.5, 100mm f/2.8 and sundry items.
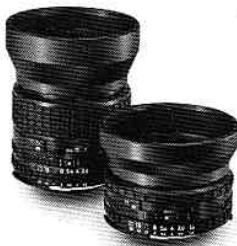
likon and Nikkor Lenses for the Nikon EM
ion Series E Lenses
on Series E 50mm f/1.8
on Series E 35mm f/2.5
on Series E 100mm f/2.8
kor Lenses
deangle)
Nikkor 13mm f/5.6
Nikkor 15mm f/5.6
Nikkor 18mm f/4
Nikkor 20mm f/3.5
Nikkor 24mm f/2
Nikkor 24mm f/2.8
Nikkor 28mm f/2
Nikkor 28mm f/2.8
Nikkor 28mm f/3.5
Nikkor 35mm f/1.4
Nikkor 35mm f/2
Nikkor 35mm f/2.8
ormal)
Nikkor 50mm f/1.2
Nikkor 50mm f/1.4
Nikkor 50mm f/1.8
Vikkor 50mm f/2
ephoto)
Nikkor 85mm f/2
Nikkor 105mm f/2.5
Nikkor 135mm f/2
Nikkor 135mm f/2.8
Nikkor 135mm f/3.5
Nikkor 180mm f/2.
Nikkor 200mm f/4
Nikkor 300mm f/2.8 IF-ED
Vikkor 300mm f/4.5 IF-ED
Nikkor 300mm f/4.5
Nikkor 400mm f/3.5 IF-ED
Nikkor 400mm f/5.6 IF-ED
A Nikkor 400mm f/5.6 ED
Nikkor 600mm f/5.6 IF-ED
Nikkor 800mm f/8 IF-ED
Nikkor 1200mm f/11 IF-ED
(Reflex)
Reflex-Nikkor 500mm f/8
Reflex-Nikkor 1000mm f/11
Reflex-Nikkor 2000mm f/11
(Zoom)
Zoom-Nikkor 28-45mm f/4.5
Zoom-Nikkor 35-70mm f/3.5
Zoom-Nikkor 43-86mm f/3.5
Zoom-Nikkor 80-200mm f/4.5
Zoom-Nikkor 50-300mm f/4.5 ED
■ Zoom-Nikkor 50-300mm f/4.5
(Fisheve)
Fisheye-Nikkor 6mm f/2.8
A Fisheye-Nikkor 8mm f/2.8
A Fisheye-Nikkor 16mm f/3.5
(Special)
PC-Nikkor 28mm f/4
PC-Nikkor 35mm f/2.8
Noct-Nikkor 58mm f/1.2
Micro-Nikkor 55mm f/3.5
Micro-Nikkor 105mm f/4
Micro-Nikkor 200mm f/4 IF
(Televonverter)
Nikon Teleconverter TC-14
Nikon Teleconverter TC-200
Nikon Teleconverter TC-300
Notes:
1) When using PC-Nikkor lenses, it is important to note that exposure metering must be performed before the lens is shifted; should metering be performed after shifting, it may result in erroneous metering indication. First, note the shutter speed needle's position inside the viewfinder before shifting the lens. After shifting the lens, reset the ASA film speed scale 28 until the same shutter speed appears inside the viewfinder. For details, refer to the instruction manual of the lens.
2) Older Nikkor lenses which have been modified for AI operation and AI lenses of other than Nikon manufacture do not provide full performance with the Nikon EM, when used with the SB-E.
Nor can most Al-modified 55mm f/1.2 and 28mm f/3.5 lenses be mounted on the Nikon EM; therefore, to prevent damage, don't attempt it.
3) If you mount the EM on a tripod with a large head, contact between the lens barrel and the head may make it impossible to operate the lens. In this case, use Nikon's special adapter between the camera body and the tripod head.
Caution: Auto Nikkor lenses and lenses of other manufacture which do not have the AI feature must not be mounted on the EM. Attempts to mount such lenses will damage the camera's AI indexing mechanism.
natural_image
Simple line drawing of a hand holding a tool, no text or symbols present- Don't force your camera's controls—they are designed to work with a minimum of pressure.

natural_image
Cartoon illustration of two figures with arrows hitting a target, no text or symbols present- Clean all lens and prism surfaces periodically with a blower-type brush or lens tissue moistened with an approved photo lens cleaning liquid.
natural_image
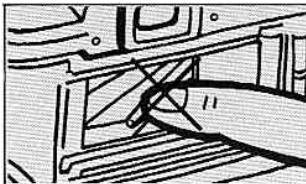
Pure mechanical diagram showing a lever and guide mechanism without any text or symbols- Avoid touching the camera's interior surfaces, especially the shutter curtains 36 and film pressure plate 39.
natural_image
Cartoon illustration of a person reacting to a camera with motion lines, no text or symbols present- If you drop the camera accidentally, take it to a Nikon authorized dealer or service center for immediate servicing.

- Store your camera, lenses, accessories in a cool, dry place. Remove the batteries when the camera or accessories are not to be used for an extended period.
natural_image
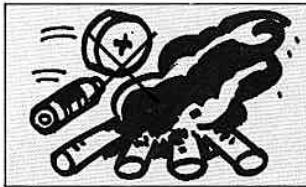
Cartoon illustration of a person using a magnifying glass to smoke or smoke from a pile of books (no text or symbols)- Dispose of used batteries properly—never throw them into fire. For battery performance by brand, refer to manufacturer's literature.
X. SPECIFICATIONS
ype of camera
'picture format
.ens mount
.enses usable
35mm single-lens reflex (SLR), aperture-priority automatic
35mm (24mm x 36mm film size) Nikon bayonet type
Nikon Series. E 50mm f/1.8 as Standard; other Series E lenses; Al-type Nikkor lenses and others (p. 30)
hutter
Electronically controlled, vertical-travel, metal focal-plane shutter; stepless speeds from 1 sec. to 1/1000 sec. when shutter operation mode selector is set to AUTO; 1/90 sec. mechanical shutter speed when set to M90; B setting also provided for long exposures Film winding lever provided; completed stroke of 144° simultaneously advances film, cocks shutter and operates frame counter; choice of one continuous stroke or series of shorter strokes
film advance
Fixed eyelevel pentaprism full-aperture viewing type with built-in TTL exposure meter; shutter speed scale and exposure needle visible inside; ready-light lights up when SB-E or SB-10
Focusing screen
Reflex mirror Self-timer
Exposure measurement
Metering range
Exposure signal
Speedlight is in use; center of scale's bracket indicates 1/90 sec.; finder coverage approx. 92% of picture field; 0.86X magnification with 50mm lens set at infinity ( )
Fixed-type Nikon "K" screen; comprises matte fresnel field with central split-image range-finder spot surrounded by microprism ring and 12mm-dia. reference circle which denotes area of center-weighted metering
Instant-return, non-lockable type Lever provided can be set for up to approx. 10-sec. exposure delay; setting cancellable before shutter release button is pressed TTL center-weighted exposure metering at full aperture; meter incorporates one silicon photodiode (SPD)
EV 2 to EV 18 (i.e., f/2 at 1 sec. to f/16 at 1/1000 sec. at ASA 100 and with 50mm f/1.8 lens)
"Beep-beep" warning sound activated when shutter release button is pressed to fingerguard position if matching shutter

speed for lens aperture set is approx. 1/30 sec. and below, or approx. 1/1000 sec. and above
Approx. +2EV when exposure compensation button is kept depressed as shutter release button is pressed
Two 1.5V silver-oxide batteries (S-76 type)
Meter switched on when shutter release button is pressed; stays switched on for several seconds after finger is lifted off button
LED lamp lights up to indicate sufficient power availability when power check button is pressed
ASA25\~1600
Shows number of frames exposed; automatically resets to "S" when camera back is opened; automatic operation starts from frame 1
Manual; film rewind crank rotated after film rewind button is depressed
Flash synchronization
Built-in ISO-type hot-shoe; automatic flash sync at 1/90 sec. with SB-E Speedlight Unit which activates camera's ready-light when flash operation is ready; ready-light "blinks" to signal incorrect ASA/aperture combination; M90 shutter operation mode selector setting used with other electronic flash units, providing flash sync at 1/90sec.; bulb-type units not usable
Motor drive coupling
Electrical contact and coupler built-in for operation with MD-E Motor Drive
Camera back
Swings open when film rewind knob is pulled up; memo holder provided
Body finish
Black
Accessories provided
Camera body cap, triangular grommets for neckstrap and two 1.5V silver-oxide batteries
Dimensions Weight
135mm(W)×86mm(H)×54mm(D) 460g (body only)
- All specifications are subject to change without notice.
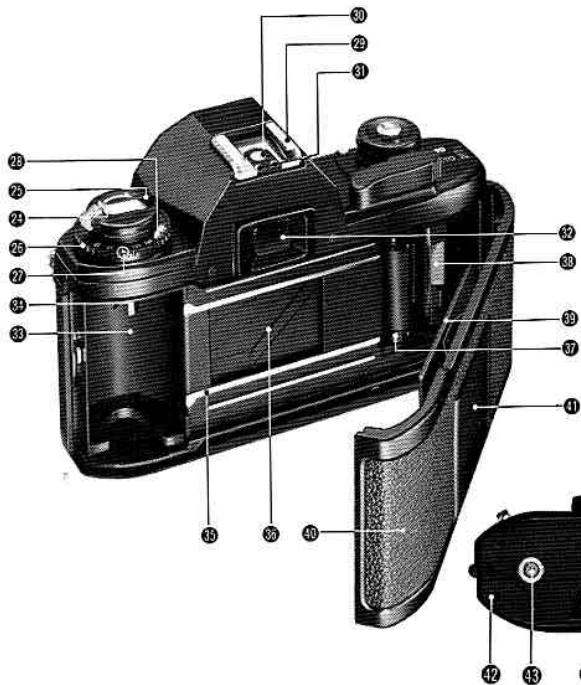
24 Film rewind crank (p. 22)
② Film rewind knob
25 ASA film speed selector ring (p. 16)
② ASA film speed setting index
28 ASA film speed scale
29 Flash unit hot-shoe (p. 28)
30 Hot-shoe contact
③1 Ready-light contact for SB-E/SB-10 Speedlight
32 Viewfinder eyepiece
33 Film cassette chamber (p. 14)
③ Film rewind fork
35 Film guide rails
36 Shutter curtains
37 Film sprockets
38 Film takeup spool
89 Film pressure plate
40 Camera back
① Memo holder (p. 16)
⑫ Motor drive positioning hole (p. 26)
43 Motor drive coupling
49 Film rewind button (p. 22)
④ Tripod/motor drive coupling socket
45 Battery chamber lid/battery clip (p. 11)
47 Motor drive electrical contact
- NOMENCLATURE
- TABLE OF CONTENTS
- HOW TO HOLD THE CAMERA
- SETTING UP THE CAMERA BODY AND THE LENS
- QA
- PREPARING TO SHOOT AND ACTUAL SHOOTING
- Load the Film
- Set ASA
- Focus
- 1
- Unload the Film
- Film Plane Indicator
- Infrared Photography
- Exposure Measurement
- Shutter Operation Mode Selection
- Depth of Field
- 'II. SPECIAL ACCESSORIES FOR THE NIKON EM
- Motorized Shooting with the Nikon MD-E Motor Drive
- Flash Photography with the Nikon SB-E Speedlight Unit
- OTHER EM ACCESSORIES AND USABLE LENSES
- Other Accessories
- likon and Nikkor Lenses for the Nikon EM
- SPECIFICATIONS
- Flash synchronization
- Motor drive coupling
- Camera back
- Body finish
- Accessories provided
- Dimensions Weight
Brand : NIKON
Model : EM
Category : SLR camera